basic 101 makeup with contouring & highlighting...
TRANSCRIPT

Ellie Malmin
Lash, Brow, & Makeup ACADEMY
http://lashbrowmakeupacademy.com/
Visit for more resources!
Basic 101 Makeup with Contouring & Highlighting
Effects
© Ellie Malmin

1 | P a g e Visit http://lashbrowmakeup-academy.com/ for more resources!
TABLE OF CONTENTS
Products Used for Basic 101 Makeup - pg. 2
Foundation - pg. 7
Steps One & Two
Highlighting - pg. 9
Step Three
Blush & Powder - pg. 10
Steps Four & Five
Eyes - pg. 11
Steps Six, Seven & Eight
Lips, Mascara & Strip Lashes - pg. 13
Steps Nine & Ten
Click here to view the YouTube video supplement for this E-Book http://youtu.be/q-cK8b2sQJk?list=UUDSt_YOdGY8gv-JOLiPCBFQ
** We’ve also included an infographic at the end that summarizes the steps

2 | P a g e Visit http://lashbrowmakeup-academy.com/ for more resources!
Products used for 101 Basic Makeup
This basic 101 makeup application with contouring and highlighting effects is easy, fun & fast makeup so that you can accomplish a polished look to get out the door & or have your client looking their best in less than five minutes. For the purpose of the video tutorial that accompanies this E-Book, the whole process will take longer than five minutes & may for you as well at first. But be assured that after you complete this process a few times on yourself at home it will take you less than five minutes in subsequent applications to accomplish this beautiful look.
This is a fresh clean makeup application that should only take you 5 minutes or less. Listed below are the products I used. You may also use your favorite make up.
2 colors of CINEMA SECRETS Foundation o One that matches your
skin tone and another that is slightly darker
CINEMA SECRETs is a cream foundation. I chose this particular product because it has no mineral oil or lanolin in it. It does however contain beeswax which allows it to retain its color and coverage as the day goes on and the foundation begins to mix with your own facial oils. The makeup will not blot off, but oils and perspiration (sweat) can be blotted away. It is a foundation that is going to stay on for at least 12 to 14 hours. You should pick a color that is closest to your natural skin tone and becomes transparent when blended on your skin. You can apply
3 | P a g e Visit http://lashbrowmakeup-academy.com/ for more resources!
this with a sponge or a brush, it is your own personal preference. The second foundation is a slightly darker color. We will use it to darken and show a sun kissed contour to the facial features.
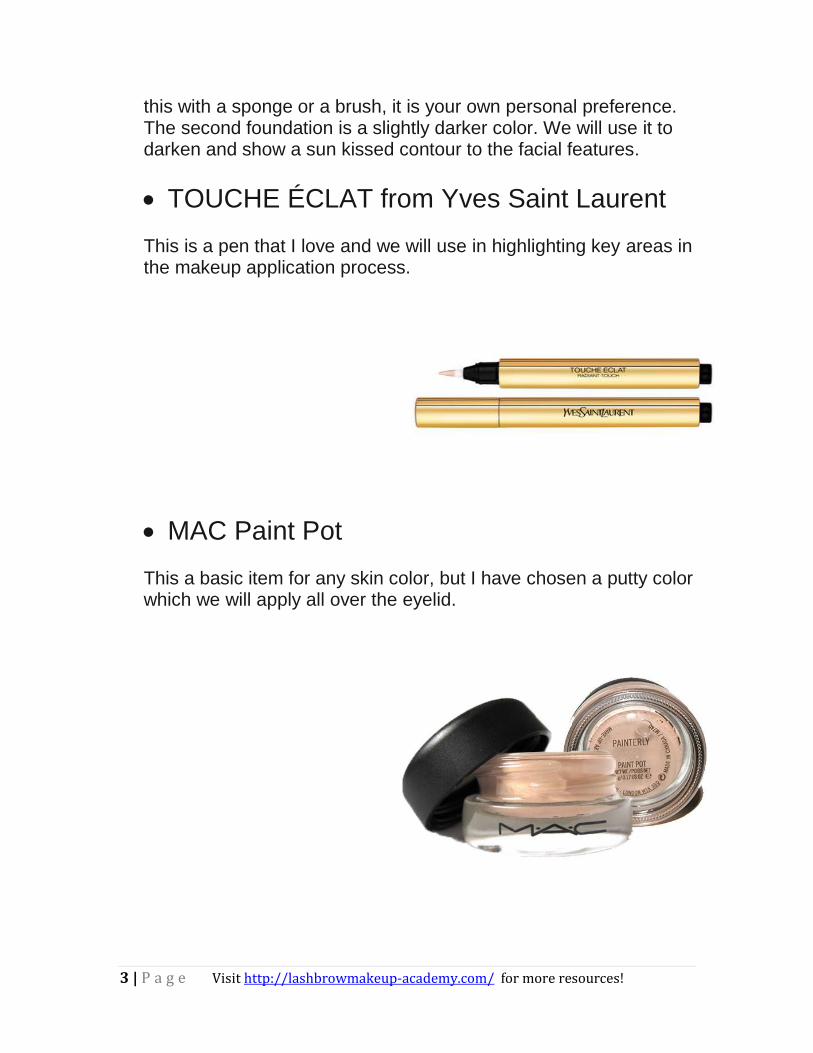
TOUCHE ÉCLAT from Yves Saint Laurent
This is a pen that I love and we will use in highlighting key areas in the makeup application process.
MAC Paint Pot
This a basic item for any skin color, but I have chosen a putty color which we will apply all over the eyelid.

4 | P a g e Visit http://lashbrowmakeup-academy.com/ for more resources!
A matte pallet of eye shadow
This is an eye shadow pallet with many matte colors that we will use for contouring the eyes.
Blush from the Dollar Store
This is a basic blush nothing expensive necessary.

5 | P a g e Visit http://lashbrowmakeup-academy.com/ for more resources!
MAKE UP FOR EVER Aqua Eyes black gel liner
2 powders One that is translucent from MAC Cosmetics and KETT Cosmetics lose no color powder
The translucent powder we will use all over the face & the loose powder we will apply over the highlighting areas.
ColorStay Lipstick from Revlon
We will use the trusted color stay lipstick from Revlon.

6 | P a g e Visit http://lashbrowmakeup-academy.com/ for more resources!
Sponges
Makeup Brushes
We will use these items to create a very natural polished look. This look can also be upgraded for evening by popping on some strip eyelashes. Also, you can darken the eyeliner and or make more of a winged liner effect. But for the purposes of this tutorial we will stick to the basics that are going to develop a very fresh and clean look. In the video tutorial that accompanies this E-Book, I use these techniques on one side of my model’s face. In that particular application I chose to use a sponge for the foundation, but you can use a foundation brush to achieve the same results.

7 | P a g e Visit http://lashbrowmakeup-academy.com/ for more resources!
Foundation
www.Cinemascretscom
STEP 1: Apply CINEMA SECRETS Foundation, the one which is your skin tone, with a sponge or a brush all over the face including over & under the eyelid area. But, avoid the lips.
The foundation may be a little darker than your natural skin tone, but you will want it that way to accomplish a better highlighting and contouring effect. Apply the foundation under and over the eyelid area, all over the face, but avoid applying to the lips.

8 | P a g e Visit http://lashbrowmakeup-academy.com/ for more resources!
STEP 2: Apply the darker foundation down the nose and up on the forehead to the hair line. Apply also across the cheeks back to the hairline line.
Put on the darker color down the bridge of the nose, across the cheekbone and slightly back to the hairline on the forehead. Now you are beginning to see a transition between the lighter & darker areas. This provides a beautiful contouring effect. Finally, take the sponge (or brush) that you used to apply the regular foundation and just smooth over the whole area. This can be done quickly, it does not have to take too much time or require any detail at all.
2
2
9 | P a g e Visit http://lashbrowmakeup-academy.com/ for more resources!
Highlighting
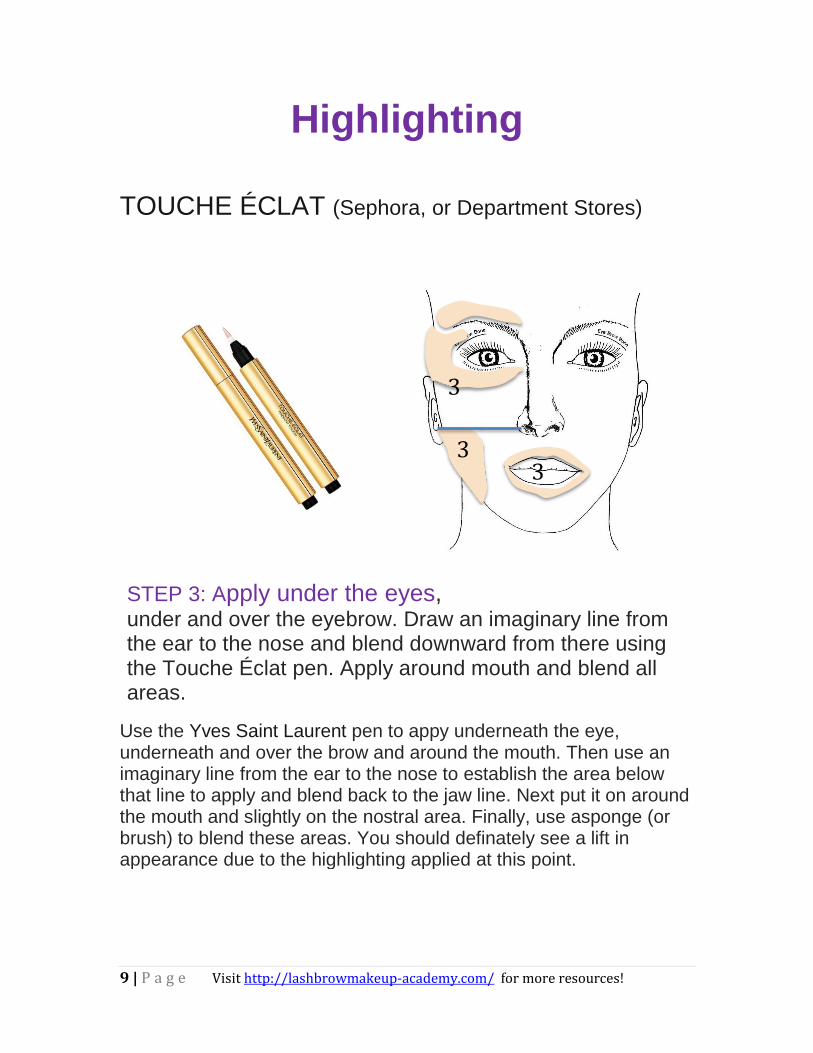
TOUCHE ÉCLAT (Sephora, or Department Stores)
STEP 3: Apply under the eyes, under and over the eyebrow. Draw an imaginary line from the ear to the nose and blend downward from there using the Touche Éclat pen. Apply around mouth and blend all areas.
Use the Yves Saint Laurent pen to appy underneath the eye, underneath and over the brow and around the mouth. Then use an imaginary line from the ear to the nose to establish the area below that line to apply and blend back to the jaw line. Next put it on around the mouth and slightly on the nostral area. Finally, use asponge (or brush) to blend these areas. You should definately see a lift in appearance due to the highlighting applied at this point.
3
3 3

10 | P a g e Visit http://lashbrowmakeup-academy.com/ for more resources!
Blush and Powder
STEP 4: Apply Bush in the area shown, starting at the hair line and working toward the nose.
www.kettcosmetics.com
Use a little bit of blush and apply with a fairly large brush moving in circular motions staring out at the hairline and working your way toward the nose across the cheekbone in a scooping direction. This will give a sun kissed skin effect.
STEP 5:
Apply translucent powder all over.
Use the same large brush from the blush application to apply translucent powder all over the face.
Apply Kett Cosmetics, no color powder, over
areas that were highlighted from STEP 3.
4

11 | P a g e Visit http://lashbrowmakeup-academy.com/ for more resources!
Eyes
STEP 6: Apply color all over the eyelid. A nude colored Paint Pot from MAC.
Use a little bit of a nude color MAC paint pot all over the eyelid. There is no technique to this application and I like to just use my finger to apply one coat to the eyelid, but you can use a makeup sponge and achieve the same results.
STEP 7: Apply matte brown eye shadow with the eye
open. Apply in the crease from the outer eye to the inner eye.
While looking straight ahead apply a matte brown colored eye shadow with a brush in the crease starting at the outer eye and moving inward like a windshield wiper.
STEP 8: Apply Make Up For Ever Aqua Black gel Liner in the water line area and inside rim of the eye. See the video for an extra tip on using the smooth round tip of brush for

12 | P a g e Visit http://lashbrowmakeup-academy.com/ for more resources!
applying liner.
Using Make Up For Ever Aqua Black gel Liner, which I love, and applying with a liner brush at the water line of the eye area. You can easily do this by gently pulling down on the eyelid and starting at the outer point of the eye move inward along the rim. Finish up the lower lid application by going back and apply liner over the top of the lower eyelashes at the eye line. Now apply along the upper inside line of the eyelid. Come back after you have applied mascara and have finished off your lips with gloss to apply liner following the lash line of the upper lid moving from the outer corner inward and stopping at the midpoint. A personal tip of mine; whenever you are using a gel liner you may always use a brush or the brush that the liner comes with to apply the liner, but you can take that brush and use the tip of it to blend in and apply to the water line of the lower eyelid rim. Make sure that the brush’s tip it is a smooth surface for the best outcome and comfort of the eye. It is very gentle, it does not hurt the eye and it is easy to clean.

13 | P a g e Visit http://lashbrowmakeup-academy.com/ for more resources!
Lips, Mascara & Strip Lashes
STEP 9: Apply lip color Use Revlon ColorStay lip color to apply it to the lips. Please note that if you are doing makeup for someone other than yourself, you should always use a disposable applicator. The Revlon Stay All Day is my personal favorite because it is kissable, it does not come off & it is not drying to the lips. After you apply the mascara you can apply the gloss as the lip color has had a chance to dry completely.
STEP 10: Apply mascara
Using a disposable mascara wand. This will keep your mascara fresher and there will never be too much mascara on the wand which can cause clopping. Place the mascara wand in mascara and bend the brush as shown on video, or described below. Place a mirror down on your counter and look down in the mirror to apply the mascara by shimming and shaking mascara on & into the lash. By doing this you

14 | P a g e Visit http://lashbrowmakeup-academy.com/ for more resources!
will get a good lift as well as curl to the natural lash.
When we apply mascara it is extremely important in providing that lift to our eyes. I like to use a disposable mascara wand because when you take your mascara wand out of the mascara you can see how much mascara is actually on that original wand by rubbing it on the back of your hand (or use a tissue) and that is where you get a lot of clops from your mascara. To avoid the clopping happening, take a disposable wand, insert it into the mascara tub and bend it at the base of the brush in a 90ᵒ angle. Next put a mirror on the table (counter or your lap) in front of you and while you are looking down on the mirror use the mascara wand to apply it in an upward motion. This actually curls the natural lash. Now use a shimmy and shaking motion with the mascara wand while you pull up across the lash to finalize the mascara application. Also note, that you do not want to look straight ahead into the mirror while you are applying mascara, but instead look down and pull up with the wand. By doing this you will see how you will achieve a better lift. You can put on as many coats as you want & then throw away the wand. You can get these disposable wand at any CVS or beauty supply store and they will keep your mascara fresher and free of bacteria. Now go back and apply the gloss to you lips and finalize your liner with an application to the upper lid above the lash line. Did you know your natural lashes shed on a daily bases. When you apply mascara with the wand that comes with the mascara it grabs the lose lashes and they end up in your tube of mascara. It’s dark and moist in there which is the perfect breading place for bacteria. No wonder you should replace mascara every 3 months. That’s just another reason I use disposables. Complete your look by filling in your eyebrows with the same color you use to do the contouring on your eyelid. You can simply go over the brow itself. Please note that we have a segment where we go over eyebrow extensions and if you are interested you can view that video to see how eyebrow extensions are done.
Strip Eyelashes can be the finishing touch. See the video
that accompanies this E-Book for fitting lashes. You can get lashes at any drug store or beauty supply store. One

15 | P a g e Visit http://lashbrowmakeup-academy.com/ for more resources!
important thing to remember about lashes is that before you put any adhesive on you want to place them on your eyelid to size them to fit your lash line. Next you can tailor them to the size of your particular eye. You will want to trim them if needed with tiny scissors and make sure that they measure from corner to corner of your lash line. Apply adhesive on the rim of the lashes and let the adhesive get tacky. Another tip of mine is to take a brush handle and apply the Strip lash around the handle so that the lash will curve & then take to the curve of your eyelash line better. Next with your eye closed place the lash on the lash line pressing it gently into place. I like to use the white adhesive that dries clear so that you know when it is dry and you can go ahead with your mascara application. Keep in mind that if you are applying lashes, lashes should be applied before mascara. The reason for this is because you will want to blend the lash to your natural lashes. I feel that strip lashes finish the eye and make for a very polished look. They are like the pretty accessories on your little black dress. Finally, when putting on strip lashes you will want to be sure to go back and touchup and/or finish off your eyeliner especially where the strip lashes end on the top inner eye line corner. This will make for a seamless strip lash application.
On the next page we’ve included an infographic summary of the steps

16 | P a g e Visit http://lashbrowmakeup-academy.com/ for more resources!
Step 1 - Apply the foundation closest to your skin tone. Apply all over the face including under and over the eye area with a sponge or foundation brush. Avoid applying on the lips. Step 2 - Take darker foundation and apply in areas marked step two and blend into lighter foundation color.
Step 3 - Use Yves Saint Laurent pen and apply it in section 3. It does not have to be perfect, just blended with sponge.
3
3
3
2
2
2
Step 4 - Blush application should start back by ear working toward the nose. Do not go below the jaw line. Slightly blend one time with a brush so there is no harsh beginning or end of the blush application.
3
4
Step 5A Apply translucent powder all over. Step 5B Using Kett powder that is lighter than the powder from Step 5A & go over area 3.
Step 6 - Apply Nude Paint Pot from MAC all over eyelid.
Step 7 - Apply a matte brown eye shadow color in the crease of the eyelid with the eye open.
Step 8 - Apply Forever Black Aqua Gel makeup in rim of eye and the inner corner of the lash line.
Step 9 – Apply lip color using ColorStay by Revlon & applying gloss after step 10.
Step 10 – Apply mascara with a disposable wand while looking down over a mirror.

17 | P a g e Visit http://lashbrowmakeup-academy.com/ for more resources!
Thank you for your interest in our E-Book! Don’t forget to view the YouTube video or any of our other helpful content to keep you looking and feeling your best. Please visit us online: http://lashbrowmakeup-academy.com If you have any questions whatsoever about our training programs, the cost or class schedules, or anything regarding techniques being used, please contact: Ellie Malmin, Mother of beauty Phone: (561) 358-5999 Email: ellie@lashbrowmakeup-academy