banner web general / user guide / 8
TRANSCRIPT

Banner Web General User Guide
Release 8.3December 2009

Trademark, Publishing Statement and Copyright NoticeSunGard or its subsidiaries in the U.S. and other countries is the owner of numerous marks, including “SunGard,” the SunGard logo, “Banner,” “PowerCAMPUS,” “Advance,” “Luminis,” “fsaATLAS,” “DegreeWorks,” “SEVIS Connection,” “SmartCall,” “PocketRecruiter,” “UDC,” and “Unified Digital Campus.” Other names and marks used in this material are owned by third parties.
© 2001-2009 SunGard. All rights reserved.
Contains confidential and proprietary information of SunGard and its subsidiaries. Use of these materials is limited to SunGard Higher Education licensees, and is subject to the terms and conditions of one or more written license agreements between SunGard Higher Education and the licensee in question.
In preparing and providing this publication, SunGard Higher Education is not rendering legal, accounting, or other similar professional services. SunGard Higher Education makes no claims that an institution's use of this publication or the software for which it is provided will insure compliance with applicable federal or state laws, rules, or regulations. Each organization should seek legal, accounting and other similar professional services from competent providers of the organization’s own choosing.
Prepared by: SunGard Higher Education4 Country View RoadMalvern, Pennsylvania 19355United States of America(800) 522 - 4827
Customer Support Center Websitehttp://connect.sungardhe.com
Documentation Feedbackhttp://education.sungardhe.com/survey/documentation.html
Distribution Services E-mail [email protected]
Revision History Log
Publication Date SummaryDecember 2009 New version that supports Banner Web General 8.3 software.

Contents
Banner Web General 8.3User Guide
Chapter 1 Web General Overview
Functions . . . . . . . . . . . . . . . . . . . . . . . . . . . . . . . . . . . . .1-1
Accessing Web General. . . . . . . . . . . . . . . . . . . . . . . . . . . . . .1-2
Chapter 2 Using Web General
Surveys. . . . . . . . . . . . . . . . . . . . . . . . . . . . . . . . . . . . . . .2-2
Answer a Survey . . . . . . . . . . . . . . . . . . . . . . . . . . . . . . . . . .2-2
Security . . . . . . . . . . . . . . . . . . . . . . . . . . . . . . . . . . . . . .2-2
Security Questions and Answers . . . . . . . . . . . . . . . . . . . . . . . . . .2-2
Resetting Your PIN . . . . . . . . . . . . . . . . . . . . . . . . . . . . . . . . .2-3
Changing Your PIN . . . . . . . . . . . . . . . . . . . . . . . . . . . . . . . . .2-4
Ethnicity and Race Survey . . . . . . . . . . . . . . . . . . . . . . . . . . . .2-5
Update Ethnicity and Race (Logon). . . . . . . . . . . . . . . . . . . . . . . . .2-5
View Ethnicity and Race (Logon) . . . . . . . . . . . . . . . . . . . . . . . . . .2-5
Ethnicity and Race Options (Logon) . . . . . . . . . . . . . . . . . . . . . . . .2-5
View Ethnicity and Race (Menu) . . . . . . . . . . . . . . . . . . . . . . . . . .2-6
Update Ethnicity and Race (Menu) . . . . . . . . . . . . . . . . . . . . . . . . .2-6
Personal Information . . . . . . . . . . . . . . . . . . . . . . . . . . . . . . .2-6
View Addresses and Phones . . . . . . . . . . . . . . . . . . . . . . . . . . . .2-6
Update Addresses and Phones. . . . . . . . . . . . . . . . . . . . . . . . . . .2-7
View E-mail Addresses . . . . . . . . . . . . . . . . . . . . . . . . . . . . . . .2-8
Update E-mail Addresses. . . . . . . . . . . . . . . . . . . . . . . . . . . . . .2-9
Directory Profile . . . . . . . . . . . . . . . . . . . . . . . . . . . . . . . . . . .2-9
View Emergency Contacts . . . . . . . . . . . . . . . . . . . . . . . . . . . . .2-10
December 2009 Banner Web General 8.3 iiiUser Guide
Contents

Update Emergency Contacts . . . . . . . . . . . . . . . . . . . . . . . . . . . .2-11
Update Marital Status . . . . . . . . . . . . . . . . . . . . . . . . . . . . . . . .2-11
Name Change Information . . . . . . . . . . . . . . . . . . . . . . . . . . . . .2-12
Social Security Number Change Information . . . . . . . . . . . . . . . . . . . .2-13
Chapter 3 Technical Reference
Interaction with VBS. . . . . . . . . . . . . . . . . . . . . . . . . . . . . . . .3-1
Showing or Hiding “International” Fields . . . . . . . . . . . . . . . . . . . .3-2
Web Login Pages . . . . . . . . . . . . . . . . . . . . . . . . . . . . . . . . .3-2
User Login (twbkwbis.P_WWWLogin) . . . . . . . . . . . . . . . . . . . . . . .3-3
Login Verification (twbkwbis.P_ValLogin) . . . . . . . . . . . . . . . . . . . . . .3-4Information and Help Text . . . . . . . . . . . . . . . . . . . . . . . . . . . . .3-8
Terms of Usage (twbkwbis.P_UsagePage) . . . . . . . . . . . . . . . . . . . . .3-8Information and Help Text . . . . . . . . . . . . . . . . . . . . . . . . . . . . .3-9
Personal Information Pages . . . . . . . . . . . . . . . . . . . . . . . . . . .3-10
Answer A Survey (bwgksrvy.P_ShowSurveys) . . . . . . . . . . . . . . . . . . .3-11
Change Security Question (twbkwbis.P_SecurityQuestion) . . . . . . . . . . . .3-11
View Addresses and Phones (bwgkogad.P_SelectAtypView) . . . . . . . . . . .3-12
Update Addresses and Phones - Select Address (bwgkogad.P_SelectAtypUpdate) . . . . . . . . . . . . . . . . . . . . . . . . .3-15
Update Addresses and Phones - Update/Insert (bwgkogad.P_DispAddrUpdate). . . . . . . . . . . . . . . . . . . . . . . . . .3-18Deleting the United States Postal Service Link . . . . . . . . . . . . . . . . . .3-19
View E-mail Addresses (bwgkogad.P_SelectEmalView) . . . . . . . . . . . . . .3-23Messages . . . . . . . . . . . . . . . . . . . . . . . . . . . . . . . . . . . . .3-24
Update E-mail Addresses - Select Address (bwgkogad.P_SelectEmalUpdate) . . . . . . . . . . . . . . . . . . . . . . . .3-24
Update E-mail Addresses - Update/Insert (bwgkogad.P_DispEmailUpdate) . . . . . . . . . . . . . . . . . . . . . . . . .3-26
Directory Profile (bwgkoprf.P_ShowDiroItems) . . . . . . . . . . . . . . . . . . .3-28
View Emergency Contacts (bwgkoemr.P_ViewEmrgContacts) . . . . . . . . . . .3-33
Update Emergency Contacts - Select Contact (bwgkoemr.P_SelectEmrgContacts) . . . . . . . . . . . . . . . . . . . . . . .3-33
Update Emergency Contacts (bwgkoemr.P_UpdateEmrgContacts) . . . . . . . .3-34Contact Priority Numbers . . . . . . . . . . . . . . . . . . . . . . . . . . . . .3-35
iv Banner Web General 8.3 December 2009User GuideContents
Update Marital Status (bwgkogad.P_SelectMtypUpdate). . . . . . . . . . . . . .3-38
Name Change Information (bwgkoinf.P_DispUpdName) . . . . . . . . . . . . . .3-39
Social Security Number Change Information (bwgkoinf.P_DispUpdSSN) . . . . .3-40New SSN Link . . . . . . . . . . . . . . . . . . . . . . . . . . . . . . . . . . .3-41
Change PIN (twbkwbis.P_ChangePin) . . . . . . . . . . . . . . . . . . . . . . .3-42
User Logout (twbkwbis.P_Logout) . . . . . . . . . . . . . . . . . . . . . . . . .3-43
Ethnicity and Race Survey Pages . . . . . . . . . . . . . . . . . . . . . . . .3-43
Set Up the Ethnicity and Race Survey . . . . . . . . . . . . . . . . . . . . . . .3-44
Update Ethnicity and Race (bwgkomre.P_RaceSurvey) . . . . . . . . . . . . . .3-45
View Ethnicity and Race (bwgkomre.P_RaceSurveyConfirm) . . . . . . . . . . .3-47
Ethnicity and Race (bwgkomre.P_RaceSurveyConfirm) . . . . . . . . . . . . . .3-48
View Ethnicity and Race (bwgkomre.P_ViewEthnicityRace) . . . . . . . . . . . .3-49
Update Ethnicity and Race (bwgkomre.P_SelectEthnicityRace) . . . . . . . . . .3-50
Chapter 4 Web General Packages
Packages . . . . . . . . . . . . . . . . . . . . . . . . . . . . . . . . . . . . . .4-1
Credit Card Payment Processing. . . . . . . . . . . . . . . . . . . . . . . . .4-1
Integration with Banner APIs . . . . . . . . . . . . . . . . . . . . . . . . . . .4-2
Luminis Channels for Banner. . . . . . . . . . . . . . . . . . . . . . . . . . .4-2
Index
December 2009 Banner Web General 8.3 vUser Guide
Contents

vi Banner Web General 8.3 December 2009User GuideContents
Decemb
1 Web General Overview
This chapter provides a summary of the functions of Banner Web General, and specifies how users access the system.
Functions
Banner Web General gives your users access to their personal information via the Internet. This allows them to maintain this information themselves, reducing the administrative work institution personnel have to do.
You can view and modify the following using Web General:
• Surveys (see page 2-2)
• Ethnicity and race information (see page 2-5)
• Addresses (see page 2-6)
• Telephone numbers (see page 2-6)
• E-mail addresses (see page 2-8)
• Directory profile (see page 2-9)
• Emergency contact information (see page 2-10)
• Marital status information (see page 2-11)
Web General allows users to respond to surveys and determine the information that will be included in the campus directory.
Users cannot change their names or social security numbers directly through Web General, but Web General provides helpful information and a link to the Social Security Administration’s web site.
Each of the features of Web General is described in detail in Chapter 2, “Using Web General.”
er 2009 Banner Web General 8.3 1-1User Guide
Web General Overview

1-2
Accessing Web General
The Banner Self-Service applications provide two types of Web access, non-secured and secured. Users can access non-secured areas without needing to enter a user ID and PIN. Web General has secured access only - you must log on with an ID and PIN to access it.
To access Web General, select Secure Area from the home page.
The logon page appears, prompting you to enter your ID and PIN.
NoteThe PIN is case-sensitive. Depending on your institution’s settings, the user ID may also be case-sensitive.
If they are valid, the Main Menu appears:
Banner Web General 8.3 December 2009User GuideWeb General Overview

Decemb
Select Personal Information from the menu or from the links at the top of the page. The Personal Information Menu page appears:
All of the Web General features are accessible through this page.
er 2009 Banner Web General 8.3 1-3User Guide
Web General Overview

1-4
Banner Web General 8.3 December 2009User GuideWeb General Overview
Decemb
2 Using Web General
Web General is a SunGard® application that lets users maintain personal information. It also allows users to manage passwords and security questions, and to answer surveys that have been created in Banner General on the Survey Definitions Form (GUASVRY).
The Personal Information menu in Banner Self-Service provides access to Web General’s features. See “Accessing Web General” in Chapter 1 for instructions on logging in and navigating to the Personal Information menu.
This chapter includes the following Web General pages and topics:
• “Answer a Survey” on page 2-2
• “Security Questions and Answers” on page 2-2
• “Resetting Your PIN” on page 2-3
• “Changing Your PIN” on page 2-4
• “Ethnicity and Race Survey” on page 2-5
• “View Addresses and Phones” on page 2-6
• “Update Addresses and Phones” on page 2-7
• “View E-mail Addresses” on page 2-8
• “Update E-mail Addresses” on page 2-9
• “Directory Profile” on page 2-9
• “View Emergency Contacts” on page 2-10
• “Update Emergency Contacts” on page 2-11
• “Update Marital Status” on page 2-11
• “Name Change Information” on page 2-12
• “Social Security Number Change Information” on page 2-13
er 2009 Banner Web General 8.3 2-1User Guide
Using Web General

2-2
Surveys
Answer a Survey
This page lists all the surveys that have been sent to the user.
Select the survey you want to answer. The questions are listed, one after the other. The following buttons always appear while you are in the survey:
• Next Question - skips over the question and displays the next.
• Finish Later - saves all the answers you have provided and takes you out of the survey. This survey will still appear on your list of surveys that appears when you select Answer a Survey from the Web General Main Menu.
• Survey Complete - saves all the answers you have provided and removes the survey from your list of surveys. You cannot access the survey again or change any of the answers.
• Remove Survey from List - takes you out of the survey and removes it from your list of surveys. You cannot access it again.
As you go through the survey, you can enter text in the fields and select check boxes and radio buttons as appropriate.
When you reach the last question on the survey, the Return to Beginning of Survey button appears in place of the Next Question button. If you select it, the first survey question appears again and you can move through all the questions again, in order.
Surveys are saved whenever you select Survey Complete or Finish Later.
Security
Security Questions and Answers
The Banner Self-Service products use security questions and answers to help users who forget their passwords.
If you forget your Self-Service password, you can enter your ID and click Forgot PIN? to see and answer security questions that you previously set up. If you answer the questions correctly, your PIN will be reset and you will be able to access Self-Service.
Banner Web General 8.3 December 2009User GuideUsing Web General

Decemb
You must set up security questions and answers:
• on your very first Self-Service login
• on your first login after your institution’s security question policies change.
NoteUsers who access Self-Service through single sign-on (SSO) from Luminis® will not be required to set up security questions and answers and will not use Self-Service security questions to retrieve a lost PIN.
You can also choose to change your security questions by clicking the Change Security Questions link in Web General.
In any case, the process is the same. Even if you set up security questions previously, you start with a blank slate each time.
To set up security questions and answers:
1. Enter your PIN.
2. Select a pre-defined security question from the drop-down menu, or type your own question.
Depending on your institution’s settings, you might not have the option to type your own question. In that case, just select one of the pre-defined security questions.
3. Type your answer to the question.
4. Repeat the process for the remaining security questions.
The number of questions is based on your institution’s settings. You might have only one question to answer, or there might be several.
5. Click OK.
Resetting Your PIN
If you forget your PIN, follow these steps to reset your PIN.
1. On the login page, enter your User ID.
2. Click I Forgot My PIN. A question and answer page displays, showing one or more of your previously saved security questions.
er 2009 Banner Web General 8.3 2-3User Guide
Using Web General

2-4
3. Type the answer to each of the questions, and click OK.
NoteYour answers must exactly match the answers that you previously saved, except that case (upper case or lower case) does not matter, and white space (such as spaces between words) is ignored.
A PIN Reset page displays.
4. Type your new PIN, and type it again in the Confirm PIN field.
5. Click OK.
Changing Your PIN
You can change your PIN in Web General, if you can remember the old PIN. If you cannot, you will need to contact your system administrator, who can reset your PIN in Banner using use the Third Party Access Form (GOATPAC) or the Third Party Access Audit Form (GOATPAD).
To access this page, select Change your PIN from the Personal Information Menu.
Enter your old PIN, the new PIN, and the new PIN for a second time. Select Change PIN. Your PIN will be changed if all the following are true:
• The Old PIN you entered is your correct current PIN
• Both instances of the new PIN are identical
• The new PIN is a valid PIN, following the rules established for your institution.
Banner Web General 8.3 December 2009User GuideUsing Web General

Decemb
Ethnicity and Race Survey
You can present a survey to certain Self-Service users to obtain ethnicity and race information. The survey will be presented after the user’s logon. For details on who will see the survey, see “Ethnicity and Race Survey Pages” on page 3-43.
Normally, the ethnicity and race survey is presented during a limited time period, and each user must complete the survey only once during that period.
The user can also access the ethnicity and race survey from the Personal Information menu. The survey questions and options are the same regardless of whether it is presented at logon or accessed through the menu, but the user’s navigational options are slightly different in the two versions of the survey.
Update Ethnicity and Race (Logon)
This page asks the user to identify an ethnicity category (Hispanic or Latino or Not Hispanic or Latino) and one or more race categories from the options listed. The specific race categories are set up by the institution.
When finished the user can click the Review button to navigate to the View Ethnicity and Race page.
See below under “Update Ethnicity and Race (Menu)” for an example of the survey. The two versions of the survey page are similar to each other, except that the logon version has a Review button while the menu-accessed version has a link to navigate to View Ethnicity and Race.
View Ethnicity and Race (Logon)
This page is presented after the user completes the race and ethnicity survey. The user can review selections made via the survey and choose to save them or to return to the Update Ethnicity and Race page to make changes.
Ethnicity and Race Options (Logon)
This page is shown to a user who did not enter any information on the survey. The choices are Edit, which returns the user to the survey page, or Ask Me Later, which closes the survey so the user can proceed to the regular Self-Service menus.
er 2009 Banner Web General 8.3 2-5User Guide
Using Web General

2-6
View Ethnicity and Race (Menu)
This page can be accessed from the Personal Information menu. It displays the user’s ethnicity and race details and includes a link to the Update Ethnicity and Race page so that the user can change these details.
Update Ethnicity and Race (Menu)
This page can be accessed from the Personal Information menu. It is used to enter or change a user’s ethnicity and race details. It includes a link to the View Ethnicity and Race page so that the user can review the details.
The specific race categories are set up by the institution, so your survey page will look different from this example.
Personal Information
View Addresses and Phones
This page allows users to view the telephone and address information that is on file for them in the Banner database. To access this page, select View Addresses and Phones from the Web General Main Menu.
Banner Web General 8.3 December 2009User GuideUsing Web General

Decemb
The information is sorted by type. No inactive addresses or telephone numbers are displayed.
Update Addresses and Phones
This page gives users the opportunity to add and change the address information stored in the Banner database.
To change address and telephone information:
1. Select Update Addresses and Phones from the Personal Information Menu or select the Update Addresses and Phones link at the bottom of the View Addresses and Phones page. The Update Addresses and Phones - Select Address page appears.
2. Select the link next to the address or phone number you want to change.
3. Enter your changes and select Submit.
4. If you want to add a new telephone number or address, select the type from the pull-down menu. Enter the new information and select Submit.
You can have only one active address for each type at one time. If you have one address become active while there is another of the same type that is active, the effective dates are automatically modified to make the first one inactive.
Additionally, any telephone number that you enter on this page is automatically associated with the specified address in Banner. If you make the address inactive in Banner at some point, the telephone number will also be automatically inactivated.
For more information on active and inactive addresses and telephone numbers, refer to the Banner General User Guide.
er 2009 Banner Web General 8.3 2-7User Guide
Using Web General

2-8
Based on your institution’s settings, certain fields on this page might be hidden. See “Showing or Hiding “International” Fields” on page 3-2.
This page, as delivered, includes a link that, if clicked, opens the United States Post Office web site in a new browser window. You can select it to download change-of-address forms. For information on removing links, please refer to the Banner Web Tailor User Guide.
View E-mail Addresses
This page allows users to view the e-mail information about them that is stored in the Banner database. To access this page, select View E-mail Addresses from the Personal Information Menu.
E-mail addresses are sorted alphabetically within each address type, with the preferred address appearing first. Each address that appears on the web will have the Display on Web check box selected on the E-mail Address Form (GOAEMAL) in Banner General.
Banner Web General 8.3 December 2009User GuideUsing Web General

Decemb
Update E-mail Addresses
This page allows users to maintain the e-mail information about them that is stored in the Banner database. To access this page, select Update E-mail Addresses from the Personal Information Menu.
You can choose which types of addresses are displayed in the Type of E-mail to Insert pull-down menu by selecting Web Ind on the E-Mail Address Type Validation Form (GTVEMAL) in Banner General. For details, refer to the Banner General User Guide.
Directory Profile
Users can specify the personal information that will appear in their campus directory profile.
Select Directory Profile from the Personal Information Menu.
er 2009 Banner Web General 8.3 2-9User Guide
Using Web General

2-10
Select Display in Directory for all the pieces of information that should be included in your Directory Profile.
NoteAdministrators can refer to Chapter 7, “Campus Directory,” of the Banner Employee Self-Service User Guide for information on how to set up the Campus Directory.
View Emergency Contacts
This page lets you view information about your emergency contacts, the people who should be notified in the event of an emergency. To access this page, select View Emergency Contacts from the Personal Information Menu. You can select the Update Emergency Contacts link to change the information or add another emergency contact.
Banner Web General 8.3 December 2009User GuideUsing Web General

Decemb
Update Emergency Contacts
This page lets you update the emergency contact information in the Banner database. To access this page, select Update Emergency Contacts from the Personal Information Menu.
Your contacts are listed. Select the name of the contact to be updated, or select New Contact to add a contact. Enter or change the information about the contact. To change the order in which the contacts are listed, modify the number in the Order field.
When you have finished, select Submit to save your changes.
Based on your institution’s settings, certain fields on this page might be hidden. See “Showing or Hiding “International” Fields” on page 3-2.
Update Marital Status
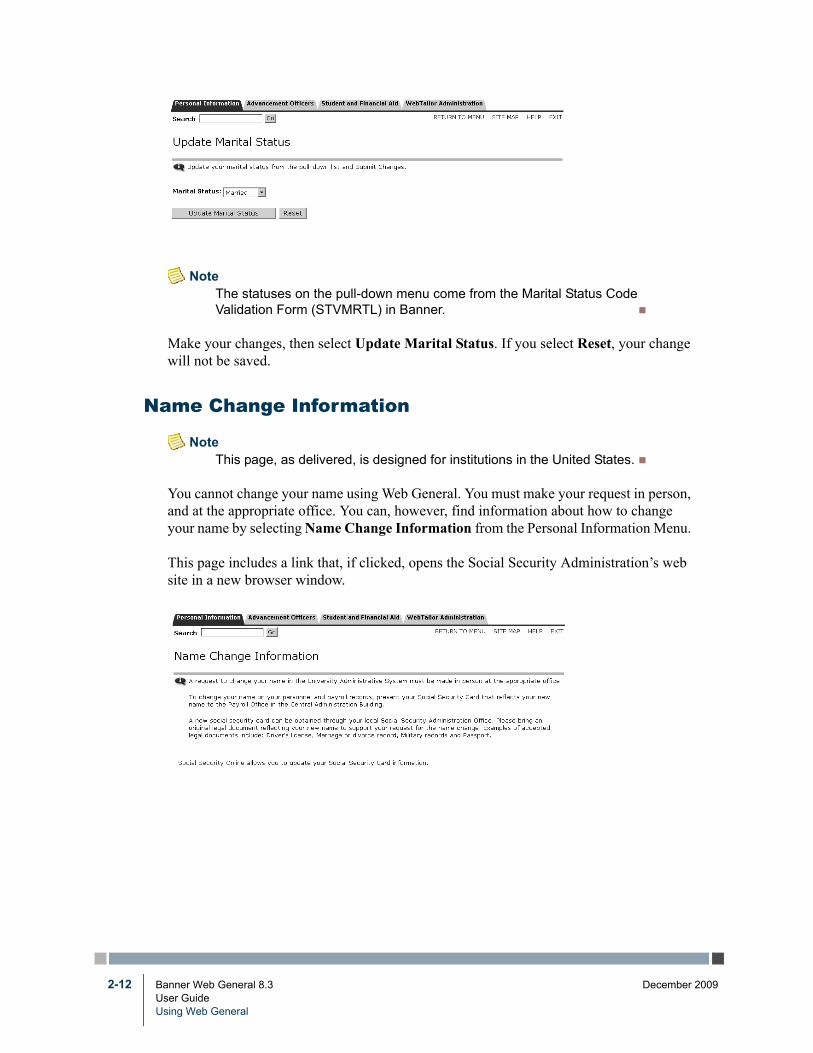
To modify your marital status information, select Update Marital Status from the Personal Information Menu.
er 2009 Banner Web General 8.3 2-11User Guide
Using Web General
2-12
NoteThe statuses on the pull-down menu come from the Marital Status Code Validation Form (STVMRTL) in Banner.
Make your changes, then select Update Marital Status. If you select Reset, your change will not be saved.
Name Change Information
NoteThis page, as delivered, is designed for institutions in the United States.
You cannot change your name using Web General. You must make your request in person, and at the appropriate office. You can, however, find information about how to change your name by selecting Name Change Information from the Personal Information Menu.
This page includes a link that, if clicked, opens the Social Security Administration’s web site in a new browser window.
Banner Web General 8.3 December 2009User GuideUsing Web General

Decemb
Social Security Number Change Information
NoteThis page, as delivered, is designed for institutions in the United States.
You cannot change your social security number using Web General. You must make your request in person, and at the appropriate office. You can, however, find information about changing your social security number by selecting Social Security Number Change Information from the Personal Information Menu.
This page includes a link that, if clicked, opens the Social Security Administration’s web site in a new browser window.
er 2009 Banner Web General 8.3 2-13User Guide
Using Web General

2-14
Banner Web General 8.3 December 2009User GuideUsing Web General
Decemb
3 Technical Reference
This chapter presents technical information about the Web pages in Banner Web General. The following topics are included:
• “Interaction with VBS” on page 3-1
• “Showing or Hiding “International” Fields” on page 3-2
• “Web Login Pages” on page 3-2
• “Personal Information Pages” on page 3-10
• “Ethnicity and Race Survey Pages” on page 3-43
Each page’s description includes:
• A brief functional overview
• The source(s) of the information on the page
• The implications of updates to Banner made via the page
• The links to and from other pages and menus in Banner Web
• The diagnostic messages which may be generated from users’ actions
• A list of any SunGard®-delivered information text that will need to be carefully reviewed by the institution during implementation
NoteDiagnostic message or Info Text information does not appear for any pages that do not generate a diagnostic message or require a review of Info Text.
The delivered page header information and Info Text in Web General have been written to be generic for all of the Banner Self-Service products. If you have not licensed all of them, be sure to review the page header information and Info Text and tailor them to reflect the products at your institution.
Interaction with VBS
The Value-Based Security (VBS) and Personally Identifiable Information (PII) feature uses Oracle’s Fine-Grained Access Control (FGAC) tool. This feature enables you to restrict user access to institutional data and personal information according to your institution’s business rules and the scope of user job requirements.
er 2009 Banner Web General 8.3 3-1User Guide
Technical Reference

3-2
VBS allows you to restrict access to what users can see and update on various Web pages. You must set up the restrictions in Banner General. For more information, please refer to the Banner Data Security Handbook.
Showing or Hiding “International” Fields
Four person information fields were added with Web General 8.2 in support of international formats for names, telephones, and addresses:
• House Number (_HOUSE_NUMBER)
• Street Line 4 (_STREET_LINE_4)
• Telephone Country Code (_CTRY_CODE_PHONE)
• Last Name Prefix (_SURNAME_PREFIX)
Because most Banner customers were expected to choose not to use these four fields, masking rules were delivered to hide these fields by default. You can show or hide these fields by doing either of the following:
• Running the gssmask.sql script.
• Changing the masking rules for these fields in the Data Display Mask Rules form (GORDMSK). A special object named **SSB_MASKING is used for the purpose of applying GORDMSK masking rules to these four fields in Self-Service (and also the International Access Telephone field).
For detailed instructions, see “Masking International Person Information Fields” in Chapter 4 of the Banner General Data Security Handbook.
Web Login Pages
This section includes the following topics:
• “User Login (twbkwbis.P_WWWLogin)” on page 3-3
• “Login Verification (twbkwbis.P_ValLogin)” on page 3-4
• “Terms of Usage (twbkwbis.P_UsagePage)” on page 3-8
The information stored in the Banner database and presented to the users in Web General is highly confidential. Therefore, users must log into the Secure Area to view and update it.
Banner Web General 8.3 December 2009User GuideTechnical Reference

Decemb
The programming logic that controls user IDs and PINs for all the Banner Self-Service products exists in Banner General and Banner Web General.
NoteInstitutional preferences for PINs and Security Questions and Answers are set on Banner General’s GUAPPRF form. See Banner Online Help for details of the settings that can be made in GUAPPRF.
All the user IDs and PINs are stored in the GOBTPAC table in Banner General and can be maintained using the Third Party Access Form (GOATPAC) or the Third Party Access Audit Form (GOATPAD). Web General uses this information to authenticate web users.
The very first time a user successfully logs into the Secure Area, the system presents a Security Question/Answer page. The user must define one or more security question for which only they have the answer. These questions and answers can help the user to re-establish his PIN without bothering your institution’s web master, so your administration needs fewer people involved with PIN maintenance, resulting in better overall PIN security. See “Change Security Question (twbkwbis.P_SecurityQuestion)” on page 3-11.
If the institution has set up the ethnicity and race survey feature and if an active survey is in progress, a user may be presented with an ethnicity and race survey after logon. When a user logs on, the system determines whether the user needs to complete the ethnicity and race survey, and if so, displays the Update Ethnicity and Race page (bwgkomre.P_RaceSurvey). The survey is presented after any user security pages have been completed. See “Ethnicity and Race Survey Pages” on page 3-43.
User Login (twbkwbis.P_WWWLogin)
A user enters his Banner ID and current PIN. As the PIN is entered, the Web page displays asterisks (******) to protect the privacy of the information.
Web Page Fields
Item Description/Source Information
ID The user’s current or any previous ID that is displayed in the Identification Form (SPAIDEN).
PIN PIN field on the GOATPAC or GOATPAD form in Banner General.
Disabled Indicator Disabled Indicator on the GOATPAC or GOATPAD form. If this is selected (Yes in the database), the user is not allowed to login to the Web. To allow Web access, the check box should be cleared.
er 2009 Banner Web General 8.3 3-3User Guide
Technical Reference

3-4
Login Verification (twbkwbis.P_ValLogin)
This page is displayed if the user ID and/or password you entered on the User Login (twbkwbis.P_WWWLogin) page was incorrect.
Login Attempts How many times the user has entered an invalid ID and PIN combination. The twgbwrul_login_attempts column of the Web Rules Table (TWGBWRUL) holds the maximum number of unsuccessful login attempts before the PIN is disabled. To enter this maximum, select Web Rules from the Web Tailor Menu.
PIN Expiration PIN Expirations are an optional Web feature. If implemented, PIN expiration dates can use an auto-expiration feature for all users. PIN expiration dates for specific users can be entered in the Expiration Date field on the Third Party Access Form (GOATPAC). To auto-expire PINs for all user accounts with PIN Expiration Dates, enter a value in PIN Expiration Days on the Web Rules page in Web Tailor.
Buttons/Icons on This Page
Button/Icon Action
Login Goes to the Main Menu (twbkwbis.P_GenMenu).
Forgot PIN? Goes to the Security Answer page (twbkwbis.P_ValLogin).
Web Page Fields
Item Description/Source Information
ID The user’s current or any previous ID that is displayed in the Identification Form (SPAIDEN).
PIN PIN field on the GOATPAC or GOATPAD form in Banner General.
Web Page Fields
Item Description/Source Information
Banner Web General 8.3 December 2009User GuideTechnical Reference

Decemb
Disabled Indicator Disabled Indicator on the GOATPAC or GOATPAD form. If this is selected (Yes in the database), the user is not allowed to login to the Web. To allow Web access, the check box should be cleared.
Login Attempts How many times the user has entered an invalid ID and PIN combination. The twgbwrul_login_attempts column of the Web Rules Table (TWGBWRUL) holds the maximum number of unsuccessful login attempts before the PIN is disabled. To enter this maximum, select Web Rules from the Web Tailor Menu.
PIN Expiration PIN Expirations are an optional Web feature. If implemented, PIN expiration dates can use an auto-expiration feature for all users. PIN expiration dates for specific users can be entered in the Expiration Date field on the GOATPAC or GOATPAD form. To auto-expire PINs for all user accounts with PIN Expiration Dates, enter a value in PIN Expiration Days on the Web Rules page in Web Tailor.
Updates to Banner
Item Description
Last Web Access From the Last Web Access field on the GOATPAC or GOATPAD form. This field displays the Last Web Access date and time display on the Login Verification page after the user enters a valid ID and PIN.
Buttons/Icons on This Page
Button/Icon Action
Login Goes to the Main Menu (twbkwbis.P_GenMenu).
Forgot PIN? Goes to the Security Answer page (twbkwbis.P_ValLogin).
Web Page Fields
Item Description/Source Information
er 2009 Banner Web General 8.3 3-5User Guide
Technical Reference

3-6
Web Page Fatal/Warning Error Messages
Message: PIN must be <value> digits long.
Source: twbkwbi1.sqlProcedure twbkwbis.P_ValidateChangePin(referenced function is twbkglib.F_PinLength)
Action: End user or administrative action required. User did not enter the required number of digits in the PIN field.
Message: Your PIN has expired. Please change it now.
Source: twbkwbi1.sqlProcedure twbkwbis.P_ValLogin
Action: End user or administrative action required. PIN Expiration Date specified on GOATPAC and GOATPAD for the end user has been reached. End user must enter a new PIN which is different from the previous PIN; or an authorized administrative user can make the expiration date null or change it to a future date.
Message: Your PIN will expire in <value> day(s). You may change it now, or enter your PIN in the Re-enter Old PIN field and select Login.
Source: twbkwbi1.sqlProcedure twbkwbis.P_ValLogin
Action: End user or administrative action required. PIN Expiration Date specified on GOATPAC and GOATPAD for the end user occurs in the number of days specified. End user may change PIN now or continue with current PIN.
Message: New PIN must be different from existing PIN!
Source: twbklib1.sqlreferenced by twbkwbis.P_ValidateChangePin
Action: End user or administrative action required. End user attempted to change his PIN by specifying the current PIN as the new PIN. This is not permitted. End user must enter a PIN that is different from the current PIN.
Banner Web General 8.3 December 2009User GuideTechnical Reference

Decemb
Message: Authorization Failure - Invalid User ID or PIN.
Source: twbkwbi1.sqlProcedure twbkwbis.P_ValLogin
Action: End user or administrative action required. End user entered an invalid ID and PIN combination. Additional attempts to enter a valid ID and PIN combination will be permitted until the number of Login Attempts specified on the Web Rules Form is reached (equal to the value of Login Attempts).
Message: You are not authorized to login. If you are an employee please contact the Human Resources Department. Students should contact the Student Records Department.
Source: twbkwbi1.sqlProcedure twbkwbis.P_ValLoginInformation Text for Label: DEAD, Sequence 1
Action: End user or administrative action required. ID and PIN combination is valid, but the person is marked Deceased on the General Person Form (SPAPERS). Administrative investigation and review should be undertaken as appropriate.
Message: Your Web Access has been disabled. Please contact the Computing and Information Services Office for information about your account.
Source: twbkwbi1.sqlProcedure twbkwbis.P_ValLoginInformation Text for Label: DISABLE, Sequence 1
Action: End user or administrative action required. End user's Web access has been disabled due to reaching the number of invalid login attempts specified on the Web Rules page in Web Tailor.
er 2009 Banner Web General 8.3 3-7User Guide
Technical Reference
3-8
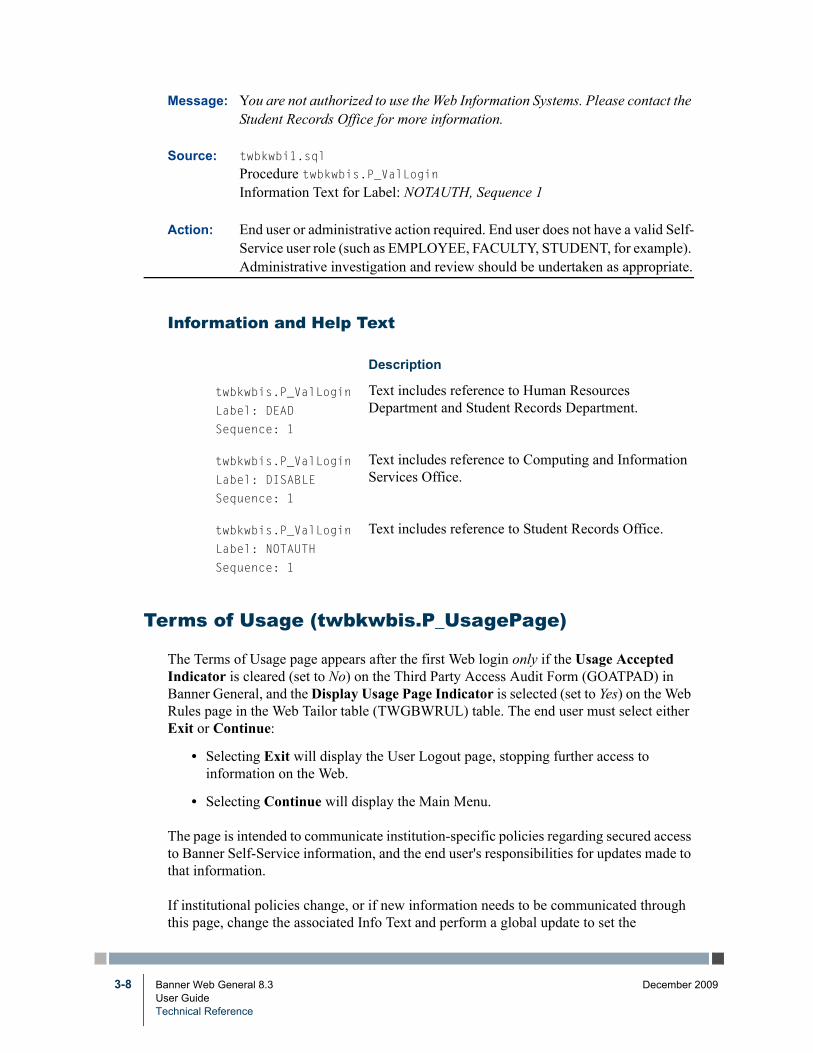
Message: You are not authorized to use the Web Information Systems. Please contact the Student Records Office for more information.
Source: twbkwbi1.sql
Procedure twbkwbis.P_ValLoginInformation Text for Label: NOTAUTH, Sequence 1
Action: End user or administrative action required. End user does not have a valid Self-Service user role (such as EMPLOYEE, FACULTY, STUDENT, for example). Administrative investigation and review should be undertaken as appropriate.
Information and Help Text
Terms of Usage (twbkwbis.P_UsagePage)
The Terms of Usage page appears after the first Web login only if the Usage Accepted Indicator is cleared (set to No) on the Third Party Access Audit Form (GOATPAD) in Banner General, and the Display Usage Page Indicator is selected (set to Yes) on the Web Rules page in the Web Tailor table (TWGBWRUL) table. The end user must select either Exit or Continue:
• Selecting Exit will display the User Logout page, stopping further access to information on the Web.
• Selecting Continue will display the Main Menu.
The page is intended to communicate institution-specific policies regarding secured access to Banner Self-Service information, and the end user's responsibilities for updates made to that information.
If institutional policies change, or if new information needs to be communicated through this page, change the associated Info Text and perform a global update to set the
Description
twbkwbis.P_ValLogin
Label: DEAD
Sequence: 1
Text includes reference to Human Resources Department and Student Records Department.
twbkwbis.P_ValLogin
Label: DISABLE
Sequence: 1
Text includes reference to Computing and Information Services Office.
twbkwbis.P_ValLogin
Label: NOTAUTH
Sequence: 1
Text includes reference to Student Records Office.
Banner Web General 8.3 December 2009User GuideTechnical Reference

Decemb
gobtpac_usage_accept_ind to N in the database. The Terms of Usage page will reappear the next time the user logs on.
Information and Help Text
Web Page Fields
Item Description/Source Information
Display Usage Page Indicator
From the Web Rules page in the Web Tailor. If this is selected (set to Yes), the Terms of Usage will display the first time all users log on to the Web.
Usage Accepted Indicator
From the Third Party Access Audit Form (GOATPAD) in Banner General. All new records created on this form default this indicator to cleared (set to No), which will cause the Terms of Usage page to appear the first time the user logs on.
Updates to Banner
Item Description
Usage Accepted Indicator
If the user clicks on the Continue button, the Usage Accepted Indicator in GOATPAD will be updated to selected (set to Yes).
Buttons/Icons on This Page
Button/Icon Action
Exit Displays the User Logout page.
Continue Returns to the Main menu.
twbkwbis.P_UsagePage
Label: DEFAULT Sequences 1 and 2
Review all text and edit to reflect institution-specific policies and user responsibilities regarding use of the Banner Self-Service information system.
er 2009 Banner Web General 8.3 3-9User Guide
Technical Reference

3-10
Personal Information Pages
This section includes the following topics:
• “Answer A Survey (bwgksrvy.P_ShowSurveys)” on page 3-11
• “Change Security Question (twbkwbis.P_SecurityQuestion)” on page 3-11
• “View Addresses and Phones (bwgkogad.P_SelectAtypView)” on page 3-12
• “Update Addresses and Phones - Select Address (bwgkogad.P_SelectAtypUpdate)” on page 3-15
• “Update Addresses and Phones - Update/Insert (bwgkogad.P_DispAddrUpdate)” on page 3-18
• “View E-mail Addresses (bwgkogad.P_SelectEmalView)” on page 3-23
• “Update E-mail Addresses - Select Address (bwgkogad.P_SelectEmalUpdate)” on page 3-24
• “Update E-mail Addresses - Update/Insert (bwgkogad.P_DispEmailUpdate)” on page 3-26
• “Directory Profile (bwgkoprf.P_ShowDiroItems)” on page 3-28
• “View Emergency Contacts (bwgkoemr.P_ViewEmrgContacts)” on page 3-33
• “Update Emergency Contacts - Select Contact (bwgkoemr.P_SelectEmrgContacts)” on page 3-33
• “Update Emergency Contacts (bwgkoemr.P_UpdateEmrgContacts)” on page 3-34
• “Update Marital Status (bwgkogad.P_SelectMtypUpdate)” on page 3-38
• “Name Change Information (bwgkoinf.P_DispUpdName)” on page 3-39
• “Social Security Number Change Information (bwgkoinf.P_DispUpdSSN)” on page 3-40
• “Change PIN (twbkwbis.P_ChangePin)” on page 3-42
• “User Logout (twbkwbis.P_Logout)” on page 3-43
Banner Web General delivers the functionality that supports the items on the Personal Information Menu that appears on every Self-Service application’s main menu. This section describes the implementation of the basic requirements for those pages, regardless of application.
Banner Web General 8.3 December 2009User GuideTechnical Reference
Decemb
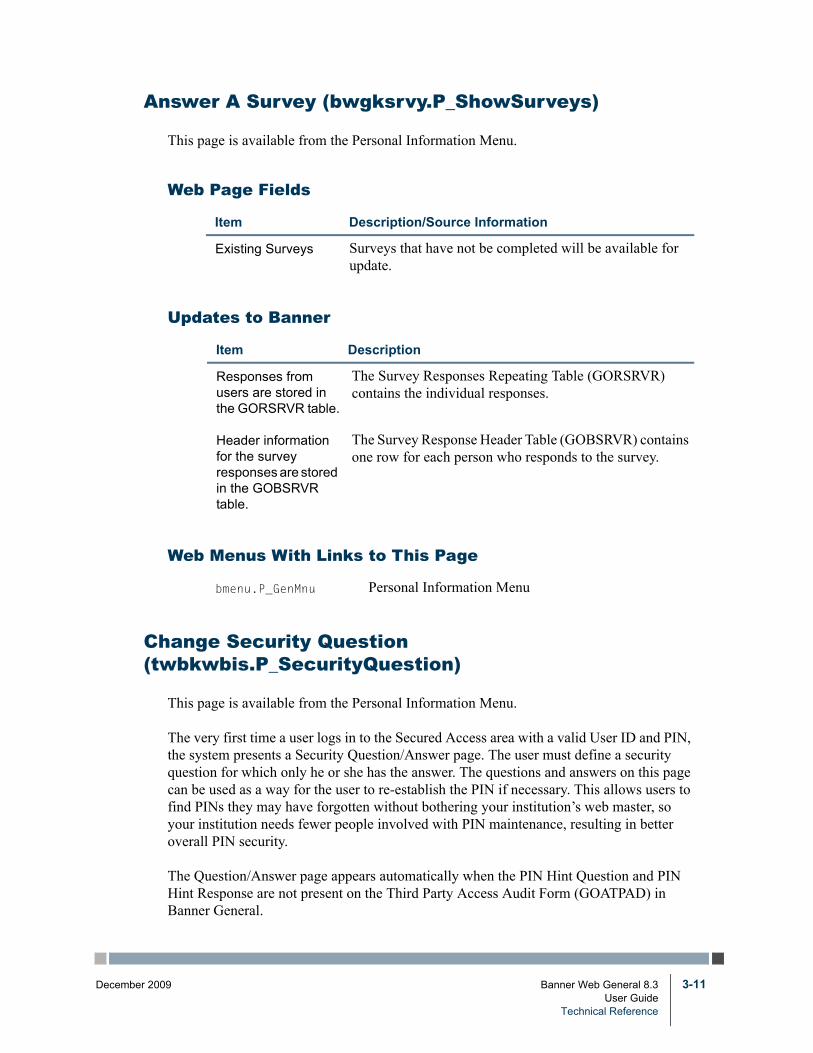
Answer A Survey (bwgksrvy.P_ShowSurveys)
This page is available from the Personal Information Menu.
Change Security Question (twbkwbis.P_SecurityQuestion)
This page is available from the Personal Information Menu.
The very first time a user logs in to the Secured Access area with a valid User ID and PIN, the system presents a Security Question/Answer page. The user must define a security question for which only he or she has the answer. The questions and answers on this page can be used as a way for the user to re-establish the PIN if necessary. This allows users to find PINs they may have forgotten without bothering your institution’s web master, so your institution needs fewer people involved with PIN maintenance, resulting in better overall PIN security.
The Question/Answer page appears automatically when the PIN Hint Question and PIN Hint Response are not present on the Third Party Access Audit Form (GOATPAD) in Banner General.
Web Page Fields
Item Description/Source Information
Existing Surveys Surveys that have not be completed will be available for update.
Updates to Banner
Item Description
Responses from users are stored in the GORSRVR table.
The Survey Responses Repeating Table (GORSRVR) contains the individual responses.
Header information for the survey responses are stored in the GOBSRVR table.
The Survey Response Header Table (GOBSRVR) contains one row for each person who responds to the survey.
Web Menus With Links to This Page
bmenu.P_GenMnu Personal Information Menu
er 2009 Banner Web General 8.3 3-11User Guide
Technical Reference

3-12
View Addresses and Phones (bwgkogad.P_SelectAtypView)
This page displays address and telephone information. It displays all of the user’s current and future addresses, and the associated telephone information. The addresses are grouped by address type.
Address Type Inclusion
If the following criteria are met, the address type is included:
1. At least one rule must exist for the address type on the Address Role Privileges Form (GOAADRL) in Banner General for the Web role(s) associated for the user.
2. The privilege indicator for the address type must be U (update) or D (display).
3. An active address for any current, or future date exists in the database for the Type of Address.
A user may have multiple Self-Service roles. If more than one address role rule exists with a different privilege for the same address type for the user, the rule with the highest privilege will be effective for the Address and Phone options available on the Web.
For example, suppose a user has four roles and the following rules exist in GOADDRL:
Web Page Fields
Item Description/Source Information
Old Question The question that the user supplied the first time he or she logged in to the Secure Access area.
Old Answer The answer that the user supplied for this question.
New Question The new question that the user wants to use.
New Answer The answer that the user supplied for this question.
Buttons/Icons on This Page
Button/Icon Action
Submit Saves your changes.
Reset Clears the contents of the New Question and New Answer fields.
Banner Web General 8.3 December 2009User GuideTechnical Reference

Decemb
The user will be permitted to access View the Mailing Address and Phones, even though the STUDENT role does not allow access to, or display of, Mailing address type information. Update is considered a higher privilege than Display only, and Display only is considered a higher privilege than No access.
NoteIf an address type role does not exist for a specific address type and Web role, that combination is treated as No access.
Inactive Addresses
Inactive addresses will never be displayed, even if the Address Role Privileges Form (GOAADRL) in Banner General includes a rule to allow display or update for the specified address type for the user’s Self-Service role. Addresses with past or future effective dates can be viewed.
The date’s format is determined by the date format specified on the Web Rules page of Web Tailor.
For example, the Mailing address type is enabled for Self-Service access, and the user has the following mailing address records:
Mailing address one:Effective from January 1, 1996 to December 31, 2000, marked Inactive
Mailing address two:Effective from January 1, 2001 to December 31, 2001
Mailing address three:Effective from January 1, 2002 through December 31, 2005
Mailing address four:Effective from January 1, 2006 (no end date currently specified)
If today's date is June 1, 2005, when this user selects View Address Information, the address and phone information for address three and address four will be displayed. They will be grouped under the Mailing Addresses heading. Address three will have Current next to the address. Address four will have Future next to the address.
Address Type Role Privilege
MA(iling) EMPLOYEE U(pdate)
MA(iling) FACULTY D(isplay only)
MA(iling) STUDENT N(o access)
MA(iling) ALUMNI U(pdate)
er 2009 Banner Web General 8.3 3-13User Guide
Technical Reference
3-14
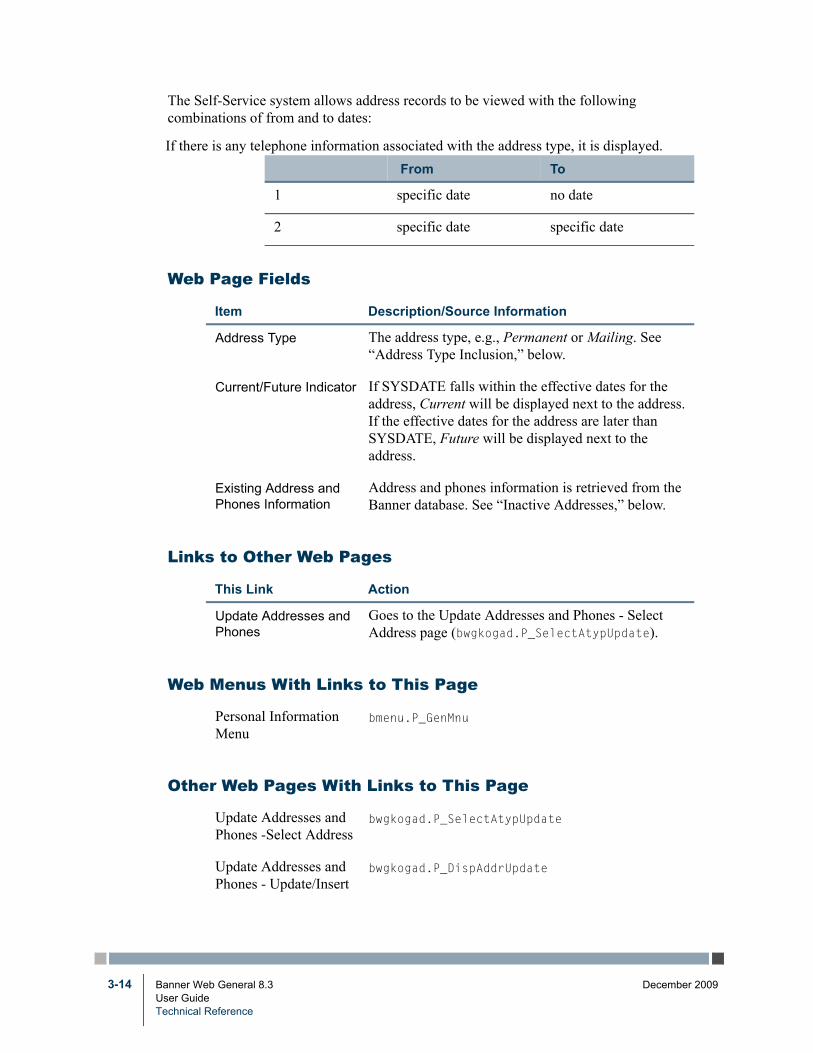
The Self-Service system allows address records to be viewed with the following combinations of from and to dates:
If there is any telephone information associated with the address type, it is displayed. From To
1 specific date no date
2 specific date specific date
Web Page Fields
Item Description/Source Information
Address Type The address type, e.g., Permanent or Mailing. See “Address Type Inclusion,” below.
Current/Future Indicator If SYSDATE falls within the effective dates for the address, Current will be displayed next to the address. If the effective dates for the address are later than SYSDATE, Future will be displayed next to the address.
Existing Address and Phones Information
Address and phones information is retrieved from the Banner database. See “Inactive Addresses,” below.
Links to Other Web Pages
This Link Action
Update Addresses and Phones
Goes to the Update Addresses and Phones - Select Address page (bwgkogad.P_SelectAtypUpdate).
Web Menus With Links to This Page
Personal Information Menu
bmenu.P_GenMnu
Other Web Pages With Links to This Page
Update Addresses and Phones -Select Address
bwgkogad.P_SelectAtypUpdate
Update Addresses and Phones - Update/Insert
bwgkogad.P_DispAddrUpdate
Banner Web General 8.3 December 2009User GuideTechnical Reference

Decemb
Web Page Fatal/Warning Error Messages
Message: There are no addresses available for you to view.
Source: bwgkoad1.sqlProcedure bwgkoadr.P_SelectAtypView
Action: End user or administrative action required. The end user has no active addresses available. The end user must go to the Update Addresses and Phones - Select Address page and insert a new address with effective dates on or after the SYSDATE.
Update Addresses and Phones - Select Address (bwgkogad.P_SelectAtypUpdate)
Two pages are involved in updating address and phone information.
The Update Addresses and Phones - Select Address page displays all of the user’s current and future addresses, along with the associated phones information. The addresses are grouped by address type.
Each address has a link to the Update Addresses and Phones - Update/Insert page, which allows the user to update the address and phone information for that address. The user can also choose to insert a new address by selecting an address type from the pull-down list and choosing Type of Address to Insert. This takes the user to the Update Addresses and Phones - Update/Insert page where he can insert new address and telephone information.
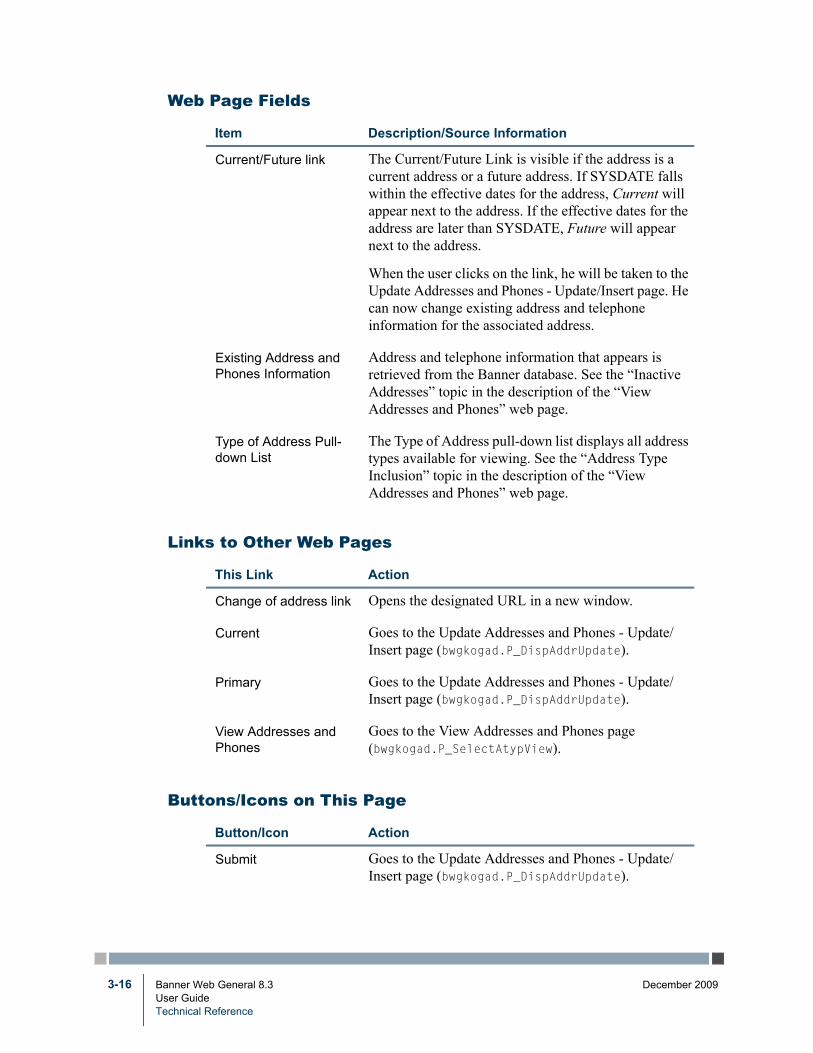
Web Page Fields
Item Description/Source Information
Type of Address The Type of Address heading displays all available address types. See the “Address Type Inclusion” topic in the description of the “View Addresses and Phones” web page.
er 2009 Banner Web General 8.3 3-15User Guide
Technical Reference
3-16
Current/Future link The Current/Future Link is visible if the address is a current address or a future address. If SYSDATE falls within the effective dates for the address, Current will appear next to the address. If the effective dates for the address are later than SYSDATE, Future will appear next to the address.
When the user clicks on the link, he will be taken to the Update Addresses and Phones - Update/Insert page. He can now change existing address and telephone information for the associated address.
Existing Address and Phones Information
Address and telephone information that appears is retrieved from the Banner database. See the “Inactive Addresses” topic in the description of the “View Addresses and Phones” web page.
Type of Address Pull-down List
The Type of Address pull-down list displays all address types available for viewing. See the “Address Type Inclusion” topic in the description of the “View Addresses and Phones” web page.
Links to Other Web Pages
This Link Action
Change of address link Opens the designated URL in a new window.
Current Goes to the Update Addresses and Phones - Update/Insert page (bwgkogad.P_DispAddrUpdate).
Primary Goes to the Update Addresses and Phones - Update/Insert page (bwgkogad.P_DispAddrUpdate).
View Addresses and Phones
Goes to the View Addresses and Phones page (bwgkogad.P_SelectAtypView).
Buttons/Icons on This Page
Button/Icon Action
Submit Goes to the Update Addresses and Phones - Update/Insert page (bwgkogad.P_DispAddrUpdate).
Web Page Fields
Item Description/Source Information
Banner Web General 8.3 December 2009User GuideTechnical Reference

Decemb
Web Page Fatal/Warning Error Messages
Message: There are no addresses available for you to update.
Source: bwgkoad1.sqlProcedure bwgkoadr.P_SelectAtypUpdate
Action: End user or administrative action required. The end user has no active addresses available. The end user must insert a new address with effective dates on or after the SYSDATE to update it.
Message: Errors occurred. Please try again. Invalid address type.
Source: bwgkoad1.sqlProcedure bwgkoadr.P_ValidateAtyp
Action: End user or administrative action required.In this example, the end user did not select a valid address type from the pull-down list. The last sentence can vary, depending on which field had invalid data.
Web Menus With Links to This Page
Personal Information Menu
bmenu.P_GenMnu
Other Web Pages With Links to This Page
View Addresses and Phones
bwgkogad.P_SelectAtypView
Directory Profile bwgkoprf.P_ShowDiroItems
er 2009 Banner Web General 8.3 3-17User Guide
Technical Reference
3-18
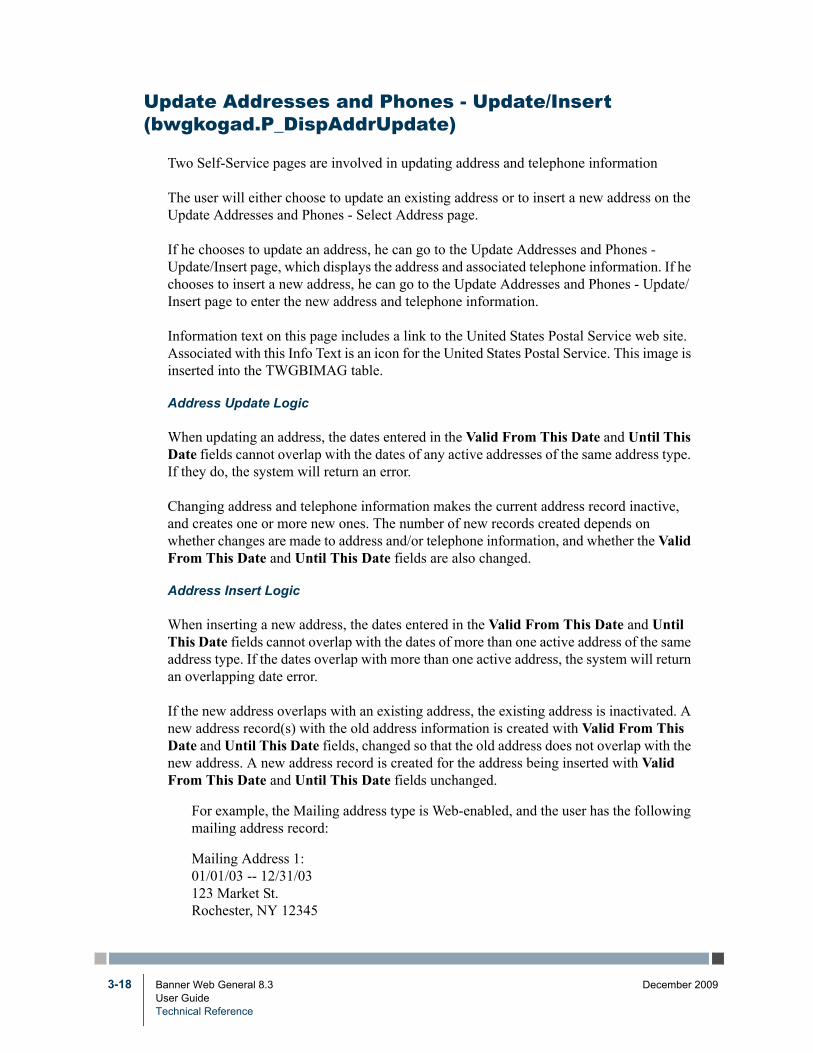
Update Addresses and Phones - Update/Insert (bwgkogad.P_DispAddrUpdate)
Two Self-Service pages are involved in updating address and telephone information
The user will either choose to update an existing address or to insert a new address on the Update Addresses and Phones - Select Address page.
If he chooses to update an address, he can go to the Update Addresses and Phones - Update/Insert page, which displays the address and associated telephone information. If he chooses to insert a new address, he can go to the Update Addresses and Phones - Update/Insert page to enter the new address and telephone information.
Information text on this page includes a link to the United States Postal Service web site. Associated with this Info Text is an icon for the United States Postal Service. This image is inserted into the TWGBIMAG table.
Address Update Logic
When updating an address, the dates entered in the Valid From This Date and Until This Date fields cannot overlap with the dates of any active addresses of the same address type. If they do, the system will return an error.
Changing address and telephone information makes the current address record inactive, and creates one or more new ones. The number of new records created depends on whether changes are made to address and/or telephone information, and whether the Valid From This Date and Until This Date fields are also changed.
Address Insert Logic
When inserting a new address, the dates entered in the Valid From This Date and Until This Date fields cannot overlap with the dates of more than one active address of the same address type. If the dates overlap with more than one active address, the system will return an overlapping date error.
If the new address overlaps with an existing address, the existing address is inactivated. A new address record(s) with the old address information is created with Valid From This Date and Until This Date fields, changed so that the old address does not overlap with the new address. A new address record is created for the address being inserted with Valid From This Date and Until This Date fields unchanged.
For example, the Mailing address type is Web-enabled, and the user has the following mailing address record:
Mailing Address 1:01/01/03 -- 12/31/03123 Market St.Rochester, NY 12345
Banner Web General 8.3 December 2009User GuideTechnical Reference

Decemb
The user inserts the following Mailing address:
10/10/03 -- 10/20/03456 Main St.San Diego, CA 54321
Mailing Address 1 will become inactive, and the following will become the new address information.
Mailing Address 1:01/01/03 -- 10/09/03123 Market St.Rochester, NY 12345
Mailing Address 2:10/10/03 -- 10/20/03456 Main St.San Diego, CA 54321
Mailing Address 3:10/21/03 -- 12/31/03123 Market St.Rochester, NY 12345
Deleting the United States Postal Service Link
Users can delete this link by performing the following steps.
1. Log on to the Banner Self-Service with a Web Tailor Administrator role.
2. From the Main Menu, select Web Tailor Administrator.
3. From the Web Tailor menu, select Information Text.
4. From the Select Information Text to Customize page, select bwgkogad.P_SelectAtypUpdate. Select Customize Information Text.
5. From the Reorder or Customize Information Text page, select the label of the item with sequence number 2.
6. On the Customize the Selected Information Text Entry page, verify that the correct Information Text is displayed, as follows:
Change of address information and USPS forms are available through <A HREF="https://moversguide.usps.com/?referral=USPS" target="_blank">this link</A>.
7. Select Delete this Entry.
er 2009 Banner Web General 8.3 3-19User Guide
Technical Reference

3-20
Web Page Fields
Item Description/Source Information
Type of Address The address type of the address being updated or inserted. Display only.
See the “Address Type Inclusion” topic in the description of the “View Addresses and Phones” web page.
Delete This Address Checkbox
Select to make the current address inactive.
Existing Address and Phones Information
Address and telephone information from the Banner database; however, inactive addresses will never appear, even if the Address Role Privileges Form (GOAADRL) includes a rule to allow display or update for the specified address type for the user’s Self-Service role. Any addresses with future effective dates will be available for update. The date’s format is determined on the Web Rules page in Web Tailor.
Address and/or phones record(s)
A phone entered in the address information area will be designated as the primary phone for the address, and will check the Primary Indicator (set to Y), and associate the address type and sequence number with that phone number.
If the Delete Address check box is selected, the address will be made inactive in the database. If the Delete check box next to an additional phone number is selected, the phone will be made inactive.
The system does not allow for active addresses with the same address type to have overlapping dates. To allow the user the maximum amount of freedom, the logic to insert an address is different from the logic to update one. The following explains the differences.
See “Address Update Logic” and “Address Insert Logic” above.
Banner Web General 8.3 December 2009User GuideTechnical Reference

Decemb
Updates to Banner
Item Description
Address and/or phones record(s)
See “Address Update Logic” and “Address Insert Logic” above.
Note: Address and primary phone changes and additions appear on the Address and Telephone windows of the Identification Forms (e.g., SPAIDEN, FOAIDEN, etc.). Telephone changes and additions appear on the Telephone window of the Identification Forms (e.g., SPAIDEN, FOAIDEN, etc.).
Links to Other Web Pages
This Link Action
View Addresses and Phones
Goes to the View Addresses and Phones page (bwgkogad.P_SelectAtypView).
Buttons/Icons on This Page
Button/Icon Action
Submit Saves your changes and goes to the Update Addresses and Phones page.
Reset Deletes the choices the user has made and returns to the default settings.
Select a Different Address to Update
Goes to the Update Addresses and Phones - Select Address page (bwgkogad.P_SelectAtypUpdate)
Web Menus With Links to This Page
Personal Information Menu
bmenu.P_GenMnu
Other Web Pages With Links to This Page
Update Addresses and Phones - Select Address
bwgkogad.P_SelectAtypUpdate
er 2009 Banner Web General 8.3 3-21User Guide
Technical Reference

3-22
Web Page Fatal/Warning Error Messages
Message: Errors occurred. Please try again..
One or more of the following messages may be displayed, depending on the information entered by the user:- Form item From date must be entered- Address Line 1 must be entered- City must be entered- State or Province and ZIP, or Postal Code, or Nation must be entered- Phone number is required when other phone information has been entered
Source: bwgkoad1.sqlProcedure bwgkoadr.P_ValAddrUpdate
Action: End user or administrative action required.The data entered by the end user did not meet the minimum Banner database requirements to create either an address or telephone record.
Message: Errors occurred. Please try again.Form item <date field> has invalid format/values.<date field> can be either “From date” or “Until date”
Source: bwgkoad1.sqlProcedure bwgkoadr.P_ValidateAtyp
Action: End user or administrative action required. The end user did not enter a correct date format or values.
Message: A Mailing address exists with future effective dates beginning on...
Source: bwgkoad1.sql
Procedure bwgkoadr.P_DispAddrUpdate
Action: End user or administrative action optional. If the end user enters a blank Until date, a future address may be made inactive inadvertently. This is merely a warning to the user.
Banner Web General 8.3 December 2009User GuideTechnical Reference

Decemb
Message: Errors occurred. Please try again.From / Until date combination overlaps existing address which is effective from <date> to <date>
Source: bwgkoad1.sqlProcedure bwgkoadr.P_ValAddrUpdate
Action: End user or administrative action required. The end user entered a From / Until date combination that overlaps one or more existing addresses of the same address type. The end user needs to re-enter the From / Until dates.
View E-mail Addresses (bwgkogad.P_SelectEmalView)
This page displays all active e-mail addresses, grouped by e-mail type. The preferred e-mail address will have Preferred next to it. Any comments for a particular address immediately follow it.
Setup Requirements
Item Description
Update E-mail Addresses
You must set up e-mail addresses on the Update E-mail Addresses - Select Address page (bwgkogad.P_SelectEmalUpdate) or else none will appear on this page.
Links to Other Web Pages
This Link Action
Update E-mail Addresses
Goes to the Update E-mail Addresses - Select Address page (bwgkogad.P_SelectEmalUpdate).
Web Menus With Links to This Page
Personal Information Menu
bmenu.P_GenMnu
er 2009 Banner Web General 8.3 3-23User Guide
Technical Reference

3-24
Messages
Message: There are no e-mail addresses available for you to view.
Source: bwgkoad1.sqlProcedure bwgkoadr.P_SelectEmailView
Action: End user or administrative action required.The end user has no active e-mail addresses available. The end user must go to the Update E-mail Addresses - Select Address page and insert a new address. The end users may have a type of e-mail that has not been set to be viewed on the web. The administrator uses the E-mail Address Type Validation Form (GTVEMAL) in Banner General to specify which address types will be displayed.
Update E-mail Addresses - Select Address (bwgkogad.P_SelectEmalUpdate)
Two Self-Service pages are involved in updating e-mail address information.
This page will display all active e-mail addresses, grouped by e-mail type. The preferred e-mail address will have Preferred next to it. Any comments for a particular address will be printed directly below the e-mail address.
To update an existing e-mail address, the user will select the address link to go to the Update E-mail Address -Update/Insert page to update the e-mail address information. To insert a new e-mail address, the user will select the e-mail address type from the pull-down list. The Update E-mail Address - Update/Insert page appears, and the user can insert the new e-mail address.
Web Page Fields
Item Description/Source Information
Type of E-mail Address Heading
The e-mail address types. At least one active e-mail address must exist for the user for the e-mail address type to be included in the page.
E-mail Address Information
E-mail address information shown is retrieved from the Banner database; however, inactive addresses will never be displayed.
E-mail Addresses Comment
Comment on this e-mail address is retrieved from the Banner database
Banner Web General 8.3 December 2009User GuideTechnical Reference

Decemb
Web Page Fatal/Warning Error Messages
Message: There are no e-mail addresses for you to update.
Source: bwgkoad1.sqlProcedure bwgkoadr.P_SelectEmalUpdate
Action: End user or administrative action required.The end user has no active e-mail addresses available. The end user must go to the Update E-mail Addresses - Select Address page and insert a new address. The end users may have a type of e-mail that has not been set to be viewed on
Type of E-mail Address Pull-down
Displays all e-mail address types that have been defined in Banner on the E-mail Address Type Validation Form (GTVEMAL).
Links to Other Web Pages
This Link Action
E-mail address Goes to the Update E-mail Addresses - Update/Insert page (bwgkogad.P_DispEmailUpdate).
View E-mail Addresses Goes to the View E-mail Addresses page (bwgkoemr.P_SelectEmalView).
Buttons/Icons on This Page
Button/Icon Action
Submit Goes to the Update E-mail Addresses - Update/Insert page (bwgkogad.P_DispEmailUpdate).
Web Menus With Links to This Page
Personal Information Menu
bmenu.P_GenMnu
Other Web Pages With Links to This Page
View E-mail Addresses bwgkogad.P_SelectEmalView
Web Page Fields
Item Description/Source Information
er 2009 Banner Web General 8.3 3-25User Guide
Technical Reference

3-26
the web. The administrator uses the E-mail Address Type Validation Form (GTVEMAL) in Banner General to specify which address types will be displayed.
Message: Errors occurred. Please try again. Invalid e-mail type.
Source: bwgkoad1.sqlProcedure bwgkoadr.P_ValidateEmal
Action: End user or administrative action required.The end user did not select a valid e-mail address type from the pull-down list.
Update E-mail Addresses - Update/Insert (bwgkogad.P_DispEmailUpdate)
Two Self-Service pages are involved in updating e-mail address information.
The user will either choose to update an existing e-mail address or to insert a new e-mail address on the Update E-mail Addresses - Select Address page. After a user selects to update an e-mail address, he can go to the Update E-mail Address - Update/Insert page, which displays the e-mail address, comments associated with the address, a preferred check box and a delete check box. If the user chooses to insert a new e-mail address, he can go to the Update E-mail Address - Update/Insert page to enter the new e-mail address and associated information.
Web Page Fields
Item Description/Source Information
Type of E-mail Address Heading
The e-mail address type.
E-mail Address Information
E-mail address information displayed is retrieved from the Banner database; however, inactive addresses will never be displayed.
Preferred Address The address type and the e-mail address of the preferred e-mail address. Only one e-mail address can be a preferred address.
Delete this Address Check the check box to make the current address inactive.
Banner Web General 8.3 December 2009User GuideTechnical Reference

Decemb
Updates to Banner
Item Description
E-mail record(s) Updates to existing e-mail addresses can include changing the address or comment information, inactivating the address or designating the address as preferred. Only one e-mail address may be designated as the preferred address. These changes will update the existing record appropriately. Existing e-mail addresses can never be deleted on the web, but they can be made inactive. Any new e-mail address records will be added to the database, and displayed on the GOAEMAL form and the E-mail window of the Identification forms (e.g., SPAIDEN).
Note: Updates and additions will be displayed on the E-mail Address Form (GOAEMAL) and the E-mail window of the Identification forms (e.g., SPAIDEN)
Note: If a user enters an e-mail type and address is identical to an existing one that is inactive, the record will become active again.
User ID E-mail address records updated or added via the Web will record the Oracle Web Server Agent as the User ID associated with the changes.
Links to Other Web Pages
This Link Action
View E-mail Addresses Goes to the View E-mail Addresses page (bwgkogad.P_SelectEmalView).
Buttons/Icons on This Page
Button/Icon Action
Submit Saves your changes and goes to the bwgkogad.P_ProcEmailUpdate page.
Reset Deletes the choices the user has made and returns to the default settings.
Select a Different E-mail Address to Update
Goes to the Update E-mail Addresses - Select Address page (bwgkogad.P_SelectEmalUpdate)
er 2009 Banner Web General 8.3 3-27User Guide
Technical Reference

3-28
Web Page Fatal/Warning Error Messages
Message: Errors occurred. Please try again.E-mail must be entered.
Source: bwgkoad1.sqProcedure bwgkoadr.P_ValEmailUpdate
Action: End user or administrative action required.The end user has not entered an e-mail address. The data entered by the end user did not meet the minimum Banner database requirements to create an e-mail address record.
Message: Errors occurred. Please try again.Only one preferred e-mail address may be specified.
Source: bwgkoad1.sqlProcedure bwgkoadr.P_ValEmailUpdate
Action: End user or administrative action required.There is already an active e-mail address that is preferred.
Message: Errors occurred. Please try again. This E-mail address already exists for this address type. Please enter another address.
Source: bwgkoad1.sqlProcedure bwgkoadr.P_ValEmailUpdate
Action: End user or administrative action required.There is already a record in the database with the same e-mail address and the same address type. To update this address, the end user goes back to the Update E-mail Addresses - Select Address page. He then selects the link for the e-mail address to update it.
Directory Profile (bwgkoprf.P_ShowDiroItems)
A list of directory items is displayed for the user. Items with check boxes allow the user to include that piece of information in the campus directory. Items without check boxes are automatically included in the campus directory, except for unlisted telephone numbers. Any phones designated as unlisted will not be published.
Banner Web General 8.3 December 2009User GuideTechnical Reference

Decemb
Some of the directory profile items are specific to the STUDENT role, the EMPLOYEE role, the ALUMNI role, or another Self-Service role. If Not Reported appears next to a specific item, the item is not available for the user's role, or it is not found in the Banner database. Rules on the Directory Options Rule Form (GOADIRO) determine the hierarchy of address types and telephone types that should be searched for reporting that information.
NoteA directory profile for a user does not exist until the user has accessed this page and performed an update. Campus directory information can still be created for that person.
The rules established on the Directory Options Rule Form (GOADIRO) in Banner General control the items that are included in the Directory Profile, depending on the user's Self-Service roles. GOADIRO also controls which directory items will automatically be the default when the campus directory is created, even if a directory profile record has not been created on the Web. In addition, rules in GOADIRO control which items the user can choose to include in the directory profile.
Web Page Fields
Item Description/Source Information
Address and Telephone Display
Directory profile items identified as either an Address or Telephone Item Type must have search hierarchies defined on GOADIRO. This hierarchy determines which address and telephone types will be searched in what order to find a currently active address or telephone information from the Banner database. The first address and telephone found in the specified hierarchy is displayed on the page. If an address or telephone cannot be found among the types specified in the hierarchy, Not Reported appears on the page.
E-mail Addresses Display
The directory profile will display all active e-mail addresses that exist for the user. The e-mail address type for each e-mail address appears in parentheses.
College Affiliation A College Affiliation is displayed for users with the STUDENT Self-Service role only. It is the description of the college designated as Primary from the most recent general student record as reported on the General Student Form (SGASTDN).
er 2009 Banner Web General 8.3 3-29User Guide
Technical Reference

3-30
Expected Graduation Year
An Expected Graduation Year is displayed for users with the STUDENT Self-Service role only. It is the expected graduation date from the most recent general student record as reported on the General Student Form (SGASTDN). If no date exists, Not Reported will appear.
Employee Position Title
Employee Department
Employee Position Title is displayed for users with the EMPLOYEE Self-Service role only. It is the position title description for the currently active jobs reported in the Title field on the Employee Jobs Form (NBAJOBS). Employee Department appears in parentheses next to the position title description.
Maiden Name Displayed for users with the ALUMNI Self-Service role only. It is the Birth Name field on the Constituent/Organization Form (APANAME).
Class Year Displayed for users with the ALUMNI Self-Service role only. It is the Preferred Class Year field on the Constituent Information Form (APACONS).
Preferred College Displayed for users with the ALUMNI Self-Service role only. It is the Preferred College field on the Constituent Information Form (APACONS).
Web Page Fields
Item Description/Source Information
Banner Web General 8.3 December 2009User GuideTechnical Reference

Decemb
Setup Requirements
Item Description
Directory Options Rule Form (GOADIRO)
For each Directory Item, enter values for the following fields:
Display Sequence (number)--Designates the order in which the directory profile items appear on the page. Items with a lower number will appear before items with a higher number. Gaps between numbers will not cause blank spaces to appear on the page.
Display in Directory--Allows the institution to specify whether the particular directory item should be included in the Student directory, the Employee directory, the Alumni directory, or all directories.
Display in Directory–Allows the institution to specify whether the particular directory item should be included in the Student directory, the Employee directory, the Alumni directory, or all directories.
Update in Profile–If selected, the user can to control whether the directory item is included for publication in the campus directory by checking and clearing the item on the Directory Profile page. If the indicator is cleared, the user cannot prevent the item from being included in the campus directory.
Display in Profile–If selected, the directory item should be displayed on the Directory Profile page and included in the campus directory.
Default to Directory–If selected, the item will automatically be included in the campus directory, even if a user does not create a directory profile on the page.
er 2009 Banner Web General 8.3 3-31User Guide
Technical Reference

3-32
Updates to Banner
Item Description
Directory Profile Record A directory profile record will not be created in the Banner database until the user submits an update on the Directory Profile page. Once the directory profile record is created, additional updates will modify the existing record. The User ID is the Oracle Web Server Agent for all changes made on the page, and the Activity Date identifies the date of the most recent change.
Links to Other Web Pages
This Link Action
E-mail address If the e-mail address is displayed as a hyperlink, launches the user’s e-mail program with the person’s e-mail address.
Update Addresses and Phones
Goes to the Update Addresses - Select Type page (bwgkogad.P_SelectAtypUpdate).
Name Change Information
Goes to the Name Change Information page (bwgkoinf.P_DispUpdName).
Update E-mail Addresses
Goes to the Update E-mail Addresses - Select Type page (bwgkogad.P_SelectEmalUpdate).
Buttons/Icons on This Page
Button/Icon Action
Submit Changes Goes to the Personal Information Menu (bmenu.P_GenMnu).
Reset Deletes the choices the user has made and returns to the default settings.
Web Menus With Links to This Page
Personal Information Menu
bmenu.P_GenMnu
Banner Web General 8.3 December 2009User GuideTechnical Reference

Decemb
View Emergency Contacts (bwgkoemr.P_ViewEmrgContacts)
All existing emergency contact information for the user will appear in ascending priority order. If no emergency contacts exist, the message No Emergency Contact Information found is shown.
Update Emergency Contacts - Select Contact (bwgkoemr.P_SelectEmrgContacts)
Two Self-Service pages are involved in updating emergency contact information.
A user can update an existing emergency contact by selecting the name link displayed, or they can enter a new contact by selecting the New Contact link. After selecting a new or existing contact, the user goes to the Update Emergency Contacts page.
Web Page Fields
Item Description/Source Information
Existing emergency contact information
Emergency contact information from the Emergency Contact Form (SPAEMRG) or the Emergency Contact window of the Identification forms (e.g., SPAIDEN).
Links to Other Web Pages
This Link Action
Update Emergency Contacts
Goes to the Update Emergency Contacts - Select Contact page (bwgkoemr.P_SelectEmrgContacts).
Web Menus With Links to This Page
Personal Information Menu
bmenu.P_GenMnu
Other Web Pages With Links to This Page
Update Emergency Contacts - Select Contact
bwgkoemr.P_SelectEmrgContacts
Update Emergency Contacts
bwgkoemr.P_DispEmrgForm
er 2009 Banner Web General 8.3 3-33User Guide
Technical Reference

3-34
Update Emergency Contacts (bwgkoemr.P_UpdateEmrgContacts)
Two Self-Service pages are involved in updating emergency contact information.
A user indicates whether they want to update an existing emergency contact or create a new one on the Update Emergency Contacts - Select Contact page.
The Update Emergency Contacts page displays the information for an existing contact. If a new contact was chosen, the user can enter the new information on the page. If the user chose to update and existing one, they can change the contact information itself or its priority number, or they can delete it. Minimum Banner database requirements will be enforced for entering information for a new contact.
Web Page Fields
Item Description/Source Information
Emergency contact information
Existing emergency contact information from the Emergency Contact Form (SPAEMRG) or the Emergency Contact window of the Identification forms (e.g., SPAIDEN).
Links to Other Web Pages
This Link Action
Name Goes to the Update Emergency Contacts page (bwgkoemr.P_DispEmrgFormPidm) with the fields filled in with the values for the selected contact.
Access Emergency Contacts
Goes to the Emergency Contacts page (bwgkoemr.P_ViewEmrgContacts).
Web Menus With Links to This Page
Personal Information Menu
bmenu.P_GenMnu
Other Web Pages With Links to This Page
View Emergency Contacts
bwgkoemr.P_ViewEmrgContacts
Banner Web General 8.3 December 2009User GuideTechnical Reference

Decemb
Contact Priority Numbers
If a contact is deleted, the priority numbers for the remaining contacts are updated automatically.
The priority number for a contact can be changed, but not to a value greater than the maximum value for existing contacts. When the priority number of an existing contact is changed, and a contact already exists with that priority number, the existing contact priority numbers will be reordered. This reordering will preserve the existing order - contacts with a “higher” priority (lower priority number) than other contacts will still have a “higher” priority after the reordering.
For example, existing contact priority numbers are:
1 - Contact A2 - Contact B3 - Contact C
The user changes the contact with priority 3 to priority 1. The contact numbers are reordered as follows:
1 - Contact C2 - Contact A3 - Contact B
If the user deletes an emergency contact, any existing contacts with a “lower” priority (higher priority number) will be reordered to use the deleted contact’s number.
For example, existing contact priority numbers are:
1 - Contact W2 - Contact X3 - Contact Y4 - Contact Z
The user deletes the contact with priority 2. The contact priority numbers are reordered as follows:
1 - Contact W2 - Contact Y3 - Contact Z
When a user enters a new contact, its priority will automatically be assigned by adding 1 to the lowest priority contact (highest number).
er 2009 Banner Web General 8.3 3-35User Guide
Technical Reference
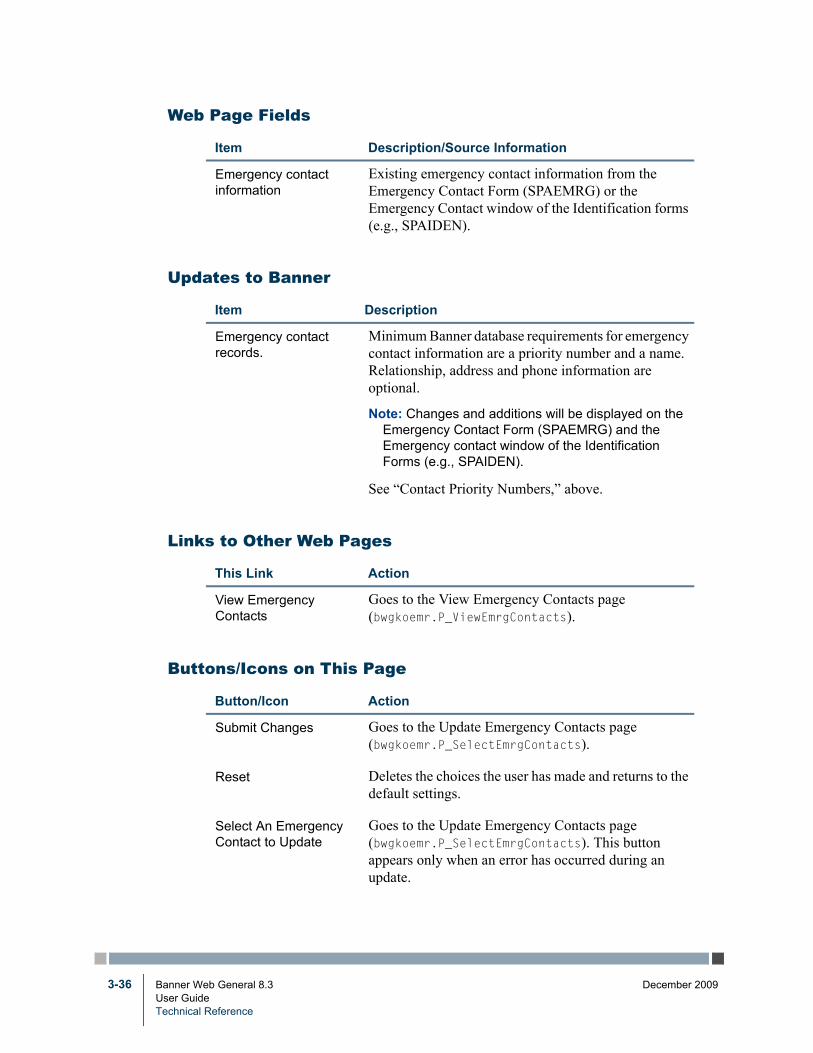
3-36
Web Page Fields
Item Description/Source Information
Emergency contact information
Existing emergency contact information from the Emergency Contact Form (SPAEMRG) or the Emergency Contact window of the Identification forms (e.g., SPAIDEN).
Updates to Banner
Item Description
Emergency contact records.
Minimum Banner database requirements for emergency contact information are a priority number and a name. Relationship, address and phone information are optional.
Note: Changes and additions will be displayed on the Emergency Contact Form (SPAEMRG) and the Emergency contact window of the Identification Forms (e.g., SPAIDEN).
See “Contact Priority Numbers,” above.
Links to Other Web Pages
This Link Action
View Emergency Contacts
Goes to the View Emergency Contacts page (bwgkoemr.P_ViewEmrgContacts).
Buttons/Icons on This Page
Button/Icon Action
Submit Changes Goes to the Update Emergency Contacts page (bwgkoemr.P_SelectEmrgContacts).
Reset Deletes the choices the user has made and returns to the default settings.
Select An Emergency Contact to Update
Goes to the Update Emergency Contacts page (bwgkoemr.P_SelectEmrgContacts). This button appears only when an error has occurred during an update.
Banner Web General 8.3 December 2009User GuideTechnical Reference

Decemb
Web Page Fatal/Warning Error Messages
Message: Contact order must be between 1 and <max existing contact priority>. You entered <value>.
Source: bwgkoem1.sqlProcedure bwgkoemr.P_UpdateEmrgContacts
Action: End user or administrative action required. The end user tried to change the contact priority for an existing contact to a number that is greater than the highest number for an existing emergency contact. The end user is permitted only to specify a new number within the range of existing contacts, which will reorder them as described in the Updates in Banner section above.
Message: Contact order must be a number. You entered <value>.
Source: bwgkoem1.sqlProcedure bwgkoemr.P_UpdateEmrgContacts
Action: The end user entered a value other than one through eight for the contact priority. Although the database can accommodate nine emergency contact records, the page does not permit the end user to specify nine because of the method and logic used to reorder contacts.
Message: Errors occurred. Please try again.
One or more of the following messages may be displayed, depending on the information entered by the end user:
* Address line 1 must be entered
* City must be entered
Web Menus With Links to This Page
Personal Information Menu
bmenu.P_GenMnu
Other Web Pages With Links to This Page
View Emergency Contacts
bwgkoemr.P_ViewEmrgContacts
er 2009 Banner Web General 8.3 3-37User Guide
Technical Reference
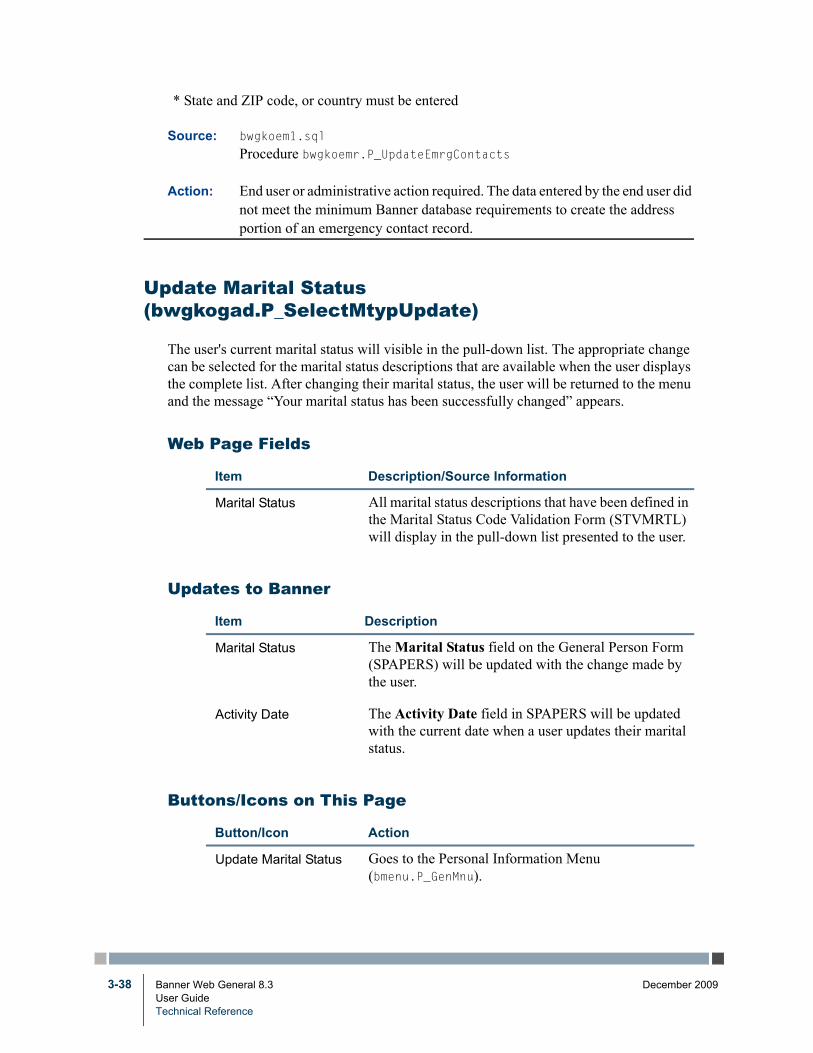
3-38
* State and ZIP code, or country must be entered
Source: bwgkoem1.sql
Procedure bwgkoemr.P_UpdateEmrgContacts
Action: End user or administrative action required. The data entered by the end user did not meet the minimum Banner database requirements to create the address portion of an emergency contact record.
Update Marital Status (bwgkogad.P_SelectMtypUpdate)
The user's current marital status will visible in the pull-down list. The appropriate change can be selected for the marital status descriptions that are available when the user displays the complete list. After changing their marital status, the user will be returned to the menu and the message “Your marital status has been successfully changed” appears.
Web Page Fields
Item Description/Source Information
Marital Status All marital status descriptions that have been defined in the Marital Status Code Validation Form (STVMRTL) will display in the pull-down list presented to the user.
Updates to Banner
Item Description
Marital Status The Marital Status field on the General Person Form (SPAPERS) will be updated with the change made by the user.
Activity Date The Activity Date field in SPAPERS will be updated with the current date when a user updates their marital status.
Buttons/Icons on This Page
Button/Icon Action
Update Marital Status Goes to the Personal Information Menu (bmenu.P_GenMnu).
Banner Web General 8.3 December 2009User GuideTechnical Reference
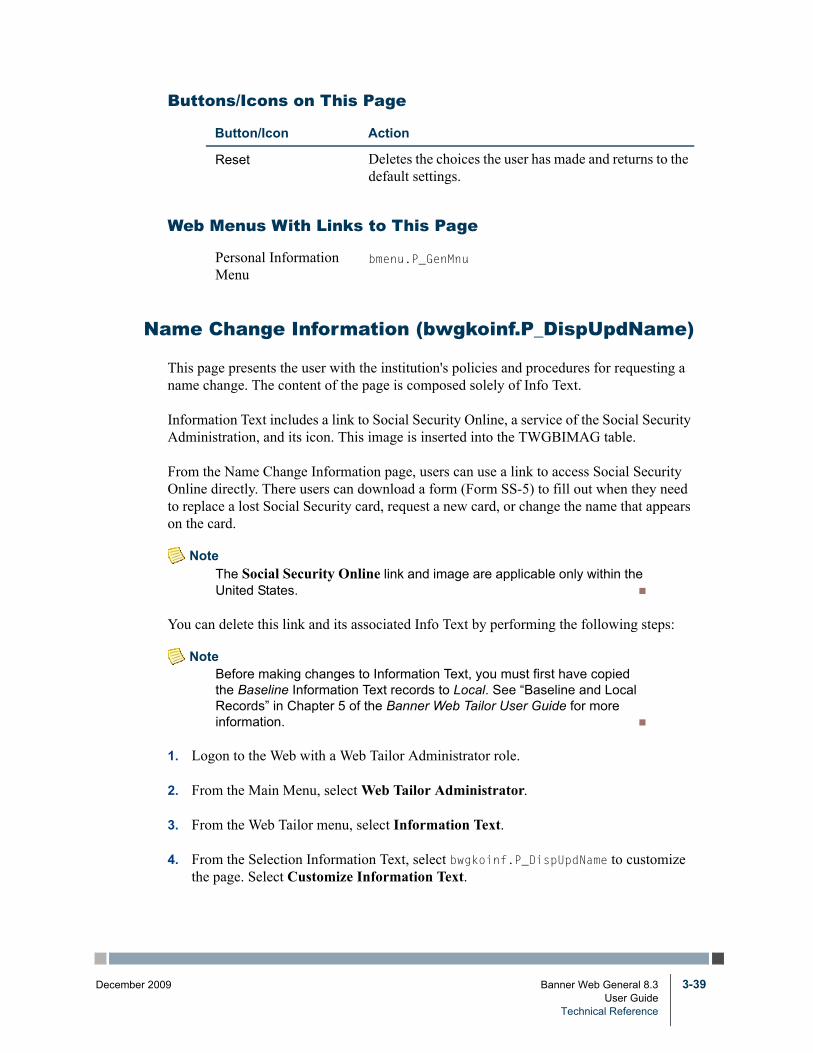
Decemb
Name Change Information (bwgkoinf.P_DispUpdName)
This page presents the user with the institution's policies and procedures for requesting a name change. The content of the page is composed solely of Info Text.
Information Text includes a link to Social Security Online, a service of the Social Security Administration, and its icon. This image is inserted into the TWGBIMAG table.
From the Name Change Information page, users can use a link to access Social Security Online directly. There users can download a form (Form SS-5) to fill out when they need to replace a lost Social Security card, request a new card, or change the name that appears on the card.
NoteThe Social Security Online link and image are applicable only within the United States.
You can delete this link and its associated Info Text by performing the following steps:
NoteBefore making changes to Information Text, you must first have copied the Baseline Information Text records to Local. See “Baseline and Local Records” in Chapter 5 of the Banner Web Tailor User Guide for more information.
1. Logon to the Web with a Web Tailor Administrator role.
2. From the Main Menu, select Web Tailor Administrator.
3. From the Web Tailor menu, select Information Text.
4. From the Selection Information Text, select bwgkoinf.P_DispUpdName to customize the page. Select Customize Information Text.
Reset Deletes the choices the user has made and returns to the default settings.
Web Menus With Links to This Page
Personal Information Menu
bmenu.P_GenMnu
Buttons/Icons on This Page
Button/Icon Action
er 2009 Banner Web General 8.3 3-39User Guide
Technical Reference

3-40
5. From the Reorder or Customize Information Text page, select sequence number 5. (Select the label for this Info Text entry.)
6. On the Customize the Selected Information Text Entry page, verify that the correct Info Text is displayed. The Info Text for the displayed entry appears as follows:
<A HREF="http://www.ssa.gov/replace_sscard.html" target="_blank"> Social Security Online </A> allows you to update your Social Security Card information.
7. Select Delete this Entry.
Source:
This page does not have any fields.
Social Security Number Change Information (bwgkoinf.P_DispUpdSSN)
This page presents the user with the institution's policies and procedures for requesting a social security number change. The content of the page is composed solely of Info Text.
Info Text includes a link to Social Security Online, a service of the U.S. Social Security Administration, and an icon for Social Security Online. This image is inserted into the TWGBIMAG table.
Setup Requirements
Item Description
bwgkoinf.P_DispUpdName
Label: DEFAULT, Sequence 1,2,3,4,5 and 6
Info Text must reflect your institution’s policies and procedures for submitting a name change.
Web Menus With Links to This Page
Personal Information Menu
bmenu.P_GenMnu
Other Web Pages With Links to This Page
Directory Profile bwgkoprf.P_ShowDiroItems
Banner Web General 8.3 December 2009User GuideTechnical Reference

Decemb
New SSN Link
From the Social Security Number Change Information page, users can use a link to access Social Security Online directly. There users can download a form (Form SS-5) to fill out when they need to replace a lost Social Security card, request a new card, or change the name that appears on the card.
NoteThe Social Security online link and image are applicable only within the United States.
You can delete this link and its associated Information Text by performing the following steps.
NoteBefore making changes to Information Text, you must first have copied the Baseline Information Text records to Local. See “Baseline and Local Records” in Chapter 5 of the Banner Web Tailor User Guide for more information.
1. Log onto the Web with a Web Tailor Administrator role.
2. From the Main Menu, select Web Tailor Administrator.
3. From the Web Tailor menu, select Information Text.
4. From the Selection Information Text, select bwgkoinf.P_DispUpdName to customize the page. Select Customize Information Text.
5. From the Reorder or Customize Information Text page, select sequence number 5. (Select the label for this Info Text entry.)
6. On the Customize the Selected Information Text Entry page, verify that the correct Info Text is displayed. It appears as follows:
<A HREF="http://www.ssa.gov/replace_sscard.html" target="_blank"> Social Security Online </A> allows you to update your Social Security Card information.
7. Select Delete this Entry.
Setup Requirements
Item Description
bwgkoinf.P_DispUpdSSN
Label: DEFAULT, Sequence 1, 2, 3 and 4
Info Text must reflect your institution’s policies and procedures for submitting a social security number change.
er 2009 Banner Web General 8.3 3-41User Guide
Technical Reference

3-42
Change PIN (twbkwbis.P_ChangePin)
To change a PIN, the user accesses this page from the Personal Information menu, then types and confirms the new PIN. After a PIN has been successfully changed, the user must use the new PIN for the next logon.
A PIN may be changed at any time by a user. It may be required on a specific date or after a certain period of time if the institution uses PIN expiration dates and the expiration date has been reached.
Web Menus With Links to This Page
Personal Information Menu
bmenu.P_GenMnu
Web Page Fields
Item Description/Source Information
Enter Old PIN PIN field on the Third Party Access Form (GOATPAC) and the Third Party Access Audit Form (GOATPAD) in Banner General. As the user enters the PIN, asterisks (******) display protect the privacy of the information.
Enter New PIN The user enters a PIN of their choice. As the user enters the new PIN, asterisks (******) display to protect the privacy of the information.
Re-enter New PIN The user verifies the new PIN by re-entering the same value entered in the Enter New PIN field. As the user re-enters the new PIN, asterisks (******) display to protect the privacy of the information.
Updates to Banner
Item Description
Current PIN Information -- PIN, User ID and Activity Date
The PIN field in the Third Party Access Form (GOATPAC) and the Third Party Access Audit Form (GOATPAD) is updated with the new PIN. Also, the User ID recorded with the change is updated to the name of the Oracle Web Server Agent, and the Activity Date is updated to the current date.
Banner Web General 8.3 December 2009User GuideTechnical Reference

Decemb
User Logout (twbkwbis.P_Logout)
The User Logout page will display whenever the user selects the Exit button, which is available on most Self-Service pages.
Ethnicity and Race Survey Pages
This section includes the following topics:
• “Set Up the Ethnicity and Race Survey” on page 3-44
• “Update Ethnicity and Race (bwgkomre.P_RaceSurvey)” on page 3-45
• “View Ethnicity and Race (bwgkomre.P_RaceSurveyConfirm)” on page 3-47
• “Ethnicity and Race (bwgkomre.P_RaceSurveyConfirm)” on page 3-48
• “View Ethnicity and Race (bwgkomre.P_ViewEthnicityRace)” on page 3-49
• “Update Ethnicity and Race (bwgkomre.P_SelectEthnicityRace)” on page 3-50
PIN History Information The previous PIN information used to logon to the current session (PIN, User ID and Activity Date) is moved to the PIN History display information in the GOATPAD form.
Buttons/Icons on This Page
Button/Icon Action
Change PIN Goes to the Personal Information Menu (bmenu.P_GenMnu).
Reset Deletes the choices the user has made and returns to the default settings.
Web Menus With Links to This Page
Personal Information Menu
bmenu.P_GenMnu
Updates to Banner
Item Description
er 2009 Banner Web General 8.3 3-43User Guide
Technical Reference

3-44
ExternCode
NOT U vey is on the
NOT U vey is on the
You can present a survey to the following Self-Service users to obtain ethnicity and race information:
• Employees
• Students
• Faculty members and advisors
• LDAP users
If the survey parameters have been established, when a user successfully logs on to Self-Service, the survey will be presented and the user will have the options to complete the survey or to complete it later. Once the user has completed the survey it survey will no longer be presented.
The survey pages are delivered by SunGard Higher Education. The survey is displayed when all of the following conditions are met:
• The current date is in the date range specified on GTVSDAX. When you set up a date range on the Crosswalk Validation Form (GTVSDAX), the survey will be presented during the specified range.The start date of the survey is required, but the end date is not. Thus, if there is no end date and the current date is equal to or greater than the start date specified on GTVSDAX, the survey will be presented. Also, if you do not set up a date range, the survey will not be presented.
• The Ethnicity and Race Confirmed check box on the relevant identification form is unchecked.
In addition to the survey pages, links have been added to the Personal Information menu so that users can view or update ethnicity and race information.
Set Up the Ethnicity and Race Survey
The internal codes shown in the following table have been added to the Crosswalk Validation Form (GTVSDAX) to control the dates between which the ethnicity and race survey is presented to Self-Service users. If you do not enter values in the Reporting Date field for the RESTARTDAT internal code, the survey will not be presented.
al Internal Code
Internal Code Group Description Reporting Date
SED RESTARTDAT SSMREDATE Race/Ethn Survey Start Date first date the surto be displayed web
SED REENDDATE SSMREDATE Race/Ethn Survey Start Date last date the surto be displayed web
Banner Web General 8.3 December 2009User GuideTechnical Reference

Decemb
1. Access the Crosswalk Validation Form (GTVSDAX).
2. Perform a query on the SSMREDATE internal code group.
3. (required) Enter the first date the survey is to be presented in the Reporting Date field for internal code RESTARTDAT.
4. (optional) Enter the last date the survey is to be presented in the Reporting Date field for internal code REENDDATE.
5. Save your changes.
Update Ethnicity and Race (bwgkomre.P_RaceSurvey)
This page is used to collect ethnicity and race information via the survey. If the survey is active, when a user successfully logs on to Self-Service, the survey will be presented as long as the Ethnicity and Race Confirmed checkbox on the relevant Identification form is unchecked for the user.
Web Page Fields
Item Description/Source Information
Ethnicity User’s ethnicity. Values are Hispanic or Latino and Not Hispanic or Latino. Only one value can be checked. If a user checks both checkboxes, the system displays an error message. If ethnicity information is already stored on the system, the relevant checkbox is checked.
Note: Information Text is used instead of a field label.
Race User’s race(s). Multiple values can be selected.
The column labels are the category descriptions associated with regulatory codes that are marked as system required on the Regulatory Race Validation Form (GTVRRAC), which are delivered by SunGard Higher Education. Each column displays the races associated with the race code on the Race Rules Form (GORRACE). If race information is already stored on the system, the relevant checkbox is checked.
Note: Information Text is used instead of a field label.
er 2009 Banner Web General 8.3 3-45User Guide
Technical Reference
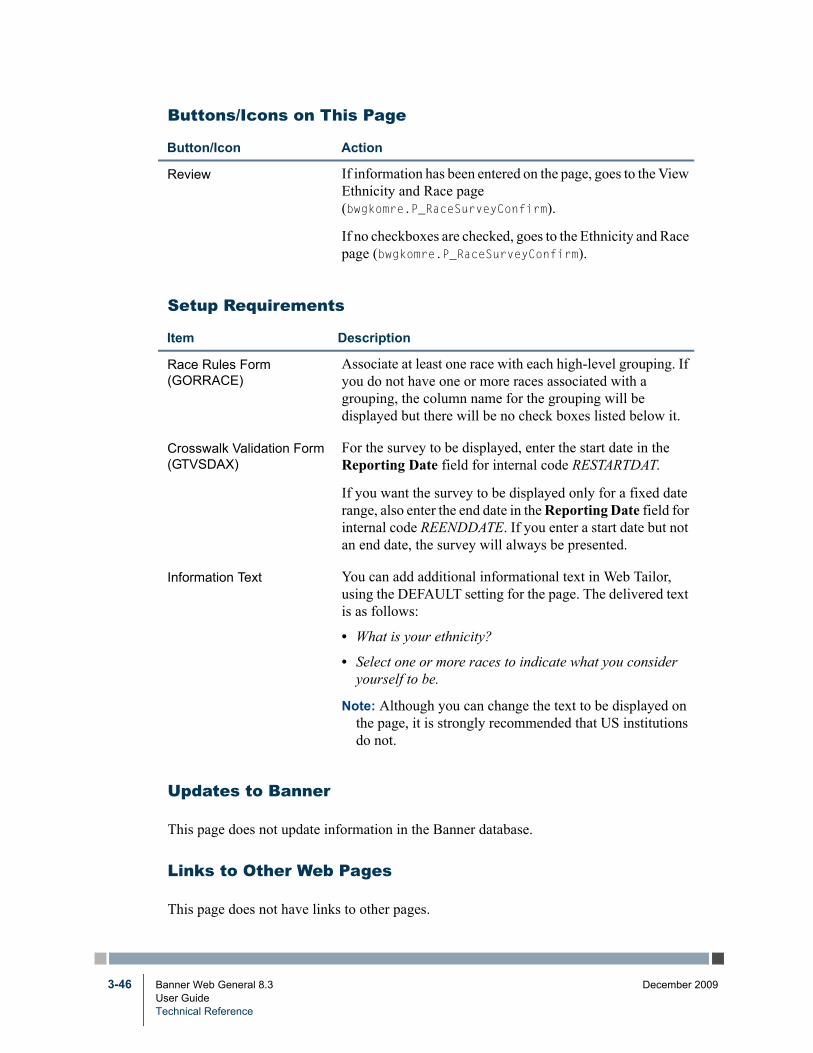
3-46
Updates to Banner
This page does not update information in the Banner database.
Links to Other Web Pages
This page does not have links to other pages.
Buttons/Icons on This Page
Button/Icon Action
Review If information has been entered on the page, goes to the View Ethnicity and Race page (bwgkomre.P_RaceSurveyConfirm).
If no checkboxes are checked, goes to the Ethnicity and Race page (bwgkomre.P_RaceSurveyConfirm).
Setup Requirements
Item Description
Race Rules Form (GORRACE)
Associate at least one race with each high-level grouping. If you do not have one or more races associated with a grouping, the column name for the grouping will be displayed but there will be no check boxes listed below it.
Crosswalk Validation Form (GTVSDAX)
For the survey to be displayed, enter the start date in the Reporting Date field for internal code RESTARTDAT.
If you want the survey to be displayed only for a fixed date range, also enter the end date in the Reporting Date field for internal code REENDDATE. If you enter a start date but not an end date, the survey will always be presented.
Information Text You can add additional informational text in Web Tailor, using the DEFAULT setting for the page. The delivered text is as follows:
• What is your ethnicity?
• Select one or more races to indicate what you consider yourself to be.
Note: Although you can change the text to be displayed on the page, it is strongly recommended that US institutions do not.
Banner Web General 8.3 December 2009User GuideTechnical Reference

Decemb
Web Menus With Links to This Page
No menus have links to this page.
View Ethnicity and Race (bwgkomre.P_RaceSurveyConfirm)
This page allows the user to review the race and ethnicity selections made via the survey. It can be accessed only from the Update Ethnicity and Race page (bwgkomre.P_RaceSurvey)
Setup Requirements
This page has no setup requirements.
Web Page Fields
Item Description/Source Information
Ethnicity User’s ethnicity. Values are Hispanic or Latino and Not Hispanic or Latino. Display only.
Race User’s race(s). Multiple values are displayed if more than one race has been specified by the user. Display only.
Buttons/Icons on This Page
Button/Icon Action
Edit Goes to the Update Ethnicity and Race page (bwgkomre.P_RaceSurvey).
Save Saves the values to Banner and goes to the page defined in Web Tailor to be the first page presented.
Note: Any previously saved ethnicity and race information is cleared and the records entered by the user are saved. If the user’s record previously had race information associated with regulatory race codes other than those that are marked as system required on the Regulatory Race Validation Form (GTVRRAC), that information will be overwritten with the new values selected when this button is clicked.
er 2009 Banner Web General 8.3 3-47User Guide
Technical Reference

3-48
Links to Other Web Pages
This page does not have links to other pages.
Web Menus With Links to This Page
No menus have links to this page.
Ethnicity and Race (bwgkomre.P_RaceSurveyConfirm)
This page provides options to users who did not enter any information on the survey.
Updates to Banner
Item Description
Ethnicity Stored in the SPBPERS table.
Race Stored in the GORPRAC table.
Web Page Fields
Item Description/Source Information
Survey Response (untitled) Radio button group for the user to specify a response to the survey. Choices are Edit and Ask Me Later.
Last Date to Respond Date on which the survey ends, if the end date is entered on the Crosswalk Validation Form (GTVSDAX). If no date has been entered, this field is not displayed.
Buttons/Icons on This Page
Button/Icon Action
Continue Takes one of the following actions, depending on which radio button the user selected.
• If the user selected the Edit radio button, the system goes to the Update Ethnicity and Race page (bwgkomre.P_RaceSurvey).
• If the user selected the Ask Me Later radio button, the system goes to the page defined in Web Tailor to be the first page presented.
Banner Web General 8.3 December 2009User GuideTechnical Reference

Decemb
Setup Requirements
This page has no setup requirements.
Updates to Banner
This page does not update information in the Banner database.
Links to Other Web Pages
This page does not have links to other pages.
Web Menus With Links to This Page
No menus have links to this page.
View Ethnicity and Race (bwgkomre.P_ViewEthnicityRace)
This page displays the user’s ethnicity and race details. It includes a link to access the Update Ethnicity and Race page (bwgkomre.P_SelectEthnicityRace) so that the user can change these details. This page is accessed from the Personal Information menu.
Web Page Fields
Item Description/Source Information
Ethnicity User’s ethnicity. Values are Hispanic or Latino or Not Hispanic or Latino. If the user’s ethnic category has not been specified, no value is displayed. Display only.
Race User’s race(s). Multiple values are selected if more than one race has been specified by the user.
The column labels are the category descriptions associated with regulatory codes that are marked as system required on the Regulatory Race Validation Form (GTVRRAC), which are delivered by SunGard Higher Education. Each column displays the races associated with the race code on the Race Rules Form (GORRACE).
er 2009 Banner Web General 8.3 3-49User Guide
Technical Reference

3-50
Buttons/Icons on This Page
This page does not have buttons to other pages.
Updates to Banner
This page does not update information in the Banner database.
Update Ethnicity and Race (bwgkomre.P_SelectEthnicityRace)
This page is used to enter or change a user’s ethnicity and race details. It includes a link to access the View Ethnicity and Race page (bwgkomre.P_ViewEthnicityRace) so that the user can review the details. This page is accessed from the Personal Information menu.
Setup Requirements
Item Description
Regulatory Race Validation Form (GTVRRAC)
Define the high-level groupings for your races.
Race Rules Form (GORRACE)
Associate at least one race with each high-level grouping. If you do not have one or more races associated with a grouping, the column name for the grouping will be displayed but there will be no check boxes listed below it.
Links to Other Web Pages
This Link Action
Update Ethnicity and Race Goes to the Update Ethnicity and Race page (bwgkomre.P_SelectEthnicityRace)
Web Menus With Links to This Page
Personal Information Menu bmenu.P_GenMnu
Web Page Fields
Item Description/Source Information
Ethnicity User’s ethnic category. Values are Hispanic or Latino and Not Hispanic or Latino.
Banner Web General 8.3 December 2009User GuideTechnical Reference

Decemb
Race User’s race(s). Multiple values can be selected.
The column labels are the category descriptions associated with regulatory codes that are marked as system required on the Regulatory Race Validation Form (GTVRRAC), which are delivered by SunGard Higher Education. Each column displays the races associated with the race code on the Race Rules Form (GORRACE). If race information is already stored on the system, the relevant checkbox is checked.
Buttons/Icons on This Page
Button/Icon Action
Submit Saves the values to Banner and returns the user to the Personal Information menu.
Setup Requirements
Item Description
Regulatory Race Validation Form (GTVRRAC)
Define the high-level groupings for your races.
Race Rules Form (GORRACE)
Associate at least one race with each high-level grouping. If you do not have one or more races associated with a grouping, the column name for the grouping will be displayed but there will be no check boxes listed below it.
Updates to Banner
Item Description
Ethnicity Stored in the SPBPERS table.
Race Stored in the GORPRAC table.
Web Page Fields
Item Description/Source Information
er 2009 Banner Web General 8.3 3-51User Guide
Technical Reference

3-52
Links to Other Web Pages
This Link Action
View Ethnicity and Race Goes to the View Ethnicity and Race page (bwgkomre.P_ViewEthnicityRace)
Web Menus With Links to This Page
Personal Information Menu bmenu.P_GenMnu
Banner Web General 8.3 December 2009User GuideTechnical Reference

Decemb
4 Web General Packages
Packages
The following packages support Web General processing.
• BWGKOADR—processes the Address, Telephone, and E-mail pages for the web.
• BWGKOEMR—processes the Emergency Contact pages for the web.
• BWGKOGAD—processes the Address, Telephone, and E-mail pages for the web.
• BWGKOINF—displays the instructions for name or SSN updates.
• BWGKOMAR—provides for the Marital Status view and update functions.
• BWGKOMRE—processes the ethnicity and race survey.
• BWGKOPRF—provides the Directory Profile Functions
• BWGKORAC—processes the ethnicity and race survey.
• BWGKSRVY—provides survey handling processes for Web General.
Credit Card Payment Processing
The following packages are used with web credit card payment processing. Please refer to Payment Processor Connection Handbook for more information about them.
• BWGKCCRD
• BWGKTPAY
• BWGKEPAY
• BWGKIPAY
• BWGKCPAY
• BWGKJPAY
er 2009 Banner Web General 8.3 4-1User Guide
Web General Packages

4-2
Integration with Banner APIs
Web General packages work with the Banner Application Program Interfaces (APIs) that were introduced in Banner 7.0. Program logic that appeared in the Web General packages prior to release 7.0 is now in Banner APIs.
The APIs used by Web General include:
• Address (gb_address)
• Telephone (gb_telephone)
• E-mail (gb_email)
• Biographical/Demographic (gb_bio)
• Emergency Contact (gb_emergency_contact)
Validation logic previously found in the following Web General packages is now managed by Banner APIs.
• The bwgkoadr.sql/bwgkoad1.sql package has been changed to call the Address, Telephone, and E-mail APIs.
• The bwgkoemr.sql/bwgkoem1.sql package has been changed to call the Emergency Contact API.
• The bwgkogad.sql/bwgkoga1.sql package has been changed to call the Address, Telephone, and E-mail APIs.
• The bwgkomar.sql/bwgkoma1.sql package has been changed to call the Biographical/Demographic API.
Luminis Channels for Banner
Clients who have implemented Luminis® and the Self-Service products can use the Luminis Channels for Banner first delivered with Banner 7.0.
The bwgcbref.sql/bwgcbre1.sql package provides the business logic for the My Reports channel. The bwgcxchn.sql/bwgcxch1.sql package generates the XML for the General channels using business logic defined in bwgcbref.sql/bwgcbre1.sql. The My Banner channel uses the existing business logic in the GUKMENU package.
Refer to the Luminis Channels for Banner Handbook for more information.
Banner Web General 8.3 December 2009User GuideWeb General Packages

Decemb
Index
A
address informationdeleting 3-20updating 3-15, 3-18
Address Role Privileges Form (GOAADRL) 3-12, 3-13, 3-20
address type 3-12APACONS Constituent Information Form 3-
30APANAME Constituent/Organization Form 3-
30
C
Constituent Information Form (APACONS) 3-30
Constituent/Organization Form (APANAME) 3-30
credit card processing 4-1
D
Directory Options Rule Form (GOADIRO) 3-29
directory profilescontrolling the contents of 3-29creating 3-28role-specific items 3-29
disabling a web account 3-3, 3-5
E
E-mail Address Form (GOAEMAL) 3-27E-mail Address Type Validation Form
(GTVEMAL) 3-24, 3-25, 3-26e-mail addresses
deleting 3-26preferred 3-26reactivating 3-27
updating 3-24, 3-26viewing 3-23
e-mail type 3-23Emergency Contact Form (SPAEMRG) 3-33,
3-34, 3-36emergency contact information
changing priorities 3-35creating 3-34updating 3-33, 3-34viewing 3-33
Employee Jobs Form (NBAJOBS) 3-30enabling a web account 3-3, 3-5error messages 3-6, 3-15, 3-17, 3-22, 3-24,
3-25, 3-28, 3-37
F
formsAPACONS Constituent Information Form
3-30APANAME Constituent/Organization
Form 3-30GOAADRL Address Role Privileges
Form 3-12, 3-13, 3-20GOADIRO Directory Options Rule Form
3-29GOAEMAL E-mail Address Form 3-27GOATPAC Third Party Access Form 3-3,
3-4, 3-6, 3-42GOATPAD Third Party Access Audit
Form 3-3, 3-6, 3-8, 3-9, 3-11, 3-42GTVEMAL E-mail Address Type
Validation Form 3-24, 3-25, 3-26NBAJOBS Employee Jobs Form 3-30SGASTDN General Student Form 3-29,
3-30SPAEMRG Emergency Contact Form 3-
33, 3-34, 3-36SPAIDEN Identification Form 3-3, 3-4SPAPERS General Person Form 3-7, 3-
38
er 2009 Banner Web General 8.3 I-1User Guide
Index

STVMRTL Marital Status Code Validation Form 3-38
G
General Person Form (SPAPERS) 3-7, 3-38General Student Form (SGASTDN) 3-29, 3-
30GOAADRL Address Role Privileges Form 3-
12, 3-13, 3-20GOADIRO Directory Options Rule Form 3-29GOAEMAL E-mail Address Form 3-27GOATPAC Third Party Access Form 3-3, 3-4,
3-6, 3-42GOATPAD Third Party Access Audit Form 3-
3, 3-6, 3-8, 3-9, 3-11, 3-42GOBSRVR Survey Response Header Table
3-11GORSRVR Survey Responses Repeating
Table 3-11GTVEMAL E-mail Address Type Validation
Form 3-24, 3-25, 3-26
I
Identification Form (SPAIDEN) 3-3, 3-4Info Text
name change information page 3-39
L
last web access 3-5login
unsuccessful 3-7verification 3-4
login process 3-4
M
Marital Status Code Validation Form (STVMRTL) 3-38
marital status informationupdating 3-38viewing 3-38
N
name change information page 3-39NBAJOBS Employee Jobs Form 3-30
P
phone informationdeleting 3-20updating 3-15, 3-18
PIN Hint Question 3-3, 3-11PIN Hint Response 3-3, 3-11PINs
auto-expire for all end user accounts 3-4, 3-5
changing 3-42disabling 3-3, 3-5expiration 3-4, 3-5, 3-6historic information 3-43re-establishing 3-3using 3-3
primary phone 3-20
R
role rules 3-12
S
Secure Access 3-12Secure Area 3-2security 3-2SGASTDN General Student Form 3-29, 3-30Social Security Administration 3-39, 3-40Social Security Number change information
page 3-40Social Security Online 3-39, 3-40SPAEMRG Emergency Contact Form 3-33,
3-34, 3-36SPAIDEN Identification Form 3-3, 3-4SPAPERS General Person Form 3-7, 3-38STVMRTL Marital Status Code Validation
Form 3-38Survey Response Header Table (GOBSRVR)
3-11Survey Responses Repeating Table
(GORSRVR) 3-11
I-2 Banner Web General 8.3 December 2009User GuideIndex

Decemb
T
tablesGOBSRVR Survey Response Header
Table 3-11GORSRVR Survey Responses
Repeating Table 3-11TWGBWRUL Web Rules Table 3-4, 3-5,
3-8Terms of Usage
displaying 3-8redisplaying 3-9
Third Party Access Audit Form (GOATPAD) 3-3, 3-6, 3-8, 3-9, 3-11, 3-42
Third Party Access Form (GOATPAC) 3-3, 3-4, 3-6, 3-42
TWGBIMAG 3-39, 3-40TWGBIMAG table 3-18TWGBWRUL Web Rules Table 3-4, 3-5, 3-8
U
United States Postal Service web sitedeleting link 3-18
unlisted telephone numbers 3-28User Logout page 3-43
W
Web Generaloverview 3-10
Web Rules Table (TWGBWRUL) 3-4, 3-5, 3-8WebTailor
overview 2-1
er 2009 Banner Web General 8.3 I-3User Guide
Index

I-4 Banner Web General 8.3 December 2009User GuideIndex