baking 2 manual · cranberry granola bars ..... 29 butterscotch bars ... you don’t have to become...
TRANSCRIPT

EC112
BBaAkKingN2G
North Dakota State University, Fargo, North Dakota
OCTOBER 2005
Revised July 2012

2
Acknowledgments The New Mexico 4-H Curriculum Review Committee revised this project in 2001.
Members of the committee were: Shelly Porter, Colfax County Extension Home Economist Owida Franz, Union County Extension Home Economist Betty McCreight, Lincoln County Program Director-Home Economist Margaret Dines, Grant County Extension Home Economist Darlene Dickson, 4-H/Youth Specialist
Layout by: Ana Henke, Media Specialist Assistant, Agricultural Communications, New Mexico State University Adapted in North Dakota by the 4-H Healthy Livestyles Programming Commitee: Marcia Hellendsaas, McKenzie and Dunn County Extension Agent - Nutrition, Food Safety and Health Gail Slinde, Ward County Extension Agent - 4-H Youth Development Kaylyn Anderson, LaMoure County Extension Agent - 4-H Youth Development/Nutrition Education Macine Lukach, Cavalier County Extension Agent - Nutrition, Food Safety and Health Heather Hagen, Former Cass County 4-H Member Deb Hagen, Cass County 4-H Volunteer Leader Jane Edwards, Extension Nutrition Specialist, NDSU Department of Health, Nutrition and
Exercise Sciences Julie Garden-Robinson, Extension Food and Nutrition Specialist, NDSU Department of Health,
Nutrition and Exercise Sciences Carrie Stark, 4-H Youth Development Specialist, NDSU Extension Service, Center for 4-H Youth
Development
Revised June 2012 by Julie Garden-Robinson, Extension Food and Nutrition Specialist

3
Contents Introduction ................................................................................ 4
Eating Well ................................................................................... 5
Getting Ready to Bake .............................................................. 10
Let’s Talk About Ingredients ...................................................11
Let’s Look at Equipment ...........................................................14
More Baking Terms ....................................................................16
Let’s Bake Quick-loaf Breads ...................................................17
Nut Bread ................................................................................ 18
Cranberry and Blueberry Nut Bread .......................................... 18
Banana Nut Bread ....................................................................19
Zucchini Bread ........................................................................ 20
Standards of Quality for Quick-loaf Breads ............................ 21
How to Judge Baked Products: Quick-loaf Breads................... 22
Let’s Bake Coffeecake ............................................................... 23
Quick Coffeecake ..................................................................... 23
Fruit-filled Coffeecake .............................................................. 24
Standards of Quality for Coffeecakes ..................................... 25
How to Judge Baked Products: Coffecakes.............................. 26
Let’s Bake Cookies and Bars .................................................... 27
Brownies ................................................................................. 28
Chocolate Chip Applesauce Brownies ........................................ 29
Cranberry Granola Bars ........................................................... 29
Butterscotch Bars ..................................................................... 30
Jam Thumbprint Cookies ..........................................................31
Peanut Butter Blossom Cookies ................................................. 32
Brown Sugar Nut Rounds .......................................................... 33
Standards of Quality for Cookies ........................................... 34
How to Judge Baked Products: Cookies and Bars.................... 35
Let’s Bake Gingerbread ............................................................ 36
Let’s Bake Cornbread ................................................................37
Other Activities ......................................................................... 38
Baking Record Form ................................................................. 42

4
Introduction
The 4-H Baking II project is designed to build upon basic concepts learned in the Baking I project. In Baking II, you will learn how to make more advanced types of quick breads and cookies. You also will review basic mea- suring techniques and baking terms, and demon- strate the proper way to use baking equipment and utensils when making the recipes in this project.
You will learn: • How to make new quick breads, including quick-
loaf breads, coffeecake, cornbread and gingerbread
• How to make different types of cookies, including brownies, bars, slice-and-bake refrigerator cookies and shaped cookies
To complete this project you should: • Attend 4-H club meetings and baking project meetings as available in your county
• Give a demonstration or presentation to teach others what you have learned from this project
• Participate in citizenship activities
• Develop leadership skills through your club and county activities
• Keep records of your project work and accomplishments
• Make and exhibit baked products at your county fair or achievement day
Exhibit Ideas*
Basic nut bread
Banana nut bread
Zucchini bread
Quick coffeecake
Fruit-filled coffeecake
Brown sugar nut cookies
Gingerbread
Jam thumbprint cookies
Peanut butter blossom cookies
Plain brownies
Cornbread
Butterscotch bars
*Follow 4-H exhibit guidelines

5
Eating Well
“MyPyramid” has been rebuilt and it’s now a plate! Here’s what the colors stand for:
orange - grains green - vegetables red - fruits blue - dairy foods purple - protein foods
The U.S. Department of Agriculture (USDA) wanted an easier way to remind people to eat healthfully. MyPlate shows the five food groups using a familiar picture: a place setting with a plate, cup and fork.
MyPlate Speaks Let’s look at some of the other messages this new symbol is trying to send:
Balancing Calories
• Enjoy your food, but eat less.
• Avoid oversized portions. Foods to Increase
• Make half your plate fruits and vegetables.
• Make at least half your grains whole grains.
• Switch to fat-free or low-fat (1%) milk. Foods to Reduce
• Compare sodium in foods such as soup, bread and frozen meals. Choose foods with lower numbers.
• Drink water instead of sugary drinks.
Make it personal. Through the USDA’s MyPlate website (www.choosemyplate.gov), you can get personalized recommendations about the mix of foods you need to eat and how much you should be eating.

6
How Much Do I Need to Eat? Everyone wants to know how much he or she should eat to stay healthy. That’s a tricky question, though. It depends on your age, whether you’re a girl or boy, and how active you are. Kids who are more active burn more calories, so they need more calories. But we can give you some estimates for how much you need of each food group. Grains
Grains are measured in ounce equivalents. What are they? Ounce equivalents are just another way of showing a serving size.
Here are ounce equivalents for common grain foods. An ounce equivalent equals:
1 piece of bread ½ cup of cooked cereal, such as oatmeal ½ cup of rice or pasta 1 cup of cold cereal
• 4- to 8-year-olds need 4 to 5 ounce equivalents each day.
• 9- to 13-year-old girls need 5 ounce equivalents each day.
• 9- to 13-year-old boys need 6 ounce equivalents each day.
And one last thing about grains: Make at least half your grain food choices whole grains, such as 100 percent wheat bread, brown rice and oatmeal. Vegetables
Of course, you need your vegetables, especially those dark green and orange ones. But how much is enough? Vegetable servings are measured in cups.
• 4- to 8-year-olds need 1½ cups of veggies each day.
• 9- to 13-year-old girls need 2 cups of veggies each day.
• 9- to 13-year-old boys need 2½ cups of veggies each day.
Fruits
Sweet, juicy fruit definitely is part of a healthy diet. Here’s how much you need: • 4- to 8-year-olds need 1 cup to 1½ cups of fruit
each day. • 9- to 13-year-old girls need 1½ cups of fruit each
day. • 9- to 13-year-old boys need 1½ cups of fruit each
day. Dairy Foods
Dairy foods are rich in calcium to build strong bones to last a lifetime.
• 4- to 8-year-olds need 1 to 2 cups of milk (or other calcium-rich food) each day.
• 9- to 13-year-old girls need 3 cups of milk (or other calcium-rich foods) each day.
• 9- to 13-year-old boys need 3 cups of milk (or other calcium-rich foods) each day.
If you want something other than milk, you can substitute yogurt, cheese or calcium-fortified orange juice — just to name a few. Protein Foods
These foods contain iron and lots of other important nutrients. Like grains, these foods are measured in ounce equivalents.
An ounce equivalent of this group would be:
1 ounce of meat, poultry or fish ¼ cup cooked dry beans 1 egg 1 tablespoon of peanut butter a small handful of nuts or seeds
• 4- to 8-year-olds need 3 to 4 ounce equivalents each day.
• 9- to 13-year-old girls need 5 ounce equivalents each day.
• 9- to 13-year-old boys need 5 ounce equivalents each day.
Whoa! That’s a lot to swallow. The good news is that your mom, dad and the other grownups in your life will help you eat what you need to stay healthy. Here’s more good news: You don’t have to become a perfect eater overnight. Adapted with permission from http://kidshealth.org/kid/stay_healthy/food/pyramid.html

7
2
3
6
7
8
9
5
U_ SD
10
10 tips
Nutrition Education Series
choose MyPiate 10 tips to a great plate
ChooseMyPiate.gov
Making food choices for a healthy lifestyle can be as simple as using these 10 Tips. Use the ideas in this list to balance your calories, to choose foods to eat more often, and to cut back on foods to eat less often.
Find out hO\I\I many calories YOU need for a day
as a first step in managing your weight. Go to
www.ChooseMyPiate.gov to find your calorie level. Being
physically active also helps you balance calories.
enjoy your food, but eat less Take the time to fully enjoy
your food as you eat it. Eating
too fast or when your attention is
elsewhere may lead to eating too
many calories. Pay attention to hunger
and fullness cues before, during, and after meals. Use
them to recognize when to eat and when you've had
enough.
avoid oversized portions Use a smaller plate, bowl, and glass. Portion out
foods before you eat. When eating out, choose a
smaller size option, share a dish, or take home part of
your meal.
4foods to eat more often
switch to fat-free or low-fat (1%) milk
They have the same amount of
calcium and other essential nutrients as
whole milk, but fewer calories and less
saturated fat.
make half your grains whole grains
To eat more whole grains, substitute a whole-grain
product for a refined product-such as eating whole-
wheat bread instead of white bread or brown rice instead of
white rice.
foods to eat less often Cut back on foods high in solid fats, added sugars,
and salt. They include cakes, cookies, ice cream,
candies, sweetened drinks, pizza, and fatty meats like ribs,
sausages, bacon, and hot dogs. Use these foods as
occasional treats, not everyday foods.
compare sodium in foods Use the Nutrition Facts label ........·
Eat more vegetables, fruits, whole grains, and fat-free or 1% milk and dairy products.These foods have the
nutrients you need for health-including potassium,
calcium, vitamin D, and fiber.Make them the
basis for meals and snacks.
make half your plate fruits and vegetables Choose red, orange, and dark-green vegetables like
tomatoes, sweet potatoes, and broccoli, along with other
vegetables for your meals. Add fruit to meals as part of
main or side dishes or as dessert.
,A United States M Department ofAgriculture
Center for Nutr 1on
to choose 10\/\ler sodium versions
of foods like soup, bread, and frozen
meals. Select canned foods labeled
"low sodium," "reduced sodium," or
"no salt added."
drink water instead of sugary drinks Cut calories by drinking water or unsweetened
beverages. Soda, energy drinks, and sports drinks
are a major source of added sugar, and calories, in American
diets.
DG TipSheet No.1
June 2011 USDA is an equal oppolfunily
- Policy and Promotion Go to www.ChooseMyPiate.gov for more information.

8
1 6
3
5
USD
10 tips
Nutrition Education Series
make half your grains whole
10 tips to help you eat whole grains
ChooseMl'Piate.gov
Any food made from wheat,rice,oats,cornmeal,barley,or another cerealgrain is a grain product.Bread, pasta, oatmeal, breakfast cereals, tortillas, and grits are examples. Grains are divided into two
subgroups, whole grains and refined grains. Whole grains contain the entire grain kernel-the bran, germ, and
endosperm. People who eat whole grains as part of a healthy diet have a reduced risk of some chronic diseases.
make simple switches To make half your grains whole grains, substitute a
whole-grain product for a refined-grain product. For
bake up some whole-grain goodness Experiment by substituting buckwheat, millet, or oat flour for up to half of the flour in pancake, waffle,
example, eat 100% whole-wheat bread or bagels instead of white bread or bagels,
or brown rice instead of white rice.
2whole grains can be healthy snacks
muffin, or other flour-based recipes. They may need a bit more leavening in order to rise.
7
f .,•.;·• Popcorn, a whole grain, can be ' :.... a healthy snack.Make it with
little or no added salt or butter.
Also, try 100% whole-wheat or rye crackers.
save some time Cook extra bulgur or barley when you have time.
Freeze half to heat and serve later as a quick
side dish.
4 mix it up with whole grains Use whole grains in mixed dishes, such as barley in vegetable soups or stews and bulgur wheat in
casseroles or stir-fries. Try a quinoa salad or pilaf.
try whole-wheat versions For a change, try brown rice or whole-wheat pasta.
Try brown rice stuffing in baked green peppers or
tomatoes, and whole-wheat macaroni
in macaroni and cheese.
,A United States M.Department of Agriculture
--==center for Nutrition

9
8
9
10be a good role model for children
Set a good example for children by serving and eating whole grains every day with meals or as snacks.
check the label for fiber Use the Nutrition Facts label to check the fiber
content of whole-grain foods. Good sources of fiber contain 10% to 19% of the Daily Value;
excellent sources contain 20% or more.
know what to look for on the ingredients list Read the ingredients list and
choose products that name a whole-
grain ingredient first on the list. Look for ''whole wheat,"
"brown rice," "bulgur," "buckwheat," "oatmeal," ''whole-grain
cornmeal," ''whole oats," ''whole rye," or ''wild rice."
be a smart shopper The color of a food is not an indication that it is
a whole-grain food. Foods labeled
as "multi-grain," "stone-ground," "100% wheat," "cracked wheat," "seven-grain," or "bran" are usually not 100% whole-grain products, and
may not contain any whole grain.
DG TipSheet No.4 June 2011
USDA is an equal opportunity
- Policy and Promotion Go to www.ChooseMyPiate.gov for more information.

10
Why Do We Eat? We know everyone needs food to live. But why?
Food gives you two things:
• Energy to move and to do things
• Stuff to help you grow and stay healthy
Just like a car needs fuel to run, your body needs food for energy. Without energy, you couldn’t run or play.
Besides giving you energy, food helps you grow and heal. When you skin a knee or an elbow, your body needs to fix or replace the skin you scraped off. If you get sick, your body needs to fight the infection, rebuild weak body parts and get well. Your body also keeps you from getting too hot or cold. Nutrients are the things in food that help your body perform all these functions. So your body doesn’t need just the food, it needs the nutrients in the food.
Nutrients — Who Needs Them? Nutrients are chemical substances that your body gets from the food you eat. Each nutrient has a different job to do. They all are necessary in specific amounts, but your body knows how to handle it all! You’re an amazing machine!
• Vitamin A helps you see in the dark.
• Water regulates body temperature.
• Calcium builds strong bones and teeth.
• Fat gives you energy and carries some vitamins to where the body needs them.
• Iron helps your blood carry oxygen to all parts of your body — even your toes!
• Protein builds and repairs muscles and other parts of your body.
• Vitamin C helps heal cuts.
• Carbohydrates give you energy to grow, move and do things.

11
Getting Ready to Bake
In the Baking I project, you learned how to use basic kitchen equipment, measure ingredients properly for success, follow kitchen and food safety rules, and get ready to bake.
In Review: Remember To . . . Read the recipe carefully before you begin. Make sure you read the recipe from start to finish and understand exactly what you will be doing, how to do it and about how much time you will need. Ask an adult to help explain steps or procedures that you don’t understand.
Clear a work space. The less clutter, the less chance that you will make a mistake when baking. Make sure kitchen counters are clean and your hands are washed.
Get your equipment ready. Set out all the equipment and utensils you need for the recipe. Check pans and bowls to make sure they are the same size and type the recipe suggests.
Gather all ingredients. Check the recipe’s ingredient list and gather them around your work space. Remember to measure all ingredients carefully. Even small changes in the amount of ingredients added to a recipe or the temperature of your oven may make a big
difference in the success of your final baked product.
Ready . . . well, almost!

12
Let’s Talk About Ingredients
Flour Some flours are made from soft wheats, others from hard wheats, and others are a combination of both soft and hard wheat. The type of flour affects the texture of baked products. All-purpose flour will be used in all of the recipes in this project.
All-purpose flour: A blend of soft and hard wheat flours are used to make this multipurpose flour, which can be used in a wide range of baked products. All-purpose flour should be stored in an airtight container in a cool, dry place. To measure, stir flour with a spoon to lighten it. Gently spoon flour into a dry measuring cup. Level off the top with the straight edge of a knife or metal spatula.
Sweeteners In baking, sweeteners add flavor, tenderness and a bit of brown- ing to baked goods. Sweeteners may be granular, as in granulated white and brown sugar, or liquid, as in honey, corn syrup and molas- ses.
White, Granulated Sugar This is the most common sweetener used in baking. It is made from sugar cane or sugar beets. Measure by spooning into a dry measuring cup and leveling the top off with the straight edge of a knife or metal spatula.
Brown Sugar Brown sugar is a mixture of granulated sugar and molasses, which gives it flavor and color. Brown sugar is available in both light and dark varieties. To measure, pack firmly in a dry mea- suring cup and level off the top with the straight edge of a knife or metal spatula. Brown sugar sometimes can be lumpy or hard. If lumpy, press through a sieve before adding to your recipe. To quickly soften hardened brown sugar, place in a microwave-safe glass dish. Add one apple wedge or one slice of white bread. Heat, covered, on high power for 30 to 40 seconds. Let stand 30 seconds; remove apple or bread and stir sugar before measuring.
Powdered Sugar Also known as confectioner’s sugar, this type of sugar actually is granulated sugar that has been milled to a fine powder, then mixed with cornstarch to prevent lumping. Sift powdered sugar before using; do not substitute for granulated sugar. Lightly spoon into dry measuring cup; level with straight edge of a knife or metal spatula.
Molasses Molasses is a thick, dark brown syrup generally made from the juice pressed from sugar cane during refining. It mainly is used for flavoring gingersnaps and gingerbread, and also adds sweetness to other baked goods. Molasses comes in light and dark varieties. To measure, pour molasses into a liquid measuring cup until you reach the desired measurement.

13
Fats Many baked products rely on fats for flavor and tenderness.
Shortening Shortening is a solid fat that is made from vegetable oils. To measure, press firmly into a dry measuring cup with a spoon or rubber scraper, making sure to press out any air bubbles. Level the excess shortening off with the straight edge of a knife or metal spatula. Shortening is packaged in sticks that are marked by tablespoon or cup measurements. Use a knife to cut on the mark that shows the amount you need. Plain and butter-flavored types are available. Shortening should be stored at room temperature.
Butter Butter is made from fresh or soured cream and may be purchased unsalted or salted, which adds flavor and increases the shelf life of the butter. Butter is stored in the refrigerator and should be kept covered to retain its flavor and keep it from absorb- ing other food odors. Since butter most often is packaged in stick form, it is easy to measure by checking the markings on the wrapper and cutting the amount you need with a knife. If the wrapper is not marked, measure it as you would shortening.
Measuring Butter
2 cups = four sticks = 1 pound
1 cup = two sticks = ½ pound
½ cup = one stick = ¼ pound or 8 tablespoons
a cup = 5a tablespoons
¼ cup = ½ stick = 4 tablespoons
Margarine Margarine contains fat, water, milk solids and salt. It was developed in the late 1800s as a substitute for butter. For best results when baking, use margarine that has at least 80 percent vegetable oil or fat. Lighter margarines, which should be used only as table spreads, contain additional water and milk solids that may affect the quality of baked goods. Margarine and butter are measured in the same way. Store in the refrigerator.
Vegetable Oil Vegetable oils generally are made from corn, soybeans, sunflower seeds or peanuts and should be measured in a liquid measuring cup for accuracy. Do not substitute vegetable oil for solid fats such as butter or shortening. Store at room temperature.
Eggs Large eggs are needed for the recipes in this project book. If you use an egg size other than large, you may need to increase or decrease the number of eggs you use in the recipe. A large egg equals 1/3 cup when measured.
Egg Safety Eating raw or undercooked eggs can be hazardous, especially to older people, infants, young children, pregnant women and the seriously ill. This is why eating raw cookie dough or other uncooked products containing raw eggs is not a good idea. Commercial egg products, purchased in the grocery store, are safe to use because any salmonella bacteria has been destroyed. Eggs should be stored in their carton in the refrigerator.

14
Baking Powder and Baking Soda Baking powder and baking soda are leavening agents that add light- ness to baked goods, causing them to “rise” by producing carbon dioxide. Double-acting baking powder produces gases in two stages: first, when liquids are added and second, during baking. Baking soda creates carbon dioxide bubbles instantly when mixed with ingre- dients such as buttermilk, so recipes that use only baking soda and no baking powder should be baked right away.
Milk Milk and milk products are used in baking to provide moisture, flavor and color. They also help baking soda and baking powder begin work- ing in baked products. Whole, low-fat and skim milk are different in the amount of fat they contain, but can be used in baked products without making any changes. Whole milk may give baked products a richer flavor than skim milk. Milk should be measured in a liquid measuring cup for accuracy.
Buttermilk Buttermilk is low-fat or skim milk with an added bacterial culture. It is thick and creamy with a bit of a sour taste. Powdered buttermilk also is available. Follow package directions for making buttermilk. Sour milk can be made and substituted for buttermilk. To make sour milk, place 1 tablespoon lemon juice or vinegar into a liquid measuring cup and add enough milk to make 1 cup total liquid. Let the mixture stand five minutes before using in your recipe.
Chocolate Different types of chocolate vary in flavor and texture when melted, so be sure to use the correct type of chocolate called for in the recipe. Store chocolate in a tightly covered container or sealed plastic bag in a cool, dry place to prevent a chocolate “bloom” or gray film from forming.
Unsweetened Chocolate Squares This type of chocolate is sometimes called baking or bitter chocolate since it is unsweetened and has no added flavoring.
To melt chocolate:
1. Place chocolate pieces or squares in a heavy saucepan on the lowest possible heat setting. Stir chocolate as it melts, watching carefully to avoid overheating. Or . . .
2. Place chocolate pieces or squares in a microwave-safe measuring cup or bowl. Microwave uncovered, on high (100 percent) power, for one minute; stir. Continue microwaving, 10 to 20 seconds at a time, stirring between times, until chocolate is smooth.
Unsweetened Cocoa Powder When substituting cocoa for chocolate squares, use 1/4 cup cocoa plus two teaspoons of shortening or butter for each 1 ounce chocolate square.
Nuts Whole or chopped, plain or salted, nuts add a rich flavor and texture to baked products. Favorite varieties include pecans, walnuts, peanuts and almonds. You can substitute many other varieties of nuts for a change of pace.

15
Let’s Look at Equipment
You can make good-quality products without all of the equipment listed below, but the correct equipment and utensils always make the job easier. You will want to check the equipment in your kitchen to see what you have available to bake the products in this project. Learn to properly and safely use the correct piece of equipment or utensil for each job.
Standard Measuring Cups Use a glass or clear plastic measuring cup for liquids. Place the measuring cup on a flat surface, then pour in the liquid until you reach the desired measurement. Always read the measurement at eye level. Dry-ingredient measuring cups hold an exact amount and have straight rims so you can level off the ingredients with a straight-edged knife or narrow metal spatula. They usually are made of metal or plastic. A set usually has 1/4 cup, 1/3 cup, 1/2 cup and 1 cup measures.
Measuring Spoons A set of standard-sized measuring spoons is used to measure small amounts of dry or liquid ingredients. The most common sizes are 1/4 teaspoon, 1/2 teaspoon, 1 teaspoon and 1 tablespoon. Always level dry ingredients with a straight-edged knife or narrow metal spatula. When measuring a liquid, fill the spoon to the top, holding it over a separate bowl in case spilling occurs. Measuring spoons can be made of metal or plastic.
Mixing Bowls You will need bowls of different sizes to complete the recipes. A set of three nesting mixing bowls will suit most needs.
Spatulas Always level ingredients with the straight edge of a narrow metal spatula or knife. A larger metal spatula is helpful in taking baked products out of the pan or when transferring cookies from one surface to another. A rubber spatula is used for scraping ingredients from the side of mixing bowls or measuring cups.

16
Cookie Sheets Use heavy-gauge, shiny aluminum cookie sheets with very low sides or no sides at all. Dark baking sheets absorb heat and may cause cookie bottoms to overbrown. Insulated baking sheets tend to heat up slowly so cookies may become pale in color and coarse textured. However, using insulated baking sheets may lessen the chance of overbrowning the bottom of cookies.
Baking Pans When baking, pay attention to the size of pan the recipe recommends. The thickness of the dough in the pan affects the texture of the finished product. A pan that is too small will result in a cakelike texture and may overflow; too large a pan will allow the dough to spread too thin, resulting in a dry, brittle texture. When using glass pans, reduce the temperature by 25 degrees.
Grater Utensil used for grating citrus peel or zest, cheese, vegetables or other foods into small pieces.
Wire Whisk Utensil used to beat ingredients, such as eggs, together until they are well-blended.
Nut Chopper A device with blades that chops nuts into small pieces, trapping them in a glass container.
Pastry Blender Utensil with a wooden or plastic handle and several dull blades that is used to cut in or work a solid fat into dry ingredients.

17
More Baking Terms
If you’re a bit puzzled by a word in a recipe, check this list of baking terms for an explanation. Here are a few of the more commonly used baking terms you learned about in Baking I, along with some new terms that you will be using in this project. Batter An uncooked mixture that is thin enough to pour, usually containing
eggs, flour and liquid.
Beat To mix ingredients vigorously, using a continuous circular motion. Blend To combine two or more ingredients thoroughly. Well-blended is used
to describe ingredients that have been combined until no trace of any single ingredient is left.
Chill To place food in the refrigerator until cold. Chop To cut ingredients, such as nuts, into pieces. Coarsely chopped means
large pieces, finely chopped means small pieces.
Combine To mix together two or more ingredients. Dough An uncooked mixture usually containing flour, liquid and seasonings that
is soft enough to be worked with your hands, but is too stiff to pour.
Grate To rub a food against a surface of small, sharp-edged rasps to make fine particles or pieces.
Preheat To heat the oven to a certain temperature before putting food in to cook. Preheat an oven for at least 15 minutes.
Set Aside To put food aside while you do something else in the recipe. Sprinkle To scatter one or more ingredients over a surface.
Zest The brightly colored outer layer of the peel of a citrus
fruit, mainly lemons and oranges. It is grated to add flavor to cookies, quick breads and other recipes.

18
Let’s Bake Quick-loaf Breads
Unlike yeast breads, quick breads are made with quick-acting baking powder and baking soda and are mixed, shaped and baked all at once without waiting between steps. The biscuits, muffins and pancakes made in Baking I are all examples of quick breads. In Baking II, you will learn to make additional quick breads — cornbread, gingerbread and quick-loaf breads.
Golden Rules of Quick Bread Baking As suggested by their name, quick breads are a breeze to make if you follow a few golden rules of quick bread baking.
• Measure ingredients accurately.
• Avoid mixing the batter too much. When adding the liquid, stir until the dry ingredients are just moistened; the batter will be lumpy. If overmixed, the bread will be tough.
• If your bread is soggy and the middle has fallen, it could mean one of several things: - Too much liquid in proportion to the dry ingredients - Insufficient leavening - Batter stood too long before baking, or it is underdone
• If your bread has a coarse texture, it means it probably has too much fat and leavening in it
• If your bread has a thick, dark brown crust, it probably has too much sugar in it
• If your bread has a bitter or soapy aftertaste, it probably has too much baking soda or baking powder added to the recipe

19
Nut Bread Use this basic nut bread recipe to make two variations of nut bread featuring cranberries and blueberries.
Ingredients Equipment 3 cups sifted all-purpose flour Large mixing bowl 1 cup sugar Medium mixing bowl 1 tablespoon baking powder Mixing spoon ½ teaspoon salt Measuring spoons ¼ teaspoon baking soda Dry measuring cups 1 egg, beaten Liquid measuring cup 1b cups milk Cutting board ¼ cup vegetable oil Knife for chopping nuts ¾ cup chopped pecans or walnuts Fork or wire whisk
Loaf pan, 9 by 5 by 3 inches Potholders Cooling rack
Procedure
1. Preheat oven to 350 F.
2. Assemble all ingredients and equipment.
You can make smaller loaves for gift giving or party trays. Divide batter into three (5¾-by-3-by-2- inch) baking pans. Bake for 30 to 35 minutes.
A nut chopper or food processor will speed up the process of chopping nuts.
3. Grease and flour the bottom and 1/2 inch up the sides of a 9-by-5-by-3-inch loaf pan; set aside.
4. In a large mixing bowl, combine flour, sugar, baking powder, salt and baking soda. Make a well in the center of the dry mixture; set aside.
5. In a small mixing bowl, combine the egg, milk and oil. Add egg mixture all at once to the dry mixture. Stir just until moistened. The batter should be lumpy. Fold in chopped nuts.
6. Spoon batter into prepared pan, pushing well to corners.
7. Bake for 60 to 70 minutes or until a wooden toothpick inserted near the center comes out clean. Loaf should be golden brown and should shrink from the sides of the pan when done. Most loaf breads also will have a characteristic crack down the center of the loaf.
8. Cool on cooling rack in pan for 10 minutes. Remove from pan and cool completely on wire rack before slicing. (Note: If bread remains in pan longer than the 10-minute cooling time, it may become soggy or stick in the pan).
Cranberry Nut Bread Prepare recipe above, except add 2 teaspoons finely shredded orange peel to the dry mixture. Fold 1 cup coarsely chopped cranberries into batter when you add the nuts.
Blueberry Nut Bread Prepare recipe above, except add 1 teaspoon finely shredded lemon peel to dry mixture. Fold 1 cup fresh or frozen blueberries into batter along with nuts. If using canned blueberries, rinse and drain them before adding to batter.

20
Banana Nut Bread This popular quick bread makes use of overripe bananas, turning them into a great treat. The riper the bananas, the sweeter and more flavorful the bread.
Ingredients Equipment 2 cups sifted all-purpose flour Large mixing bowl 1½ teaspoons baking powder Medium mixing bowl ½ teaspoon baking soda Mixing spoon ¼ teaspoon salt Measuring spoons ¼ teaspoon ground cinnamon Dry measuring cups c teaspoon ground nutmeg Liquid measuring cup 2 eggs, beaten Cutting board 1½ cups mashed ripe bananas Knife for chopping nuts or
(three to four) nut chopper/food processor 1 cup sugar Fork or wire whisk ½ cup vegetable oil Loaf pan, 9 by 5 by 3 inches ½ cup chopped pecans or walnuts Potholders
Cooling rack
Store overripe bananas for another day’s baking by peeling, then freezing them in a sealable plastic freezer bag. Defrost for one to 1½ hours before mixing into bread batter.
Procedure
1. Preheat oven to 350 F.
2. Assemble all ingredients and equipment.
3. Grease and flour the bottom and 1/2 inch up sides of a 9-by-5-by-3-inch loaf pan; set aside.
4. In a large mixing bowl, combine flour, baking powder, baking soda, salt, cinnamon and nutmeg. Make a well in the center of the dry mixture; set aside.
5. In a small mixing bowl, combine eggs, banana, sugar and oil. Add egg mixture all at once to dry mixture. Stir just until moistened. The batter should be lumpy. Fold in chopped nuts.
6. Spoon batter into prepared pan. Bake for 55 to 65 minutes or until a wooden toothpick inserted near the center comes out clean. If necessary, loosely cover the top of the loaf with foil for the last 15 minutes of baking to prevent overbrowning.
7. Cool in pan on a wire cooling rack for 10 minutes. Remove loaf from pan. Cool completely on wire rack before slicing.

21
Zucchini Bread When added to a quick-bread batter, this vegetable takes on a whole new taste.
Ingredients Equipment 3 eggs Wire whisk 1 cup vegetable oil Large mixing bowl 2 cups sugar Dry measuring cups 2 teaspoons vanilla Liquid measuring cup 2 cups grated zucchini, unpeeled Mixing spoon 3 cups sifted all-purpose flour Grater 1 teaspoon baking soda Measuring spoons 1 teaspoon salt Small mixing bowl 3 teaspoons cinnamon Cutting board ½ teaspoon baking powder Knife for chopping nuts or 1 cup chopped pecans nut chopper or food processor
Two loaf pans, (9 by 5 by 3 inches) Potholders Cooling rack
Procedure
1. Preheat oven to 350 F.
2. Assemble all ingredients and equipment.
3. Grease and flour the bottom and 1/2 inch up sides of two (9-by-5-by-3-inch) loaf pans; set aside.
4. Beat eggs in large mixing bowl with a wire whisk until frothy.
5. Add the vegetable oil, sugar and vanilla; mix the ingredients with a large spoon until well-blended.
6. Stir in the grated zucchini.
7. In a small mixing bowl, combine flour, baking soda, salt, cinnamon and baking powder.
8. Stir dry ingredients gently into the zucchini mixture until just blended. Fold in chopped pecans.
9. Spoon the batter evenly into the two prepared loaf pans. Bake for one hour or until toothpick inserted near the center comes out clean.
10. Cool in pans for 10 minutes on wire rack. Remove loaves from pans. Cool completely on wire rack before slicing.

22
Standards of Quality for Quick-loaf Breads
Good quick-loaf breads have: • Well-proportioned shape of a quick-loaf bread
• Uniform color
• Even grain, no tunnels
• Pleasant flavor
• Evenly rounded top
• Tender, slightly rough crust
• Moist, tender crumb
• Characteristic crack down center
Incorrect proportions or mixing or inaccurate measurements can cause bread to be: • Undersized
• Tunneled
• Coarse textured
• Crumbly
• Dry
• Compact, heavy
Incorrect sized pans cause bread to be: • Peaked
• Soggy, compact
• Too light
• Too brown
Incorrect time and temperature causes bread to be: • Too brown
• Too light
• Doughy
• Heavily crusted
• Hard, dry
Incorrect handling after baking causes bread to be: • Soggy on bottom
• Steamed inside
Good examples of Quick-loaf Bread Poor examples of Quick-loaf Bread

23
How to Judge Baked Products: Quick-loaf Breads What qualities make a good quick-loaf bread? Here is a simple checklist so you can be your own judge. Don’t forget that judges will sample your baked products, so taste is as important as appearance. You may make copies of this score sheet to use each time you bake quick-loaf breads.
Product:
Date:
Compare quick-loaf breads
Excellent Good Needs Improvement
Outside characteristics
Color: Golden-brown crust
Shape: Tender, slightly rough crust
Evenly rounded top with crack down middle of top
Inside characteristics
Moist, tender crumb; neither soggy nor too dry
Texture
Evenly grained, somewhat coarser than cake, but free from tunnels
Flavor
Well-blended, characteristic of ingredients
No off flavor from fat, flour, leavening, nuts
Weight
Heavier than cakes
Comments

24
Let’s Bake Coffeecake
Quick Coffeecake Nothing can compare with a piece of warm, fresh-baked coffeecake for breakfast or as a snack.
Ingredients Equipment 1¼ cups all-purpose flour Large mixing bowl ¾ cup brown sugar Two small mixing bowls ¼ teaspoon salt Pastry blender or two forks a cup butter or shortening Dry measuring cups 1 teaspoon baking powder Liquid measuring cup ¼ teaspoon baking soda Measuring spoons ½ teaspoon cinnamon Rubber spatula ¼ teaspoon nutmeg 8-inch-square baking pan 1 egg, beaten Knife and cutting board or ½ cup + 2 tablespoons buttermilk nut chopper/food processor ½ cup chopped pecans or walnuts Potholders
Cooling rack
Tip: If you don’t have but- termilk, make sour milk instead. (See page 13 for recipe.)
Procedure
1. Preheat oven to 350 F.
2. Assemble all ingredients and equipment.
3. Grease the bottom and 1/2 inch up sides of an 8-inch-square baking pan; set aside.
4. In a large mixing bowl, combine flour, brown sugar and salt. Cut in butter or shortening with a pastry blender or two forks until the mixture resembles coarse crumbs; set aside 1/3 cup crumb mixture.
5. In a small mixing bowl, combine baking powder, baking soda, cinnamon and nutmeg; mix into remaining dry mixture in large mixing bowl.
Tip: To reheat coffeecake, wrap in heavy foil and heat in a 350-degree oven for about 15 minutes or wrap in plastic wrap and microwave for 25 to 30 seconds.
6. In another small mixing bowl, combine egg and buttermilk. Add egg mixture all at once to dry mixture; mix well.
7. Spoon batter into prepared pan.
8. Stir together reserved crumb mixture and nuts. Sprinkle over batter.
9. Bake for 25 minutes or until a wooden toothpick inserted in center comes out clean. Remove from the oven and place pan on a cooling rack. Best when served warm. Store in a tightly covered container at room temperature.

25
Fruit-filled Coffeecake
Ingredients Equipment 2¼ cups all-purpose flour Mixing bowl ¾ cup granulated sugar Dry measuring cups ¾ cup butter or margarine Measuring spoons ½ teaspoon baking powder Liquid measuring cup ½ teaspoon baking soda Pastry blender or two forks ¼ teaspoon ground nutmeg Small mixing bowl c teaspoon salt Egg beater or fork 1 egg, beaten Mixing spoon b cup buttermilk or sour milk Rubber spatula 1 teaspoon vanilla 9-inch-square baking pan 1¼ cups canned fruit pie filling Potholders
(cherry, peach, blueberry, apricot) Cooling rack 1 recipe Vanilla Icing (See recipe below)
Tip: If you don’t have buttermilk, make sour milk instead. (See page 13 for recipe.)
Procedure 1. Preheat oven to 350 F.
2. Assemble all ingredients and equipment.
3. Grease and flour a 9-inch-square baking pan; set aside.
4. In a large mixing bowl, combine flour and granulated sugar. Use a pastry blender to cut butter or margarine into the flour/sugar mixture until it forms coarse crumbles. Set aside 1/2 cup of mixture for topping.
5. Stir baking powder, baking soda, nutmeg and salt into the crumb mixture remaining in the large mixing/ bowl. Make a well in the center.
6. In a small bowl, combine egg, buttermilk and vanilla. Add egg mixture all at once to flour mixture, stirring until just moistened. (Batter should be lumpy). Set aside 1 cup batter.
7. Spread remaining batter in bottom and 1 inch up sides of prepared baking pan. Carefully spread desired pie filling on top of batter. Spoon reserved batter in small mounds on top of filling. Sprinkle with reserved topping.
8. Bake for 40 minutes or until a wooden toothpick inserted in the center comes out clean. (If necessary, cover edges with aluminum foil after 30 minutes to prevent overbrowning).
9. While coffee cake is baking, make the vanilla icing using the recipe below.
10. Cool in pan on wire rack for 15 minutes. Drizzle with prepared vanilla icing. Serve warm.
Vanilla Icing: Stir together 1/2 cup sifted powdered sugar, 1/2 teaspoon vanilla and enough milk (1 to 2 teaspoons) to make an icing of drizzling consistency.

26
Standards of Quality for Coffeecakes
Good coffeecakes have: • Golden brown crusts
• Even grain, texture somewhat coarser than cake, but free from holes or tunnels
• Moistness; free from doughiness or dryness
• Light weight; tender
• Pleasing flavor
Example of a good piece of coffeecake
Example of a good whole
coffeecake

27
How to Judge Baked Products: Coffeecakes What qualities make a good coffeecake? Here is a simple checklist so you can be your own judge. Don’t forget that judges will sample your baked products, so taste is as important as appearance. You may make copies of this score sheet to use each time you bake a coffeecake.
Product:
Date:
Compare coffee cakes
Excellent Good Needs Improvement
Outside characteristics
Color: Golden-brown crust
Tender crust
Inside characteristics
Moist, tender crumb; neither soggy nor too dry
Texture
Evenly grained, somewhat coarser than traditional cake, but free from tunnels
Flavor
Well-blended, characteristic of ingredients
No off flavor from fat, flour, leavening, nuts
Weight
Light in weight
Comments

28
Let’s Bake Cookies and Bars
Cookies In Baking I, you learned to make drop and rolled cookies. Here are some favorite recipes for brownies, slice-and-bake refrigerator cookies and shaped cookies that you may enjoy baking and serving to your family.
The word “cookie” comes from the Dutch word for cake, “koekje.” And that is just what the first cookies actually were, small portions of cake batter used to test the oven temperature before the cake itself went in to bake. Today, the variety of cookies is almost endless because the possibilities are so great.
The favorite kinds of cookies we all enjoy so much today came to America from all parts of the world:
England: Little currant cookies, scones and shortbread Scandinavia: Rich, buttery cookies such as spritz wreaths, almond crescents and butter cookies Austria: Chocolate cookies, split and filled with jam France: Elegant chocolate peaks and petit fours
From this rich heritage, Americans have developed their own “special” cookies:
• Brownies
• Refrigerator cookies
• Chocolate chip cookies
• Nut drop cookies
Kinds of Cookie Dough Soft dough, from which you make:
• Bar cookies
• Drop cookies
Stiff dough, from which you make:
• Refrigerator cookies
• Pressed cookies
• Rolled cookies
• Molded cookies
• Filled cookies
• Shaped cookies
All cookies have almost the same basic ingredients, but the amount of ingredients you use,the method of mixing and additional ingredients result in the different types.

29
Brownies Brownies are made with a thick batter that results in either a cake or fudgelike brownie, depending on the ingredients you use. This recipe makes a chewy, moist, cakelike brownie that you will want to make time and again.
Ingredients Equipment ½ cup butter or margarine Dry measuring cups 2 squares unsweetened chocolate, Measuring spoons
broken into pieces Large saucepan 1 cup sugar Wooden mixing spoon 2 eggs, beaten Small mixing bowl 1 teaspoon vanilla Fork or wire whisk ¾ cup + 1 tablespoon sifted 8-inch-square baking pan
all-purpose flour Potholders/hot pad ¼ teaspoon baking powder Cooling rack ½ teaspoon salt
Procedure
1. Preheat oven to 350 F.
2. Assemble all ingredients and equipment.
3. Grease an 8-inch-square baking pan on bottom and ½ inch up sides; set aside.
4. In a large saucepan, melt butter or margarine and chocolate over low heat. Remove pan from heat and place on a hot pad.
5. Using a wooden spoon, lightly beat sugar into the chocolate mixture. Add eggs and vanilla, beating until just combined.
6. In small bowl, combine flour, baking powder and salt. Add to chocolate mixture, stirring until just combined. Spread batter in prepared pan.
Examples of good brownies
7. Bake for 25 to 30 minutes. Cool in pan on wire rack. Cut into bars with a sharp knife and remove from pan. Store in tightly covered container to prevent drying.
Brownie Variations: • Add 1 cup coconut, chocolate chips or chopped nuts to the batter before baking.
• Brownies also may be frosted with your favorite butter icing or simply sprinkle brownies with powdered sugar.
• For a special touch, place chocolate peppermint candies on top of brownies as soon as they come out of the oven. Return the pan to the oven for a few minutes to melt the chocolate. Spread evenly over the brownies.

30
Chocolate Chip Applesauce Brownies
Ingredients 1½ c. sugar ½ c. Crisco or butter ½ tsp. cinnamon 2 Tbsp. cocoa 2 c . applesauce 2 eggs
2 c. flour 1½ tsp. soda ½ tsp. salt ½ c. nuts, chopped ½ c. chocolate chips, chopped
Procedure 1. Preheat oven to 350 F.
2. Beat the sugar and butter together.
3. Add the eggs and then applesauce. Add the dry ingredients and beat.
4. Grease or coat a 10-by-16-inch jelly roll pan with nonstick cooking spray. Pour batter into pan.
5. Sprinkle 1 Tbsp. sugar, 1/2 c. nuts and chocolate chips over the top.
6. Bake 25 to 30 minutes.
Makes 24 servings Per serving: 124 calories, 21g carbohydrate, 4g fat, <1g fiber and 160mg sodium
Cranberry Granola Bars
Ingredients ½ c. honey 2 Tbsp. + 2 tsp. brown sugar 1 Tbsp. + 1 tsp. oil 1½ c. oats 1¼ c. toasted rice cereal 1¼ c. dried cranberries
Directions 1. Combine honey, brown sugar and oil in a small saucepan. Heat over low
heat until well mixed.
2. Mix oats, rice cereal and cranberries. Add honey mixture and stir until thoroughly combined.
3. Pat firmly into an 8-by-8-inch baking pan.
4. Bake in 350-degree oven for 15 minutes; press mixture firmly once more into the bottom of the pan. Bake five more minutes.
5. Cool completely. Refrigerate at least one hour for easier cutting.
Makes 16 servings Per serving: 128 calories, 27g carbohydrate, 1g fat, 2g fiber and 20mg sodium

31
Butterscotch Bars These bars have a wonderful butterscotch flavor and a chewy texture.
Ingredients Equipment 1 cup (6 ounces) butterscotch chips Large saucepan ¼ cup butter or margarine Dry measuring cups 1 cup brown sugar Measuring spoons 2 eggs, beaten Mixing spoon ½ teaspoon vanilla Small mixing bowl 1 cup all-purpose flour 8-inch-square baking pan 1 teaspoon baking powder Potholders ½ teaspoon salt Cooling rack
Procedure
1. Preheat oven to 350 F.
2. Assemble all ingredients and equipment.
3. Melt butterscotch chips and butter or margarine in large saucepan on low heat, stirring occasionally.
4. Remove from heat and stir in the brown sugar. Let cool for five minutes, then blend in the eggs and vanilla.
5. Thoroughly combine the flour, baking powder and salt in a small bowl. Add to brown sugar mixture and mix until thoroughly blended.
6. Spread into a greased and floured 8-inch-square baking pan.
7. Bake for 30 to 35 minutes or until golden brown. Remove pan from oven and place on a wire rack to cool. Cut into squares. Store in a tightly covered container.
Tip: Removing bars from the pan is easier if you remove the corner piece first.
Exhibitors Tip: Choose bars from the middle of the pan or cut outer edges from bars for a more uni- form exhibit.
Bar cookies, including brownies, are called bars because they usually are served in the shape of a bar of gold, a square or a rectangle. For a fun change, cut bars into triangles or diamonds.

32
Jam Thumbprint Cookies Makes approximately 42 cookies.
These shaped cookies are great for a special occasion or an anytime treat.
Ingredients Equipment b cup butter or margarine, softened Large mixing bowl ½ cup granulated sugar Electric mixer 2 egg yolks Dry measuring cups 1 teaspoon vanilla Two small mixing bowls 1½ cups all-purpose flour Measuring spoons 2 slightly beaten egg whites Cutting board 1 cup finely chopped walnuts Knife for cutting nuts a to ½ cup jam or preserves Metal spoon
Rubber spatula Cookie sheet Potholders Cooling rack
Tip: These cookies can be baked, cooled and frozen ahead of time. When ready to use, thaw first, then fill with your favorite jam.
Procedure 1. Assemble all ingredients and equipment.
2. In a large mixing bowl, beat butter with an electric mixer on medium to high speed for 30 seconds.
3. Add the sugar and beat until combined. Stop the electric mixer as needed to scrape the sides of the bowl with a rubber spatula.
4. Beat in egg yolks(*) and vanilla until combined. (Be sure to reserve egg whites in a small bowl. Cover and refrigerate. Use within two days.)
5. Beat in half of flour, then add second half of flour, mixing well.
6. Cover and chill dough at least one hour.
7. Preheat oven to 375 F.
8. Grease cookie sheet; set aside.
9. Shape dough into 1-inch balls. Roll balls in slightly beaten egg whites, then roll in walnuts.
10. Place balls 1 inch apart on the prepared cookie sheet. Press your thumb deep into the center of each ball. If the indention needs to be reshaped after baking, do so while cookies are still warm. (The handle of a wooden spoon also works well as a “thumb” to make the indention in the cookies.)
11. Bake for 10 to 12 minutes or until edges are lightly browned. Transfer to a wire cooling rack; cool completely. Before serving, fill centers with your favorite jam or preserve.
*To separate an egg, gently but firmly crack the middle of the egg shell on the edge of a bowl. Use an egg separator or carefully pass the egg yolk back and forth from shell to shell, allowing the egg white to separate from the egg yolk into a bowl. Place the yolk into another small bowl.

33
Peanut Butter Blossom Cookies Makes approximately 45 cookies.
These are kid-pleasing peanut butter cookies with the addition of a milk chocolate star or kiss placed in the center.
Ingredients Equipment ½ cup shortening Large mixing bowl ½ cup peanut butter Electric mixer ½ cup granulated sugar Rubber spatula ½ cup brown sugar Two small mixing bowls 1 egg Dry measuring cups 2 tablespoons milk Measuring spoons 1 teaspoon vanilla Mixing spoon 1¾ cups all-purpose flour Cookie sheet 1 teaspoon baking powder Cooling rack c teaspoon baking soda Potholders Chocolate stars or kisses (approximately 45) ¼ cup granulated sugar
Procedure
1. Preheat oven to 350 F.
2. Assemble all ingredients and equipment.
Variation: Place a whole pecan or walnut in the center of the cookies in place of the chocolate star or kiss.
3. In a large mixing bowl, beat the shortening and peanut butter with an electric mixer on medium speed for 30 seconds.
4. Add the 1/2 cup granulated sugar and brown sugar, mixing until combined.
5. Beat in egg, milk and vanilla until well-mixed.
6. In a small mixing bowl, combine flour, baking powder and baking soda. Add dry ingredients to creamed mixture, mixing until thoroughly blended.
7. Shape dough into 1-inch balls. Roll balls in the 1/4 cup granulated sugar. Place balls 2 inches apart on an ungreased cookie sheet.
8. Bake for 10 to 12 minutes or until edges are firm and bottoms are lightly browned. Remove from oven and immediately press a chocolate star or kiss into the center of each cookie. Cool cookies on cookie sheet for a few minutes, then transfer to a wire cooling rack to continue cooling. Chocolate will firm as the cookies cool, but will remain soft.

34
Brown Sugar Nut Rounds
Makes approximately 50 cookies.
Once called icebox cookies, today’s slice-and-bake refrigerator cookies are as convenient as ever to make. To create a fancier cookie, perhaps for the holidays, dip each baked, cooled cookie halfway in melted chocolate and sprinkle with chopped, toasted nuts.
Ingredients Equipment ½ cup shortening Large mixing bowl ½ cup butter or margarine, softened Electric mixer 1¼ cups packed brown sugar Dry measuring cups 1 egg Measuring spoons 1 teaspoon vanilla Small mixing bowl 2½ cups sifted all-purpose flour Waxed paper ½ teaspoon baking soda Knife ¼ teaspoon salt Cookie sheet ¾ cup finely chopped or ground pecans Cooling rack
Potholders
Procedure 1. Assemble all ingredients and equipment.
2. In a large mixing bowl, beat shortening and butter with an electric mixer on medium to high speed for 30 seconds.
3. Add the brown sugar, beating until combined. Beat in the egg and vanilla.
4. In a small mixing bowl, combine the flour, baking soda and salt. Beat half of the flour mixture into the other mixture, then add second half of flour, mixing well.
5. Add pecans; thoroughly combine throughout dough with mixer or wooden spoon.
6. On waxed paper, shape dough into two 8-inch rolls or logs, making sure they are nicely rounded. Wrap each roll in waxed paper or plastic wrap. Chill in refrigerator for at least two hours or until firm enough to slice.
7. Preheat oven to 375 F.
8. Using a thin-bladed knife, cut dough into ¼-inch thick slices. Place slices 1 inch apart on ungreased cookie sheets.
Tip: Take only one roll of dough from the refrigera- tor at a time to slice. Keep the other roll chilled until ready to use.
Tip: To make cookies nice and round, keep the dough in “shape” when chilling by sliding the roll into a tall drinking glass. While slicing, rotate the roll often to avoid flattening one side.
9. Bake for 10 minutes or until edges are firm. Cool cookies for a few minutes on the cookie sheet, then transfer to a wire cooling rack and continue to cool.

35
Standards of Quality for Cookies Prepared and baked with care, all types of cookies easily can meet high standards.
Good cookies have:
• Uniform shape (typical of kind)
• Uniform color
• Texture true to type (soft or crisp)
• Tender crumb (though a few varieties are crisp)
• Good flavor
Incorrect proportions or inaccurate measurements can cause cookies to be:
• Streaked with flour
• Tough
• Too rich
• Dry
• Crumbly
• Too soft
Poor baking techniques can cause cookies to be:
• Uneven
• Poorly browned
• Doughy
• Too pale
• Too hard
• Too soft
• Run together
• Too dry
• Too brown
Poor mixing techniques can cause cookies to be:
• Streaked with flour
• Hard
• Dry
• Crumbly

36
How to Judge Baked Products: Cookies and Bars The product will vary with the type and shape of cookie.
Product:
Date:
Compare three cookies or bars
Excellent Good Needs Improvement
Outside characteristics
Color: typical of its type
Symmetrical shape and size
Uniform shape and size across samples
Inside characteristics
Moist, neither soggy nor too dry
Crisp, chewy, or soft according to kind
Tender
Even cells or holes
Flavor
Well-blended, characteristic of ingredients
Not too much spice, flavoring, etc.
No off flavor from fat, oil, leavening, nuts, etc.
Comments

37
Let’s Bake Gingerbread Gingerbread is good served hot or cold, plain or fancy. Why not try a dollop of whipped cream sprinkled with a touch of ground cinnamon on top?
Ingredients Equipment ½ cup shortening Electric mixer ½ cup granulated sugar Large mixing bowl 2 eggs Small mixing bowl ½ cup molasses Dry measuring cups 1½ cups all-purpose flour Liquid measuring cup 1 teaspoon baking soda Measuring spoons 1 teaspoon ground cinnamon Mixing spoon 1 teaspoon ground allspice Rubber spatula 1 teaspoon ground ginger 8-inch-square baking pan 1 cup hot water Potholders
Cooling rack
Procedure
1. Preheat oven to 350 F.
2. Assemble all ingredients and equipment.
3. Grease and flour an 8-inch-square baking pan; set aside.
Safety Tips: Make sure the electric mixer is unplugged whenever you put in or take out the beaters. Turn the mixer off before scraping the sides of the bowl. Ask an adult to help measure the hot water.
4. In large mixing bowl, beat shortening at medium speed with an electric mixer until light and fluffy.
5. Gradually add sugar, beating well. Add eggs and molasses, mixing well.
6. Combine flour, baking soda, cinnamon, allspice and ginger in a small mixing bowl. Add to shortening mixture alternately with hot water, beginning and ending with flour mixture. Mix after each addition.
7. Pour batter into prepared baking pan. Bake for 30 minutes or until a wooden toothpick inserted in center of gingerbread comes out clean.
8. Cool in pan on a wire cooling rack. Cut into squares. Transfer squares to a tightly closed container.

38
Let’s Bake Cornbread You and your family will enjoy warm squares of this tender, slightly sweet cornbread.
Ingredients Equipment 1 cup sifted all-purpose flour Large mixing bowl 1 cup yellow cornmeal Small mixing bowl ¼ cup granulated sugar Dry measuring cups 4 teaspoons baking powder Liquid measuring cup ¾ teaspoon salt Measuring spoons ¼ cup butter or margarine, melted Fork or wire whisk 2 eggs, beaten Mixing spoon 1 cup milk Rubber spatula
9-by-9-by-2-inch square baking pan Potholders Cooling rack
Procedure
1. Preheat oven to 400 F.
2. Assemble all ingredients and equipment.
3. Grease bottom and sides of 9-by-9-by-2-inch square baking pan.
4. In large mixing bowl, stir together flour, cornmeal, sugar, baking powder and salt; set aside.
5. In a small mixing bowl, combine eggs; milk; and cooled, melted butter or margarine. Add egg mixture all at once to dry mixture. Stir just until moistened.
6. Pour batter into baking pan.
7. Bake for 18 to 20 minutes or until lightly browned. Place on wire cooling rack. Cut into squares. Serve warm.
You may use a 10-inch cast iron skillet or a 9-inch round baking pan in place of a square pan. Just remember to exhibit a 3-by-3-inch square of cornbread for your fair or achievement day.

39
Other Activities
Demonstration Give a demonstration teaching others what you have learned from this project. You may show how to make one of the baked products in this book or demonstrate a technique you have learned.
Citizenship Gifts of delicious homemade baked goods are welcome gifts. When you wrap a gift of food, think of these things:
• Plan a wrapping to keep the baked goods fresh and clean.
• Include a simple note.
• Call ahead of time to arrange a convenient time to deliver your gift. Ask a member of your family to go with you.
Leadership • Help your baking leader prepare for the project meeting.
• Lead the other members in cleaning the kitchen or preparing a recipe.
• Help call members about meetings and activities.
• Help start a food drive that your club, school or church sponsors.
• Help coordinate a club concession or bake sale.
Career Exploration Tour a bakery, restaurant or food manufacturing facility. Learn how it bakes, pack- ages and markets large amounts of food. Learn what bakers do on the job. Ask about other jobs related to their business.
Recordkeeping: Keep a record of all your 4-H activities. Use the record form in this project book.

40
Baking 2 Word Search
G I N G E R B R E A D P N X A
C I N I H C C U Z P C V I B X
O B E G K E T A L O C O H C P
O S H O R T E N I N G H O D X
K G R A T E R U O L F F W M Q
I Y S D L F D M N G F X L Q L
E K Q H J W A I M E H Q N Z U
R X C O R N B R E A D O V E N
L C H M N G X C A N E B A P Y
B A K I N G A K S S T M L I Z
L C C I B K M U U P U S L C R
D E X N E I I B R O W N I E S
W I K Q L E T T I K H O N R Y
M W C K O X O S N X K G A D K
K U W I E L F A G X C L V M K
Baking
Brownies
Chocolate
Cinnamon
Coffeecake Cookie Cornbread Exhibit
Flour Gingerbread Grater Ingredients
Measuring Milk Mixing Oven
Recipe Shortening Vanilla Zucchini

41
Baking 2 Crossword
1 2 3
4 5 6 7
8 9
10
11
12 13
14 15
Across Down
1. A type of shaped cookie 2. Helps baked products rise 4. “Fast” bread 3. Type of flavoring 5. Spice used in baked products 6. Can be chopped 8. Type of fruited nut bread 7. Kind of fat
10. Used for handling hot pans 9. Common type of flour 13. A dark brown syrup 11. Equal to two or three drops 14. Sweetens baked goods 12. Cracked before using 15. To refrigerate

42
A
R A
Baking 2 Crossword (Answer Key)
1 2 3 T H U M B P R I N T V
A A 4 5 6 7 Q U I C K C I N N A M O N
I U A I 8B
9 N A N A N U T R L
L G S G L
L S A A 10
P P O T H O L D E R S
U D I 11 D N
12 13 P E M O L A S S E S
O G S 14 15 S U G A R C H I L L
E
43
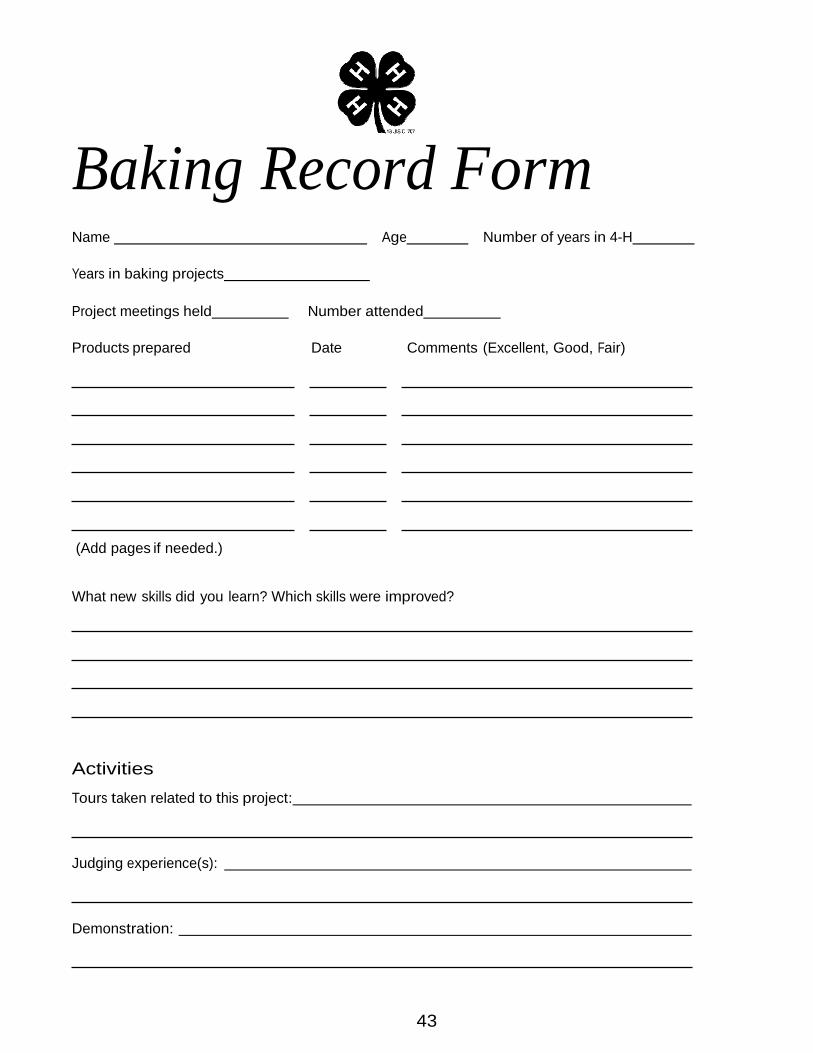
Baking Record Form
Name Age Number of years in 4-H
Years in baking projects Project meetings held Number attended Products prepared Date Comments (Excellent, Good, Fair)
(Add pages if needed.)
What new skills did you learn? Which skills were improved?
Activities
Tours taken related to this project:
Judging experience(s):
Demonstration:

44
Citizenship:
Leadership: ______________________________________________________________________
Exhibits Product Where exhibited Placing
Leader, helper, or parents’ comments:
Member signature Parent signature
Project leader signature
(Add pages as needed.)

45
This publication is adapted with permission from New Mexico State University's Cooperative Extension Service
County commissions, North Dakota State University and u_s_ Department of Agriculture cooperating_ North Dakota State University does not discriminate on the basis of age, color, disability, gender expression/identity, genetic information, marital status, national origin, public assistance status, sex, sexual orientation, status as a u_s_ veteran, race or religion_ Direct inquiries to the Vice President for Equity, Diversity and Global Outreach, 205 Old Main, (701) 231-7708_ This publication will be made available in alternative formats for people with disabilities upon request, (701) 231-7881 500-11-05