av entertainment networking seminar may-2011 -...
TRANSCRIPT

Panasonic Canada Inc.
Customer & Product Assurance
Alan Tran
May-2011
AV Entertainment
Networking Seminar

• 2011 Models Network Features
• WiFi adaptor compatibility
• Home Network Explain & Setup
• How to prepare a PC for DLNA Streaming
Topics

2011 Models Viera Products
Network Features
iPhone Remote

2011 Models Viera Products
Network Features

2011 Models Blu-ray
Players Network Features
iPhone Remote

2011 Models Blu-ray Home Theatre
Network Features
In all Models

2011 Models Viera Products
Viera Connect (Viera Cast)

2011 Models Viera Products
EASY IPTV

Digital Living Network Alliance
DLNA allows the sharing of media content within a home network.
DLNA certified Panasonic products can play the following media contents from a Windows 7 PC:
AVCHD (.mts, .m2ts)
Mpeg (.mpg)
DivX including HD (.avi)
iTunes video podcast (.mp4)
HDTV broadcast transport stream (.ts)
MKV (Matroska) video (.mkv)
Digital still image (.jpg)
Audio (.mp3)

1080p
Home Network AV Streaming Diagram

2011 Models Viera WiFi
Adaptor Compatibility
Netgear Wireless Dual Band
USB Adapter WNDA3100 V2
Panasonic Wireless Dual Band
USB Adapter DYWL10
Panasonic Wireless Dual Band USB Adapter
N5HBZ0000055 Included with certain models.
Not for sale separately
All models listed
on this page are
compatible with
the three WiFi
adaptors.

2011 Models Viera WiFi
Adaptor Compatibility
Netgear Wireless Dual Band
USB Adapter WNDA3100 V2
Panasonic Wireless Dual Band
USB Adapter DYWL10
All models listed
on this page are
compatible with
the two WiFi
adaptors.

2011 Models Blu-ray Players
WiFi Adaptor Compatibility
Panasonic Wireless Dual Band
USB Adapter DYWL10
DMPBD75 can only connect to Home Network by network cable.

AV Home Network Explain & Setup

Wireless Network Explain
Most wireless network routers operate on 2.4GHz RF band.
The issue is that there are many wireless devices operating
on the same 2.4GHz frequency and may cause
interference to other devices on the same band within a
close range.
2.4GHz ?
5GHz ?
2.4GHz
Wireless Network Explain
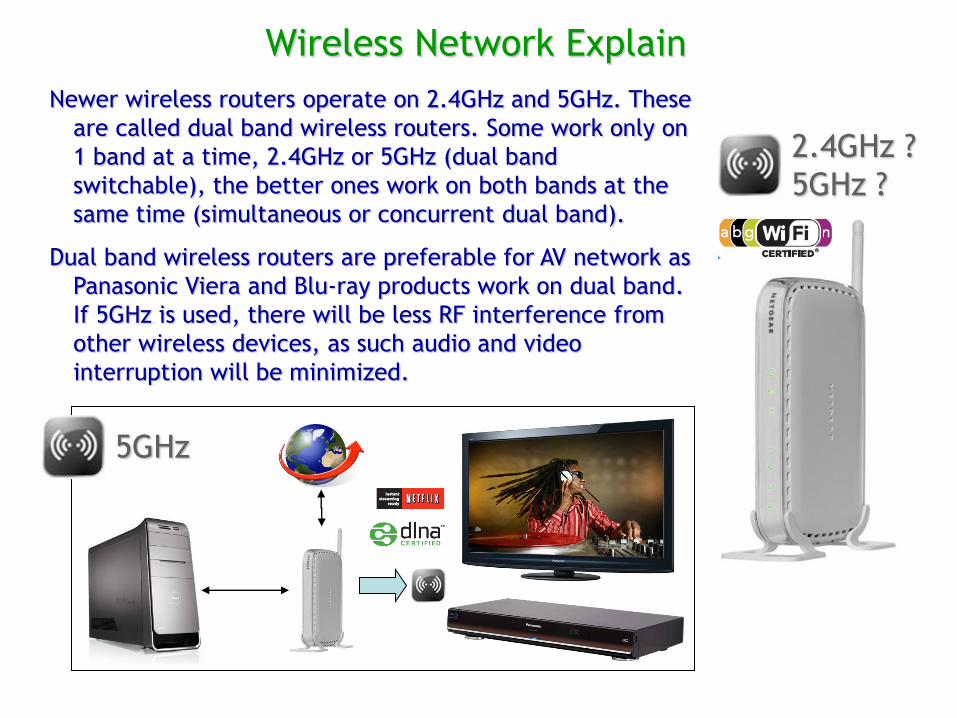
Newer wireless routers operate on 2.4GHz and 5GHz. These
are called dual band wireless routers. Some work only on
1 band at a time, 2.4GHz or 5GHz (dual band
switchable), the better ones work on both bands at the
same time (simultaneous or concurrent dual band).
Dual band wireless routers are preferable for AV network as
Panasonic Viera and Blu-ray products work on dual band.
If 5GHz is used, there will be less RF interference from
other wireless devices, as such audio and video
interruption will be minimized.
2.4GHz ?
5GHz ?
5GHz

Wireless Network
Connect & Set Up
Panasonic Viera and Blu-ray products
support 3 types of connection:
1. PUSH BUTTON*
2. PIN*
3. WiFi network scanning method (needs
SSID and password for secured network)
* Work with routers supporting WPS (WiFi
Protected Setup).

Note: Connection by WPS is only available in newer network routers.
The product will have the words WiFi Protected Setup and a WPS logo that looks like this
printed on the box.
Wireless Network Connection
Connect using WPS (WiFi Protected Setup)
Plug the wireless network adaptor into one of the USB ports on the product’s side
panel or rear panel.
Press [Menu] on the remote, use the cursor and OK buttons to navigate, go to Setup
and select:
Network settings Network connection Wireless (WiFi) WPS (Wi-Fi Protected Setup using push button)

Wireless Network Connection
Connect using WPS (WiFi Protected Setup)
After selecting WPS
connection using push
button method, press the
WPS button on the
network router and
select:
The display will try to
connect to the router
within 2 minutes with
the screen showing
the in-progress
message.
Connect
Once the connection is
established, the screen
will show the wireless
connection settings.

Note: This method is used if the network router does not support WPS, or if there is problem
connecting using WPS.
Wireless Network Connection
Connect using Wireless Network Scan
Plug the wireless network adaptor into one of the USB ports on the product’s side panel
or rear panel.
Press [Menu] on the remote, use the cursor and OK buttons to navigate, go to Setup and
select:
Network settings Network connection Wireless (WiFi) Search for wireless networks
Wireless Network Connect using Wireless Network Scan
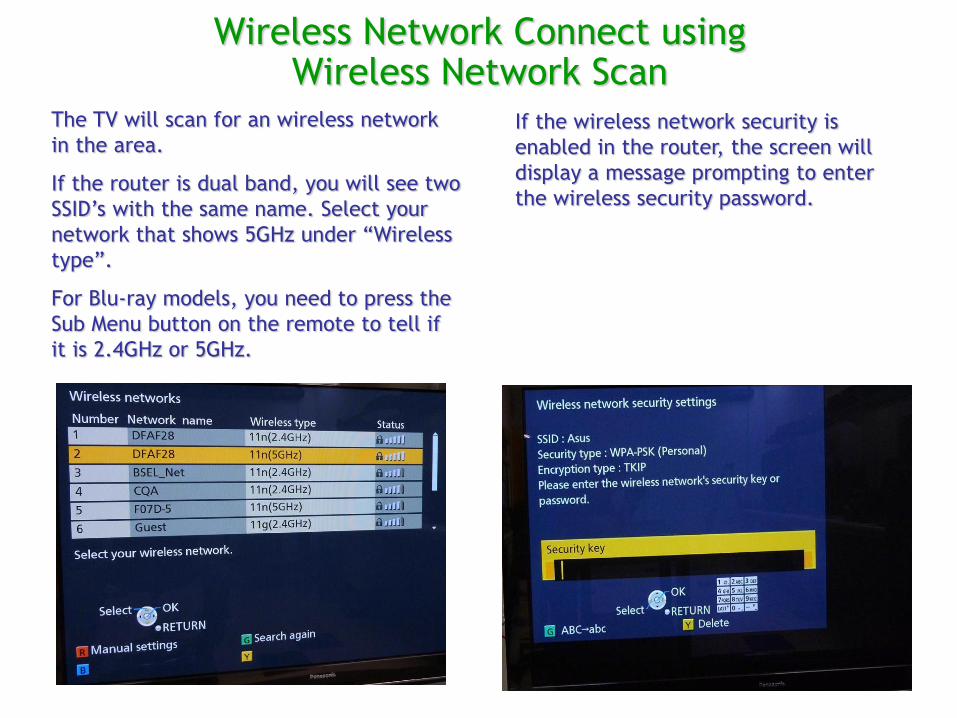
The TV will scan for an wireless network
in the area.
If the router is dual band, you will see two
SSID’s with the same name. Select your
network that shows 5GHz under “Wireless
type”.
For Blu-ray models, you need to press the
Sub Menu button on the remote to tell if
it is 2.4GHz or 5GHz.
If the wireless network security is
enabled in the router, the screen will
display a message prompting to enter
the wireless security password.

Wireless Network Connection
Connect using Wireless Network Scan
In the next screen, confirm the
password entered.
Once the connection is established,
the screen will show the wireless
connection settings.

Wireless Network Connection
Wireless Network Settings The Wireless network settings shows the connecting condition of
the wireless network.
SSID is the name of
the wireless
network.
2nd line shows the
type of the
wireless network
(i.e. 802.11g).
3rd line shows the
type of security
used in the
wireless network.
4th line shows the type
of security encryption
used in the wireless
network.
5th line shows the RF
reception condition
between the network
router and the
display. 4 bars or
more is required for
optimum operating
condition.
Wireless Network Connection
Connect using Wireless Network Scan
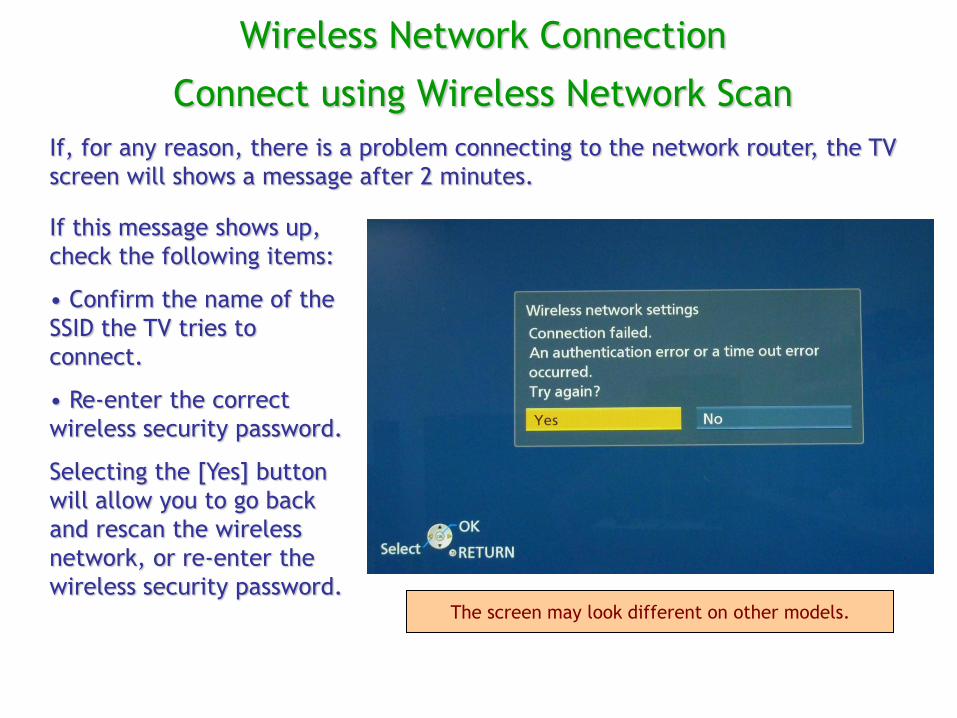
If, for any reason, there is a problem connecting to the network router, the TV
screen will shows a message after 2 minutes.
If this message shows up,
check the following items:
• Confirm the name of the
SSID the TV tries to
connect.
• Re-enter the correct
wireless security password.
Selecting the [Yes] button
will allow you to go back
and rescan the wireless
network, or re-enter the
wireless security password. The screen may look different on other models.

Wireless Network Connection
Wireless Network Settings
The Wireless network Connection Test shows the TV’s connecting
status.
1st line shows the
connection status
to the network
router.
2nd line shows if
the TV’s IP
address is
provided by DHCP
of the router.
3rd line shows if
there is any IP
address conflict on
the Home Network.
4th line shows if the
TV is able to access
the Internet through
the Home Network.
5th line shows if the
TV is able to access
the Viera Cast Server
through the Internet.
Network settings Connection test MENU

How to prepare a PC for DLNA Streaming Recommended system:
1. Intel or AMD dual core CPU
2. 4GB RAM
3. 1TB hard drive
4. Windows 7 Home Premium (32bit or 64bit)
5. Software codec packs as required by the type
of contents
When AV streaming by DLNA, the PC needs to decode the contents. A fast CPU
helps when decoding HD video such as AVCHD or MPEG2 transport streams.
The CPU speed is also important when there are multiple devices streaming
different types of contents from the PC.
Last note, as a media server, the PC should always be connected to the network
router by a network cable. Using a wired network connection will ensure an
uninterrupted AV streaming enjoyment from the media server.
How to prepare a PC for DLNA Streaming
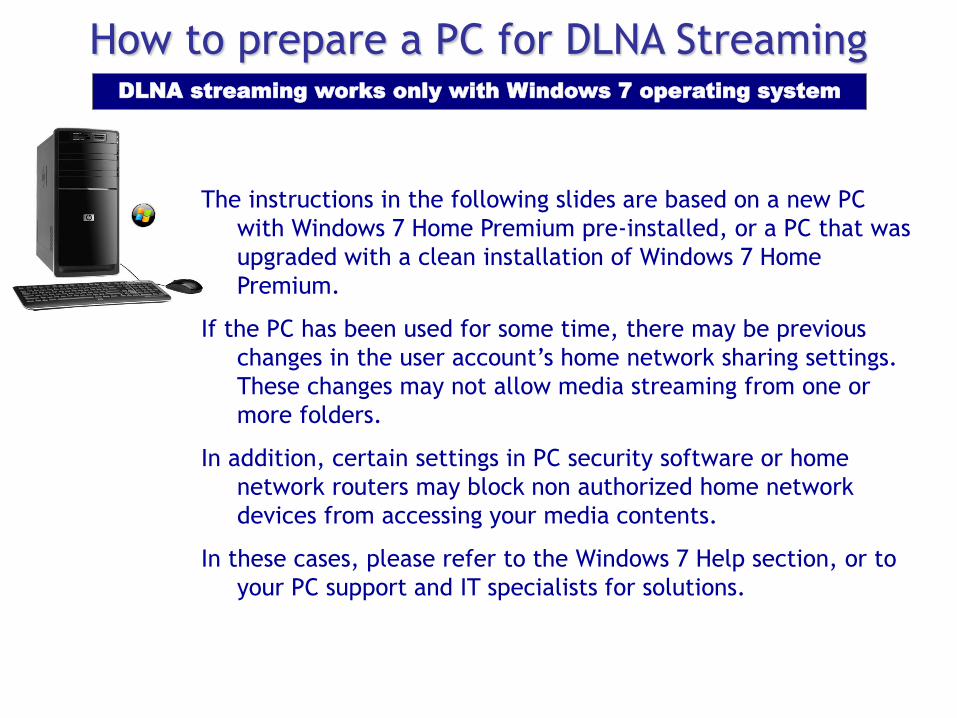
The instructions in the following slides are based on a new PC
with Windows 7 Home Premium pre-installed, or a PC that was
upgraded with a clean installation of Windows 7 Home
Premium.
If the PC has been used for some time, there may be previous
changes in the user account’s home network sharing settings.
These changes may not allow media streaming from one or
more folders.
In addition, certain settings in PC security software or home
network routers may block non authorized home network
devices from accessing your media contents.
In these cases, please refer to the Windows 7 Help section, or to
your PC support and IT specialists for solutions.
DLNA streaming works only with Windows 7 operating system

How to prepare a PC for DLNA Streaming
1. Log in the user account you
would like to configure DLNA
media streaming.
2. Go to the bottom right
corner of Windows Desktop,
right click on the Home
Network icon, then select
[Open Network and Sharing
Center] from the pop-up
menu.

How to prepare a PC for DLNA Streaming 3. In [Network and Sharing Center] window, click on [Choose
homegroup and sharing options].
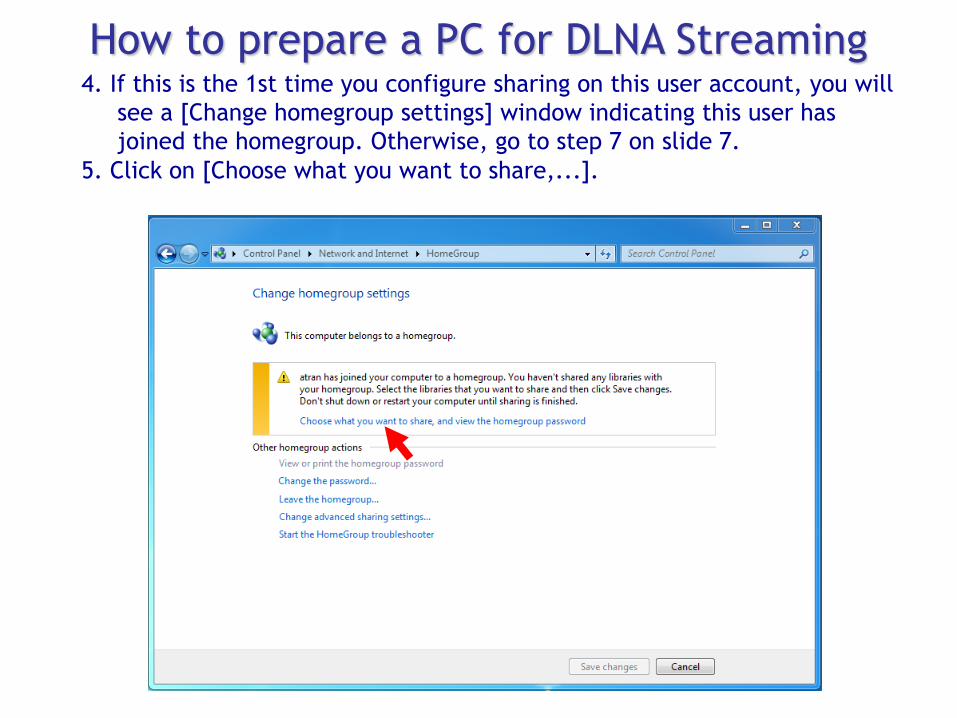
How to prepare a PC for DLNA Streaming 4. If this is the 1st time you configure sharing on this user account, you will
see a [Change homegroup settings] window indicating this user has
joined the homegroup. Otherwise, go to step 7 on slide 7.
5. Click on [Choose what you want to share,...].

How to prepare a PC for DLNA Streaming 6. In [Share with other home computers running Windows 7] window,
check the contents you would like to share.
Since you only need to stream audio and video contents, check the
boxes next to [Pictures], [Music] and [Videos].
Click [Next] after checking the boxes.

How to prepare a PC for DLNA Streaming 7. In [Change homegroup settings] window, confirm that [Pictures], [Music]
and [Videos] boxes are checked.
Check the box next to [Stream my pictures, music and videos to...]
below [Share media with devices].
Click on [Choose media streaming options...].
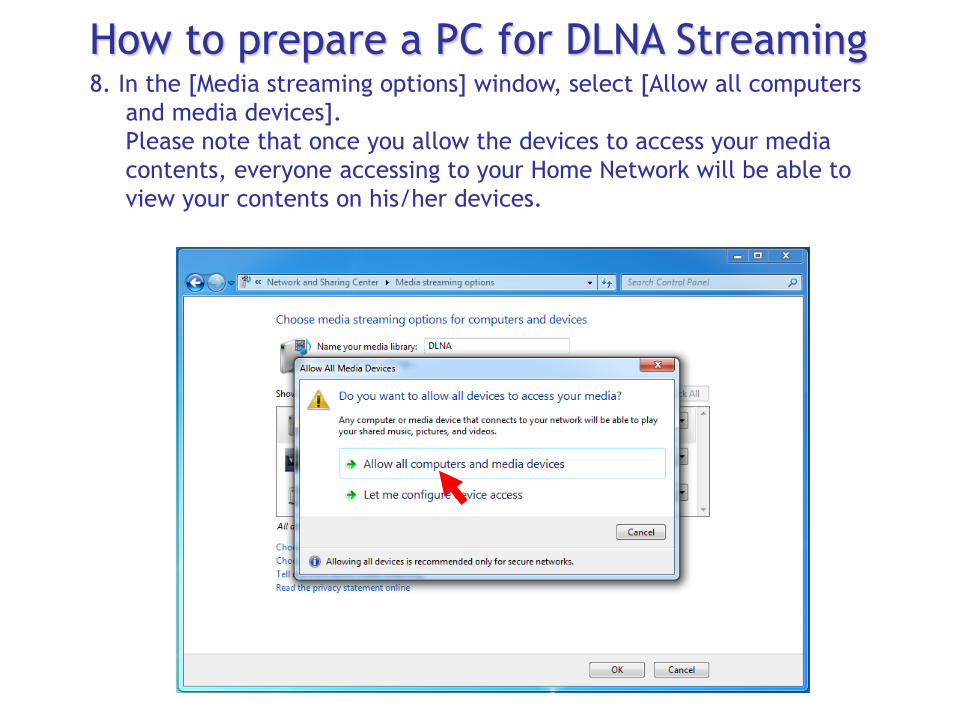
How to prepare a PC for DLNA Streaming 8. In the [Media streaming options] window, select [Allow all computers
and media devices].
Please note that once you allow the devices to access your media
contents, everyone accessing to your Home Network will be able to
view your contents on his/her devices.
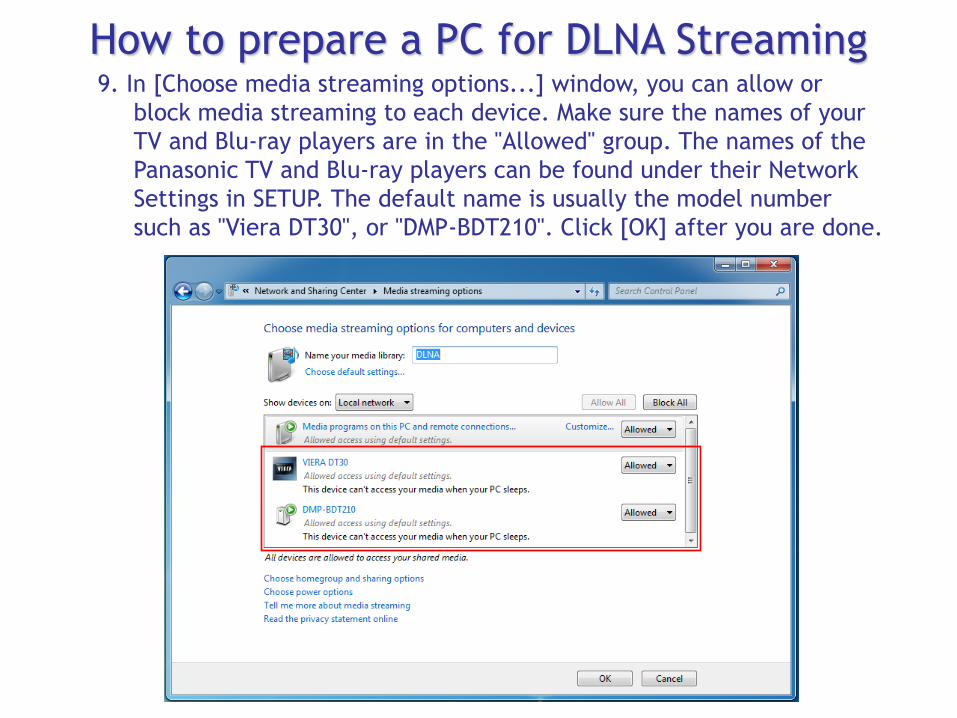
How to prepare a PC for DLNA Streaming 9. In [Choose media streaming options...] window, you can allow or
block media streaming to each device. Make sure the names of your
TV and Blu-ray players are in the "Allowed" group. The names of the
Panasonic TV and Blu-ray players can be found under their Network
Settings in SETUP. The default name is usually the model number
such as "Viera DT30", or "DMP-BDT210". Click [OK] after you are done.
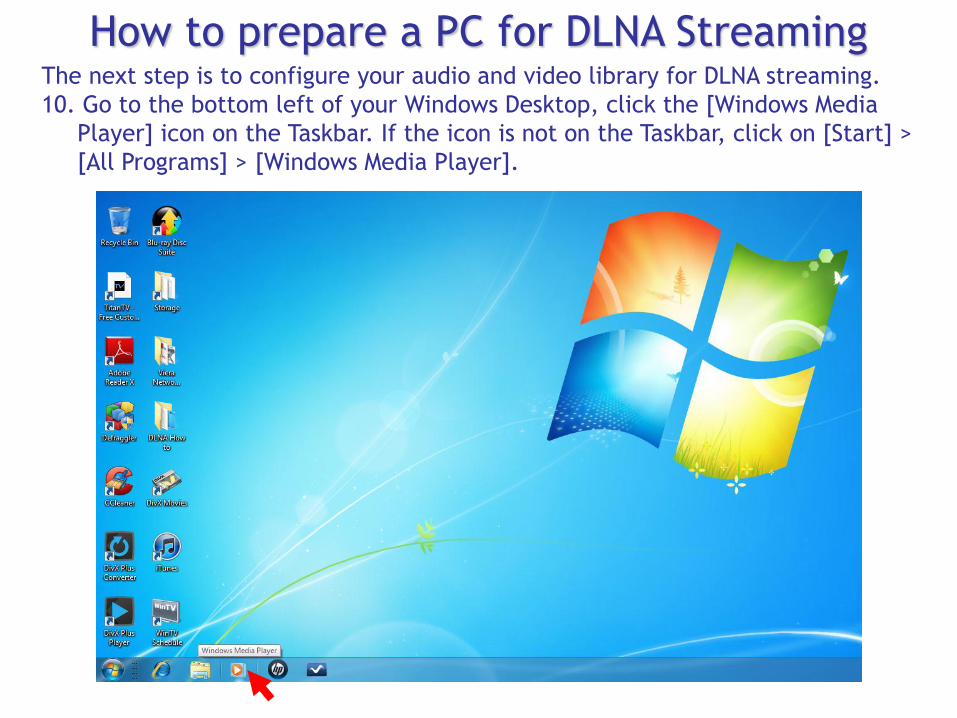
How to prepare a PC for DLNA Streaming The next step is to configure your audio and video library for DLNA streaming.
10. Go to the bottom left of your Windows Desktop, click the [Windows Media
Player] icon on the Taskbar. If the icon is not on the Taskbar, click on [Start] >
[All Programs] > [Windows Media Player].

How to prepare a PC for DLNA Streaming 11. After Windows Media Player starts, you will see the titles of the audio and
video library of the user currently logged in.
Since Panasonic TV and Blu-ray players use Windows Media player for
streaming, they can only play the media shown in Windows Media Player. The
default folders for these media files are [My Music], [My Pictures] and [My
videos].
User name

How to prepare a PC for DLNA Streaming
12. Go to Windows Media Player task menu click on [Stream], make sure
there is a check mark preceding [Automatically allow devices to play
my media…] in the drop down menu.
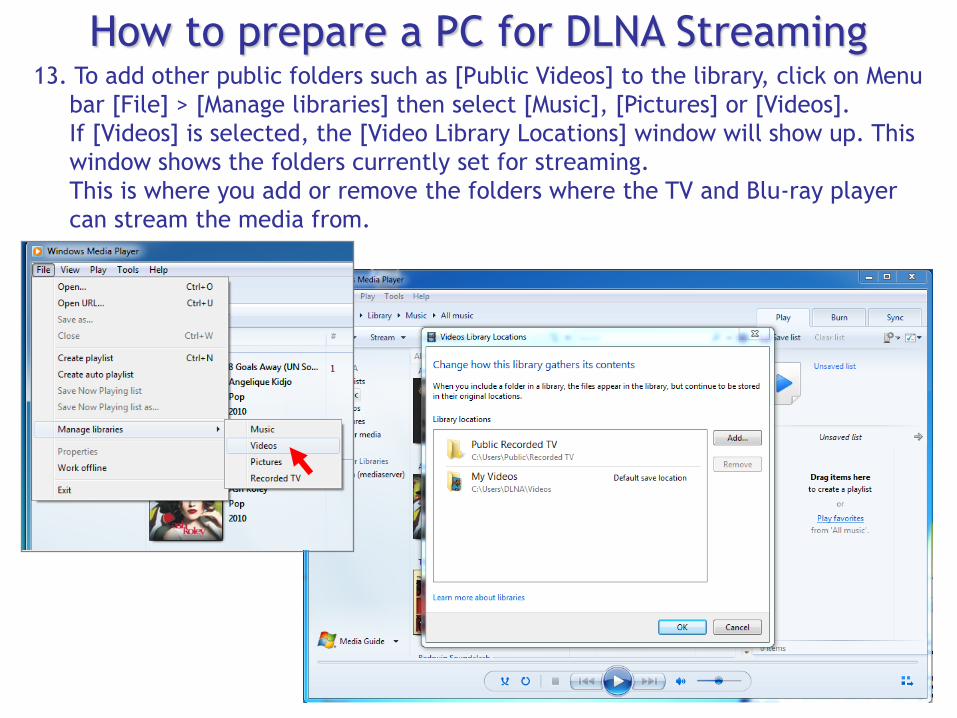
How to prepare a PC for DLNA Streaming 13. To add other public folders such as [Public Videos] to the library, click on Menu
bar [File] > [Manage libraries] then select [Music], [Pictures] or [Videos].
If [Videos] is selected, the [Video Library Locations] window will show up. This
window shows the folders currently set for streaming.
This is where you add or remove the folders where the TV and Blu-ray player
can stream the media from.

How to prepare a PC for DLNA Streaming 14. If you would like to add another folder, just click on [Add], then browse
to a folder that you want the devices to stream from, select it then click
on [Include folder]. All media files saved to the newly added folder can
be streamed to the TV or Blu-ray players later.

How to prepare a PC for DLNA Streaming 15. After completion, restart Windows Media Players. If the media files in
the newly added folder do not show up in Windows Media Player, click on
Menu bar [Tools] > [Apply media information changes]. click [Close]
after media change update is completed.
Depending on certain
PC configurations, a
restart of the OS may
be required to apply
the changes.

How to prepare a PC for DLNA Streaming
The media streaming configuration is completed at this point. The
TV and Blu-ray players will be able to stream the supported
media files added to the library in the future.
If this is a new PC, now is the time to download and install extra
software decoder packs so Windows Media Player can support
more media files such a MPEG2 transport stream and certain avi
files.
The easiest way to add software decoders is to install VLC Media
Player and DivX Player as these 2 media players come with the
decoders supporting many types of media files.