asi painting skills
TRANSCRIPT
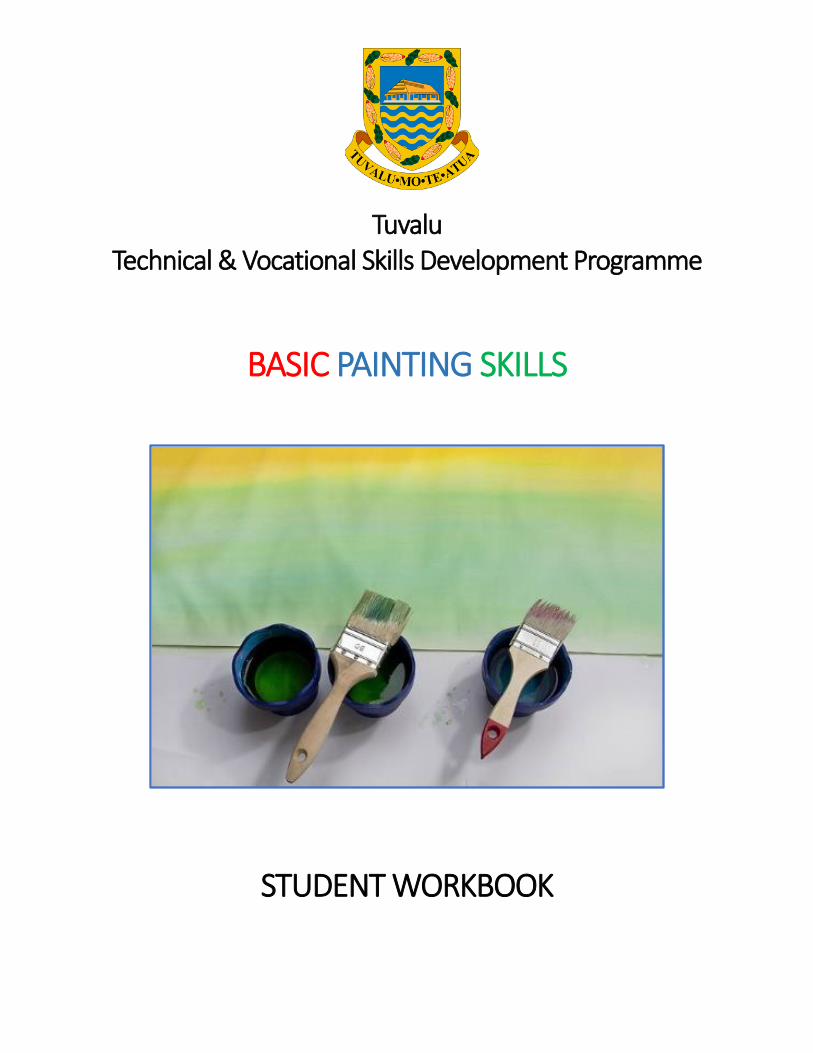
Tuvalu Technical & Vocational Skills Development Programme
BASIC PAINTING SKILLS
STUDENT WORKBOOK
Credits
Basic Painting Skills is a Level 1 course which forms part of the Tuvalu
Technical & Vocational Skills Development programme, Painting and
Decorating. It was especially written and designed to be delivered in
schools and communities in Tuvalu, and other Pacific island nations.
This programme was initiated by the Tuvaluan Ministry of Education, and
supported by the Commonwealth of Learning.
Writers: Uelese Obrien Nauti Primary School Taualo Penivao Nauti Primary School Vaelei Pouniu Faikimua Primary School
Esau Teagai Nauti Primary School
Moti Silo Tolise Primary School
Instructional Design Editor: Michael Coghlan
Layout & Adviser: Alison Mead Richardson
Commonwealth of Learning
© 2017 Commonwealth of Learning
Unless otherwise specified all material in this publication is made available
under a Creative Commons Attribution-ShareAlike 4.0 Licence
(international): http://creativecommons.org/licenses/by-sa/4.0/

1
Basic Painting Skills
Contents
Welcome ................................................................................................. 3
Who is this course for? ............................................................................ 3
What does the course cover?: .................................................................. 3
How does the course work? ..................................................................... 4
The role of your teacher .......................................................................... 4
Projects ........................................................................................................ 5
Glossary .................................................................................................. 5
Introduction to Basic Painting Skills ......................................................... 8
Review Questions .................................................................................... 9
Topic 1: Painting Tools and Safety .......................................................... 10
Learning Objectives ................................................................................... 10
Basic tools and materials for painting ....................................................... 10
Tools and their Uses .................................................................................. 11
Abrasive Tools and Their Uses .................................................................. 12
Other Materials and their Uses ................................................................. 13
Painting Safely....................................................................................... 14
Occupational Health and Safety (OHS) ..................................................... 15
Work Health and Safety Checklist .......................................................... 15
Before painting .......................................................................................... 15
Clean-up .................................................................................................... 16
Paint Disposal and Recycling……………………..............................................17
Topic 1 Review Questions ...................................................................... 17
Activity .................................................................................................. 18
Topic 2: Surface Preparation .................................................................. 19
Learning Objectives ................................................................................... 19
Surface Preparation .................................................................................. 19
Abrasion .................................................................................................... 20
2
Sandpaper ................................................................................................. 20
Orbital Sanders .......................................................................................... 20
Topic 2 Review Questions ...................................................................... 21
Practical Work ....................................................................................... 21
Topic 3: Applying Paint .......................................................................... 22
Learning Objectives ................................................................................... 22
Painting Process ........................................................................................ 22
Applying Paint ........................................................................................... 25
Topic 3 .................................................................................................. 25
Review Questions .................................................................................. 25
Practical work ............................................................................................ 26
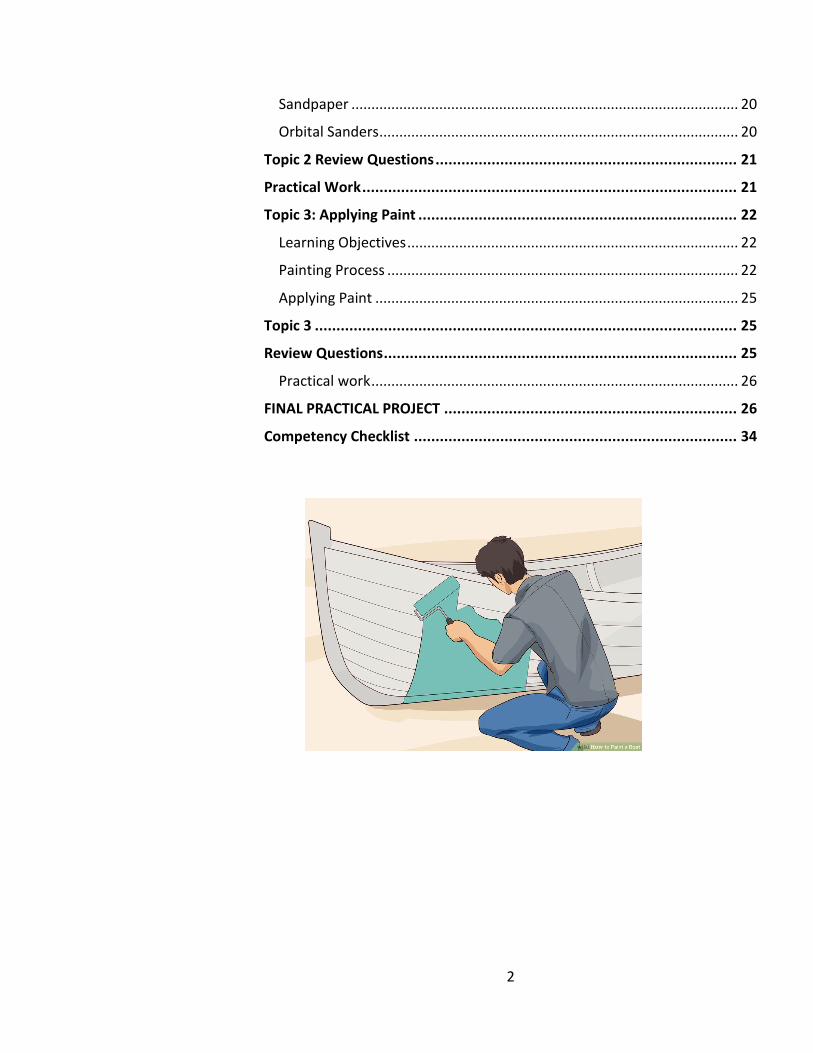
FINAL PRACTICAL PROJECT .................................................................... 26
Competency Checklist ........................................................................... 34

3
Welcome Welcome to this course on basic painting skills. In this course you will work
with an experienced painter and teacher who will help you to go through
this workbook and learn about the skills of painting. They will also help you
to practice these skills until you become competent. If you continue to
learn more about painting and decorating and complete the whole
programme, you may be able to earn a living as a painter and decorator.
While it takes time to become an experienced painter, it is a task that can be mastered by men and women. Many women work as professional painters.
Who is this course for? This course is an introduction to basic painting skills. It is written for people
who have little or no experience with painting. It is intended for students
starting from Year 7 and beyond, school leavers, and community groups
who have little knowledge or experience of painting.
What does the course cover? This basic painting course covers three topics:
Topic 1: Painting – Tools and Safety
This section introduces various painting tools, materials and toxic
chemicals, and how they are used in the painting process. Painting tools like
brushes, roller, and tray are used to apply paint directly to surfaces.
Materials like drop sheet, gloves, and dust mask protect the painting and
the painter during the job. Chemicals like turpentine and kerosene are to
clean painting tools after the job.
Topic 2: Surface Preparation
This section shows how you prepare surfaces for painting. The job requires
abrasion to fill holes and cracks on surfaces and smooth them for painting.
Before painting, surfaces should be dust-free and clean.
4
Topic 3: Applying Paint
This final section of the course covers three major layers of painting. Primer
painting is applied on surfaces as the foundation of painting. The second
coat is known as ‘undercoat’. It is the main coat of paint before a finishing
coat is applied. The three painting coats are applied in all painting jobs.
How does the course work? The course will be led by a teacher or experienced trades person who will
show you the details of using painting tools, materials, and chemicals
correctly. Also, they will guide you in the skills of surface preparation and
applying of coats of paint.
The course will work best with small groups of students who can talk about
things and learn from each other.
Student Workbook
Your workbook has activities, pictures and explanations as well as space to
make your own notes in the margin.
The four topics in your workbook have separate sections for most of the
key areas – such as: painting materials, uses, and safety; surface
preparation; and application of paint. You teacher will work through each
section with you, talking about the tools and materials and show you how
to use them.
There is a Student Checklist at the back of the workbook for your teacher to
tick-off as you complete each section.
The role of your teacher Your teacher for this course is a competent tradesperson with knowledge of
painting methods and skills in using painting tools. They will show how to
work with painting correctly and tell you how well your skills are
developing.
Your teacher will:
Have samples of painting work, tools, materials and paint for you to
work with
Explain the written material
Show you
o How to use painting tools and other materials
o How to work safely with paint and other materials
5
o How to prepare surfaces before painting
o How to apply different coats of paint
Watch your work and tell you how are you doing
Complete your student checklist to record the work you have done
Projects
This course tells you a lot about painting tools, materials and chemicals,
surface preparation, and the application of painting coats on surfaces.
However, you really need to learn and apply them practically. Learning and
application of painting can only be perfect after a lot of practice.
During the course you will work on a project that uses the skills you have
learned. You will prepare and paint:
A piece of furniture or other object you bring from home
An old boat with quality painting applied on its surface. (This will be
done as a whole class project.)
Glossary This is a handy list of words used in the workbook with their meanings. If
you find a word in the workbook that you do not understand, you can check
back here to learn what it means.
Absorbent surface surfaces that are able to take in and hold paint
Abrasive Tool tools that are used on surfaces to produce a smooth finish before the first coat of paint is put on
Acrylic a water-based paint which is easily put on, dries quickly, and does not get darker over time.
Bond the ability of one layer of paint to stick to another
Bristles short thick hairs of a paint brush
Brush tool used by the painter to paint any surface
Chemicals substances suitable for painting work, e.g. paint stripper, bleach, cleaning solutions, etc.
Combustible Combustible materials are materials that can burn or catch fire
Coarse word to describe part of surface which can be rough, bristly, abrasive
6
Drop-sheet sheet used for covering the floor, furniture, or anything you want to protect when painting
File cutting tool used to remove/smooth rough and sharp edges from metal
Flat sheen Term used to describe paint – meaning softly shining surface or appearance
Gloss Paints paint giving shiny finish: a paint that produces a smooth, shiny, hard-wearing surface
Grit measure used for coarseness of sandpaper
Hardwood A type of wood that has a fine /tight grain texture with a clear grain pattern usually running the length of the timber.
Kerosene (Kero) also known as lamp oil; a combustible liquid widely used as a fuel in industry and households, but used in painting mainly to clean brushes.
Low sheen Term used to describe paint – meaning dull surface or appearance
Mineral Turpentine (Turps)
used to thin oil based paint, and to clean brushes used with oil base paints.
Non-absorbent surface surfaces that are not able to take in and hold paint, for example, some plastics
Oil based paint that dries quite slowly with little change in colour so corrections are easy to make
Opacity ability of a paint film when applied at a given thickness to hide previous coat from view
Paint Brush tool used to apply paint on surfaces
Particle board board made from sawdust, shavings, and other wood waste generated by manufacturers
Porous term to describe surfaces that have tiny holes in them. These holes allow water, oils, and other substances to penetrate the surface
Primer the first coat applied to a surface. It is the foundation of the painting and helps to protect the surface
Putty a type of cement used for filling small holes and cracks in wood and walls
Putty knife a tool used to apply putty
Sealer a special purpose coating that can be broadly divided into three types; Acrylic based, Oil Based and Spirit Based
7
Semi-gloss a finishing coat that gives a quality appearance
Softwood wood with an open grained texture with patterns that stand out when coated
Spirit acts as a barrier to range of stains, inks, dyes etc. from staining through the top coat
Stopping applying thick creamy putty filler on open grain or fine cracks in timber,
Thinner liquid, like turpentine, used to thin paint or varnishto the desired consistency
Turps or turpentine; a liquid used to clean paint brushes
Undercoat Undercoats are applied after primer or sealer and before finishing coats.

8
Introduction to Basic Painting Skills
This course is designed to help you learn basic skills in painting. Painting
can help preserve materials and make objects and buildings around us
more appealing inside and out. Painting and decorating are valuable trade
skills and people with these skills are always in demand. It can be a
rewarding career.
What you will learn
At the end of the course you will be able to:
identify relevant painting materials
demonstrate safe use of these materials
demonstrate basic painting skills
9
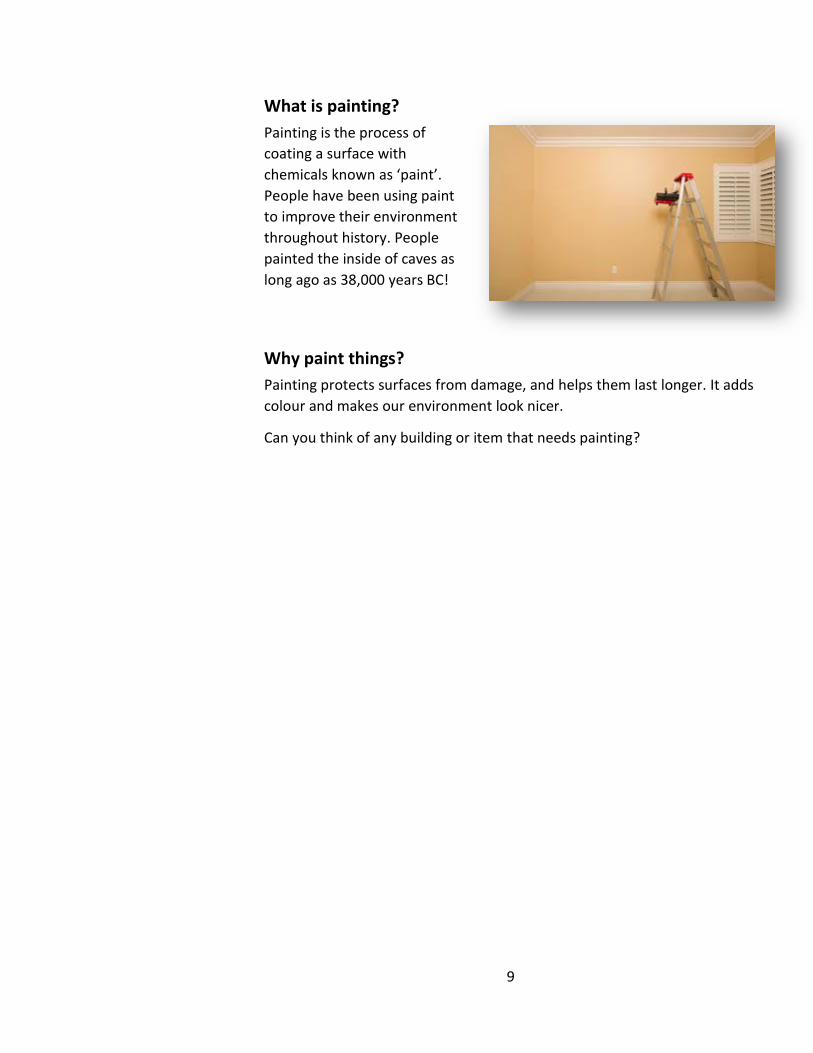
What is painting?
Painting is the process of
coating a surface with
chemicals known as ‘paint’.
People have been using paint
to improve their environment
throughout history. People
painted the inside of caves as
long ago as 38,000 years BC!
Why paint things?
Painting protects surfaces from damage, and helps them last longer. It adds
colour and makes our environment look nicer.
Can you think of any building or item that needs painting?
10
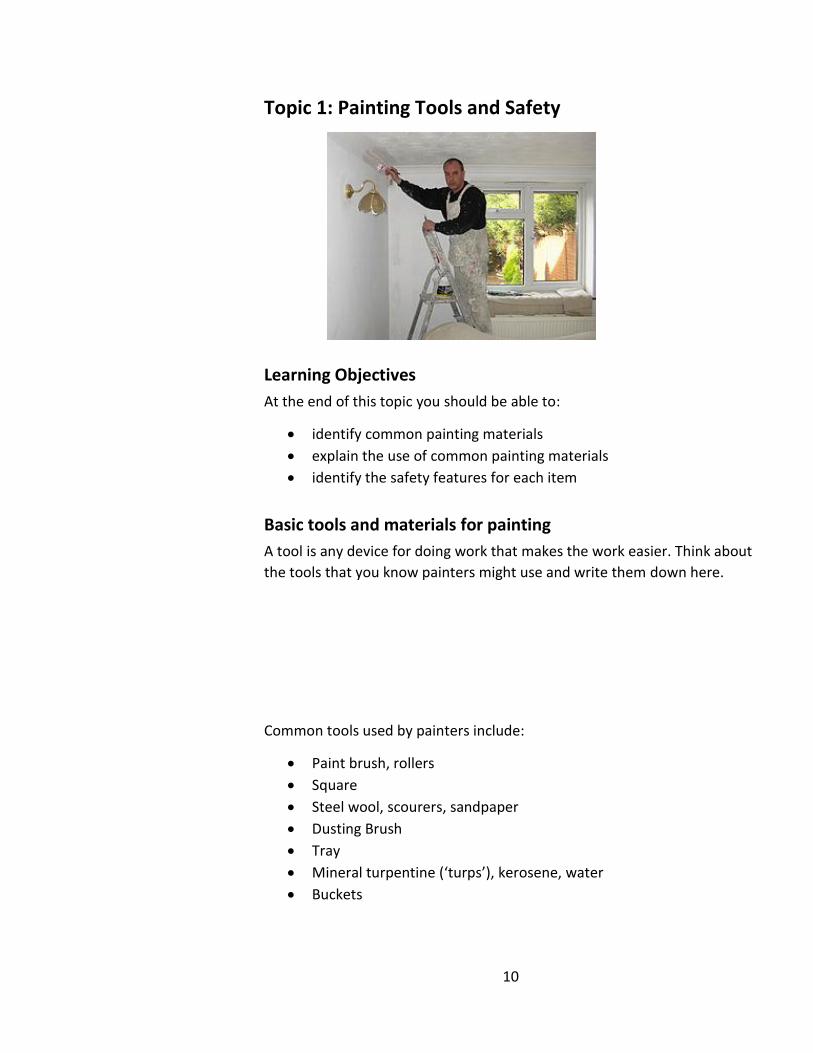
Topic 1: Painting Tools and Safety
Learning Objectives
At the end of this topic you should be able to:
identify common painting materials
explain the use of common painting materials
identify the safety features for each item
Basic tools and materials for painting
A tool is any device for doing work that makes the work easier. Think about
the tools that you know painters might use and write them down here.
Common tools used by painters include:
Paint brush, rollers
Square
Steel wool, scourers, sandpaper
Dusting Brush
Tray
Mineral turpentine (‘turps’), kerosene, water
Buckets

11
Tools and their Uses
Brush - is a tool use for coating smaller areas, corners, and narrow spaces.
Hammer- for punching and pushing nails before painting a surface
Paint Roller - is a tool for painting larger areas/ spaces. Can be also be used for texture painting.
Dusting Brush - is a tool used for removing dust and dirt before painting
Tray - for dipping the roller brush before applying paint.
12
Putty Knife - for applying fillers to small holes before painting
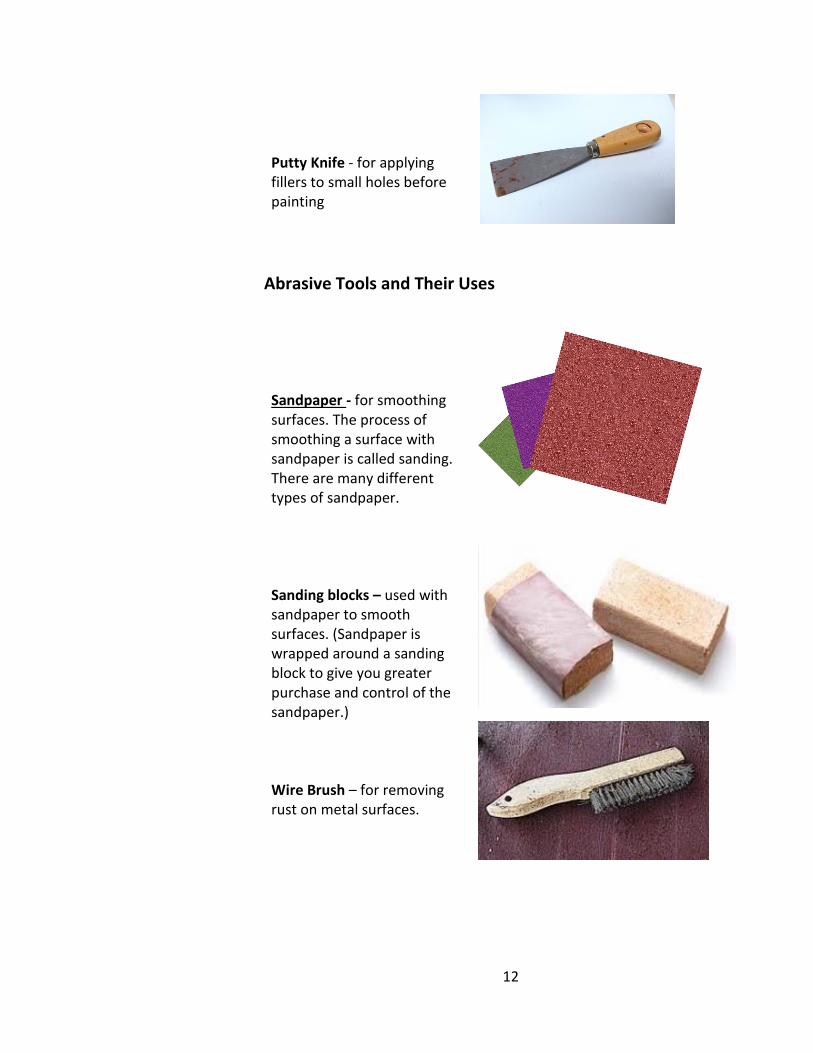
Abrasive Tools and Their Uses
Sandpaper - for smoothing surfaces. The process of smoothing a surface with sandpaper is called sanding. There are many different types of sandpaper.
Sanding blocks – used with sandpaper to smooth surfaces. (Sandpaper is wrapped around a sanding block to give you greater purchase and control of the sandpaper.)
Wire Brush – for removing rust on metal surfaces.
13
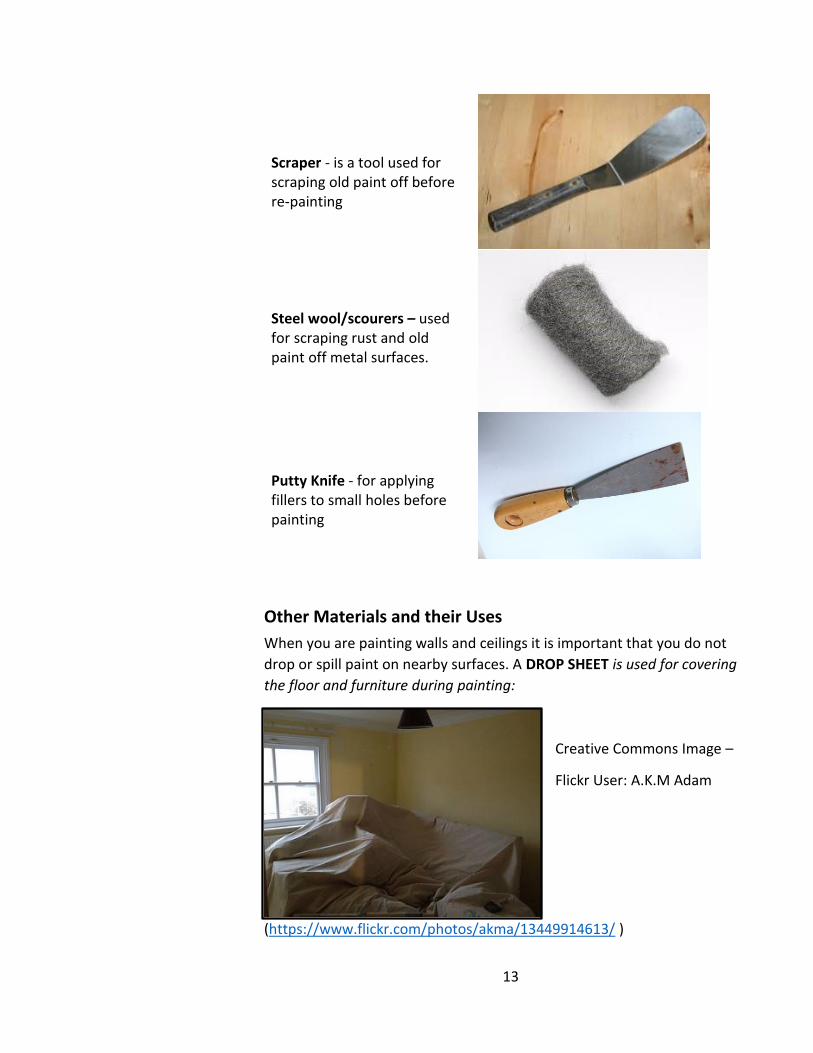
Scraper - is a tool used for scraping old paint off before re-painting
Steel wool/scourers – used for scraping rust and old paint off metal surfaces.
Putty Knife - for applying fillers to small holes before painting
Other Materials and their Uses
When you are painting walls and ceilings it is important that you do not
drop or spill paint on nearby surfaces. A DROP SHEET is used for covering
the floor and furniture during painting:
Creative Commons Image –
Flickr User: A.K.M Adam
(https://www.flickr.com/photos/akma/13449914613/ )
14
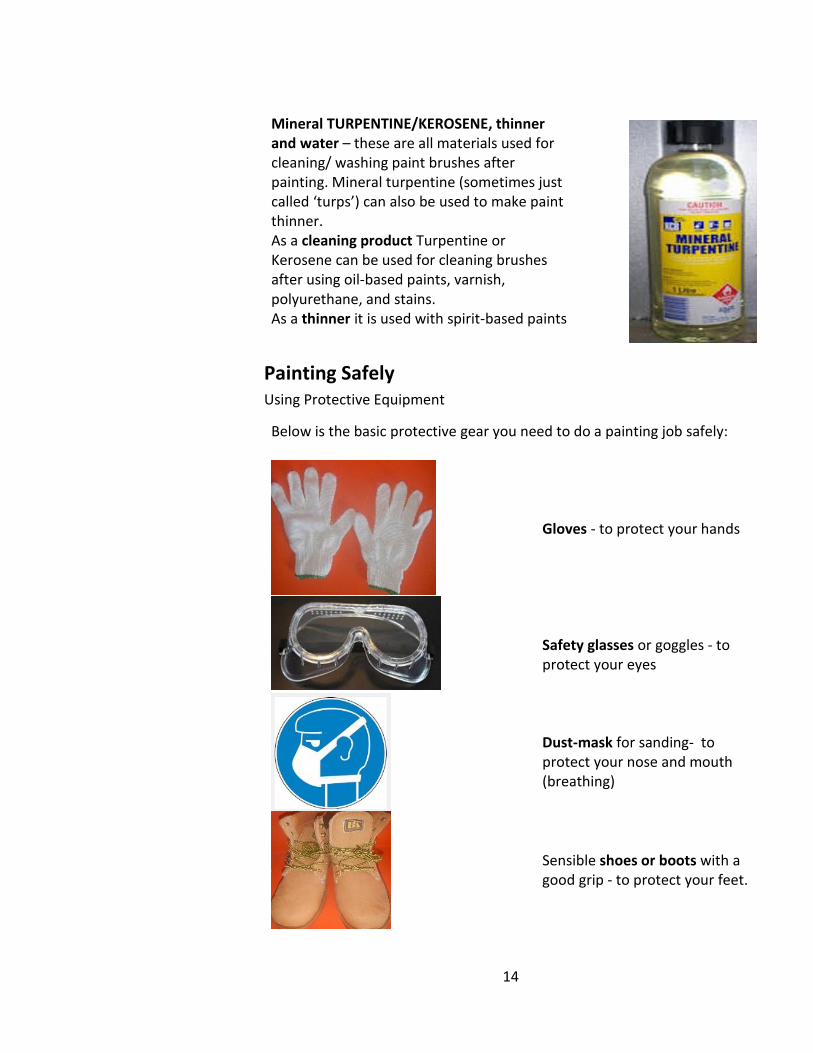
Mineral TURPENTINE/KEROSENE, thinner and water – these are all materials used for cleaning/ washing paint brushes after painting. Mineral turpentine (sometimes just called ‘turps’) can also be used to make paint thinner. As a cleaning product Turpentine or Kerosene can be used for cleaning brushes after using oil-based paints, varnish, polyurethane, and stains. As a thinner it is used with spirit-based paints
Painting Safely Using Protective Equipment
Below is the basic protective gear you need to do a painting job safely:
Gloves - to protect your hands
Safety glasses or goggles - to protect your eyes
Dust-mask for sanding- to protect your nose and mouth (breathing)
Sensible shoes or boots with a good grip - to protect your feet.
15
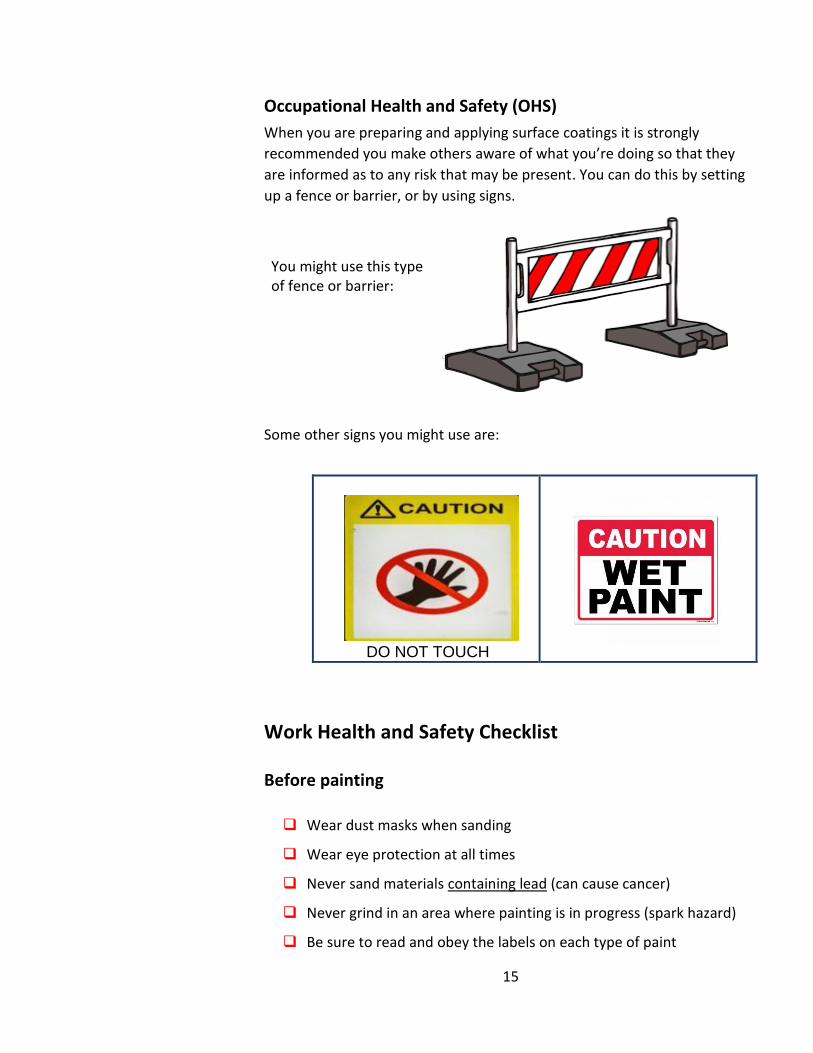
Occupational Health and Safety (OHS)
When you are preparing and applying surface coatings it is strongly
recommended you make others aware of what you’re doing so that they
are informed as to any risk that may be present. You can do this by setting
up a fence or barrier, or by using signs.
You might use this type of fence or barrier:
Some other signs you might use are:
DO NOT TOUCH
Work Health and Safety Checklist
Before painting
Wear dust masks when sanding
Wear eye protection at all times
Never sand materials containing lead (can cause cancer)
Never grind in an area where painting is in progress (spark hazard)
Be sure to read and obey the labels on each type of paint
16
Clean-up
Wash all paint brushes with Mineral turpentine /kerosene /water
/thinner
Store paint and all liquids in their original containers. If, for some
reason, this is not possible, be sure the new container is clearly
labelled
Keep all liquids away from sources of heat, sparks, and fires.
Wash your hands after you have finished cleaning up
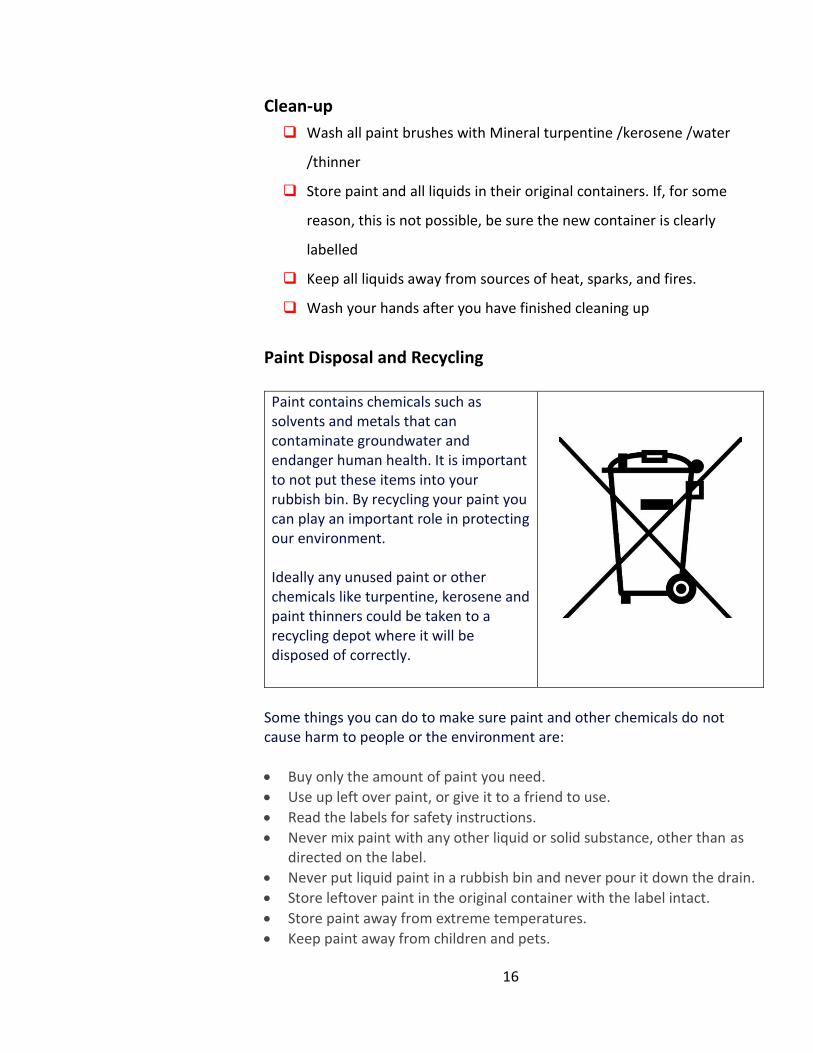
Paint Disposal and Recycling
Paint contains chemicals such as solvents and metals that can contaminate groundwater and endanger human health. It is important to not put these items into your rubbish bin. By recycling your paint you can play an important role in protecting our environment. Ideally any unused paint or other chemicals like turpentine, kerosene and paint thinners could be taken to a recycling depot where it will be disposed of correctly.
Some things you can do to make sure paint and other chemicals do not cause harm to people or the environment are:
Buy only the amount of paint you need.
Use up left over paint, or give it to a friend to use.
Read the labels for safety instructions.
Never mix paint with any other liquid or solid substance, other than as directed on the label.
Never put liquid paint in a rubbish bin and never pour it down the drain.
Store leftover paint in the original container with the label intact.
Store paint away from extreme temperatures.
Keep paint away from children and pets.
17
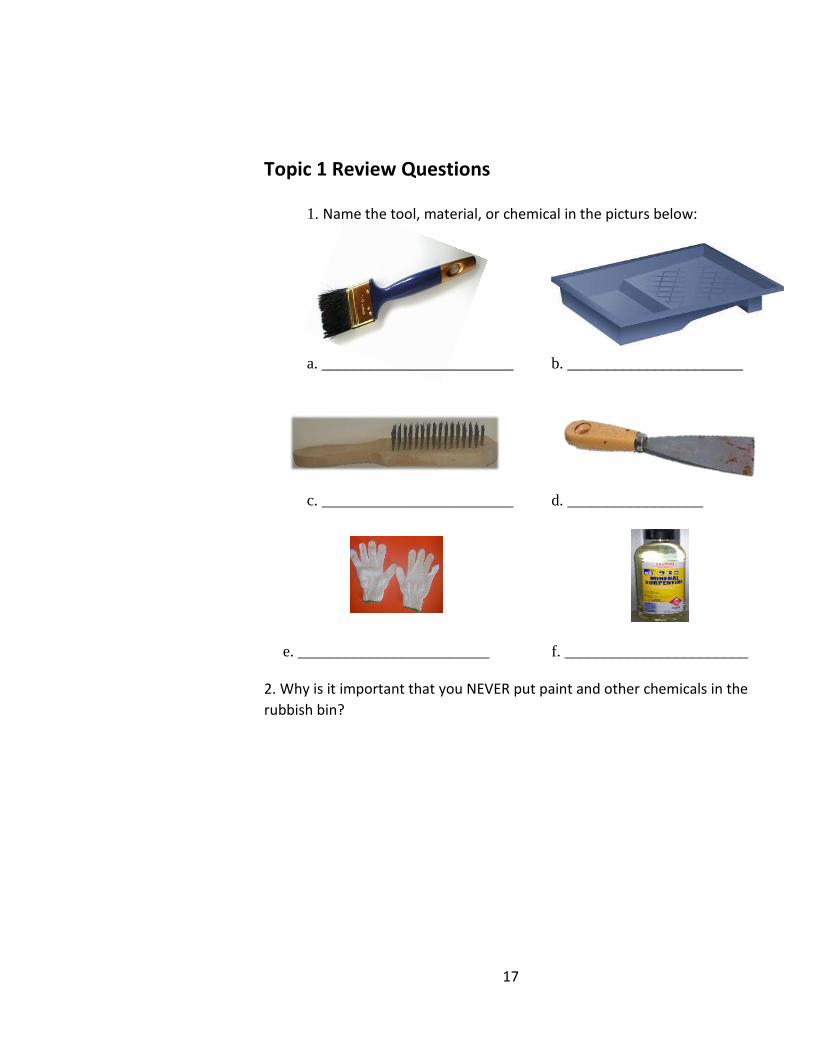
Topic 1 Review Questions
1. Name the tool, material, or chemical in the picturs below:
a. ________________________ b. ______________________
c. ________________________ d. _________________
e. ________________________ f. _______________________
2. Why is it important that you NEVER put paint and other chemicals in the
rubbish bin?
18
Topic 1 Activity This activity is best done in small groups in discussion with your teacher.
After painting, you need to do a clean-up. How would you clean up:
a) the work area?
b) How do you store tools?
c) How do you store chemicals like Mineral Turpentine or Kerosene?
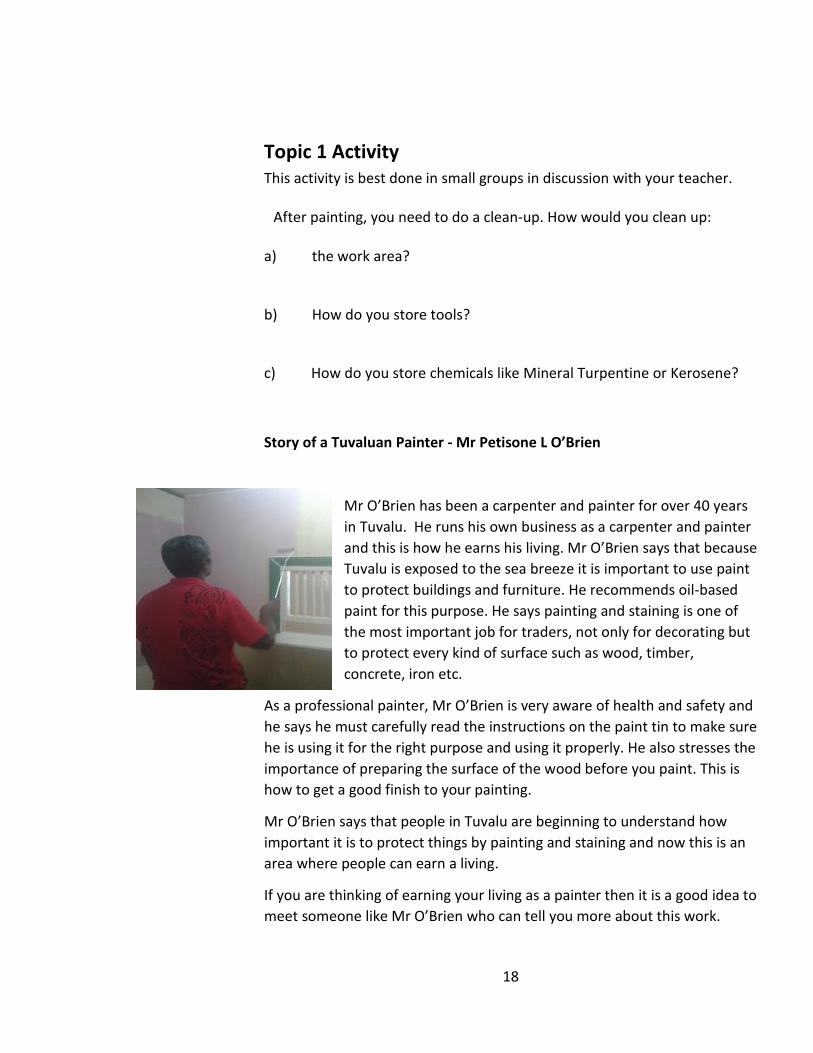
Story of a Tuvaluan Painter - Mr Petisone L O’Brien
Mr O’Brien has been a carpenter and painter for over 40 years
in Tuvalu. He runs his own business as a carpenter and painter
and this is how he earns his living. Mr O’Brien says that because
Tuvalu is exposed to the sea breeze it is important to use paint
to protect buildings and furniture. He recommends oil-based
paint for this purpose. He says painting and staining is one of
the most important job for traders, not only for decorating but
to protect every kind of surface such as wood, timber,
concrete, iron etc.
As a professional painter, Mr O’Brien is very aware of health and safety and
he says he must carefully read the instructions on the paint tin to make sure
he is using it for the right purpose and using it properly. He also stresses the
importance of preparing the surface of the wood before you paint. This is
how to get a good finish to your painting.
Mr O’Brien says that people in Tuvalu are beginning to understand how
important it is to protect things by painting and staining and now this is an
area where people can earn a living.
If you are thinking of earning your living as a painter then it is a good idea to
meet someone like Mr O’Brien who can tell you more about this work.
19
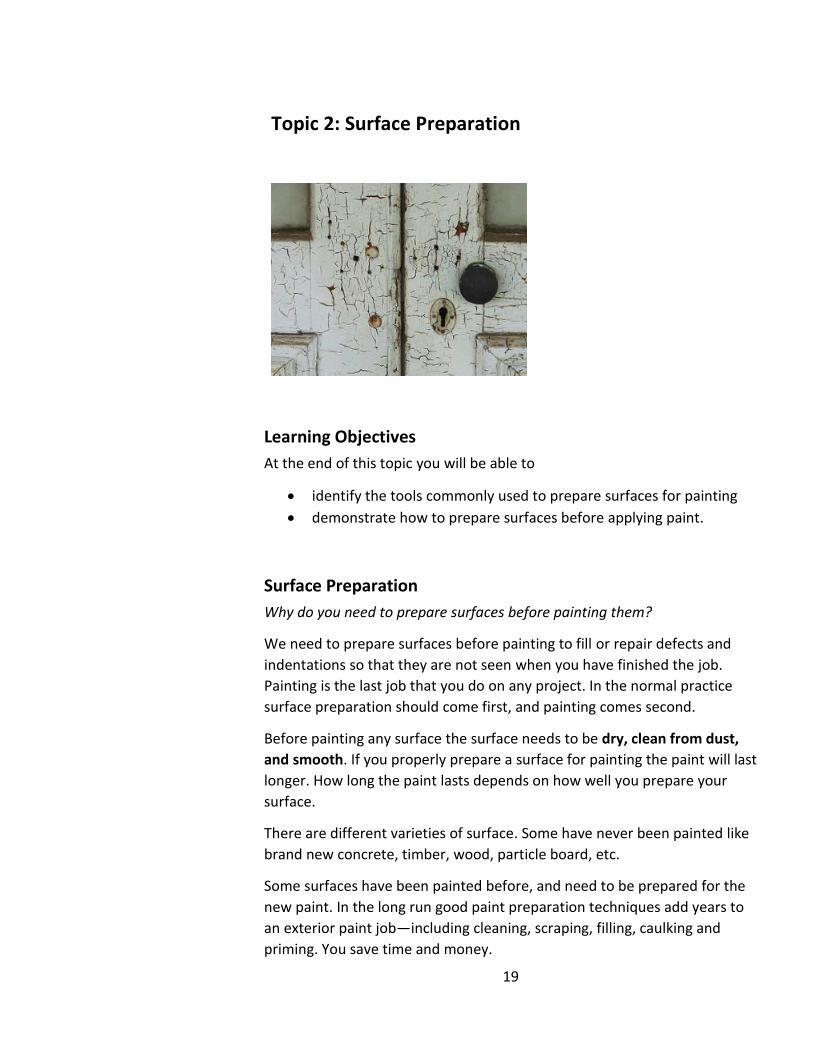
Topic 2: Surface Preparation
Learning Objectives
At the end of this topic you will be able to
identify the tools commonly used to prepare surfaces for painting
demonstrate how to prepare surfaces before applying paint.
Surface Preparation
Why do you need to prepare surfaces before painting them?
We need to prepare surfaces before painting to fill or repair defects and
indentations so that they are not seen when you have finished the job.
Painting is the last job that you do on any project. In the normal practice
surface preparation should come first, and painting comes second.
Before painting any surface the surface needs to be dry, clean from dust,
and smooth. If you properly prepare a surface for painting the paint will last
longer. How long the paint lasts depends on how well you prepare your
surface.
There are different varieties of surface. Some have never been painted like
brand new concrete, timber, wood, particle board, etc.
Some surfaces have been painted before, and need to be prepared for the
new paint. In the long run good paint preparation techniques add years to
an exterior paint job—including cleaning, scraping, filling, caulking and
priming. You save time and money.
20
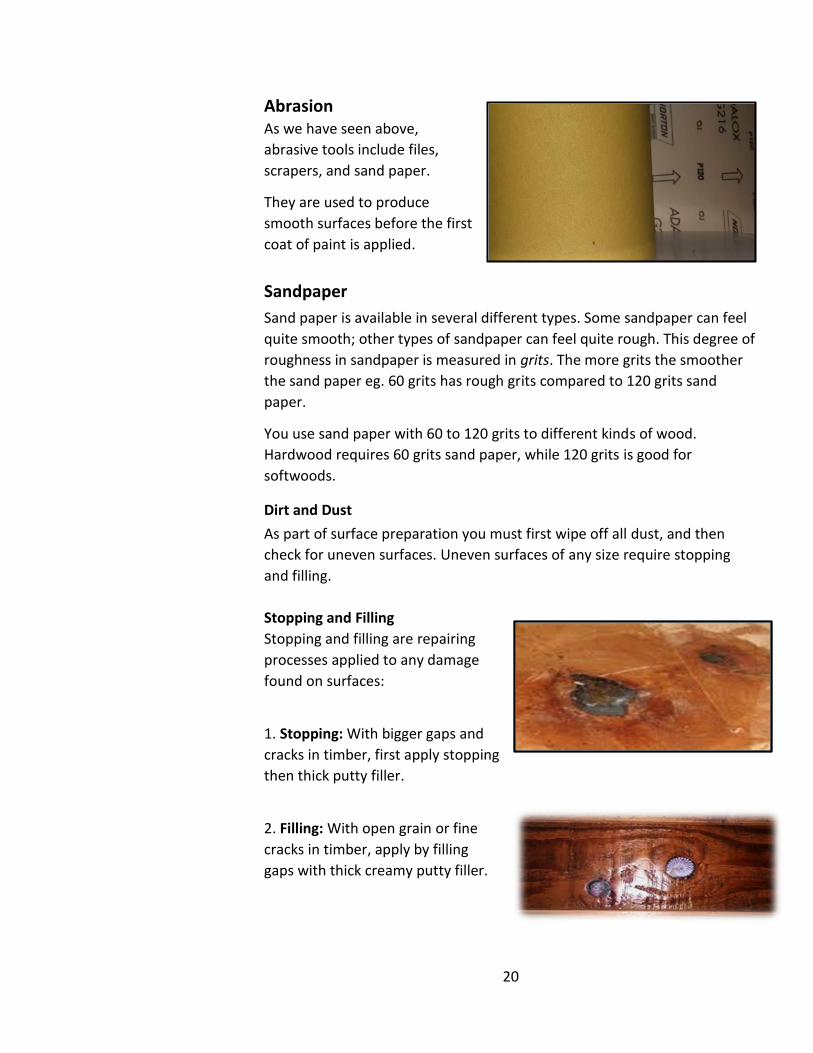
Abrasion As we have seen above,
abrasive tools include files,
scrapers, and sand paper.
They are used to produce
smooth surfaces before the first
coat of paint is applied.
Sandpaper
Sand paper is available in several different types. Some sandpaper can feel
quite smooth; other types of sandpaper can feel quite rough. This degree of
roughness in sandpaper is measured in grits. The more grits the smoother
the sand paper eg. 60 grits has rough grits compared to 120 grits sand
paper.
You use sand paper with 60 to 120 grits to different kinds of wood.
Hardwood requires 60 grits sand paper, while 120 grits is good for
softwoods.
Dirt and Dust
As part of surface preparation you must first wipe off all dust, and then
check for uneven surfaces. Uneven surfaces of any size require stopping
and filling.
Stopping and Filling Stopping and filling are repairing
processes applied to any damage
found on surfaces:
1. Stopping: With bigger gaps and
cracks in timber, first apply stopping
then thick putty filler.
2. Filling: With open grain or fine
cracks in timber, apply by filling
gaps with thick creamy putty filler.
21
Topic 2 Review Questions (You can do these questions alone or with others in the class.)
1. Why prepare surfaces before painting them?
2. Name two processes that prepare surfaces for painting.
3. Which grit number determines smooth sand paper?
4. Which sandpaper is smoother – 60 grits or 120 grits?
5. How can you fill surfaces with bigger gaps and cracks?
Practical Work Before we move on to the next section about applying paint, we are going
to practice preparing surfaces for painting. You are going to practice surface
preparation on a piece of furniture or other object that you bring from
home.
Bring any furniture or other object from home that requires painting.
Firstly, you are going to prepare the surface and get the furniture ready for
painting. You will need to clean it, sand or scrape it, and then fill in any
cracks or holes.
You might like to work in pairs. Ask your teacher for assistance if you’re not
sure what to do.

22
Topic 3: Applying Paint
Learning Objectives
At the end of this topic students should be able to
Identify the four stages or layers of applying paint to surfaces
demonstrate the 4 stages or layers of how to apply paint
after surface preparation.
Painting Process
Good painting involves more than applying just one coat paint. Good
painting involves applying a number of coats of paint to a surface. Each coat
has a specific purpose, and they are applied in the following order:
1. (first) Primer/sealer
2. (second) Undercoats
3. (third) Finishing Coats
First coat: Primer or Sealer
Primer
Primer is the first coat of paint applied
on the surface.
23
Primer helps protect and maintain the surface in its original condition.
The function of primer includes:
Changing absorbent surfaces to non-absorbent
Providing strong adhesion between a number of coatings
Protecting metals against rust and corrosion.
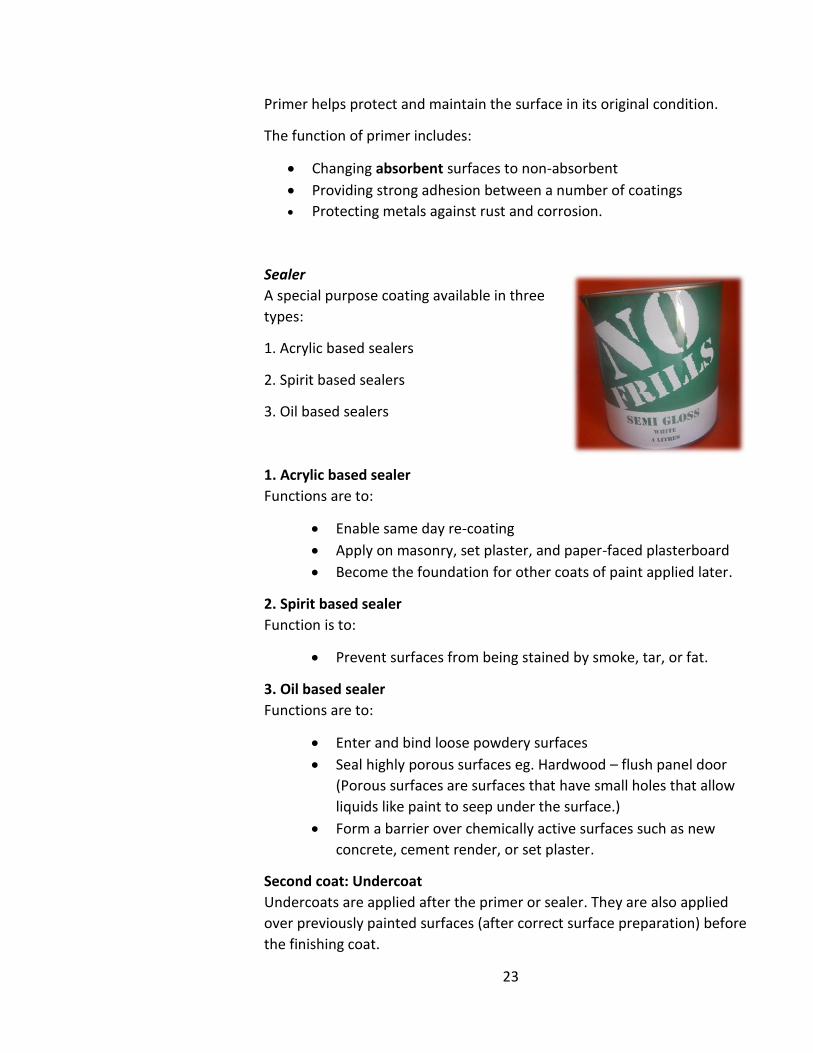
Sealer
A special purpose coating available in three
types:
1. Acrylic based sealers
2. Spirit based sealers
3. Oil based sealers
1. Acrylic based sealer
Functions are to:
Enable same day re-coating
Apply on masonry, set plaster, and paper-faced plasterboard
Become the foundation for other coats of paint applied later.
2. Spirit based sealer
Function is to:
Prevent surfaces from being stained by smoke, tar, or fat.
3. Oil based sealer
Functions are to:
Enter and bind loose powdery surfaces
Seal highly porous surfaces eg. Hardwood – flush panel door
(Porous surfaces are surfaces that have small holes that allow
liquids like paint to seep under the surface.)
Form a barrier over chemically active surfaces such as new
concrete, cement render, or set plaster.
Second coat: Undercoat
Undercoats are applied after the primer or sealer. They are also applied
over previously painted surfaces (after correct surface preparation) before
the finishing coat.
24
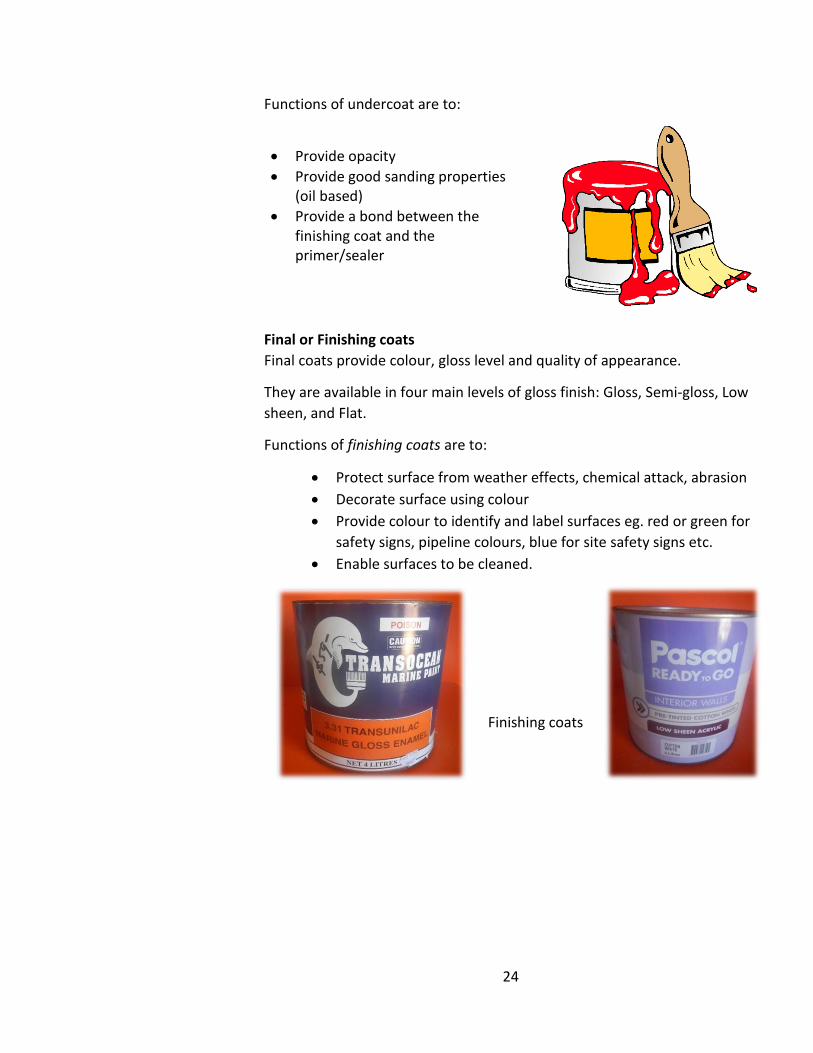
Functions of undercoat are to:
Provide opacity
Provide good sanding properties (oil based)
Provide a bond between the finishing coat and the primer/sealer
Final or Finishing coats
Final coats provide colour, gloss level and quality of appearance.
They are available in four main levels of gloss finish: Gloss, Semi-gloss, Low
sheen, and Flat.
Functions of finishing coats are to:
Protect surface from weather effects, chemical attack, abrasion
Decorate surface using colour
Provide colour to identify and label surfaces eg. red or green for
safety signs, pipeline colours, blue for site safety signs etc.
Enable surfaces to be cleaned.
Finishing coats
25
Applying Paint
There are four (4) steps to follow when applying paint with a paint brush:
1. Dip - dip brush in the paint (about 3-5 cm)
2. Tap – tap brush on the side of the can to allow excess
paint to drip back into the can
3. Cover – cover surface with paint lightly
4. Layout – apply paint on surface for smooth finishing
The paint should flow smoothly onto the surface with little effort. When the
brush begins to drag, stop and reload the brush with more paint. Use long
strokes to apply paint. Avoid dabbing small areas with paint as this leaves
marks on the surface you’re painting.
When you use long, consistent strokes the brush will leave a slight ridge as
you paint but these will disappear as the paint sets.
The four (4) steps when applying paint with a roller:
1. Dip – dip roller in the tray of paint
2. Tap – tap roller on the side of the tray
3. Zigzag – apply the roller on the surface in a zigzag
4. Layout – apply paint on surface
Topic 3 Review Questions
1. Name three stages in preparing surfaces for painting.
2. How many painting coats are there altogether?
3. What painting jobs require a sealing coat?
4. Which painting tool requires a zigzag application?
26
Practical work
For Topic 2 you brought a piece of furniture or other object from home and
prepared the surface so it is ready for painting. You are now going to apply
coats of paint to improve the furniture or object. The furniture should look
better when you take it home!
Ask your trainer how many coats of paint you need to apply to the
furniture, and which types of coat. They will make sure you have the right
kind of paint to do the job. If you’re not sure you have the right paint, make
sure you check with your trainer before you start.
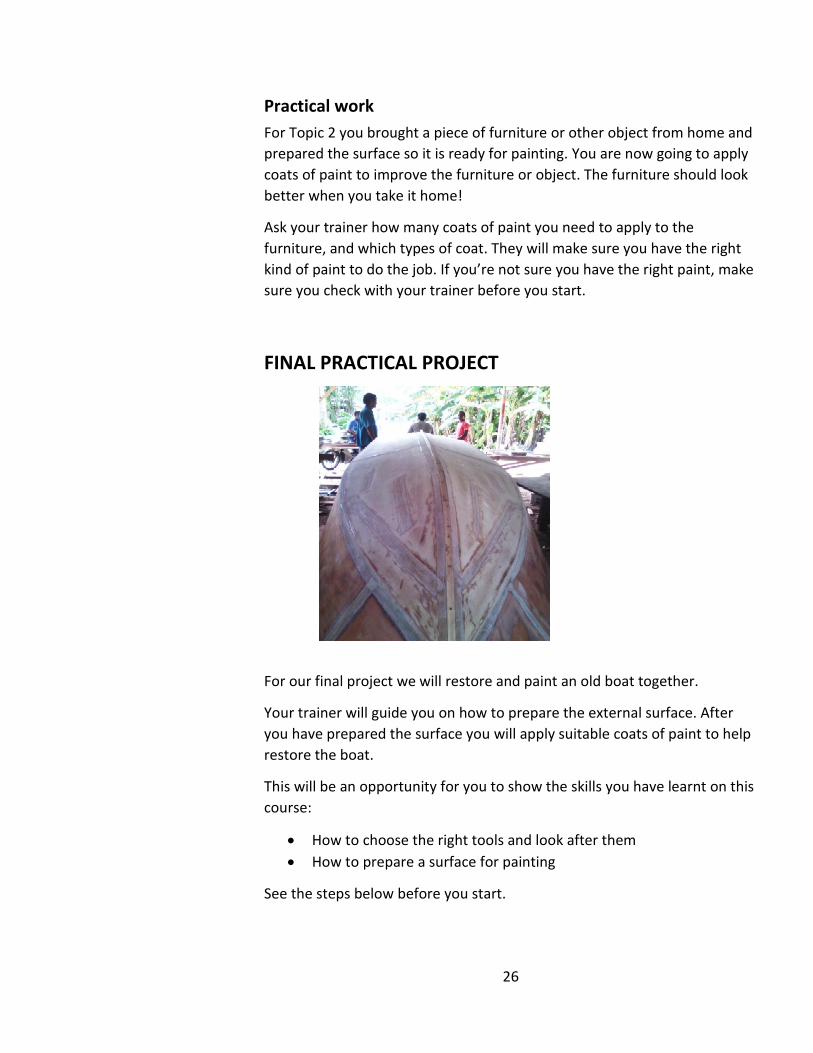
FINAL PRACTICAL PROJECT
For our final project we will restore and paint an old boat together.
Your trainer will guide you on how to prepare the external surface. After
you have prepared the surface you will apply suitable coats of paint to help
restore the boat.
This will be an opportunity for you to show the skills you have learnt on this
course:
How to choose the right tools and look after them
How to prepare a surface for painting
See the steps below before you start.

27
How to Paint a Boat Painting a boat takes a lot of time and effort, from preparing the hull to
buying the paint, but anyone can do it with some simple equipment and a
few open afternoons.
Preparing the boat
1. Clean the boat thoroughly. You need to get everything off of the
surface, from dirt and sand to marine life and seaweed. It is easiest to
clean the surface of the boat as it comes out of the water. Use a high-
pressure hose, a scrapper, and rags to make the boat very clean.
2. Remove hardware from the boat. You want to take off as much as
possible, down to any aluminum window siding. This could cause a crease
between the hardware and the paint, which will allow water to get into the
cracks and ruin the paint.
Anything you cannot remove you should cover in painter's
tape to keep clean and protected.
28
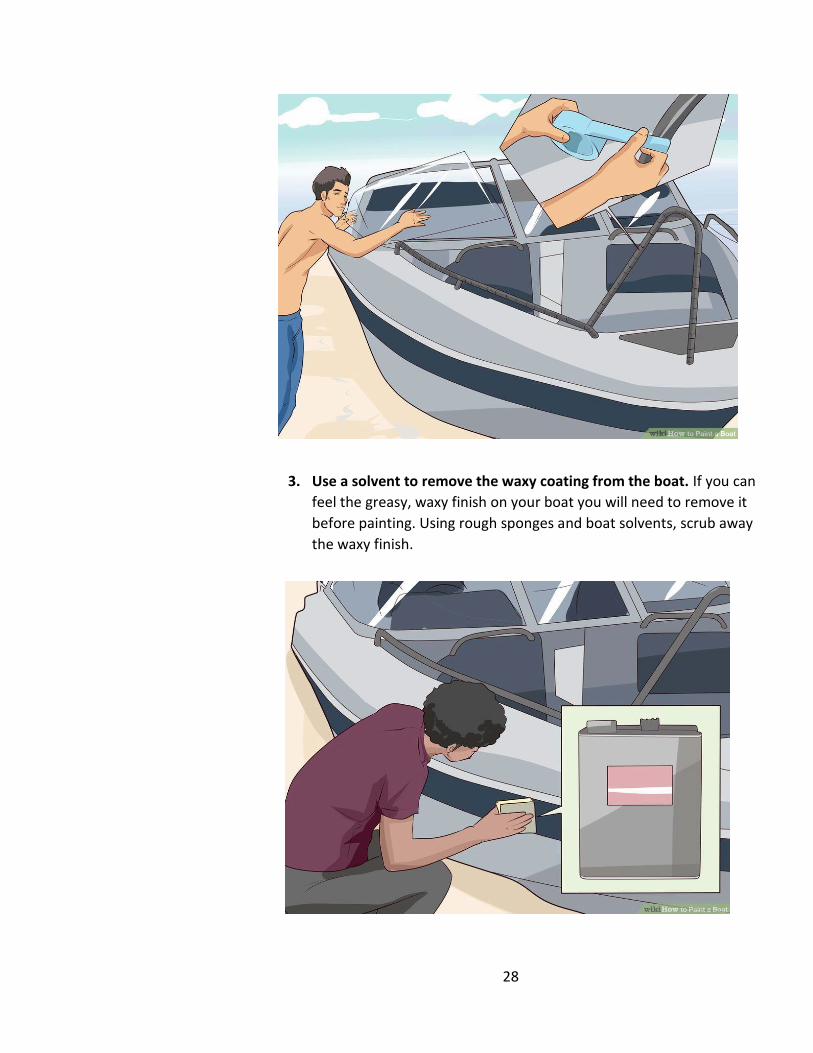
3. Use a solvent to remove the waxy coating from the boat. If you can
feel the greasy, waxy finish on your boat you will need to remove it
before painting. Using rough sponges and boat solvents, scrub away
the waxy finish.
29
a. Generally, running your finger along the surface, top or
bottom, will tell you if there is still a coating-- it feels like a
candle or a freshly waxed car.
b. If you are in any doubt about the coating, go over the boat
again - paint will not stick to this waxy surface, so it all needs
to go.
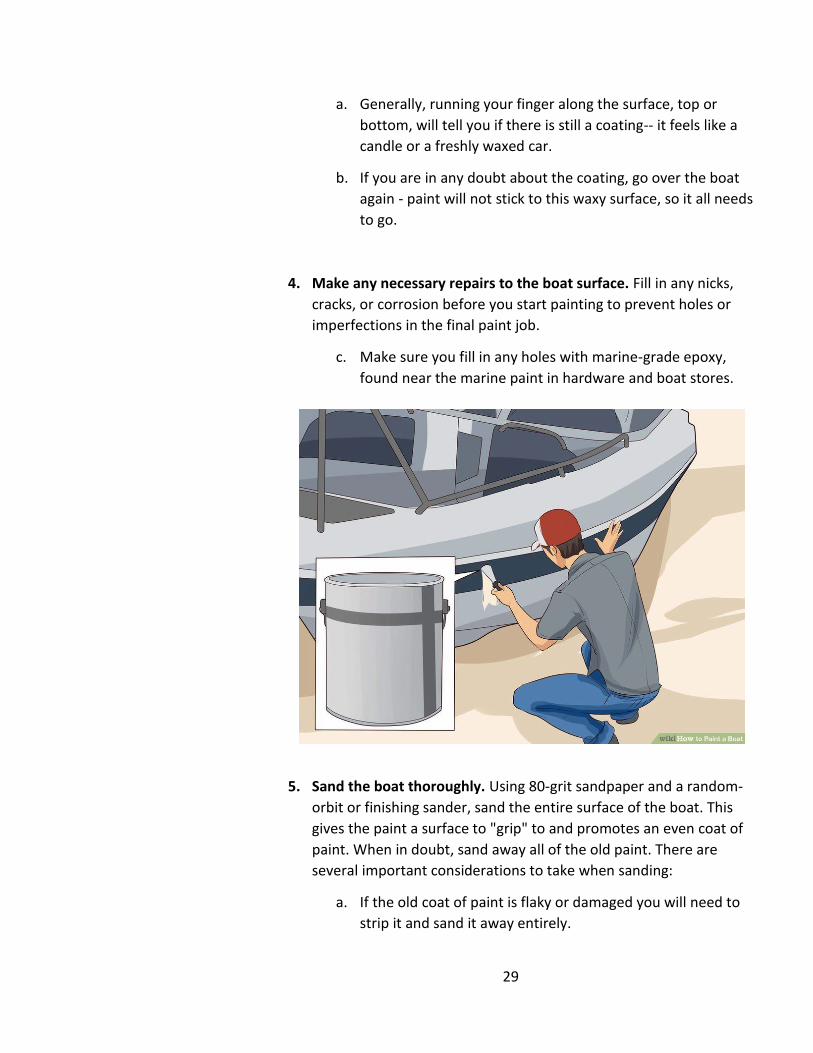
4. Make any necessary repairs to the boat surface. Fill in any nicks,
cracks, or corrosion before you start painting to prevent holes or
imperfections in the final paint job.
c. Make sure you fill in any holes with marine-grade epoxy,
found near the marine paint in hardware and boat stores.
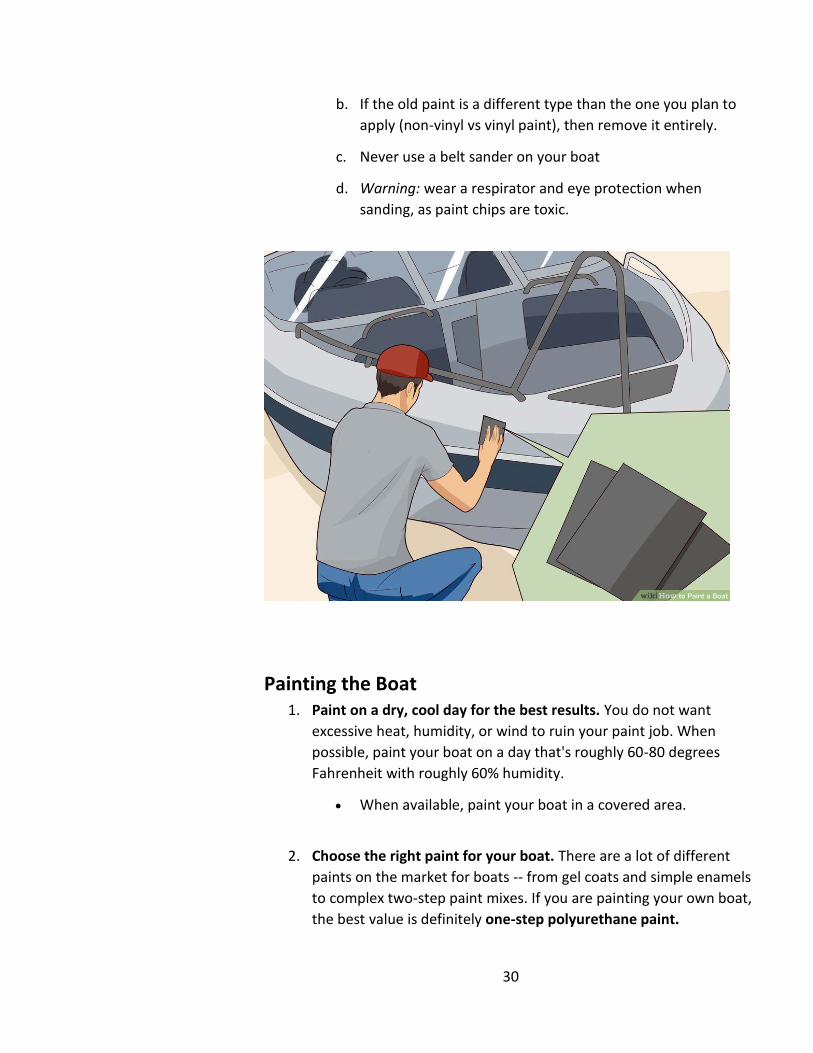
5. Sand the boat thoroughly. Using 80-grit sandpaper and a random-
orbit or finishing sander, sand the entire surface of the boat. This
gives the paint a surface to "grip" to and promotes an even coat of
paint. When in doubt, sand away all of the old paint. There are
several important considerations to take when sanding:
a. If the old coat of paint is flaky or damaged you will need to
strip it and sand it away entirely.
30
b. If the old paint is a different type than the one you plan to
apply (non-vinyl vs vinyl paint), then remove it entirely.
c. Never use a belt sander on your boat
d. Warning: wear a respirator and eye protection when
sanding, as paint chips are toxic.
Painting the Boat 1. Paint on a dry, cool day for the best results. You do not want
excessive heat, humidity, or wind to ruin your paint job. When
possible, paint your boat on a day that's roughly 60-80 degrees
Fahrenheit with roughly 60% humidity.
When available, paint your boat in a covered area.
2. Choose the right paint for your boat. There are a lot of different
paints on the market for boats -- from gel coats and simple enamels
to complex two-step paint mixes. If you are painting your own boat,
the best value is definitely one-step polyurethane paint.
31
Two step polyurethane paint, while longer lasting, takes
precise mixing and application techniques to use.
Most gel coats, excepting expensive, high-end options, will
fade in 1-2 years.
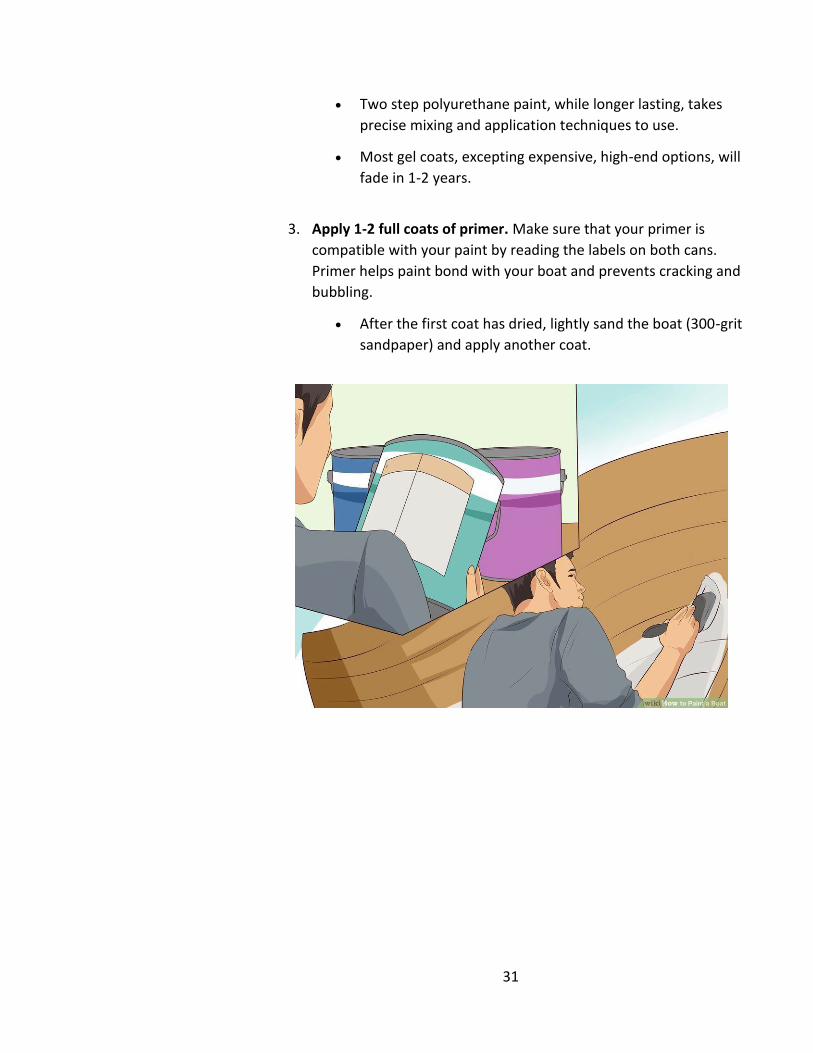
3. Apply 1-2 full coats of primer. Make sure that your primer is
compatible with your paint by reading the labels on both cans.
Primer helps paint bond with your boat and prevents cracking and
bubbling.
After the first coat has dried, lightly sand the boat (300-grit
sandpaper) and apply another coat.
32
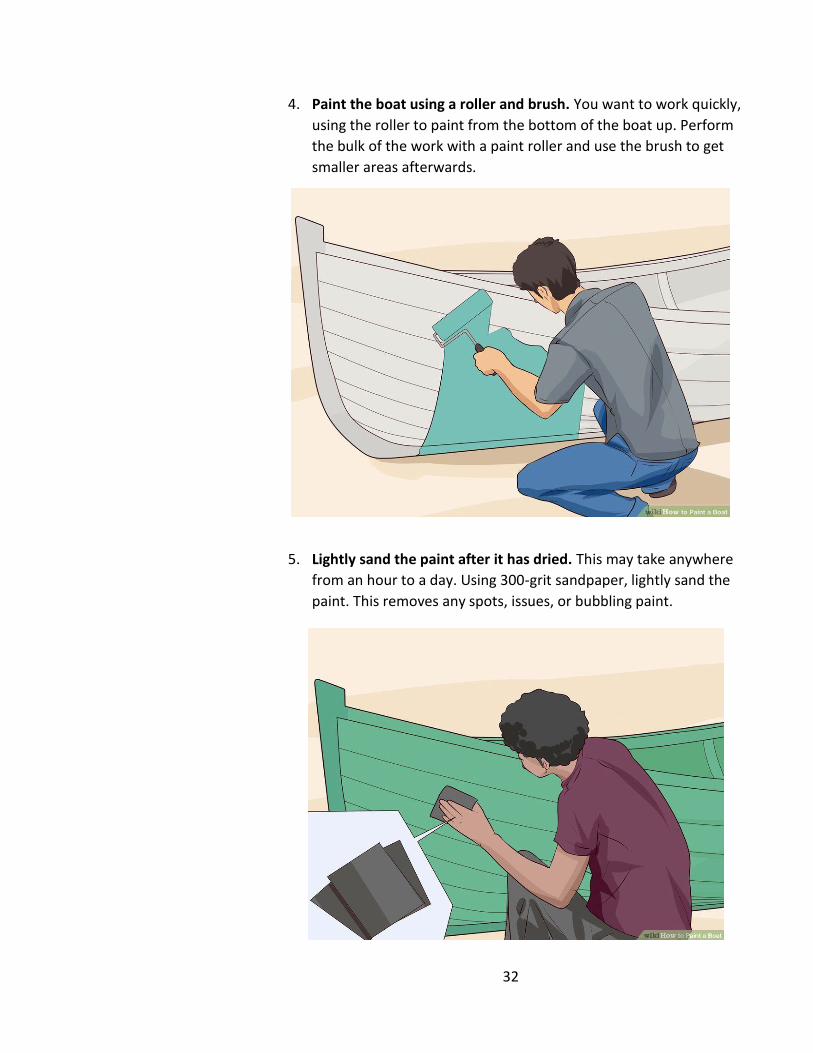
4. Paint the boat using a roller and brush. You want to work quickly,
using the roller to paint from the bottom of the boat up. Perform
the bulk of the work with a paint roller and use the brush to get
smaller areas afterwards.
5. Lightly sand the paint after it has dried. This may take anywhere
from an hour to a day. Using 300-grit sandpaper, lightly sand the
paint. This removes any spots, issues, or bubbling paint.
33
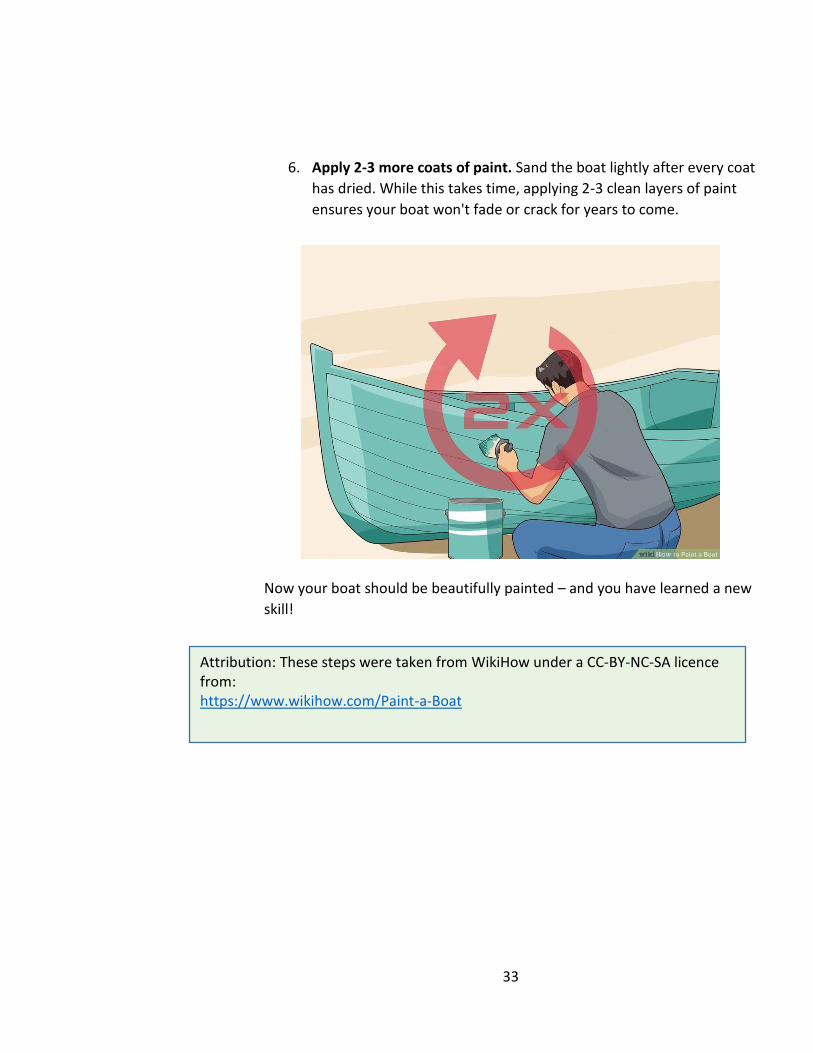
6. Apply 2-3 more coats of paint. Sand the boat lightly after every coat
has dried. While this takes time, applying 2-3 clean layers of paint
ensures your boat won't fade or crack for years to come.
Now your boat should be beautifully painted – and you have learned a new
skill!
Attribution: These steps were taken from WikiHow under a CC-BY-NC-SA licence from: https://www.wikihow.com/Paint-a-Boat

34
Basic Painting Skills Competency Checklist To be completed by the teacher
Topic 1 - Materials, Uses and Safety Student is able to identify common painting materials and their uses.
Basic Tools and their uses
o Hammer
o Paint Brush
o Paint Roller
o Dusting Brush
o Tray
o Putty Knife
Abrasive tools and their uses
o Sand paper
o Wire brush
o Scraper
o Steel wool
o Sanding block
Other Materials and their Uses
o Drop Sheet
o Mineral Turpentine
o Thinner
………………………………………………………………………….
has completed the course “Basic Painting Skills”.
I have worked with them through the course and I have
seen them complete the exercises and activities I have
marked on this checklist.
Name of Trainer: ……………………………………………..
Signed: …………………………………………………………….

35
Basic Safety Gear and their Uses
o Gloves
o Goggles
o Dust mask
o Safety shoes
Student can identify Basic Safety Rules; Occupational Health and Safety
(OHS)
o Safety before painting
o Safety when cleaning up
Topic 2: Surface Preparation Student is able to demonstrate:
o Surface preparation
o The process of Abrasion/Sanding
o Stopping and filling
Topic 3: Applying Paint Student is able to;
o Identify the four layers or coats
o Explain what each coat or layer is for
o Apply coats of paint correctly