art and craft 1-5 - kidshubs.com · web viewbible story animations and animated segment titles...
TRANSCRIPT

Arts and Crafts Skill Sessions Page 1
Arts & CraftsSessions 1-10
ContentsSession Craft Theme Bible Passages Page
Session 1 Paint a Creation Picture Creation Genesis 1:1-3 3
Session 2 Create a sky in a room Light – part 1 Genesis 1:3-5, 14-19; John 8:12 7
Session 3 Make a tin Lantern Light – part 2 Matthew 5:14-16 9
Session 4 Make a gift for a friend Friendship 1 Samuel 18:1-4 11
Session 5 Sew an apron Armour of God Ephesians 6:13-17 14
Session 6 Handprint rainbow with paint Noah obeys God Genesis 6:5-22, 7:1-24 17
Session 7 Bible Band or bracelet The Gospel Matthew 28:18-20 20
Session 8 Scrapbook Prayer Journal Prayer – part 1 Matthew 6:5-14 23
Session 9 Weekly Devotional Journal Prayer – part 2 Daniel 1:8-21, 3:1-30 25
Session 10 Make a Time craft God’s Time Ecclesiastes 3:1-8 27

INTRODUCTION TO KIDSHUBS
KidsHubs is a free global idea that helps to reach out to, and mentor children and young people. It can be used as part of an existing program or group, in a church, a school, a camp, or to start a new group in your community. The KidsHub idea is to help children learn how to follow Jesus from the Bible at the same time as learning a new skill for life. It is also a great way to encourage adults and teenagers to interact with and disciple children. KidsHubs can be based around just about anything—sport, media, photography, drama, cooking, farming, chess, music and so much more. KidsHubs is not an organisation, but a free idea and a movement.
KIDSHUBS SKILL SESSIONS AND HOW THEY CAN BE USEDKidsHubs Skill Sessions can be used as a plug-in to your existing Bible curriculum lesson (e.g. BibleMAX from http://www.max7.org/resource/BibleMAX ) with a two-hour-plus duration time. A KidsHubs Skill Session could also be used on alternate weeks if a club is limited to one hour Sessions, e.g. a group could do a BibleMAX lesson one week and a KidsHubs plug-in on the next week, and so on. KidsHubs Skill Sessions used at camps could be extended to three hours by introducing extra activities.
These Art and Craft sessions already have Bible content, and use the 7ways Leader’s Guide on Max7 – use the leaders guide to build variety into the Bible activities. http://www.max7.org/resource/7waysLG
KIDSHUBTVAlongside KidsHubs Sessions is KidsHubTV, an exciting new kids club-style TV program, which mirrors the local KidsHub groups featuring a Bible story and theme and skills demonstrated by a cast of children along with young adult leaders.
It is being produced in an open-source way so that producers across the world can have free access to core global content. Bible story animations and animated segment titles and music have been created and shared to build local versions of the show.
The long-term goal of this production is to see whole programs and short segments produced by local KidsHubs and shared via mobile phones and the KidsHubTV website with a view to broadcasting if possible.
It is hoped that as a result of seeing KidsHub videos children would be encouraged to participate in a local KidsHub or church group and/or visit the KidsHubTV website. And a church wanting to grow their children’s ministry in a region (like India) where the show is screening, could download Bible lessons written to complement each episode, and benefit from the momentum of the show.
Arts and Crafts Skill Sessions Page 2
ARTS AND CRAFTS 1 | CREATION
OVERVIEW OF THE SESSION
Skill: Paint a creation pictureBible Passage: Genesis 1:1-3Main Idea: Our creativity is a gift from God the CreatorMaterials Needed: paper, pencils, crayons, paints, paintbrushes, creation pictures, Bible.
Reflection for Leaders: The Creation story teaches us a few things about God and ourselves: God’s authority - God created all life and so He has authority over humanity and all of creation. He is great - He controls the world, He is all powerful. God is creative - He made all things good and perfect, each with different and unique character-
istics. Human beings are special - we are very special to Him because we are made in His image and
God has given us the responsibility to look after the world. We are able to think and make deci-sions unlike animals.
THE SESSION PLAN
Bible Time (20 mins) 1. Introduce
Our creativity is a gift from God the Creator.
What have you created lately?
2. Explore:Using Genesis 1:1-3, choose one of the 7 Ways to explore a Bible story in 7 Ways Training Leader’s Guide on http://www.max7.org/resource/7waysLG Suggestion: Watch a video of the creation story, or have the children look at pictures of creation that you have gathered. See the line drawings at the end of this lesson.
You could also give children a sheet of paper to draw some of the things God created- or each day of creation, as they listen to the creation story.
3. Discussion of the Biblical theme
What is the sequence of the creation story?
How did God create the world?
What does the creation teach us about God?
What does the creation teach us about ourselves?
How are humans unique from the rest of creation?
What do you think is the most interesting thing that God created? Why?
What do you think is the worst or least interesting thing that God created? Why?
If God gave you a chance to change something in all creation, what would that be? Why?
Arts and Crafts Skill Sessions Page 3

4. Out in Creation (5min + 30 sec each)
Ask the children to go and find something that God created and bring it back to show the group. Allow 5 minutes to search and at least 30 seconds per child to show the item and say why it is significant.
5. Memory Verse:
“The heavens declare the glory of God; the skies proclaim the work of his hands.” Psalm 19:1 (NIV)
Suggestion: Find 16 large leaves and write a word on each leaf. Spread them out on the table in front of the children. Get the children to put the leaves in order, so the verse can be read. Then, to help them remember the verse, take away one leaf at a time while the children say the verse over and over. By the end there are no leaves left and they can say the verse by memory – or - choose one of the 7 Ways to memorize scripture.
6. Discussion Starters
While the children are doing their artwork, the leaders might like to start conversations about these topics below:
Faith: Art involves seeing what you are going to draw before you even draw. In the Bible this principle is called faith. Hebrews 11:1 says that faith is the assurance of things hoped for, the conviction of things not yet seen.
Patience: an art piece usually requires patience to get the task finished, and so we need to be patient while doing our artwork and focus on the finished product. Patience is one of the fruits of the Holy Spirit that each Christian needs to develop. Galatians 5:22
Creativity: Creativity is a fashioning or shaping or conceiving of something unique. God is the great example of creativity, for he was wildly creative in making our world. God also re-creates us, transforms us inside, when we ask the Holy Spirit into our lives.
It’s also a great opportunity to encourage the children with their creative efforts. Ask them where they think they got their love for drawing and painting from and where they got their ability to be creative.
Introduce the Skill (20 min)Each child is supplied with the equipment they need – paper, pencils, crayons, markers, paint, paintbrushes, etc.
1. Start with the skill of drawing with carbon/lead pencils. Teach them a basic skill, like how to draw a tree, or a flower, or a piece of fruit. First, show them your finished drawing, which they will copy. Then show them one step at a time and make sure all children in the group are keeping up. Give individual coaching and help where needed.
2. If they are managing well, introduce to them the skill of using crayons or paints (whatever your interest and skill). As above, show them your finished picture first, then take them through, step-by-step how to do it. Maybe start with something like a sunrise scene, using well-known local geography (river, hills etc.).
Apply the Skill (50 min)Give each child one of the seven days of creation to draw or paint.
Arts and Crafts Skill Sessions Page 4

1. Ask the children to sit and think for a minute about what they want to create. Ask them to imagine it in their mind, before they start drawing anything. Remind them that this is like faith – believing you can do it without seeing it.
2. Now ask them to plan the picture on another smaller piece of paper with a carbon/lead pencil. It would be good for the leader to give some feedback to each child at this point.
3. Now they can start on their final copy. As the children are working, the leader goes around the group, spending individual time with each child as they are working on their creation, helping them with the use of the tools and with ideas. Give each child lots of positive comments, particularly related to their creativity.
Ask them to stop after 50 minutes, even if they haven’t finished. They can finish their art at home.
De-Brief (10 min)Ask the children about their creations –
What was fun, what was hard, what was frustrating, what was rewarding?
Did they need patience?
Could they see their own creativity coming out?
Does it look like the picture they had in their heads before they started?
Introduce Next Skill (5 min)The next session will be about light, and the children will be making a night sky and a day sky.
Pray (10 min)Choose one of the 7 Ways to Pray, in 7 Ways Training Leader’s Guide. Suggestion: Ask the children to pray in short sentences thanking God for whom he is and for the skill and lessons they have learned.
Dismiss (5 mins)Choose one of the 7 Ways to dismiss children. Suggestion: Way 4. Take home an object. The children are encouraged to take home their item of nature they collected from outside, and also their artwork.
Arts and Crafts Skill Sessions Page 5

Arts and Crafts Skill Sessions Page 6

ARTS AND CRAFTS 2 | LIGHT - PART 1
OVERVIEW OF THE SESSION
Skill: Create a sky in a roomBible passage: Genesis 1:3-5, 14-19, John 8:12Main idea: God created light for usMaterials needed: Colour construction paper, constellation patterns, pencils, crayons, colour, markers, highlighters, black cloth, white cloth, glue, pins, and scissors
Reflection for Leaders: God created light on day one of creation. Then He created the sun, moon and stars on day four. He decided His creations were all good. Then when Jesus walked on the earth He claimed that He is the light of the world. It’s important for the children to learn that just as we cannot survive without light, we cannot live without the light of Jesus in our lives. John 8: 12 says that when we follow Jesus we will have the light that gives life. The next session teaches the children how they can shine with the light of Christ.
THE SESSION PLAN
Bible Time (20 mins) 1. Introduce
What are some similarities between the sun and Jesus?
2. Explore:
Using the reading from Genesis 1:1-3 and 14-19, choose one of the 7 ways to explore a Bible story in 7 Ways Training Leader’s Guide on http://www.max7.org/resource/7waysLG Suggestion: Way 3. Draw the main events of the story. Or watch a video of the creation story, or have the children look at pictures of creation.
3. Discussion of the Biblical theme
On what day did God create light?
What would have happened if God had created the animals before creating the light and the plants?
Why do we need light?
Read John 8:12 together. Ask the children to explain what this means. Why is Jesus so im-portant to us?
4. Memory Verse:
“The Lord is my light and salvation – whom shall I fear?” Psalm 27:1 (NIV)
Choose one of the 7 Ways to memorize scripture. Suggestion: Way 1. Build up word by word, by repeating each word after the leader, adding one more word each repetition.
5. Discussion Starters
While the children are doing their artwork, the leaders might like to start conversations about how clever God is to create light – particularly the sun to keep us alive, and how this is an analogy for Jesus our light who keeps us alive.
Arts and Crafts Skill Sessions Page 7

Introduce the Skill (20 min)Skills the children need to learn include:
how to use pencils and colours or markers how to use and how not to use a pair of scissors
(including safety precautions)The sky has a lot of constellations with lots of different stars and God created some to shine during the day and others during the night. Show the children the pictures of the constellations you have gathered. Make sure they are constellations you can see in your night sky.The white cloth represents day while the black cloth represents night. Hang them on opposite sides of the room. If you can’t get cloth, you could use cardboard boxes flattened and taped together. Paint one black, and the other pale blue.
Apply the Skill (60 min)Provide all the necessary materials and allow the children to choose the materials they need to draw the different things that God created to give us light – sun, moon, stars.After drawing the shapes, the children cut them out.Using the pictures of constellations you have gathered, children can design the stars on the night-time cloth in the shapes of your favourite constellations before gluing them on.Lastly, they all help to hang the sun on the daytime cloth and the moon and star constellations on the night-time cloth using craft glue to stick them.If you would like more time for this session, ask ‘Debriefing questions’ while the children are working, and also ‘Introduce the Next Skill’ at this time- it will give you 10 more minutes of Art time.
De-Brief (5 min)Ask the children about their day and night sky pictures – what was fun, what was hard, what was frustrating, what was rewarding.
Introduce Next Skill (5 min)The next KidsHub art and craft session will be the second light session, and the children will be making tin lanterns.
Pray (5 min)Choose one of the 7 Ways to Pray, in 7 Ways Training Leader’s Guide on... http://www.max7.org/resource/7waysLG Suggestion: Way 2. Small group prayer. Each child prays a sentence of praise to God.
Dismiss (5 mins)Choose one of the 7 Ways to dismiss children in 7 Ways Training Leader’s Guide on http://www.max7.org/resource/7waysLG Suggestion: Way 3. Chant. Repeat the Memory Verse together.
Arts and Crafts Skill Sessions Page 8
Constellation, the Southern Cross can only been seen from the Southern Hemisphere.
Image Source: www.abc.net.au

ARTS AND CRAFTS 3| LIGHT – PART 2
OVERVIEW OF THE SESSION
Skill: Make a tin lantern Bible passage: Matthew 5:14-16Main idea: We can shine Jesus’ light and make a difference.Materials needed: For each child: a clean tin can, with all labels removed, graph paper and pencil, permanent marker, two pieces of thin wire, tea-light (or small) candle. To share: hammer, large long nail, a towel to lay the tin can on during the process, paint to decorate outside of tin can (optional).Preparation: If you have a freezer, put some sand in the tins, fill with water and put them in the freezer until frozen. Wet sand, hard packed in the tin might help if you don’t have a freezer. This helps the tins to keep their shape when they are being hit by the hammer.
Reflection for Leaders: In the previous ‘Light’ session the children learned that God created light and it was good. Light is important for life, and this gives a deeper meaning to Jesus’ statement, ‘I am the light of the world’. In this session, we will continue with the theme of light and the children will learn that Jesus gives his light to us, so that we can shine this light and make a difference in our lives for good.
THE SESSION PLAN
Bible Time (20 mins) 1. Introduce
Ask the children to name all the different types of light we use in our lives.
2. Explore:
Using the reading from Matthew 5:14-16, choose one of the 7 ways to explore a Bible story in 7 Ways Training Leader’s Guide on http://www.max7.org/resource/7waysLG Suggestion: Way 1. Make a model. Have a torch or a candle and a bowl to put over the light, as someone reads the Bible passage.
Discussion of the Biblical theme
If we are like light, where do we get this light from?
What sort of things can you do that will be like light for others? As a group make a big list.
What is the result of us shining our light? (God’s name will be praised)
Think of examples of someone putting their light under a bowl (or hiding their light)
What have you learned about God and yourself from this passage?
3. Memory Verse:
“Make your light shine, so that others will see the good you do and praise your Father in heaven” Matthew 5:16 (CEV)
Choose one of the 7 Ways to memorize scripture in 7 Ways Training Leader’s Guide on http://www.max7.org/resource/7waysLG Suggestion: Way 6. Actions – make up actions to go with each phrase of the verse, e.g. light is a finger held up as a candle.
Arts and Crafts Skill Sessions Page 9
4. Discussion Starters
While the children are doing their artwork, the leaders might like to start conversations about how children can make the light of Christ shine in their life.
Introduce the Skill (20 min) Show the finished product or a photo of a lantern, so the
children know what they will be making.
Explain what each item they receive will be used for.
Provide a few spare tins for the children to practise hitting nails into it with a hammer.
Apply the Skill (60 min) Children draw a design on their graph paper. Leader offers encouragement and suggestions
for a really good design for each child. Provide each child with the materials they need.
Take the tins out of the freezer and lay on a towel in front of each child. If you weren’t able to freeze water in the tins, encourage the children not to hit too hard.
Each child marks dots on their tin according to their design. Then with the hammer and nail, they tap on the dots to make holes in the tins, to make an interesting design. Mark and make 2 holes at the open top of the tin to thread a wire handle through later.
Melt the ice and clean out the tin. Paint the outside of the tin (optional). Thread wire through the two holes at the top of the tin and close the loop to make a handle. Then the tin lanterns can now be hung up.
Give each child a tea-light or small candle to place in their tins.
Demonstrate how to light the candle without being burned.
Line up the tin lanterns to admire, and then blow out the candles together.
De-Brief (5 min)Ask the children about their lanterns – what was fun, what was hard, what was frustrating, what was rewarding. Do a simple safety demonstration to remind children about taking care of unshielded flames (the candle) in their home to prevent fires.
Introduce Next Skill (5 min)The next session will be about friendship, and the children will be making gifts to give their friends.
Pray (5 min)Choose one of the 7 Ways to Pray. Suggestion: Pray as a group for each other that you will be able to shine like lights for Jesus, setting a good example and pointing people to God.
Dismiss (5 mins)Choose one of the 7 Ways to dismiss children. Suggestion: Way 3. Interview. The Leader pretends to be a reporter and interviews each child and asks them the same question- ‘What will you try this week to shine like a light for Jesus?’ Make this fun and affirming.
Arts and Crafts Skill Sessions Page 10
Image source: www.greenkidcraftsblog.com

ARTS AND CRAFTS 4 | FRIENDSHIP
OVERVIEW OF THE SESSION
Skill: Make a gift for a friendBible Passage: 1 Samuel 18:1-4Main Idea: If you want a good friend you need to be a good friend.Materials Needed: Friendship bracelet – different colors of embroidery thread or wool, scissorsPlacemat – cardboard, pictures from magazines, markers, scissors, glue, adhesive plastic or laminating machine and sheets.Flowers – different colors of tissue paper, pipe cleaner, scissors
Reflection for Leaders: Sometimes friends are closer than brothers or sisters. Friends share affection, companionship, confidences, consideration, devotion, esteem, faithfulness, fellowship, harmony, helpfulness, loyalty, partnership, support, sympathy, trust, and understanding. Friends are a very special part of our lives. Above all, God is our very best friend. His friendship is a role model for all other friendships. When Jonathan met David, they became very close friends. Their friendship is one of the deepest and closest in the Bible, based on commitment to God and loving each other through the tough times. The Bible says that Jonathan was the person who should have hated David most because he was going to be made king instead of him, yet he loved him ‘as his own soul’.
THE SESSION PLAN
Bible Time (20 mins) 1. Introduce
As a group, make a list of qualities of a good friend.
What is a godly friendship?
2. Explore:Explore the reading from 1 Samuel 18:1-4, by choosing one of the 7 ways to explore a Bible story. Suggestion: Way 2. Interview. Choose two children to pretend to be David and Jonathan. The leader asks them questions about their friendship.
3. Discussion of the Bible theme
Who were David and Jonathan?
What was the relationship between David, Jonathan and Saul?
Although Jonathan was next in line to be King, do you think he minded that God had chosen David to be the next King? Why?
What does it mean to love someone ‘as your own soul’?
What do you think the robe, the armour, the sword, bow and belt symbolize (vs 4)?
Who would you like to be a better friend to?
4. Memory Verse:
“A friend loves at all times.” Proverbs 17:17a (NIV)
Arts and Crafts Skill Sessions Page 11

Choose one of the 7 Ways to memorize scripture. Suggestion: Way 6. Actions. Children make up an action for each word or phrase.
5. Discussion Starters
While the children are making their gifts, the leaders might like to start conversations about these topics below:
Trust: friendships require trust in order to work. Trust believes that the other person wants what is best for you and that they will not do anything to break that trust and cause you harm. Let the wristband you are making be a symbol that you trust that particular person – it is a circle that is not broken.
Love: all godly friendships should be based on love, as mentioned in 1 Corinthians 13:4-7. So as friendship wristbands are made, make them in love for that special friend in your life.
Patience: All friendships involve patience with one another because we are made different and we have different strengths and weaknesses. A strong friendship grows through each other’s weaknesses and sticks at it. So even with making wristbands, patience is needed to work on the job and stick at it until it’s finished.
Caring: Friends put your needs ahead of their own and are always there for you. Choose a design that you think your friend will like, and put aside your own likes.
Honesty: friends tell you honestly about things whatever they are. As you work on the wrist-band, be prepared that your friend might be honest and tell you that they don’t like it. Re-flect on how you will cope with their honesty.
Introduce the Skill (20 min)We have different friends and everyone is unique but as Christians all our friendships should honour God and honour our friends just like David and Jonathan’s friendship honoured God and each other. Choose one of these gifts for your friend that you think they will like and will honour them.
Friendship Bracelet Placemat Tissue Paper Flower
Tissue Paper Flower
Lay out all the materials you have for each craft you want to offer. Ask the children to choose their first craft and collect the materials they will need, then go and sit with the leader who is supervising this craft. Explain that if they have time they can make another gift for another friend.
Apply the Skill (50 min)Here are some basic instructions for these three crafts:Friendship bracelet:
1. Using 2 different colored threads, cut 2 pieces of one color and 2 pieces of the other color 30cm (12 inches) long each.
Arts and Crafts Skill Sessions Page 12
www.innerchildfun.com Source: www.innerchildfun.com

2. Put contrasting threads together in 2 pairs, then copying the picture, weave the threads over and under each other loosely, then carefully and evenly pull tight, making sure all the ends are the same length.
3. Attach a clasp to the ends or make two sliding knots so the bracelet can be pulled tight.
4. Sliding knot – treat each of the 4 threads as one thread on each side. Lay them on the bench in front of you in a circle, crossing over. Take one group of threads and loop back over onto itself, with a tail of about 10 cm. Then wrap the tail over all the threads twice, then feed through the loop and pull tight. Now do the same thing with the other ends. Now you should be able to decrease or increase the size of the bracelet.
Placemat1. Decorate a piece of cardboard about 30 x22cm, with pictures, and words that express posi-
tive things about your friend, eg a picture of a soccer ball with the words, ‘you are a great soccer player’, a heart, and the words, ‘you are a caring friend’ etc.
2. If possible laminate the cardboard or cover with adhesive plastic (clear contact) to make it waterproof.
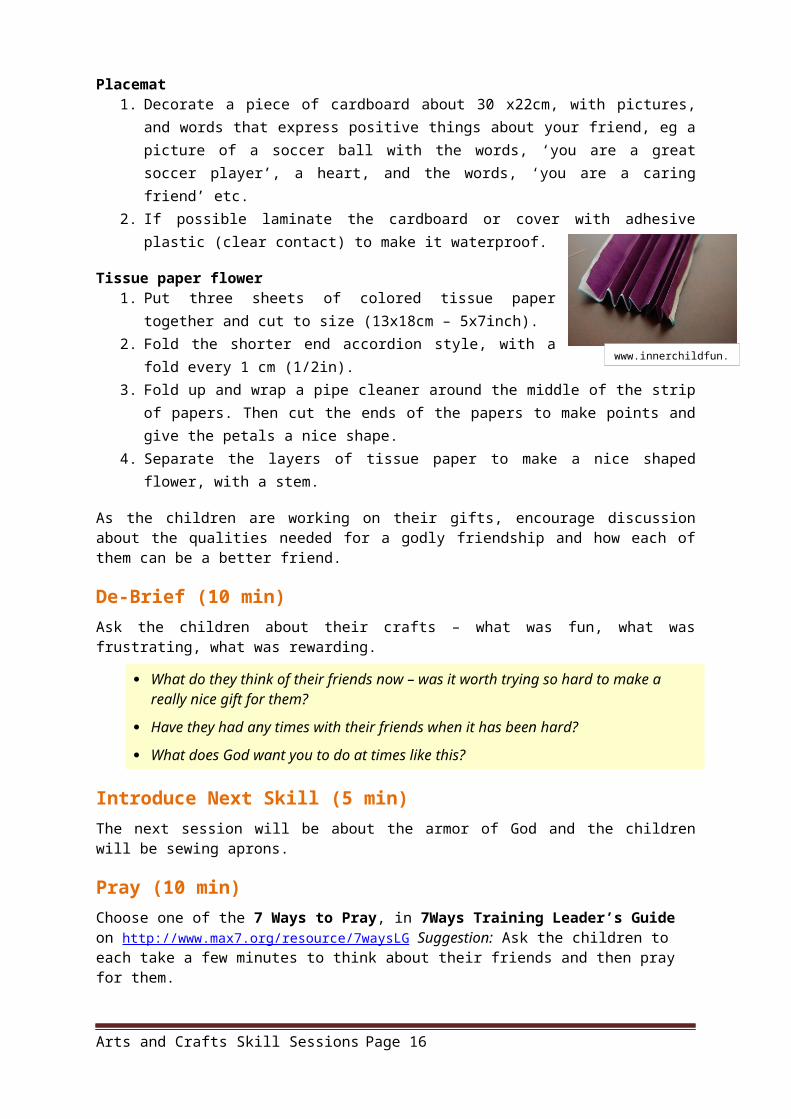
Tissue paper flower1. Put three sheets of colored tissue paper together and cut to size
(13x18cm – 5x7inch).2. Fold the shorter end accordion style, with a fold every 1 cm (1/2in).3. Fold up and wrap a pipe cleaner around the middle of the strip of pa -
pers. Then cut the ends of the papers to make points and give the petals a nice shape.4. Separate the layers of tissue paper to make a nice shaped flower, with a stem.
As the children are working on their gifts, encourage discussion about the qualities needed for a godly friendship and how each of them can be a better friend.
De-Brief (10 min)Ask the children about their crafts – what was fun, what was frustrating, what was rewarding.
What do they think of their friends now – was it worth trying so hard to make a really nice gift for them?
Have they had any times with their friends when it has been hard?
What does God want you to do at times like this?
Introduce Next Skill (5 min)The next session will be about the armor of God and the children will be sewing aprons.
Pray (10 min)Choose one of the 7 Ways to Pray, in 7Ways Training Leader’s Guide on http://www.max7.org/resource/7waysLG Suggestion: Ask the children to each take a few minutes to think about their friends and then pray for them.
Dismiss (5 mins)
Arts and Crafts Skill Sessions Page 13
www.spoiltrottenbeds.co.uk
www.innerchildfun.com
Choose one of the 7 Ways to dismiss children. Suggestion: Way 1. Leader Challenge. The leader challenges the children to be a better friend this week. Remind them that if they want a good friend, they need to be a good friend.
ARTS AND CRAFTS 5 | ARMOR OF GOD
OVERVIEW OF THE SESSION
Skill: Sew an apronBible Passage: Ephesians 6:13-17Main Idea: The Lord gives us strength.Materials needed: Fabric, tailoring paper, needles and threads, pair of scissors, tape measure, pencils and pens, tailor’s chalk, cutting table, pins and pin cushions, sewing machines.
Reflection for Leaders: In our Christian lives we battle against the powerful evil forces the devil. God has given us armor and tells us to use every piece of it to resist the devil’s attacks and to stand for God. We need supernatural power every day to defeat the devil and hence God gives us the armor and the Holy Spirit within us to help us overcome the devil no matter where we are.
THE SESSION PLAN
Bible Time (20 mins) 1. Introduce
What battle or struggle are Christians involved in every day?
2. Explore:
Using Ephesians 6:13-17, choose one of the 7 Ways to tell a Bible Story. Suggestion: Way 1. Make a model. Choose a child and dress that child in pieces of armour you have made as the Bible passage is read aloud.
3. Discussion of the Bible theme
What are some of the powerful evil forces that we fight against?
What is armour?
What is armour used for in battle?
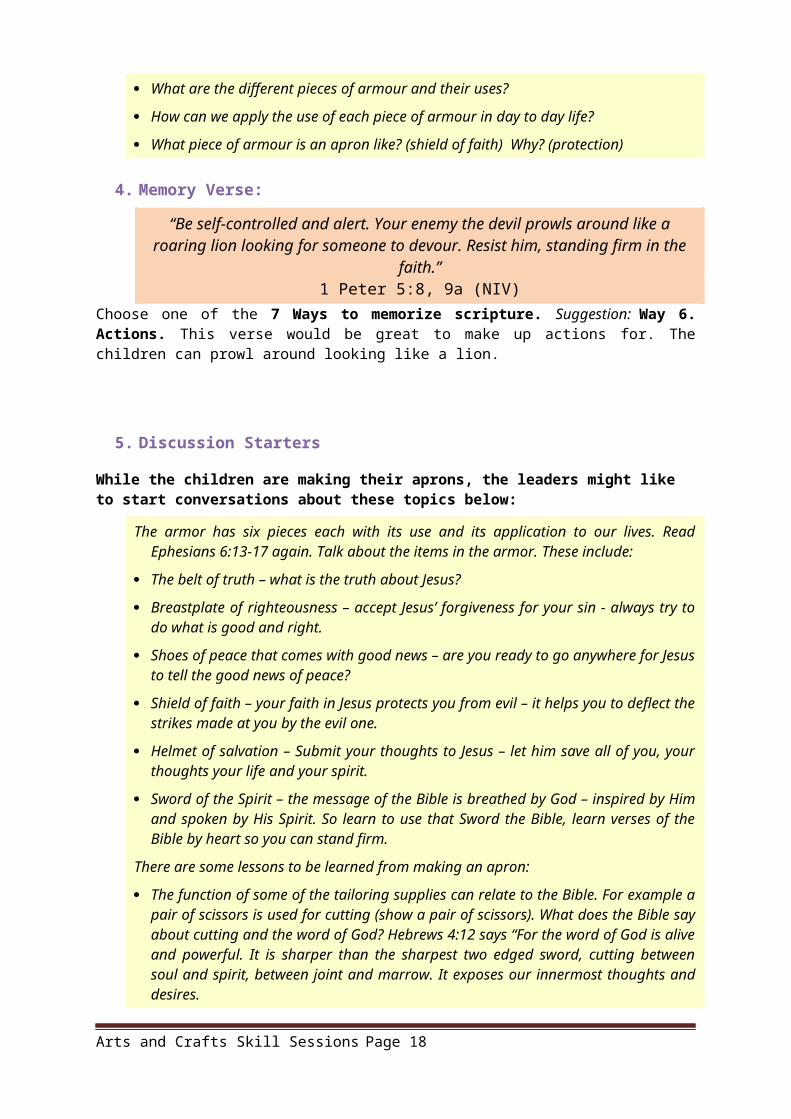
What are the different pieces of armour and their uses?
How can we apply the use of each piece of armour in day to day life?
What piece of armour is an apron like? (shield of faith) Why? (protection)
4. Memory Verse:
“Be self-controlled and alert. Your enemy the devil prowls around like a roaring lion looking for someone to devour. Resist him, standing firm in the faith.”
1 Peter 5:8, 9a (NIV)
Arts and Crafts Skill Sessions Page 14

Choose one of the 7 Ways to memorize scripture. Suggestion: Way 6. Actions. This verse would be great to make up actions for. The children can prowl around looking like a lion.
5. Discussion Starters
While the children are making their aprons, the leaders might like to start conversations about these topics below:
The armor has six pieces each with its use and its application to our lives. Read Ephesians 6:13-17 again. Talk about the items in the armor. These include:
The belt of truth – what is the truth about Jesus?
Breastplate of righteousness – accept Jesus’ forgiveness for your sin - always try to do what is good and right.
Shoes of peace that comes with good news – are you ready to go anywhere for Jesus to tell the good news of peace?
Shield of faith – your faith in Jesus protects you from evil – it helps you to deflect the strikes made at you by the evil one.
Helmet of salvation – Submit your thoughts to Jesus – let him save all of you, your thoughts your life and your spirit.
Sword of the Spirit – the message of the Bible is breathed by God – inspired by Him and spoken by His Spirit. So learn to use that Sword the Bible, learn verses of the Bible by heart so you can stand firm.
There are some lessons to be learned from making an apron:
The function of some of the tailoring supplies can relate to the Bible. For example a pair of scissors is used for cutting (show a pair of scissors). What does the Bible say about cutting and the word of God? Hebrews 4:12 says “For the word of God is alive and powerful. It is sharper than the sharpest two edged sword, cutting between soul and spirit, between joint and marrow. It exposes our innermost thoughts and desires.
The function of an apron (show an apron) is to shield or protect the person who is wearing it, e.g. an apron protects a cook from getting food on her clothes. This can be likened to the shield of faith. Our faith in Christ protects us from the dangers of the evil one. Discuss other functions of an apron and where they are used.
Introduce the Skill (20 min)The Leader needs to go through each of these points with their group. Don’t take too long with this, otherwise the children will get bored and not listen. Make it interactive, by showing them each item and asking them about it. Praise them if they answer well.
Basic tailoring supplies – fabric, pins, needles, thread, scissors
Sewing machine and its parts
Safety regulations
Children need to learn about the basics of tailoring (sewing). Give them each a piece of scrap material to practice making a hem, pinning it, tacking the hem in place and then sewing a straight line to complete the hem.
Arts and Crafts Skill Sessions Page 15
Tacking or Baste stitching — large hand-or-machine-stitches that hold fabric in place without pins. It is mainly used in tailored clothes to ensure a proper fit before the fine stitches are done. Tacking stitches are often done with a different coloured thread, and are easy to pull out.
Apply the Skill (60 min)After the children have gone through the above, they are then given tailoring supplies to start the apron making process. Make sure you have leaders who know how to do this and can show the children what to do, according to local situations.
Using the tailoring paper, draw the shape of an apron and the pocket inset. Allow for hems, and cut out the shape. Then pin this paper shape to the fabric and cut the fabric out around the pattern.
Sew the pocket in first, and then hem around the apron. Finally add the straps for tying.
De-Brief (5 min)Ask the children about their aprons – what was fun, what was hard, what was frustrating, what was rewarding. Think about the times this week when you will need the protection of your faith, like armour, or an apron.
Introduce Next Skill (5 min)The next session will be about the Noah and the children will be making a large rainbow with handprints.
Pray (5 min)Choose one of the 7 Ways to Pray. Suggestion: Children sit in a circle and take turns to thank God for each piece of armour He has given us to fight against the attacks from the enemy.
Dismiss (5 mins)Choose one of the 7 ways to dismiss children. Suggestion: Way 2. Chant. Repeat the Memory Verse learned earlier.
Arts and Crafts Skill Sessions Page 16

ARTS AND CRAFTS 6| NOAH
OVERVIEW OF THE SESSION
Skill: Handprint rainbow with paintBible Passage: Genesis 6:5-22, 7:1-24Main Idea: Noah obeys GodMaterials Needed: Colored paints, large paper or cardboard, paint trays, rubber gloves (optional).
Reflection for Leaders: Noah was a blameless man; he wholeheartedly loved and obeyed God and walked step by step in faith as a living example for others. So God chose him to build an ark that would save him and his family during the flood. People were breaking God’s heart with their sins and so in Noah’s time He sent a flood that destroyed the earth. God spared Noah and his family because Noah was a good man who loved and obeyed God.
THE SESSION PLAN
Bible Time (20 mins) 1. Introduce
When was the last time you saw a rainbow in the sky?
2. Explore:Using Genesis 6:5-22, 7:1-24, choose one of the 7 Ways to explore a Bible story in 7 Ways Training Leader’s Guide on www.max7.org. Suggestion: Way 7. Write a song. Divide the children in groups and have them write a song about Noah and how he obeyed God.
3. Discussion of the Biblical theme
Sit with the children and discuss the following questions with them:
Why did God choose Noah to build the ark?
How long do you think it took Noah to build the ark?
What do you think Noah’s neighbors were saying about Him in all that time?
How did Noah know it would rain?
What special promise did God make to Noah after the flood? (Genesis 9:12-13)
Do we do things just because God says?
Think of some examples of when it might be scary to obey God.
What are some of the hard or easy things to obey?
4. Memory Verse:
“Noah found favor in the eyes of the Lord.” Genesis 6:8 (NIV)
Arts and Crafts Skill Sessions Page 17
Choose one of the 7 Ways to memorize scripture, in 7 Ways Training Leader’s Guide on www.max7.org. Suggestion: Way 6. Actions. Children make up an action for each word or phrase.
5. Discussion Starters
While the children are doing their artwork, the leaders might like to start conversations about these topics below:
The rainbow is a sign God gave to Noah when He made a covenant with him. God promised Noah that He will never again destroy the earth with a flood and that when the rainbow is in the sky, God will see it and remember His covenant between Him and every living creature on earth. From this we learn that God is faithful, he makes promises and fulfils them, he never forgets His promise to us. He is not like a person who lies or changes their mind about the promises they make to us. We can always trust Him.
Rainbows are one the most beautiful things God created. They are bright and colorful and make our world a beautiful place to live. The handprint rainbow will require the children to work together peacefully and cooperate with each other in order to come up with one rain-bow that has everyone’s hand print.
What the Bible says about working together in peace;
Hebrews 12:14 -Strive for peace with everyone for the holiness without which no one will see the Lord.
Galatians 5:22-Peace is one of the fruits of the Holy Spirit.
Introduce the Skill (20 min)Firstly, discuss with the children what colours make up a rainbow. There are 7 colours in this order from top to bottom – red, orange, yellow, green, blue, indigo ( blue/purple) and violet (purple/red).
Now, teach the children the skill of mixing paints to make these colours.
1. Each child starts with blobs of red, blue and yellow paints spaced out on a piece of newsprint or cardboard in front of them. This becomes their palette. They also need a paintbrush and a small container of water.
2. To make green – add a small amount of blue to a small amount of yellow (always add the darker colour to the lighter colour) and mix. Keep adding a bit of blue till you get a green tone you are happy with.
3. To make orange – add red to yellow and follow the same process as above.
4. To make purple – add a small amount of blue to red. Now the children will have 6 colours on their palette.
5. Now make indigo, by adding blue to purple.
6. Lastly make violet by mixing purple to red.
Apply the Skill (50 min)Now the children will create a handprint rainbow:
Children will see that every hand print is different as they work together on a cooperative art project.
Ask the children to choose a color they want their hand print to be.
Arts and Crafts Skill Sessions Page 18

With their own paintbrush and a fresh piece of newsprint/cardboard, they can now mix the rainbow color (one of the 7 colors) they want their handprint to be.
Then each child paints the palm of their own hand with the paint they have just mixed, with their own paintbrush (they paint the hand that is not their writing hand)
Each child in turn now places their handprint onto the row of their color choice, and presses hard for a few seconds.
Have a bucket of water handy so the children can wash the paint off their painted hand.
Discuss the differences in size and shape of all the children's hand prints, emphasising how special and unique each child is.
De-Brief (10 min)The children each share about what they have leant in the session in brief sentences.
Introduce Next Skill (5 min)The next KidsHub art and craft session will be about the Gospel and the children will be making a Gospel Bangle.
Pray (10 min)Choose one of the 7 Ways to Pray, in 7 Ways Training Leader’s Guide on www.max7.org. Suggestion: Ask the children to pray in short sentences thanking God for who He is and for the skill and lessons they have learnt.
Dismiss (5 mins)Choose one of the 7 Ways to dismiss children, in 7 Ways Training Leader’s Guide on www.max7.org. Suggestion: Leader Challenge. Challenge the children to obey God this week no matter how hard it is.
Arts and Crafts Skill Sessions Page 19

ARTS AND CRAFTS 7 | BIBLE OVERVIEW
OVERVIEW OF THE SESSION
Skill: Bible Band or braceletBible Passage: Matthew 28:18-20Main Idea: the main story of the BibleMaterials Needed: beads in these colors: blue, green, brown, red, clear, purple, gold (2 per bangle); plus fish beads (or multi-coloured beads if you can’t find a fish) ; thin elastic or thin leather strap, toggle & t-bar clasp with 2 jump rings, scissors, lighter or matches ( for leader’s use only)
Reflection for Leaders: The Bible is a collection of books inspired by God and written by faithful followers. The Bible is the book that tells us how God wants us to behave and what he wants us to do. It contains the good news that saves us and we all have the responsibility to spread this good news to all people.
THE SESSION PLAN
Bible Time (30 mins) 1. Introduce
Ask: When the following colors are mentioned, what are some of the things you can relate them to from the Bible?
- Blue, green, brown, red, clear (no color), purple, gold, multi-colored
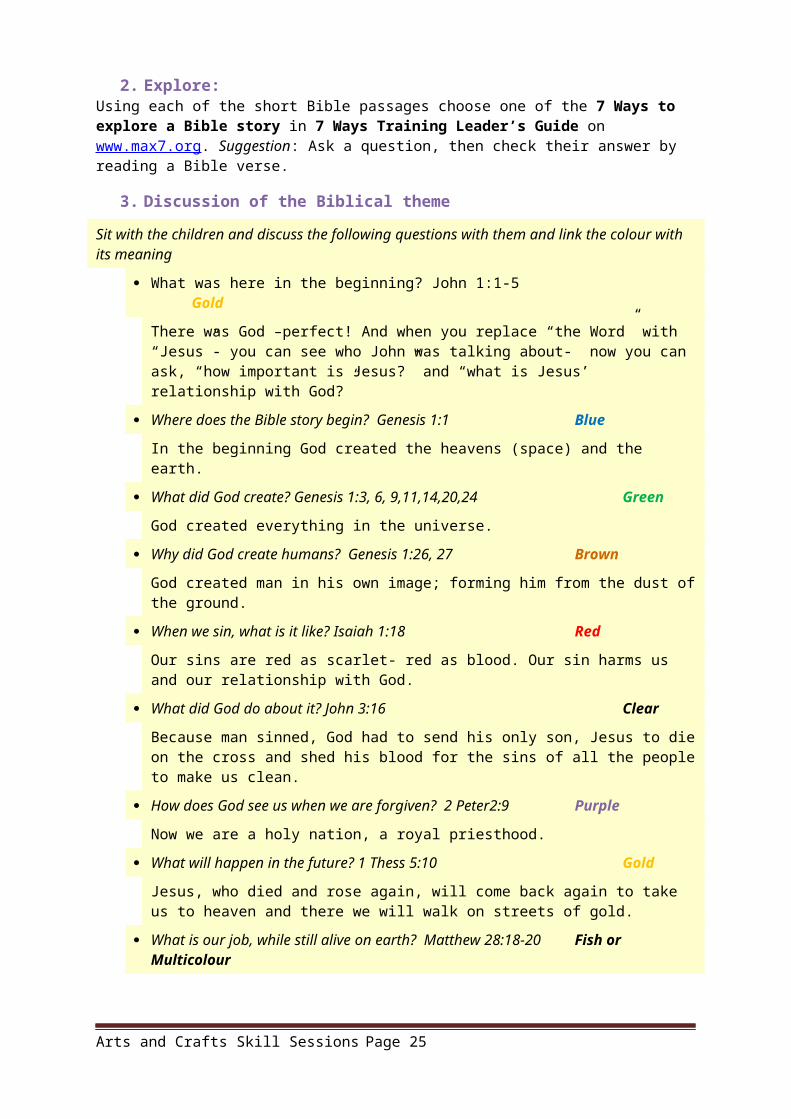
2. Explore:Using each of the short Bible passages choose one of the 7 Ways to explore a Bible story in 7 Ways Training Leader’s Guide on www.max7.org. Suggestion: Ask a question, then check their answer by reading a Bible verse.
3. Discussion of the Biblical theme
Sit with the children and discuss the following questions with them and link the colour with its mean-ing
What was here in the beginning? John 1:1-5 Gold
There was God –perfect! And when you replace “the Word” with “Jesus”- you can see who John was talking about- now you can ask, “how important is Jesus?” and “what is Jesus’ re-lationship with God?”
Where does the Bible story begin? Genesis 1:1 Blue
In the beginning God created the heavens (space) and the earth.
What did God create? Genesis 1:3, 6, 9,11,14,20,24 Green
God created everything in the universe.
Why did God create humans? Genesis 1:26, 27 Brown
God created man in his own image; forming him from the dust of the ground.
When we sin, what is it like? Isaiah 1:18 Red
Arts and Crafts Skill Sessions Page 20

Our sins are red as scarlet- red as blood. Our sin harms us and our relationship with God.
What did God do about it? John 3:16 Clear
Because man sinned, God had to send his only son, Jesus to die on the cross and shed his blood for the sins of all the people to make us clean.
How does God see us when we are forgiven? 2 Peter2:9 Purple
Now we are a holy nation, a royal priesthood.
What will happen in the future? 1 Thess 5:10 Gold
Jesus, who died and rose again, will come back again to take us to heaven and there we will walk on streets of gold.
What is our job, while still alive on earth? Matthew 28:18-20 Fish or Multicolour
We are fishers of men, God commands us to tell the good news to everyone (multi-col-oured bead if you can’t find a fish bead- to remind us that God’s message is for everyone).
4. Memory Verse:
“Go into all the world and preach the good news to all creation” Mark 16:15 (NIV)
Choose one of the 7 Ways to memorize scripture, in 7 Ways Training Leader’s Guide on www.max7.org. Suggestion: Way 6. Actions. Children make up an action for each word or phrase.
5. Discussion Starters
While the children are doing their bangles, the leaders might like to encourage the children to memorize the order of the colours and what they each mean, so that they can tell the story of the Bible to others.
Introduce the Skill (5 min)Show the children examples of the Bible Bands they will be making today. The first one is easier than the second one. The leader shows them how to make each one as all the children watch. Then each child is given each child their materials and assigned to a leader according to which Bible Band they will be making.
Apply the Skill (30 min) Bible Band 1: (easier)
Needed: (per child) piece of narrow leather cord 40cm long, Toggle and T-bar clasp, 2 jump rings, jewellery pliers... Or 30 cm piece of elastic (thin enough to thread beads onto); 8 coloured beads, scissors.
1. Thread the 8 colored beads onto the elastic/leather, in order. Put a simple knot at each end of the beads to keep them centred and in place.
2. To make the band fit your wrist, thread each end of the elastic or leather through the fish bead. Knot each end, and then you can pull the ends tight. Or, you can tie the clasp parts on each end of the leather to keep it on the wrist.
Bible Band 2: (harder) http://lc.pandahall.com/articles/1884-3-steps-on-making-leather-cord-friendship-bracelet-for-men-with-sliding-knots.html
Arts and Crafts Skill Sessions Page 21
www.pinterest.com

Needed: (per child) leather cord, 8 coloured beads, a fish-shaped bead, large button, scissors, lighter or matches
Step 1: Make a closure loop
Cut two 30cm leather cords and fold them in half;
Make a sliding knot with a piece of cord 10 cm long, about 2 cm from the fold:
Make a loop at one end of the 10cm cord. Lay it on the long folded pieces of cord, near the folded end. Wrap the long end of the 10cm cord around all the cords, wrap it around again, closer to the loop, then again, closer to the loop. Take the loose end and poke it through the little loop and carefully pull both ends tight. Trim the left over cord.
Step 2: Make the main part of the band
Tie an overhand knot 1.5cm away from the sliding knot;
String the first 4 colored beads (blue, green, brown, black) onto each leather cord.
String the fish bead onto one of the cords and then make an overhand knot 2.5cm away from the first knot, taking up the fish bead into the middle of the knot.
Repeat No 2, with the other 4 colored beads (red, white, purple, gold). Tie another overhand knot another 2.5cm away.
Step 3: Finish the leather cord band
Cut another 10cm leather cord and make a sliding knot 1.5cm away from the third overhand knot. Then cut the extra cord and soften it with the flame of a lighter or match for a few seconds. (leader to do this)
Thread 4 cords through the button and tie a fast knot; then trim the excess cords.
De-Brief (10 min)Ask the children to try and tell the Bible story using the Bible band to the rest of the group.
Introduce Next Skill (5 min)The next KidsHub art and craft session will be about prayer and the children will be making a prayer journal.
Pray (10 min)Choose one of the 7 Ways to Pray, in 7 Ways Training Leader’s Guide on www.max7.org. Suggestion: Ask the children to thank God for the His word and ask him for courage to tell the gospel to others using the Bible bangle.
Dismiss (5 mins)Choose one of the 7 Ways to dismiss children in 7 ways Training Leader’s Guide on www.max7.org. Suggestion: Way 1. Leader Challenge. The leader challenges the children to tell the gospel to at least one person and make them a Bible band.
Arts and Crafts Skill Sessions Page 22

ARTS AND CRAFTS 8 | PRAYER - PART 1
OVERVIEW OF THE SESSION
Skill: Scrapbook Prayer JournalBible Passage: Matthew 6:5-14Main Idea: I can talk to God anywhere, anytimeMaterials Needed: Scrap book paper, plain white paper, crafting scissors, glue, ribbons/strings/binders, punching machine, stickers, colors/crayons/markers/pencils, prayers verses, beads, colored paper.
Reflection for Leaders: Prayer is a way to build our relationship with God, it is simply a conversation with God, one that is held with respect for his unending love and power, but that is spoken in our own words. Matthew 6:7 says, "When you pray, don't babble on and on as people of other religions do. They think their prayers are answered merely by repeating their words again and again." (NLT) In other words, we need not pray with any formula, and we can and should speak to God in our own words.
THE SESSION PLAN
Bible Time (30 mins) 1. Introduce
What is your favorite way to pray?
2. Explore:Using the reading from Matthew 6:5-14, choose one of the 7 Ways to explore a Bible story in 7 Ways Training Leader’s Guide on www.max7.org Suggestion: Way 6: Act it out.
3. Discussion of the Biblical theme
Sit with the children and discuss the following questions with them:
To whom should we pray to?
Why do we pray?
Where is the best place to pray? Why?
Why do we pray “Give us this day our daily bread?”
Why do we thank God for what He has done?
If we refuse to forgive others, God will also refuse to forgive us, why?
If you disobeyed your parent and later went into your room and knelt down to prayer, would God hear and answer your prayer? Why/Why not?
Does prayer work like magic?
4. Memory Verse:
“Do not be anxious about anything, but in everything, by prayer and petition, with thanksgiving, present your requests to God.” Philippians 4:6 (NIV)
Arts and Crafts Skill Sessions Page 23

Choose one of the 7 Ways to memorize scripture, in 7 Ways Training Leader’s Guide on www.max7.org. Suggestion: Way 7. Give children the Memory Verse. Give each child a piece of card so they can write the Memory Verse on it and decorate it. They can take this card home.
5. Discussion Starters
While the children are doing their prayer journal, the leaders might like to start conversa-tions about the children’s personal experiences of prayer.
Introduce the Skill (15 min)1. Firstly, discuss with the children what a prayer journal is. It is a personalized book filled with
prayers written to God about anything. It is a great way to keep track of our prayer requests, praises and thanksgiving to God.
2. Show the children your own prayer journal you have made, and share ideas.
3. The prayer journal can be divided into weekly or daily reflections. The date is written at the top of the page. Then each page can be divided into:
- Praises / Thanksgiving / Requests (Personal and For others)
4. Remind them that it takes time to write down their prayers. A prayer can also be in the form of a drawing or a sticker to represent something they are praying for.
5. Bookmarks with favorite or encouraging scriptures or sayings can also be made and placed in the prayer journal. Maybe these could be made as gifts to give away to friends or family.
Apply the Skill (50 min)Each child gets sheets of plain paper. They can make their prayer journal any size or shape.
Then they bind the sheets together using the materials available.
Now they can start designing and drawing whatever they want on the cover page. A suggestion is that they give it a title, e.g. ‘Sarah’s Prayer Journal’
If they have time they can write their first prayers in for this week.
De-Brief (10 min)Ask the children if any of them would like to show the others their prayer journal.
Introduce Next Skill (5 min)The next KidsHub art and craft session will be the second part of the topic of prayer and the children will be continuing with their prayer journal.
Pray (10 min)Choose one of the 7 Ways to Pray, in 7 Ways Training Leader’s Guide on www.max7.org. Suggestion: Ask the children to pray in short sentences thanking God for who He is and for the skill and lessons they have learnt. Or, one child might like to read out a prayer they just wrote.
Dismiss (5 mins)Choose one of the 7 Ways to dismiss children, in 7 Ways Training Leader’s Guide on www.max7.org. Suggestion: Way 1. Leader Challenge. Challenge the children to gather favourite prayers, Bible verses and poems from home and school to bring next week.
Arts and Crafts Skill Sessions Page 24
ARTS AND CRAFTS 9 | PRAYER - PART 2
OVERVIEW OF THE SESSION
Skill: Weekly Devotional Journal Bible Passage: Daniel 1:8-21, 3:1-30Main Idea: Four friends who stood up for GodMaterials Needed: Scrap book paper, plain white paper, crafting scissors, adhesive, ribbons/strings/binders, punching machine, stickers, colors/crayons/markers/pencils, prayers verses, beads, colored paper
Reflection for Leaders: Understand the background of Daniel, his captivity and his three friends.
Bible passages of how Daniel stood up for God, why and how;
- Refused to eat the King’s food (Daniel 1:8)
- Refused to bow down to King Nebuchadnezzar’s golden image. (Daniel 3:12, 17)
The only way Daniel was able to stand up for God was because he was a young man who prayed about everything all the time, matters and always gave thanks. (Daniel 2: 17-23, 6:10)
THE SESSION PLAN
Bible Time (30 mins) 1. Introduce
Tell about a time when you felt really scared.
2. Explore:Using the reading from Matthew 6:5-14, choose one of the 7 Ways to explore a Bible story in 7 Ways Training Leader’s Guide on www.max7.org. Suggestion: Way 6. Interviews. If there are two leaders, one can pretend to be Daniel and one can be an interviewer. The interviewer asks Daniel questions so that the children get to know the story.
3. Discussion of the Biblical theme
Sit with the children and discuss the following questions with them:
What happened in the story?
“Daniel honored God and God honored Daniel’. How?
Would you like to have been Daniel? Why?
What did Daniel do after God answered his prayers?
How do you feel when your prayers are answered and what do you after?
If you were Daniel, and you were told to worship an idol or be thrown in a very hot fire, what would you have done?
Ask the children to draw the scariest part of Daniel’s story in their prayer journal.
Arts and Crafts Skill Sessions Page 25

4. Memory Verse:
“They trusted in him and defied the King’s command and were willing to give up their lives rather than serve or worship any god except their own God.” Daniel 3:28b (NIV)
Choose one of the 7 Ways to memorize scripture, in 7 Ways Training Leader’s Guide on www.max7.org. Suggestion: Way 6. Actions.
5. Discussion Starters
Ask the children what they think a weekly devotional journal is.
Introduce the Skill (15 min)1. Firstly, discuss with the children what a weekly devotional journal is. It is a personalized
book with a different Bible passage to reflect on and journal about each week.
2. Show the children your own devotional weekly journal you have made, to give them an idea of what to do.
3. The devotional journal can be divided into weekly reflections, the date is written at the top of the page and the Bible passage for the week is also written at the top.
4. They can have other headings on each page, to help focus their journaling:
o My favourite verse
o My weekly challenge
o What I learnt about God
o What I learnt about myself
o What feelings I had this week
Apply the Skill (50 min)Each child gets sheets of plain paper. They can make their weekly devotional journal any size and shape they want.
Then they bind the sheets together using the materials available.
Now they can start designing and drawing whatever they want on the cover page. A suggestion is that they give it a title, eg ‘Sarah’s Weekly Devotions’
De-Brief (10 min)Ask the children to share what they have learnt from the session and how they are going to stand out for God.
Pray (10 min)Choose one of the 7 Ways to Pray, in 7 Ways Training Leader’s Guide on www.max7.org. Suggestion: Way 2: Pair and Share. The children can share about their struggles with reading the Bible regularly and then pray for each other.
Dismiss (5 mins)Choose one of the 7 Ways to dismiss children, in 7 Ways Training Leader’s Guide on www.max7.org. Suggestion: Way 1: Leader Challenge. Challenge the children to take their weekly devotional journals home and commit to making this a weekly habit.
Arts and Crafts Skill Sessions Page 26

ARTS AND CRAFTS 10 | GOD’S TIME
OVERVIEW OF THE SESSION
Skill: Make a Time CraftBible Passage: Ecclesiastes 3:1-8 Main Idea: God has organised a time for everything and a season for every activity.Materials Needed: Watch Band: Colored scarfs or wide strong ribbon, watch faces, male and female snap fasteners, tape measureClock: paper plates- some of a different colour, coloured paper, split pins (paper fasteners), markers or paint or foam numbers and glueTimeline: a variety of colored construction paper, ribbon or string, stapler or sticky tape, hole punch, markers, card
Reflection for Leaders:Solomon says that everything has a season. God has created the night to follow the day and the summer to follow the spring. Everything has a time and season. What season of life are you in right now? Read the passage, work out what season you are in right now, and give thanks to God for all that you are learning in this season, remembering that it will pass.
THE SESSION PLAN
Bible Time (20 mins) 1. Introduce
God has a plan for everything and so He made all things to have a season. Just imagine a world without seasons and stages of life. It would be disorganized.
2. Explore:Using Ecclesiastes 3:1-8, choose one of the7 Ways to explore a Bible story in 7 Ways Training Leader’s Guide on http://www.max7.org/resource/7waysLG .Suggestion: Act it out. The children use actions to show the different seasons.
3. Discussion of the Biblical theme
What is time? (Minutes, hours, days, months, years)
How did God create the world? (In days – or time periods)
What does Ecclesiastes teach us about time? (There is a time for everything – all planned by God. Our life is planned in seasons – doing different things at different times of our life)
Why is time important and why follow it? (That’s how God made this world – it’s God’s plan for how we go through life)
Imagine if there was no time to laugh, be sad, plant or dance? (Life would be boring and meaningless)
What does Solomon say about our birthday? (There is a time to be born.)
Look at the passage again. What season (or time) are you in right now?
Activity: What would happen if the following activities were done during these seasons?
Arts and Crafts Skill Sessions Page 27

Laughing when they tell you a friend’s parent died? (Eccl 3:4)
Keeping all the clothes you have ever had, not giving or throwing them away. (Eccl 3:6)
If people were to talk all the time, day and night without a break. (Eccl 3:7)
4. Memory Verse:
”There is a time for everything and a season for every activity under heaven”.
Ecclesiastes 3:1
Choose one of the 7 Ways to memorize scripture, in 7 Ways Training Leader’s Guide on www.max7.org. Suggestion: Way 1. Build up word by word. This is a short verse, so won’t take long to learn, if they build it up word by word.
5. Discussion Starters
While the children are doing their work, the leaders might like to start conversations on these topics below about what the Bible says on the following:
Hate: The Bible teaches us not to hate our enemies but instead love them and pray for them. We should also hate injustice and hate it when people are treated badly and when God is not being given glory.
It also teaches us to hate sin in our lives and in the lives of others. However we are not to hate the sinner; Psalm 97:10, Proverbs 8:13
Killing: This means to take the life of a person One of the Ten Commandments is that “You shall not kill” and so no one has the right to kill
but there situations when it is necessary for protection and self-defence. Teachers of the Law would say that putting a person’s life at risk is also breaking this commandment. What examples can you think of?
Introduce the Skill (20 min)Show the crafts the children can choose to make. We have given you three suggestions. You don’t need to provide all three. You might not want your children to have a choice, but just do the one you have chosen. That is fine. If you want to offer more than one craft, you will need more help from adults or teens – one helper for each different craft with a small group of children
Discuss with the children how the craft/s relate to the message about time and seasons.
Each child is supplied with the equipment they need and sits with the person leading that craft.
It is now up to each leader to explain the process of making the craft, and helping each child when they struggle.
Apply the Skill (50 min)WATCH BAND
1. Select a sturdy, wide ribbon, or scarf to make your watch band.
2. Measure your wrist with a tape measure; add 6 cm (2 ¼ inches)
3. Measure the ribbon and cut it to the size you need, adding about 2.5 cm (1 inch) to each end, to turn over.
4. Run the ribbon through the ring slot on one side of the watch face, over the back of the watch face, and through the other slot. The ribbon should have enough tension to hold it in place, but
Arts and Crafts Skill Sessions Page 28

if you want to make sure the ribbon stays, take a needle and thread and stitch it to the watch rings. Only use a couple of stitches. Use thread that matches the ribbon.
5. Fold over each end of the ribbon (2cm - 3/4 inch) so that it doesn’t fray. Press with an iron to flatten the fold.
6. Read the directions on how to attach your snap. Attach the male snap face on one end of the rib -bon directly over the folded-over area. Attach the female half of your snap face to the other folded end of the ribbon. Make sure the male half and female half faces line up in the proper di -rection before you attach them. The male and female snap faces should close properly when placed on your wrist.www.ehow.com/how_7817164_make-ribbon-watch-band.html
PAPER CHAIN TIMELINE 1. Take your construction paper and cut it into strips and make a pa-
per chain by interlocking paper loops made from the paper strips. 2. Next cut out rectangles from the card and punch a hole in the top
of each. On each rectangle write an event in your life and the date it happened (e.g. I was born - 5th May 2006; or my mother was sick – July 2012). Thread a piece of ribbon or string through the hole you punched and then tie the other end through a loop on the pa-per chain you created.
3. Arrange the events in date order along the chain. On the other side of each card draw a face that expresses the feeling you felt at that event, e.g. happy, angry, sad, scared, loved, and shy. See examples of feeling faces on Page 30.
http://www.thebestkidsbooksite.com/craftdetails3.cfm?CraftID=675
PAPER PLATE CLOCK - good for children who are learning to tell the time 1. Glue the two plates together, one on top of the other, so your
clock has a rim that's a different color from the face.2. Stick the numbers (or write them) in the proper places. If your child
needs guidance, draw a small dot where each number goes.3. Write out the minutes with the marker.4. Cut out the hour and minute hands and fasten to the center of the
plate with a brad or split pinhttp://meaningfulmama.com/2012/08/226-diy-clock-for-teaching-time.html
Ask them to stop after 50 minutes, even if they haven’t finished. They can finish at home.
Arts and Crafts Skill Sessions Page 29

http://ayearoffhe.blogspot.com.au/2011/06/2011-wk-23-our-feelings-working-on.html
De-Brief (10 min)Ask the children about their watch band
What was fun, what was hard, what was frustrating, what was rewarding?
Did they need patience?
Could they see their own creativity coming out?
Does it look like the craft they had in their heads before they started?
Pray (10 min)Choose one of the 7 Ways to Pray, in 7Ways Training Leader’s Guide. Suggestion: Ask the children to pray in short sentences thanking God for all the different seasons of life and for the skill and lessons they have learned.
Dismiss (5 mins)Choose one of the 7 Ways to dismiss children. Suggestion: Each child finds another child who did a different craft. They show their craft to each other and talk about it.
Arts and Crafts Skill Sessions Page 30
Arts and Crafts Skill Sessions Page 31

Arts and Crafts Skill Sessions Page 32