arranging a technical course - … · arranging a technical course ... complete for your technical...
TRANSCRIPT

39
4
Arranging a Technical Course
■ ■ ■ ■ ■ ■ ■ ■ ■ ■ ■ ■ ■ ■ ■ ■ ■ ■ ■ ■ ■ ■ ■ ■ ■ ■ ■ ■ ■ ■ ■ ■ ■ ■ ■ ■ ■ ■ ■ ■ ■ ■ ■ ■
Now that you have asked the questions appropriate for determining the audience, business purpose, and objectives of your course, it is time to compile these items into a solid design document.
The course design document is your roadmap for the entire course development process. The design document is your means to determine exactly what the course will be. This chapter covers the intricacies involved in creating a complete and accu-rate design document. It also covers options for organizing your material so that the course objectives are supported as much as possible.
X the building blocks of a course design document, including an appropriate and complete topical outline
X various options for organizing a technical course, along with the benefits and drawbacks of each style.
What’s Inside This Chapter
In this chapter, you’ll learn

Arranging a Technical Course ■ ■ ■ ■ ■ ■ ■ ■ ■ ■ ■ ■ ■ ■ ■ ■ ■ ■ ■ ■ ■ ■ ■ ■ ■ ■ ■ ■ ■ ■ ■ ■ ■ ■ ■ ■ ■ ■ ■ ■
40
The Building Blocks of a Course Design DocumentCreating your course design document is one of the most important tasks you will complete for your technical course development project. The design document is where you determine specifics of what the course will cover. At a minimum, your design document should contain
ff a working title for the projectff the agreed-on audienceff SMART (Specific, Measurable, Achievable, Realistic, and Testable) course objectivesff a topical outline.
Basic RuleYour course design document should contain your title, audience,
objectives, and course topics.
In your course design document, you may also include animations, graphics, mod-
els, or other items that have long lead times to produce, as well as a list of available resources, a list of prerequisite courses, and a description of accompanying job aids.
The Topical OutlineThe largest section contained within your course design document is your topical outline. The topical outline is a detailed outline of each concept to be covered during the course. Every technical item on the outline needs to relate back to one of the SMART course objectives (see Figure 4–1). You will probably find that the topical outline is the most challenging part of the design document to create.
Noted
If you are working with a subject matter expert (SME) who has never helped create a course design document, it may help to show him or her an example of a design document from another course or the document in this book so that both of you are operating from the same frame of reference.

■ ■ ■ ■ ■ ■ ■ ■ ■ ■ ■ ■ ■ ■ ■ ■ ■ ■ ■ ■ ■ ■ ■ ■ ■ ■ ■ ■ ■ ■ ■ ■ ■ ■ ■ ■ ■ ■ ■ ■ Arranging a Technical Course
41
Figure 4–1. Sample Course Design Document
Principles of POS Software
Audience
POS technicians with 2 to 3 months’ experience in the lab
Prerequisites
Basic POS terminology
SMART Course Objectives
At the end of this course, learners should be able to
• navigate successfully around the POS system
• create a field report
• adjust the inputs of the sales report to create a usable field report and explain the rationale behind these decisions.
Topical Outline
• Course introduction
f Safety
f Learner introductions
f How to get the most out of this course
• Navigating the software
f Hydraulic Data Tab
f Job Input Tab
f Verification Tab
f Exercise: Software Scavenger Hunt
• Learners will open up a preloaded job file and find answers to various questions (e.g., What is the hydrostatic pressure of product #2, according to this job data?).
• Creating an analysis
f Basic information
f Applications
f Exercise: Information Needed
• Before covering the type of information needed to create a field report, learners will have to brainstorm what information is needed. They should be divided into groups, with each group reporting their findings on a flip chart.
f Job information form
• Customer data
• Mechanical, Hydraulic, and Chemical Principles
f Exercise: Signore Enterprises Job Order—Part A
• Learners will be given raw job data to input into the system to create a preliminary output.
Continued

Arranging a Technical Course ■ ■ ■ ■ ■ ■ ■ ■ ■ ■ ■ ■ ■ ■ ■ ■ ■ ■ ■ ■ ■ ■ ■ ■ ■ ■ ■ ■ ■ ■ ■ ■ ■ ■ ■ ■ ■ ■ ■ ■
42
As you create your design document, you need to be sure that the outline is complete and that it takes into account parallel and unparallel concepts. These items will be discussed below.
Completeness of OutlineYou should be aware of whether particular sections in your outline are complete
or incomplete. You can determine whether a section is complete by referring to the course objectives. All of the objectives should be met through the course topics rep-resented. If the course objectives are not met by the items listed, you have an incom-plete section.
Consider the objectives from the previous outline, shown in Figure 4–2.
Figure 4–1. Continued
• Contingencies
f Planning for the unexpected
f Common errors
f Adjusting for new regulations
f Exercise: Signore Enterprises Job Order—Part B
• Learners will be given additional information about the job that they previously entered into the POS system. Based on this information, they will make adjustments to the various fields in each of the software tabs and print out an adjusted, usable report. Learners should be able to explain the rationale behind their choices.
f Exercise: Course Reflection
• Learners will write down three things they learned during the course and how they will apply this information to their jobs.
Figure 4–2. Course Objectives from the Course Design Document
Course Objectives
At the end of this course, learners should be able to
• navigate successfully around the POS system
• create a field report
• adjust the inputs of the sales report to create a usable field report and explain the rationale behind these decisions.

■ ■ ■ ■ ■ ■ ■ ■ ■ ■ ■ ■ ■ ■ ■ ■ ■ ■ ■ ■ ■ ■ ■ ■ ■ ■ ■ ■ ■ ■ ■ ■ ■ ■ ■ ■ ■ ■ ■ ■ Arranging a Technical Course
43
This time, however, imagine that as you put together the topical outline, you find that your coverage of topics is skewed. In this instance, the topic is heavy on data for “Navigating the software” and quite sparse for “Creating an analysis” and “Contingencies.” This outline demonstrates the way in which technical developers many times receive material. It is up to you to recognize when an outline is skewed and does not contain complete information (see Figure 4–3).
Parallel and Unparallel Concepts Taken into AccountYou should also be aware of the level of detail of particular topics on your outline. For example, let’s say your technical course was about “Baking a Cake” and you had the topic list shown in Figure 4–4. The items in this outline are not all parallel con-cepts. “Measure correct amount of baking soda” is more detailed than the rest of the items in the outline. As such, you would want the outline to reflect this and would move “Measure correct amount of baking soda” to a subtopic in the appropriate place in the outline, as in Figure 4–5.
Figure 4–3. Sample Topical Outline
Topical Outline
• Course introduction
f Safety
f Learner introductions
f How to get the most out of this course
• Navigating the software
f Hydraulic Data Tab
f Job Input Tab
f Verification Tab
f Exercise: Software Scavenger Hunt
• Learners will open up a preloaded job file and find answers to various questions (e.g., What is the hydrostatic pressure of product #2, according to this job data?).
• Creating an analysis
f ????
• Contingencies
f ????

Arranging a Technical Course ■ ■ ■ ■ ■ ■ ■ ■ ■ ■ ■ ■ ■ ■ ■ ■ ■ ■ ■ ■ ■ ■ ■ ■ ■ ■ ■ ■ ■ ■ ■ ■ ■ ■ ■ ■ ■ ■ ■ ■
44
This may seem trivial, but as you move to more complicated topics it becomes even more important. Consider the example in Figure 4–6. If you are a nontechnical developer, you will not always understand the intricacies of your technical topic. But there are ways you can learn to think about technical subjects in order to create an appropriate and complete topical outline.
As you build a topical outline for a technical training class, you should be on the lookout for the following types of information:
ff categoriesff levels of informationff definitionsff componentsff relationshipsff analogies ff processes.
Keeping in mind what type of information you are gathering, as you compile it, will be important when you start to put together your outline and your course.
As you talk about technical information with your subject matter experts (SMEs), you should keep a finger on the category under which the information you are speaking
Figure 4–4. Unparallel Topics (Incorrect)
Baking a Cake
• Gather ingredients
• Measure correct amount of baking soda
• Mix ingredients
• Bake ingredients
Figure 4–5. Unparallel Topics (Corrected)
Baking a Cake
• Gather ingredients
f Measure correct amount of baking soda
• Mix ingredients
• Bake ingredients

■ ■ ■ ■ ■ ■ ■ ■ ■ ■ ■ ■ ■ ■ ■ ■ ■ ■ ■ ■ ■ ■ ■ ■ ■ ■ ■ ■ ■ ■ ■ ■ ■ ■ ■ ■ ■ ■ ■ ■ Arranging a Technical Course
45
about might fall, the level of information you are discussing (for example, whether it is a broad, abstract principle or a very small detail), whether the information is a definition or a component of a bigger piece, or whether two or more items are related.
Keep track of statements like this one: “The center component of Product A is pretty distinct compared to what was previously available with Product B.” You may not understand just what the difference is between Product A and Product B, but you should be able to tell—based on how the two terms are discussed—that they should be in different categories. Sometimes you are not just listening for an under-standing of the concept; you are also listening for key words that will clue you in to where this information is supposed to be organized. Keeping in mind the type of information you are talking about, as you are talking about it, can help you as you create your topical outline.
Basic RuleYou must be aware of what type of information you are dealing with as
you develop your topical outline.
Figure 4–6. Unorganized Versus Organized Topic Lists
Unorganized Topic List
• Mirroring (mirror neuron system)
• Single unit recording
• Aggregate fields
• Mismatch negativity
• Parts of the brain
• Cognitive neuropsychology
• Cerebral cortex
• Broca’s area
• Brain responses
• SPECT
• Change blindness
• Methods
• Psychophysics
Organized Topic List
Parts of the brain
• Aggregate fields
• Cerebral cortex
• Broca’s area
Brain responses
• Mismatch negativity
• Mirroring
• Change blindness
Methods
• Psychophysics
• Cognitive neuropsychology
• SPECT
• Single unit recording
Arranging a Technical Course ■ ■ ■ ■ ■ ■ ■ ■ ■ ■ ■ ■ ■ ■ ■ ■ ■ ■ ■ ■ ■ ■ ■ ■ ■ ■ ■ ■ ■ ■ ■ ■ ■ ■ ■ ■ ■ ■ ■ ■
46
As you create the outline, be sure its organization makes logical sense. The next section discusses various options for arranging technical courses.
Noted
Nontechnical designers working with an SME may sometimes find that the course design document evolves as the project evolves. It is important to remember that just as you are learning about the technical topic, your SME is also probably facing a learning curve with all that goes into the course devel-opment process. Sometimes the SME won’t realize until further into the devel-opment process that the level of information is skewed or that a necessary topic has been omitted from the course. Of course, you should still ask the appropriate “why this change now” question to ensure that you are not deal-ing with scope creep, but ultimately you need to be open and somewhat flex-ible with the design document as the course progresses.
Options for Arranging a Technical Course A developer should always have a big picture of the chosen organizational system of the course in mind as he or she gathers information. Keeping this in mind will help you recognize where in the course to place any spontaneous technical tidbits you might catch, as well as alert you to when you might even need to change the course structure as the project evolves.
Noted
It is not uncommon for the course structure to change—sometimes several times during the design process. As you learn more about the topic and under-stand the level of detail with which the SME is working, you might realize that a more logical order of the course is appropriate.
The following sections describe various options for arranging technical training courses.
Organization by Order of Job ProcessA course can be organized in the order in which tasks are completed in the target audience’s job. A course organized in this way may have three sections:
1. Pre-job or task preparation

■ ■ ■ ■ ■ ■ ■ ■ ■ ■ ■ ■ ■ ■ ■ ■ ■ ■ ■ ■ ■ ■ ■ ■ ■ ■ ■ ■ ■ ■ ■ ■ ■ ■ ■ ■ ■ ■ ■ ■ Arranging a Technical Course
47
2. Tasks done during the job 3. Post-job procedures
If there are specific products covered, those products would be covered in turn in each section of the course, as in the example in Figure 4–7. This type of organiza-tion is ideal for training courses tailored to a very specific target audience in which all members hold the same job title.
Benefits: This type of course organization allows for instruction that is very close and relevant to the exact job of the target audience.
Drawbacks: Jumping around to different products during each section of the course (pre-job, job, and post-job) may be confusing to learners and make it difficult for them to remember what characteristics go with each product.
Organization by Product or ServiceA course can also be organized based on the various products or services offered. The processes associated with each product or task (service) are covered completely in separate sections, as in Figure 4–8. This type of organization is ideal for training courses that cover distinct and individual products or tasks.
Figure 4–7. Order in the Job Process
Overview
Pre-job
Product 1
Product 2
Product 3
Job
Product 1
Product 2
Product 3
Post-job
Product 1
Product 2
Product 3
Conclusion

Arranging a Technical Course ■ ■ ■ ■ ■ ■ ■ ■ ■ ■ ■ ■ ■ ■ ■ ■ ■ ■ ■ ■ ■ ■ ■ ■ ■ ■ ■ ■ ■ ■ ■ ■ ■ ■ ■ ■ ■ ■ ■ ■
48
Benefits: This type of organization allows learners an opportunity to see how each product or service is specifically used in context.
Drawbacks: If a course is organized this way, there can be repetition of informa-tion covered about each product. Sometimes even very different products will have similar operational procedures.
Organization by Case StudyThis type of course is organized around a case scenario. In this type of organization, learners are given a case study to complete. The steps they must follow function as the order of the course. Sometimes this type of course organization can look very similar to the order of the job process course organization system.
This type of organization is ideal when you have a comprehensive case study available that matches the objectives of the course. The case study structure gives learners a big picture of the situation, the topic, and the class and then allows them to go into detail from there. The case study organization works well for learners who desire to see the big picture before discussing details. It can also work well in courses in which participant discussion and extrapolation are required.
Benefits: The case study organizational style is usually quite engaging to the learners and relevant to their jobs, so organizing a course in this way can motivate them and help them directly relate training content to the workplace.
Drawbacks: This type of training can be quite time-consuming to develop. Also, not every topic fits nicely into a case study format.
Organization by Concepts: From Easy to DifficultA course can also be organized by concepts—in this case, basic to complex (see Figure 4–9). Simple topics are covered first, and then these simple topics are used as building blocks for later, more complex topics. This type of organization is ideal when you have related topics that build on each other.
Figure 4–8. Organization by Products or Services
Overview
Product/Task 1
Pre-job
Job
Post-job
Product/Task 2
Pre-job
Job
Post-job
Product/Task 3
Pre-job
Job
Post-job
Conclusion

■ ■ ■ ■ ■ ■ ■ ■ ■ ■ ■ ■ ■ ■ ■ ■ ■ ■ ■ ■ ■ ■ ■ ■ ■ ■ ■ ■ ■ ■ ■ ■ ■ ■ ■ ■ ■ ■ ■ ■ Arranging a Technical Course
49
This type of organization is also useful if most of your target audience is new to the field and unconfident; this structure gives a novice audience an easy win at the beginning of the class by providing “successes” with the easier topics at the beginning.
Benefits: This organizational structure allows learners to gradually and continu-ally be challenged. Learners start with a relatively easy topic and are then allowed to build and apply that information to more difficult topics. Starting with an easier topic gives participants an early win in the training.
Drawbacks: This structure may not work for task-focused training. By organizing a course this way, you may be teaching participants concepts that are not consistent with the regular flow of their jobs. Task-based training should mirror the workplace as closely as possible, and this type of organizational structure may make that diffi-cult to accomplish.
Organization by Concepts: Difficult, Then Build from Easy to Difficult A course can also be organized by starting with a difficult topic, then moving back to an easy topic, and then building up in difficulty from there, as in Figure 4–10. This structure is useful if your target audience members are experienced individuals who don’t necessarily think they need to be in training; this structure can provide a chal-lenge right away in the course to pique the interest of more experienced learners.
Figure 4–9. Organization by Concepts: Building from Easy to Difficult

Arranging a Technical Course ■ ■ ■ ■ ■ ■ ■ ■ ■ ■ ■ ■ ■ ■ ■ ■ ■ ■ ■ ■ ■ ■ ■ ■ ■ ■ ■ ■ ■ ■ ■ ■ ■ ■ ■ ■ ■ ■ ■ ■
50
Benefits: Starting off with a difficult topic can spark interest and motivate learn-ers to pay attention.
Drawbacks: This organizational structure may not follow the tasks of the job exactly. Also, if you misread your target audience and start out with something too difficult, they may never recover.
Organization by Concepts: Constant Variation Between Easy and DifficultA course can also be organized by a back-and-forth combination of easy and difficult topics, as in Figure 4–11. The course may start with an easy topic, move to a difficult topic, then go back to an easy topic, return to a difficult topic, and so on.
Figure 4–10. Organization by Concepts: Difficult, Then Build from Easy to Difficult
Figure 4–11. Organization by Concepts: Easy, Difficult, Easy, Difficult
■ ■ ■ ■ ■ ■ ■ ■ ■ ■ ■ ■ ■ ■ ■ ■ ■ ■ ■ ■ ■ ■ ■ ■ ■ ■ ■ ■ ■ ■ ■ ■ ■ ■ ■ ■ ■ ■ ■ ■ Arranging a Technical Course
51
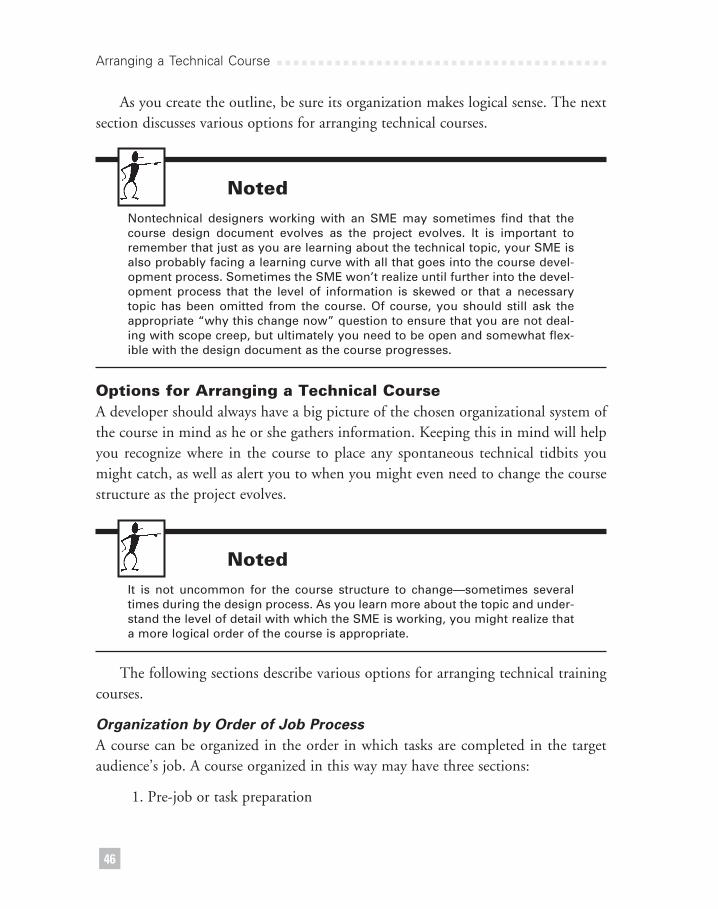
Conversely, a course can also be organized by starting with a difficult topic, then moving to an easy topic, then going back to a difficult topic, returning to an easy topic, and so on (see Figure 4–12).
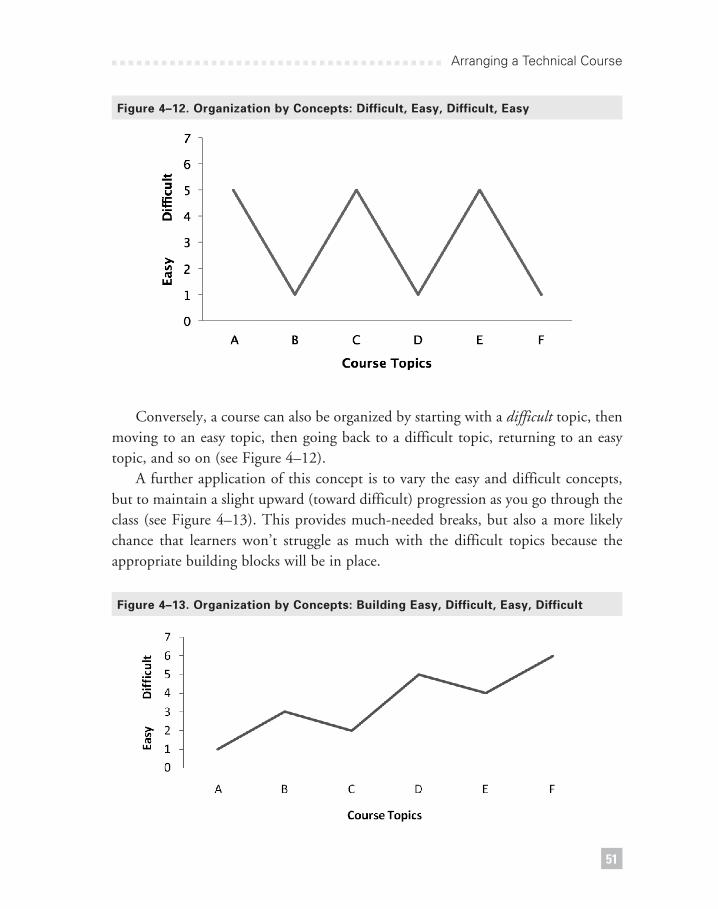
A further application of this concept is to vary the easy and difficult concepts, but to maintain a slight upward (toward difficult) progression as you go through the class (see Figure 4–13). This provides much-needed breaks, but also a more likely chance that learners won’t struggle as much with the difficult topics because the appropriate building blocks will be in place.
Figure 4–12. Organization by Concepts: Difficult, Easy, Difficult, Easy
Figure 4–13. Organization by Concepts: Building Easy, Difficult, Easy, Difficult

Arranging a Technical Course ■ ■ ■ ■ ■ ■ ■ ■ ■ ■ ■ ■ ■ ■ ■ ■ ■ ■ ■ ■ ■ ■ ■ ■ ■ ■ ■ ■ ■ ■ ■ ■ ■ ■ ■ ■ ■ ■ ■ ■
52
These organizational structures can be useful when training topics are variable in their difficulty, or for classes that have very complicated material that is likely to make learners “burn out.” Having the easy-difficult or difficult-easy interchange gives learners much-needed breaks during the course.
Benefits: This structure allows learners breaks in the difficulty of training. Participants are kept challenged, but not completely burned out.
Drawbacks: This organizational structure may not follow the tasks of the job exactly. Also, if you misread your target audience and have an overly basic section at the beginning with experienced learners, those participants might be bored and have a bad first impression of the class. On the other hand, if you have an overly compli-cated section at the beginning with novice learners, the topic may go completely over their heads.
Learner ChoiceIt may sound frightening, but another option is to allow learners to choose what topics are covered and in what order. This type of organization is ideal when you have motivated participants ready to take charge of their learning. It is good for learners who have reached the “conscious incompetence” stage of being, that is, for those who are aware of what they don’t know about a particular topic.
Noted
If learners are choosing their own topics, you will have to indicate this in the wording of the course objectives.
If it is not appropriate to let learners have control over all of the topics covered in training, you may consider simply allowing them to determine the order in which topics are covered. If you have topics of parallel importance and levels of complica-tion (see Figure 4–14), letting learners choose the order in which those topics are covered will give them at least some tangible control over their learning.
Benefits: The benefit of this structure is that learners have control of their learn-ing. This can motivate participants to be actively engaged.
Drawbacks: This structure may not work for learners who are still at the uncon-scious incompetence stage of learning, as they won’t even know what topics they should be asking for in order to improve their performance. In addition, with this type of structure, your control over the organization of the course is lost. The course

■ ■ ■ ■ ■ ■ ■ ■ ■ ■ ■ ■ ■ ■ ■ ■ ■ ■ ■ ■ ■ ■ ■ ■ ■ ■ ■ ■ ■ ■ ■ ■ ■ ■ ■ ■ ■ ■ ■ ■ Arranging a Technical Course
53
flow may not be efficient. There could be a repeat of topics that, had you organized the course a particular way, you could have consolidated. You may lose a logical flow—a related product or service that builds on another may not be covered right after the other. You may also run the risk of starting off with a topic that is too dif-ficult and having to explain the easier building blocks within that difficult topic, thus not really allowing learners to choose the order of the topics and just generally con-fusing everyone.
CombinationBecause not everything fits nicely into a category, you may find you need to use a combination of different organizational structures to fit your particular case. The combination organizational structure may be just the right fit for a number of tricky classes that don’t seem to fit perfectly into another category.
The combination organizational structure can look like many different things; the three images in Figure 4–15 are simply examples. For example, in Combination 1, each product is discussed separately according to that product’s distinct pre-job plan-ning and job operations. Since all the products share basically the same post-job procedures in this case, the post-job procedures of all the products are discussed together. In Combination 2, all of the products have similar pre-job procedures, but have distinctly different job and post-job operations. Thus the pre-job procedures are covered together and the job and post-job operations are covered separately per
Figure 4–14. Learner Choice
Topic?
Topic?
Topic?
Topic?
Topic?
Topic?

Arranging a Technical Course ■ ■ ■ ■ ■ ■ ■ ■ ■ ■ ■ ■ ■ ■ ■ ■ ■ ■ ■ ■ ■ ■ ■ ■ ■ ■ ■ ■ ■ ■ ■ ■ ■ ■ ■ ■ ■ ■ ■ ■
54
product. Finally, in Combination 3, all pre-job planning procedures are covered together. Then participants are allowed to choose the order of which of the three products they would like to cover.
Benefits: The combination course structure allows you the flexibility to fit an ideal organizational structure to your unique technical topic.
Drawbacks: If the organization gets too patchy or decentralized, your course structure is at risk of losing its organizational logic and can result in a completely unorganized flow. You need to keep this in mind if you start to mix together too many organizational structures.
Figure 4–15. Combination
Example of Combination 1
Overview
Product 1Pre-job
Job
Product 2Pre-job
Job
Product 3Pre-job
Job
Post-jobProduct 1Product 2Product 3
Conclusion
Example of Combination 2
Overview
Pre-jobProduct 1Product 2Product 3
Product 1Job
Post-job
Product 2Job
Post-job
Product 3Job
Post-job
Conclusion

■ ■ ■ ■ ■ ■ ■ ■ ■ ■ ■ ■ ■ ■ ■ ■ ■ ■ ■ ■ ■ ■ ■ ■ ■ ■ ■ ■ ■ ■ ■ ■ ■ ■ ■ ■ ■ ■ ■ ■ Arranging a Technical Course
55
Getting It DoneAfter you have gathered all the necessary information (audience, business purpose, and objectives) for your technical course development project, the next step is compiling, analyzing, and arranging this information. This chapter has discussed creating a design document that fully supports the
course objectives and the overall business goal. It is necessary to identify all of the topics necessary for a course and to determine the order in which those topics should be arranged.
There are many ways in which a course can be organized, each with its own benefits and drawbacks. You will need to look at your specific topic and course objectives in order to determine which structure is ideal.
Figure 4–15. Combination
Example of Combination 3
Overview
Pre-jobProduct 1Product 2Product 3
Learner Choice
Product 1Job
Post-job
Product 2Job
Post-job
Product 3Job
Post-job
Conclusion
Job Product
Job Product Job Product

Arranging a Technical Course ■ ■ ■ ■ ■ ■ ■ ■ ■ ■ ■ ■ ■ ■ ■ ■ ■ ■ ■ ■ ■ ■ ■ ■ ■ ■ ■ ■ ■ ■ ■ ■ ■ ■ ■ ■ ■ ■ ■ ■
56
Worksheet 4–1. Course Design Document Checklist
Use the following checklist to ensure that you have a complete and accurate course design document.
My outline has the following:
9 Working title
9 Audience
9 Business purpose
9 SMART objectives
9 Topic list
9 Complete content: All relevant content to meet course objectives is included.
9 Appropriate categories and levels of information: Content is staged correctly on the outline.
9 A logical flow: Course topics flow in a manner conducive to the target audience and the course objectives.
Worksheet 4–2. Choosing a Course Structure
Answering the following questions will help you choose an appropriate organizational structure for your technical training project.
1. Is this training topic about a product or a task?
2. How similar are the various products or tasks I am covering in my training? How much of the content is likely to overlap?
3. What are my target audience members like? Are they likely to appreciate a challenge at the beginning of the course, or would a challenge intimidate them or hamper their learning?
4. How motivated are the target audience members?
5. If participants chose their own order of topics covered, would the training be adversely affected? Would time be wasted?