arisaka type 38 rifle · 39) place the sear spring on the sear spring pin on the sear as shown in...
TRANSCRIPT
Arisaka Type 38 Rifle Disassembly and Reassembly
Disassembly Instructions
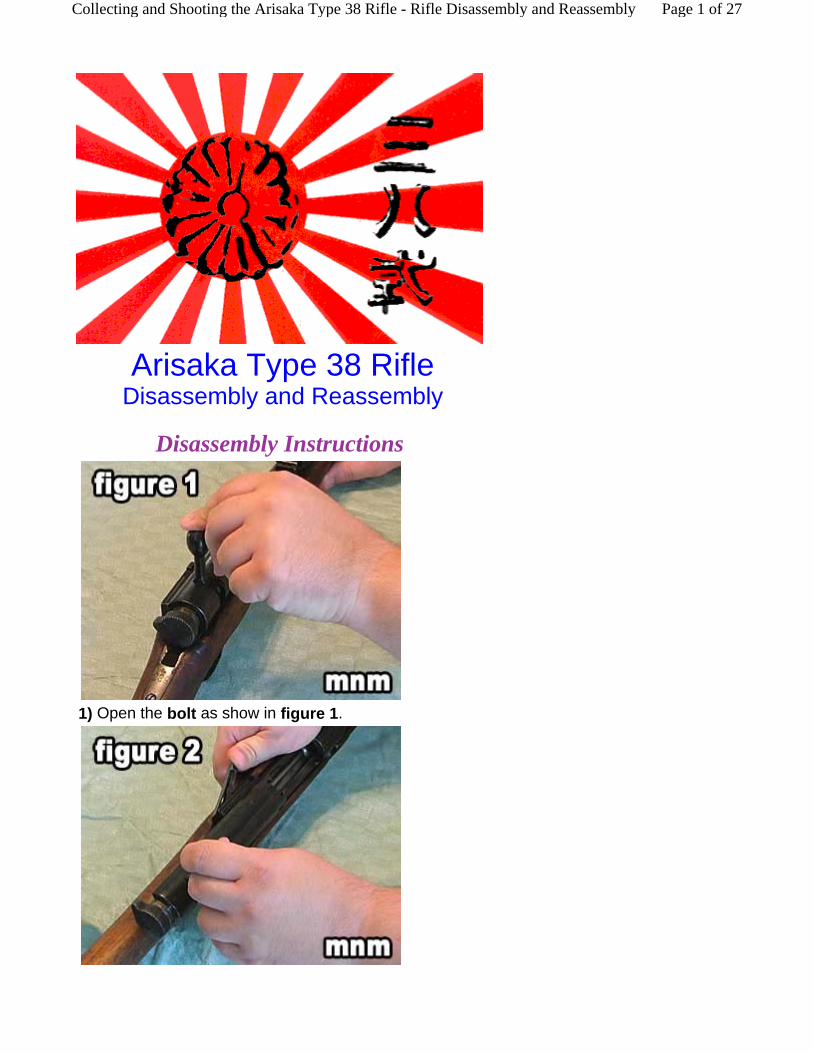
1) Open the bolt as show in figure 1.
Page 1 of 27Collecting and Shooting the Arisaka Type 38 Rifle - Rifle Disassembly and Reassembly
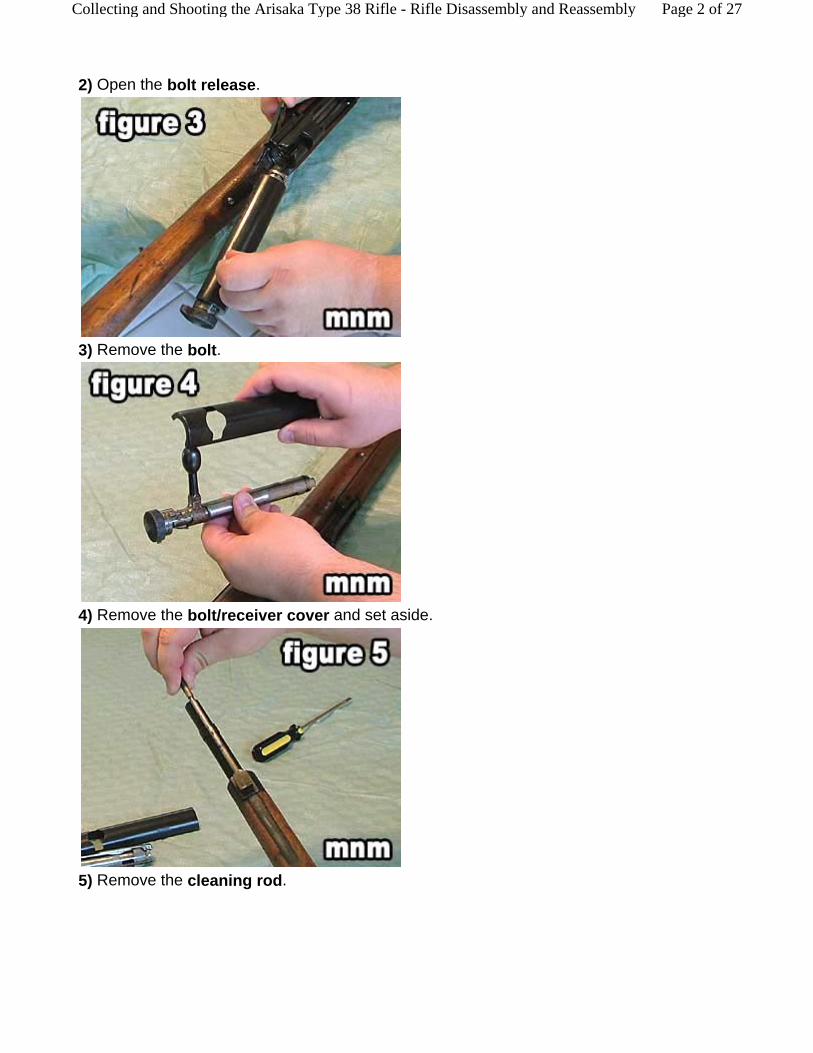
2) Open the bolt release.
3) Remove the bolt.
4) Remove the bolt/receiver cover and set aside.
5) Remove the cleaning rod.
Page 2 of 27Collecting and Shooting the Arisaka Type 38 Rifle - Rifle Disassembly and Reassembly
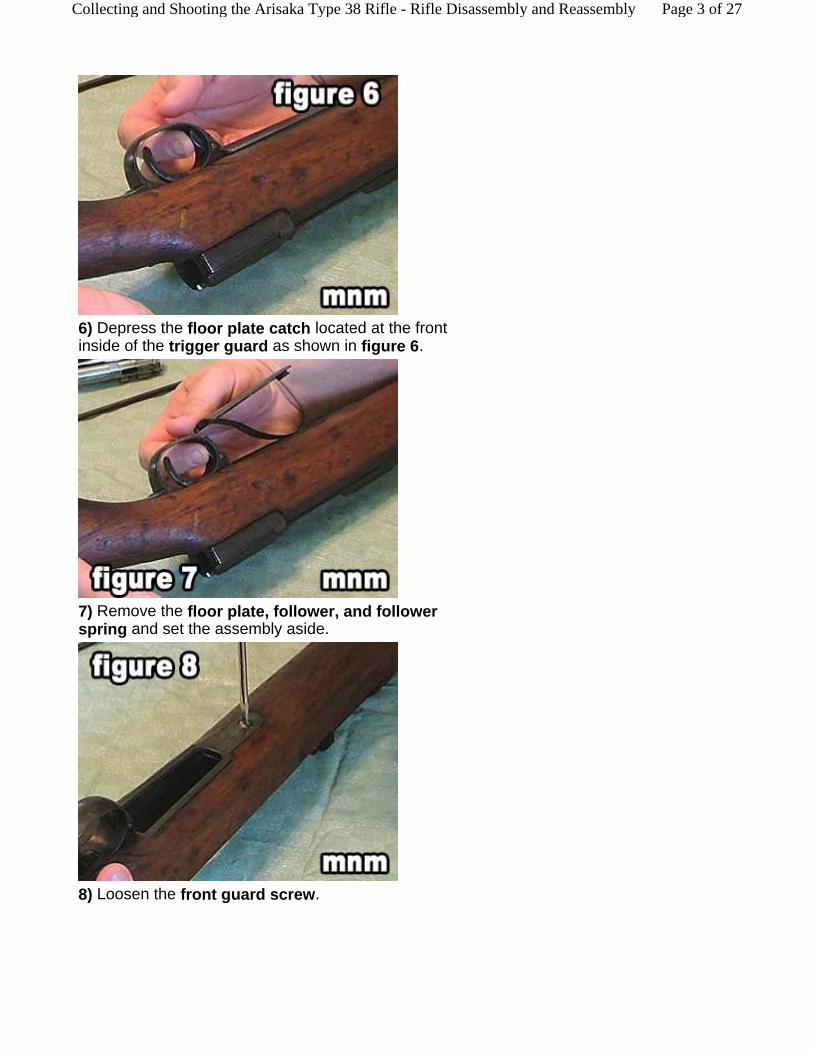
6) Depress the floor plate catch located at the front inside of the trigger guard as shown in figure 6.
7) Remove the floor plate, follower, and follower spring and set the assembly aside.
8) Loosen the front guard screw.
Page 3 of 27Collecting and Shooting the Arisaka Type 38 Rifle - Rifle Disassembly and Reassembly
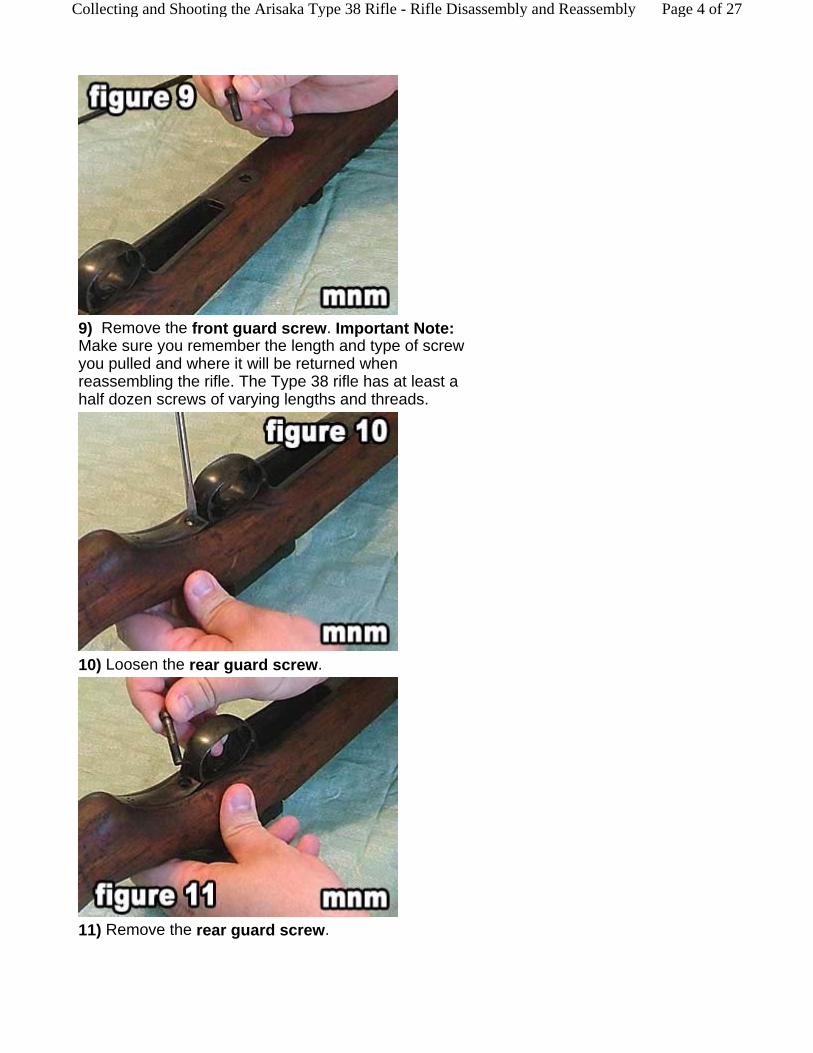
9) Remove the front guard screw. Important Note: Make sure you remember the length and type of screw you pulled and where it will be returned when reassembling the rifle. The Type 38 rifle has at least a half dozen screws of varying lengths and threads.
10) Loosen the rear guard screw.
11) Remove the rear guard screw.
Page 4 of 27Collecting and Shooting the Arisaka Type 38 Rifle - Rifle Disassembly and Reassembly
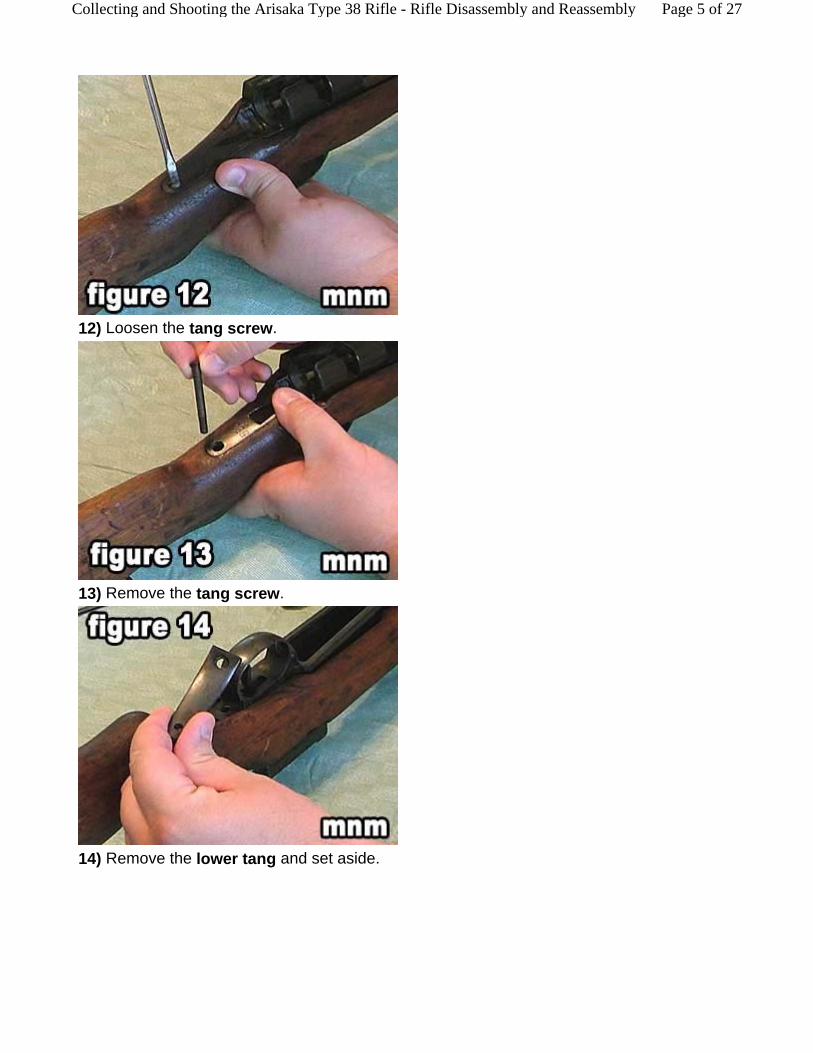
12) Loosen the tang screw.
13) Remove the tang screw.
14) Remove the lower tang and set aside.
Page 5 of 27Collecting and Shooting the Arisaka Type 38 Rifle - Rifle Disassembly and Reassembly
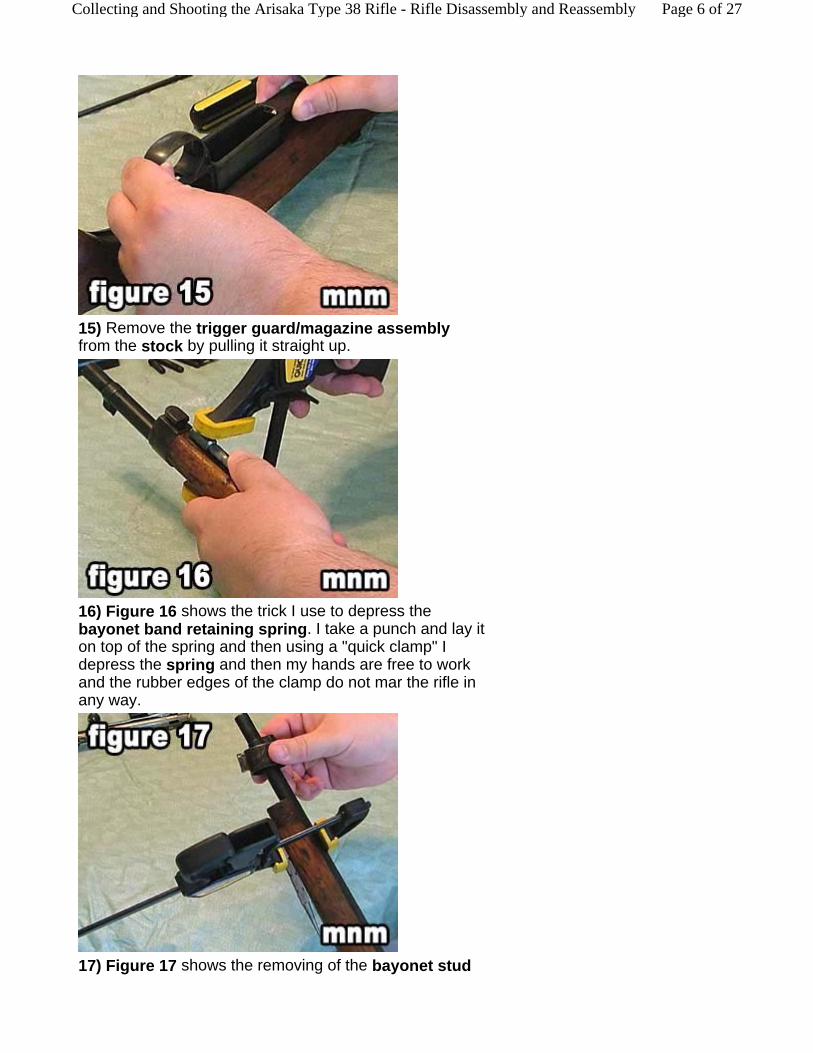
15) Remove the trigger guard/magazine assembly from the stock by pulling it straight up.
16) Figure 16 shows the trick I use to depress the bayonet band retaining spring. I take a punch and lay it on top of the spring and then using a "quick clamp" I depress the spring and then my hands are free to work and the rubber edges of the clamp do not mar the rifle in any way.
17) Figure 17 shows the removing of the bayonet stud
Page 6 of 27Collecting and Shooting the Arisaka Type 38 Rifle - Rifle Disassembly and Reassembly
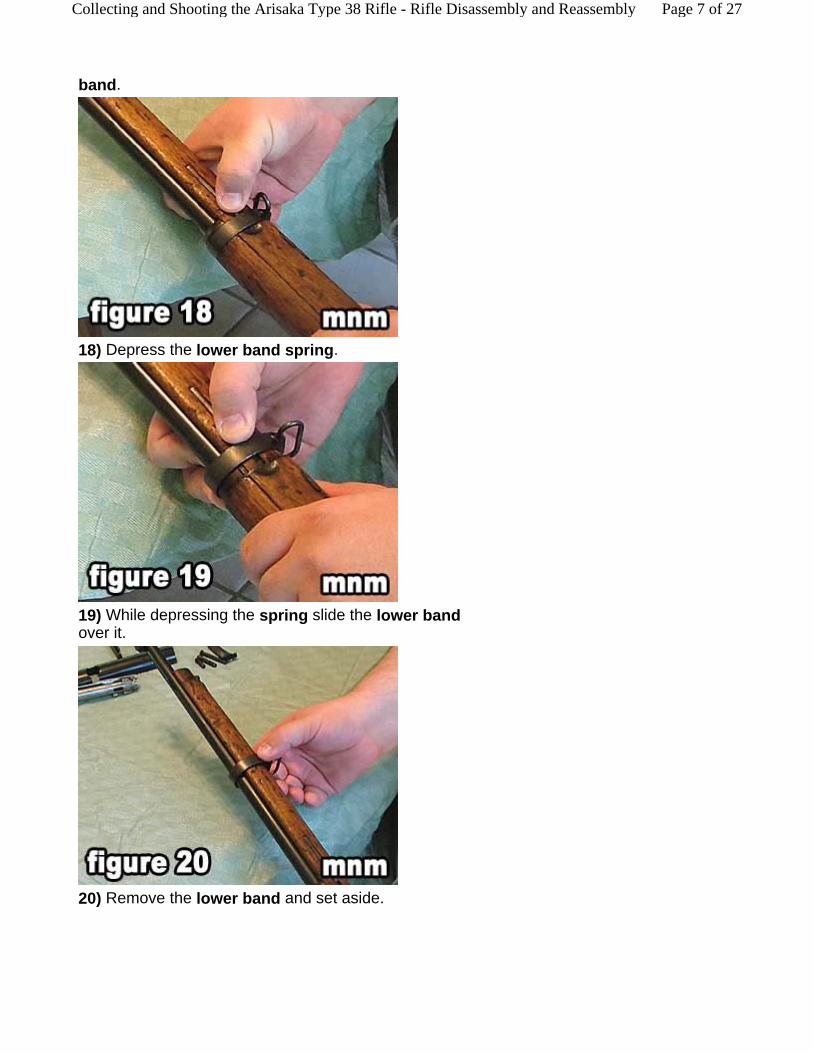
band.
18) Depress the lower band spring.
19) While depressing the spring slide the lower band over it.
20) Remove the lower band and set aside.
Page 7 of 27Collecting and Shooting the Arisaka Type 38 Rifle - Rifle Disassembly and Reassembly
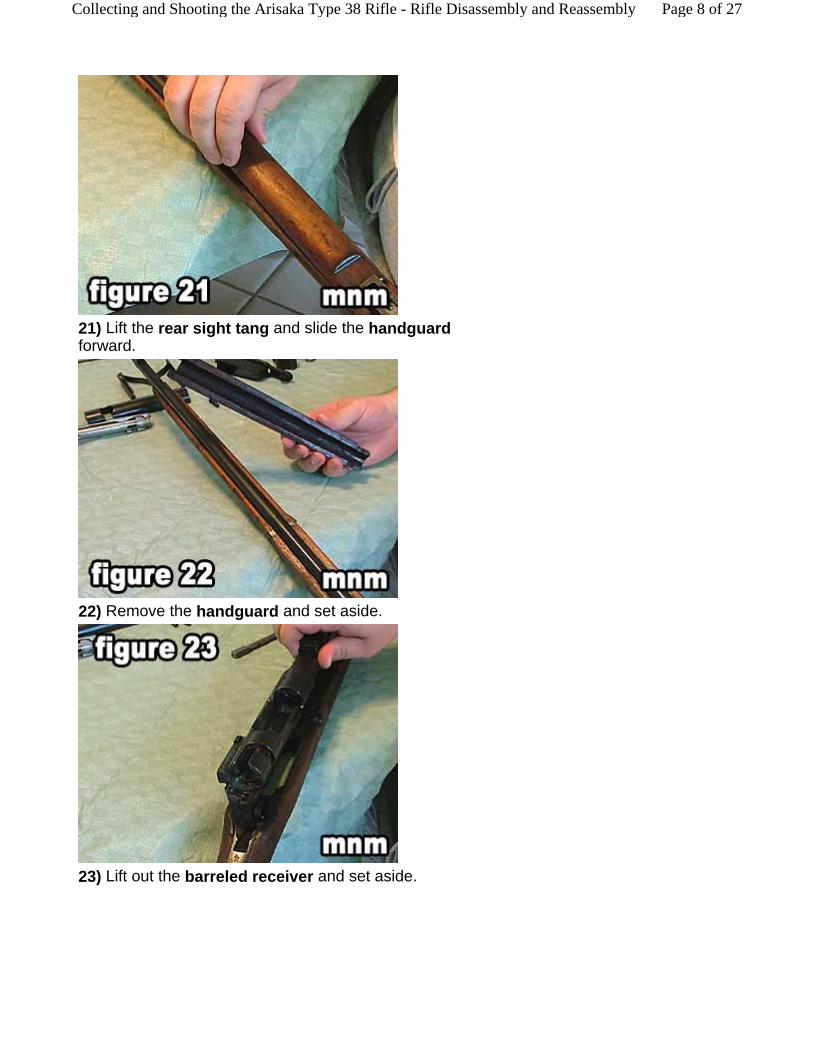
21) Lift the rear sight tang and slide the handguard forward.
22) Remove the handguard and set aside.
23) Lift out the barreled receiver and set aside.
Page 8 of 27Collecting and Shooting the Arisaka Type 38 Rifle - Rifle Disassembly and Reassembly
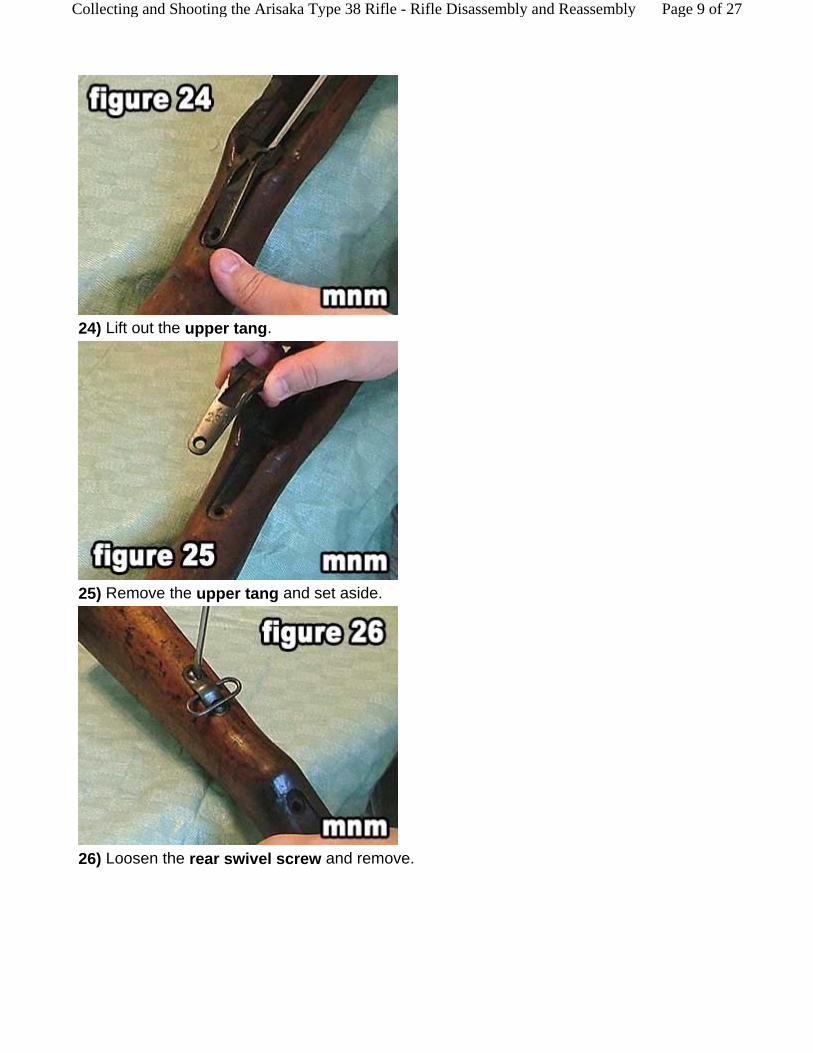
24) Lift out the upper tang.
25) Remove the upper tang and set aside.
26) Loosen the rear swivel screw and remove.
Page 9 of 27Collecting and Shooting the Arisaka Type 38 Rifle - Rifle Disassembly and Reassembly
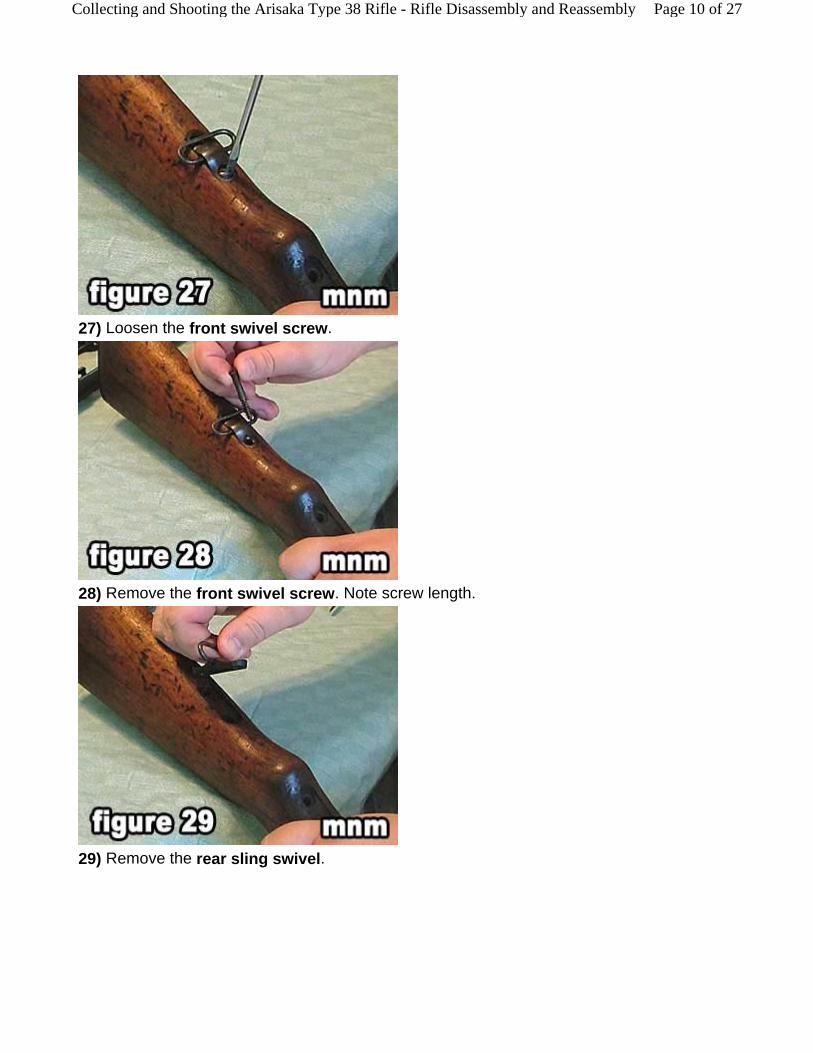
27) Loosen the front swivel screw.
28) Remove the front swivel screw. Note screw length.
29) Remove the rear sling swivel.
Page 10 of 27Collecting and Shooting the Arisaka Type 38 Rifle - Rifle Disassembly and Reassembly

30) Unscrew the lower butt plate screw.
31) Remove the lower butt plate screw.
32) Unscrew the upper butt plate screw.
Page 11 of 27Collecting and Shooting the Arisaka Type 38 Rifle - Rifle Disassembly and Reassembly

33) Remove the upper butt plate screw.
34) Remove the butt plate and set aside.
35) Figure 35 shows the sear pin.
Page 12 of 27Collecting and Shooting the Arisaka Type 38 Rifle - Rifle Disassembly and Reassembly
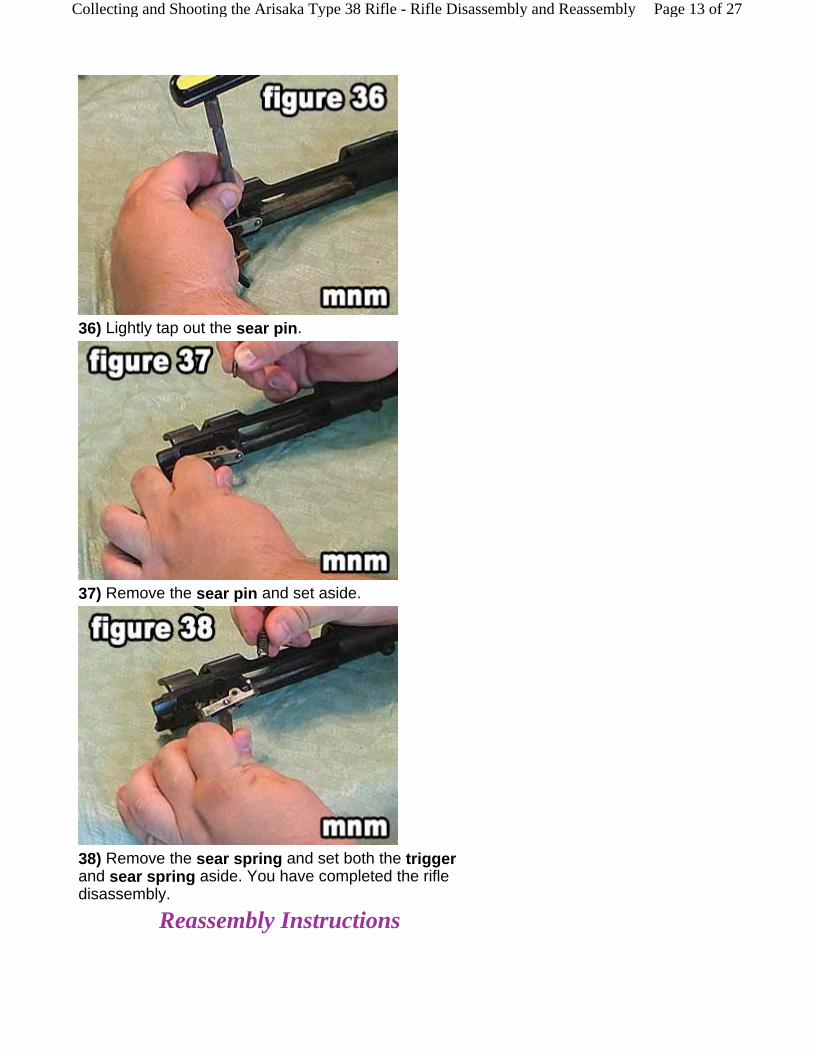
36) Lightly tap out the sear pin.
37) Remove the sear pin and set aside.
38) Remove the sear spring and set both the trigger and sear spring aside. You have completed the rifle disassembly.
Reassembly Instructions
Page 13 of 27Collecting and Shooting the Arisaka Type 38 Rifle - Rifle Disassembly and Reassembly
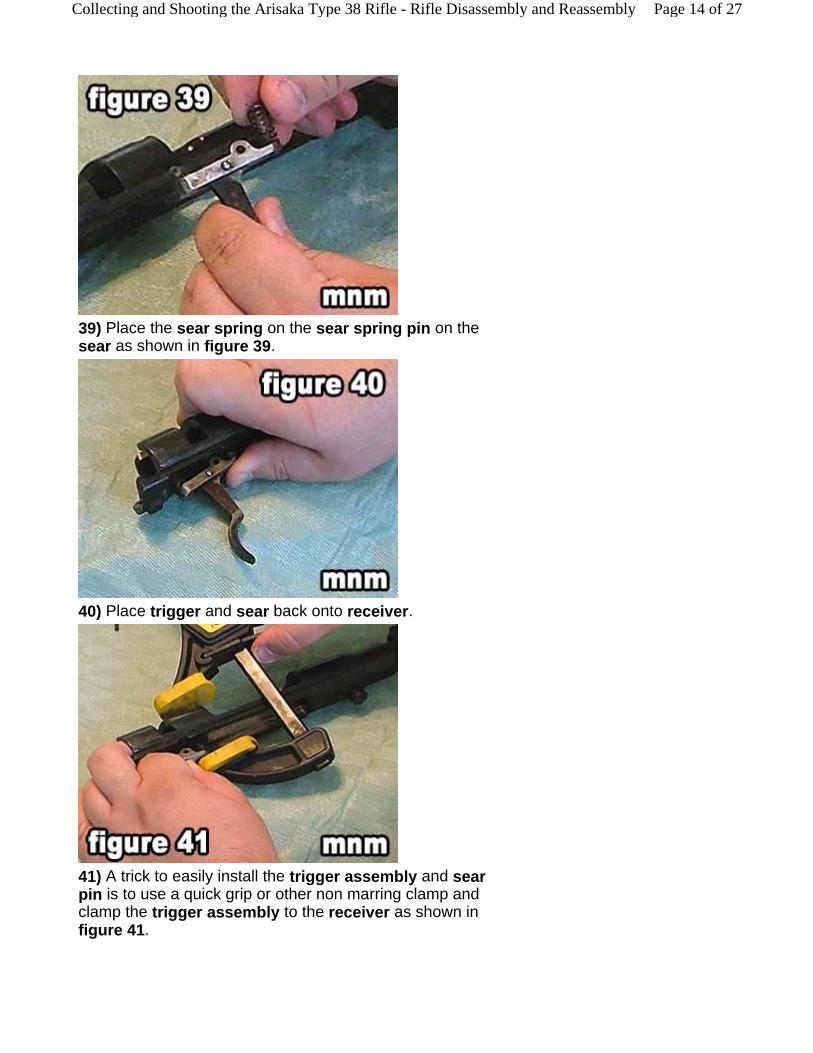
39) Place the sear spring on the sear spring pin on the sear as shown in figure 39.
40) Place trigger and sear back onto receiver.
41) A trick to easily install the trigger assembly and sear pin is to use a quick grip or other non marring clamp and clamp the trigger assembly to the receiver as shown in figure 41.
Page 14 of 27Collecting and Shooting the Arisaka Type 38 Rifle - Rifle Disassembly and Reassembly
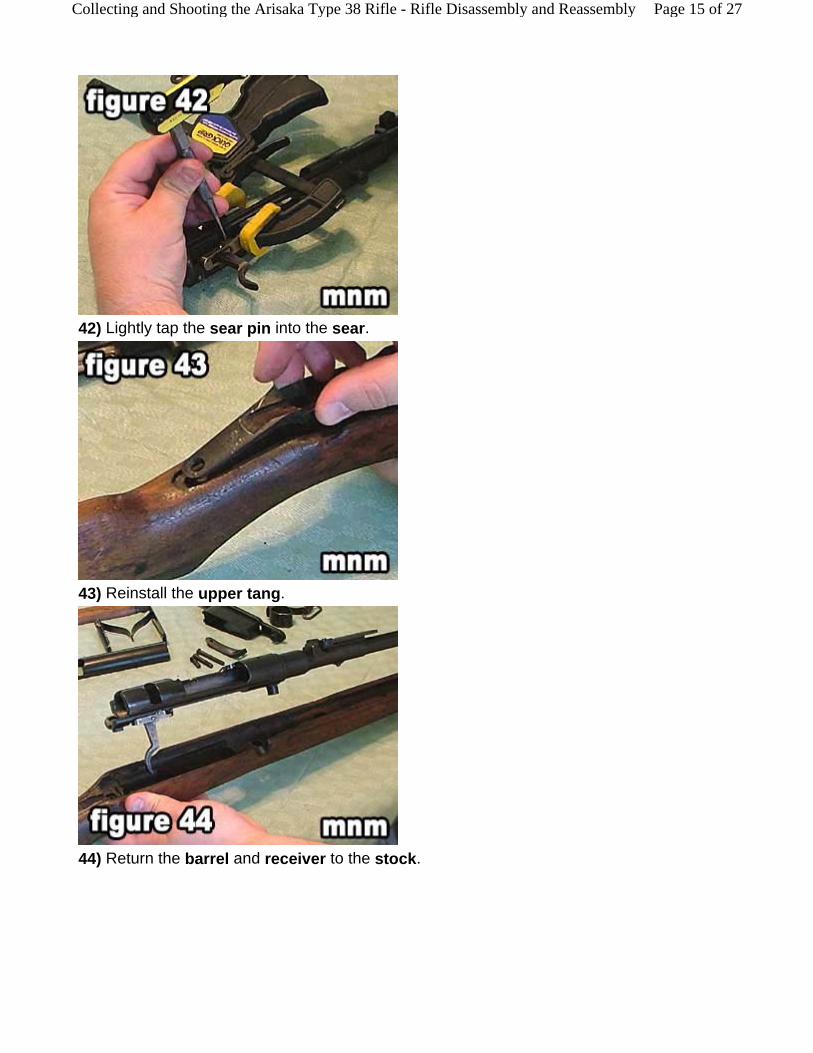
42) Lightly tap the sear pin into the sear.
43) Reinstall the upper tang.
44) Return the barrel and receiver to the stock.
Page 15 of 27Collecting and Shooting the Arisaka Type 38 Rifle - Rifle Disassembly and Reassembly
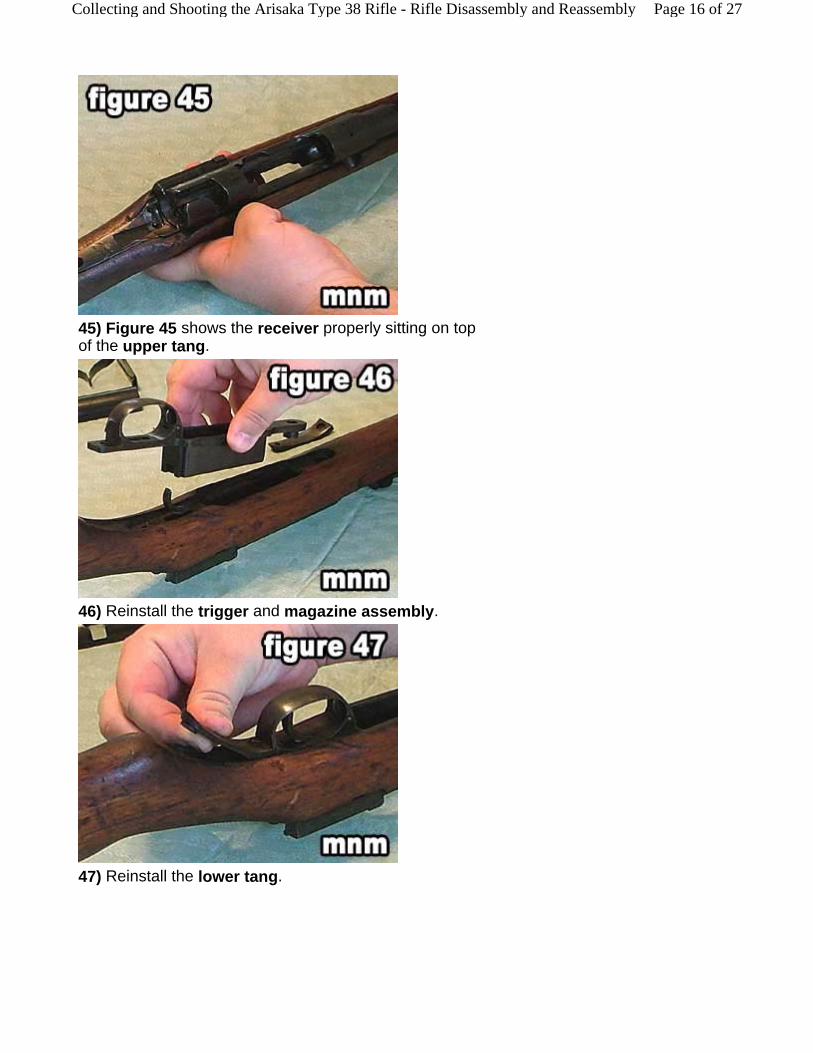
45) Figure 45 shows the receiver properly sitting on top of the upper tang.
46) Reinstall the trigger and magazine assembly.
47) Reinstall the lower tang.
Page 16 of 27Collecting and Shooting the Arisaka Type 38 Rifle - Rifle Disassembly and Reassembly
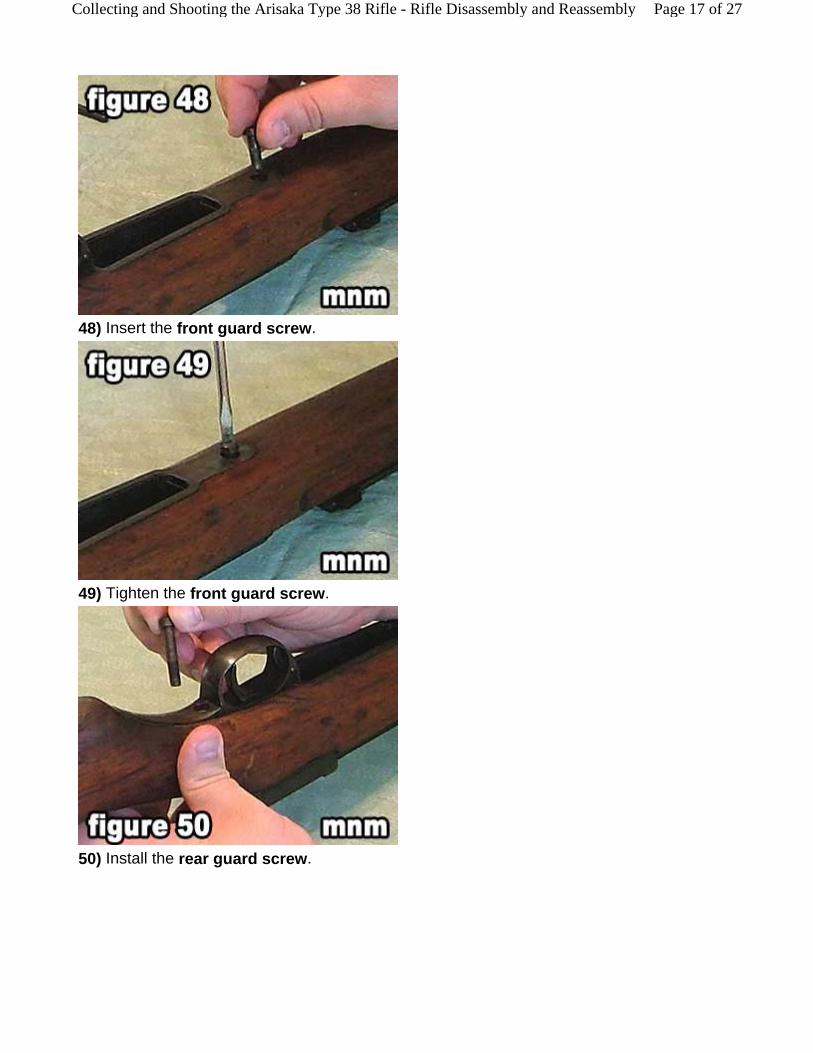
48) Insert the front guard screw.
49) Tighten the front guard screw.
50) Install the rear guard screw.
Page 17 of 27Collecting and Shooting the Arisaka Type 38 Rifle - Rifle Disassembly and Reassembly
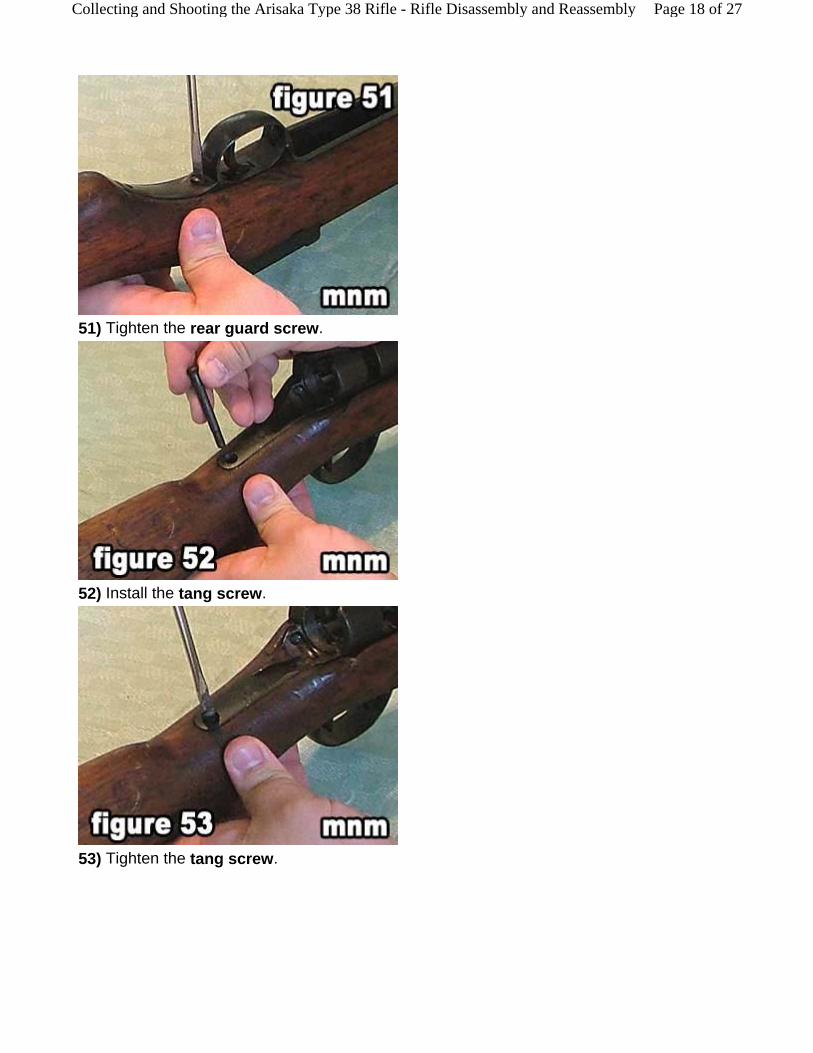
51) Tighten the rear guard screw.
52) Install the tang screw.
53) Tighten the tang screw.
Page 18 of 27Collecting and Shooting the Arisaka Type 38 Rifle - Rifle Disassembly and Reassembly

54) Reinstall the rear sling swivel.
55) Install the rear swivel screw.
56) Install the front swivel screw.
Page 19 of 27Collecting and Shooting the Arisaka Type 38 Rifle - Rifle Disassembly and Reassembly

57) Tighten the front swivel screw.
58) Tighten the rear swivel screw.
59) Reinstall the butt plate.
Page 20 of 27Collecting and Shooting the Arisaka Type 38 Rifle - Rifle Disassembly and Reassembly
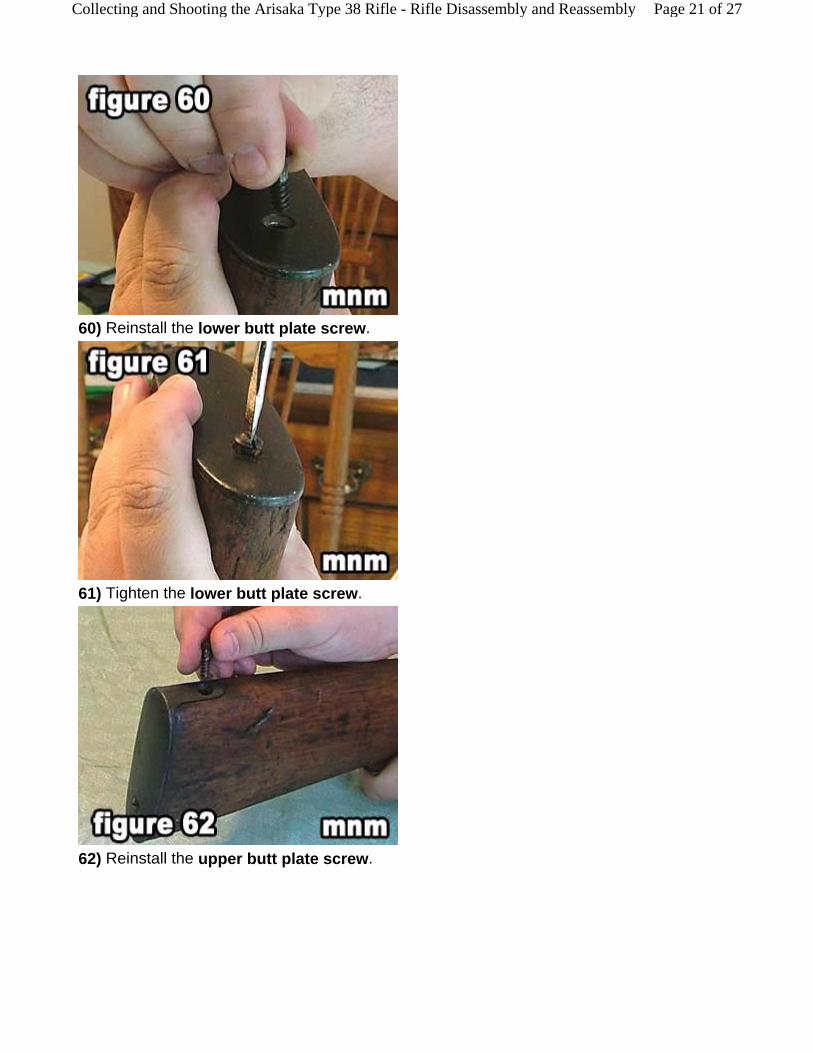
60) Reinstall the lower butt plate screw.
61) Tighten the lower butt plate screw.
62) Reinstall the upper butt plate screw.
Page 21 of 27Collecting and Shooting the Arisaka Type 38 Rifle - Rifle Disassembly and Reassembly
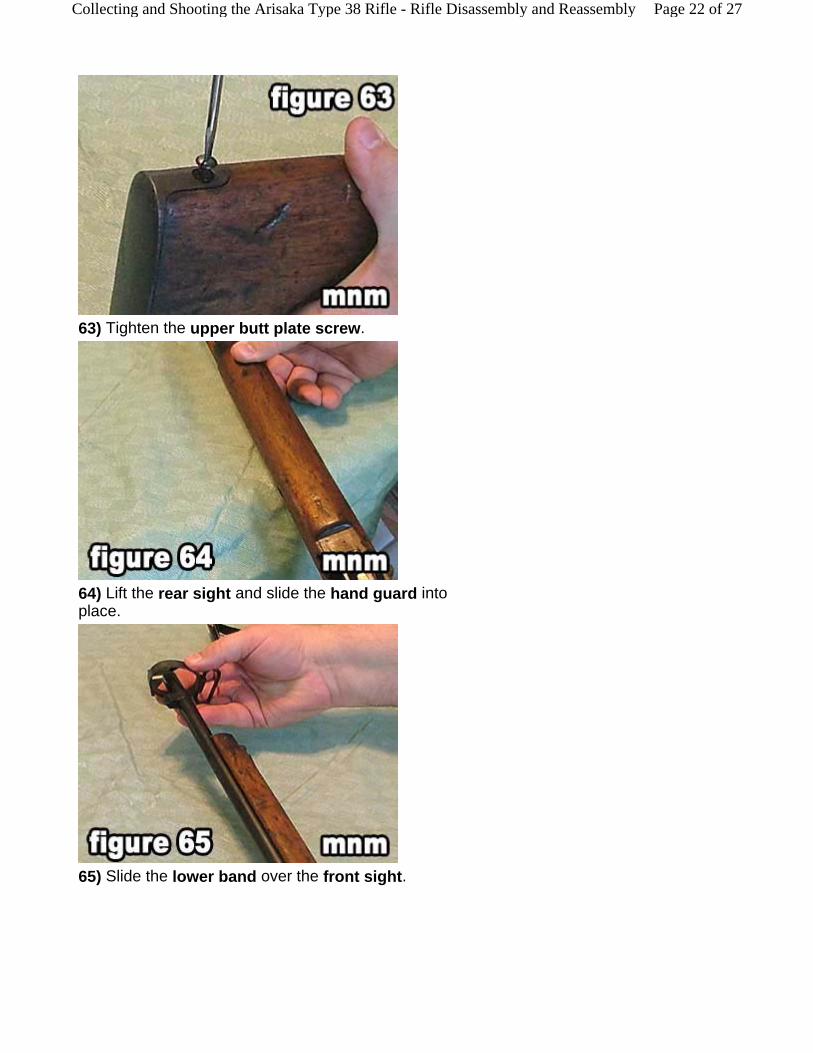
63) Tighten the upper butt plate screw.
64) Lift the rear sight and slide the hand guard into place.
65) Slide the lower band over the front sight.
Page 22 of 27Collecting and Shooting the Arisaka Type 38 Rifle - Rifle Disassembly and Reassembly
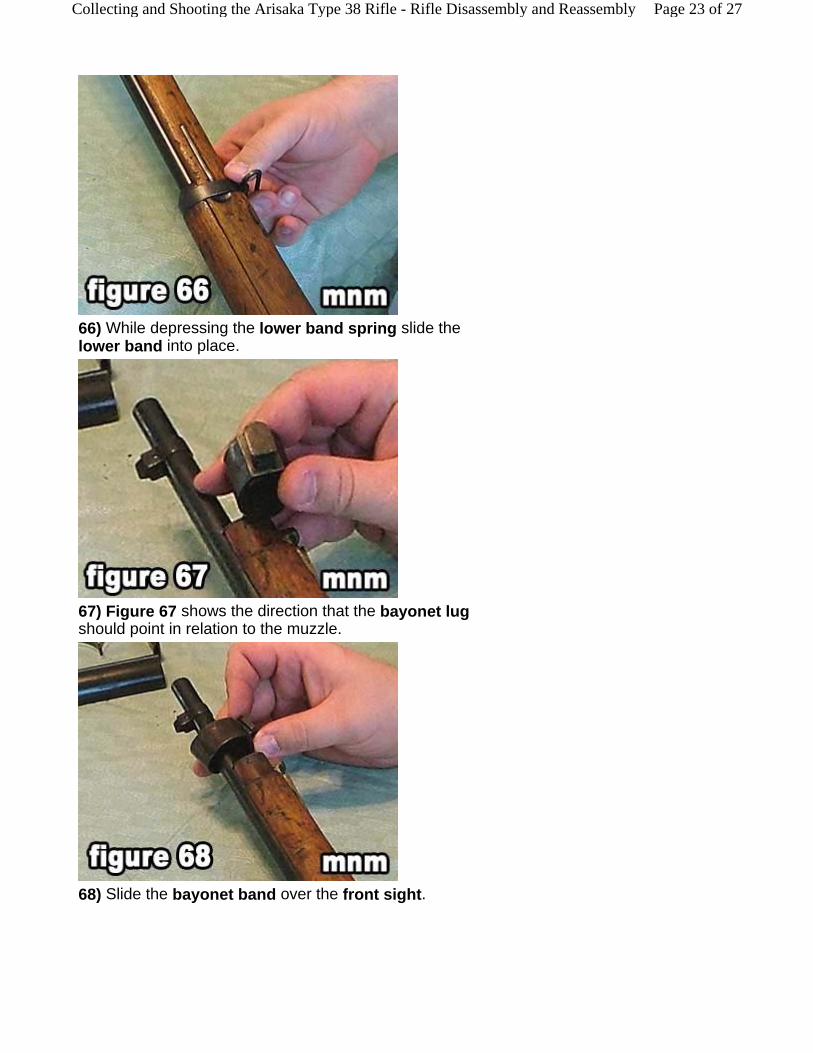
66) While depressing the lower band spring slide the lower band into place.
67) Figure 67 shows the direction that the bayonet lug should point in relation to the muzzle.
68) Slide the bayonet band over the front sight.
Page 23 of 27Collecting and Shooting the Arisaka Type 38 Rifle - Rifle Disassembly and Reassembly
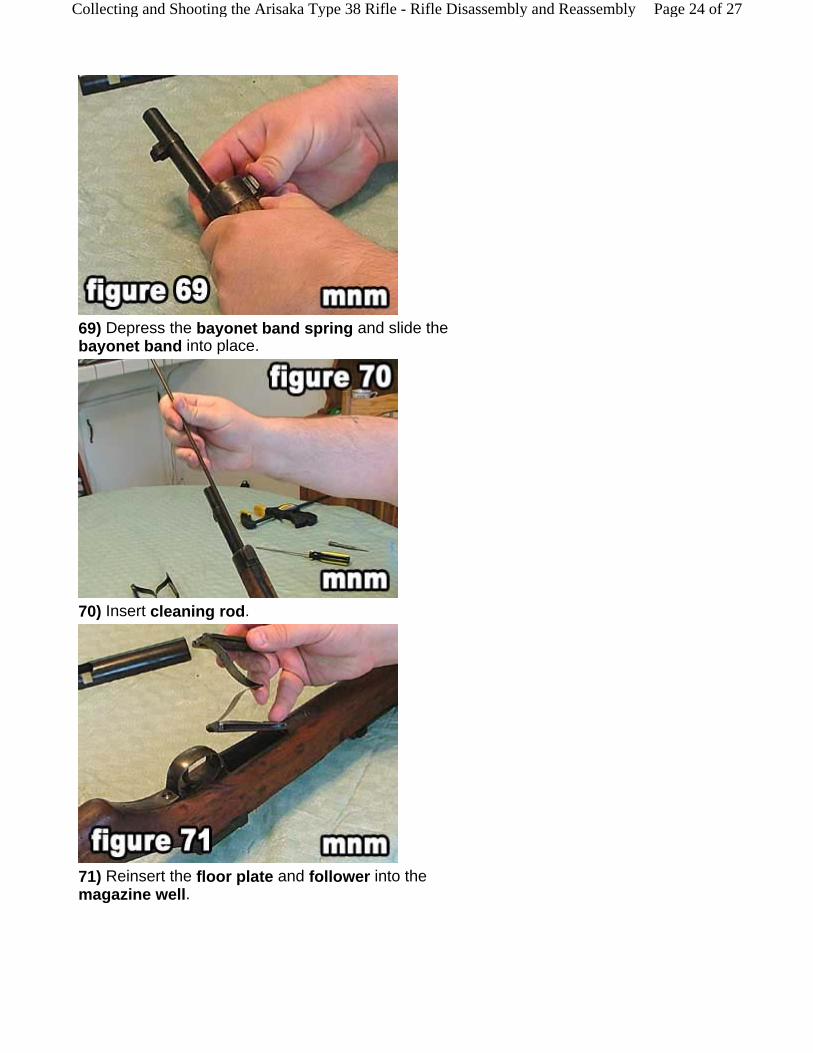
69) Depress the bayonet band spring and slide the bayonet band into place.
70) Insert cleaning rod.
71) Reinsert the floor plate and follower into the magazine well.
Page 24 of 27Collecting and Shooting the Arisaka Type 38 Rifle - Rifle Disassembly and Reassembly
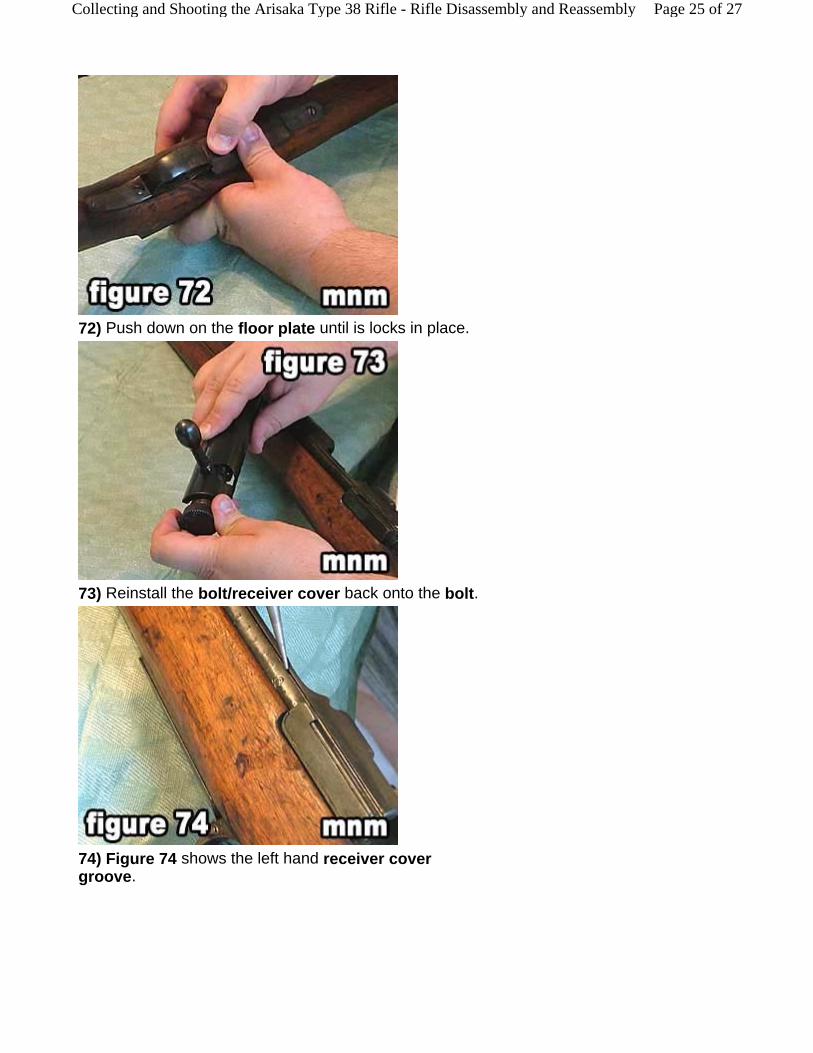
72) Push down on the floor plate until is locks in place.
73) Reinstall the bolt/receiver cover back onto the bolt.
74) Figure 74 shows the left hand receiver cover groove.
Page 25 of 27Collecting and Shooting the Arisaka Type 38 Rifle - Rifle Disassembly and Reassembly
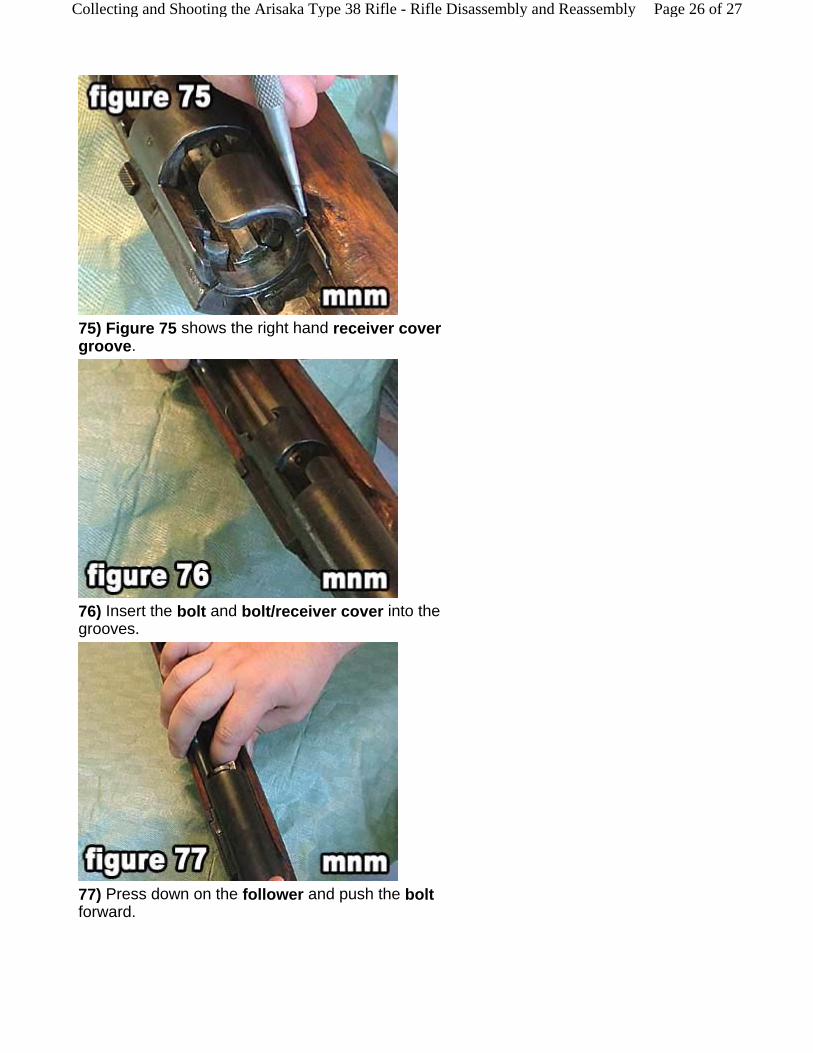
75) Figure 75 shows the right hand receiver cover groove.
76) Insert the bolt and bolt/receiver cover into the grooves.
77) Press down on the follower and push the bolt forward.
Page 26 of 27Collecting and Shooting the Arisaka Type 38 Rifle - Rifle Disassembly and Reassembly
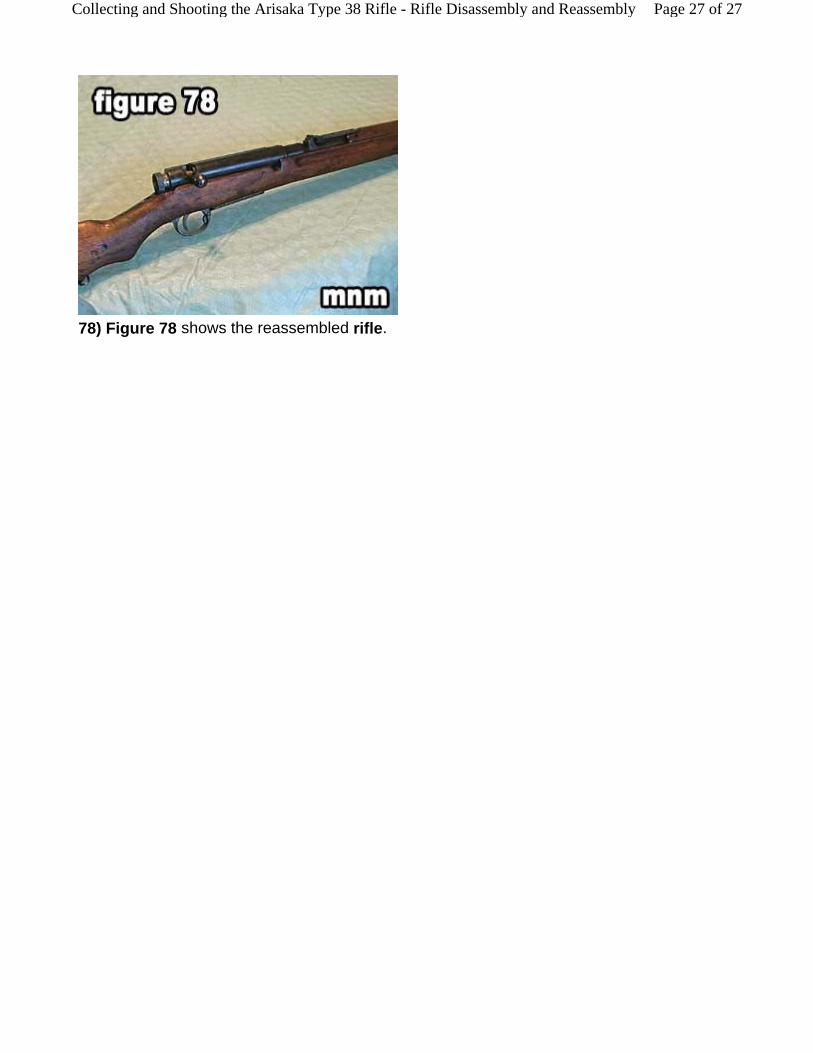
78) Figure 78 shows the reassembled rifle.
Page 27 of 27Collecting and Shooting the Arisaka Type 38 Rifle - Rifle Disassembly and Reassembly