arduino - k5rwk.orgk5rwk.org/rwk01/attachments/article/24/what is arduino by brady...•computer...
TRANSCRIPT
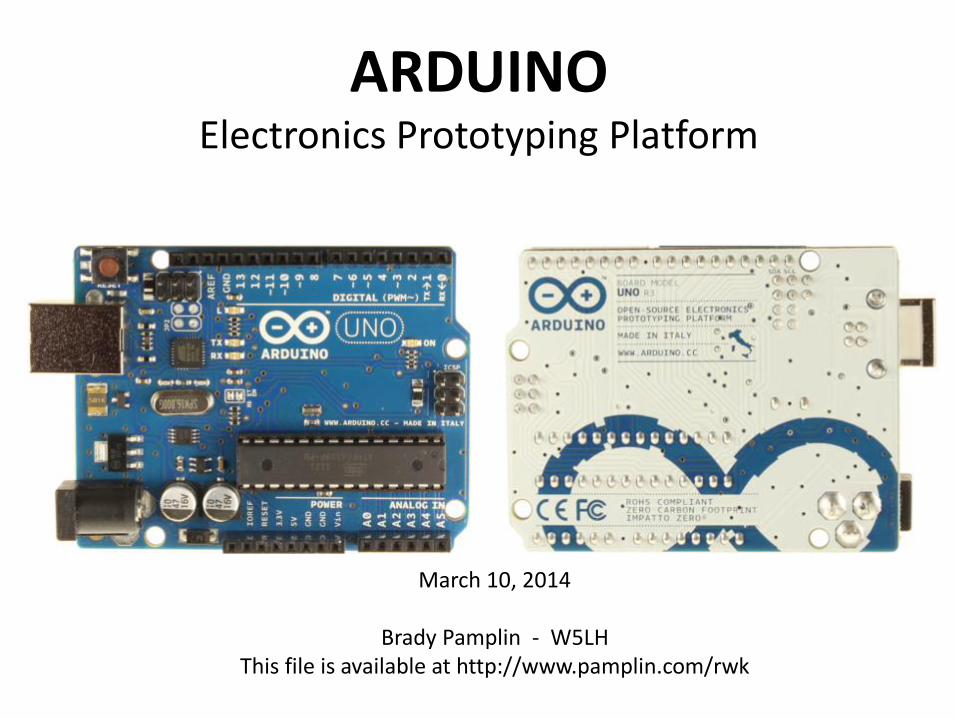
ARDUINO Electronics Prototyping Platform
March 10, 2014
Brady Pamplin - W5LH This file is available at http://www.pamplin.com/rwk
GOALS
• Anyone can do it!
• Computer chips and Arduino
• The smart $3.72 hardware component
• Demonstration
• Ham and other applications
• Program Examples

Types of Computer Chips
• Microprocessor – Top priority is performance
– PCs, Macs, Servers
– External memory, I/O
• Microcontroller – Top priority is low cost
– Embedded in cars, appliances, radios, …
– Self contained, minimal parts count
• System on Chip – SOC – Smart mobile devices, Raspberry Pi
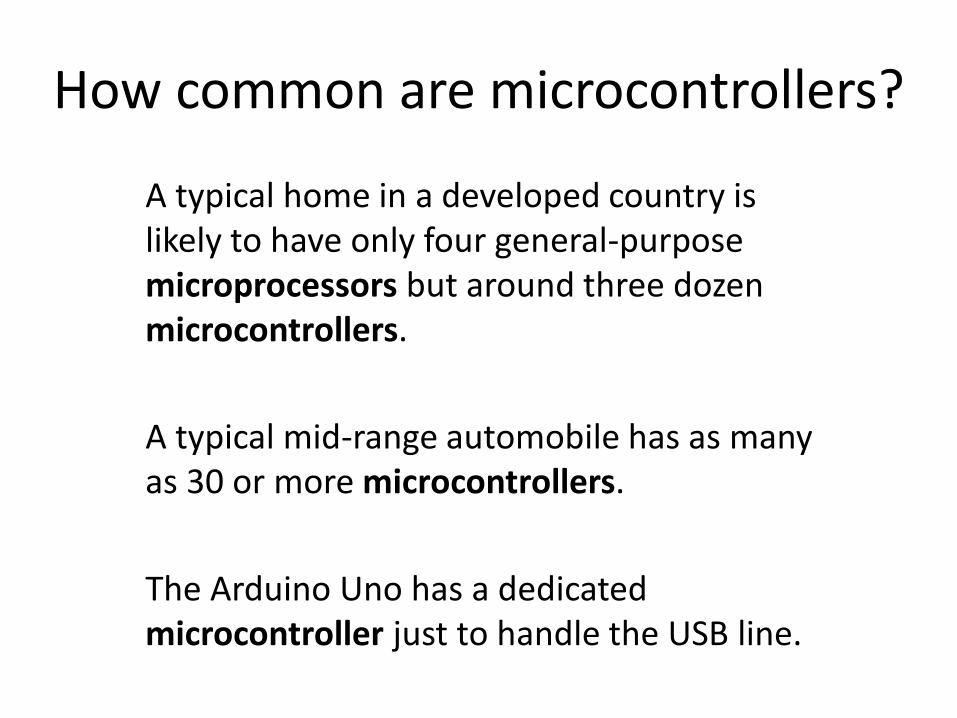
How common are microcontrollers?
A typical home in a developed country is likely to have only four general-purpose microprocessors but around three dozen microcontrollers.
A typical mid-range automobile has as many as 30 or more microcontrollers.
The Arduino Uno has a dedicated microcontroller just to handle the USB line.

Atmel ATmega328
• 14 digital I/O pins (6 PWM) – source or sink 40ma – total ~150ma
• 6 analog inputs
• 32k flash memory
• 16 MHz
• Programmable
• 5V serial
• I2C and SPI
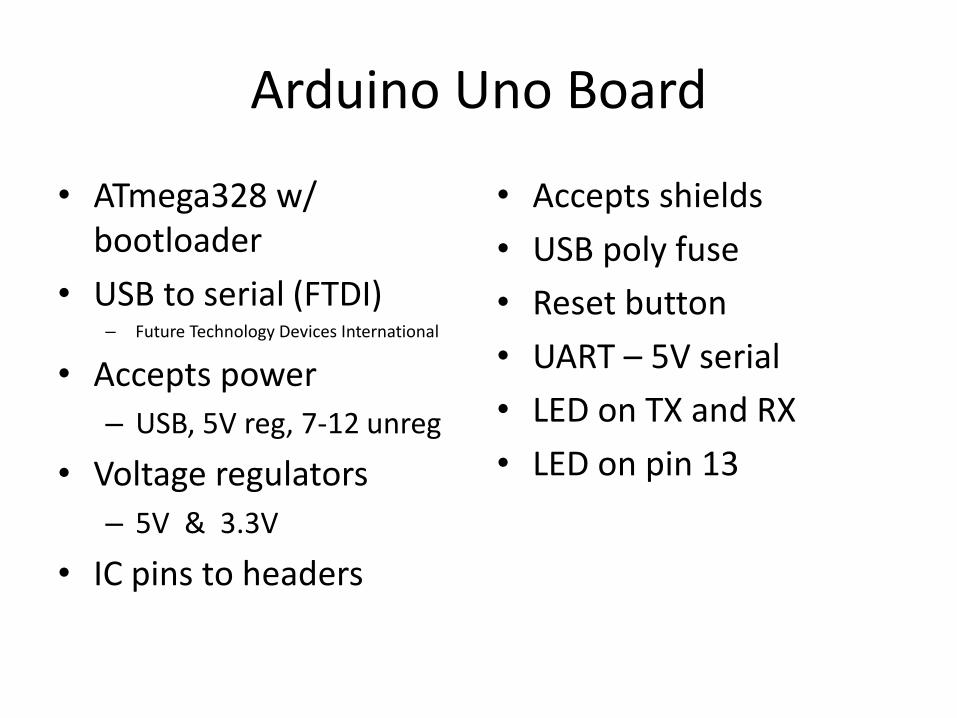
Arduino Uno Board
• ATmega328 w/ bootloader
• USB to serial (FTDI) – Future Technology Devices International
• Accepts power
– USB, 5V reg, 7-12 unreg
• Voltage regulators
– 5V & 3.3V
• IC pins to headers
• Accepts shields
• USB poly fuse
• Reset button
• UART – 5V serial
• LED on TX and RX
• LED on pin 13

What does Arduino mean to me?
• Open source standard board configurations
• Open source integrated development environment
Windows / Mac / Linux
• Libraries – Ethernet, WiFi, Servo, LCD,…
• Popular chip with many variants
• Bootloader
• Extremely popular - Wide selection of configurations and incredible internet information available
• Many specialized shields

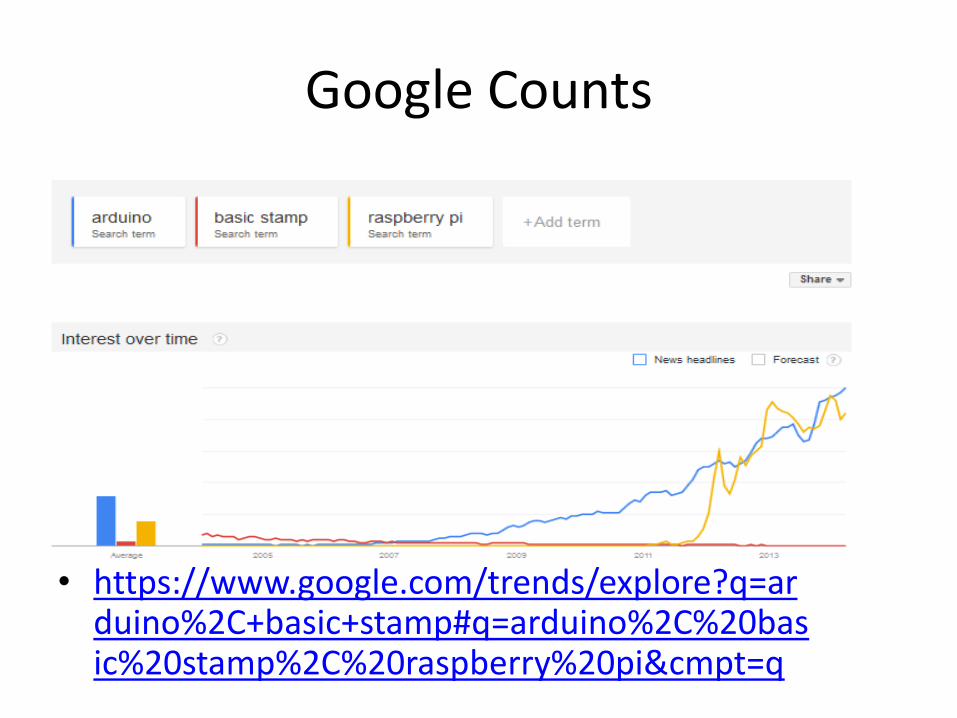
Google Counts
• https://www.google.com/trends/explore?q=arduino%2C+basic+stamp#q=arduino%2C%20basic%20stamp%2C%20raspberry%20pi&cmpt=q
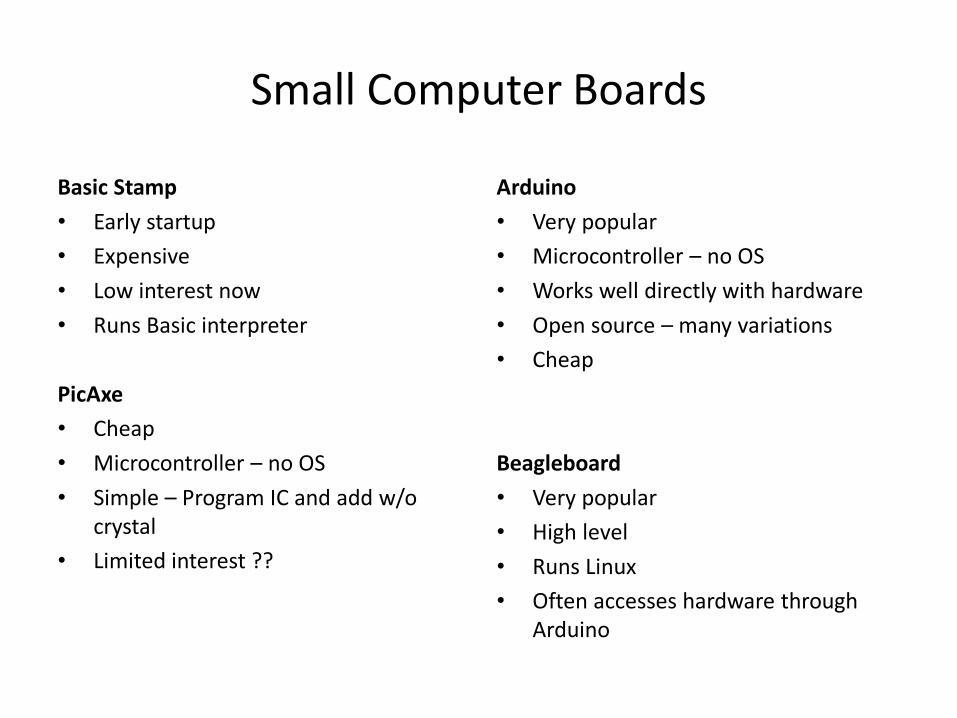
Small Computer Boards
Basic Stamp
• Early startup
• Expensive
• Low interest now
• Runs Basic interpreter
PicAxe
• Cheap
• Microcontroller – no OS
• Simple – Program IC and add w/o crystal
• Limited interest ??
Arduino
• Very popular
• Microcontroller – no OS
• Works well directly with hardware
• Open source – many variations
• Cheap
Beagleboard
• Very popular
• High level
• Runs Linux
• Often accesses hardware through Arduino

Over 100 variations!
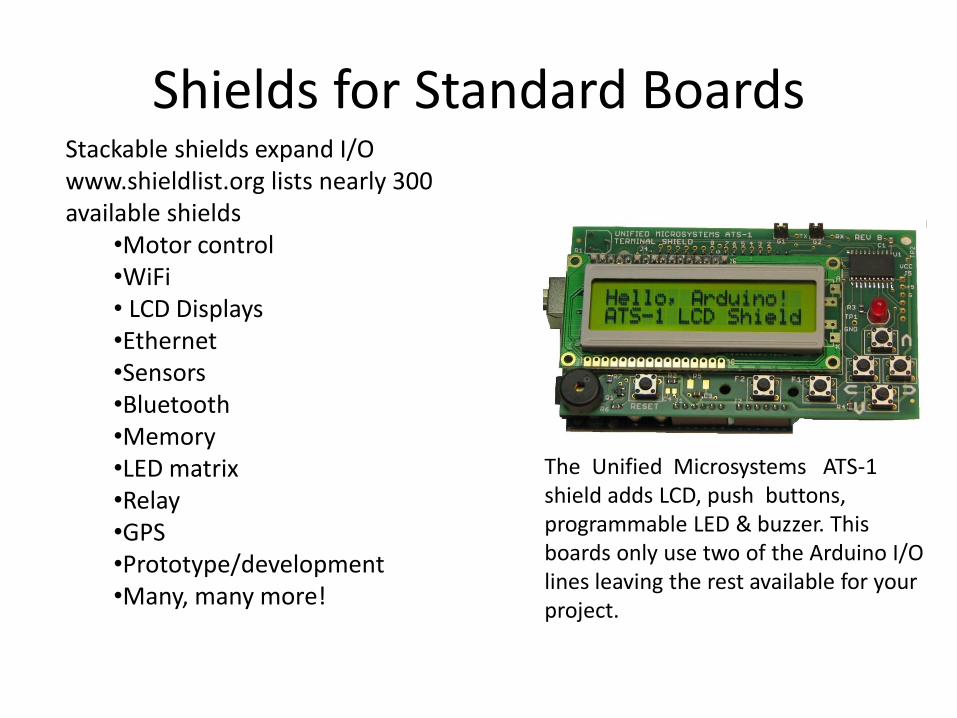
Shields for Standard Boards Stackable shields expand I/O www.shieldlist.org lists nearly 300 available shields
•Motor control •WiFi • LCD Displays •Ethernet •Sensors •Bluetooth •Memory •LED matrix •Relay •GPS •Prototype/development •Many, many more!
The Unified Microsystems ATS-1 shield adds LCD, push buttons, programmable LED & buzzer. This boards only use two of the Arduino I/O lines leaving the rest available for your project.

Shields
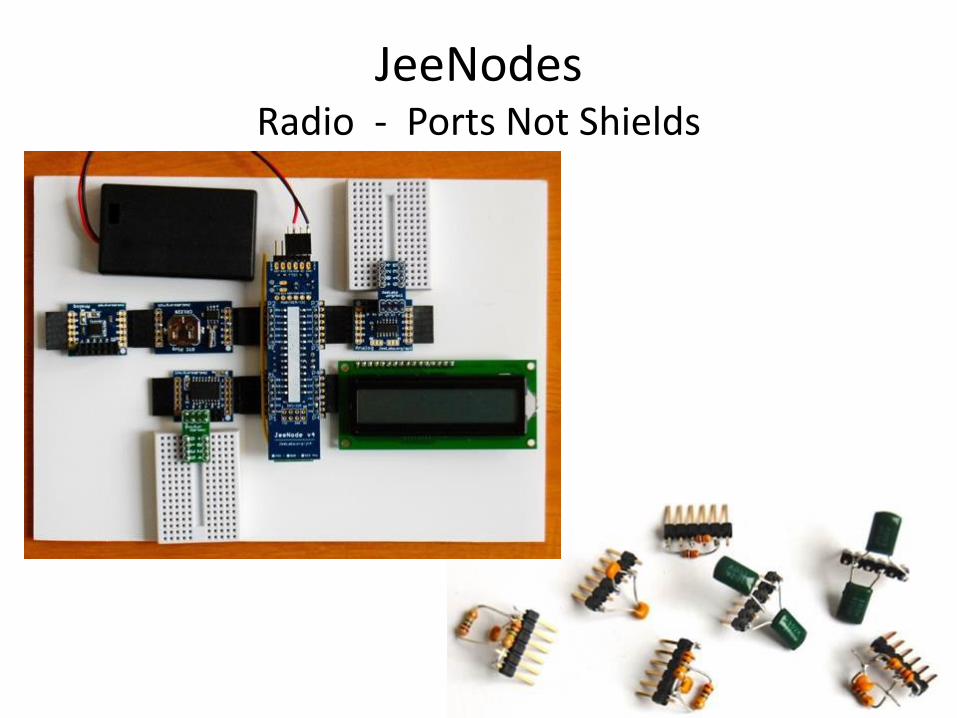
JeeNodes Radio - Ports Not Shields

Startup Kit
“Standard board”
• Arduino board w/ USB
• USB A-B cable
“Small board”
• Arduino board w/o USB
• FTDI breakout 6 pin female header on back
• Appropriate USB cable
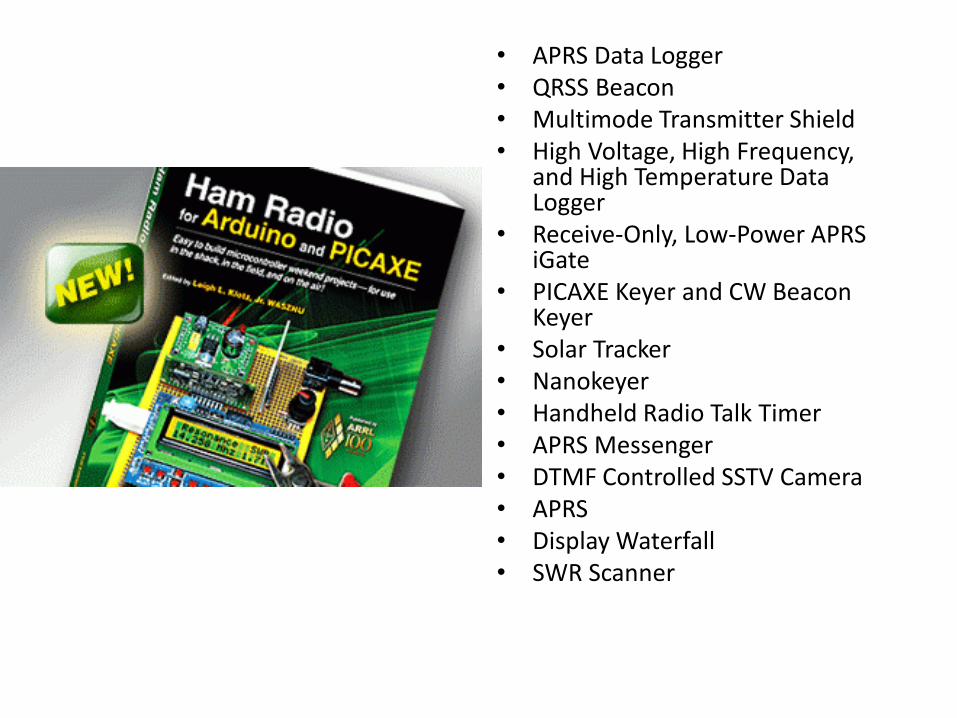
• APRS Data Logger • QRSS Beacon • Multimode Transmitter Shield • High Voltage, High Frequency,
and High Temperature Data Logger
• Receive-Only, Low-Power APRS iGate
• PICAXE Keyer and CW Beacon Keyer
• Solar Tracker • Nanokeyer • Handheld Radio Talk Timer • APRS Messenger • DTMF Controlled SSTV Camera • APRS • Display Waterfall • SWR Scanner
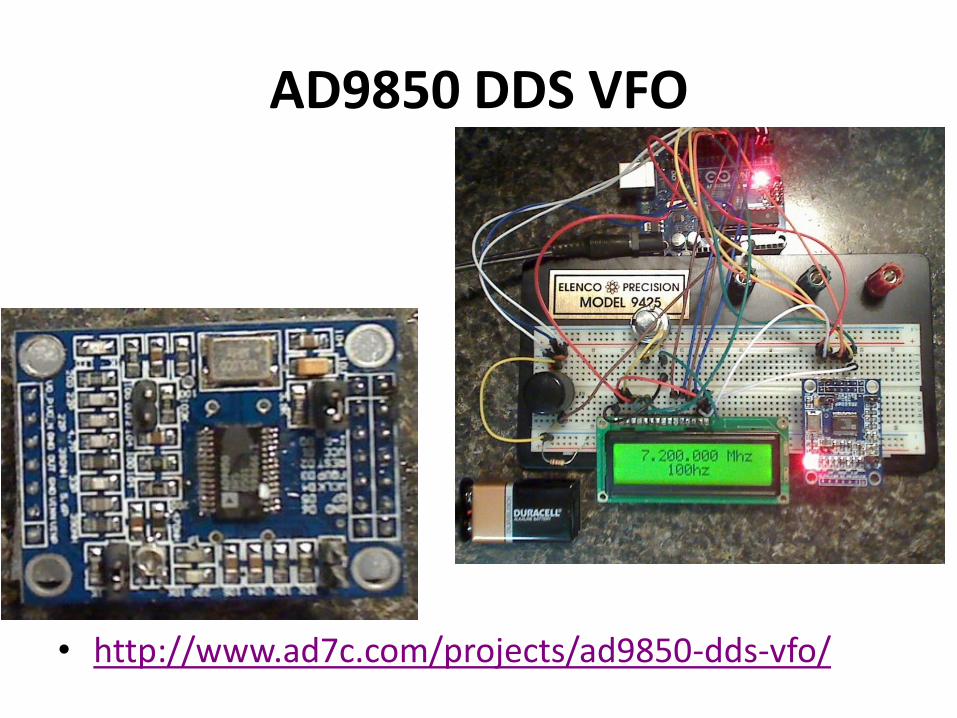
AD9850 DDS VFO
• http://www.ad7c.com/projects/ad9850-dds-vfo/

QRP Transceiver Shields
http://m0xpd.blogspot.com/2013/03/arduino-qrp-transceiver.html

Arduino Decoding Morse Code
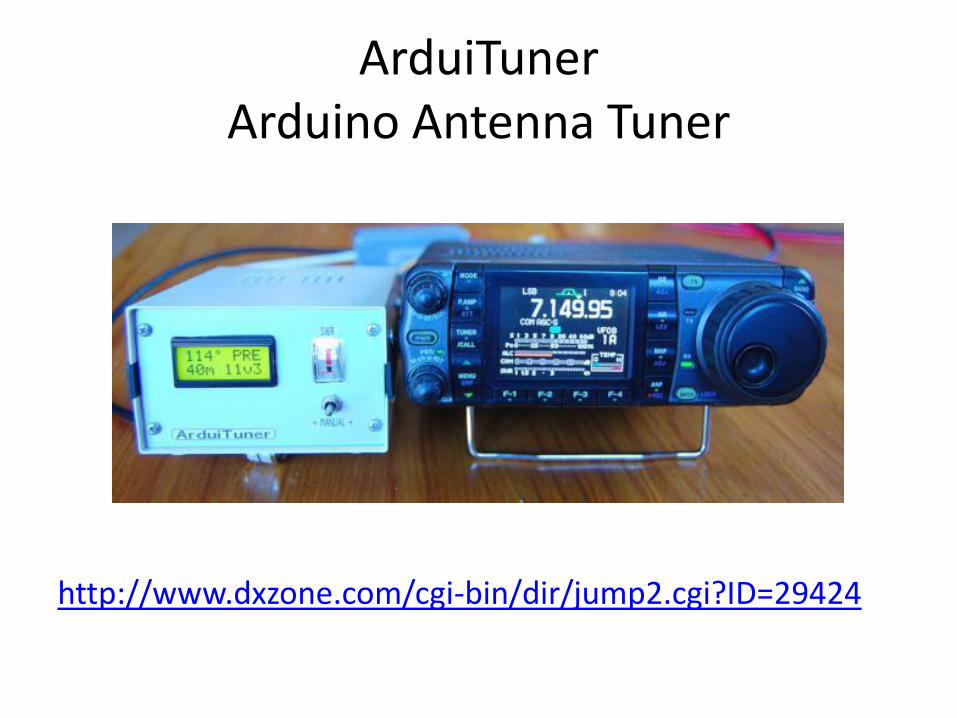
ArduiTuner Arduino Antenna Tuner
http://www.dxzone.com/cgi-bin/dir/jump2.cgi?ID=29424
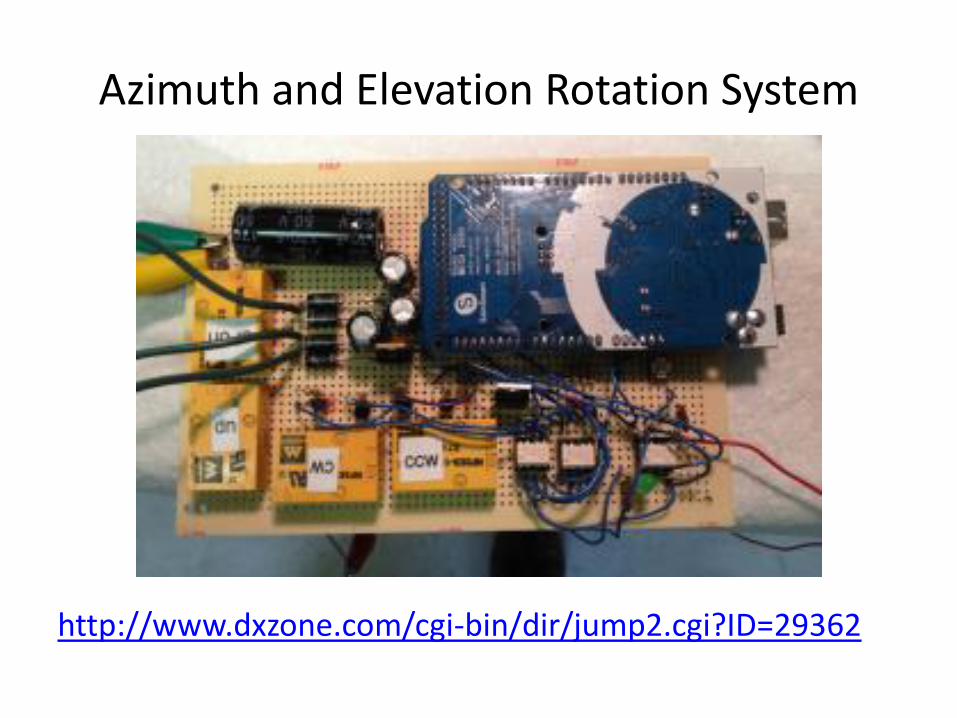
Azimuth and Elevation Rotation System
http://www.dxzone.com/cgi-bin/dir/jump2.cgi?ID=29362
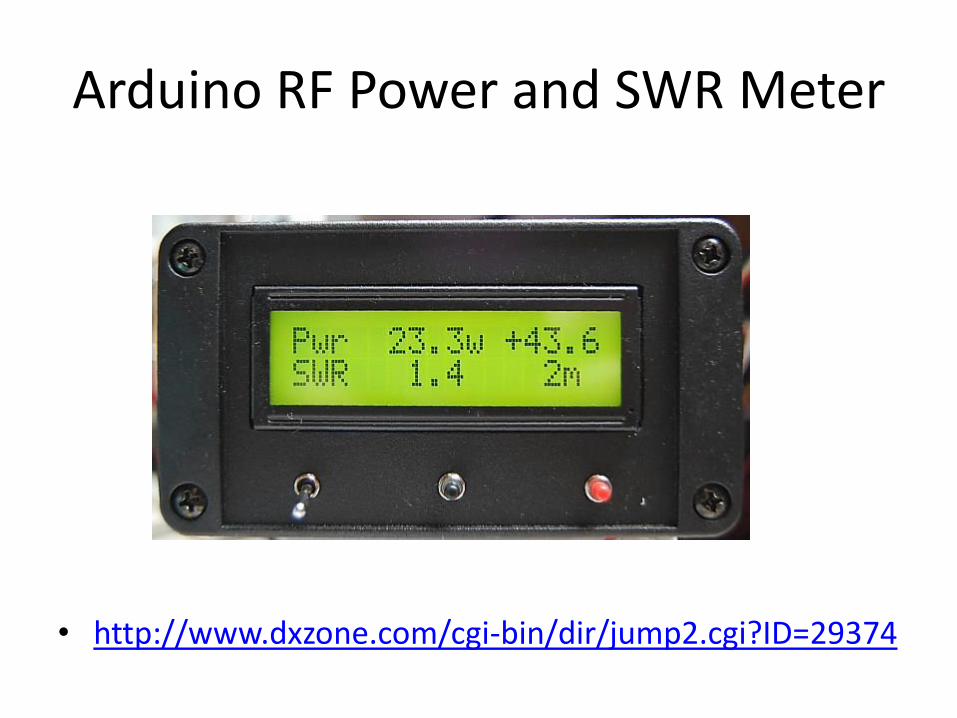
Arduino RF Power and SWR Meter
• http://www.dxzone.com/cgi-bin/dir/jump2.cgi?ID=29374
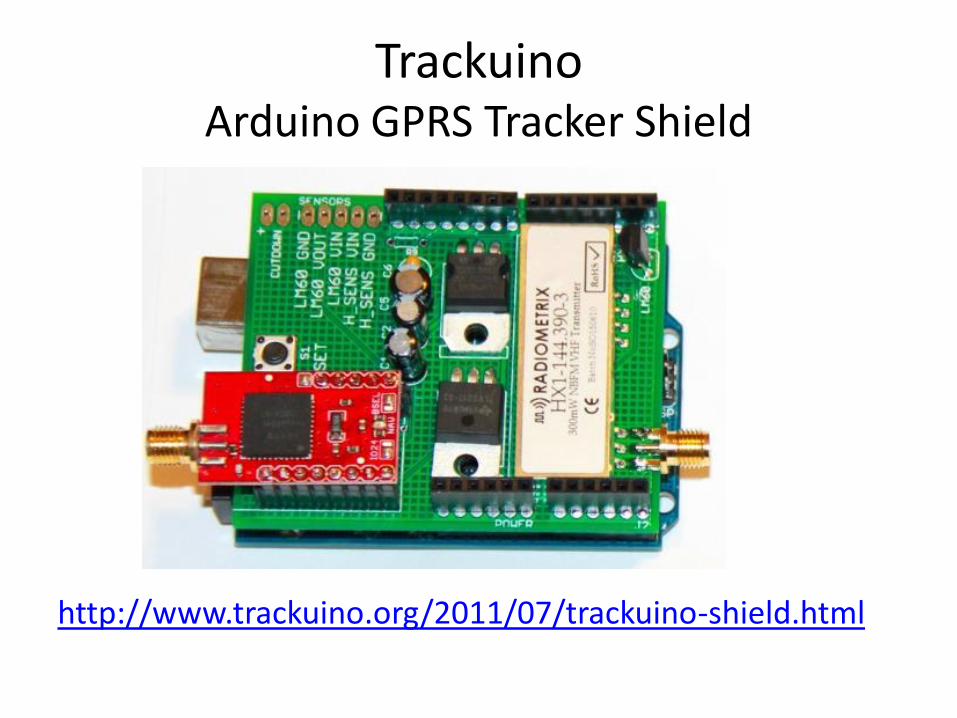
Trackuino Arduino GPRS Tracker Shield
http://www.trackuino.org/2011/07/trackuino-shield.html
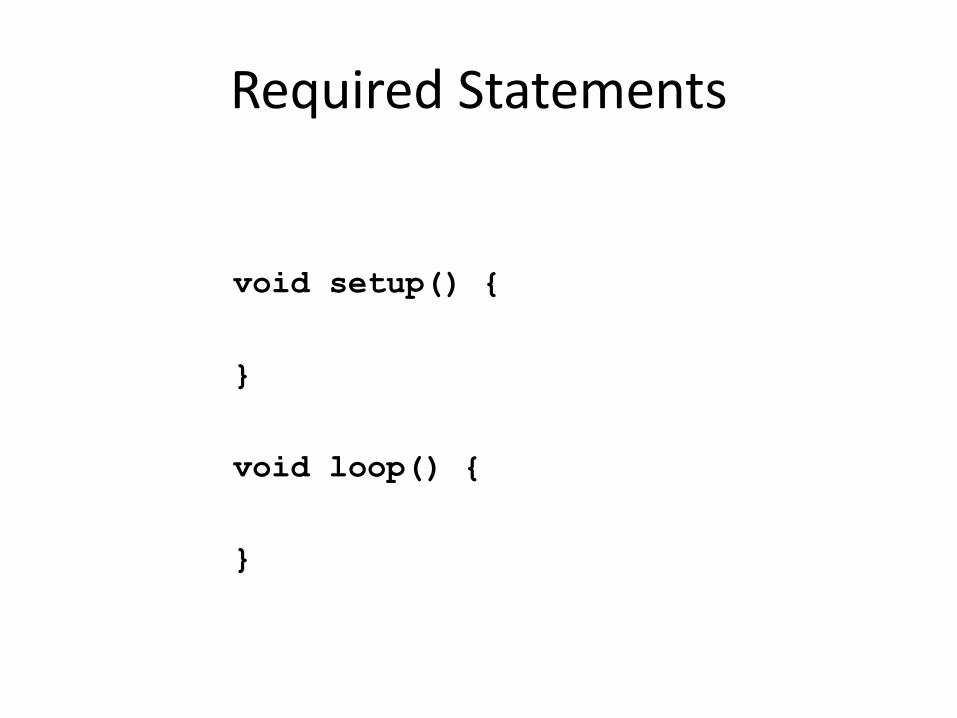
Required Statements
void setup() {
}
void loop() {
}
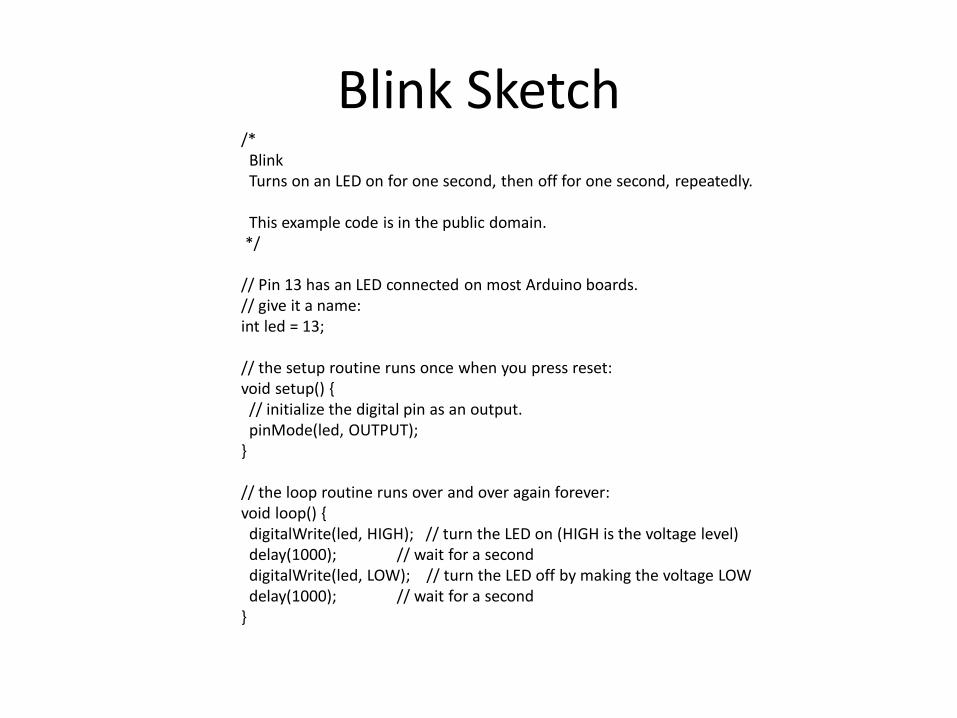
Blink Sketch /* Blink Turns on an LED on for one second, then off for one second, repeatedly. This example code is in the public domain. */ // Pin 13 has an LED connected on most Arduino boards. // give it a name: int led = 13; // the setup routine runs once when you press reset: void setup() { // initialize the digital pin as an output. pinMode(led, OUTPUT); } // the loop routine runs over and over again forever: void loop() { digitalWrite(led, HIGH); // turn the LED on (HIGH is the voltage level) delay(1000); // wait for a second digitalWrite(led, LOW); // turn the LED off by making the voltage LOW delay(1000); // wait for a second }

Blink Sketch int led = 13;
void setup() {
pinMode(led, OUTPUT);
}
void loop() {
digitalWrite(led, HIGH);
delay(1000);
digitalWrite(led, LOW);
delay(1000);
}
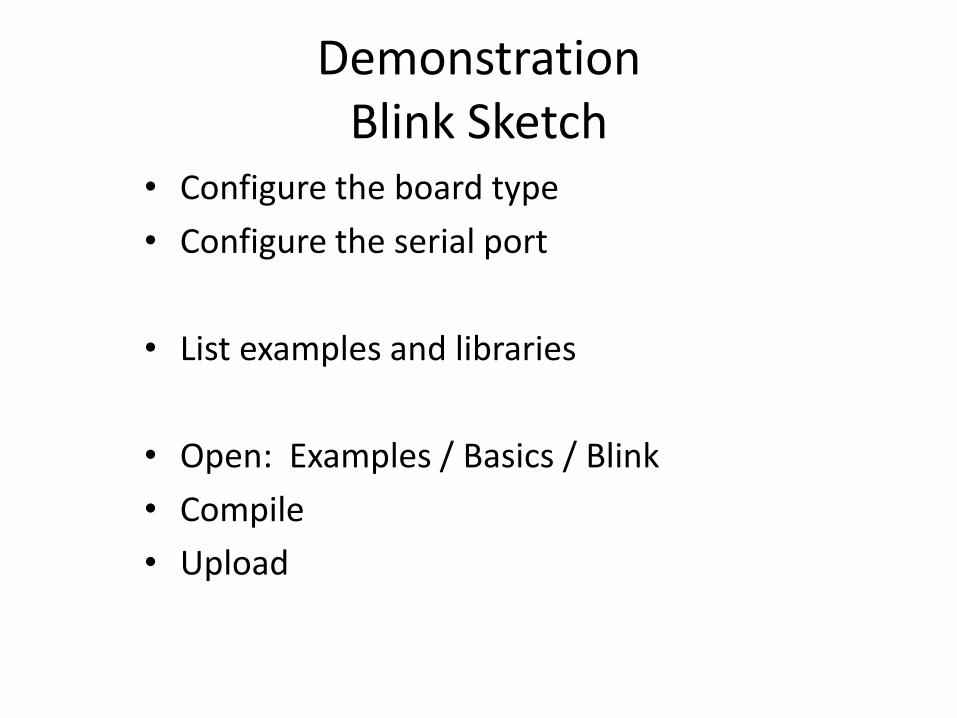
Demonstration Blink Sketch
• Configure the board type
• Configure the serial port
• List examples and libraries
• Open: Examples / Basics / Blink
• Compile
• Upload

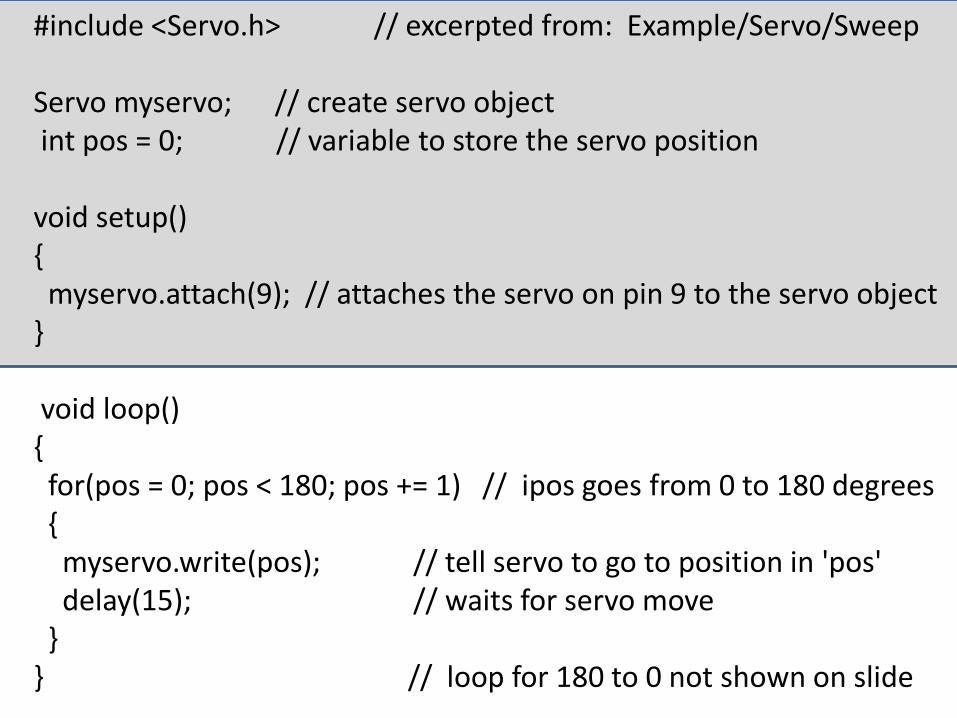
#include <Servo.h> // excerpted from: Example/Servo/Sweep Servo myservo; // create servo object int pos = 0; // variable to store the servo position void setup() { myservo.attach(9); // attaches the servo on pin 9 to the servo object } void loop() { for(pos = 0; pos < 180; pos += 1) // ipos goes from 0 to 180 degrees { myservo.write(pos); // tell servo to go to position in 'pos' delay(15); // waits for servo move } } // loop for 180 to 0 not shown on slide
#include <Servo.h> // excerpted from: Example/Servo/Sweep Servo myservo; // create servo object int pos = 0; // variable to store the servo position void setup() { myservo.attach(9); // attaches the servo on pin 9 to the servo object } void loop() { for(pos = 0; pos < 180; pos += 1) // ipos goes from 0 to 180 degrees { myservo.write(pos); // tell servo to go to position in 'pos' delay(15); // waits for servo move } } // loop for 180 to 0 not shown on slide
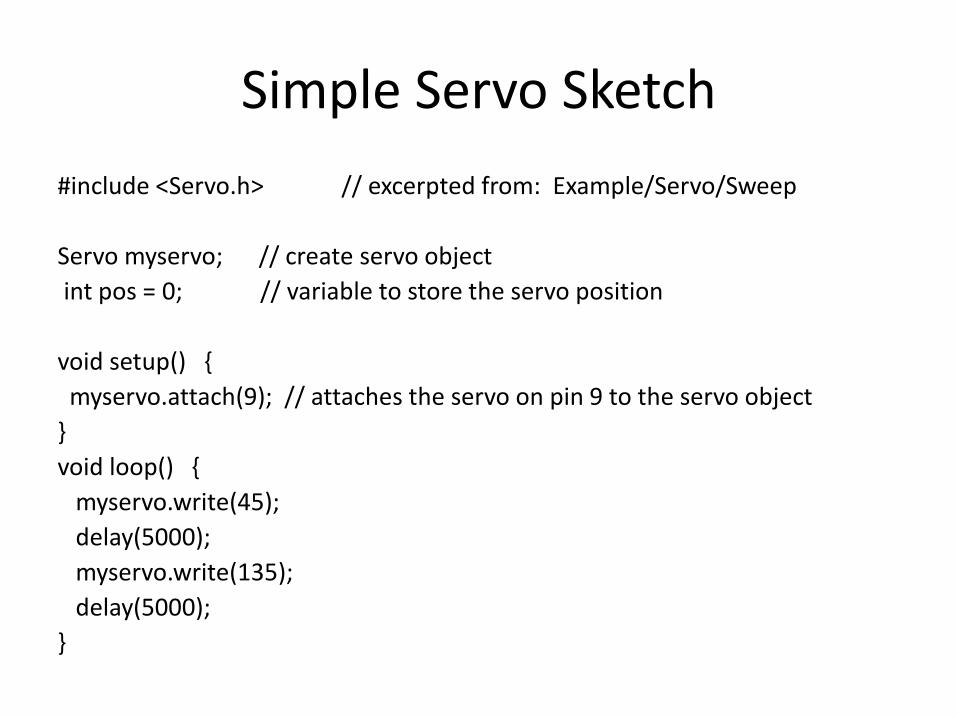
Simple Servo Sketch
#include <Servo.h> // excerpted from: Example/Servo/Sweep
Servo myservo; // create servo object
int pos = 0; // variable to store the servo position
void setup() {
myservo.attach(9); // attaches the servo on pin 9 to the servo object
}
void loop() {
myservo.write(45);
delay(5000);
myservo.write(135);
delay(5000);
}

Excerpt – Read Buttons
int read_LCD_buttons(){
adc_key_in = analogRead(0);
if (adc_key_in < 50) return btnRIGHT;
if (adc_key_in < 195) return btnUP;
if (adc_key_in < 380) return btnDOWN;
if (adc_key_in < 555) return btnLEFT;
if (adc_key_in < 790) return btnSELECT;
return btnNONE;
}
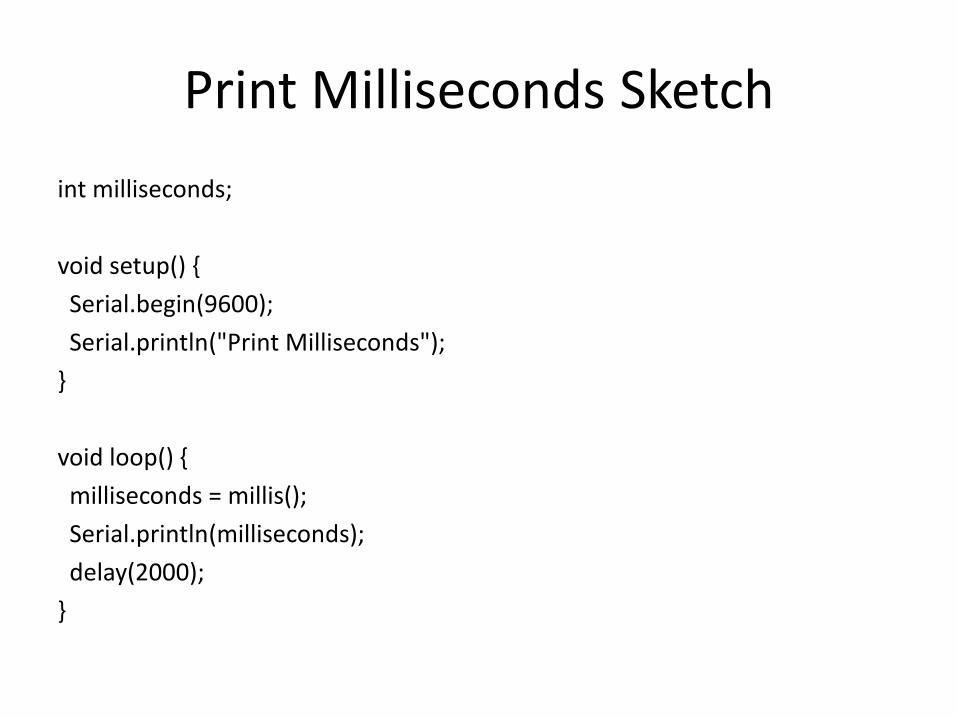
Print Milliseconds Sketch
int milliseconds;
void setup() {
Serial.begin(9600);
Serial.println("Print Milliseconds");
}
void loop() {
milliseconds = millis();
Serial.println(milliseconds);
delay(2000);
}
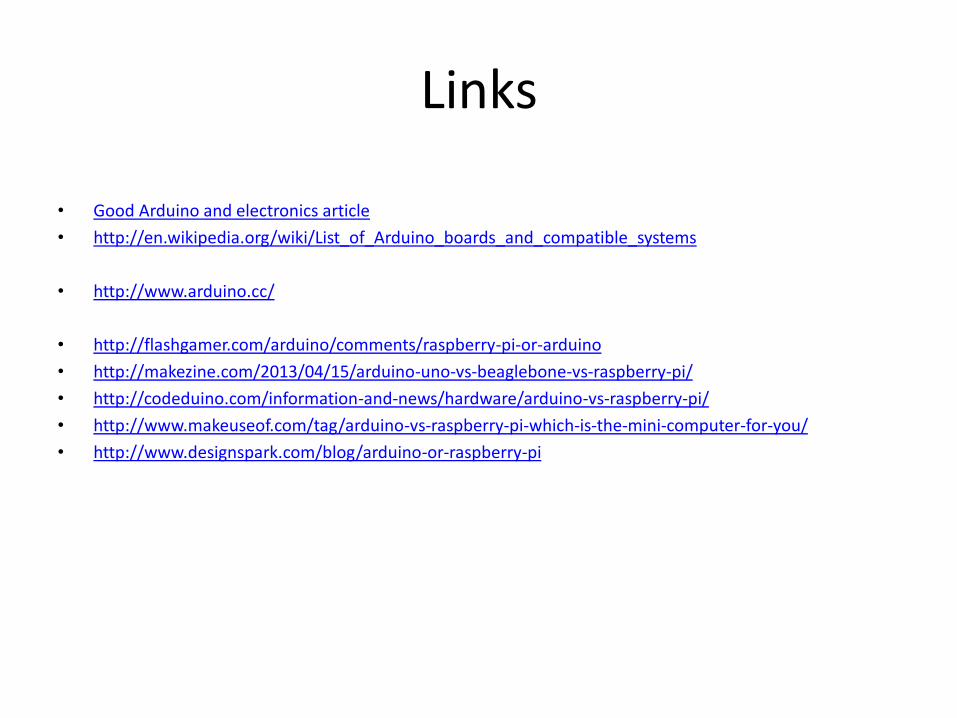
Links
• Good Arduino and electronics article
• http://en.wikipedia.org/wiki/List_of_Arduino_boards_and_compatible_systems
• http://www.arduino.cc/
• http://flashgamer.com/arduino/comments/raspberry-pi-or-arduino
• http://makezine.com/2013/04/15/arduino-uno-vs-beaglebone-vs-raspberry-pi/
• http://codeduino.com/information-and-news/hardware/arduino-vs-raspberry-pi/
• http://www.makeuseof.com/tag/arduino-vs-raspberry-pi-which-is-the-mini-computer-for-you/
• http://www.designspark.com/blog/arduino-or-raspberry-pi