an atp bioluminescence metabolic viability assay
TRANSCRIPT

LIVEGlo™An ATP BioluminescenceMetabolic Viability Assay
Technical Manual
(Version )
This manual should be read in its entirety prior to usingthis product
For In Vitro Research Use Only.Not for clinical diagnostic use.
No part of this instruction manual may be copied, duplicated or used without the express consent of Preferred Cell Systems™
Preferred Cell Systems™
KM027.001
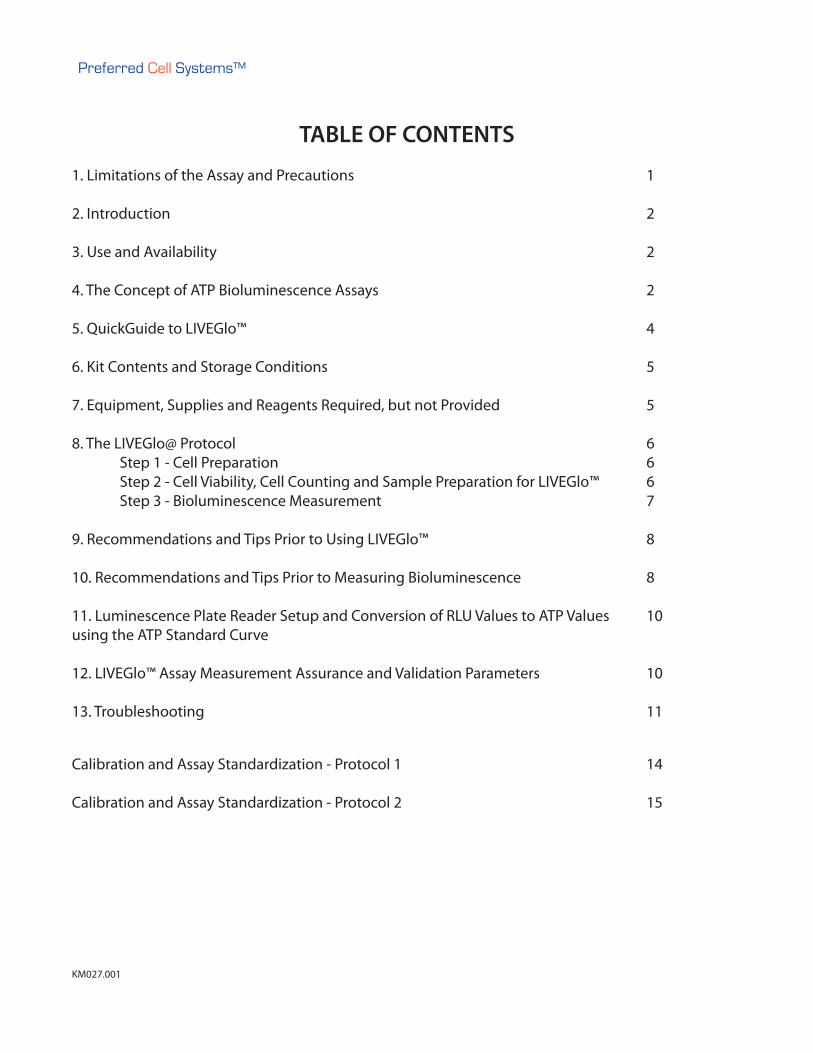
TABLE OF CONTENTS
1. Limitations of the Assay and Precautions 1
2. Introduction 2
3. Use and Availability 2 4. The Concept of ATP Bioluminescence Assays 2
5. QuickGuide to LIVEGlo™ 4
6. Kit Contents and Storage Conditions 5
7. Equipment, Supplies and Reagents Required, but not Provided 5
8. The LIVEGlo@ Protocol 6 Step 1 - Cell Preparation 6 Step 2 - Cell Viability, Cell Counting and Sample Preparation for LIVEGlo™ 6 Step 3 - Bioluminescence Measurement 7
9. Recommendations and Tips Prior to Using LIVEGlo™ 8
10. Recommendations and Tips Prior to Measuring Bioluminescence 8
11. Luminescence Plate Reader Setup and Conversion of RLU Values to ATP Values 10using the ATP Standard Curve
12. LIVEGlo™ Assay Measurement Assurance and Validation Parameters 10
13. Troubleshooting 11
Calibration and Assay Standardization - Protocol 1 14
Calibration and Assay Standardization - Protocol 2 15
Preferred Cell Systems™
KM027.001

1. LIMITATIONS OF THE ASSAY AND PRECAUTIONS
1. LIVEGlo™ is not approved by either the U.S. Food and Drug Administration (FDA) or the European Medicines Agency (EMA)
2. LIVEGlo™ is for research use only and has not been approved for clinical diagnostic use.3. This kit should not be used beyond the expiration date on the kit label.4. Do not mix or substitute reagents or other kit contents from other kit lots or sources.5. Always use professionally calibrated and, preferably, electronic pipettes for all dispensing procedures.
Small discrepancies in pipetting can lead to large pipetting errors. Although electronic pipettes self-calibrate themselves, they still need to be professionally calibrated on a regular basis.
6. Good laboratory practices and universal protective precautions should be undertaken at all times when handling the kit components as well as human cells and tissues. Material safety data sheets (MSDS) are included in each literature packet.
Preferred Cell Systems™
1KM027.001

2. Introduction
A cell viability assay determines whether cells are alive or dead. There are two types of viability assay. The first is dye exclusion viability and the second is metabolic viability. Dye exclusion viability measures the percentage of live or dead cells by using a dye such as trypan blue, propidium iodide, 7-aminoactinomycin D (7-AAD) or acridine orange. Many of these dyes pass through the membrane and bind to DNA. The ability of a dye to pass through the membrane indicates the cell’s membrane integrity. If the dye can pass through the membrane and enter the cell and bind to components within the cells, the presence of the dye is considered an indication that the cells are dead. However, dye exclusion viability does not take the metabolic or cellular activity into account and therefore does not detect cellular and membrane integrity.
As an example of this, cells can demonstrate a high proportion of “live” cells by dye exclusion viability, but the cells could be metabolically “dead” by not producing chemical energy, in the form of adenosine triphosphate or ATP, to support all the required cellular and nuclear activities. This false positive result can have important consequences, especially in the cellular therapy and regenerative medicine fields.
LIVEGlo™ is a fast and simple assay that can be used on fresh primary cell suspensions from a variety of organs and tissues or from thawed, previously cryopreserved cells, to measure metabolic viability. If cells are alive, they will be producing chemical energy in the form of ATP, produced in the mitochondria.
A viability assay is usually performed prior to cell culture or other cell treatment. Some cells, such as primary stem cells, and especially quiescent stem cells, have very low levels of metabolism. Other cell types, for example hepatocytes or cells of the kidney will exhibit high basal levels of intracellular ATP.
The LIVEGlo™ Metabolic Viability Assay does not produce the customary percentage value of dead/live cells. Instead, it produces a concentration of iATP in micromolar (μM) amounts. Therefore, it is important to ascertain the acceptance/rejection limits for a specific cell type as this can vary between different types of cells and different species.
3. Use and Availability
LIVEGlo™ is intended to be used as a metabolic viability assay for the following mammalian cell types:
• Fresh, primary, explanted cells.• Thawed, previously cryopreserved cells.• Transformed cell lines, tumor cell lines.
LiveGlo™ can be used in combination with any dye exclusion viability assay. However, LIVEGlo™ provides a quantitative evaluation of the concentration of intracellular ATP produced by the cells. For each cell type used, it is recommended to ascertain the acceptance/rejection ATP concentration that will indicate sustained metabolism or proliferation.
LIVEGlo™ is available as a 1 plate assay kit with the catalog number: PS-96-1.
4. The Concept of ATP Bioluminescence Assays
LIVEGlo™ is a ATP bioluminescence metabolic viability assay. The fundamental concept underlying the assay is the measurement of the cell’s chemical energy in the form of intracellular adenosine triphosphate (iATP). If a cell produces iATP, it is demonstrating cellular and mitochondrial integrity and is therefore viable.
Cells are prepared as a single cell suspension and plated into the 96-well plate provided with the assay kit. The ATP reagent is added and the plate incubated at room temperature in the dark for 10 minutes. During this time, the cells are lysed and the released iATP acts as a limiting substrate of a luciferin/luciferase reaction to produce bioluminescence in the form of light according to the following equation:
Preferred Cell Systems™
2KM027.001

Luciferase ATP + Luciferin + O2 -------> Oxyluciferin + AMP + PPi + CO2 + LIGHT Mg2+
The bioluminescence emitted is detected and measured in a luminescence plate reader as relative luminescence units (RLU). The assay instrument can be can be calibrated and the assay standardize using controls and standards that are included with the assay kit.
Performing an ATP standard curve and controls has the following advantages:1. The controls calibrate the instrument and also ensure that the reagents are working correctly.2. The ATP standard curve also ensures that the reagents are working correctly.3. The ATP standard curve allows the luminometer output in Relative Luminescence Units (RLU) to be converted to
standardized ATP concentrations (μM).4. Performing the ATP standard curve allows results to be compared over time.5. The results obtained from controls and standard curve should be compared with those provided in Section 12.
These are the measurement assurance parameters that allow the investigator to ensure that the assay is working correctly prior to measuring samples. When the values from the controls and ATP standard curve are within the ranges provided in Section 12, the investigator can consider the results trustworthy.
6. Obtaining similar measurement assurance parameters with those in this manual indicates that the user has per-formed the assay correctly and has demonstrated proficiency, i.e. this is a proficiency test.
The ATP standard curve and controls need only be measured once on the day samples are to be processed. Do not use previous results from an ATP standard curve and controls performed on a different day. This will cause erroneous results.
The ATP standard curve is used to convert sample RLU results into ATP concentrations by interpolation. This procedure can often be performed automatically by the instrument software. If the software does not allow this, it will be necessary to use third-party software to perform this operation.
Preferred Cell Systems™
3KM027.001

5. QuickGuide to LIVEGlo™ (Figure 1)
Preferred Cell Systems™
4
STEP 3Adjust cell
concentration to working cell
concentration. If necessary, setup a cell
dose response.
STEP 4Gently mix cells by vortexing
STEP 6Dispense 0.1mL of the sample working cell concentration into
replicate wells of the non-sterile 96-well plate provided. The final cell concentration will be 10x lower than the working
concentration
TIPS• If possible, use
self-calibrating electronic pipettes.
• Always use gloves when measuring ATP.
• Performing calibration and standardization provides measurement assurance for trustworth results.
• Always ensure well contents are mixed properly (see manual).
• Use adhesive foil (included) to maintain unused well sterility.
STEP 7Add 0.1mL of ATP-ER to each well, mix and measure bioluminescence after 10 min incubation in the dark
STEP 5If instrument calibration
and assay standardization is to be performed, do this
prior to Step 6 (see separate QuickGuide)
STEP 1Prepare single
cell suspension of sample.
STEP 2Measure cell
concentration
KM027.001

6. Kit Contents and Storage Conditions
LIVEGlo™ assay kits contain reagents that have been frozen and stored at -80°C prior to shipment. The kit is shipped either with dry ice or blue ice. The following components are included:
TABLE 1Item Component Storage
1 Medium (IMDM) for dilution of the ATP standard. -20°C until used
2 ATP standard. -20°C until used
3 ATP extra high, high and low controls. -20°C until used
4 ATP Enumeration Reagent (ATP-ER)* -20°C in the dark until used
5 Adhesive Plate Covering to protect unused wells. Can be kept with other kit components
6 Non-sterile 96-well plate(s) for ATP standard curve determination. Can be kept with other kit components
7 Non-sterile 96-well plate(s) for sample viability measurement.
Exact volumes of kit reagents and supplies are provided on a separate sheet included with this assay kit.
*The ATP-ER should not be thawed until needed and can be refrozen 11 cycles without significant loss of sensitivity. It can be kept at 2-8ºC for 48h once thawed and is stable for 20 weeks when stored at -20oC. This reagent is light sensitive. Keep in the dark.
IMPORTANTAll kit components are quality controlled and optimized so that they work together. Please do not replace kit components with those of a different product. This will invalidate the warranty provided by Preferred Cell Systems™.
This kit contains a reagent for measuring luminescence (ATP-ER) that decays with time. Preferred Cell Systems™ recommends that this kit be used before the expiry date of this reagent. Preferred Cell Systems™ does not take responsibility for the quality of reagents beyond their expiry date. If the kit cannot be used prior to the expiry date of this reagent, fresh reagent can be obtained from Preferred Cell Systems™.
Good laboratory practices and universal protective precautions should be undertaken at all times when handling the kit components as well as cells and tissues. Material safety data sheets (MSDS) are included in each literature packet.
7. Equipment, Supplies and Reagents Required, but not Provided
Although it is not necessary to perform the assay under sterile conditions, it is good practice to do so.
Equipment and Supplies1. Laminar Flow Biohood2. Plate luminometer (e.g. Berthold LB962 CentroLIA/pc; Molecular Devices, SpectraMaxL)3. Plastic tubes (5ml)4. Single channel pipettes, preferably electronic (e.g. Rainin EDP pipettes for variable volumes between 1μl and
100μl).5. 8-channel pipette, preferably electronic (e.g. Rainin EDP pipettes for fixed or variable volumes between 10μl and
100μl).6. Reservoir for 8-channel pipette 7. Pipette tips for different pipettes.8. Vortex mixer.9. 1.5ml plastic vials (5 for each ATP dose response).10. Hemocytometer, electronic cell counter or flow cytometer to determine cell concentration and/or dye exclusion
viability.
Preferred Cell Systems™
5KM027.001

8. The LIVEGlo™ Protocol
PLEASE READ THE FOLLOWING PROTOCOL CAREFULLY SEE SECTION 9 BEFORE PERFORMING THE PROTOCOL
Performing LIVEGlo™ is a 2-step process.
Step 1 - Cell preparation.Step 2 - Cell viability, cell counting and sample preparation for LIVEGlo™ measurementStep 3 - Luminescence measurement. An ATP dose response is performed prior to sample luminescence measurements with conversion of RLUs to μM ATP.
Step 1 and Step 2 must be performed in a laminar flow biohazard hood
STEP 1 – Cell Preparation
Prepare or thaw cells using a validated cell preparation protocol. If cells are to be processed prior to cell culture, it is good practice to measure metabolic cell viability before and after the procedure to ensure that cell death has not occurred.
STEP 2 - Cell Viability, Cell Counting and Sample Preparation for LIVEGlo™
Dye exclusion viability can also be determined using a hemocytometer, automated method or flow cytometer. However, please be aware that percentage values obtained with dye exclusion methods may not conform to the quantitative measurement obtained using LIVEGlo™.
Determine the cell count using a validated protocol. Do not base the cell count on dye exclusion viability. Adjust the working cell concentration so that it is 10 times the final cell concentration/mL in the well. A total of 0.1mL of the working cell concentration will be added to each well, thereby reducing the cell concentration 10 fold.
For example, if the final cell concentration in the well is to be 10,000 cells, the working cell concentration will be 100,000 cells/mL.
For a specific cell type and condition, it may be necessary to perform a cell dose response in order to determine the optimal cell concentration to measure metabolic viability. This can be done over a dose range from 1,000 cells up to 50,000 cells. Once an optimal cell dose is determined for the type of cells, maintain this cell dose for all future measurements so that they can be compared over time to obtain historical data.
It is recommenced to initially perform a minimum of 6 replicates/cell dose so that statistical variation can be determined and pipetting errors can be minimized. Once this has been established, it is possible to reduce the number of replicates/samples, if required.
When dispensing cells or the ATP reagent into wells of the 96-well plate provided, ensure that the pipette tip is directed into the center of the well. Never dispense cells or reagents onto the walls of the well, since this can cause erroneous results.
Cell samples are added to each replicate well in a 0.1µL volume. Depending on the number of replicate wells being prepare for each sample, these can be configured either in rows or in columns to maximize the number of samples/plate. (See Section 9).
Preferred Cell Systems™
6KM027.001

STEP 3 – BIOLUMINESCENCE MEASUREMENT
Please note the following important points:• FOR ALL OF THE FOLLOWING STEPS, WEAR LABORATORY GLOVES. ATP is present on the skin and can cause
erroneous results• PLEASE REFER TO SECTION 11 ON HOW TO SETUP THE PLATE LUMINOMETER. The instrument should be setup and
prepared for use prior to any of the following steps being performed.• Please refer to Section 10 for recommendations and tips prior to starting this part of the procedure. In particular,
please refer to Section 10 for important information on mixing components. • Remove the ATP Enumeration Reagent (ATP-ER) from the freezer and thaw at room temperature or in cold running
water prior to analysis. Do not thaw the ATP-ER in a water bath or 37oC incubator.• If the assay is to be calibrated and standardized, remove the ATP standard, controls and reagents from the freezer
and thaw to room temperature or in cold running water prior to analysis. • ATP standard curves performed on previous days or for previous experiments or studies must not be used since the
ATP-ER intensity changes with time and lot number.• Use one of the non-sterile, 96-well plates provided with the kit to perform the ATP standard dose response curve.
A. Calibrating and Standardizing the AssayIt is highly recommended to calibrate the luminescence plate reader and standardize the assay prior to measuring samples. This will allow a comparison with the expected measurement assurance values (see Section 12) that should be obtained prior to measuring samples. Use one of the non-sterile, 96-well white plate provided with the assay kit for this purpose.
LIVEGlo™ includes the following to calibrate and standardize the ATP bioluminescence part of the assay to measure quantitative metabolic cell viability.
• IMDM medium: Used only for ATP standard serial dilution.• ATP Standard at 10µM. Serially diluted to produce the ATP standard curve.• Low ATP Calibration Control. Used for normal and extra high cell proliferation.• High ATP Calibration Control. Used for normal cell proliferation.• Extra High ATP Calibration Control. Used for extra high cell proliferation.
B. Deciding Which Calibration Controls to Use and ATP Standard Curve Range
Please see the graphical protocols at the end of this manual that show the steps for calibrating and standardizing LIVEGlo™.
Instructional videos for calibrating and standardizing and ATP bioluminescence assay are also available on the Preferred Cell Systems website at: http://preferred-cell-systems.com/videos.php.
PROTOCOL 1: If it is expected that the cells have a low proliferation ability, use the low and high calibration controls and perform an ATP standard curve from 0.01µM to 1µM. See Page 14. Thawed, previously cryopreserved cells would fall into this group.
PROTOCOL 2: For fresh, primary cells or cells with expected high intrinsic metabolism, e.g. hepatocytes, kidney cells, the low and extra high calibration controls can be used and an ATP standard curve from 0.03µM to 3µM. See Page 15.
PROTOCOL 3. All 3 ATP controls and an ATP standard curve from 0.01µM to 3µM can also be used.
It is important that the sample ATP values lie within the limits of the ATP standard curve, otherwise the interpolation of Relative Luminescence Unit (RLU) values from the luminescence plate reader into ATP concentrations will not be accurate.
Preferred Cell Systems™
7KM027.001

C. Sample MeasurementThe addition of ATP-ER is performed in the same manner as the ATP Standard Curve.
1. If only part of the plate has been used, transfer the plate to a bio-safety hood and remove the lid under sterile conditions. Take a sterile adhesive plate coverfoil from the kit box, remove the backing and layer it over the top of the plate. Using a sharp knife or scalpel, cut away the foil that covers the wells to be processed. The unused, empty wells will now remain sterile for the next samples. (See Section 10, Adhesive Plate Covering Film).
2. Using, preferably, a multichannel pipette, add 0.1mL of ATP-ER to all replicate wells. Mix the contents as described in Section 10 or as seen in the instructional video.
3. Repeat this procedure for each column or row. Always change the pipette tips between each ATP-ER addition.4. When ATP-ER has been added to all wells, replace the plastic cover and incubate for 10 min at room temperature in
the dark to lyse the cells and stabilize the luminescence signal. Alternatively, transfer the plate to the luminescence plate reader, close the draw of the reader and incubate in the dark for 10 minutes
5. Unused ATP-ER may be returned to the bottle and refrozen. See section 10 for ATP reagent storage conditions and stability.
D. Using a plate luminometer with automatic dispenserThe user may have a plate luminometer that allows reagents to be dispensed automatically directly into the well. Preferred Cell Systems™ does not recommend using automatic dispensers, since the contents of the well are not mixed sufficiently using this method.
E. Using a liquid handlerLIVEGlo™ can be performed in high throughput mode. If you intend to perform any part of the LIVEGlo™ procedure using a liquid handler, please contact Preferred Cell Systems™ for information on setting up the instrument. Extra ATP-ER is required when using a liquid handler.
9. Recommendations and Tips Prior To Using LIVEGlo™.
(i) Number of Replicates PerformedA minimum of 4 replicates/sample can be used, although 6 replicates will provide better statistics. Please remember that using fewer replicates may save components in the short term, but may also cause inconclusive results. If outliers are encountered, which may have to be removed from the analysis, the consequence could be that extra experiments would be required resulting in extra time and costs.
(ii) Plate ConfigurationUsing 4 replicates/sample can be performed either in rows across the plate or in columns. If 6 replicate wells/sample are used, these should be plated in rows across the plate. If 8 replicates/sample are used, the sample should be plated n columns across the plate.
(iii) 96-Well Plates ProvidedThe reagents have been optimized to work with the 96-well plate(s) provided in the LIVEGlo™ kit. Please do not replace the plates included with the kit with those of another manufacturer. Bioluminescence output can be seriously affected and the assay kit warranty will be void. Additional plates can be purchased from Preferred Cell Systems™ if required.
10. Recommendations and Tips Prior To Measuring Bioluminescence
• Always wear laboratory (e.g. latex) gloves during this operation to avoid ATP contamination from skin.• DO NOT wipe the pipette tip with tissue etc as this will wick the reagent from the tip and cause an erroneous ATP
standard curve and false sample results.• Always change pipette tips after each use.• Each day bioluminescence is measured, a standard curve MUST be performed. The ATP-ER decays with time. A new
Preferred Cell Systems™
8KM027.001

ATP standard curve must be performed to ensure accurate conversion of the RLU values to ATP concentrations so that results can be compared.
• HALO® includes solid white plates for both cell culture and the ATP standard curve and controls. Do not use different plates for the assay. Doing so will result in inaccurate results and invalidation of the assay kit warranty. Extra plates can be purchased from Preferred Cell Systems™.
Bioluminescence Assay Kit Components• Prior to measuring bioluminescence, remove the ATP standard, 1 set of ATP controls and the ATP-Enumeration
Reagent (ATP-ER) from the freezer and thaw at room temperature or at 22 - 23˚C.• Sufficient ATP standard, controls and ATP-ER are supplied to perform 2 standard curves and controls/assay kit.
Additional ATP standards and controls can be obtained from Preferred Cell Systems™.• If thawing more than one bottle of ATP-ER for analysis, mix the contents of the bottles together before dispensing
into reagent reservoir. • ATP-ER can be refrozen up to 11 cycles without significant loss of sensitivity. Thawed ATP-ER can be kept at 2-8˚C, in
the dark, for 48h or is stable at -20oC for 20 weeks.
Volumes of Luminescence Kit Components Required• Each vial of ATP standard contains enough volume to perform one or two ATP standard dose responses.• The amount of ATP-ER added to each well is 0.10mL. Therefore:
Total amount of ATP-ER (μl) required = 0.1mL x (number of wells used + 24 (background, ATP standard curve and ATP controls)).
ATP Standard Curve Depending on the size of the kit purchased, non-sterile, 96-well plates have been included to perform an ATP standard curve prior to processing the sample cultures. Performing an ATP standard curve and controls on each day samples are processed is an essential part of the assay because it has 4 functions:• It tests whether the instrument is working properly and calibrates it.• It ensures that the reagents are working correctly.• It calibrates and standardizes the assay and allows the assay system to be validated, if required.• It allows the output of the plate luminometer, in relative luminescence units (RLU), to be converted to ATP
concentrations, thereby standardizing the procedure so that intra- and inter-laboratory experiments can be compared.
Adhesive Plate Covering Film To help keep the plate(s) sterile, adhesive, air permeable, sterile films are provided so that the part of the plate that is not being used can be covered and kept sterile until required. If using the adhesive film provided, the plate cover should be removed in a laminar air-flow hood and replaced with the film to ensure sterility.
Mixing the Contents of 96-well PlateMixing the contents of the wells after adding ATP-ER is one of the most important procedures of the assay. It is recommended that the addition of ATP-ER is performed using a multi-channel pipette to achieve consistency and reduce variability. Addition of the reagent and mixing should be performed in the following manner:1. Take up the required amount of reagent and add it to the well without inserting the tip into the well contents.2. Starting from the center of the well, aspirate and dispense the contents twice without removing the pipette tip
from the contents of the well.3. Move the pipette tip to one corner of the well and aspirate and dispense the contents twice without removing the
tip from the contents of the well.4. Repeat this operation as shown in Figure 4 for each corner of the well.5. Try not to cause excessive bubbles in the culture and DO NOT over mix since this can result in drastically reduced
luminescence values.6. This procedure effectively and optimally mixes the contents well.
Preferred Cell Systems™
9KM027.001

Figure 2. Positions of pipette tip for mixing the well contents
11. Luminescence Plate Reader Setup and Conversion of RLU Values to ATP Values Using the ATP Standard Curve
It is very important that the luminescence or multimode plate reader is setup correctly, otherwise false results could occur. Preferred Cell Systems™ has provided a separate document to help the investigator setup their instrument and perform the calculations in order to convert Relative Luminescence Units (RLU) into ATP concentrations using the ATP standard curve. It is strongly recommended that the investigator consult this document prior to performing any ATP bioluminescence assay. This document can be downloaded with this manual at http://preferred-cell-systems.com/LIVEGlo.php.
12. LIVEGlo™ Assay Measurement Assurance and Validation Parameters
If LIVEGlo™ has been calibrated and standardized, ATP bioluminescence technology allows the User’s results to be compared to the measurement assurance parameters shown in Table 4. For each control, ATP standard dose and the log-log linear regression curve fit parameters provided, the User’s results must lie within the ranges provided. If this is the case, then the following are applicable:
1. The User has performed and passed the integrated proficiency test.2. The instrument and assay readout reagents are working correctly.3. The User can continue to process and measure samples.4. The User can trust results of the assay.
IMPORTANT. If the User’s results DO NOT comply with those in the table, DO NOT measure the samples. Perform a repeat of the controls and ATP standard curve. If the results still do not comply with those in the Table 4, contact Preferred Cell Systems for help.
Table 4: ATP Controls and Standard Curve Measurement Assurance ParametersExpected Parameter
Observed Value Mean ± 15%(*) Min / Max %CV (where applicable)
0.01µM ATP 0.0099µM ATP 0.00972 - 0.0114 0.009 - 0.01 2.34%
0.03µM ATP 0.029µM ATP 0.285 - 0.0336 0.028 - 0.03 1.67%
0.05µM ATP 0.0497µM ATP 0.0486 - 0.0571 0.048 - 0.051 1.57%
0.01µM ATP 0.1026µM ATP 0.1003 - 0.118 0.099 - 0.107 1.96%
0.3µM ATP 0.317µM ATP 0.310 - 0.364 0.302 - 0.325 1.51%
0.5µM ATP 0.5023µM ATP 0.491 - 0.578 0.491 - 0.515 1.19%
1.0µM ATP 1.048µM ATP 1.024 - 1.205 0.977 - 1.117 3.7%
Preferred Cell Systems™
10KM027.001

Expected Parameter
Observed Value Mean ± 15%(*) Min / Max %CV (where applicable)
3.0µM ATP 2.722µM ATP 2.661 - 3.130 2.633 - 2.934 2.09%
Intercept 6.533 6.386 - 7.513 5.86 - 6.7 1.84%
Slope 0.9656 0.944 - 1.110 0.947 - 0.988 1.21%
r2 goodness of fit) 0.9993 - 0.998 - 1 0.05%
R (correlation coef-ficient)
1 - 0.999 - 1 0.02%
Low control, (0.05µM ATP
0.0487µM ATP 0.0476 - 0.0560 0.042 - 0.063 6.79%
High control 0.7µM ATP
0.725 0.710 - 0.836 0.655 - 0.904 5.35%
Extra high control (1.75µM ATP)
1.756 1.717 - 2.019 1.61 - 2.198 5.24%
The above values represent results from 71 control and ATP standard curve studies performed from January 2016 to June 2018
(*) 15% represents the acceptable range of values for FDA Bioanalytical Method Validation Guidelines
Samples Values:• Lowest ATP value indicating unsustainable cell proliferation for hematopoietic cells: ~0.04μM
Please note that human B-cells, especially cryopreserved cells, may exhibit very low ATP values. It is important to compare the stimulated B-cells with their background (no growth factors added) to determine B-cell activity.
• ATP value below which cells are not metabolically viable: ~0.01μM.• All samples values must lie on the ATP standard curve for accurate RLU to ATP conversion. If ATP values are greater
than 3µM, the replicate samples should be diluted with IMDM and re-measured. Take the dilution value into account when estimating the true ATP concentration. Alternatively, repeat the culture and ATP measurement using fewer cells.
Assay Validation ParametersLIVEGlo™ exhibits the following validation parameters:• Assay ATP linearity => 4 logs• Assay ATP sensitivity: ~ 0.001μM• Assay cell sensitivity: 20-25 cells/well (depending on cell type and purity)• Accuracy (% correct outcomes): ~95%• Sensitivity and specificity detected by Receiver Operator Characteristics (ROC) curve fit and detected as area under
the curve (AUC): 0.73 - 0.752 (lowest possible value, 0.5; highest possible value, 1).• Precision (Reliability and Reproducibility) =< 15%. At lower limit of quantification (LLOQ): 20%• Robustness (intra- and inter-laboratory comparison): ~95%.• High throughput capability (Z-Factor): >0.76 (lowest possible value, 0.5; highest possible value, 1).
13. Troubleshooting
If Calibration and Standardization Results Do Not Conform to Measurement Assurance Parameters (Section 12) If the investigator has elected to calibrate and standardize the assay using the ATP controls and standard supplied with the kit, the results should be within the ranges provided in Section 12. If the values obtained conform to the measurement assurance parameters, the investigator can continue the assay and process and measure the samples with the assurance that the results can be trusted.
Preferred Cell Systems™
11KM027.001

If any of the values obtained during calibration and standardization do not conform or are not within the ranges provided in Section 12, the user should repeat the calibration and standardization. Often discrepancies occur due to pipetting and/or dilution errors. Accurate and careful dilution of the ATP stock solution is important. It is also possible that if pipettes have not been professionally calibrated, errors can occur. These will also be picked up during this phase of the assay. Finally, if the ATP-ER has not be handled or stored correctly, it will decay, leading to erroneous results. Please contact Pre-ferred Cell Systems™ to obtain new ATP-ER.
High Coefficients of Variation (%CV)Coefficients of variation (%CV) should be =< 20%. The percent coefficient of variation is calculated as standard deviation/mean x 100. High %CVs are usually an indication of incorrect dilutions or pipetting error. Although outliers might be obtained between similar samples, large variations between replicates should not be obtained. Please consider the following:
• Accurate reagent dispensing and mixing are of prime importance. Since the volumes dispensed are small it is imperative to use instruments that have been properly calibrate to avoid pipetting error.
• Insufficient mixing of components prior to cell plating and insufficient mixing during the addition of luminescence reagents to cultures in the 96-well plate can also lead to high CVs. Use repeater pipettes. Use calibrated or self-calibrating electronic pipettes or dispensers to add and mix the luminescence reagents.
• If the luminometer requires determining the “gain” empirically, it is possible that this parameter has not been optimally set and will result in an incorrect signal to noise ratio. Once the optimal “gain” has been set for the instrument, it should not be changed.
Low RLU Values Performing an ATP dose response prior to sample measurement can help detect problems prior to sample measurement. If low RLU values occur, this could be due to the following reasons.
• Reagent decay: The ATP-ER decays with time, even when frozen. This can lead to low bioluminescence. Once thawed the reagent can be refrozen up to 11 cycles without significant loss of sensitivity. Do not use the reagent after expiry date has elapsed. As a rule of thumb, the RLU value for the lowest ATP standard should be 10 times greater than that of the background value.
• Reagent deterioration: Reagents arrived thawed, at room temperature or greater or were not stored correctly.
Luminescence Reagent Mixing. The luminescence reagent has to be added and thoroughly mixed with the culture components. The ATP-ER lyses the cells and releases intracellular ATP. If mixing is not adequate, only a proportion of the cells will be lysed and the RLU values will be low. Conversely, too much mixing can lead to ATP degradation and low luminescence readings. Please follow the mixing instructions shown in Section 10 on the instruction video for ATP bioluminescence calibration and standardization.
Plates Drying Out • The cell volume in each well is 0.1µL. For LIVEGlo™ it is usual for th cell suspension to be prepared and a sample
added to the plate and measured almost directly for metabolic viability. If cells are left in the plate for long periods prior to the addition of ATP-ER and measuring bioluminescence, it is possible that the cell volume will decrease due to drying out of the wells.
Preferred Cell Systems™
12KM027.001

Preferred Cell Systems™
Ordering InformationToll free: 1-888-436-6869
Tel: (719) 264-6251Fax: (719) 264-6253
Email: [email protected] online at preferred-cell-systems.com
Technical SupportTel: (719) 264-6251
Email: [email protected]
Preferred Cell Systems™1485 Garden of the Gods Road
Suite 152Colorado Springs, CO 80907
U.S.A.Website: www.preferred-cell-systems.com
LIVEGlo™ is a trademark of Preferred Cell Systems™LIVEGlo™ incorporates patents: 7,354,729, 7,354,730, 7,666,615, 7,709,258, 7,883,861, 7,700,354.
LIVEGlo™ was designed and developed by Preferred Cell Systems™, Inc
KM027.001

ATP Standardfor 1µMdilution
ATP Standardfor 0.5µMdilution
ATP Standardfor 0.1µMdilution
ATP Standardfor 0.05µM
dilution
ATP Standardfor 0.01µM
dilution
STEP 3Add 0.35mL
STEP 4Add 0.9mL
STEP 5Add 0.9mL
STEP 6Add 0.9mL
STEP 2Add 0.9mL
STEP 1. Label 1.5mL vials
IMDMincluded with
kit
STEP 80.35mL
STEP 100.1mL
STEPS 2-6: Using a calibrated pipette dispense IMDM into each of 5 vials
A
B
C
D
E
F
G
H
1 2 3 4 5 6 7 8 9 10 11 12
STEP 12Add 0.1mLinto wellsA1 - D1
Follow Color CodingSTEP 13: Add 0.1ml from Vial 5 into wells E1-H1STEP 14: Add 0.1mL from Vial 4 into wells A2-D2STEP 15: Add 0.1mL from Vial 3 into wells E2-H2STEP 16: Add 0.1mL from Vial 2 into wells A3-D3STEP 17: Add 0.1mL from Vial 1 into wells E3-H3
STEP 18: LOW CONTROL (LC, included with kit)Vortex and lightly centrifuge to remove liquid from capAdd 0.1mL from lowcontrol to wells A4-D4
STEP 19: HIGH CONTROL (HC, included with kit)Vortex and lightly centrifuge to remove liquid from capAdd 0.1mL from highcontrol to wells E4-H4
Change pipette tips for each well
Calibration and Standardization Protocol of an ATP Bioluminescence Assay
PROTOCOL 1: ATP Standard Curve from 0.01µM to 1µMFor Samples with Known or Expected Normal Cell Proliferation
STEP 20: Add ATP-ER to reserviour and using a multichannel pipette, dispense 0.1mL into each replicate wellSTEP 21: Mix replicate wells as described for Figure 2 in this manual. Change tips for each new addition of ATP-ERSTEP 22: Transfer 96-well plate to luminescence plate reader STEP 23: Incubate in the dark for 2 minutes and measure luminescence
ATP StandardStock
contains 0.3mL10µM ATP
(included withkit)
STEP 70.1mL
STEP 90.1mL
STEP 110.1mL
Vial1
Vial2
Vial3
Vial4
Vial5
Reagents & Materials Needed1. 1.5mL vials or similar (not included)2. IMDM (included)3. ATP Standard (included)4. ATP Controls (included)5. Non-sterile, 96-well plate (included)
TIPS
> Use calibrated pipettesthroughout.> Vortex thoroughly between each dilution.> Change tips between each dilution.> Follow color coding.
LC
HC
1
1
1
1
2
2
2
2
3
3
3
3
4
4
4
4
5
5
5
5
LC
LC
LC
LC
HC
HC
HC
HC
KM003.001

ATP Standardcontains 0.3mL
10µM ATP(included with
kit)
ATP Standardfor 1µMdilution
ATP Standardfor 0.3µMdilution
ATP Standardfor 0.1µMdilution
ATP Standardfor 0.03µM
dilution
STEP 2Add 0.4mL
STEP 3Add 0.9mL
STEP 4Add 0.9mL
STEP 5Add 0.9mL
STEP 6 Add 0.7mL
STEP 1. Label 1.5mL vials
IMDMincluded with
kit
STEP 70.2mL
STEP 90.1mL
STEP 80.1mL
STEP 100.1mL
STEPS 2-6: Using a calibrated pipette dispense IMDM into each of 5 vials
A
B
C
D
E
F
G
H
1 2 3 4 5 6 7 8 9 10 11 12
STEP 11Add 0.1mLinto wellsA1 - D1
Follow Color CodingSTEP 12: Add 0.1ml from Vial 5 into wells E1-H1STEP 13: Add 0.1mL from Vial 4 into wells A2-D2STEP 14: Add 0.1mL from Vial 3 into wells E2-H2STEP 15: Add 0.1mL from Vial 2 into wells A3-D3STEP 16: Add 0.1mL from Vial 1 into wells E3-H3
STEP 17: LOW CONTROL (LC, included with kit)Vortex and lightly centrifuge to remove liquid from capAdd 0.1mL from lowcontrol to wells A4-D4
STEP 18: EXTRA HIGH CONTROL (XC, included with kit)Vortex and lightly centrifuge to remove liquid from capAdd 0.1mL from extra highcontrol to wells E4-H4
Change pipette tips for each well
Calibration and Standardization Protocol of an ATP Bioluminescence Assay
PROTOCOL 2: ATP Standard Curve from 0.03µM - 3µM For Samples with Known or Expected High Cell Proliferation
STEP 19: Add ATP-ER to reserviour and using a multichannel pipette, dispense 0.1mL into each replicate wellSTEP 20: Mix replicate wells as described for Figure 2 in this manual. Change tips for each new addition of ATP-ERSTEP 21: Transfer 96-well plate to luminescence plate reader STEP 22: Incubate in the dark for 2 minutes and measure luminescence
Reagents & Materials Needed1. 1.5mL vials or similar (not included)2. IMDM (included)3. ATP Standard (included)4. ATP Controls (included)5. Non-sterile, 96-well plate (included)
TIPS
> Use calibrated pipettesthroughout.> Vortex thoroughly between each dilution.> Change tips between each dilution.> Follow color coding.> A 0.01µM ATP Standard can be made from the Vial 4 and added to the plate.
Vial1
Vial2
Vial3
Vial4
Vial5
LC
XC1
1
1
1
2
2
2
2
3
3
3
3
4
4
4
4
5
5
5
5
LC
LC
LC
LC
XC
XC
XC
XC
KM004.001