america’s test kitchen quick and easy - qvc.com · romaine: best known for its starring role ......
TRANSCRIPT
QUICK and EASY 30-MINUTE MEALS
Recipes from Cook’s Country from America’s Test Kitchen
Recipes from Cook’s Country from America’s Test Kitchen
CONTENTS
Bistro Salad . . . . . . . . . . . . . . . . . . . . . . . . . . . 1
Chicken, Artichoke, and Spinach Calzone . . . . . . . . . . . . . . . . . . .2
Ginger-Glazed Pork Tenderloin . . . . . . . . . . . . . . . . . . . . . . . .3
Herb-Roasted Chicken with Dijon Green Beans . . . . . . . . . . . . . . . . .4
Indoor Burgers with Crispy Onions . . . . . . . . . . . . . . . . . . . . .5
Quick Risotto with Garlic Shrimp . . . . . . . . . . . . . . . . . . . . .6
Skillet Broccoli Macaroni and Cheese . . . . . . . . . . . . . . . . . .7
© 2
013
Am
eri
ca’
s Te
st K
itch
en
. All
rig
hts
re
serv
ed
. CO
VE
R P
HO
TO
GR
AP
HY
: Da
nie
l J. v
an
Ack
ere
Would you believe that you could make delicious, family-friendly meals at home in less time than it takes to get takeout? QVC’s David Venable and Cook’s Country from America’s Test Kitchen teamed up to show you just how easy it can be . Please the whole family with these quick and easy dinner recipes, one for every night of the week! Now you can put great food on the table and still have time to enjoy your family, friends, or even tackle that couch to 5K training plan you’ve been meaning begin .

© 2013 America’s Test Kitchen . All rights reserved . PHOTOGRAPHY: Anthony Tieuli
Getting to know Salad Greens
MESCLUN: This blend of baby greens (the names derives from the French for “mixture”) varies by producer and retailer but typically includes some mix of baby spinach, radicchio, arugula, mâche, baby oak leaf, frisée, and herbs . Look for mixes with a variety of greens .
FRISÉE: From the French for “curled,” this aptly named green, which is a member of the chicory family, has a subtle peppery kick and a festive shape . Mix with mild lettuces to make this pricey green go further .
ROMAINE: Best known for its starring role in Caesar salad, romaine lettuce is crisp, like iceberg, but with a sweeter flavor . Its many ridges and channels hold creamy dressings well . When freshest, heads will be firm and relatively light in color .
DRESSES WELL FEATHERED FRIEND MIX IT UP
1Recipes from Cook’s Country from America’s Test Kitchen
BISTRO SALAD Serves 4
WHY THIS RECIPE WORKS: Thick-cut bacon and a fried egg add heft to these greens, turning a quick salad into supper .
1 tablespoon red wine vinegar 1½ teaspoons minced shallot ½ teaspoon mayonnaise ½ teaspoon Dijon mustard Salt and pepper 3 tablespoons extra-virgin olive oil 8 slices thick-cut bacon, cut into 1-inch pieces 4 large eggs 1 head frisée (6 ounces), cut into 1-inch pieces 1 romaine lettuce heart (6 ounces), cut into 1-inch pieces
1. Combine vinegar, shallot, mayonnaise, mustard, 1/8 teaspoon salt, and 1/8 teaspoon pepper in bowl. Slowly whisk in oil until thoroughly incorporated; set aside.
2. Cook bacon in 12-inch nonstick skillet over medium heat until crisp, about 8 minutes. Using slotted spoon, transfer bacon to paper towel–lined plate. Pour off all but 1 tablespoon fat from skillet. Heat fat over medium-low heat. Fry eggs, covered, until whites are just set, 2 to 3 minutes.
3. Meanwhile, toss frisée and romaine with dressing and divide among individual bowls. Top each salad with fried egg and bacon. Season with salt and pepper to taste. Serve.
TEST KITCHEN NOTE: You can substitute 8 cups of mixed greens for the frisée and romaine .
DAVID SAYS: This warm, nutritious salad would be welcomed by guests at a weekend brunch…especially if accompanying heavy classics like pancakes, cinnamon buns, or French toast . Serve immediately after taking the eggs out of the pan, so the heat of the egg gently warms the whole dish .
Recipes from Cook’s Country from America’s Test Kitchen
30MINUTES

Don’t Make This Mistake!
3. Using a sharp knife, cut five slits, about 2½ inches long, diagonally across the top of each calzone . Make sure to cut through only the top layer of dough and not completely through the calzone .
2. Working from one end of the seam to the other, gently pull the bottom layer of dough over the tip of your index finger and press to seal .
1. Lightly press the dough to be flush to the edge of the cheese at the seam and then press the dough edges firmly to seal them together .
© 2013 America’s Test Kitchen . All rights reserved . PHOTOGRAPHY: Daniel J . van Ackere
2Recipes from Cook’s Country from America’s Test Kitchen
CH ICKEN, ARTICHOKE, & SPI NACH CALZON E Serves 4
WHY THIS RECIPE WORKS: Shredded rotisserie chicken provides a quick, hearty filling for these calzones .
1 (2½-pound) rotisserie chicken, skin and bones discarded, meat shredded into bite-size pieces (about 3 cups)
9 ounces frozen artichoke hearts, thawed, patted dry, and chopped 2 ounces (2 cups) baby spinach 6 ounces low-moisture mozzarella cheese, shredded (1½ cups) 4 ounces feta cheese, crumbled (1 cup) ¼ cup chopped fresh basil ½ teaspoon salt ¼ teaspoon pepper 1 pound pizza dough 2 tablespoons olive oil
1. Adjust oven rack to upper-middle position and heat oven to 450 degrees. Combine chicken, artichokes, spinach, mozzarella, feta, basil, salt, and pepper in bowl.
2. Divide dough in half. On lightly floured counter, roll dough into two 9-inch rounds. Working with 1 dough round at a time, place half of filling over half of dough, leaving 1-inch border around edges. Brush edges with water, fold dough over filling, and crimp to seal. Repeat with remaining dough and remaining filling.
3. Brush rimmed baking sheet with 1 tablespoon oil. Transfer calzones to prepared sheet and cut two 1-inch slits in top of each calzone. Brush calzones with remaining 1 tablespoon oil and bake until golden brown, about 20 minutes. Serve.
TEST KITCHEN TIP: The dough will be easier to roll if you let it sit at room temperature for 5 minutes before rolling it out .
DAVID SAYS: Have a free weekend? Make some calzones in advance for weeknights that are particularly busy . Assemble, seal, and place the calzones on a baking sheet as directed . Wrap tightly and refrigerate or freeze until needed . If heating from frozen, just add 10-15 minutes to the baking time .
Recipes from Cook’s Country from America’s Test Kitchen
30MINUTES
Make sure you seal the calzones properly or you’ll end up with burst seams and leaky cheese . Brush the exposed edges with water and then press the dough edges together firmly and crimp to seal . We developed a special technique (see the photos) that ensures a really tight seal .
© 2013 America’s Test Kitchen . All rights reserved . PHOTOGRAPHY: Anthony Tieuli
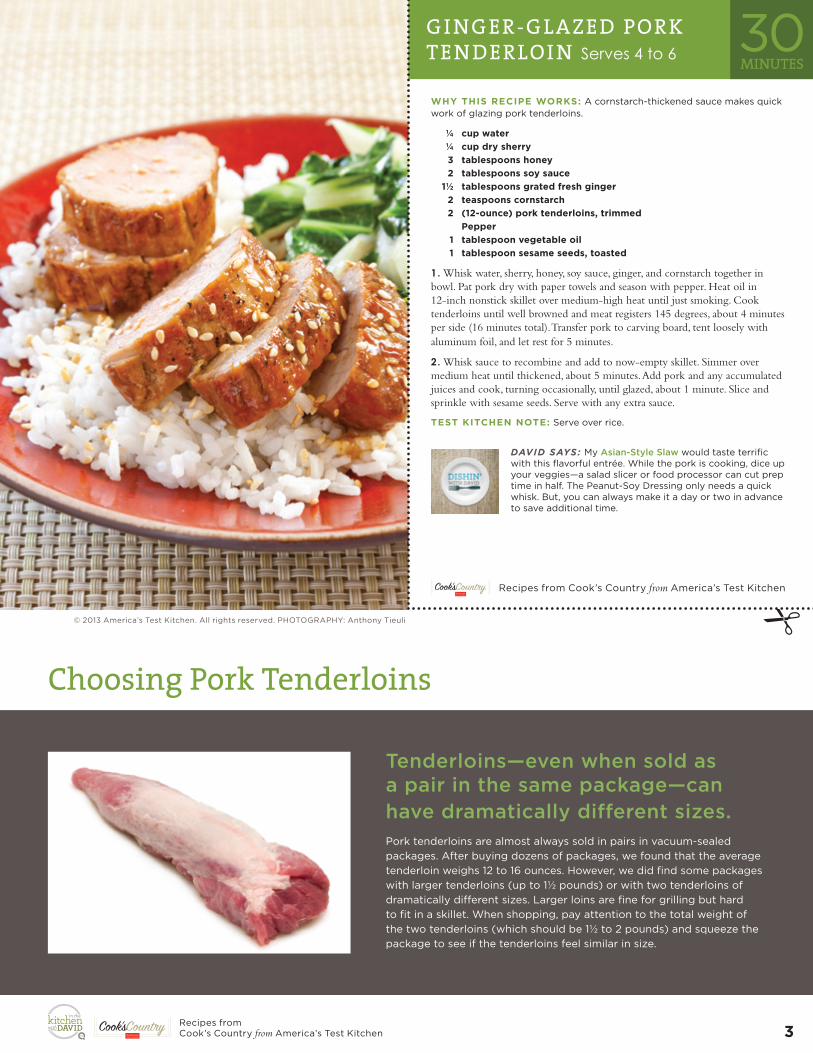
Choosing Pork Tenderloins
Tenderloins—even when sold as a pair in the same package—can have dramatically different sizes. Pork tenderloins are almost always sold in pairs in vacuum-sealed packages . After buying dozens of packages, we found that the average tenderloin weighs 12 to 16 ounces . However, we did find some packages with larger tenderloins (up to 1½ pounds) or with two tenderloins of dramatically different sizes . Larger loins are fine for grilling but hard to fit in a skillet . When shopping, pay attention to the total weight of the two tenderloins (which should be 1½ to 2 pounds) and squeeze the package to see if the tenderloins feel similar in size .
3Recipes from Cook’s Country from America’s Test Kitchen
G I NG ER-G LAZED PORK TEN DERLOI N Serves 4 to 6
WHY THIS RECIPE WORKS: A cornstarch-thickened sauce makes quick work of glazing pork tenderloins .
¼ cup water ¼ cup dry sherry 3 tablespoons honey 2 tablespoons soy sauce 1½ tablespoons grated fresh ginger 2 teaspoons cornstarch 2 (12-ounce) pork tenderloins, trimmed Pepper 1 tablespoon vegetable oil 1 tablespoon sesame seeds, toasted
1. Whisk water, sherry, honey, soy sauce, ginger, and cornstarch together in bowl. Pat pork dry with paper towels and season with pepper. Heat oil in 12-inch nonstick skillet over medium-high heat until just smoking. Cook tenderloins until well browned and meat registers 145 degrees, about 4 minutes per side (16 minutes total). Transfer pork to carving board, tent loosely with aluminum foil, and let rest for 5 minutes.
2. Whisk sauce to recombine and add to now-empty skillet. Simmer over medium heat until thickened, about 5 minutes. Add pork and any accumulated juices and cook, turning occasionally, until glazed, about 1 minute. Slice and sprinkle with sesame seeds. Serve with any extra sauce.
TEST KITCHEN NOTE: Serve over rice .
DAVID SAYS: My Asian-Style Slaw would taste terrific with this flavorful entrée . While the pork is cooking, dice up your veggies—a salad slicer or food processor can cut prep time in half . The Peanut-Soy Dressing only needs a quick whisk . But, you can always make it a day or two in advance to save additional time .
Recipes from Cook’s Country from America’s Test Kitchen
30MINUTES

© 2013 America’s Test Kitchen . All rights reserved . PHOTOGRAPHY: KELLER + KELLER
Rinsing Chicken
Should you rinse chicken before cooking? Both the U .S . Department of Agriculture and the Food and Drug Administration advise against washing poultry . According to their research, while rinsing may remove some bacteria, the only way to ensure that all bacteria are killed is through proper cooking . Moreover, splashing bacteria around the sink can be dangerous, especially if water lands on food that is ready to be served . All the same, some people will argue that chicken should be rinsed for flavor—not safety—reasons . After sitting in its own blood and juices for days, they argue, chicken should be unwrapped and refreshed under running water . To find out if rinsing had any impact on flavor, we roasted four chickens—two rinsed, two unrinsed—and held a blind tasting . Tasters couldn’t tell the difference . Our conclusion? Skip the rinsing .
4Recipes from Cook’s Country from America’s Test Kitchen
H ERB-ROASTED CH ICKEN WITH DIJON G REEN BEANS Serves 4
WHY THIS RECIPE WORKS: A mustardy compound butter flavors both the chicken and the green beans .
5 tablespoons unsalted butter, softened 2 tablespoons Dijon mustard 2 tablespoons minced fresh thyme 3 garlic cloves, minced Salt and pepper 2 teaspoons honey 4 (12-ounce) bone-in split chicken breasts,
trimmed and halved crosswise 2 pounds green beans, trimmed and cut into 2-inch lengths ¼ cup water
1. Adjust oven rack to lowest position and heat oven to 450 degrees. Combine butter, mustard, thyme, garlic, ½ teaspoon salt, and ½ teaspoon pepper in bowl. Transfer 2 tablespoons butter mixture to second bowl and stir in honey; reserve. Pat chicken dry with paper towels and rub with unsweetened butter mixture. Cook chicken, skin side down, in 12-inch nonstick skillet over medium-high heat until browned, about 5 minutes. Arrange chicken, skin side up, in 13 by 9-inch baking dish and roast until meat registers 160 degrees, about 20 minutes.
2. Meanwhile, melt reserved honey butter over medium-high heat in now-empty skillet. Add green beans and cook, stirring occasionally, until spotty brown, 8 to 10 minutes. Stir in water and ½ teaspoon salt, cover, and reduce heat to medium-low. Cook until beans are nearly tender, 3 to 5 minutes. Remove lid and cook until liquid evaporates and beans are tender, about 1 minute. Season with salt and pepper to taste. Serve with chicken.
DAVID SAYS: I absolutely love one-pot recipes and meals that can be made with the same cookware . Not only does your food have delicious cohesion, but less cookware means less dishes . What a great time to get the kids started on a regular cleanup routine .
Recipes from Cook’s Country from America’s Test Kitchen
30MINUTES
© 2013 America’s Test Kitchen . All rights reserved . PHOTOGRAPHY: Daniel J . van Ackere
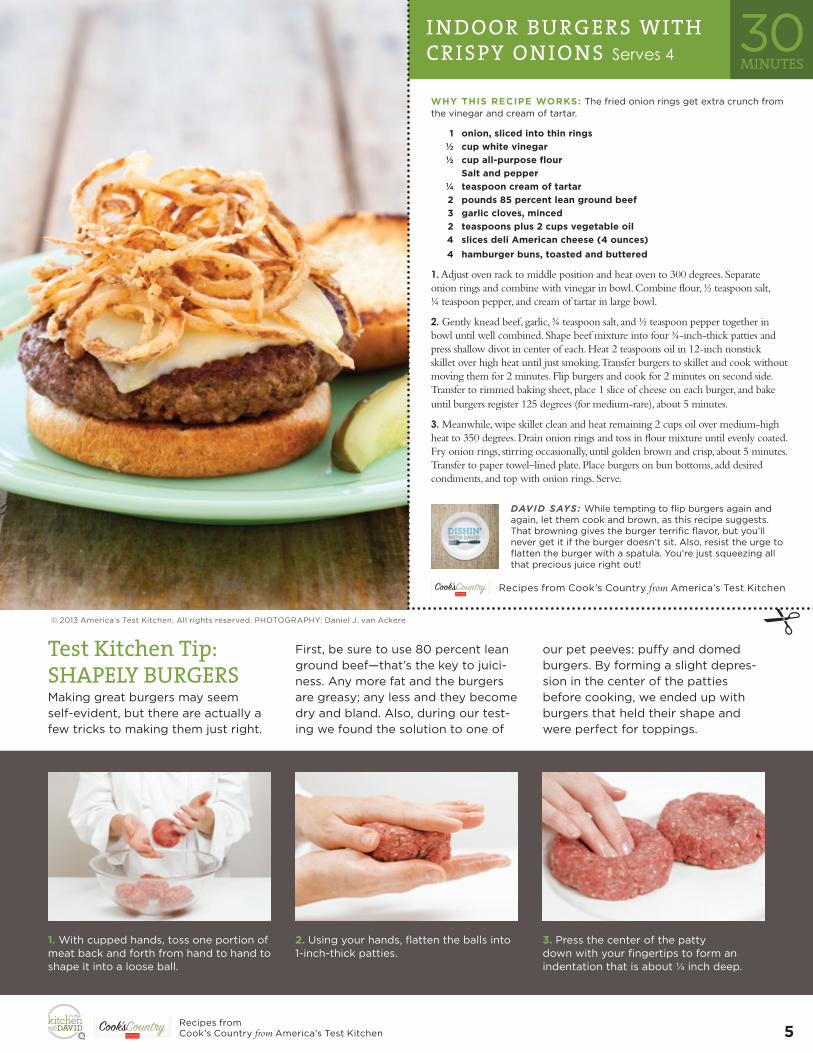
Test Kitchen Tip: SHAPELY BURGERSMaking great burgers may seem self-evident, but there are actually a few tricks to making them just right .
First, be sure to use 80 percent lean ground beef—that’s the key to juici-ness . Any more fat and the burgers are greasy; any less and they become dry and bland . Also, during our test-ing we found the solution to one of
our pet peeves: puffy and domed burgers . By forming a slight depres-sion in the center of the patties before cooking, we ended up with burgers that held their shape and were perfect for toppings .
3. Press the center of the patty down with your fingertips to form an indentation that is about ¼ inch deep .
2. Using your hands, flatten the balls into 1-inch-thick patties .
1. With cupped hands, toss one portion of meat back and forth from hand to hand to shape it into a loose ball .
5Recipes from Cook’s Country from America’s Test Kitchen
I N DOOR BU RG ERS WITH CRISPY ON IONS Serves 4
WHY THIS RECIPE WORKS: The fried onion rings get extra crunch from the vinegar and cream of tartar .
1 onion, sliced into thin rings ½ cup white vinegar ½ cup all-purpose flour Salt and pepper ¼ teaspoon cream of tartar 2 pounds 85 percent lean ground beef 3 garlic cloves, minced 2 teaspoons plus 2 cups vegetable oil 4 slices deli American cheese (4 ounces) 4 hamburger buns, toasted and buttered
1. Adjust oven rack to middle position and heat oven to 300 degrees. Separate onion rings and combine with vinegar in bowl. Combine flour, ½ teaspoon salt, ¼ teaspoon pepper, and cream of tartar in large bowl.
2. Gently knead beef, garlic, ¾ teaspoon salt, and ½ teaspoon pepper together in bowl until well combined. Shape beef mixture into four ¾- inch-thick patties and press shallow divot in center of each. Heat 2 teaspoons oil in 12-inch nonstick skillet over high heat until just smoking. Transfer burgers to skillet and cook without moving them for 2 minutes. Flip burgers and cook for 2 minutes on second side. Transfer to rimmed baking sheet, place 1 slice of cheese on each burger, and bake until burgers register 125 degrees (for medium-rare), about 5 minutes.
3. Meanwhile, wipe skillet clean and heat remaining 2 cups oil over medium-high heat to 350 degrees. Drain onion rings and toss in flour mixture until evenly coated. Fry onion rings, stirring occasionally, until golden brown and crisp, about 5 minutes. Transfer to paper towel–lined plate. Place burgers on bun bottoms, add desired condiments, and top with onion rings. Serve.
DAVID SAYS: While tempting to flip burgers again and again, let them cook and brown, as this recipe suggests . That browning gives the burger terrific flavor, but you’ll never get it if the burger doesn’t sit . Also, resist the urge to flatten the burger with a spatula . You’re just squeezing all that precious juice right out!
Recipes from Cook’s Country from America’s Test Kitchen
30MINUTES
© 2013 America’s Test Kitchen . All rights reserved . PHOTOGRAPHY: Daniel J . van Ackere
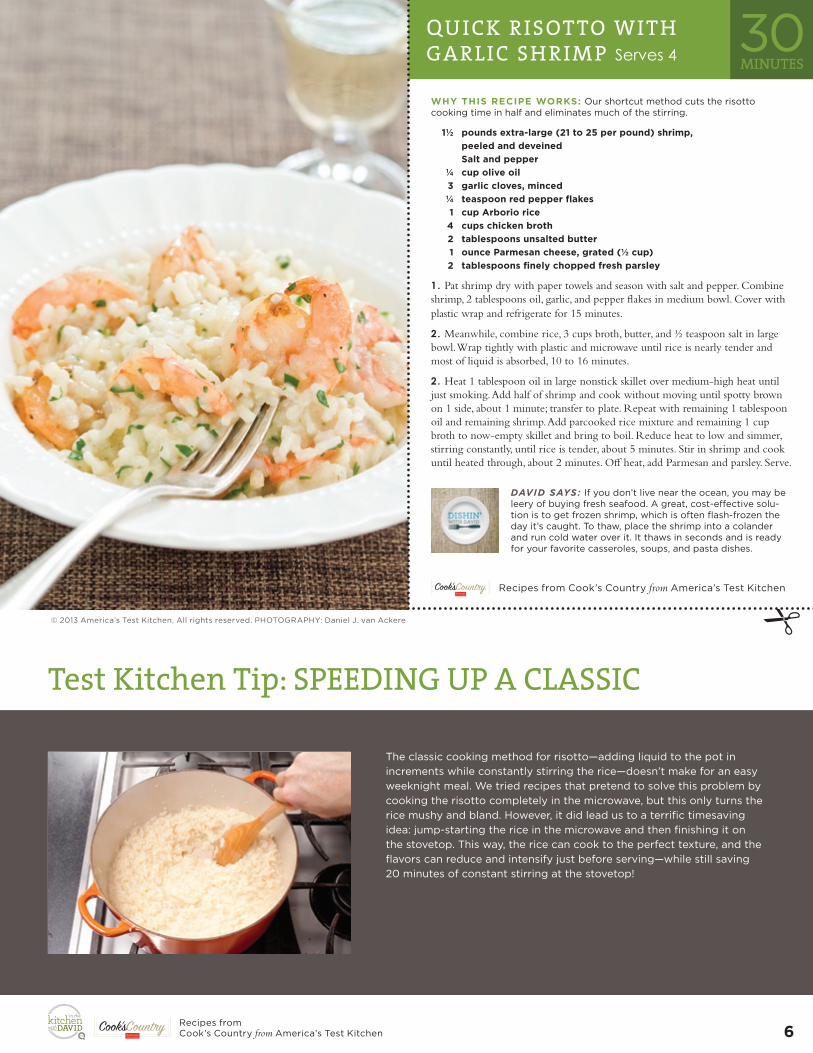
Test Kitchen Tip: SPEEDING UP A CLASSIC
The classic cooking method for risotto—adding liquid to the pot in increments while constantly stirring the rice—doesn’t make for an easy weeknight meal . We tried recipes that pretend to solve this problem by cooking the risotto completely in the microwave, but this only turns the rice mushy and bland . However, it did lead us to a terrific timesaving idea: jump-starting the rice in the microwave and then finishing it on the stovetop . This way, the rice can cook to the perfect texture, and the flavors can reduce and intensify just before serving—while still saving 20 minutes of constant stirring at the stovetop!
6Recipes from Cook’s Country from America’s Test Kitchen
QU ICK RISOTTO WITH GARLIC SH RIM P Serves 4
WHY THIS RECIPE WORKS: Our shortcut method cuts the risotto cooking time in half and eliminates much of the stirring .
1½ pounds extra-large (21 to 25 per pound) shrimp, peeled and deveined
Salt and pepper ¼ cup olive oil 3 garlic cloves, minced ¼ teaspoon red pepper flakes 1 cup Arborio rice 4 cups chicken broth 2 tablespoons unsalted butter 1 ounce Parmesan cheese, grated (½ cup) 2 tablespoons finely chopped fresh parsley
1. Pat shrimp dry with paper towels and season with salt and pepper. Combine shrimp, 2 tablespoons oil, garlic, and pepper flakes in medium bowl. Cover with plastic wrap and refrigerate for 15 minutes.
2. Meanwhile, combine rice, 3 cups broth, butter, and ½ teaspoon salt in large bowl. Wrap tightly with plastic and microwave until rice is nearly tender and most of liquid is absorbed, 10 to 16 minutes.
2. Heat 1 tablespoon oil in large nonstick skillet over medium-high heat until just smoking. Add half of shrimp and cook without moving until spotty brown on 1 side, about 1 minute; transfer to plate. Repeat with remaining 1 tablespoon oil and remaining shrimp. Add parcooked rice mixture and remaining 1 cup broth to now-empty skillet and bring to boil. Reduce heat to low and simmer, stirring constantly, until rice is tender, about 5 minutes. Stir in shrimp and cook until heated through, about 2 minutes. Off heat, add Parmesan and parsley. Serve.
DAVID SAYS: If you don’t live near the ocean, you may be leery of buying fresh seafood . A great, cost-effective solu-tion is to get frozen shrimp, which is often flash-frozen the day it’s caught . To thaw, place the shrimp into a colander and run cold water over it . It thaws in seconds and is ready for your favorite casseroles, soups, and pasta dishes .
Recipes from Cook’s Country from America’s Test Kitchen
30MINUTES
© 2013 America’s Test Kitchen . All rights reserved . PHOTOGRAPHY: Daniel J . van Ackere
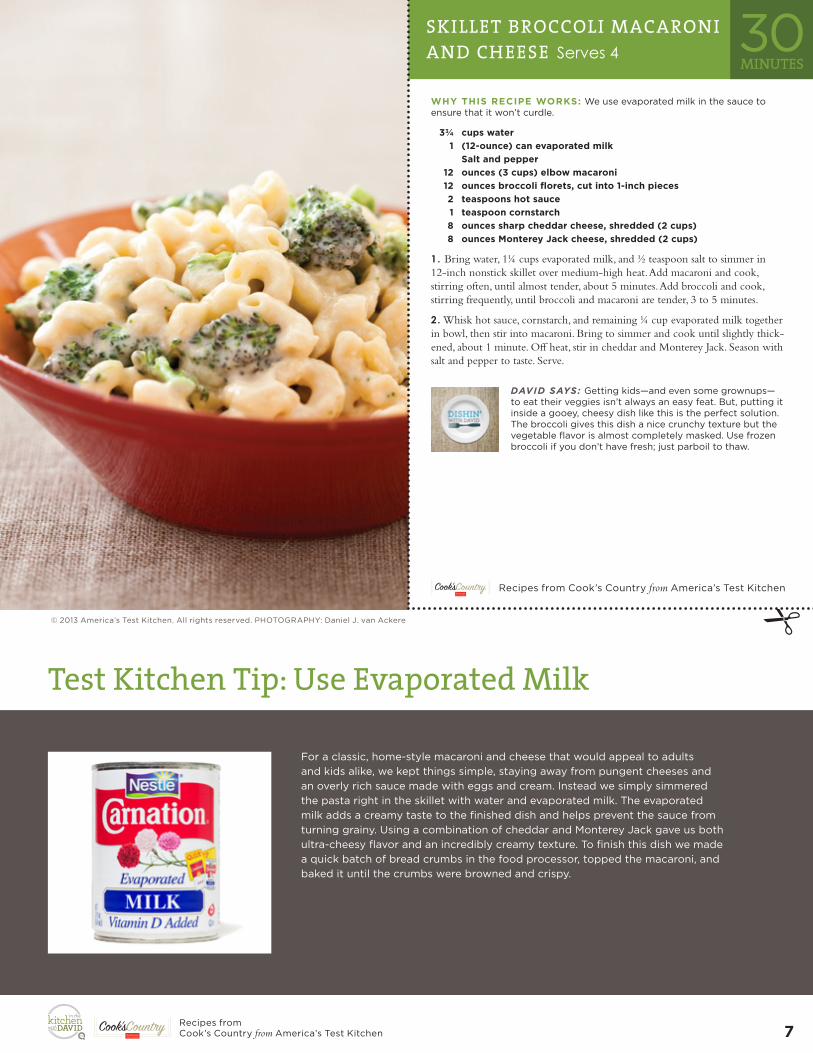
Test Kitchen Tip: Use Evaporated Milk
For a classic, home-style macaroni and cheese that would appeal to adults and kids alike, we kept things simple, staying away from pungent cheeses and an overly rich sauce made with eggs and cream . Instead we simply simmered the pasta right in the skillet with water and evaporated milk . The evaporated milk adds a creamy taste to the finished dish and helps prevent the sauce from turning grainy . Using a combination of cheddar and Monterey Jack gave us both ultra-cheesy flavor and an incredibly creamy texture . To finish this dish we made a quick batch of bread crumbs in the food processor, topped the macaroni, and baked it until the crumbs were browned and crispy .
7Recipes from Cook’s Country from America’s Test Kitchen
SKILLET BROCCOLI MACARONI AND CHEESE Serves 4
WHY THIS RECIPE WORKS: We use evaporated milk in the sauce to ensure that it won’t curdle .
3¾ cups water 1 (12-ounce) can evaporated milk Salt and pepper 12 ounces (3 cups) elbow macaroni 12 ounces broccoli florets, cut into 1-inch pieces 2 teaspoons hot sauce 1 teaspoon cornstarch 8 ounces sharp cheddar cheese, shredded (2 cups) 8 ounces Monterey Jack cheese, shredded (2 cups)
1. Bring water, 1¼ cups evaporated milk, and ½ teaspoon salt to simmer in 12-inch nonstick skillet over medium-high heat. Add macaroni and cook, stirring often, until almost tender, about 5 minutes. Add broccoli and cook, stirring frequently, until broccoli and macaroni are tender, 3 to 5 minutes.
2. Whisk hot sauce, cornstarch, and remaining ¼ cup evaporated milk together in bowl, then stir into macaroni. Bring to simmer and cook until slightly thick-ened, about 1 minute. Off heat, stir in cheddar and Monterey Jack. Season with salt and pepper to taste. Serve.
DAVID SAYS: Getting kids—and even some grownups— to eat their veggies isn’t always an easy feat . But, putting it inside a gooey, cheesy dish like this is the perfect solution . The broccoli gives this dish a nice crunchy texture but the vegetable flavor is almost completely masked . Use frozen broccoli if you don’t have fresh; just parboil to thaw .
Recipes from Cook’s Country from America’s Test Kitchen
30MINUTES