american film institute - horizon high school …hhsdrama.com/documents/afiscreeneducation.pdf•...
TRANSCRIPT


AMERICAN FILM INSTITUTESCREEN EDUCATION CENTER
PROTOCOL AND MATERIALSGUIDE TO THE
SCREEN EDUCATION PROCESS
© AMERICAN FILM INSTITUTE 2006
Mission, Background & Research• AFI Screen Education Mission Statement• Why Screen Education Works• Aligning the Screen Education Process to the Writing Process
Section OneActivating the Screen Education Process with the Door Scene• Introduction• Teacher Guidelines & Standards• Student Exercises and Handouts
Section TwoUsing the Screen Education 5-Step Process to Create Content-Based Video Projects• Teacher Guidelines and Standards• Student Exercises and Handouts• Publish and Connect
Section ThreeTeacher Resources & Handouts• Glossary of Film Terms• Storyboard Glossary of Common Film Shots• Guide to Script Formatting• The Window Exercise: Basic Three-Point Lighting• Peer-to-Peer Feedback Protocol Guide• Evaluation Rubrics
Section FourFilmmaker’s Tool Kit• Blank Storyboards• Production Call Sheet• Hand-Held Viewfinder Cut-Out• Parental Release for Exhibiting Final Projects
TABLE OF CONTENTS
www.AFI.edu 3
MISSION STATEMENTThe American Film Institute (AFI) is the preeminent national organization dedicated to advancing and preserving film, television and other forms of the moving image.
The AFI Screen Education Center seeks to transform American education in an era increasingly shaped by visual media and advanced technology. AFI’s pedagogy empowers educators and all kinds of learners to master the skills needed for living and working in the 21st century.
Screen Ed Goals:
• Integrate the AFI Screen Education process into American classroom practice;
• Help all students better express their deepest understanding of core classroom content through the AFI Screen Education process;
• Harness the appeal of technology and media to engage students and help them learn;
• Enable all kinds of students to master literacy necessary for life and work in the 21st century;
• Provide professional development that helps teachers use the AFI Screen Education process successfully;
• Demonstrate the effectiveness of the AFI Screen Education process on a scale broad enough to serve schools throughout the nation.
• Establish the AFI Screen Education process as a valued classroom tool within the entire educational community;
• Create and distribute AFI Screen Education products, services and solutions.
INTRODUCTION
www.AFI.edu 4

WHY SCREEN ED WORKSThe AFI Screen Ed process is designed to allow student learning to emerge from creative collaboration and critical review of students’ work, rather than from more traditional forms of classroom instruction. The process is a progressive cycle–essentially a series of learning discussions –in which students work collaboratively to produce a film for critical review and analysis by their peers, teachers and professional mentors. It appears that when there is a commitment to the Screen Education process, student learning is affected in three significant ways:
Learning How to Learn
Students take charge of their own learning–they learn how to learn. Through the use of script interpretation, storyboards (graphic organizers), scriptwriting, camera shots, critique, revision and analysis, the students are piecing together the thinking process and making meaning–constructing knowledge. The collaborative environment allows them to distribute the learning throughout the group. Over the course of the semester, the students learn at a much higher cognitive level than a typical, more traditional classroom situation.
21st Century Skills
Students are engaged deeply in 21st Century skills in every phase of the Screen Education process. Every cycle of the process relies on these skills and competencies in some capacity.
Mastering Content
Students in the Screen Education program master and retain content at a deeper level than in more traditional classroom settings. Because most of the process happens outside the bounds of the written word—students can work things out before putting their thoughts into words. In Screen Education, students can “think” in their own language and tell their own stories with moving images that the whole world will understand, in a common language with shared meaning. Screen Education is empowering. Students can, and do, take charge of their own learning. AFI’s Screen Education program is transformational for both students and teachers.
INTRODUCTION
www.AFI.edu 5

INTRODUCTION
www.AFI.edu 6
AFI Screen Ed...✓…engages students in 21st century skills
✓…is a high quality program that teachers value and apply in their classroom practice;
✓…fosters instruction that enhances student learning;
✓…significantly increases the use of technology in the classroom;
✓…increases students’ motivation towards their projects, both inside and outside of school;
✓…serves schools and students who are more diverse than the national average;
✓…fosters instruction that supports all kinds of learners;
✓…increases students’ desire to share work and collaborate with peers and mentors;
✓…increases teachers’ desire to collaborate with other teachers;
✓…can be flexibly applied to national, state and local standards within multiple disciplines of curricula.

How to Use These Materials
This handbook will familiarize you with the Screen Education process. The materials are organized in the following order:
1. A brief introduction to the AFI Screen Education process.
2. Instructions and educational context for the “Door Exercise”—a key introductory exercise practiced at all AFI Screen Education Teacher Training Workshops. Many teachers have students complete the Door Exercise before producing their actual video projects. It’s a great way to get comfortable with the basics of using filmmaking techniques to tell a story.
3. A detailed outline of the AFI Screen Education process. While the Door Exercise is an assignment with a prescribed sequence of tasks, the five-step AFI Screen Education process is flexible, applicable across curricula to students’ specific projects. You will find a wealth of information on filmmaking techniques, teamwork, time management and educational standards in the detailed discussion of this process.
4. In the back of this guide are reference materials and forms you may copy for use in the classroom as you progress through the Screen Education process.
Introduction to the AFI Screen Education 5-Step Process
Teachers and students integrate the techniques of filmmaking into the classroom. The results? Transformational experiences where students become uniquely involved with course material.
Step 1 – Script Development(Brainstorm, decide upon project, identify the “Who, What, Where, When, Why”)
Step 2 – Screenwriting & Storyboarding
Step 3 – Production & Filming
Step 4 – Editing
Step 5 – Exhibit, Review, & Reflect
INTRODUCTION
www.AFI.edu 7
In addition, AFI’s Screen Education Web site, www.AFI.edu, is an ever-expanding source of instruction, support and online community for AFI Screen Education teachers.

Step 1 Step 2 Step 3 Step 4 Step 5
AFI Screen Ed SCRIPT DEVELOPMENT
• Identifying
• Organizing
• Reading
• Listening
SCREENWRITING & STORYBOARDING
• Understanding complex relationships
• Creative thinking
• Planning
PRODUCTION & FILMING
• Allocating resources
• Working with others
• Problem-solving
• Decision-making
• Self-management
EDITING
• Using technology
• Creative thinking
• Problem-solving
• Decision-making
• Reasoning
EXHIBIT, REVIEW, REFLECT
• Responsibility
• Self-esteem
• Self-management
• Listening
• Speaking
• Sociability
• Integrity
• Honesty
• Intuition
Writing PRE-WRITING
• Reading
• Listening
• Speaking
WRITING
• Creative thinking
• Decision-making
• Visualizing with the mind’s eye
REVIEW & REVISE
• Problem-solving
• Reasoning
• Knowing how to learn
EDITING
• Creative thinking
• Problem-solving
• Decision-making
• Reasoning
PUBLISH & REFLECT
• Responsibility
• Self-esteem
• Self-management
• Listening
• Speaking
• Sociability
• Integrity
• Honesty
• Intuition
Reading COMPOSITION
• Reading for the main points
• Summarizing
• Analyzing
READ/CONSTRUCT MEANING
• Creative thinking
• Decision-making
SENTENCE COMBINING
• Reading for the main points
• Summarizing
• Analyzing
SENTENCE CONSTRUCTION
• Word order/syntax
• Understanding parts of speech
WORD ATTACK SKILLS
• Word recognition
• Word meaning
• Word roots
• Prefix and suffix understanding
CONTEXTUALIZING SCREEN EDUCATION IN CONTEMPORARY EDUCATIONAL PRACTICE

SECTION ONE
ACTIVATING THE SCREEN EDUCATION PROCESS WITH “THE DOOR SCENE”
•INTRODUCTION
•TEACHER GUIDELINES & STANDARDS
•STUDENT EXERCISES & HANDOUTS
INTRODUCTION
www.AFI.edu 9

AFI SCREEN EDUCATION PROCESSActivating the Process: The Door Scene
Introduction
When do we usually see video cameras? Weddings, births, birthday parties, school and sporting events come to mind. Now ask yourself how often you actually sit down and watch those videos. How often can you get someone else to watch? Are these videos interesting? Do all those long continuous shots, wild moves and dizzying zooms make for compelling viewing? Do you understand why they call it “amateur video” on the news? This is because most people use their home video cameras to document an event rather than tell a story.
The irony of this situation is that most people living in western culture during the last 50 years have learned to decode and understand a nearly continuous and increasingly sophisticated stream of visual information. Visual language, with its unique vocabulary and grammar, is effortlessly comprehended by even the youngest members of our society. So, with all the prior knowledge and experience gained from years of watching TV and movies, why do most home movies look like home movies? It’s a matter of literacy.
Although we quickly learn to read the visual language around us, “writing” visually (by accessing screen vocabulary and grammar to communicate rather than to just comprehend) is a skill typically reserved for highly trained media professionals and enthusiasts.
The AFI Screen Education process begins by bridging that visual literacy gap in a transformational way. By accessing prior knowledge, and engaging as a group to construct and define criteria for what makes good visual storytelling, Screen Education teachers and students bridge that visual literacy gap—a first step in engaging with filmmaking as part of mainstream curriculum.
It begins with “The Door Scene.”
TEACHER GUIDELINES
www.AFI.edu 10
It’s a matter of literacy.

Technical Requirements:
• Video Camera (one per production group consisting of 3-5 students)
• Video Monitor (to exhibit projects for class discussion and feedback)
• Video editing enabled computer (one per group)
General Standards for Exercises
• NA-VA.9-12.1 Conceive and create works of visual art that demonstrate understanding of how the communication of their ideas relates to the media, techniques and processes they use.
• NA-VA.9-12.1 Students initiate, define and solve challenging visual arts problems independently, using intellectual skills such as analysis, synthesis and evaluation.
• NA-VA.9-12.6 Students synthesize the creative and analytical principles and techniques of the visual arts and other selected arts disciplines.
• NT.K-12.1 Students demonstrate a sound understanding of the nature and operation of technology systems. Students are proficient in the use of technology.
Resources & Handouts
• Feedback Protocol
• Glossary of Shots
• Blank Storyboards
TEACHER GUIDELINES
www.AFI.edu 11

Instructions and Tips for Using the Door Scene
The Door Scene is designed to introduce students to the basic skills and concepts of filmmaking in an experiential constructivist way. The five steps prescribed in this experience also parallel the steps of the writing process.
TEACHER GUIDELINES
www.AFI.edu 12
STEP ONE
Step One of the process engages the student in a principled exploration of directed visual storytelling without any prior instruction or information. The step simply asks the student to pick up a camera and communicate fear and suspense.
The group discussion and review of the projects result in a dialogue in which students start to access and utilize prior knowledge about visual language and grammar, as they discuss what is and is not working about the project. Refer to the Feedback Protocol Guide in the Teacher Resource Section for guidance.
As a result, the class as a whole begins to define criteria for what is good visual storytelling and what is not. Students begin to see the difference between trying to tell a story in one continuous shot—as though it were a long run-on sentence—and using shorter, more specific shots that construct a scene as they would construct a paragraph.
Step One aligns with the writing process by engaging students in a pre-writing exercise with an activity that causes the writer to think about the subject, organizing his thoughts before he begins writing. Students also identify and outline essential elements of their story by providing the who, what, where, when, why and how.
Estimated time required: 60 – 90 min.

TEACHER GUIDELINES
www.AFI.edu 13
STEP TWO
Step Two of the process asks students to draw on the ideas generated by the class discussions at the end of Step One about communicating more clearly and effectively.
Introducing the concept of a storyboard at this point as a means of communication and graphic organization challenges students to put down on paper the specific visual ideas they want to show in their scenes, by individually storyboarding their shots to create the tension required by the script. They then share these with their group, deciding together on the series of shots that best tell the story.
Step Two aligns with principles of pre-writing and writing by having students elaborate, extend and explore ideas, organizing them into visual sentences and paragraphs. Ideas are first translated to paper, requiring elements traditionally associated with the writing process, such as organization, voice, grammar and fluency.
Estimated time required: 60 – 90 min. (Some home study time might be used for creation of the individual storyboards, thus allowing more class time for discussion and creation of group storyboards.)
Estimated time required: 60 – 90 min.

TEACHER GUIDELINES
www.AFI.edu 14
STEP THREE
Step Three of the process is the favorite of most Screen Education teachers because it usually represents a point where they can see how their students are engaged in the process, through their attachment to the visions they have created.
Students will begin this class session ready and eager to shoot the storyboards they have worked hard as a group to create. Begin the session by collecting storyboards from all the teams; then re-distribute them randomly so no group has its original storyboard.
Take a moment to enjoy the students’ initial shock and disappointment. Then explain that the purpose of this surprise is to evaluate how clearly each group expressed their ideas for the scene. Direct the students’ attention to the instructions for Step Two that state clearly:
Every detail must be included in your storyboard. It must be so visually clear that a stranger, unfamiliar with the scenario, could take your storyboard and shoot the film exactly as you visualized it when creating your storyboard.
This is a critical step in teaching the importance of being able to express clear visual grammar. After the groups shoot each others’ storyboards, the next round of peer-to-peer review of the projects will further sharpen the criteria for good visual storytelling, by students explaining to each other what Group A read on the storyboards and shot, as opposed to what Group B “meant to say.” Continue to push the discussion by asking questions like, ”What would make that idea clearer?“ and ”How can that shot be more effective in expressing that idea?”
Step Three aligns with the writing process by visually exploring principles of grammar, vocabulary, reasoning, problem solving, and visual literacy and fluency. Students begin to edit their work by thinking critically about their scenes in terms of what is effectively telling their story and what is distracting from it.
Estimated time required: 60 – 90 min.

TEACHER GUIDELINES
www.AFI.edu 15
STEP FOUR
Step Four of the process allows the students for the first time to ”put it all together,” as they now will do what they thought they were going to do in the previous step—shoot their own storyboards. Allow them some time to consider the group critiques of the films they ”wrote”—which were shot by another group—and make any revisions to their original storyboards that would improve their scene. Production groups shoot their scenes, adhering to all the previous project parameters and limitations.
Using desktop video editing equipment, direct students to import their video footage, cut out the ”bad” parts and assemble the shots in order of their storyboards. This assembly edit should tell the story completely without music, effects or transitions. By now, students should be quite comfortable with the peer-to-peer review cycle that has followed every step in this process. Focus on verbal communication skills and good habits for group discussion during this process.
Step Four aligns with the writing process by continuing the practice of peer editing with review and revision of students’ projects by adding, omitting, combining, sharing and receiving feedback. This parallels the process of refining a written work.
Estimated time required: 60 – 90 min.
(For best results, some teachers have devoted an entire session to allow students more time to get comfortable with the technical challenges of using an editing system.)

TEACHER GUIDELINES
www.AFI.edu 16
STEP FIVE
Step Five of the process moves from the assembly edit of the film to the final version, by challenging students to explore enhancing its impact with music, transitions, effects, etc. Students should be exhibiting signs of their emerging fluency in visual language, excitement for the filmmaking process and newfound proficiency with the technology, thereby moving the final step of this process along on its own momentum.
A final screening of the completed projects for the entire class can provide an additional learning experience, by reminding groups and individuals of the progress they have made over the last few days, by communicating their ideas through clear, interesting and compelling visual stories.
Step Five aligns with the final stages of the writing process by challenging students to hone, refine, exhibit and reflect on their work and the process.
Estimated time required: 60 – 90 min.
©“The Door Scene” exercise is adapted from original material developed for AFI Screen Education by AFI, Workforce LA, Dave Master & John Perry

THE DOOR SCENE—STEP ONEIntroduction to Visual Storytelling
Challenge:
Form production teams of no more than five people. (Three is ideal.) Using a video camera, interpret and shoot the following scripted scenario:
A person is about to open a door. The person hears a sound and becomes mildly concerned. The person finds the door locked and searches for his or her keys. The person hears the sound again and becomes visibly apprehensive. As the filmmaker, your goal is to build tension and growing panic, using any visual element or device that you can think of.
The film closes with the person finally opening the door and getting to the other side safely. Here, you want to communicate to the audience the character’s feeling of relief and safety.
Parameters/Limitations:
• Neither the character nor the audience ever sees the source of the sound.
• The film can have only one actor.
• The film may not exceed 90 seconds.
• The entire film must take place within five feet of either side of the door.
• You must assemble the shots “in camera,” as you go along, WITHOUT using editing equipment.
Exhibit:
Each production team screens its finished film for the entire class for feedback.
• Did the film communicate the script?
• Did it communicate the rising tension and relief?
• What could you shoot differently?
• What would make your film more understandable?
• What would give your film more emotional impact?
STUDENT EXERCISE/ASSIGNMENT
www.AFI.edu

THE DOOR SCENE—STEP TWOStoryboarding the Scene
Challenge:
Storyboard a script scenario for the Door Scene in a manner you feel will be the most visually effective. However, when you create your storyboard, think of a creative, entertaining or surprising new ending for the scenario. The entire film must follow the original script until the character opens the door. From that point on, you are on your own! Also, write a detailed description of your new ending.
Parameters/Limitations:
• Same general parameters and limitations as in Step One.
• You must use at least five different shots.
• Every detail must be included in your storyboard. It must be so visually clear that a stranger, unfamiliar with the scenario, could take your storyboard and shoot the film exactly as you visualized it when creating your storyboard.
• You may write descriptions for each storyboard panel to help with your screen direction. However, as much as you can, try to communicate the information visually. Use your written descriptions to scaffold your visuals, not replace them.
Handouts:
• Storyboarding Guide
• Blank Storyboard
Exhibit, Reflect, Revise:
In your original production teams, pitch your storyboards to one another. Be prepared to defend your creative choices. Why is it the cleanest, most entertaining and emotive storyboard in your team? At this point, your team has two options:
1. Select one of your team member’s storyboards to be filmed.2. Create a new storyboard to be filmed.
In either case, create a list of the criteria you agreed upon as a group to make your choices. Bring your criteria list, your own storyboard, your written description and your team’s selection/new storyboard to the next session.
STUDENT EXERCISE/ASSIGNMENT
www.AFI.edu

PROJECT____________________ SCENE

THE DOOR SCENE—STEP THREEInterpreting Storyboard to Film
Challenge:
Turn in your team’s storyboards to your teacher. Each team films another team’s storyboard, exactly as you understand it. As you film, take notes on what is confusing and why you interpreted the storyboard the way you did.
Parameters/Limitations:
• You may not communicate with the team who created the storyboards you are filming.
• You must shoot exactly what the storyboard you have received communicates to you.
• You may not try to improve the storyboard or add your own ideas.
Exhibit, Review, Reflect:
Present the film in class comparing it to the storyboard. When comparing the film to the storyboard, keep the following questions in mind:
• How closely does the film match the storyboard?
• What did the storyboard artist originally intend?
• What misinterpretations, miscommunications and discrepancies arose?
• What would have made the storyboard clearer?
• What criteria will you adhere to the next time you do this?
• What did the group learn?
STUDENT EXERCISE/ASSIGNMENT
www.AFI.edu

THE DOOR SCENE—STEP FOURRe-shooting and Assembling an Edit
Challenge A:
Shoot the Door Scene again, this time from your own storyboards, using in-camera edits and the same parameters as in previous steps. Consider the changes and feedback you discussed in the previous step, and revise your original storyboards to reflect your intentions for the scene.
Challenge B:Import your video footage into a desktop digital video editing system. Trim away the unwanted material (i.e. false starts and stops, mistakes), and assemble the sequence of shots in order of your storyboards into a rough cut of your film without transitions, effects, music or titles.
Things to Think About:
• Does the film communicate what you intended?
• Does it clearly tell a story? What is unclear?
• Have you “built” the scene? Is there anticipation? Tension? Conflict?
• What would you change? Why?
Exhibit, Reflect, Revise:
Watch and discuss the rough edit with your group.
• Do the group members feel what you wanted them to feel?
• Was the story clear to them? Why or why not?
• Were there any suggestions?
STUDENT EXERCISE/ASSIGNMENT
www.AFI.edu

THE DOOR SCENE—STEP FIVEEditing the Final Cut
Challenge:
Explore adding transitions, music, titles and effects to enhance the film’s overall impact, making the story clearer, more interesting and more dramatic.
Things to Think About:
• How does the use of transitions affect the mood, perception of time and dramatic intent of your film?
• Does the music you are using enhance the overall story of your film?
• Does the effect you are using distract from the mood or tone of your film?
Exhibit, Reflect, Revise:
Watch and discuss the edit with your group.
• Does the final version conform to the original assignment parameters, time limitations, special requirements, etc.?
• Did you address your peers’ suggestions from the rough edit? Is your film better? Why or why not?
• How does the addition of things like music, transitions and effects help tell your story?
STUDENT EXERCISE/ASSIGNMENT
www.AFI.edu

SECTION TWO
USING THE SCREEN EDUCATION 5-STEP PROCESS TO CREATE CONTENT-BASED VIDEO PROJECTS
•TEACHER GUIDELINES & STANDARDS
•STUDENT EXERCISES & HANDOUTS
•PUBLISH AND CONNECT
www.AFI.edu 23
AFI SCREEN EDUCATION PROCESSGuidelines for Content-Based Video Projects
Introduction
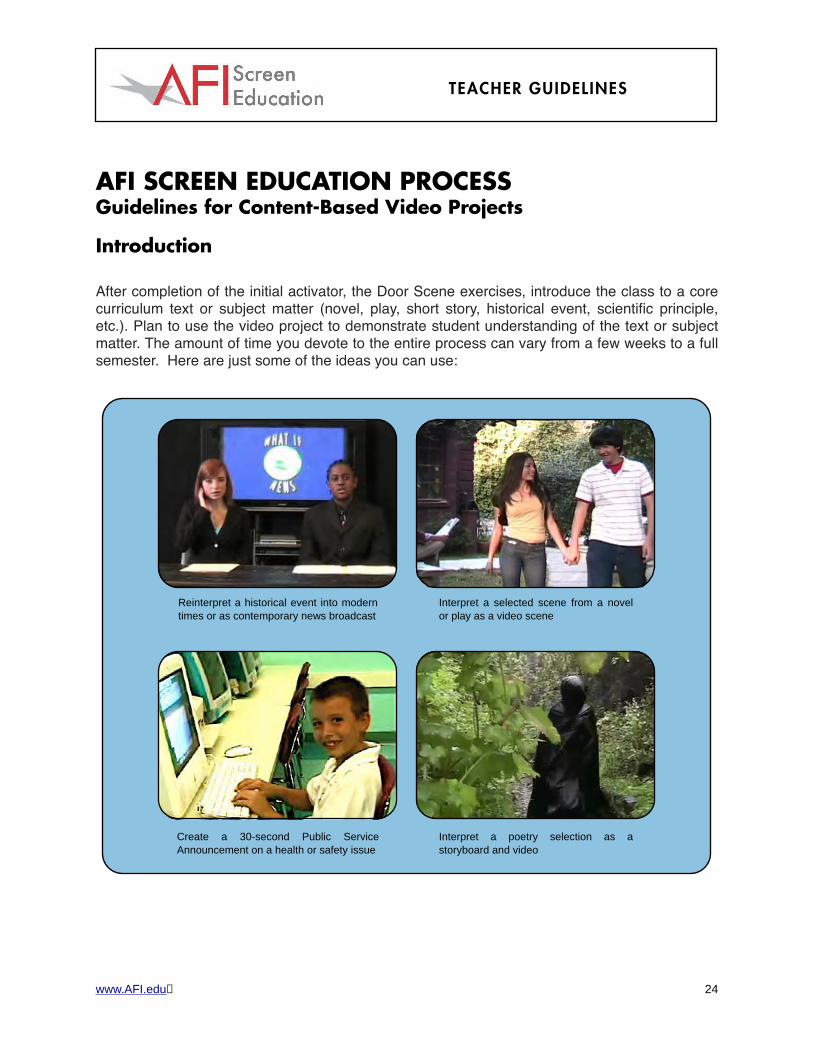
After completion of the initial activator, the Door Scene exercises, introduce the class to a core curriculum text or subject matter (novel, play, short story, historical event, scientific principle, etc.). Plan to use the video project to demonstrate student understanding of the text or subject matter. The amount of time you devote to the entire process can vary from a few weeks to a full semester. Here are just some of the ideas you can use:
TEACHER GUIDELINES
www.AFI.edu 24
Create a 30-second Public Service Announcement on a health or safety issue
Interpret a poetry selection as a storyboard and video
Interpret a selected scene from a novel or play as a video scene
Reinterpret a historical event into modern times or as contemporary news broadcast

Technical Requirements:
• Video Camera (one per production group)
• Video Monitor (to exhibit projects for class discussion and feedback)
• Video editing enabled computer (one per group)
General National Tech Standards for Screen Ed Process
• NT.K-12.1 Students demonstrate a sound understanding of the nature and operation of technology systems. Students are proficient in the use of technology.
• NT.K-12.5 Students use technology to locate, evaluate and collect information from a variety of sources. Students use technology tools to process data and report results. Students evaluate and select new information resources and technological innovations based on the appropriateness for specific tasks.
• NT.K-12.2 Students understand the ethical, cultural and societal issues related to technology. Students practice responsible use of technology systems, information and software. Students develop positive attitudes toward technology uses that support lifelong learning, collaboration, personal pursuits and productivity.
• NT.K-12.6 Students use technology resources for solving problems and making informed decisions. Students employ technology in the development of strategies for solving problems in the real world.
TEACHER GUIDELINES
www.AFI.edu 25

General National Visual Arts Standards for Screen Ed Process
• NA-VA.9-12.1 Conceive and create works of visual art that demonstrate understanding of how the communication of their ideas relates to the media, techniques and processes they use.
• NA-VA.9-12.1 Students initiate, define and solve challenging visual arts problems independently using intellectual skills such as analysis, synthesis and evaluation.
• NA-VA.9-12.6 Students synthesize the creative and analytical principles and techniques of the visual arts and selected other arts disciplines.
• NA-VA.9-12.2 Students demonstrate the ability to compare two or more perspectives about the use of organizational principles and functions in artwork and to defend personal evaluations of these perspectives. Students create multiple solutions to specific visual arts problems that demonstrate competence in producing effective relationships between structural choices and artistic functions.
• NA-VA.9-12.3 Students evaluate and defend the validity of sources for content and the manner in which subject matter, symbols, and images are used in the students' works.
• NA-VA.9-12.4 Students analyze and interpret artworks for relationships among form, context, purposes and critical models, showing understanding of the work of critics, historians, aestheticians and artists. Students analyze common characteristics of visual arts evident across time and among cultural/ethnic groups to formulate analyses, evaluations and interpretations of meaning.
• NA-VA.9-12.5 Students identify intentions of those creating artworks, explore the implications of various purposes and justify their analyses of purposes in particular works. Students describe meanings of artworks by analyzing how specific works are created and how they relate to historical and cultural contexts. Students reflect analytically on various interpretations as a means for understanding and evaluating works of visual art.
TEACHER GUIDELINES
www.AFI.edu 26

AFI SCREEN EDUCATION PROCESSStep One: Script Development
During this pre-production step of the process, students will perform the following tasks:
• Review the project goals, practical limitations and boundaries.
• Discuss timelines, resources and grading rubrics.
• Set length parameters for the final project (30 sec. – 5 min.).
• Write a one-page story treatment describing the proposed project.
• Present or “pitch” the story idea to the class for comment and approval.
• Create a shooting script for the film project.
• Create a set of storyboards that accurately visually describe the film project.
• Set deadlines and milestones.
• Explore varied filmmaking resources.
• Review Genres of Film to be used in Video Project.
TEACHER GUIDELINES
www.AFI.edu 27

AFI SCREEN EDUCATION PROCESSStep One: Script Development
The Treatment:
A detailed summary of a film story. Often used to sell a project before the script is written.
Challenge:
Based on the subject matter and the parameters your class has established, develop project ideas and compose a simple one-page document that will act as a guide for developing the story into a script. This treatment describes what you intend to do and why. Your scene must be developed so it stands alone, with a set-up, tension development (conflict/crisis) and resolution.
Things to Think About:
• What characters are in the scene? What do they say? How do they communicate?
• How will this scene deepen the audience’s understanding of the characters and their interpersonal relationships?
• How will the audience feel the emotion you intend?
• Does the scene make sense, given what has preceded it?
• If it is an adaptation, does your scene alter the original story more than it should?
• What setting have you chosen to illustrate this storyline or concept?
Exhibit and Summarize:
Present your treatments in small groups. Listen and note suggestions of the group members. Question the treatments of the other group members using the “things to think about” listed above as a guide. Remember that how you ask a question is as important as what you ask. Always ask a question the way you would have it asked of you. Defend and explain your choices and changes. Be open to constructive criticism and feedback. Keep a written record of suggestions you want to use.
STUDENT EXERCISE/ASSIGNMENT
www.AFI.edu

AFI SCREEN EDUCATION PROCESSSTEP ONE: SCRIPT DEVELOPMENT
The Pitch:
Promotion of a film or story idea by means of a verbal argument and visual demonstration.
Challenge:
Based on your treatment and video project rubric, verbally present your video project ideas to your peers and teacher. Prepare a one-to-two-minute pitch of your scene to the class members, who—as the studio producers—will determine whether your film should be granted a green light for production. You may present your idea in any manner you wish, but remember that you are selling your idea so that your film will be made. Be ready to answer questions about your idea.
Things to Think About:
• Make any supporting graphics large enough for everyone to see.
• Present to the audience in a manner that allows everyone to see your display.
• Maintain eye contact with the audience.
• Use gestures or a pointer to direct the eyes of the audience, and to help you set the pace of the sequences you have described.
• Keep a pace consistent with your story.
• Highlight key shots or elements.
• Try using sound effects or quote some dialogue, if you think this will help clarify and sell your idea.
Exhibit, Reflect, Revise:
Pitch and revise your presentation to the class until it receives the “green light” by the class and teacher.
Summarize:
Discuss as a class what worked and what did not work during the pitching process.What does your class agree to as an effective pitching process?
STUDENT EXERCISE/ASSIGNMENT
www.AFI.edu

AFI SCREEN EDUCATION PROCESSStep Two: Screenwriting and Storyboarding
Screenwriting:
Movies tell stories with visual images and sound. Movie stories originate in the mind of a writer who creates a screenplay or script. The screenplay provides a detailed roadmap for the director and other members of the filmmaking team. The screenplay includes all the words spoken by the characters (dialogue), stage directions that indicate all nonverbal actions by characters, elements of setting, sound effects, design and music—in short, the screenwriter writes everything intended for an audience to see and hear.
Challenge:
Based on the notes you received from your treatment and pitch, write a screenplay that expands on your original treatment. Create and present a full script for peer review that describes story, dialogue, setting and mood.
Exhibit and Summarize:
Present your screenplay to your group. Have your group select the most appropriate aspects of each individual screenplay. As a group, select the most appropriate and expressive script, and choose the group member(s) who will rewrite the script with the group’s revisions.
Handouts:
Sample Script Page & Formatting Guide
STUDENT EXERCISE/ASSIGNMENT
www.AFI.edu

AFI SCREEN EDUCATION PROCESSStep Two: Screenwriting and Storyboarding
The Storyboard:
A visual script created by a series of pictures that conveys the essential shots of a scene. With simple artwork, even stick figures, the storyboard artist quickly and simply communicates to the entire team the visual components— broken down into individual shots—of the script. The director and cinematographer should be able to determine the position of actors and the direction of their movements, the type and framing of the shot (close-up, long shot, etc.) and the way each shot will fit into preceding and following ones.
Activating Exercise:
Reverse Storyboarding Exercise—Screen a scene from a film with the sound off. Identify each shot by type and by a simply drawn storyboard frame. Discuss why the filmmaker chose the shots and what the audience learned from the shots that were chosen.
Challenge:
Based on your script, visualize the story by creating storyboards to act as the outline for your video shoot. Individually, create a storyboard of the script your team has developed. As a group, present completed storyboards to your peers and teacher for feedback and approval. Your teacher will lead a peer-to-peer review of storyboards comparing them to storyboarding rubrics and overall video project rubrics.
Remember the criteria you’ve already established. Your storyboard may use drawings or photos.
Things to Think About:
• Does your storyboard show the important shots that you want in your film?
• Does it show how the film sequence will be paced?
• Will it give enough guidance to the filmmaker? (Expression shots, establishing shots, action shots, relationship shots, etc.)
• Does the storyboard show the action that is happening?
• Does it show what everyone is doing and feeling?
• Could someone else outside of your group clearly understand what it is communicating?
STUDENT EXERCISE/ASSIGNMENT
www.AFI.edu

Exhibit:
Present your storyboard to your team to gather feedback.
• Why have you chosen these particular shots in this particular order?
• What effect are you trying to show?
As a team, create a revised storyboard or select the most effective from your group.
Handouts:
• Storyboarding – shots and definitions
• Blank Storyboards
• Storyboard rubric
• Video project rubric
STUDENT EXERCISE/ASSIGNMENT
www.AFI.edu

AFI SCREEN EDUCATION PROCESSStep Three: Filming
Depending on the size of your class, you as teacher will be overseeing the production of 5 to 10 student films. Helping your students manage their time and resources as they produce their projects will be your top priority as Studio Chief.
Depending on the structure of the filmmaking unit, it is likely that many students will be shooting their films off campus on weekends, evenings and holidays, for the simple reason
that films look better if they are shot in actual locations, or on sets that have been created to serve the story. It is hard to sell an audience on a film set during the reign of Julius Caesar filmed entirely in a 21st century classroom, with computers in the background, modern clothing and florescent overhead lights. Students engaged in filmmaking will seek out the best locations and resources to effectively tell their stories; therefore, be prepared to utilize class time for group planning, problem solving and assessment of group progress.
Your students will perform the following tasks during step three of the process:
• Establish production teams (five students per team is ideal) and select the filmmaking responsibilities during the production of their projects
• Assume the roles and responsibilities of professional filmmakers and shoot the elements demanded by in their scripts and storyboards
• Problem solve, work as teams and manage production resources.
TEACHER GUIDELINES
www.AFI.edu 33

AFI SCREEN EDUCATION PROCESSStep Three: Filming
Crew Up: Roles and Responsibilities for the Shoot
Challenge:
As a team, decide what roles each of you will play to produce the scene that you have scripted and storyboarded. Generate and distribute a Call Sheet detailing each crew member’s job, the date, time and location of the shoot, and the names and contact information for each crew member.
The Call Sheet should also detail any and all actors, props, wardrobe, special effects or needs for the shoot. Do not forget to assign who will bring the camera and tape stock. The Call Sheet is distributed to the entire crew and to the teacher the day before each day of shooting.
Things to Think About:
• Who will manage the production from start to finish?
• Who will direct?
• Who will shoot the film?
• What actors will play the scene’s roles?
• How will you create believable characters? Locations? Situations?
Handouts:
• Definition sheet of filmmaking roles, jobs and responsibilities.
• Call Sheet
STUDENT EXERCISE/ASSIGNMENT
www.AFI.edu

AFI SCREEN EDUCATION PROCESSStep Three: Filming
Shooting from the Storyboards
Challenge:
Based on the storyboards you created and re-worked according to feedback, film the shots required to completely tell the story described in your script and storyboards.
Things to Think About:
• Do you have everything required on the Call Sheet?
• What is your job and what are your responsibilities for the shoot?
• Where will you shoot the scene? Why?
• Are you recording sound you don’t want?
• How will you light the scene to achieve your dramatic intent?
• How will you create mood? Always refer back to your scripts and the original material for clues.
• Do you have all the props and costumes you need on the day(s) you are shooting?
• Are you shooting everything you will need when you edit? Shots that aren’t on your original storyboards might also be helpful. Establishing shots, cut-aways, reverse angles?
Exhibit, Reflect, Revise:
Show your rough footage (dailies) to your team, preferably before you finish shooting at your location. Do they show what you wanted? Can you arrange them into a coherent narrative? If not, shoot more.
Handouts:
• Call Sheet
• Hand-Held Aspect Ratio Frame
STUDENT EXERCISE/ASSIGNMENT
www.AFI.edu
BE SAFE, BE SMART! It is not only your right to be safe, but your responsibility to protect yourself and others from hazards. Always mount your productions safely and legally, observing all the regulations for your school and the laws governing your location.
AFI SCREEN EDUCATION PROCESSStep Four: Editing
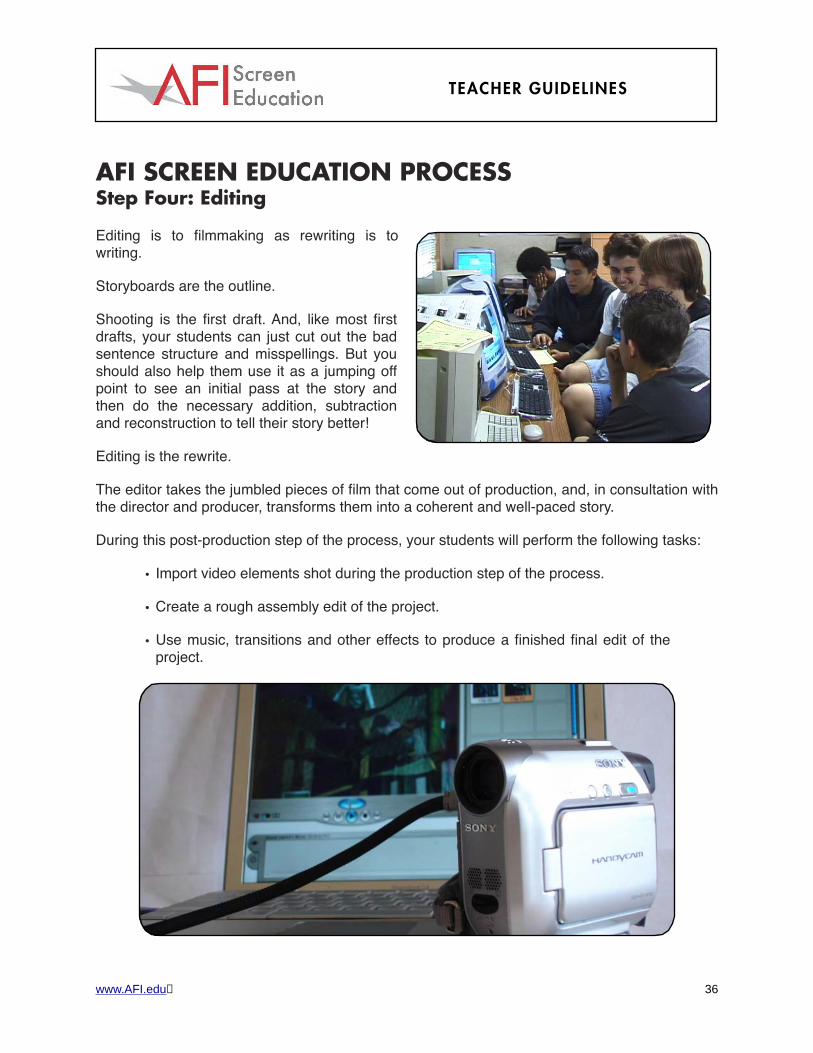
Editing is to filmmaking as rewriting is to writing.
Storyboards are the outline.
Shooting is the first draft. And, like most first drafts, your students can just cut out the bad sentence structure and misspellings. But you should also help them use it as a jumping off point to see an initial pass at the story and then do the necessary addition, subtraction and reconstruction to tell their story better!
Editing is the rewrite.
The editor takes the jumbled pieces of film that come out of production, and, in consultation with the director and producer, transforms them into a coherent and well-paced story.
During this post-production step of the process, your students will perform the following tasks:
• Import video elements shot during the production step of the process.
• Create a rough assembly edit of the project.
• Use music, transitions and other effects to produce a finished final edit of the project.
TEACHER GUIDELINES
www.AFI.edu 36

AFI SCREEN EDUCATION PROCESSStep Four: Editing
The Assembly Edit
Challenge:
Import your video footage into a desktop digital video editing system. Trim away the unwanted material and assemble the sequence of shots in the order of your storyboard panels into a rough cut of your film without transitions, effects, music or titles.
Things to Think About:
Like your original treatment, the assembly edit is a rough product meant to communicate the basic ideas of your story.
• Does the film communicate what you intended?
• Does it clearly tell a story? What is unclear?
• Have you established location, setting and time period? How could you make those elements clearer?
• Have you “built” the scene? Is there anticipation? Tension? Conflict?
• What would you change? Why? How do you intend to change it?
Exhibit, Reflect, Revise:
Watch and discuss the rough edit with your class.
• Do your peers feel what you wanted them to feel?
• Was the story clear to them? Why or why not?
• Were there any suggestions?
Take notes on their ideas and reactions. You may need to shoot additional footage to make your film clearer.
STUDENT EXERCISE/ASSIGNMENT
www.AFI.edu

AFI SCREEN EDUCATION PROCESSStep Four: Editing
The Final Edit
Challenge:
Based on the feedback received from other groups, produce a final edit of your film that will make the story clearer, more interesting and more dramatic. Explore adding transitions, music, titles and effects to enhance the film’s overall impact.
Things to Think About:
• How does the use of transitions affect the mood, perception of time and dramatic intent of your film?
• Does the music you are using enhance the overall story of your film?
• Do the effects you are using distract from the mood or tone of your film?
Exhibit, Reflect, Revise:
Watch and discuss the edit with your group.
• Does the final version conform to the original assignment parameters, time limitations, special requirements, etc.?
• Did you address your peers’ ideas after they saw the rough edit?
• Is your film better? Why or why not?
• How does the addition of elements like music, transitions and effects help tell your story?
STUDENT EXERCISE/ASSIGNMENT
www.AFI.edu

AFI SCREEN EDUCATION PROCESSStep Five: Exhibit/Review/Reflect
Writing a Critical Film Review
A good film review provides the reader with a basic idea of what the film is about. It provides the writer’s critical assessment of the success/failure or effectiveness/ineffectiveness of the film, supported by evidence gathered from the film. It is more than a plot synopsis or enthusiastic blurb of publicity hype. For the writer, the review is an opportunity to exhibit a critical awareness of the elements of the film, as well as to share the delight and pleasure (or frustration and disappointment) that the film offers the viewer.
During this final step of the process, your students will perform the following tasks:
• Create a written review of a student-created film by drawing on their previous peer-to-peer discussion experience.
• Evaluate the overall effectiveness of the film based on the objectives of the unit.
TEACHER GUIDELINES
www.AFI.edu 39

AFI SCREEN EDUCATION PROCESSStep Five: Exhibit/Review/Reflect
Reviewing the Films
Study the Pros, Reflect and Discuss:
Collect three reviews for a film you’ve seen. Check in publications like Daily Variety, The Hollywood Reporter and your local paper or online journal for reviews.
Read the reviews and decide if the reviewer has a positive or negative opinion of the film.
• What kind of words does the reviewer use to express an opinion?
• What examples does the reviewer cite from the film to support the review?
• Does the reviewer give away important plot twists or surprises?
• Do you agree with the review? Why or why not?
Use the reviews you agree with to support your argument, and contrast your ideas with the reviewers who have a differing opinion.
Challenge:
After screening all the completed films in class, individually write a review of each group’s project. Take a position and defend it. Discuss your reviews with your team. Throughout this process you’ve been asked to look at the work of your peers, offering feedback on how they can improve their films. Here is your chance to tell them how successful they were.
If you provide only a plot summary, you are not writing a review—you are writing the equivalent of a book report. Once you introduce the main characters and devote a few lines to an overview of the plot, get down to the job of convincing the reader that you have something interesting to say about the film—the plot is trivial, the hero is not really a hero, the plot and characters are fine but the camera work is needlessly tricky, or whatever else you decide your main point will be. Any opinion must be supported by examples.
STUDENT EXERCISE/ASSIGNMENT
www.AFI.edu

Things to Think About:
Here are some basic, starting questions to ask yourself when writing your review:
• Is the film adapted from fiction or drama, or is it based on an original idea and screenplay? If it is an adaptation, does it follow the original and neglect the cinematic opportunities of the story? Or does it sacrifice the original work for unnecessary cinematic devices? If the story is original, how fresh or innovative is it?
• Are the characters believable?
• Are the actors appropriately cast?
• What is the theme of the film? Does the plot, acting and other elements in the film successfully impart the theme to the viewer?
• Is the setting/locale appropriate and effective?
• Is the cinematography effective? Does the film make certain use of color, texture, lighting, etc., to enhance the theme, mood and setting?
• Is the sound track effective? Is the music appropriate and functional?
• Are camera angles used effectively? Are they ever used for a particular effect?
• Are there special effects (and/or special effects makeup) in the film? If so, are they essential to the plot? Are they handled skillfully? Do they serve a necessary function, or does the film sacrifice plot or characterization for the effects themselves?
• Does the film make use of symbols or symbolism? What purpose do the symbols serve? Are they used effectively? How does the symbolism in the film contribute to or enhance the film’s overall theme?
Exhibit & Reflect:
Publish your reviews for the filmmakers.
STUDENT EXERCISE/ASSIGNMENT
www.AFI.edu

PUBLISH & CONNECTLog on to www.AFI.edu
We trust that using the AFI Screen Education Process has been a transformative experience in your classroom. We now invite you to explore the AFI Screen Education "digital hub" at AFI.edu.
The site features extensive resources for registered teachers including AFI FIND-IT™– an advanced search tool for lesson plans, student videos and other student work (scripts, storyboards, etc.). The site also has a student section packed with featured student videos and project materials, cool film links and news about other kids using the Screen Ed Process.
Best of all, AFI.edu offers teachers using the AFI Screen Ed process the opportunity to upload their own lesson plans as well as their own students' videos and project materials. We encourage you to apply and become part of the growing community of Screen Educators who are sharing their experiences and student work online.
TEACHER GUIDELINES
www.AFI.edu 42
When you register at www.AFI.edu, you will be asked for a registration-code. Enter US222 to create an account!

SECTION THREE
TEACHER RESOURCES & HANDOUTS
•GLOSSARY OF FILM TERMS
•STORYBOARD GLOSSARY OF COMMON FILM SHOTS
•GUIDE TO SCRIPT FORMATTING
•THE WINDOW EXERCISE
•PEER-TO-PEER FEEDBACK PROTOCOL GUIDE
•EVALUATION RUBRICS
www.AFI.edu 43

GLOSSARY OF FILM TERMSIntroduction
A consideration of the many disciplines involved in film production gives the motion picture a much larger and more complex dimension. No longer can a film adaptation of a novel or other literary work be considered a mere visual record when so much talent is involved in such a creative effort. Just as the various tasks in film production can be broken down and analyzed individually, so can the individual elements of the film. Filmmaking, like any other art form, has its own language and vocabulary. Once that language is mastered, films can be understood at a new level.
Camera angle: The position of the camera in relation to the subject it shows: above it, looking down (a high angle); on the same level (a straight-on angle); looking up (a low angle).
Close-up: A framing in which the scale of the object shown is relatively large. Most commonly, a person’s head is seen from the neck up, or an object fills most of the screen to emphasize its importance.
Crane shot: A shot accomplished by having the camera above the ground and moving through the air in any direction.
Crosscutting: Editing that alternates shots of two or more lines of action occurring in different places, usually simultaneously. Crosscutting is often used during a key dramatic sequence to increase tension.
Deep Focus: A use of the camera lens and lighting so that both close and distant planes are shown in sharp focus. This technique allows the filmmaker to emphasize a character or object that appears far away.
Depth of Field: The area or field between the closest and farthest planes captured by the camera, in which everything appears in sharp focus. A depth of field from five to 16 feet, for example, would mean that everything closer than five feet and farther than 16 feet would be out of focus.
Dissolve: A transition between two shots during which the first image gradually disappears while the second image gradually appears. For a moment, the two images blend in superimposition.
GLOSSARY OF FILM TERMS
www.AFI.edu

Establishing shot: A shot that shows the relationship among important figures, objects, characters and setting at a distance. From the establishing shot, the film then cuts to more detailed shots (often called coverage) that bring the audience closer to the characters.
Flashback: An alteration in the story order in which the plot moves back in time to show events that have taken place earlier than those already shown.
Focus: When light, people, places and objects are captured on film showing sharp outlines and distinct textures through manipulation of the camera lens. There are different types of focus, used to achieve specific effects.
Frame: The rectangular box that contains the image projected on the screen. This perimeter is one of the filmmaker’s most important tools. The frame is the window into the world of a film. Within it, each shot is composed and the edges of the frame allow the filmmaker to create a picture. Movies were first known as moving pictures, and this description is still useful when considering the important role the frame plays as a compositional device. Through the camera’s eye, the viewer is presented with images that convey the story. Within the frame, the filmmaker creates several different types of shots, which are generally characterized by the relationship between the size of the elements in the frame to each other and to the frame itself.
Long shot: A framing in which the scale of the object shown is not distant but relatively small. A standing human figure, for example, generally appears nearly the height of the screen.
Medium shot: A shot that shows human figures from the waist up.
Pan (or panning shot): A camera movement with the camera body turning to the right or left. On the screen, it produces a mobile framing, which scans horizontally. Panning shots can also emphasize movement.
Point of View (POV) shot: A shot taken with the camera placed where the character’s eyes would be to show what the character would actually see. This type of shot is usually cut in before or after a shot of the character looking at whatever the POV shot contains.
Wide angle: The use of a wide-angle lens to create a shot that captures a wide range of elements or objects on a single plane, while at the same time exaggerating the distance between foreground and background planes.
GLOSSARY OF FILM TERMS
www.AFI.edu
Zoom: A lens which allows the focal length—the distance between the camera and the object being filmed—to change during a single shot. The camera can zoom in by going closer to an object, or it can zoom out by pulling back from an object.

Producer: The person or group responsible for managing the production from start to finish. The producer develops the project from the initial idea, makes sure the script is finalized, arranges the financing, hires the personnel to make the film and oversees its distribution to theaters. The producer also coordinates the filmmaking process to ensure that everyone involved in the project is working on schedule and on budget. Ironically, the producer’s role is often invisible to the movie-going public, who tend to focus on actors and directors. Yet, without the producer at the helm, films do not get made.
Director: The individual primarily responsible for overseeing the shooting and assembly of a film. He or she is most directly responsible for the picture’s final appearance. The director is sometimes referred to as the author or auteur of a film because of his or her essential involvement with its creation. While the director might be compared to a novel’s author as a film’s primary visionary, he or she would not be able to make the film without the help of numerous other artists and technicians. In fact, the notion of the director as author is misleading because it assumes the director does everything—just like an author writes an entire book—which is not the case. A director works at the center of film production, but is inextricably linked with dozens of other people to get the job done.
Screenwriter: While the dialogue in a film may seem natural to the viewer, a writer carefully crafts it. The screenwriter does far more than provide dialogue for the actors. He or she also shapes the sequence of events in a film to ensure that one scene leads logically to the next, with the story being told in a logical and interesting way. When using a novel or play as a starting point, the screenwriter inevitably rearranges, adds or eliminates scenes to make sure the final order or sequence of scenes makes sense when presented on the screen. The screenwriter also includes descriptions of settings and often suggests movements or gestures for the actors. Like the producer, the screenwriter’s role is generally overlooked by the movie-going public, yet is essential to the completion of any film. If there is no script, there is no movie.
GLOSSARY OF FILM TERMS
www.AFI.edu
Behind the Camera
In order to understand film as an art form, it is important to consider the jobs of the numerous individuals who work together to make the film a reality.

Production Designer: Before one inch of film is shot, the production designer is the first artist to translate the script into visual form. He or she creates a series of storyboards that serve as the film’s first draft. A storyboard is a series of sketches, paintings or watercolors arranged on panels to show the visual progression of the story from one scene to the next. The production designer determines the palette of colors to be used and often provides important suggestions about the composition of individual shots. Creating this sketch of the film on storyboards also ensures the visual continuity of the film from start to finish. Storyboards serve as the director’s visual guide throughout the production.
Art Director: The art director is responsible for the film’s settings: the buildings, landscapes and interiors that provide the physical context for the characters. Art direction and production design are often and easily confused. While the production designer determines the big picture—the overall appearance, color palette and basic visual composition of the film—the art director provides the individual pieces within this framework, which includes everything but the actors themselves.
Costume Designer: Costumes convey a great deal about the film’s time period and the characters who wear them—their economic status, occupation and attitude toward themselves.
Cinematographer: After the production designer, art director and costume designer have finished their work on the film’s physical elements, the director of photography, or DP, is responsible for capturing their handiwork on film or video. The DP is an expert in photographic processes, lighting and the camera’s technical capabilities. When the director wants a shot to achieve certain visual or atmospheric qualities, the DP achieves it through his or her choice of lighting, film stock and careful manipulation of the camera. During shooting, the director and cinematographer work closely to shape each shot, using the storyboards created by the production designer as a guide. This craft is referred to as cinematography.
Editor: Shortly after shooting begins, the editor begins to organize the footage—known as the daily rushes—and arranges individual shots into one continuous sequence. Even in a single scene, dozens of different shots have to be chosen and assembled from hundreds of feet of film. The editor’s choices about which shots to use, and the order in which to place them, have a profound effect on the appearance of the final film.
GLOSSARY OF FILM TERMS
www.AFI.edu

Actors: For the audience, actors are the most visible and tangible part of the production. While they are obviously essential to any film, they are pieces in a much larger puzzle. Behind every actor is a director guiding his or her performance, a cinematographer creating the perfect light and film exposure, a screenwriter providing plot and dialogue, an art director designing the physical environment and a costume designer providing the proper attire. Considering an actor’s role within this larger context also suggests that his or her job is much more difficult than just appearing on the set and reciting lines.
Music: Music has been an integral part of movies since cinema’s earliest days in the 1890s. A piano or organ player accompanied even the simplest silent films. The silent movie palaces of the 1920s were equipped with elaborate organs and orchestra pits to accommodate large groups of live musicians. When sound was integrated into the filmmaking process, music, sound effects and dialogue became essential tools for enhancing a film’s visual qualities. Writing movie music has been a full-time profession since the 1930s and is still a critical component in filmmaking.
GLOSSARY OF FILM TERMS
www.AFI.edu

Introduction
Storyboards are illustrations displayed in sequence for the purpose of crafting an animated or live-action film.
In preparing to shoot a motion picture, a storyboard provides a visual layout of events as they are to be seen through the camera lens. When storyboarding, most technical details involved in crafting a film can be efficiently described in pictures, or in corollary notation.
A storyboard is essentially a large comic of the film or some section of the film, produced before filming to help directors and cinematographers visualize scenes and identify potential problems before they occur. Some directors storyboard extensively before taking the pitch to their funders. Others only storyboard complex scenes, or not at all.
In animation and special effects, the storyboarding stage is essential and may be followed by simplified video mock-ups called “animatics” to give a better idea of how the scene will look with motion.
GLOSSARY OF COMMON FILM SHOTS


SCRIPT FORMATTING GUIDECover / Title Page:
• Title & screenwriter(s) names in the middle.• Contact information is located in the lower right corner.
Page Margins:• Top: 1.0"• Bottom: 1.0"• Left: 1.5"• Right: 1.0"
Font: Always use 12-point Courier; no bold face or italics. Use underlines instead.
Page Numbering: Place the page number on every page in the upper right corner, except the cover and the first page.
Spacing: Double space between slug line, action line, speaking character, stage directions and dialogue. Single space action lines and lines of dialogue.
The Slug Line: The general or specific locale and time of day. Always in ALL CAPS.
Action Line: Sets the scene with a description of characters, places and action single spaced from margin to margin. New characters are always capitalized. After the characters have been introduced, their names no longer need to be capitalized.
Character Speaking: 3.5" from left margin and always in ALL CAPS.
Dialogue: 2.5" from left margin.
Voice Over: Indicated by placing (VO) immediately to the right of the character name.
Off Camera: To indicate that a character is speaking off screen, place (OC) immediately to the right of the character name. This is sometimes done as (OS) for off screen.
Stage directions (or parenthetically): Written in parenthesis and under the name of the character speaking. They should be placed 3.0" from left margin and include what the character is doing within the scene.
Sound/Music Effects are always capitalized.
Camera Directions: Use sparingly or not at all. Let the director do his or her job.
SCRIPT FORMATTING GUIDE
www.AFI.edu

SCREENPLAY FORMATby
Your Name

1."SCREENPLAY FORMAT"
FADE IN:
EXT. LOCATION #1 – DAY
This is how to begin your screenplay. Scene headings aretyped in capitals and must indicate: interior or exterior,the location, and day or night.
Scene action is double-spaced under the heading in upperand lower case text with double-spacing between paragraphs.
Scene action should only deal with what is happening on thescreen and must never stray into superfluous novelistictext related to character thoughts or back-story.
A general rule of thumb is to limit a paragraph of sceneaction to four or five lines. Consider each paragraph as asignificant beat of action within your scene.
INT. LOCATION #2 – NIGHT
Begin a new scene with the heading triple-spaced from thepreceding scene. Always follow a scene heading with a lineof scene action.
CHARACTER #1Character cues appear in capitalsindented to around the middle ofthe page, but not centered.The first letter of each cue isalways in alignment.
CHARACTER #2A character is designated byeither his/her first or last name,but a role designation may be usedinstead with personal titlesabbreviated. The designatedname should remain consistentthroughout the script.
(MORE)

2.
INT. LOCATION #2 – DAY
Scene transitions are technical information indicating themethod of changing from one scene to another. A generalrule of thumb is that every scene will CUT TO: the next ifno transition is specified.
Transitions are generally only used in shooting scripts,but if it's absolutely necessary to specify one, it appearsagainst the right-margin like this.
DISSOLVE TO:
EXT. LOCATION #1 - NIGHTAlways keep scene headings with the scene action. Don'tleave loose headings hanging at the bottom of a page.
It's sometimes a good idea to start a new scene on a newpage if there is only a line or two at the bottom of theprevious one, but scenes can break over the page easilylike this.
LATER
If you need to indicate the passing of time through thesame scene then use LATER as a sub-heading. There is noneed to continuously repeat the master scene heading.
THE CORNER OF THE ROOM
Similarly, you can break up lengthy and complex scenes byfocusing on specific areas of action with a sub-heading.This is useful when scripting large party or group scenes.
EXT. LOCATION #2 - NIGHTSometimes it may be necessary to hear characters when wecan't actually see them.
CHARACTER #1 (O.S.)Off Screen means the character isphysically present within the scene, but canonly be heard; e.g., they are speaking froman adjoining room.
(MORE)

3.
CHARACTER #2 (V.O.)Voiceover is used when thecharacter is not present withinthe scene, but can be heard viaa mechanical device such as atelephone or radio. It is alsoused when a character narratesparts of your story.
INTERCUT - INT. LOCATION #1/LOCATION #2 – DAY
If it's necessary to CUT back and forth betweensimultaneous actions in two different locations in the samescene, then handle your scene heading like this. Use thismethod when you want to show a phone conversation.
CHARACTER #1(into phone)
You can then type yourdialogue as normal.
CHARACTER #2(into phone)
Whilst indicating that bothcharacters are on the phone.
EXT./INT. LOCATION #1 – DAY
If you have a scene where the action is continuously movingbetween the interior and exterior of the same location,such as the hall and driveway of a house, do your sceneheading like this.
But use INTERCUT for cutting back and forth between twoseparate pieces of action inside and outside.
SERIES OF SHOTS:A) SERIES OF SHOTS: is a group of short shots which make upa narrative sequence, useful for advancing the story in arapid or economical way.
(MORE)

4.
B) The shots are presented in logical arrangement for theaction with a beginning, middle and end point to thesequence.
C) MONTAGE: is a series of two or more images that blendinto and out of each other in order to create a particulareffect.
D) It is used to create an emotional environment, a maintitle sequence or when representing archive stock footage.
E) Both SERIES OF SHOTS: and MONTAGE: are used to avoidmultiple scene headings when scenes are deemed too short(often only one shot in length) to conform to the usualformatting rules.
EXT. LOCATION #2 – NIGHT
On-screen texts, such as letters, e-mails or signs, areformatted in a couple of ways. Brief text, such as a sign,can go in the body of the scene action: "THIS IS A SIGN"
"Something longer, like a letter, isformatted like dialogue enclosed withindouble-quote marks. It can be in normalupper and lower case text, OR ALL INCAPITALS depending on the text it isrepresenting."
FADE TO:INT. LOCATION #2 – NIGHT
It is standard practice to sign-off a film script with THEEND centered on the page, preceded by FADE OUT.
FADE OUT: only ever appears at the end of a feature-lengthscreenplay, or an act in a television script. If you wantto indicate a FADE OUT: and a FADE IN: within the body ofthe script, then the correct transitional term is FADE TO:as above.
FADE OUT. THE END

THE WINDOW EXERCISEChallenge:
Light one subject using a Key Light, Fill Light, Back Light and a Set Light; making it appear that there is light coming into the room through a window.
Everyone other than the subject, remember to look through the camera (or monitor if you have one) to see the effect of the lighting. That is the only point of view that matters – as it is the only point of view that will be recorded on video/film!
As you go along, review the handout “The Illustrated Stages of Three-Point and Set Lighting” to remind you of the look of each type of light, how to achieve it, and how to check that it is done well.
Parameters/Limitations:
• Once someone is chosen as the subject they may not trade the position with another person at any point during the exercise.
• Subject must “stay on their mark,” not talk, remain as still as possible and maintain the pose at all times.
• Subject may not get up to look through the camera or at the monitor–as it will stop everyone else from being able to light.
• Subject may not choose pose. The subject’s pose is to be determined by the members of the group who are lighting only.
• No trading or negotiating with other groups for different or additional lighting elements. Achieve your lighting with the elements given to your group only.
• Lights get hot!!! Even little lights can actually cause FIRES.
STUDENT EXERCISE/ASSIGNMENT
www.AFI.edu

Essential Safety Rules For Lighting
• Always USE GLOVES when handling ALL LIGHTS.
• NOTHING can be less than 2 feet in front, beside, above, below or behind a light – with the exception of the lighting stand.
• Repeatedly check to make sure that the section of the light touching the stand (or your hands) doesn’t get hot enough to burn either your hands or stand.
• If the light is too hot when you touch it with your gloves – IT IS TOO HOT! Turn it off and wait five minutes before using it again. Just work on another light during that time.
• When using CHINA BALLS or lamps with SHADES, make sure the light bulb stays in the middle of the shade and NEVER gets close to any of the sides of the shade. This is a recipe for disaster. You run the risk of either singeing the shade, ruining it forever -- or worse -- starting a fire.
STUDENT EXERCISE/ASSIGNMENT
www.AFI.edu

HANDOUT: The Illustrated Stages of Three-Point and Set Lighting
Three-Point Lighting refers to the classic use of at least three lighting elements to light a subject in a scene.
Each lighting element fulfills a different purpose – acting as the Key Light, the Fill Light or the Back Light.
The Key Light is a lighting element that acts as the main light illuminating the subject. It can also be thought of as the brightest light on the subject.
The Fill Light is a second lighting element that illuminates the subject and “fills in” the shadows on the subject created by the key light. The amount of fill light used on the subject can create a more dramatic or a softer, more romantic effect on the subject.
The Back Light is a third lighting element that is aimed at the subject from behind them (thus the name). It casts a light on the subjects hair and shoulder in order to keep the subject from blending into the background.
Below are diagrams of a typical Three-Point Lighting Set-Up for a subject:
STUDENT EXERCISE/ASSIGNMENT
www.AFI.edu
Overhead View Side View
TIP: The Back LightThe back light does not need to come from above the subject, but can also come from the side or below.

STUDENT EXERCISE/ASSIGNMENT
www.AFI.edu
UNLIT: AREA LIGHTS ONLY
KEY LIGHT ONLY
The KEY LIGHT is the main light on the subject.
• Because the key light is so bright in our picture, we are able to change the exposure, making make the background go black, thus changing the mood and time of day.
• The key light placement is not a predetermined position. It’s position can change to fit mood, time of day and story.
• Usually the subject will be best lit if the subject is looking off somewhere between the camera and key light. Though this is not a fixed rule
Here is what our subject looks like with only the lights in the room.
• Notice how the face just blends into the background.
• Also notice how it is difficult to determine what time of day the shot is supposed to represent.
• Also see how the lighting gives no indication of the mood of the scene (other than bland.)

STUDENT EXERCISE/ASSIGNMENT
www.AFI.edu
FILL LIGHT ONLY
FILL & KEY LIGHTS ONLY
Here is an example of the subject lit by both a Key and Fill Light.
• Notice how the Key Light is stronger than the Fill.
• Notice how we are now able to see the left side of the face due to the addition of the Fill Light.
The FILL LIGHT is the light that brings out details that would otherwise be lost in the shadows that are created by the Key Light. It is less bright than the Key and often has a “softer” look.
• The more fill light is used the “softer” the subject will appear to be. The less, the more dramatic.

STUDENT EXERCISE/ASSIGNMENT
www.AFI.edu
BACK LIGHT ONLY
COMPLETE THREE-POINT LIGHTING SET-UP:
KEY, FILL & BACK LIGHT
BACK LIGHT is cast on the subject from behind and creates an edge of light that separates the subject from the background.
• Back Light is usually aimed at the hair and shoulder of the subject in order to light up the edges of the subject only.
• Be careful that the Back Light does not hit the background.
And here is the final product of the Three-Point Lighting on the Subject using the Key, Fill and Back Light.
•Note that in this example there is no set light and therefore the location and time of day cannot be determined.

Now let’s look at Set Lights: In your future videos/films you will not only have a subject, but a set. So after the subject is lit with three-point lighting, additional lighting elements will be needed to illuminate the set, key props and to further separate the subject from blending into the background. These lights are called Set Lights.
STUDENT EXERCISE/ASSIGNMENT
www.AFI.edu
SET LIGHT ONLY
THREE-POINT LIGHTING WITH SET LIGHT
Here is an example of a set that is illuminated with one Set Light. The light is placed behind a “frame” in order to look like light coming into a room through the window.
•Notice how the light coming through the window is on the same side as the Key Light. This will make it appear that the Key Light is actually coming from the light outside the window.
Here is the final product of Three-Point Lighting on the Subject with a Set Light.
•Note how the subject stands out from his background.
•Note how the Set Lights bring attention to a part of the background that clearly is important to the mood and story.
•Also note how set lighting changes a scene and successfully gives a strong feeling of place (a dark interior room), time (night) and mood (dramatic).

FEEDBACK PROTOCOLRoles
Presenter: The person who speaks for the group that is showing its project for the purpose of receiving information about what worked and what needs improvement, according to project goals and AFI criteria.
Facilitator: The person who volunteers to guide the classroom community in the steps of the protocol. The facilitator may participate in the feedback dialogue.
Time-Keeper: The person who agrees to ensure that the time schedule is followed. This person gives five-minute and one-minute signals warning that time for presentation is almost up.
Time
In advance, announce the amount of time that will be allotted for presentation and feedback. The Protocol Guide allots 30 minutes, which is how long it usually takes the first time. As the classroom community becomes familiar with the protocol, however, the process will move more quickly, with each group needing about 20 minutes. You may use all or part of this protocol in your practice, depending upon level and quality of student participation and time available.
There are seven essential phases to feedback protocol:
PHASE TIME ALLOTTEDPhase One: Overview 5 Minutes
Phase Two: Clarifying Questions 3 Minutes
Phase Three: Probing Questions 7 Minutes
Phase Four : Audience Discussion 5 Minutes
Phase Five: Facilitator Summary 2 Minutes
Phase Six: Presenter Response 3 Minutes
Phase Seven: Teacher Review 5 Minutes
TOTAL: 30 Minutes
TEACHER GUIDELINES
www.AFI.edu 76
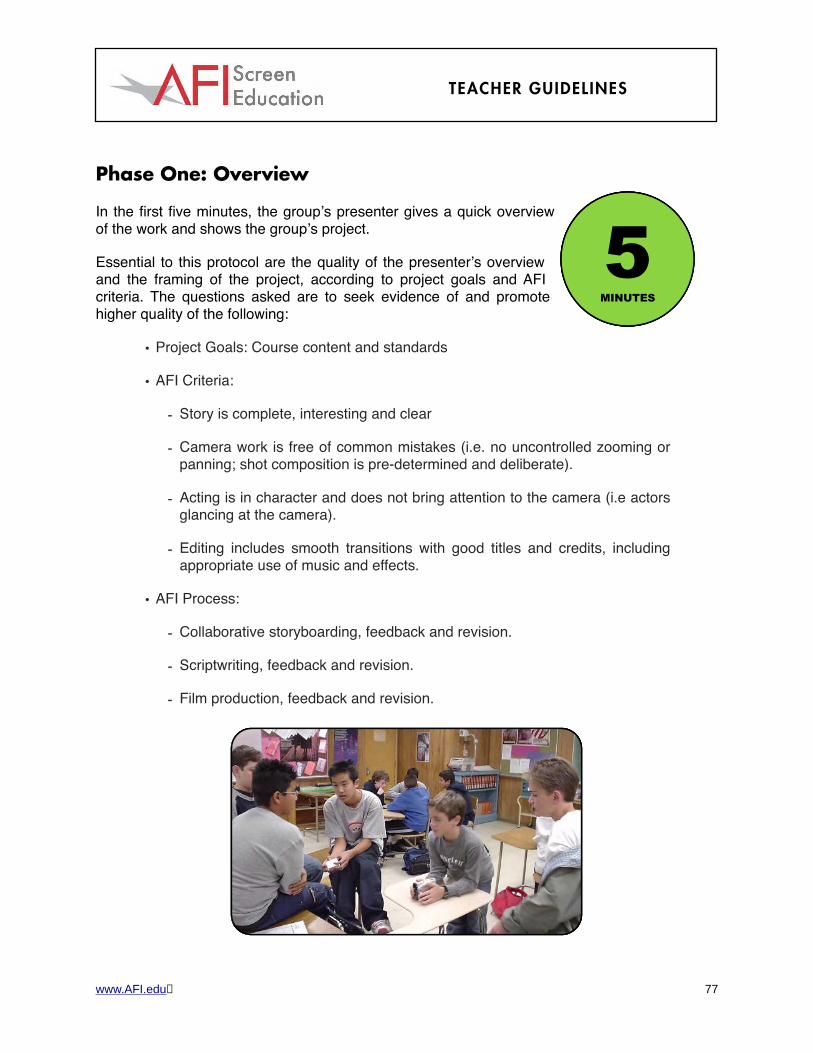
Phase One: Overview
In the first five minutes, the group’s presenter gives a quick overview of the work and shows the group’s project.
Essential to this protocol are the quality of the presenter’s overview and the framing of the project, according to project goals and AFI criteria. The questions asked are to seek evidence of and promote higher quality of the following:
• Project Goals: Course content and standards
• AFI Criteria:
- Story is complete, interesting and clear
- Camera work is free of common mistakes (i.e. no uncontrolled zooming or panning; shot composition is pre-determined and deliberate).
- Acting is in character and does not bring attention to the camera (i.e actors glancing at the camera).
- Editing includes smooth transitions with good titles and credits, including appropriate use of music and effects.
• AFI Process:
- Collaborative storyboarding, feedback and revision.
- Scriptwriting, feedback and revision.
- Film production, feedback and revision.
TEACHER GUIDELINES
www.AFI.edu 77
5MINUTES

Phase Two: Clarifying Questions
The facilitator explains that there will be three minutes for members of the classroom community to ask clarifying questions of the presenter. (Anyone in the presenting group may address the question.)
• Clarifying questions are for the benefit of the member asking the question.
• These questions ask the presenter who, what, where, when and how, but NOT why.
• A few words or a phrase are all that are needed to answer clarifying questions.
• The facilitator may hold a question for the next step, if it is goes beyond the scope of clarification.
Phase Three: Probing Questions
The facilitator calls for classroom community members to pose any probing questions that they may have.
• These questions are open-ended and often ask why.
• Probing questions are for the benefit of the group presenting to further refine their project.
• Some thought and time are required to ask and answer probing questions.
TEACHER GUIDELINES
www.AFI.edu 78
3MINUTES
7MINUTES

Phase Four: Audience Discussion
The facilitator asks the presenter to listen as the classroom community has an informed conversation about the presentation. Members talk about the presenting group in the third person, as if that group were not present, so that a rich analysis can be offered. Rather than giving a definitive answer to the project’s problems, group members discuss what they heard and observed, as well as what they did not hear or observe that would have added to the quality of the project according to stated criteria.
It is appropriate to begin with positive feedback regarding the strength of the project and other appreciative evidence, such as: What are the strengths? What is the good news here?
Next, the facilitator asks for feedback that relates to gaps, improvement and further consideration, such as: Where are the gaps? What is the group not considering? What goals, criteria and AFI process elements are missing? The presenting group is NOT allowed to speak during this
discussion, but listens non-defensively, taking notes regarding new ideas, perspectives and approaches—listening for assumptions implicit in the conversation. Remember that the classroom community was invited to consider the question and that judgment is suspended.
Phase Five: Facilitator Summary
The facilitator gives a brief summary of the successful elements of the presenting group’s project and offers next steps to revise according to feedback they just heard.
TEACHER GUIDELINES
www.AFI.edu 79
5MINUTES
2MINUTES

Phase Six: Presenter Response
The presenter then responds to the feedback. This is the presenter’s reflection of the salient and significant ideas and new thoughts received from listening to the classroom community feedback.
Phase Seven: Teacher Review
When all presentations have been made, the TEACHER leads a debriefing about the group’s observations of the process. This step is critical to evolving the classroom community—giving time to ascertain what was learned, valued and could be improved about the protocol process. Always allow time for this step. Incorporate the results into the next feedback session.
2004 AFI Screen EducationFeedback Protocol: Adapted from Consultancy: Coalition of Essential Schools
TEACHER GUIDELINES
www.AFI.edu 80
3MINUTES
5MINUTES

______________________________________________ _________________________________________PRESENTATION: PRODUCED BY: ____________________________________________ ________________________________ ______CLASS & PERIOD: EVALUATOR: DATE: _____________________________________________OVERALL SCORE:
PITCH & PRESENTATION EVALUATION RUBRIC
www.AFI.edu
CATEGORY A - 4 Stars B - 3 Stars C - 2 Stars D - 1 Star SCORE
CONTENTThe story, ideas, concepts that are represented in the project pitch.
The project has a clear, organized vision as it relates to the topic or issue. The story is clear and compelling and presented in a way that generates excitement.
The project and story are presented in a clear and organized way. Although focused, the presentation lacks an energy that gets the audience excited about seeing the project.
The presentation has a focus but strays at times The ideas are there, but the major story points are not fully communicated, leaving questions.
The presentation seems unorganized, hurried or unfinished. The general idea of the project is unclear and a complete story is not articulated.
PRESENTATIONThe words and visual elements that comprise the project pitch.
Pitch blends clear and compelling oral presentation. Two or more visual elements. Energetic presence makes it exciting and convincing.
Pitch is clearly and energetically presented with strong oral argument. At least one visual element used in a compelling way.
Pitch adequately communicates the intention of the project but has improvised feel and uses no visual elements.
Pitch struggles to communicate ideas in an organized and compelling way. No visual elements used. Presenters fail to generate any energy or excitement.
COLLABORATIONWorking together jointly to present a superior project pitch.
Presenters work as an effective team. Division of responsibilities makes best use of individuals’ strengths. Group dynamic gives the impression of a team ready to succeed.
Presenters work well together. Some effort to assign roles based on skills and talents of team members. Good participation by all.
Presentation is the result of a group effort, but only by some of the members. There is evidence of poor communication and unresolved conflict.
Presentation created by one student working more or less alone. May have received some guidance or help from others.
“GREEN LIGHT”Overall success in convincing audience that proposed project is ready to go into production.
Overall strength of ideas, presentation and clarity of vision leaves no doubt that this project is ready to be granted a Green Light for production.
All of the elements for success are there. With just a bit more thought and polish, project is worthy of a Green Light.
Project has the seeds of a good idea, but story and group dynamics need some more work before committing resources to production.
Presentation leaves questions about what kind of project is being proposed and if the group can work together effectively.

______________________________________________ _________________________________________PRESENTATION: PRODUCED BY: ____________________________________________ ________________________________ ______CLASS & PERIOD: EVALUATOR: DATE: _____________________________________________OVERALL SCORE:
PROJECT EVALUATION RUBRIC
CATEGORY A - 4 Stars B - 3 Stars C - 2 Stars D - 1 Star SCORE
STORY The story is very clear and interesting. The story had a beginning, middle and end. Excellent; no room for improvement.
The story is clear. The story had a beginning, middle and end. Holds the viewer’s attention.
The story was difficult to follow at times, but the general ideas were presented. Struggles to keep the viewer’s attention.
The story was not clear. The story had no beginning,middle or end. Needs major improvements.
STORYBOARD Storyboard is easy to read, and all elements for the shot are clearly described.
Storyboard is mostly easy to read, and all elements for the shot are described.
Storyboard is difficult to read and doesn’t clearly describe the shots.
Storyboard is very hard to read and does not clearly communicate filmmaker’s intention.
CAMERA WORK Uses four or more camera angles. Shots are framed and well lit. Camera movement is smooth and steady, using a tripod.
Uses three or more camera angles. Shots are framed but sometimes too light or dark. Camera movement is mostly smooth but needs tripod.
Uses two or three camera angles. Shots are light or dark and/or zoom in and out. Camera movement is shaky and unsure at times.
Uses one or two long continuous shots. Lighting is bad. Camera movement is distracting and shaky. Camera zooms in and out without warning.
ACTING Actors create believable compelling characters who enhance the film. Actors clearly know their lines.
Actors mostly stay in character and communicate the story. Actors mostly know their lines.
Actors sometimes struggle to remember their lines and create believable characters.
Actors do not succeed in creating believable characters and distract from the film by either not knowing their lines or by looking into the camera.
EDITING Film had transitions, music, titles and credits. Editing choices all work to create a distinctive flow and flavor.
Film had transitions, music, titles and credits.The film sometimes struggles to have a continuous flow or tone.
Film had an incomplete feel with no transitions or music, just different clips put together.
Film had no editing done whatsoever. Raw imported video in no particular order.
PRODUCTION VALUES
Film uses story and period appropriate costumes, props, locations and sets.
Film uses costumes and some attention is paid to accurate props, locations and sets.
Film minimally uses costumes, props, locations and sets.
Film does not use costumes, props and sets at all.

SECTION FOUR
FILMMAKER’S TOOL KIT
•BLANK STORYBOARDS
•PRODUCTION CALL SHEET
•HANDHELD VIEWFINDER CUT-OUT
•PARENTAL RELEASE FOR EXHIBITINGFINAL PRODUCT
www.AFI.edu 83

PROJECT____________________ SCENE

_____________________________________ ____________________________Production/Group: Date:
________________________________________________ _______________________Director: Contact #:
_______________________________________________ _______________________Producer: Contact #:
___________________________________ _______________________Dir. of Photography: Contact #:
LOCATION (address, phone, directions):
_______________________________________________________________________________
_______________________________________________________________________________
CALL SHEET
SCENE DESCRIPTION CHARACTER(S) CAST LOCATION
CAST and/or CREW MEMBER JOB/ROLE CONTACT #

CAMERA, TAPE STOCK & LIGHTING:
__________________________________________________________________
__________________________________________________________________
__________________________________________________________________
PROPS:
__________________________________________________________________
__________________________________________________________________
__________________________________________________________________
ART DEPARTMENT/SET PREPARATION:
__________________________________________________________________
__________________________________________________________________
__________________________________________________________________
MAKE UP & HAIR:
__________________________________________________________________
__________________________________________________________________
__________________________________________________________________
WARDROBE:
__________________________________________________________________
__________________________________________________________________
__________________________________________________________________
CALL SHEET
www.AFI.edu
BE SAFE, BE SMART! It is not only your right to be safe, but your responsibility to protect yourself and others from hazards. Always mount your productions safely and legally, observing all the regulations for your school and the laws governing your location.


Release Form
___________________________________I, ag r e e t h a t I may be v ideotaped, in ter v iewed or photographed as par t o f my
participation in the American Film Institute’s Screen Education project in association with my school. By signing below, I agree to allow AFI
to use my ideas, likeness and all materials associated with the production of my Screen Education project in any of their public
relations, press, screenings and the online Screen Education community, AFI.edu.
____________________________ _________________Signature Date
If under 18, Parent or Guardian
____________________________ _________________Signature Date
_________________________________________Name (please print):
___________________________________________________Address:
__________________________________________City, State and Zip:
_____________________________________________________Phone:
www.AFI.edu