amb-os ministry upload manualamb-os.com/pdfs/amb-os_upload_manual_rev-2.pdfamb-os ministry upload...
TRANSCRIPT

Amb-OS Ministry Upload Manual
Amb-OS Media, LLC AMR-100
Revision 206/23/08

Revision 2 2 © 2008

Table of ContentsINTRODUCTION ..................................................................................................................................... 4 FILE SPECIFICATION ............................................................................................................................. 4
File Details ............................................................................................................................................ 4 Naming Convention .............................................................................................................................. 4
LOGIN ....................................................................................................................................................... 6 Site ......................................................................................................................................................... 6 Login and Password entry ..................................................................................................................... 7
NAVIGATION ........................................................................................................................................... 8 Tabs ....................................................................................................................................................... 8
PROGRAMS .............................................................................................................................................. 9 Programs .............................................................................................................................................. 10
Creating a new program .................................................................................................................. 11 Creating new files for the program ............................................................................................ 15 Deleting a file from a program ................................................................................................... 18
Uploading files ................................................................................................................................ 19 Permissions ................................................................................................................................ 22
SYSTEM .................................................................................................................................................. 23 Receiver Firmware .............................................................................................................................. 23 Stream Permissions ............................................................................................................................. 23 Commands ........................................................................................................................................... 24 Generic File Upload ............................................................................................................................ 24 Generic Satellite File Transfer ............................................................................................................. 24
FILE TRANSMISSION .......................................................................................................................... 25 Automatic ............................................................................................................................................ 25 Manual ................................................................................................................................................. 25
GMT Conversion Chart ............................................................................................................................ 26 Cart Chunk ............................................................................................................................................... 27
Cart Chunk Fields ................................................................................................................................ 27 Cart Chunk Process ............................................................................................................................. 28
Buttons ............................................................................................................................................ 28 Cart Chunk Example ....................................................................................................................... 29
Revision 2 3 © 2008
INTRODUCTIONMost programs have been entered into the system and normally you would simply upload programs. This step begins in the Upload section.
On a daily basis, the following steps would be done normally.1. Create your program2. Verify the levels of the program (-6 dBfs)3. Create the MP2 (48K sampling, 192K encoding rate)4. Enter Cart Chunk data5. Log into the system6. Select the “Programs” tab on the left7. Select the “Files” tab under “Programs”8. Select “Browse” for the file you want to upload9. Select the file10. Press “Open”11. Press “Upload”
All files must meet the specifications below and must have Cart Chunk data embedded in the file before uploading.
FILE SPECIFICATION
File DetailsFormat: MP2Sampling Rate: 48000 (48K)Encoding Rate: 192KStereo or mono: Depends on content and ministry choice. Voice programs are typically mono and
music or drama are typically in stereo. Due to bandwidth limitations, unless you need to have a program in stereo, always encode it in mono.
Level: Normalize to -6 dBfs (dB Full Scale – the max digital level)
Naming ConventionMMMM_PPPP_MM-DD-YY_PN-TP_VVVV.MP2
MMMM = Ministry NamePPPP = Program NameMM-DD-YY = Program air datePN-TP = part number (PN) of total parts (TP)VVVV = Version
COMM = CommercialNCOM = Non-CommercialBORD = BorderCANA = CanadaSOXX = State Only for XX state (two letter abbreviation for the state)
Revision 2 4 © 2008

All the program names (PPPP) end with a number or “W” or “M”. That number indicates the number of times the program airs in a week.
5 = 5 times a week – typically M-F. The date matches a weekday of the month.1 = 1 time a week – typically a weekend. The date matches either Saturday or Sunday. That
depends on the individual ministry.W = Weekly – a program airing any time during the week or several times during the week. A
promo that airs for multiple programs in a week would get this. For example, if a ministry has an overview promo for a all five programs in a week would be a weekly program.
M = Monthly – a program that airs all month would get this.
The parts are described by the part number of the program and the total number of parts (PN-TP). Thus 01-01 means this is the only part of a one part program. 02-03 means the file is the second part of a three part program.
Examples:
FOTF_FOF5_04-09-08_01-01.MP2FOTF = Focus on the FamilyFOF5 = Focus on the Family daily program04-09-08 = Program's air date is April 9, 200801-01 = 1 part program, this is part 1 of 1 part.
LWFM_LWF5_05-09-08_01-03.MP2LWFM = Love Worth Finding MinistriesLWF5 = Love Worth Finding daily program05-09-08 = Program's air date is May 9, 200801-03 = 3 part program, this is part 1 of 3 parts.
FOTF_ODY1_05-10-08_01-03.MP2FOTF = Focus on the FamilyODY1 = Adventures in Odyssey Weekend05-10-08 = Program's air date is May 10, 200801-03 = 3 part program, this is part 1 of 3 parts.
The version information is stripped from the file when it is transmitted to the station, because a program may change versions for some ministries. At times a ministry may produce one version and then have a state only or market only program. To distinguish them, the SOXX information is added to the program and to keep them separated on the server. The playback or transfer of a file would not work if the version information changed and was left on the program or what the SOXX means. Since each station only airs one version of a particular program, they always have the same file name sent to their receiver.
Revision 2 5 © 2008

LOGIN
SiteThe site has now URL and is accessed only by its IP address. There are four addresses that can be used because of the backup systems. Two mirrored servers each have their own IP address on the main Internet connection and the backup Internet connection. You may use any of these IP addresses, but it would be best to use the primary address (listed first).
https://72.159.94.35https://72.159.94.36https://209.169.52.43https://209.169.52.44
If you type this into your browser address line, be sure to the use the security “s” in the https. With unsecured web access (http://www.google.com) there is no “s” after the http. However, this is a secure site and the “s” is needed. Remember the “https” if you enter this into your browser's address line.
When you connect for the first time or use a different address, you may get the following error.
This is a normal security issue and simply press “OK” to go to the login.
Revision 2 6 © 2008

Login and Password entry
This takes you to the login page where you enter your user name and password.
Simply enter your user name and password and press “Log In” or press “ENTER” on your keyboard. If you do not have your login information contact Amb-OS for that.
After successfully logging into the server you will see a screen similar to this. The tabs on the left may be different, but this manual focuses on the ones necessary to upload programs.
Revision 2 7 © 2008

NAVIGATION
TabsThis manual only addresses the tabs that are necessary to upload programs. To that end, the following screen shot shows only the necessary tabs.
You have three main tabs:
Programs: This allows you to define your program and to upload them.
System: This allows you to send commands and upload “one off” programs and send them to receivers.
Log Out: This logs you out of the system. If you need to log back in, press the “Back to Login” button.
Revision 2 8 © 2008

PROGRAMSWhen pressing the “Programs” tab, two additional sub tabs open: Files and Permissions. The “Programs” tab consists of two parts: 1) the definition of the program – seen in the screen shot below – and the 2) the actual file that is uploaded for delivery in the Files section.
Revision 2 9 © 2008

ProgramsThe program definitions are listed in this section. This only lists the programs under your ministry. All files are uploaded with the air date in the title (see the Naming Convention section). Therefore, this section only lists the program and not every audio file. The screen shot below shows a three part program.
Revision 2 10 © 2008

The Programs part has the following fields:
The program entry is simply the heading of the program. You select that to see the particulars of the program.
The name of the program is the name you want to use to track the program.
The short name is a quick reference name for your convenience.
The email is your contact information for notifications of missing files.
The buttons under this information allow you to make changes.
Update: Saves any changes you make to this entry. Use this if you change Name, Short Name or Email.
Delete: Deletes the program entry. There is no “undelete” to restore a file entry. If you delete a program entry, you have to recreate it (see Creating a new program).
Clear: Removes the displayed information so you can create a new program.
File section
Each program entry has an “Edit” button to allow you change the program information. This must used to changed the information.
The two buttons at the bottom all you to modify the programs associated with the program.Add: This button allows you to put in additional programs. If the program in the example
becomes a four part program, you can add the fourth part.Delete: This allows you to delete a part. If your program becomes one part, you can delete the
other two.
Creating a new programIf you have just clicked on the “Programs” tab the program entry has “Select file” and the other fields are empty. If not, press “Clear” to start over with a new program. To enter a new program, simply enter the new program information in all the fields and press “Update.”
Revision 2 11 © 2008

To enter new program information
1. Put in a name in the “Name” field that describes the program. You would enter something like, “New Daily Program Commercial.”
2. Enter in a short name for the file like NDP5-C, for example. If it is left blank, you will get an error saying this field was not entered.
3. Enter an email address for a primary contact. This can be left blank, but if a program upload is missed, the system will email you a notice saying a program is missing. Without an email that will not happen.
4. Press “Add” to save the information.
Revision 2 12 © 2008

The screen shot above shows you the newly entered information. Now press “Add” to add the program. If you press “Clear,” all the information will be lost and you will have to reenter the information.
After pressing “Add,” you get a confirmation window.
Revision 2 13 © 2008

If you do not wish to add the program, press “Cancel.” Otherwise press “OK” to add the program. You should get the following message after pressing “OK.” Also notice that the fields are cleared to enable you to enter a new program.
Again, if you do not enter a short name the following error appears.
Revision 2 14 © 2008

Creating new files for the programAfter creating the name of the program, you now define the actual audio files that comprise this program. The number of files depends on the show. If the show is one part, then only one file should be associated with it. However, you can include the promo in the files. A multi-part program has as many files as there are parts.
For our example, we created a program called “New Daily Program Commercial, 3 Parts” and we will ad the files to it.
The format of the new file should always be in the format under File Naming Conventions. Be sure you put the extension of the file in the name (.MP2).
MMMM_PPPP_##-##-##_PN-PT_VVVVMMMM = Ministry NamePPPP = Program Name##-##-## = the wild card of that date. This should always be entered here.PN-TP = part number (PN) of total parts (TP)VVVV = Version
COMM = CommercialNCOM = Non-CommercialBORD = BorderCANA = CanadaSOXX = State Only for XX state (two letter abbreviation for the state)
Example: NEWM_NDP5_##-##-##_01-01_COMM.MP2
Revision 2 15 © 2008

1. Select the “Add” button at the bottom of the screen and press “OK” to the prompt.
2. This will bring up a line to enter the program.
3. Enter the name of the program into open box under “File Name.” The filename must have the MP2 extension. Here is the entry for part one of our 3 part program. For example:
NEWM_NDP5_##-##-##_01-03_COMM.MP2
4. Change the run time to 0 (it will change it 00:00). This allows the AMR-100 to read the actual length of each day's file as they are uploaded to the server.
5. Set the “Send At” time to you desired time to send the file to the receivers on the network. The time is GMT and does not change for Daylight Saving Time. The following chart converts between GMT and Standard and Daylight Saving Time for midnight EST. The times between 02:00 GMT and 04:00 GMT are reserved. (GMT Conversion Chart)
Time ZoneOffset
Standard Daylight Saving
GMT 05:00 05:00
Eastern 00:00 01:00
GMT Offset -5 hours -4 hours
Central 23:00 00:00
GMT Offset -6 hours -5 hours
Mountain 22:00 23:00
GMT Offset -7 hours -6 hours
Pacific 21:00 22:00
GMT Offset -8 hours -7 hours6. Enter the “Day Offset” to send programs before their air date. To deliver a Friday program on
Monday, put in a “4” for the day offset.
Notice the warning if you did not put the “.MP2” extension on the name of the file.7. Press “Update,” the button on the left, to save the information. Pressing “Enter” will NOT
Revision 2 16 © 2008

work. If you entered the name without the “.MP2” extension, you would get the following screen.
With everything correctly entered, the program will be added and you will get the following screen.
8. To add the other two parts repeat steps 1 – 7 with the following titles:NEWM_NDP5_##-##-##_02-03_COMM.MP2NEWM_NDP5_##-##-##_03-03_COMM.MP2
And be sure to change the “Run Time” to 0 and the set the “Send At” time and the match the “Day Offset.”
9. When completed your program should look like the following screen shot.
Revision 2 17 © 2008

Deleting a file from a programTo delete a program, press the “Delete” button. The “Edit” button changes to “Delete” and then press that button to remove a program. Once that is done, you have to recreate it, because it cannot be undeleted. The steps are:
1. Press the “Delete” button next to “Add” (the “Edit” button changes to “Delete”)
2. Press the “Delete” button next to the file you want to delete3. Confirm the deletion by pressing “OK” in the confirmation box
Pressing “Cancel” will leave the file in place. You can delete any file in the list, but each file must be deleted in steps 1 to 3. You cannot delete multiple files simultaneously.
After defining the files, you must begin to upload the files.
Revision 2 18 © 2008

Uploading filesAfter you have entered the files, you need to upload files that will be delivered. Press the “Files” tab on the left under “Programs.” After setting up programs, you can come directly to here after logging into the system. You would then select your program in drop down menu and begin uploading files.
We added three files to our program – parts 1, 2 and 3. They are listed separately. The steps to upload are:
1. Press “Browse”2. Select your file3. Press “Open”4. Press “Upload”
After pressing “Browse you will see the following screen.
Highlight the file you want to upload and press “Open.” The file name must match the name you are trying to upload.
Revision 2 19 © 2008

If you select “NEWM_NDP5_05-03-08_02-03_COMM.MP2” (Part 2) when you are trying to upload “NEWM_NDP5_05-03-08_01-03_COMM.MP2” (Part 1), you will get the following error:
Notice that the box to the right of “File” is empty, because it did not successfully upload. Unfortunately, it cannot check the file until after it has been uploaded. With a single part 30 minute program, that can take awhile. Be sure you select the right file for the right program.After a successfully completing the transfer to the server, the file will be listed and be ready to send at the time you entered in the “Send At” box when you created the program. A status message is also displayed showing the upload was successful.
Revision 2 20 © 2008

After uploading all the programs, you will see each one listed and an open box to upload another date. The size information is the size of all files. Notice the size second line under “Size” increases with each file. The last one (part 3 of 3) has the total size of all three files.
If you have multiple days, you can continue to upload files. Each file will be transferred according to the “Send At” box. If you have a day offset of 3 in that box, the programs in the example above, would have been sent on 4/30/08. Therefore, if you had uploaded the program for 5/4/08, it would have been sent on 5/1/08 and so forth.Should you upload a file after its time to transfer, you can press “Send” to send the file immediately.
Revision 2 21 © 2008

PermissionsAfter uploading a program, you need to assign stations to your programs. This is done under the permissions tab on the left.
You select receivers from the list on the left and press the “>>” button in the middle to add them as stations that carry the program. You can select multiple stations by using the normal multiple select keys <Ctl> and <Shift> plus a left mouse click. The illustration above would add the four highlighted stations to the “Program Members” side.
Stations will now receive the program.
Revision 2 22 © 2008

SYSTEMThe “System” tab has several options that you normally do not use. The following section gives a brief explanation of these options. The “Target” field is the serial number of the receiver that will get what is sent.
Receiver Firmware
The current firmware version for the receiver is listed. The version on this screen shot is “1.52.” The line under the version, “Target,” is where the version would go if you press “Send Now.” A serial number of a receiver is put in the “Target” window. You should only have to do this under extreme circumstances and only if authorized by an Amb-OS technician.
Stream Permissions
This gives permissions to receivers for live streams and to allow stations to get other networks that are only on the Wegener® system.
Revision 2 23 © 2008

Commands
This allows you send a receiver command to any receiver. For example, to reboot a receiver, put “REBOOT” in the “Command:” line and the serial number of the receiver you want rebooted. You will not use this command unless instructed to do so.
Generic File Upload
This uploads a file to the Amb-OS server. This is not normally used, but if a specific one time file needs to be transferred to a receiver, you would first upload the file here and then use the “Generic Satellite File Transfer” command.
First you press “Browse” to locate your file and the press “Upload” to upload the file to the server. It will notify you of a successful file transfer.
Generic Satellite File Transfer
After uploading the file, put the EXACT name of the file you uploaded in the “File:” window and then the serial number of the receiver that will get the file into the “Target:” window and press “Send Now.”
Revision 2 24 © 2008

FILE TRANSMISSION
AutomaticFiles are automatically transferred at the time in the “Send At” window. After uploading a file, you do not need to press “Send Now” next to the file. All programs will be sent at that time. Also, if you put in a day offset in the “Send At” window, it will be sent that many days early. If you upload your weekend programs weeks in advance and you have the time at 12:00:00 with the day “Day Offset” set as 5 (noon GMT and 5 days before air date), the program for the weekend of June 6 (06-07-08) will be automatically sent on 6/2/08 at noon GMT (7:00 AM EST or 8:00 AM EDT).
ManualIf a program was not uploaded before the automated transfer time listed in the “Programs” tab and then you upload the program it will have to be sent manually. After you have uploaded the program, simply press the “Send” button next to the file you want to send.
Only use this if you have missed a transfer time.
Revision 2 25 © 2008

GMT Conversion Chart
Standard Time Daylight Saving
GMT Pacific Mountain Central Eastern Pacific Mountain Central Eastern
0 -8 -7 -6 -5 -7 -6 -5 -4
05:00 21:00 22:00 23:00 00:00 22:00 23:00 00:00 01:00
06:00 22:00 23:00 00:00 01:00 23:00 00:00 01:00 02:00
07:00 23:00 00:00 01:00 02:00 00:00 01:00 02:00 03:00
08:00 00:00 01:00 02:00 03:00 01:00 02:00 03:00 04:00
09:00 01:00 02:00 03:00 04:00 02:00 03:00 04:00 05:00
10:00 02:00 03:00 04:00 05:00 03:00 04:00 05:00 06:00
11:00 03:00 04:00 05:00 06:00 04:00 05:00 06:00 07:00
12:00 04:00 05:00 06:00 07:00 05:00 06:00 07:00 08:00
13:00 05:00 06:00 07:00 08:00 06:00 07:00 08:00 09:00
14:00 06:00 07:00 08:00 09:00 07:00 08:00 09:00 10:00
15:00 07:00 08:00 09:00 10:00 08:00 09:00 10:00 11:00
16:00 08:00 09:00 10:00 11:00 09:00 10:00 11:00 12:00
17:00 09:00 10:00 11:00 12:00 10:00 11:00 12:00 13:00
18:00 10:00 11:00 12:00 13:00 11:00 12:00 13:00 14:00
19:00 11:00 12:00 13:00 14:00 12:00 13:00 14:00 15:00
20:00 12:00 13:00 14:00 15:00 13:00 14:00 15:00 16:00
21:00 13:00 14:00 15:00 16:00 14:00 15:00 16:00 17:00
22:00 14:00 15:00 16:00 17:00 15:00 16:00 17:00 18:00
23:00 15:00 16:00 17:00 18:00 16:00 17:00 18:00 19:00
00:00 16:00 17:00 18:00 19:00 17:00 18:00 19:00 20:00
01:00 17:00 18:00 19:00 20:00 18:00 19:00 20:00 21:00
02:00 18:00 19:00 20:00 21:00 19:00 20:00 21:00 22:00
03:00 19:00 20:00 21:00 22:00 20:00 21:00 22:00 23:00
04:00 20:00 21:00 22:00 23:00 21:00 22:00 23:00 00:00
Revision 2 26 © 2008

Cart ChunkThe Cart Chunk data is entered with the “Cart Chunk” program. The name of the program is “Cartchunk.exe” and it allows you to enter the data.
Cart Chunk FieldsOnly the EndDate is required by the AMR-100 receiver to determine when a file should be deleted.
The other fields are optional and could be used by stations.
Cartchunk Version: This is automatically entered and has the version of the cart chunk standard.
Title: This is the title of the program and can be either the name of the program (“Love Worth Finding Daily Commercial”) or the name of the individual program (“Loving One Another.”)
Artist: This can either be the name of the ministry, especially if you put the name of the program in the title field.
CutID: This is a field used by automation systems and varies from system to system. This should be left blank.
ClientID: This is a field used by automation systems and varies from system to system. This should be left blank.
Category: This is a field used by automation systems and varies from system to system. This should be left blank.
Revision 2 27 © 2008
Classification: This is a field used by automation systems and varies from system to system. This should be left blank.
Outcue: The outcue of the program or segment.
StartDate: This field tells the automation system what date it can start playing the file. The AMR-100 uses the date in the file name as the start date.
StartTime: This field tells the automation system what time of the day it can start playing the file. The AMR-100 does not use this field.
EndDate: This field tells the automation system what date it should stop playing the file. The AMR-100 uses this to delete the file from the hard drive. If you put in a date before the date in the file name, the file will be deleted before its air date. Typically, you can use the day after the air date of the file. If there is a monthly promo, you can use the first of the next month. Therefore, if a promo for June has the end date of 2008-07-01, it will be deleted on July 1. The file format must be: YYYY-MM-DD.
EndTime: This field tells the automation system what time it should quit playing a file. This is not used by the AMR-100.
ProducerApp: This is the application that produced the program.
ProducerAppVer: This field is automatically filled in for you and has the version of this program.
UserDefined: Any information can be placed here.
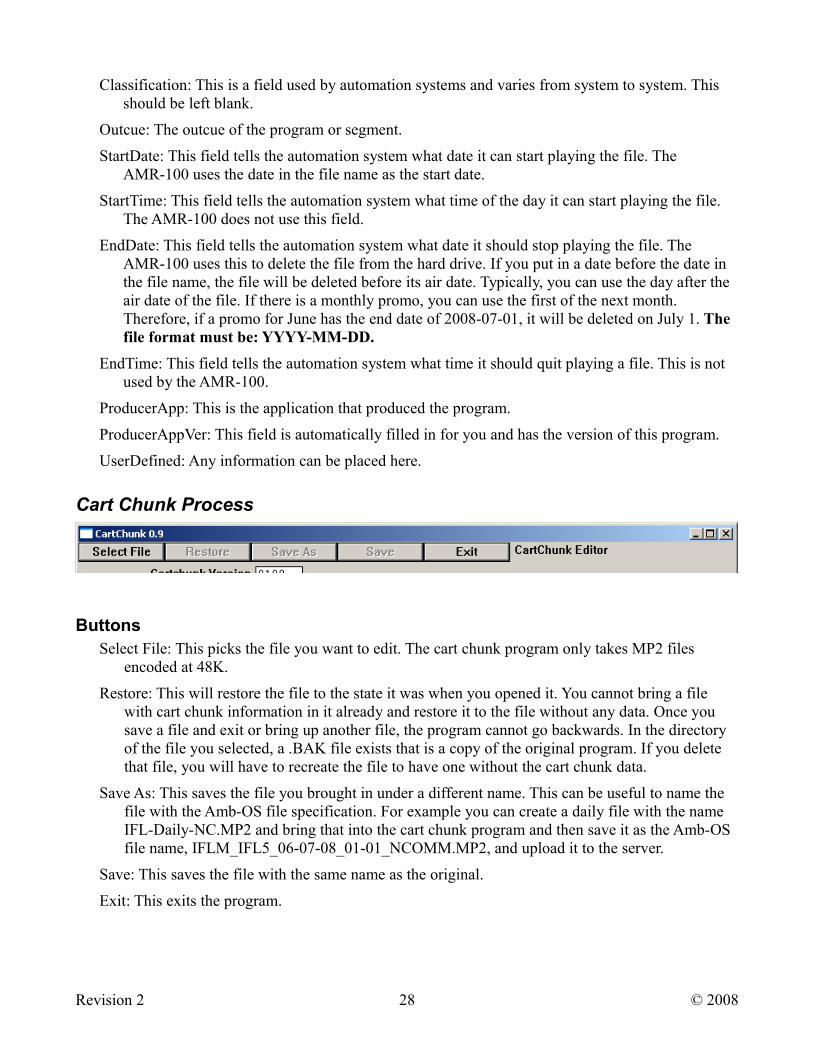
Cart Chunk Process
ButtonsSelect File: This picks the file you want to edit. The cart chunk program only takes MP2 files
encoded at 48K.
Restore: This will restore the file to the state it was when you opened it. You cannot bring a file with cart chunk information in it already and restore it to the file without any data. Once you save a file and exit or bring up another file, the program cannot go backwards. In the directory of the file you selected, a .BAK file exists that is a copy of the original program. If you delete that file, you will have to recreate the file to have one without the cart chunk data.
Save As: This saves the file you brought in under a different name. This can be useful to name the file with the Amb-OS file specification. For example you can create a daily file with the name IFL-Daily-NC.MP2 and bring that into the cart chunk program and then save it as the Amb-OS file name, IFLM_IFL5_06-07-08_01-01_NCOMM.MP2, and upload it to the server.
Save: This saves the file with the same name as the original.
Exit: This exits the program.
Revision 2 28 © 2008

Cart Chunk Example
This has a Focus on the Family program. Notice that the “Restore” button is “greyed” out, because the file has cart chunk data and it was entered in before bringing in the file. If any information is changed and the file is not saved, the original information can be retrieved by pressing the “Restore” button.
Revision 2 29 © 2008