amazing mentos! elephant toothpaste plant a seed marble ...libraries.idaho.gov/files/final...
TRANSCRIPT

• Amazing Mentos!• Elephant Toothpaste• Plant a Seed• Marble Run Mania• Gone Fishin’• Rubber Band
Helicopters• DIY Pattern Blocks• Crack the Code• Beautiful Bubbles• Puzzling Packets


Idaho Commission for Libraries 325 West State Street
Boise ID 83702
Visit us at http://libraries.idaho.gov
The contents of this toolkit were created by Jennifer Redford for use by the Idaho Commission for Libraries’
2018 Summer STEM from Your Library program.
Funding provided in part by the Idaho STEM Action Center, the U.S. Institute of Museum and Library Services under the
provision of the Library Services and Technology Act, and the Idaho Commission for Libraries.

Science, Technology, Engineering, & Math =STEM
STEM Outreach Activities Table of Contents
How to Use this Toolkit…pages 2-3 Socratic Questioning and the Scientific Method…page 4 Activities:
Amazing Mentos! (Science) …pages 5-6 Elephant Toothpaste (Science) …pages 7-8 Plant a Seed (Technology) …pages 9-10 Marble Run Mania (Technology) …pages 11-12 Gone Fishin’ (Engineering) …pages 13-14 Rubber Band Helicopters (Engineering) …pages 15-16 DIY Pattern Blocks (Math) …pages 17-18 Crack the Code (Math) …pages 19-20 Beautiful Bubbles (Science and Art) …pages 21-22 Puzzling Packets (Technology and Digital Literacy) …pages 23-24
Try It at Home…pages 25-29 Additional Resources…pages 30-31 Vocabulary… pages 32-33 Marketing… pages 34-35
To access hyperlinks and social media images, please view the online version of this document at
http://libraries.idaho.gov/page/summer-stem-your-library-micro-grants
1

How to Use this Toolkit Engaging Kids with Science This part of the toolkit contains helpful instructions for using Socratic questioning and the Scientific Method to engage kids and help them learn science concepts. Both of these methods have the additional benefit of helping children build literacy and reasoning skills. You should keep these concepts in mind as you plan your program.
Activities How Does It Work? Each of the activities in this toolkit contains a section called “How Does It Work.” You can use this section to help explain the activity to kids before you begin your program. This is also a great place to start learning about the activity’s primary STEM focus.
Objectives. This section helps you focus on what the learning outcome should be for each activity.
Let’s Try It! This section explains how to do each activity. Plus, the “Additional Resources” section at the end of this toolkit contains links to videos for each activity. Some of the activities require materials to be prepped in advance, and since some supplies may not be available locally, make sure you plan ahead. If you can, try to do each activity on your own before you do it for a program.
Literacy Tips. Each activity contains one science tip for adults to use in helping children build literacy skills. [All of these tips are in brackets and bolded.] Share the tips during your program.
Supplies. You should be able to purchase supplies for all of these activities using the grant funds from the Summer STEM program. For supplies that are harder to find or not readily available at most stores, the “supplies” section of the activity includes a link to a website from which the items may be purchased. Also, the needed supplies can often be found on amazon.com.
Knowledge Check. At the end of each activity, there are a couple of questions for you to ask the kids, to see if they understood the STEM lesson and to help you determine if it was a meaningful learning experience for them.
2

How to Use this Toolkit Try It at Home This section contains a series of “recipe cards” for you to print off and hand out to the participants. The information encourages children to replicate the concepts of each activity at home.
Additional Resources Each activity has a series of additional online resources that can help you better understand its STEM concept and visualize how it should work. For some activities, a picture book recommendation is also included, in case you would like to start your program with a storytime.
Vocabulary Vocabulary words are included in bold throughout each activity. Familiarize yourself with the definitions of these words and make sure to use them during your program to help children build their STEM vocabularies. (Definitions are located at the end of this toolkit.)
Marketing This section contains sample social media posts and hashtags that may be used when marketing Summer STEM programs. Images that you can add to your Tweets or Facebook posts can be found online at http://libraries.idaho.gov.
Helpful Hints The activities in this toolkit can be scaled -- up or down -- to accommodate just a few kids or a large group. An easel or some other display device can help you demonstrate the activity to a larger audience. You may also want to bring a table for the materials.
If you are doing these activities outside, remember to bring a chair, water, sunscreen, and an umbrella, if there is no shade.
Be mindful of children who may have allergies. Although none of the activities involve food, one of them does include the use of rubber bands, which might be problematic for children with latex allergies.
3

jj
Socratic Questioning Socratic questioning includes using open-ended questions to help children learn. This method is very similar to Dialogic Reading techniques, which encourage a dialog between adults and children during storytime and help build literacy skills. Here are six types of Socratic questions that you can use during your program to help engage children:
• Questions for clarification: “How does that relate to our discussion?”• Questions that probe assumptions: “What do you assume will happen? Why?”• Questions that probe reasoning or evidence: “Why do you think that happened?”• Questions about viewpoints or perspectives: “What is another way to look at it?”• Questions that probe implications and consequences: “What would happen if we
changed the conditions of our experiment? How does X affect Y?”• Questions about the question: “How does our activity apply to everyday life?”
Your questioning doesn’t have to be formal. During most of these activities, if you just ask the kids -- “Why do you think that happened?” -- you will give them a chance to reflect on the STEM concept and verbalize an answer.
The Scientific Method The Scientific Method is a way to help kids solve a problem using logic and reasoning. It has five steps and can be applied to many different situations. A few of these activities specifically use the Scientific Method, but you can use it for most STEM-related activities. Like Socratic questioning, the Scientific Method helps children build literacy skills by giving them the opportunity to use expressive language and new vocabulary words.
Here are the five steps of the Scientific Method:
1. Question. You can start all of these activities with this question: “What wouldhappen if . . .”
2. Hypothesis/Guess/Prediction. Ask the kids to make their best guess about what willhappen during the activity. Don’t be afraid to use the word “hypothesis”interchangeably with “guess” – this will help children build their science vocabulary.
3. Experiment. This is the part of the activity where you are actively making something,conducting an experiment, playing, etc.
4. Observations. Ask the kids to tell you what they observed -- in their own words. Thiswill help the youngsters reflect on the activity and let you know if they understoodthe activity’s STEM concept. To guide you through this step, there are “KnowledgeCheck” prompts at the end of each activity.
5. Conclusion. During the conclusion of each activity, summarize the STEM concept,using your experiment to illustrate your summary.
4

Amazing Mentos! The SCIENCE of a Physical Reaction
There are three states of matter - solid, liquid, and gas. A physical reaction occurs when a substance changes from one state to another. An example of this is when liquid water freezes into a solid ice cube. Today, we are going to experiment with a physical reaction within soda.
Carbon Dioxide (CO2) is the substance that makes liquid soda fizzy. CO2 forms into gaseous bubbles when it encounters imperfections on the side of a soda bottle or if something is dropped into the soda. The process of molecules rearranging themselves is called nucleation. If we drop salt into the soda, CO2 bubbles would form and create fizz around the salt.
How does it work? CO2 is what makes soda fizzy. When you shake a bottle of soda, you can see bubbles of CO2 form on the inside of the bottle - the CO2 gas bubbles are clinging to tiny imperfections on the sides of the bottle. The molecules of CO2 in the liquid soda assemble themselves into bubbles of CO2 gas in a process called nucleation. The gaseous bubbles of CO2 break free from the liquid soda and float to the top of the bottle. This is an example of a physical reaction - the CO2 changes from a liquid state into a gaseous state. Another example of a physical reaction is when liquid water turns to solid ice -- the water molecules rearrange themselves as the temperature of the water falls.
Mentos (a brand of mint) are covered with thousands of tiny pits -- so small that you can’t even see them! These tiny pits are perfect nucleation sites where CO2 bubbles can form. When you drop a Mentos into a bottle of soda, it sinks to the bottom and thousands of CO2 gas bubbles instantly form on the surface of the Mentos. The gas bubbles work their way to the top of the soda bottle -- pushing the liquid out in an explosion of soda!
Objectives After doing this activity, kids will be able to:
• describe a physical reaction.• identify what causes CO2 bubbles to form when a Mentos is dropped into soda.
5

Let’s Try It! Use the Scientific Method to guide kids through this Mentos Experiment:
Question: Ask the kids, “What will happen when we drop Mentos into soda?” Hypothesis/Guess/Prediction: Have the kids predict what will happen. Experiment: Drop one Mentos into one of the smaller bottles of soda. Observations: Ask the kids to tell you what they observed. Conclusion: When the Mentos is dropped into the soda, lots of gaseous CO2 bubbles form at nucleation sites and push the liquid upward as the gas is released in a physical reaction.
Keep Experimenting: Put one or two Mentos in a balloon and attach the balloon to the top of one of the smaller bottles of soda, letting the Mentos fall into the bottle of soda. The balloon will inflate with released CO2 gas and soda. Repeat a few times.
Use your paper cylinder (or other tool) to drop two or three (or more!) Mentos into one of the smaller bottles of soda. Repeat until you run out of bottles of soda. Move up to a bigger bottle of soda and more Mentos (have the kids stand at a safe distance so they don’t get soaked). If you have a small group of kids, give each one their own bottle(s) of soda and Mentos to experiment with. If you have a larger group, this is a fun experiment to observe at a distance. [Each iteration of this experiment is a chance to repeat today’s lesson on physical reactions. Children learn by repetition – whether they are learning early literacy concepts, new vocabulary, or science. Repeating a science experiment has a very similar effect as repeating a book over and over again.]
Supplies • Three (3) packages of Mentos mints.• Six (6) 20 oz. bottles of diet soda, such as Diet Coke.
(You can use other soda, but diet coke is less sticky andeasier to clean up.)
• Two (2) 2-liter bottles of Diet Coke• Piece of paper rolled into a cylinder shape (for dropping
Mentos into the bottles)○ Alternate: a paper coin-roll wrapper○ Alternate: Steve Spangler’s Deluxe Mentos Geyser Tube (recommended
for bigger explosions)• Three balloons
Knowledge Check • Why does dropping a Mentos in soda cause a physical reaction?
6

Elephant Toothpaste The SCIENCE of a Chemical Reaction
A chemical reaction happens when one chemical substance is transformed into a different chemical substance. During this experiment, you will observe the chemical reaction that causes hydrogen peroxide (H2O2) to break its chemical bonds to form two
new chemicals: water (H2O) and Oxygen (O2). You will use a catalyst to speed up the rate of the chemical reaction. During this experiment, you may observe that the elephant toothpaste seems warm to the touch. This chemical reaction is also an exothermic reaction, meaning that energy is released when the chemicals break down, which causes the foam to heat up.
How does it work? You may have used hydrogen peroxide at home to clean a cut before putting a bandage on it. When the bacteria in your wound interact with the hydrogen peroxide, small bubbles form as a chemical reaction occurs that transforms the substance from hydrogen peroxide (H2O2) to water (H2O) and Oxygen (O2). With this experiment, you will observe this reaction on a larger level. You’ll use a higher-grade hydrogen peroxide (6% concentration), which can be found in most beauty product stores. It’s used as a bleaching agent and can burn skin, so only an adult should handle this chemical. Use rubber gloves and safety glasses.
Adding dish soap will create the foamy part of the elephant paste, and food coloring is for fun. The chemical reaction will occur when you add a catalyst – in this case, yeast – to the liquid. This will cause the chemical bonds in the hydrogen peroxide to break down into water and oxygen. The oxygen bubbles will cause the dish soap to foam quickly, forming a toothpaste-like foam that will quickly ooze out of the container. Because this is an exothermic reaction, the foam will be slightly warm to the touch.
Objectives After doing this activity, kids will be able to:
• explain a chemical reaction.• describe an exothermic reaction.
7

Let’s Try It! First, we need to prepare our experiment: 1. Combine 1 packet of dry active yeast with 4 tablespoons of warmwater. Set aside – this is our catalyst. 2. In a narrow-necked bottle (a plastic water bottle or small sodabottle works great), add ½ cup hydrogen peroxide, a squirt of dish soap, and food coloring. Swirl around to combine all of the substances. Make sure to use rubber gloves and safety glasses when handling the hydrogen peroxide. If you are doing this experiment inside, you can put
the bottle in the middle of a large tray or tub to contain the foam. If you are outside, you can try a plastic kid’s pool, or just set the bottle on the ground.
After briefly explaining chemical reactions, use the scientific method to lead the kids through the experiment:
Question: We know that hydrogen peroxide (H2O2) breaks down into water (H2O) and Oxygen (O2) when exposed to bacteria. What will happen when we add active yeast, which is full of bacteria, to this solution of hydrogen peroxide and soap?
Hypothesis/Guess/Prediction: Have the kids predict what will happen.
Experiment: Use a funnel to add the yeast mixture to the hydrogen peroxide in the bottle. Quickly remove the funnel and stand back.
Observations: Ask the kids to tell you what they observed. If possible, let the kids feel the foam and describe it to you. [This is a great opportunity for kids to use expressive language and try out their new vocabulary words.]
Conclusion: When the yeast is added to the hydrogen peroxide, it releases oxygen bubbles and water, which causes the dish soap to form a super-foamy substance that we are calling Elephant Toothpaste. This is an example of a chemical reaction.
Supplies • Safety glasses, like these• 1 packet dry active yeast• Warm water• Container to mix yeast and water• Dawn dish soap (not the anti-
bacterial kind)
• Funnel• Narrow-necked bottle (15-20 oz.)• 6% (20 volume) hydrogen peroxide
(found at most beauty supply stores)
Knowledge Check • What made the hydrogen peroxide turn to foam?• How did the foam feel?
8

Plant a Seed TECHNOLOGY and Algorithms
An algorithm is a list of steps that are followed in a specific sequence to accomplish a task. Things we do every day – like get ready for school, or make a peanut butter and jelly sandwich – are algorithms; they require small steps to get a job done. A sequence is the order in
which things are done. Writing algorithms correctly is a fundamental part of computer science. Computers can do a lot of things, but only if we can tell them exactly what to do in a particular sequence.
How does it work? For this activity, an algorithm will be used to plant a seed in six steps. First, identify which steps are necessary for the task and which ones can be cut out of the process. Then decide in what order to do all of the steps to plant the seed.
Use the “Code.org’s Real-Life Algorithms: Plant a Seed Worksheet” to identify the six correct steps (from the nine options listed) for planting a seed.
Then, put the steps in sequential order and use the algorithm created to plant the seeds. By creating the step-by-step directions, you are playing the role of a computer scientist who is programming a computer. When following the steps to planting the seed in sequence, you are the computer executing a program. [Being able to describe things in sequence is also an important part of learning to read. Knowing how to do things in order is an important part of building narrative skills.]
Objectives After doing this activity, kids will be able to:
• break down a task into a series of smaller activities.• demonstrate how to arrange sequential events in a logical order.
9

Let’s Try It! Directions: From the “Plant a Seed Worksheet” identify the six steps for planting a seed. Then, arrange the steps in the correct order. If you are working with a smaller group, you can give each kid a worksheet and scissors and have them cut out and arrange the steps. If you are outside or working with a larger group, you can enlarge the images to arrange the steps on an easel or other surface.
After you have assembled your final set of directions, or algorithm, follow the sequence of the steps to plant a seed in the pot.
Correct Sequence: 1. Fill pot with soil.2. Poke a hole in the soil.3. Put a seed in hole.
4. Cover seed with soil.5. Water the seed/soil.6. Put pot in sunlight.
Supplies • “Plant a Seed Worksheet” with enough copies
for everyone, if you have a smaller crowd.Enlarge the pictures for a larger crowd.
• Small pots for plantingo Alternate: small paper cups
• Potting soil• Trowels or small shovels• Seeds – beans, sunflowers, or any other seed
you can easily find• Watering can• Water• Easel and magnets or tape (for bigger crowds)• Scissors (for smaller crowds)
Knowledge Check • Were you able to plant a seed by successfully following the algorithm?• Did the exercise leave anything out?
o What would you have added to make the algorithm even better?• What if the algorithm had been only one step: "Plant the seed"?
o Would it have been easier or harder?o What if it were 40 steps?
10

Marble Run Mania TECHNOLOGY and Debugging
A bug is a problem or a mistake in a computer program. When computer scientists write a program, they rarely get it right the first time. They have to go back through their code and debug it – or find and fix any mistakes. Research has shown that when students are first
learning to code, it is easier to debug a program than to actually write code. Debugging takes persistence, meaning to try again and again, even if something is very difficult.
How does it work? Debugging is a three-step process. First, you’ll need to be able to identify bugs or problems. You can help children understand this concept by showing them a picture which includes something that is obviously out of place. Or you can show them two similar pictures and have the kids spot differences. This is a good warm-up exercise before proceeding to the marble run.
You will also need to understand what the final product should be before looking for an error. Finally, you’ll need to be able to tell how the bug caused a different result than expected. To help do all of this, focus on three key questions:
• What happened?• What was supposed to happen?• What does that tell you?
[Asking open-ended questions like these encourages children to use expressive language. This is a good technique to use when reading with your child or when you are having a one-on-one conversation.]
Objectives After doing this activity, kids will be able to: • demonstrate that they have noticed when something doesn’t go as expected.• describe an expected result before an error occurs.• tell the difference between what the expected result should have been and what
actually occurred because of an error.
11

Let’s Try It! Before your program: This activity takes a little bit of prep before your program. You will need to create a marble run that has two different entry points – one that starts high and ends in the middle of your structure, and one that starts in the middle and ends at the bottom (see Marble Run from code.org for more details). You can make your own marble run from paper and cardboard or buy a plastic run to use. Either way, you will need to set it up before your program.
During your program: Explain that the marble run has two pieces – when you put the marble in slot A, it comes out at the end of tube A; when you put the marble in slot B, it comes out at the end of tube B. Next, explain that you are putting the two tubes together, so that when you put marble in slot A, it will come out at the end of tube B. Put tubes A and B together incorrectly and watch as the marble does not come out of tube B.
Ask the kids: What happened? We found a bug! The marble didn’t go where we expected.
What was supposed to happen? The marble should have come out of tube B.
What does that tell you? You should adjust the marble run to better connect tubes A and B. Have the kids spend some time hypothesizing how they would debug, or fix, the run. Play with the marble run and try out different ways to fix your bug – be persistent until you find an answer.
Supplies • Marbles• Cardboard tubes, paper, and tape (if you are
making your own marble run)• Plastic marble maze like one of these (if you are
purchasing a marble run):o Marble Geniuso Toysmitho Golden Age
Knowledge Check • How do you feel when something you are working on starts acting “buggy”?• How many times do you try to fix it before you give up?• What would you do if you notice something is buggy, but you didn’t know how
to fix it?
12

Gone Fishin’ ENGINEERING a Pulley
A simple machine is something that gives you a mechanical advantage by decreasing the amount a force needed to move an object. A pulley is a type of simple machine that sacrifices distance for force – the greater distance that you pull something using a pulley,
the less force you need. This means that you can lift something that is significantly heavier than you are, given enough rope and a pulley (or multiple pulleys). Once you know what to look for, you’ll see that pulleys are all around you: curtains and blinds use pulleys; a construction crane is a type of pulley; you can see them at the gym or when rock climbing; flag poles and fishing rods are another type of pulley.
How does it work? You will make fishing poles by constructing a pulley. You’ll use long cardboard tubes for poles, and shorter tubes, with string wrapped around, to be like reel on a fishing pole. Then, attach a magnet to the end of the string and see what you “catch.”
If you have access to a real fishing rod, show the kids how it works and let them try it out. Talk about how much easier it is to reel in a fish using the pulley on the pole, rather than a simple line tied to the end of a stick. [When you see a pulley in your daily life, make sure to use the word “pulley” to accurately name it. Naming and explaining unfamiliar words helps children build vocabulary.]
You can also find a pulley demonstration kit here and pulley construction kit here.
Objectives After doing this activity, kids will be able to:
• demonstrate how a pulley works.• show they understand that by using a simple machine, much less force is needed
to move an object.
13

Let’s Try It! Construct your fishing rod by punching a hole in opposite sides of the longer cardboard tube, about an inch from the end. Poke a hole in the center of the smaller tube (you can use a pen or pencil) and thread your string through it. Tie a button to the end of the string and pull it through the smaller tube. Then, thread the string through one of the
punched holes in the longer tube and pull it out the end. Insert the smaller tube into the punched holes in the longer tube and tie a magnet to the end of the string. Detailed instructions for this activity may be found here.
You can practice using your fishing rod by “catching” magnetic objects and “reeling” in the string by twisting the smaller tube to wrap the string around it. You are using a simple machine called a pulley to pick up objects with less force.
Supplies • Long cardboard tubes – you can use recycled wrapping
paper tubes, paper towel tubes, or there are options forpurchasing tubes online:
o BoxYeah Mailer Tubes (come in large quantities)o Estes BT-50 Body Tubes (more expensive, used for
crafting rockets) • Toilet-paper-sized cardboard tubes – you can use recycled
toilet paper tubes, or find them online:o Oriental Trading craft tubeso Roylco Tube Craft
• 1 ¾ inch paper punch (this will help you easily create holes for the toilet-paper-sized tubes), like the ones found here, here, and here
• Ribbon/string/yarn, cut to about three-times the length of the longer tube• Small buttons• Magnets• Magnetic toys or objects
Knowledge Check • Ask the kids to describe what a pulley is and why we would use it.• Ask the kids if they can name some examples of pulleys that they see every day.
14

Rubber Band Helicopters ENGINEERING Energy
Energy is the capacity or power to do work, and it can come in many forms: heat, light, chemical, electrical, etc.
This activity will explore two forms of energy – potential energy, which occurs when an object is storing energy; and kinetic energy, which occurs when an object is in motion.
A simple rubber band will be used to demonstrate how to create potential energy (by twisting the rubber band several times) and convert it to kinetic energy (by releasing the rubber band).
How does it work? You will make a helicopter out of craft sticks, paper, a propeller, and a rubber band.
Energy is stored in the rubber band by winding the propeller. This type of energy is potential energy. When the rubber band is released, the potential energy is converted to kinetic energy, and the helicopter begins to fly.
Use a paper cutout of a helicopter shape, attached to a craft stick, to push against the surrounding air, which will cause drag and make the paper part harder to spin. This will cause more of the energy from the rubber band to be released to the attached propeller. As the propeller spins rapidly, air is pushed downward and lift is created -- allowing the helicopter to fly. [Sometimes a word has several meanings. One of today’s words – energy – has several different forms. Learning about the different forms of energy helps children build vocabulary. Try to find other examples of words with more than one meaning and point them out to your kids.]
Objectives After doing this activity, kids will be able to:
• explain the difference between potential and kinetic energy.• use their helicopters to demonstrate how potential energy is converted to
kinetic energy.
15

Let’s Try It! To create the helicopter, first attach the propeller to the end of a craft stick (it should fit snugly). Then, bend the paperclip into an “L” shape (see picture below) and tape one side to the other end of the craft stick. (This can be kind of tricky for younger kids, so you might need extra help to teach a larger group.)
Next, cut out a helicopter shape from the cardstock ( a 1.5” by 7” shape works best, template on our website) and tape it to the craft stick, like in the picture below. Attach two rubber bands from the propeller hook to the paperclip.
To fly the helicpoter, hold the paperclip end of the craft stick firmly between two fingers and use the propeller to begin winding the rubber bands. Wind until the rubber band coils in on itself from one end to the other – this is how we create potential energy. (The video and instructions here explain this very well.) Let the propeller go and then quickly release the bottom of the stick. As the rubber band unwinds, it releases kinetic energy. The shape of the cardstock ensures that most of the energy is diverted to the propeller, which spins and causes the helicopter to lift and fly.
Supplies • Propellers with plastic mounts
o Here are some from Amazono These come with a rubber band mount –
no paper clip required!• Craft sticks• Paperclips• Rubber bands• Cardstock paper• Masking tape• Scissors (If you cut out helicopter shapes from the cardstock before your
program, you won’t have to bring scissors, and you will reduce the mess createdon the day of your program.)
Knowledge Check • What is the difference between potential and kinetic energy?• Can you use the helicopter to explain potential and kinetic energy?
16

DIY Pattern Blocks Fun with MATH and Patterns
You might already be familiar with pattern blocks - a set of six different shapes that can be combined to form tile pictures and patterns in an infinite number of ways. Playing with pattern shapes helps children understand the relationships between shapes and the
way fractions of the shapes relate to the whole. Experimenting with pattern blocks can help children understand spatial relationships and the concepts of geometry.
How does it work? A scaled-down version of pattern blocks will be created. You will make two different sets of blocks and use them to explore various patterns. You’ll discover there are an infinite number of repeating patterns that can be created. As kids manipulate and play with the blocks, have them talk through their reasoning and express their strategies.
The first set of pattern blocks to be created will consist of simple triangles. On one side of each block, divide the block in half along a diagonal and color in one side, so that it looks like there is a black triangle on that side of the block. Show the kids that they can combine their blocks in an infinite number of ways to make different patterns.
The second set of blocks will be more free form. Draw a line beginning at the center of one side of a block and draw a line that ends at the center of an adjacent side of the same block. While you won’t be able to make a repeating pattern with these blocks, you can manipulate them to form different pictures with continuous lines. [Understanding patterns is an important math skill, and it is also an important part of learning to read. The more language patterns children are exposed to (things like story and sentence structure), the easier it is for them to recognize those patterns when they begin to read.]
Objectives After doing this activity, kids will be able to:
• use the blocks to create repeating patterns.• explain their strategies for creating patterns.
17

Let’s Try It! Our first set of blocks will be a simple black-and-white pattern. If you paint the blocks white ahead of time, the kids can just use Sharpies to draw and color in a triangle that bisects one side of the block. They should look like this:
On the second set of blocks, have the kids draw a line from the center of one side of the block to its adjacent side. You can mark the center of each side ahead of time to help the kids understand the concept. You can make the lines as squiggly as you want, as long as they begin and end in the middle of each side. Repeat the process for the remaining two sides of the block face – it should look like this:
Once the blocks are finished, each set can be combined into an infinite number of patterns, like the examples to the right. As the kids are playing with the blocks, have them describe their process and strategy. A more detailed description of this activity may be found here.
If you have a smaller crowd, you might be able to let the kids take a set of blocks home. With a larger crowd, you may want to have the kids create the blocks and patterns in groups.
Supplies • 1-inch wooden cubes – you can also substitute the cubes with square tiles (cut
out of paper or cardstock)• White acrylic paint (if you are going to paint the blocks)• Sharpies (You can use black for the triangles or choose your own color!)
Knowledge Check • Have the kids demonstrate making a pattern out of the blocks.• Ask the kids to describe their process.
18

Crack the Code Fun with MATH and Number Lines
A number line is a visual tool that helps to show relationships between numbers. When children are first learning addition and subtraction, they can use number lines to understand these concepts with their eyes or by physically adding and subtracting along the
number line with their fingers.
How does it work? For this activity, you will use a number line to crack a secret code. Assign a letter to each number on your number line.
For the first part of the activity, the kids will be given a sequence of numbers that they need to translate into letters by using the coded number line. This activity will allow the kids to demonstrate basic number and letter recognition.
During the second part of the activity, the kids will be asked to solve simple addition or subtraction problems to crack the code. For example, if one of the letters in your secret code is “E,” and “E” is represented by the number 5 on the number line, the code for “E” might be 4+1 or 7-2. When the addition or subtraction problem is solved, the answer is 5 - or “E.”
This exercise works best when you can create a large number line inside, on the floor using tape, or outside, on the ground using chalk. It is best if the kids can walk on the number line while they are solving the problem. [Playing with letters and numbers can help children develop both math and language skills. Being able to identify letters is an important part of reading, and being able to identify and work with numbers is an essential part of math. This exercise lets children do both.]
Objectives After doing this activity, kids will be able to:
• identify letters and numbers and demonstrate recognition of them.• use basic addition and subtraction to determine the correct number on the
number line and then crack the code to find the corresponding letter.
19

Let’s Try It! The first step is to come up with a secret code word or phrase. (Choose a few before your program begins.) Next, make a number line - preferably a giant one with the
numbers 1 through 26. You can make your number line inside on the floor, using tape, or outside on the sidewalk, using chalk. You can also print one off for each kid to use.
You will need to assign a letter to each number on your number line. You can assign the letters in order (so “A” is 1, “B” is 2, etc.) or assign them randomly.
Translate your secret code into numbers and have the kids use the number line to crack your code. If you are working with a group, you may want to use a white board or large piece of paper to write your code on. You can also create a worksheet for the kids, so they are able to work individually.
Next, give the kids simple addition or subtraction problems that they must solve in order to crack your code. And rather than doing the math problems in their heads, ask the kids to use the number line for adding and subtracting. If you have a big number line, the kids can walk on it to solve the problem. If you have a smaller number line, the kids can use their fingers or other object (like a LEGO Minifig) to assist them in solving the math problems.
Supplies • Masking tape, painter’s tape, or chalk (if creating a big
number line outside on the sidewalk)• White board or large piece of paper and markers (if
working with a bigger group)• Paper and pens or pencils (if creating a worksheet)
Knowledge Check • Ask the kids what the hardest part about cracking the code was? And the easiest
part?• Have the kids create their own secret code for YOU to crack, using the number
line.
20

Beautiful Bubbles Mixing ART and SCIENCE
The wall of a soap bubble is made up of a layer of water that is sandwiched between soap molecules. When light hits the bubble, it is reflected off both the outer and inner layers of the soap that make up the bubble wall. Soap bubbles are iridescent and seem to contain
many different colors because light hits the bubble wall from many different angles and distances. As the thickness of the bubble decreases, the color fades -- until you can’t see any color at all.
How does it work? In addition to being fun to play with, bubbles give us an opportunity to think about how we perceive color. Although bubbles seem clear, we can see the colors of the rainbow through the reflection and refraction of light waves off of the inner and outer surfaces of the wall of the bubble.
When light hits a bubble, it is reflected off of the inner and outer wall of the bubble at different angles, which sometimes makes the bubble seem to have a rainbow-like color. No matter how hard we try, it is actually impossible to add color to a bubble -- they are too thin!
However, we can use the thin outer wall of the bubble to transfer color from a liquid bubble solution onto paper. The bubbles themselves remain clear, but we will be able to use them to create art. This is a great exercise to get kids thinking about light and colors, and also to show off their creative sides. [Kids LOVE bubbles. Incorporating science into activities that kids enjoy is a great way to motivate them to become more engaged in science and make science less scary. The same is true for reading books about things kids like – motivation is key to growing great readers and great scientists.]
Objectives After doing this activity, kids will be able to:
• talk about why bubbles seem iridescent.• show how a clear bubble can still be used to transfer paint onto paper.
21
Let’s Try It! Here are the steps to this experiment from Steve Spangler Science: 1. In a cup or bowl, add two tablespoons of one color of paint.2. Add one tablespoon of water.3. Add two tablespoons of dish soap.4. Mix the solution.5. Put a straw into the mixture and blow bubbles until the cupoverflows.
6. Carefully lay the paper on top of the bubbles, to make a print from the bubbles.OR blow bubbles directly onto the paper, using a bubble wand, and then watchthem pop.
7. Repeat -- for different layers of color.8. Let dry.
As you work through the steps of the experiment, ask the kids to describe the color of the bubbles that they blow – are they clear? Do they reflect the color of the paint solution? Does it matter if they are smaller or larger?
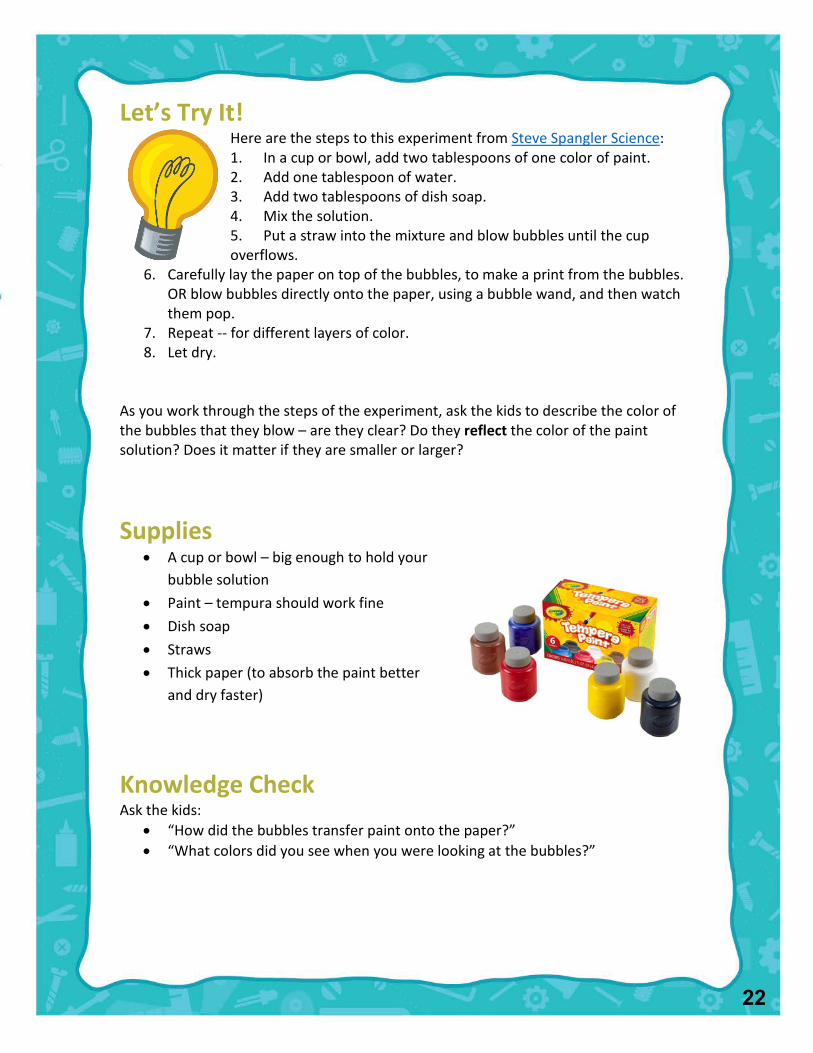
Supplies • A cup or bowl – big enough to hold your
bubble solution• Paint – tempura should work fine• Dish soap• Straws• Thick paper (to absorb the paint better
and dry faster)
Knowledge Check Ask the kids:
• “How did the bubbles transfer paint onto the paper?”• “What colors did you see when you were looking at the bubbles?”
22
Puzzling Packets The TECHNOLOGY that Drives the Internet
Even though we use the internet every day, most people don’t really know how it works. The internet is made up of a network of machines that are connected to each other. Information moves across the
network by being broken up into smaller chunks, called packets, that are routed in different paths and reassembled -- all in less than a second.
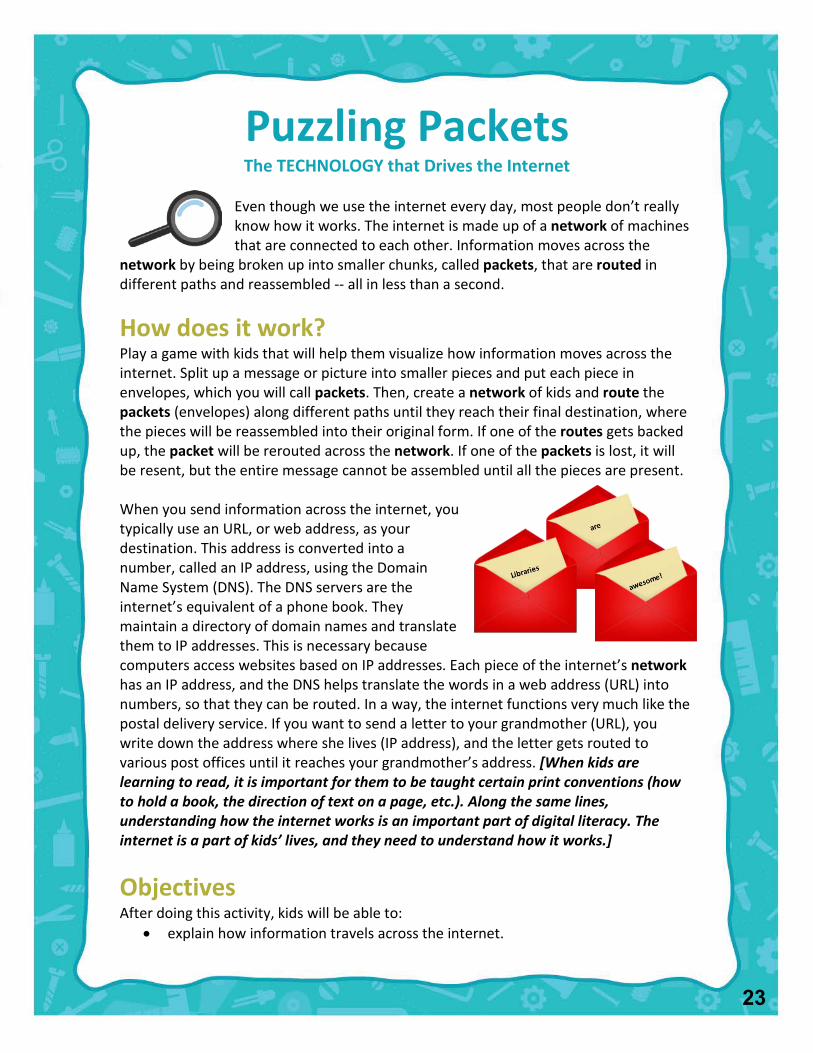
How does it work? Play a game with kids that will help them visualize how information moves across the internet. Split up a message or picture into smaller pieces and put each piece in envelopes, which you will call packets. Then, create a network of kids and route the packets (envelopes) along different paths until they reach their final destination, where the pieces will be reassembled into their original form. If one of the routes gets backed up, the packet will be rerouted across the network. If one of the packets is lost, it will be resent, but the entire message cannot be assembled until all the pieces are present.
When you send information across the internet, you typically use an URL, or web address, as your destination. This address is converted into a number, called an IP address, using the Domain Name System (DNS). The DNS servers are the internet’s equivalent of a phone book. They maintain a directory of domain names and translate them to IP addresses. This is necessary because computers access websites based on IP addresses. Each piece of the internet’s network has an IP address, and the DNS helps translate the words in a web address (URL) into numbers, so that they can be routed. In a way, the internet functions very much like the postal delivery service. If you want to send a letter to your grandmother (URL), you write down the address where she lives (IP address), and the letter gets routed to various post offices until it reaches your grandmother’s address. [When kids are learning to read, it is important for them to be taught certain print conventions (how to hold a book, the direction of text on a page, etc.). Along the same lines, understanding how the internet works is an important part of digital literacy. The internet is a part of kids’ lives, and they need to understand how it works.]
Objectives After doing this activity, kids will be able to:
• explain how information travels across the internet.
23

Let’s Try It! Start out by asking the kids how they think information travels on the internet. Explain that the internet is made up of a network of machines. When we send information via the internet, that information is broken up into smaller packets that get routed to different paths across the network. Then, the information is reassembled before being delivered to its final destination.
Here is a game you can play with kids that will demonstrate how all of this happens: You are the sender. Your job is to have a message or picture on a sheet of paper, which you will tear or cut into pieces. Do as many pieces as make sense for the size of your group -- for a smaller group, use four to six pieces; for a larger group, you’ll need more. You will then put each piece in a separate envelope and give the envelopes to a “server.”
Assign one of the kids to play the part of the server. Their job will be to split up the envelopes, or packets, and send them to different parts of the network.
The rest of the kids, except for one, can be machines on the network. Their job will be to pass the different packets among each other until all of the packets have reached the final destination. This is where you can have a little fun – you can have the kids spread out and toss the packets to each other. You can arrange them in random patterns so that some of them are closer to each other than others. The goal is to keep passing the packets from the server, along the network, to the last kid.
The job of the last kid is to be the website, or final destination, of the packets. When the “website” has received all of the packets, that last kid, the website, can open the envelopes and reassemble the original message or picture. To make it more fun, send this kid (the “website”) away from the group while you are tearing up the original paper and putting the pieces in envelopes. After you have completed one round, you can have different kids play the role of server or website.
Supplies • A piece of paper with a message or picture on it• Envelopes• Scissors (optional)
Knowledge Check • Kids will be able to describe how information is
sent across the internet.
24

Amazing Mentos! Try It at Home
You can try variations of this experiment at home, even if you don’t have Mentos. When you drop something into soda, you should see CO2 bubbles attach to the object and float upward. The CO2 is undergoing a physical reaction when it is converted to a gaseous form at nucleation sites on the object. Try it with salt, a stick of gum – anything that will fit in
the opening of a soda bottle. You can also observe gaseous CO2 bubbles form at nucleation sites on the side of the soda bottle when you shake it gently (don’t shake too hard or you’ll make a mess!).
Vocabulary: Gaseous Nucleation Site Physical Reaction
Elephant Toothpaste Try It at Home
This experiment may be too complex to do at home, but you can observe a chemical reaction with simple ingredients that you have in your cupboard. Play around with adding vinegar to different baking supplies – salt, baking powder, and baking soda. When you add the vinegar, which is a catalyst, to the baking soda, it breaks up the chemical bonds in the baking soda to form CO2 gas. You can observe that the vinegar makes the
baking soda fizz – a sure sign of a chemical reaction. If you put the vinegar in the bottom of a water bottle and put some baking soda in a balloon and cover the top of the bottle with the balloon, it should inflate when the baking soda falls down into the vinegar and releases CO2 gas. This is not an exothermic reaction, so you won’t observe any heat, but it’s still a lot of fun to watch!
Vocabulary: Catalyst Chemical Reaction
25

Exothermic Reaction
Plant a Seed (or some other task)Try It at Home
During this program, we followed an algorithm, or set of directions, to plant a seed -- which you can do at home. Or you can create your own algorithm for something new. Think of something that you know how to do really well – brush your teeth, unpack your lunch, play Pokémon, etc. Now, make step-by-step instructions indicating how you do it. You
can draw pictures, like our seed planting instructions, or write the instructions out. Then, see if someone else can accomplish the task by following your instructions, in sequence. If you forgot a step, revise your algorithm and start again.
Vocabulary: Algorithm Sequence
Marble Run Mania Try It at Home
You can make your own marble run at home by using tape, cardboard tubes, paper, and other recyclables. Try to build one that has a few different paths. See how high you can make it. During the construction process, you will probably run into several bugs, or problems, with your idea. Have persistence
and keep going. Try to debug the problem until you find something that works. Once you have it working, see if you can make it better or bigger.
Vocabulary: Bug Debugging Persistence
26

Gone Fishin’ Try It at Home
We created a fishing pole that is also a pulley – a simple machine that helps us pick up objects using less force. Use your fishing pole at home to see if there are other objects that you can pick up. Can you improve the performance of your pole by adding a second reel? Then, see if you recognize any other pulleys where you live. Try to use objects around your
house to create other pulleys.
Vocabulary: Simple Machine Pulley
Rubber Band Helicopters Try It at Home
The rubber band helicopter is powered by potential energy (stored in rubber bands) that is converted to kinetic energy. You can continue to observe how the helicopter uses energy, plus, you may want to see what else you can power using just rubber bands. Have you ever tried making a slingshot? When you pull the rubber band back on a slingshot, you are creating
potential energy. When you let it go, the energy is transferred to the object in your slingshot, and it is sent flying through the air. Just make sure not to aim it at anyone!
Vocabulary: Energy Kinetic Energy Potential Energy
27

DIY Pattern Blocks Try It at Home
You can make your own pattern blocks at home, even if you don’t have blocks! Just cut up a piece of paper into equal squares and draw patterns on them. You can start with squares that are divided diagonally in half and color one side black. Use these squares to create an infinite number of patterns. Then, experiment to create squares that form
continuous lines, like the ones in our activity, or some other type of pattern. You don’t even have to stick with squares – try other shapes like triangles, hexagons, rectangles, and rhombuses and see what types of patterns or pictures you can make with them.
Vocabulary Words: Pattern Infinite
Crack the Code Try It at Home
Make your own number line at home and assign different letters to the numbers. Create secret phrases that can only be decoded using your number line. Practice using the line to find the letters, and then create simple subtraction or addition problems that need to be solved in order to find the right letter.
Vocabulary Words: Addition Number Line Subtraction
28

Beautiful Bubbles Try It at Home
Make your own “bubble art” at home by combining paint, a tablespoon of water, and two tablespoons of dish soap in a cup or bowl. Use a straw to blow bubbles and then place a piece of thick paper on top of the bubbles. Transfer the paint to the paper and make a fun print.
Remember to observe that the bubble appears iridescent because it is reflecting light at different angles from both the inside and outside wall of the bubble. Even though the wall of the bubble is very thin and appears almost clear, it can still transfer paint.
Vocabulary Words: Iridescent Light Reflect
Puzzling Packets Try It at Home
This game might be hard to replicate at home by yourself, but you can definitely practice the concept. Information moves across the internet by being broken up into smaller chunks, or packets, which are sent in different paths across the network, and reassembled at their final destination.
Try cutting up a picture from a magazine and sealing the pieces in different envelopes. Pass the envelopes around to your friends or family (or even stuffed animals!) until they reach the end of your route. Then reassemble the pieces of paper (the packets).
Vocabulary Words: Network Packet Library!
29

Route
Additional Resources Amazing Mentos Steve Spangler Mentos Geyser Experiment Diet Coke and Mentos eruption on Wikipedia Diet Coke and Mentos: Mythbusters Picture Book: “Change It!: Solids, Liquids, Gases and You” by Adrienne Mason
Elephant Toothpaste Steve Spangler Kid-friendly Elephant Toothpaste Steve Spangler Exploding Elephant Toothpaste Rainbow Elephant’s Toothpaste DIY Elephant Toothpaste Board Book: “Baby Loves Quarks” by Ruth Spiro
Plant a Seed Real Life Algorithms Video from Code.org Real Life Algorithms Lesson Plan from Code.org Picture Book: “If You Plant a Seed” by Kadir Nelson
Marble Maze Mania Code.org lesson – Debugging: Unspotted Bugs Code.org Unspotted Bugs Video Code.org Marble Run Prep Online Book: Unspotted Bugs Picture Book: “The Most Magnificent Thing” by Ashley Spires
Gone Fishin’ Supercharged Science Lesson on Pulleys Teach Engineering Lesson on Pulleys Pulleys in Our Daily Life DIY Cardboard Fishing Pole Instructions Picture Book: “Rosie Revere, Engineer” by Andrea Beaty
Rubber Band Helicopters Instructables Step by Step Instructions The Physics Classroom – Potential Energy U.S. Energy Information Administration – What is Energy? Board Book: “Baby Loves Thermodynamics” by Ruth Spiro
30

Additional Resources DIY Pattern Blocks An explanation of pattern blocks and their relationship to math concepts DIY Pattern Blocks from Frugal Fun Infinity Tiles from Babble Dabble Do (takes this project to the next level) Picture Book: “Growing Patterns: Fibonacci Numbers in Nature” by Sarah C. Campbell
Crack the Code Creative Family Fun Number Line Code Creative Family Fun – How to Use a Number Line Picture Book: “Twelve Ways to Get to Eleven” by Eve Merriam
Beautiful Bubbles Steve Spangler Painting with Bubbles Exploratorium Bubble Colors Web Exhibits Causes of Colors Picture Book: “Big Bad Bubble” by Adam Rubin
Puzzling Packets Code.org Lesson: The Internet Code.org Beyond Programming: The Internet Code.org video: Packets, Routing, and Reliability Picture Book: “Rosie’s Walk” by Pat Hutchins
Socratic Questioning & the Scientific Method The Six Types of Socratic Questions Socratic Questioning Technique The Scientific Method for Kids Using the Scientific Method with Young Kids
Great Online Sources for More Science Zoom.sci activities from PBS.org Steve Spangler Science National Geographic Kids SciShow Kids (YouTube) Code.org
31

Vocabulary Amazing Mentos
Physical Reaction: a change in the physical properties of a substance, such as changing a liquid to a solid or gas. Gaseous: a way to describe something that has the physical characteristics of a gas. Nucleation: when the molecules of a substance rearrange themselves to change the physical state of the substance during a physical reaction.
Elephant Toothpaste Chemical Reaction: a process that breaks down the bonds of one chemical substance to form another chemical substances or substances. Catalyst: something that speeds up a chemical reaction. Exothermic Reaction: a type of chemical reaction that releases energy, causing a substance to be warm to the touch.
Plant a Seed Algorithm: a set of directions or rules. Sequence: a particular order in which a set of related events or objects follow each other.
Marble Run Mania Bug: part of a program that does not work correctly. Debugging: finding and fixing problems in an algorithm or program. Persistence: trying again and again, even when something is very difficult.
Gone Fishin’ Simple Machine: something that gives you a mechanical advantage by decreasing the amount a force needed to move an object. Pulley: a type of simple machine that sacrifices distance for force – the greater distance that you pull something using a pulley, the less force you need.
32

Vocabulary Rubber Band Helicopters
Energy: the ability to do work. Kinetic Energy: energy that occurs when an object is in motion. Potential Energy: stored energy in an object.
DIY Pattern Blocks Infinity: an amount that has no limit. Pattern: a repeated design.
Crack the Code Number Line: a visual aid that helps to show the relationship between numbers. Addition: calculating the total of two things; the process of adding one number to another. Subtraction: the process of taking one thing or number away from another.
Beautiful Bubbles Iridescent: something that has many colors that seem to change when seen from different angles. Light: a source of illumination; something that makes other things visible. Reflection: a sending back of light, or something else, without absorbing it.
Puzzling Packets Network: a group of things that are connected to one another. Packets: small chunks of information that have been carefully formed from larger chunks of information. Routing: finding the best path through a network.
33

Marketing You can use the sample posts below to market your program on Facebook, Twitter, Instagram, or other social media platforms. If needed, change the content so it makes sense for your library. Extra hashtags are included for platforms like Instagram, but you certainly don’t need to use them all. There are also sample images for social media posts on our website at http://libraries.idaho.gov/page/summer-stem-your-library-micro-grants. These work great for advertising your program ahead of time on Facebook or Twitter. You may want to use actual pictures from your program for Twitter and Instagram.
Amazing Mentos Mentos + soda, what could go wrong? We’re learning about physical reactions at this week’s #SummerSTEM program. There might be explosions. #SummerSTEM #IdahoLibraries #stemeducation #mentos #stevespangler #SummerReading #SummerLibraries #physicalreaction
Elephant Toothpaste Want to make foam big enough for an elephant’s toothbrush? Check out this week’s #SummerSTEM program and learn about a chemical reaction of epic proportions. #SummerSTEM #IdahoLibraries #stemeducation #stevespangler #SummerReading #SummerLibraries #chemicalreaction #catalyst #thefoamiswarm
Plant a Seed What do planting a seed and computer science have in common? Come to this week’s #SummerSTEM program and find out! #SummerSTEM #IdahoLibraries #stemeducation #SummerReading #SummerLibraries #algorithms #computerscience #followdirections
Marble Run Mania This week’s #SummerSTEM program is all about solving problems. It’s very serious and we probably won’t have any fun – just kidding! We’re playing with marbles! It’s going to be AWESOME! #SummerSTEM #IdahoLibraries #stemeducation #SummerReading #SummerLibraries #findthebug #code.org #computerscience #debugging
Gone Fishin’ We’re going fishing at the library! We’ll learn about simple machines and make our own fishing poles – maybe we’ll even catch something! #SummerSTEM #IdahoLibraries #stemeducation #SummerReading #SummerLibraries #simplemachines #pulleysrock #fishing #IdahoFishing
34

Marketing Rubber Band Helicopters Look up in the sky! It’s a bird! It’s a plane! No, it’s our amazing rubber band helicopters that demonstrate the properties of energy! Come to this week’s #SummerSTEM program and make one of your own! #SummerSTEM #IdahoLibraries #stemeducation #SummerReading #SummerLibraries #potentialenergy #kineticenergy #energy #helicpoters
DIY Pattern Blocks Already bored this summer? Come to this week’s #SummerSTEM program to make your own pattern blocks and see how many patterns you can create (hint: it’s an infinite number – that should keep you busy!) #SummerSTEM #IdahoLibraries #stemeducation#SummerReading #SummerLibraries #funwithblocks #patterns #funwithpatterns #infinitepatterns
Crack the Code Think you’ve got what it takes to crack our secret code? Check out this week’s #SummerSTEM program and learn how to crack our code and make your own. It’s math, but it’s fun! #SummerSTEM #IdahoLibraries #stemeducation #SummerReading #SummerLibraries #funwithmath #numberlines #secretcodes
Beautiful Bubbles Have you ever wanted to paint with bubbles? You can try it out AND learn a little science at this week’s #SummerSTEM program. #SummerSTEM #IdahoLibraries #stemeducation #SummerReading #SummerLibraries #stevespangler #bubbles #art #STEAM #SummerSTEAM #colorsarefun
Puzzling Packets Even though it can seem that the internet is magic, it actually runs off some pretty cool technology. Come to this week’s #SummerSTEM program and learn how information travels across the internet. We promise, it’s more fun than it sounds! #SummerSTEM #IdahoLibraries #stemeducation #SummerReading #SummerLibraries #code.org #packets #technology
35

Idaho Commission for Libraries 325 West State Street
Boise ID 83702 208-344-2150
Visit us at http://libraries.idaho.gov
36