a.k.a “wood butcher -...
TRANSCRIPT

Military Small Arms/Ammo Pen Box, Oorah!
Contributed by: Bill Bettag
A.K.A “Wood Butcher”
This tutorial was downloaded from
http://www.penturners.org
The International Association of Penturners - 2016

Downloaded from http://www.penturners.org Page 1 of 3
Military Small Arms/Ammo Pen Box, Oorah! By Bill Bettag, AKA Wood Butcher
This started off as a gift for a friend who has served for over 30 years and will hang up his stripes the end
of the year. I thought it was a fun project and may be of interest to those who have served or know
someone who has that would appreciate the thought and craftsmanship.
This is what I based the design on, got it from the "interweb":
You can adapt this for Navy, Marines or the "Red Neck Army" that
lives in the hills waiting for the zombie apocalypse. I made up the
decals in a word processor file and test printed on plain paper
before using the full sheet of Ink Jet decal paper. You might want
to get these printed so they can be drying and you can seal them.
This is a fairly simple and quick project that requires almost no cost and a few hours of work. I began with
a scrap piece of poplar about 14" long x 7" wide x 3/4" thick. I resawed the board on the table saw using
a thin kerf Forrest WW2 blade so there would be no need for the planer or drum sander. I cut the "slats
5/16" thick and 2" deep then sawed apart at 2" wide.
At the bandsaw I cut all pieces to size planning the cuts so the set up only took a few steps.
The sizes of the parts are as follows:
Bottom - 6 1/2" x 2" x 5/16"
Top - 6 1/2" x 2 1/4" x 5/16"
End pieces - 11/2" x 1 3/8" x 5/16" (2 pcs.)
Trim strips - 14" long (plus or minus) x 1/4" x 1/8" thick - you will use a lot of these
Inserts 1-1/8" x 1" high x 5/16" (made by drilling a 5/8" dia hole with a Forstner bit in the center
then cutting in half).
A light sanding to remove fuzz and here's what I ended up with:
Downloaded from http://www.penturners.org Page 2 of 3
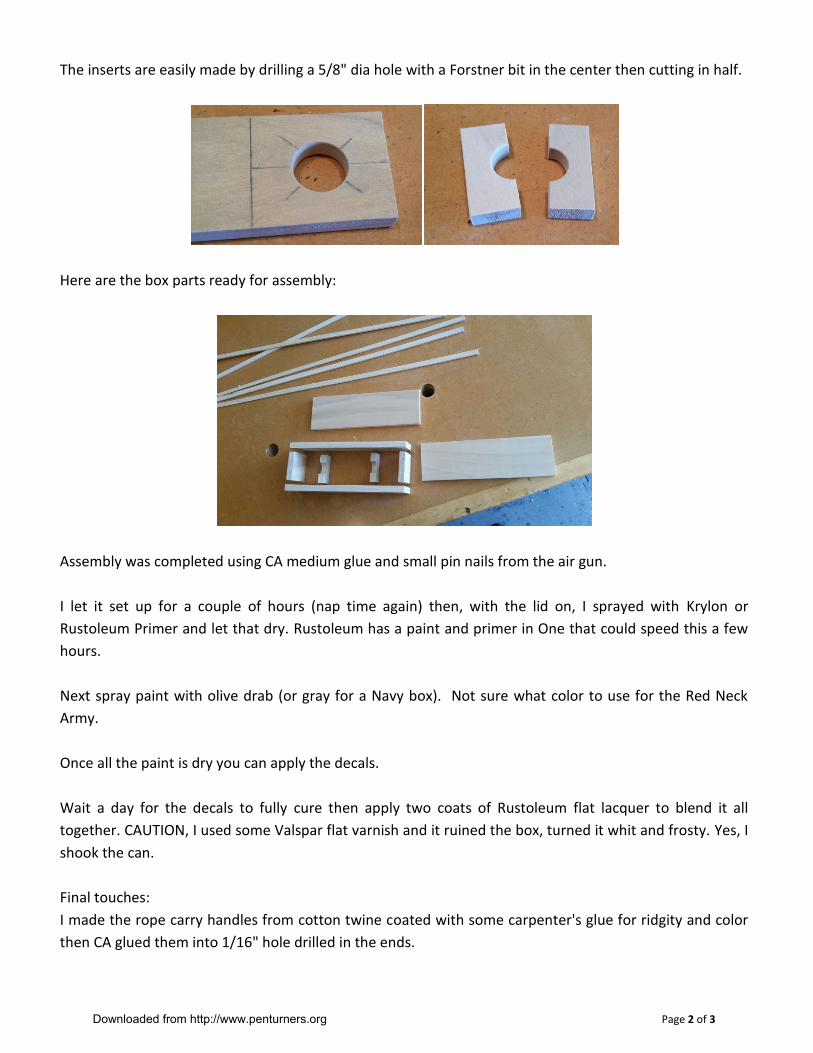
The inserts are easily made by drilling a 5/8" dia hole with a Forstner bit in the center then cutting in half.
Here are the box parts ready for assembly:
Assembly was completed using CA medium glue and small pin nails from the air gun.
I let it set up for a couple of hours (nap time again) then, with the lid on, I sprayed with Krylon or
Rustoleum Primer and let that dry. Rustoleum has a paint and primer in One that could speed this a few
hours.
Next spray paint with olive drab (or gray for a Navy box). Not sure what color to use for the Red Neck
Army.
Once all the paint is dry you can apply the decals.
Wait a day for the decals to fully cure then apply two coats of Rustoleum flat lacquer to blend it all
together. CAUTION, I used some Valspar flat varnish and it ruined the box, turned it whit and frosty. Yes, I
shook the can.
Final touches:
I made the rope carry handles from cotton twine coated with some carpenter's glue for ridgity and color
then CA glued them into 1/16" hole drilled in the ends.
Downloaded from http://www.penturners.org Page 3 of 3
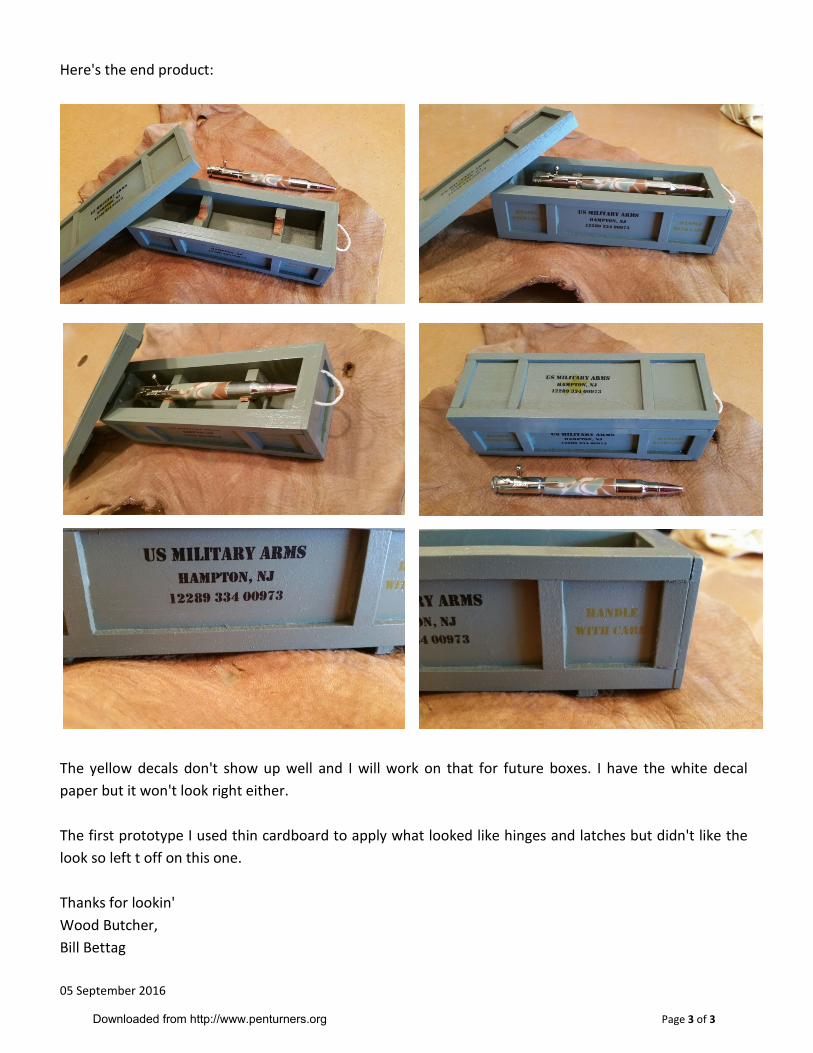
Here's the end product:
The yellow decals don't show up well and I will work on that for future boxes. I have the white decal
paper but it won't look right either.
The first prototype I used thin cardboard to apply what looked like hinges and latches but didn't like the
look so left t off on this one.
Thanks for lookin'
Wood Butcher,
Bill Bettag
05 September 2016