adobe illustrator. work area tool bar menu bar options bar active image area title bar palettes new...
TRANSCRIPT

Adobe Adobe IllustratorIllustrator

Work AreaWork Area
Tool barTool bar
Menu BarMenu BarOptions BarOptions Bar
Active Image AreaActive Image Area
Title BarTitle Bar
PalettesPalettes
New DocumentNew Document

Creating a New DocumentCreating a New Document
• FILE > New• Type in correct size
and orientation.• Select inches for
Units• Color Mode MUST
be CMYK

Tool BarTool BarWebsiteWebsite
Selection (V)Selection (V)
Magic Wand (Y)Magic Wand (Y)
Pen (P)Pen (P)
Line Segment (\)Line Segment (\)
Paintbrush (B)Paintbrush (B)
Rotate (R)Rotate (R)
Warp (Shift + R)Warp (Shift + R)
Symbol Sprayer (Shift + S)Symbol Sprayer (Shift + S)
Mesh (U)Mesh (U)
Eyedropper (I)Eyedropper (I)
Live Paint Bucket (K)Live Paint Bucket (K)
Slice (Shift + K)Slice (Shift + K)
Hand (H)Hand (H)
Fill (X)Fill (X)
Default Fill & Stroke (D)Default Fill & Stroke (D)
Color (>) & Gradient (<) None (/)Color (>) & Gradient (<) None (/)
Standard Screen Mode (F)Standard Screen Mode (F)
WebsiteWebsite
Direct Selection (A)Direct Selection (A)
Lasso (Q)Lasso (Q)
Type (T)Type (T)
Rectangle (M)Rectangle (M)
Pencil (N)Pencil (N)
Scale (S)Scale (S)
Free Transform (E)Free Transform (E)
Column Graph (J)Column Graph (J)
Gradient (G)Gradient (G)
Blend (W)Blend (W)
Live Paint Selection (Shift + L)Live Paint Selection (Shift + L)
Scissors (C)Scissors (C)
Zoom (Z)Zoom (Z)
Swap Fill & Stroke (Shift X)Swap Fill & Stroke (Shift X)
Stroke (X)Stroke (X)
Full Screen Mode (F)Full Screen Mode (F)
Full Screen W/ Menu Bar (F)Full Screen W/ Menu Bar (F)

Type ToolType Tool
• Area Type• Type on Path• Vertical Type• Vertical Area
Type• Vertical Type
on a Path

Type ToolType Tool• Type Tool (T) ~ Creates normal type ~
Type>Fonts allows you to see the style of font
• Area Type Tool & Vertical Area Type Tool (Tear off Type Tool) ~ Allows you to click on a shape and type with in it. Very similar to creating a Text Box.

Type ToolType Tool• Type on Path Tool & Vertical Type on
Path Tool (Tear off Type Tool) ~ Allows you to select a shape or line that you want your type to fit to.
• Vertical Type Tool (Tear off Type Tool) ~ Allows you to type vertically.

Selection ToolSelection Tool• Selection Tool (V) ~
Allows you to click on an object with the largest group containing that object. – Can select multiple groups
by clicking and dragging over the desired objects OR by using the shift key and clicking on the objects.

Selection ToolSelection Tool• The Bounding Box ~ It appears around selected
objects when you are using the selection tool and can be used for quick moving, scaling, rotating, or duplicating objects. – To constrain proportions while scaling, hold down
the shift key and drag a corner. – If you rotated an object and
want to reset the bounding box go to Object>Transform>Reset Bounding Box.

Direct Selection ToolDirect Selection Tool• Direct Selection Tool (A) ~
Allows you to select a specific object within a group of objects.– Selecting directly on the stroke
line w/ the DST allows you to manipulate the anchor points (they will show up white inside instead of blue) and handles.

Group Selection ToolGroup Selection Tool• Group Selection
Tool (Tear off DST) ~ Allows you to select sub groupings progressively.

Shape ToolShape Tool• Geometric Shapes (M) & (Tear off
rectangle tool) ~ The rectangle, rounded rectangle, ellipse, polygon, star, and flare tool.– Use the shift key to constrain the object’s
proportions.– Use the alt & shift key to create the object from the
center out.

Shape ToolShape Tool– Use up and down arrows to increase or decrease the
# of points on a star and sides on a polygon.– Use Option/Alt to increase the angle of the star’s
points.– After choosing the shape double click on the active
work space to type in exact proportions.

Warp ToolWarp Tool• Warp Tool (Shift + R) & Twirl, Pucker,
Bloat, Scallop, Crystallize, and Wrinkle Tools (tear off warp tool) – The liquify distort tools allow you to distort objects
manually by dragging the mouse over them. Use the Alt key to resize the Liquify brush as you drag.

Freeform ToolFreeform Tool• Free Transform Tool (E) ~ It is an easy
way to transform objects once you have learned the numerous keyboard combinations to take advantage of its functions. – Rotate ~ Click outside the bounding box and drag.– Scale ~ Click on the corner of the bounding box
and drag. Alt-drag to scale from the center and shift-drag to scale proportionally.

Freeform ToolFreeform Tool– Distort ~ Click on a corner handle of the bounding
box and ctrl-drag.– Shear ~ Click on a side handle of the bounding box
and ctrl-drag the handle.– Perspective ~ click on a corner handle of the
bounding box and ctrl-alt-drag.

Zoom ToolZoom Tool• Zoom Tool (Z) ~ Allows you to zoom in 1
level of magnification. – Hold down the Alt key to zoom out 1 level.– You can click-drag to define a specific area you
want to zoom in to.

Hand ToolHand Tool• Hand Tool (H) ~ Allows you to move your
active work space all around your monitor.– Double clicking on the hand tool will
automatically fit your page back to normal view.
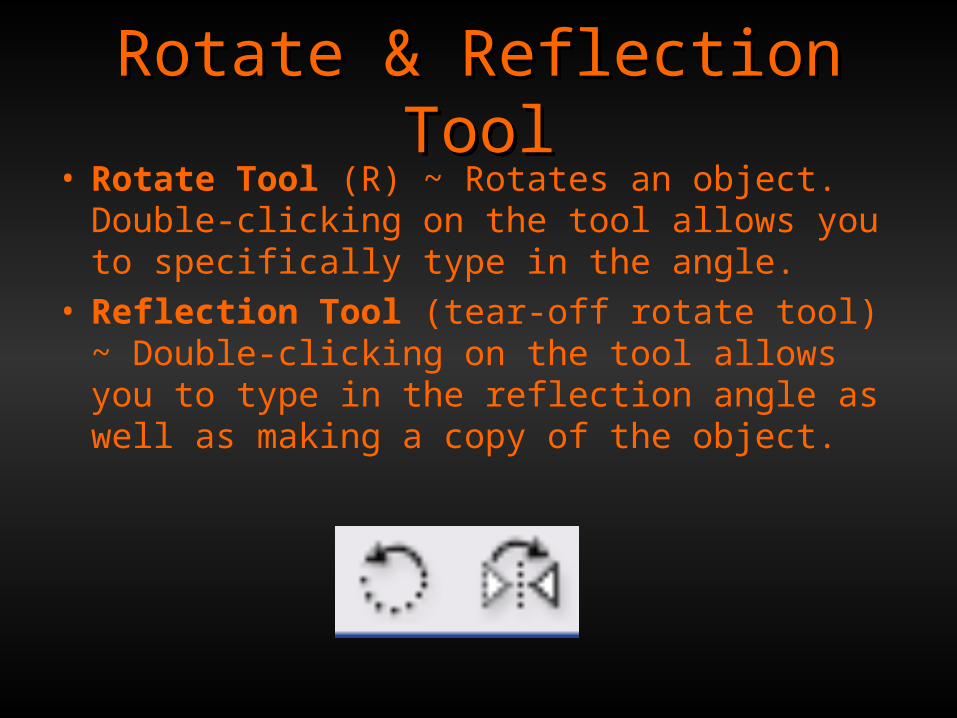
Rotate & Reflection ToolRotate & Reflection Tool• Rotate Tool (R) ~ Rotates an object.
Double-clicking on the tool allows you to specifically type in the angle.
• Reflection Tool (tear-off rotate tool) ~ Double-clicking on the tool allows you to type in the reflection angle as well as making a copy of the object.

Fill & Stroke ToolFill & Stroke Tool• The Fill square is the active color of
the selected objected. • The Stroke is the color of the outline.• The swap arrows switch the Fill color
and the Stroke color.

Fill Tool (Color Picker)Fill Tool (Color Picker)• Fill Color• Color Slider• Hue• Saturation• Brightness• Color #

Eye Dropper ToolEye Dropper Tool• Eyedropper Tool (I) ~ Picks up stroke,
fill, color, and text attributes from other objects by simply selecting the object you want to change and clicking on the other object with the eyedropper.

Pencil ToolPencil Tool• Pencil Tool (N) ~ Reshapes a selected path
when Edit selected paths is checked in the tools preferences. Select a path and draw on or close to the path to reshape it.
• Smooth Tool (tear off pencil tool) ~ Smooths the points on already-drawn paths by smoothing corners and deleting points.
• Erase tool (tear off pencil tool) ~ Removes sections of a selected path. You must draw along the path for it to work.

Line Segment ToolLine Segment Tool• Line Segment Tool (\) ~ Creates straight
lines w/ a beginning and ending anchor point by simply clicking and dragging.

Line Segment ToolLine Segment Tool• Arc Tool (tear off L.S. Tool) ~ Draws arcs
by clicking and dragging. Press the “F” key to flip the arc from convex to concave, and use the up and down arrow keys to adjust the radius of the arc. Pressing the “C” key will close the arc by drawing the perpendicular lines that form the axes, and pressing the “X” key will flip the arc w/out moving the axes.

Line Segment ToolLine Segment Tool• Spiral Tool (tear off L.S. Tool) ~ Draws a
spiral. Use the up or down arrow to increase or decrease the amount of anchor points.
• Rectangular & Polar Grid Tool (tear off L.S. Tool) ~ Draws a round or rectangular grid by click-dragging. Double clicking on the icon will allow you to change the amount of lines in the grid.

Paintbrush ToolPaintbrush Tool• Paintbrush Tool (B) ~ Allows you to use
various brushes in the Brush Palette. – Brush size ~ Use the stroke Palette.– Transparency ~ Use the transparency Palette.– Angel, roundness, diameter ~ Double click on
the Objects of selected Objects icon at the bottom of the brush palette to create custom brushes.

Scissors ToolScissors Tool• Scissors Tool (C) ~ Cuts
a path where you click by adding 2 disconnected, selected anchor points exactly on top of each other.– To select just 1 of the points,
deselect the object, than click with the direct selection tool on the spot where you cut.

Knife ToolKnife Tool• Knife Tool (tear off pen tool) ~ Slices
through all unlocked visible objects and closed paths. Simply drag the knife across the object you want to slice, then select the object(s) you want to move or delete.

Gradient ToolGradient Tool• Gradient Tool (G) ~ Allows you to change
the direction and the flow of a gradient by simply selecting the object and clicking and dragging over the selected object. – The longer you drag the cursor over the
selected object the more of an even blend will occur.

Pen ToolPen Tool• Pen Tool (P) ~ The main drawing
tool in AI and allows you to create multiple anchor points which makes up a vector drawing.– One single mouse click with the pen tool
will create an anchor point without a handle allowing you to create straight lines.
– Clicking and holding down the mouse button will create handles on your anchor points that will help you create curved lines.

Pen ToolPen Tool• Add Anchor Point Tool (tear off pen tool
or hold down the + key) ~ Adds an anchor point to a path.
• Delete Anchor Point Tool (tear off pen tool or hold down the - key) ~ Deletes an anchor point when you click directly on a path.
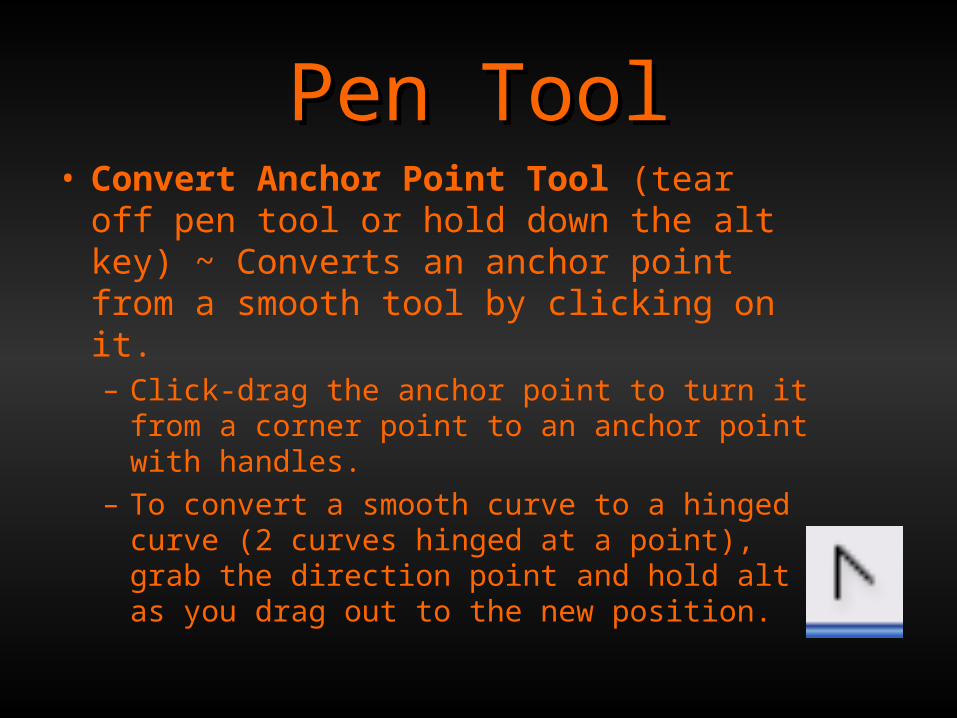
Pen ToolPen Tool• Convert Anchor Point Tool (tear off
pen tool or hold down the alt key) ~ Converts an anchor point from a smooth tool by clicking on it. – Click-drag the anchor point to turn it from
a corner point to an anchor point with handles.
– To convert a smooth curve to a hinged curve (2 curves hinged at a point), grab the direction point and hold alt as you drag out to the new position.

Blend ToolBlend Tool• Blend Tool (W) ~ Allows you to specify blend options with 2 or
more paths. • After drawing shapes and filling them with color double click on
the blend tool to select either specified steps or smooth color and click on each of the shapes in succession.
• Click on DST, select where one shape is, notice you can move each shape apart from the others as well as change the path and points.

Gradient Mesh ToolGradient Mesh Tool• Mesh Tool (U) ~ Allows you to create Gradient
Meshes.
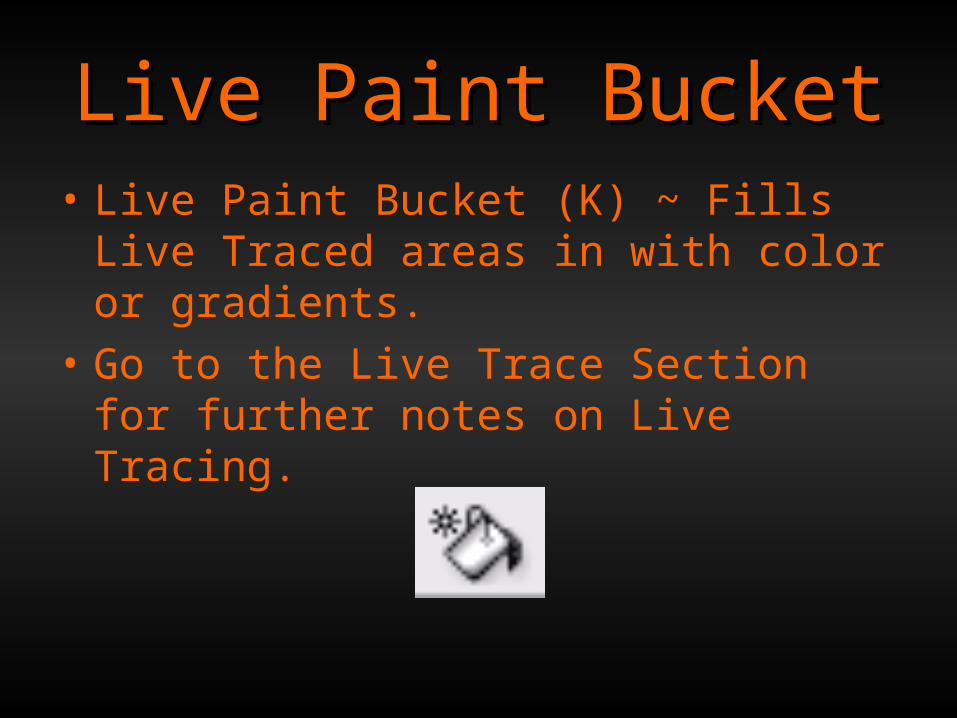
Live Paint BucketLive Paint Bucket• Live Paint Bucket (K) ~ Fills Live
Traced areas in with color or gradients.
• Go to the Live Trace Section for further notes on Live Tracing.

Character PaletteCharacter Palette• The character
palette allows a designer to change the font:
• family• style • size • kern • leading • tracking

Color PaletteColor Palette• The Color Palette is a collection of tools that
allows you to mix and choose the colors for your artwork.
• In addition to the sliders and edit fields for locating precise colors, a None button is included.
• When using the slider, holding the Shift key
down as you slide a color keeps everything
equal.

Swatches PaletteSwatches Palette• The swatch palette allows you to look at color,
gradient, or pattern swatches• To save colors you’ve mixed in the Color Palette,
drag them to the Swatches palette from the Color palette.

Navigator PaletteNavigator Palette• The Navigator palette allows you to quickly zoom
in or out and change the viewing area with the help of the palette thumbnail.
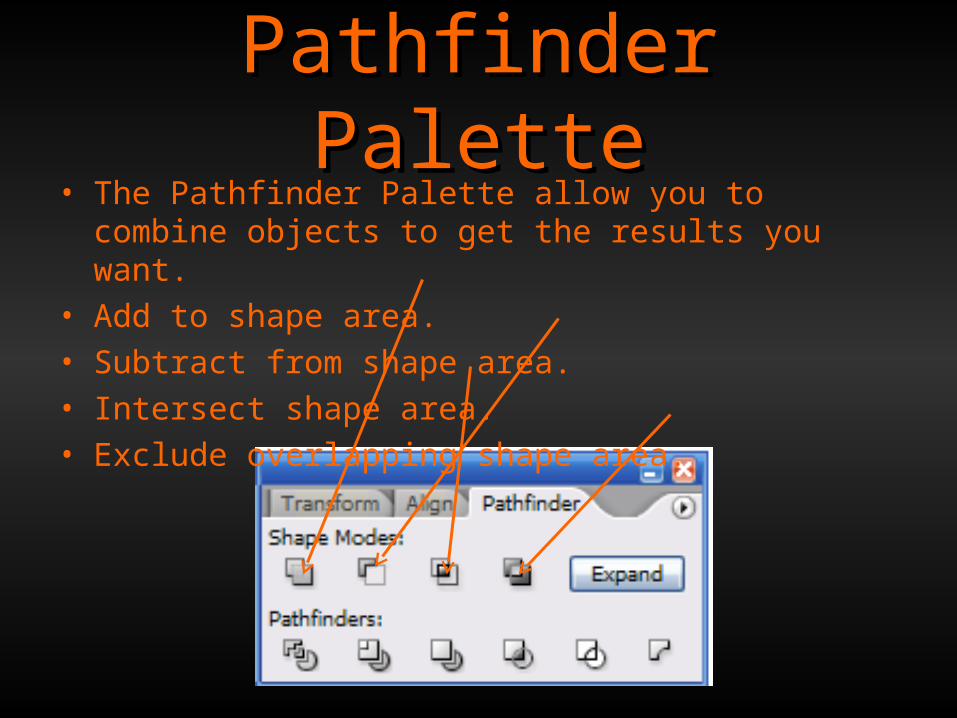
Pathfinder PalettePathfinder Palette• The Pathfinder Palette allow you to combine
objects to get the results you want.• Add to shape area.• Subtract from shape area.• Intersect shape area.• Exclude overlapping shape area.

Graphic Styles PaletteGraphic Styles Palette• Graphic Styles are saved preset graphics
or graphic styles that you have saved.

Gradient PaletteGradient Palette• The Gradient Palette allows you to choose
between radial and linear and the angle of the gradient.
• To change the color of a gradient click on the color square which will darken the triangle. Choose a new color by either going to the Color Palette and
selecting a color or go to the swatch palette and when selecting a color hold down the Alt key.

Symbols PaletteSymbols Palette• The Symbols Palette consists of preset or
created artwork that is stored.• To change the colors of a symbol, select
the symbol, right click on the symbol, and choose Break Link.

Stroke PaletteStroke Palette• The Stroke is the weight of the outline of an
image.• End lines can be changed with these options.• Corner shapes can be changed with these
options.• Dashed lines can be created in the Stroke Palette as well.
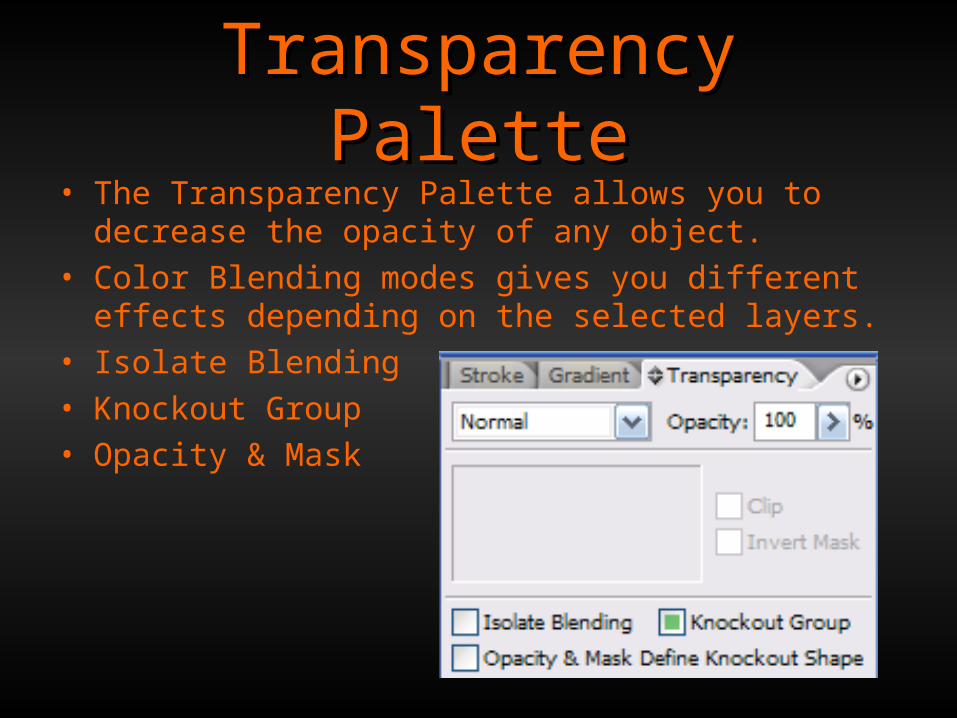
Transparency PaletteTransparency Palette• The Transparency Palette allows you to decrease
the opacity of any object.• Color Blending modes gives you different effects
depending on the selected layers.• Isolate Blending • Knockout Group• Opacity & Mask

Brushes PaletteBrushes Palette• The Brushes Palette allows you to choose from a
variety of preset brushes.

Appearance PaletteAppearance Palette• The Appearance tab allows
you to delete or edit a style, stroke, or fill.
• To edit a style click on the fx icon.
• To delete a style select on the style and drag it to the trash can.
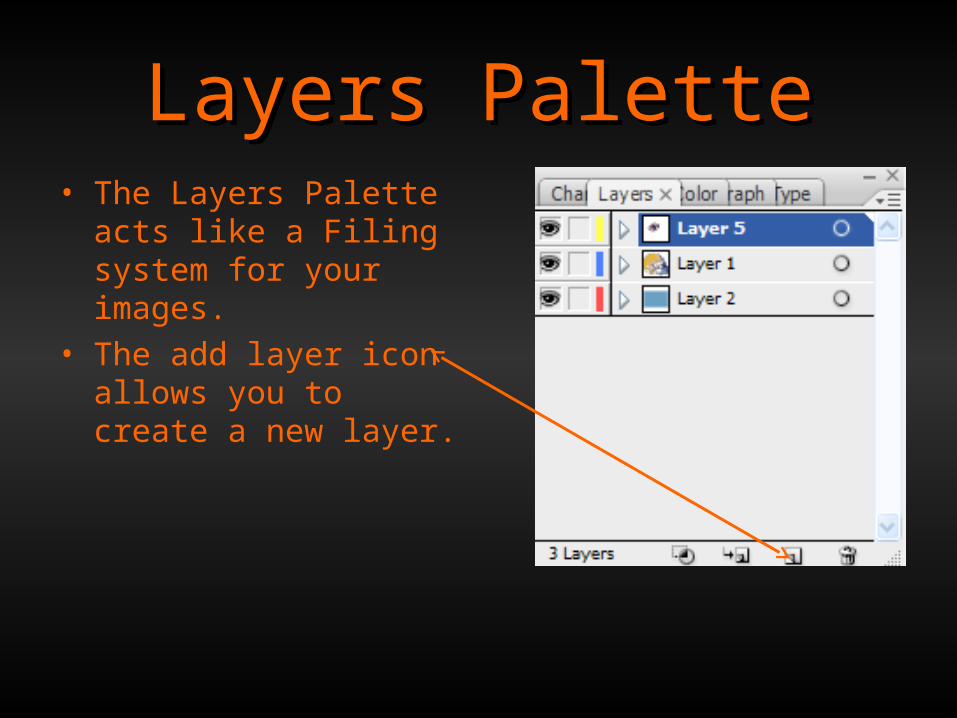
Layers PaletteLayers Palette• The Layers Palette
acts like a Filing system for your images.
• The add layer icon allows you to create a new layer.

Create OutlinesCreate Outlines• Creating outlines for type changes the type from
a font to an object and allows gradients and type manipulation to occur.
• To create outlines:– Select the type– Select Type>Create Outlines

Clipping MaskClipping Mask• A Clipping Mask gathers all the selected objects
into a group and converts the topmost object in that group into a mask.
• Select the objects you want to “clip” making sure the shape you want is on the top layer and select Object> Clipping Mask>Make.