addendum - frank's hospital workshop · retic dataplot, 22 algorithm revision numbers, 22 ......
TRANSCRIPT
PN 4237411 C (May 1999)
COULTER CORPORATIONA Beckman Coulter CompanyMiami, Florida 33196-2500 USA
COULTER® GEN•S System
Addendum
TM GEN S
* SYSTEM RUN *05/03/95 0000
COPYRIGHT 1989 - 1995COULTER CORPORATION
STATUS : READYALERT:
MAIN
BP CBC DIFF RETICS
TURBO
RESET
GEN•S
POWER
TM
R
READ ALL PRODUCT MANUALS AND CONSULT WITH BECKMAN COULTER-TRAINED PERSONNELBEFORE ATTEMPTING TO OPERATE INSTRUMENT.
HAZARDS AND OPERATIONAL PRECAUTIONS AND LIMITATIONS
WARNINGS, CAUTIONS, and IMPORTANTS alert you as follows:
WARNING - Might cause injury.CAUTION - Might cause damage to the instrument.IMPORTANT - Might cause misleading results.
CAUTION System integrity might be compromised and operational failures might occur if:
r This equipment is used in a manner other than specified. Operate the instrument as instructed in the Product Manuals.
r You introduce software that is not authorized by Beckman Coulter into your computer. Only operate your system’s computer with software authorized by Beckman Coulter.
r You install software that is not an original copyrighted version. Only use software that is an original copyrighted version to prevent virus contamination.
Beckman Coulter, Inc. urges its customers to comply with all national health and safety standards such as the use of barrier protection. This may include, but it is not limited to, protective eyewear, gloves, and suitable laboratory attire when operating or maintaining this or any other automated laboratory analyzer.
WARNING Risk of operator injury if all covers are not secured in place prior to instrument operation or you attempt to replace a part without carefully reading the replacement instructions. Do not attempt to replace any component until you carefully read the instructions for replacing the component.
IMPORTANT If you purchased this product from anyone other than Beckman Coulter or an authorized Beckman Coulter distributor, and, if it is not presently under a Beckman Coulter service maintenance agreement, Beckman Coulter cannot guarantee that the product is fitted with the most current mandatory engineering revisions or that you will receive the most current information bulletins concerning the product. If you purchased this product from a third party and would like further information concerning this topic, call your Beckman Coulter Representative.
LEGAL NOTES
iPN 4237411C
This document applies to the latest software listed and higher versions. When a subsequent software version changes the information in this document, a new issue will be released.
REVISION STATUS
Issue A, 4/97Software version, 1C.
Issue B, 11/97Software Version 1D1. Converted from Help Version 1.972371.
Issue C, 4/99Software Version 2C. Converted from Help Version 2C.990741.

PN 4237411C ii
REVISION STATUS
PN 4237411C iii
CONTENTS
UPDATES FOR YOUR MANUAL, 1
DOCUMENT OVERVIEW, 1Online Help and this Addendum , 1Previous Versions of this Addendum , 1How to Use This Addendum , 1
OPERATOR’S GUIDE--GEN•S, 3
ADDING A SAMPLE REQUEST TO THE ToDo LIST , 3
ADDING A TEST TO AN EXISTING SET OF SAMPLE RESULTS, 3
AFTER # RUNS , 4
ARCHIVE FILENAME FIELD , 4
AUTO STOP , 5
AUTONUMBERING & STARTING AT FIELDS , 5
AUTOVALIDATION OVERVIEW , 6Autovalidation Example, 7
AUTOVERIFICATION CRITERIA , 9
CHANGING YOUR PASSWORD , 9
CHECKING DAILY TEST RESULTS , 10
CONTROLS FIELD , 11
CYCLING CONTROLS IN AUTOMATIC ASPIRATION MODE , 11
CYCLING CONTROLS IN MANUAL ASPIRATION MODE , 11
DATABASE & ToDo TREE LIST , 12
DATABASE NAVIGATION BUTTONS , 13
DEFINING REFLEX MANAGER CRITERIA , 14
DELETE PATIENT SAMPLE , 14
DETAILED DESCRIPTION OF RULE FIELD , 15
DIFF FLAG PREFERENCES , 15
DRAWN DATE , 16
ENABLE VALIDATION , 16
FLAGS AND CODES , 16Flags, 17Codes, 18

PN 4237411C iv
CONTENTS
GEN•S report format—chartable report , 18Algorithm Revision Numbers, 18Report Comments, 18Printed Report Footer, 18
GEN•S REPORT FORMAT—IN-LAB REPORT , 20Algorithm Revision Numbers, 20Report Comments, 20Printed Report Footer, 20
MAXM-LIKE REPORT FORMAT , 22Retic Dataplot, 22Algorithm Revision Numbers, 22Report Comments, 22Printed Report Footer, 22
NO MATCH , 23
NO READ , 24
ONYX-LIKE REPORT FORMAT--CHARTABLE REPORT , 24Algorithm Revision Numbers, 24Report Comments, 24Printed Report Footer, 24
ONYX-LIKE REPORT FORMAT-IN LAB REPORT , 26Algorithm Revision Numbers, 26Report Comments, 26Printed Report Footer, 26
PARTIAL ASPIRATION , 28
PATIENT RECORDS DELETION WINDOW , 28
PRINTING , 29Printing Help Topics, 29
PROCESSING RESULTS OVERVIEW , 29Flagging, 29Rules for Flagging Results (Decision Rules & Criteria), 30Processing Flagging Limits, 30
REPLACE DLE E WITH DLE C , 32
REPORT FORMAT , 32
RUN CONFIGURATION WINDOW , 32
RUNNING LATEX CONTROL—DIFF , 33
RUNNING LATEX CONTROL—DIFF AND RETIC , 35
RUNNING LATEX CONTROL—RETIC , 36
PN 4237411C v
CONTENTS
SETTING UP AUTOVALIDATION , 38Enable AutoValidation Codes, 38Enable AutoVerification Criteria, 38Setup Decision Rules, 39
SETTING UP CONTROLS , 40
SETTING UP DATE AND TIME , 41
SETTING UP FLAGGING LIMITS , 42
SETTING UP LIS / HIS COMMUNICATIONS , 44
SETTING UP REPORTING UNITS , 45
SETTING UP RULES FOR FLAGGING SAMPLE RESULTS , 45
SETTING UP WHICH RESULTS TO TRANSMIT AUTOMATICALLY , 47
SPECIFIC FLAGS , 47
SPECIFYING LATEX REFERENCE VALUES , 48
STKS-LIKE REPORT FORMAT , 48Algorithm Revision Numbers, 48Report Comments, 48Printed Report Footer, 48
STORING SPECIMENS , 50Venipuncture Specimens, 50Capillary Specimens, 50
SUSPECT AND DEFINITIVE MESSAGES , 50Suspect Messages, 50Definitive Messages, 53
SYSTEM STOP CRITERIA , 54
TIP: ARCHIVING INFORMATION , 54
TURNING AUTOSTOP OFF/ON , 55
USING HELP , 55Accessing Help, 55Related Information, 56Jumping to Additional Information, 56Tips, 56Printing Help Topics, 56Working with the Help Window, 56Videos, 56
VALIDATE SAMPLE , 57
VALIDATION CODES AND MESSAGES , 57
PN 4237411C vi
CONTENTS
VERTICAL SCROLL BAR , 59
VIEWING DATABASE COUNT INFORMATION , 59
XB ANALYSIS , 59Overview, 59Using XB/XM, 60Setup Options, 60Reviewing XB/XM Analysis Information, 60
YEAR 2000 , 61
SPECIAL PROCEDURES AND TROUBLESHOOTING--GEN•S, 63
CALIBRATING CBC PARAMETERS WITH WHOLE BLOOD , 63
CALIBRATING CBC PARAMETERS WITH S-CAL® CALIBRATOR , 64
PERFORMING CARRYOVER CHECK , 64
PERFORMING REPRODUCIBILITY CHECK -- CBC (N=10) , 65
ENABLING/DISABLING BLOOD DETECTOR , 66
SETTING UP ANALYZER DATE AND TIME , 66
SETTING UP WORKSTATION CALIBRATION INFORMATION , 67
TROUBLESHOOTING OVERVIEW , 68Data Review, 68Workstation Troubleshooting, 68Electronic Troubleshooting, 68Pneumatic/Hydraulic Troubleshooting, 69Reagent Troubleshooting, 70
WORKING WITH ELECTRONIC HISTORY LOGBOOKS , 70
OPERATOR’S GUIDE--SLIDEMAKER, 71
AUTO CLEAR , 71
CHECKING SMEAR QUALITY , 71Characteristics of a Good Smear, 72
CLEANING THE DISPENSE PROBE AND RINSE CUP , 73
DEFINE SMEAR SPEED OVERVIEW , 77
DEFINE SMEAR SPEED , 77
ENSURING THE SLIDEMAKER IS ENABLED , 79System Setup – [Communications], 79Run Configuration – SlideMaker tab, 79

PN 4237411C vii
CONTENTS
LABORATORY ID , 79
MAIN MENU SCREEN (SLIDEMAKER) , 80
SENSOR STATUS , 81
SETTING UP WHEN TO MAKE A SLIDE , 81
TROUBLESHOOTING OVERVIEW (SLIDEMAKER) , 81Overview, 81
VIEWING SLIDEMAKER SETTINGS , 82Procedure, 82
REFERENCES--SLIDEMAKER , 83
REFERENCE MANUAL--GEN•S, 85
PNEUMATIC/HYDRAULIC TUBING CONNECTIONS, 85
LOADING SPECIMENS, 86
ASPIRATION, 86
HEMOGLOBIN (Hgb) CONCENTRATION, 88
SAMPLE STABILITY, 88
THROUGHPUT, AUTOMATIC MODE, 88
WBC DIFFERENTIAL PARAMETERS, 5C CELL CONTROL , 89
RETICULOCYTES, RETIC-C CELL CONTROL, 89
WBC DIFFERENTIAL, WHOLE BLOOD, 89
RETICULOCYTE PRECISION, WHOLE BLOOD, 90
ACCURACY OF THE DIFFERENTIAL PARAMETERS, 90
ACCURACY OF RETICULOCYTES, 91
TABLE 4.17 , 91
SUMMARY, 92
INDIVIDUAL FLAGGING PERFORMANCE, 92
REFERENCE RANGES, 93
UPDATE LABEL INSTRUCTIONS, 95
ABOUT THE UPDATE LABELS, 95
INSTRUCTIONS, 95

PN 4237411C viii
CONTENTS
EXAMPLE, 95
INDEX,INDEX- 1

PN 4237411C 1
UPDATES FOR YOUR MANUAL
DOCUMENT OVERVIEW
Online Help and this Addendum This addendum explains the operational changes in software version 2C for your COULTER
GEN•S™ System. This addendum cannot be used with previous versions of GEN•S System manuals. The information in this addendum is included in the GEN•S System Online Help. The GEN•S System Online Help contains,
r all of the information in this addendum
r all of the information contained in each of the GEN•S System manuals
r popup help information that is not contained in the GEN•S System manuals
r a Readme file, accessed from on the help window, that contains a decription of the changes in GEN•S 2B1 software and GEN•S 2C software.
The following GEN•S System manuals are affected by this addendum.
r COULTER GEN•S System Reference Manual, PN 4237221B
r COULTER GEN•S System Operator’s Guide, PN 4237222B
r COULTER GEN•S System Special Procedures and Troubleshooting Manual, PN 4237223D
r COULTER GEN•S SM™ SlideMaker Operator’s Guide, PN 4237212A
Keep this addendum with your set of GEN•S System manuals.
Previous Versions of this Addendum Discard previous versions of this addendum. The information in previous versions of this addendum has been incorporated in the GEN•S System manuals listed above.
How to Use This Addendum
A label icon appears throughout this document next to information that has changed or is new for the 2C software release. Update labels are supplied with this document. Detailed instructions on how to place the update labels appear at the end of this document.

PN 4237411C 2
UPDATES FOR YOUR MANUALDOCUMENT OVERVIEW
PN 4237411 C 3
OPERATOR’S GUIDE--GEN•S
Place an update label next to heading 7.4, Adding A Sample Request To The ToDo List on page 7-7 of your GEN•S Operator’s Guide, PN 4237222B, for the following revised information:
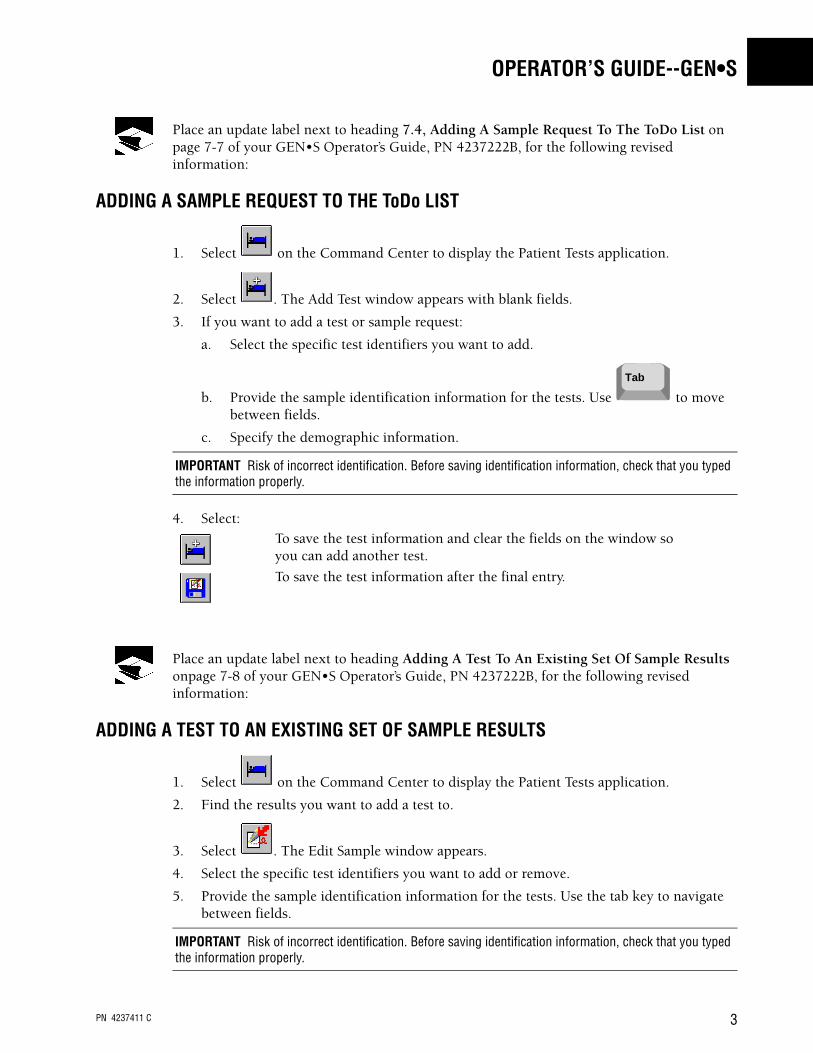
ADDING A SAMPLE REQUEST TO THE ToDo LIST
1. Select on the Command Center to display the Patient Tests application.
2. Select . The Add Test window appears with blank fields.
3. If you want to add a test or sample request:
a. Select the specific test identifiers you want to add.
b. Provide the sample identification information for the tests. Use to move between fields.
c. Specify the demographic information.
4. Select:
Place an update label next to heading Adding A Test To An Existing Set Of Sample Results onpage 7-8 of your GEN•S Operator’s Guide, PN 4237222B, for the following revised information:
ADDING A TEST TO AN EXISTING SET OF SAMPLE RESULTS
1. Select on the Command Center to display the Patient Tests application.
2. Find the results you want to add a test to.
3. Select . The Edit Sample window appears.
4. Select the specific test identifiers you want to add or remove.
5. Provide the sample identification information for the tests. Use the tab key to navigate between fields.
IMPORTANT Risk of incorrect identification. Before saving identification information, check that you typed the information properly.
To save the test information and clear the fields on the window so you can add another test.
To save the test information after the final entry.
Tab
IMPORTANT Risk of incorrect identification. Before saving identification information, check that you typed the information properly.
PN 4237411 C 4
OPERATOR’S GUIDE--GEN•SAFTER # RUNS
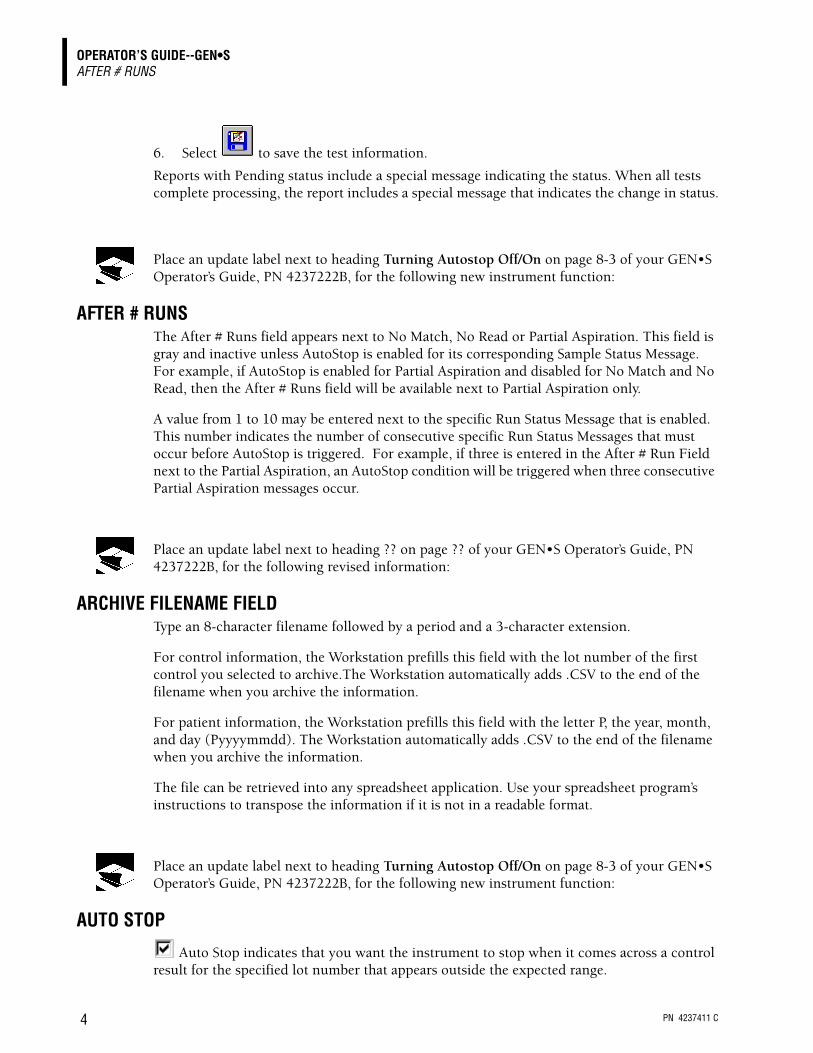
6. Select to save the test information.
Reports with Pending status include a special message indicating the status. When all tests complete processing, the report includes a special message that indicates the change in status.
Place an update label next to heading Turning Autostop Off/On on page 8-3 of your GEN•S Operator’s Guide, PN 4237222B, for the following new instrument function:
AFTER # RUNS The After # Runs field appears next to No Match, No Read or Partial Aspiration. This field is gray and inactive unless AutoStop is enabled for its corresponding Sample Status Message. For example, if AutoStop is enabled for Partial Aspiration and disabled for No Match and No Read, then the After # Runs field will be available next to Partial Aspiration only.
A value from 1 to 10 may be entered next to the specific Run Status Message that is enabled. This number indicates the number of consecutive specific Run Status Messages that must occur before AutoStop is triggered. For example, if three is entered in the After # Run Field next to the Partial Aspiration, an AutoStop condition will be triggered when three consecutive Partial Aspiration messages occur.
Place an update label next to heading ?? on page ?? of your GEN•S Operator’s Guide, PN 4237222B, for the following revised information:
ARCHIVE FILENAME FIELD Type an 8-character filename followed by a period and a 3-character extension.
For control information, the Workstation prefills this field with the lot number of the first control you selected to archive.The Workstation automatically adds .CSV to the end of the filename when you archive the information.
For patient information, the Workstation prefills this field with the letter P, the year, month, and day (Pyyyymmdd). The Workstation automatically adds .CSV to the end of the filename when you archive the information.
The file can be retrieved into any spreadsheet application. Use your spreadsheet program’s instructions to transpose the information if it is not in a readable format.
Place an update label next to heading Turning Autostop Off/On on page 8-3 of your GEN•S Operator’s Guide, PN 4237222B, for the following new instrument function:
AUTO STOP
Auto Stop indicates that you want the instrument to stop when it comes across a control result for the specified lot number that appears outside the expected range.

PN 4237411 C 5
OPERATOR’S GUIDE--GEN•SAUTONUMBERING & STARTING AT FIELDS
Note: Controls in AutoStop Criteria must be selected on the System Run Configuration window in order to activate the Auto Stop function.
Deselect this item to ensure the instrument continues processing when it comes across a control value outside the expected range.
Changing this option does not affect any previously run controls; only subsequent control runs.
Place an update label next to Turning Autonumbering Off/On on page 8-33 of your GEN•S Operator’s Guide, PN 4237222B, for the following new instrument function:
AUTONUMBERING & STARTING AT FIELDS These fields appear gray and inactive unless Cass/Pos is specified as the positive identifier. AutoNumbering is an instrument-specific option.
1. Select if you want the Workstation to automatically increment an accession number for samples received from the selected instrument. This activates the Starting At field.
2. Select to display the Starting At dialog box.
3. Type the first six-digit number you want used for the AutoNumbering option. If necessary, the Workstation pads the number with leading zeros.
4. Select .
The next sample received from the instrument, regardless of the test type, appears with this number in the Sample ID field. The number appears with an N flag indicating the Workstation assigned it using the AutoNumbering option. Each subsequent sample receives the next number in ascending order. When the Workstation reaches 999999, it restarts the number at 000000.
Deselect this field to ensure the Workstation does not use an accession number.
PN 4237411 C 6
OPERATOR’S GUIDE--GEN•SAUTOVALIDATION OVERVIEW
Place an update label next to heading 8.11, Setting Up Rules for Flagging Sample Results on page 8-15 of your GEN•S Operator’s Guide, PN 4237222B, for the following new instrument function:
AUTOVALIDATION OVERVIEW The enhanced Autovalidation procedure provides information as to the state of the sample. The sample can have one of three states with respect to validation: AutoValidated, meaning that it has passed all criteria for validation; Validated, meaning that although it failed at least one criteria, the operator has manually validated the sample; Not Validated, meaning that the sample failed at least one criteria and has not been manually validated.
On the screen, samples which are AutoValidated will not appear in the Reflex, Delta, or Review folders, and will not have the Validate button enabled. If the sample fails validation for non-decision rule criteria, it would appear in the Review Folder. If the sample fails for Decision Rule criteria, it could appear in either the Delta Check or Reflex folders (depending which one was triggered), or in the Review folder, depending whether they have configured Delta Check and Reflex failures to go to the Review folder. It is possible, if the sample fails both decision rule-related and non-rule related criteria, for the sample to appear in both or all three folders. If the user reviews and manually validates the sample, it would no longer appear in any of these folders, and the validate button would be in a depressed state when that single sample is selected.
For the print and host transmission, these messages are output as "Sample AutoValidated", "Sample Not Validated", or "Sample Validated". In addition, individual codes will provide validation information for predefined parameter sets, referred to as parameter blocks. If at least one parameter from the parameter block is included in the reported results, the appropriate validation code will be displayed. The codes may be disabled for host transmission in the Host Communications Setup area.
The major difference between the screen and print is that the screen is not profile specific. This means that on screen, all parameters, suspect/definitive messages, and rules triggered will be displayed, and the validation status depends on the whole sample. For the print and host transmission, only those parameters, suspect/definitive messages, and rule messages which are part of the profile are output, and the validation codes and messages are based on this output.
The logic for arriving at the validation status is as follows:
We first reduce the parameters to an active set. The set of active parameters starts with the set of parameters which is enabled for the system in parameter setup. It is further reduced to those parameters which were either run on the analyzer or edited into the sample. For printing and transmission, the active set is further reduced to the parameters included in the selected profile. If the status we are looking for is a validation code, the active set is further reduced to the parameters applicable to that code.
Active Set: For Flagging Limits, Decision Rules and AutoValidation logic, the Active Set of parameters are defined as those parameters that,
r are enabled for the System (System Setup – Patient – Parameters window),
r are enabled for the Report Profile you are using (System Setup – Patient –Reporting Options window),

PN 4237411 C 7
OPERATOR’S GUIDE--GEN•SAUTOVALIDATION OVERVIEW
r are part of the Test Mode you are running (C, CD, CDR, CR, or R on the Analyzer Screen) or have been edited into the sample,
r are included in the parameter block of the validation code you are looking for.
For example, suppose that all parameters are enabled for the system except research. Now suppose that a CR sample is run. We are now only looking at CR parameters, except the research ones. Now if we are looking at the printout and the selected profile is CBC, we are reduced to only the CBC parameters. To determine the status of the Validiation Message we are looking for all the CBC parameters. To determine the status of the parameter codes, such as the C Code (CBC parameter block), then we're still looking at all CBC parameters. If it is H Code, we're looking at only Hgb and Hct parameters. The W code only looks at the WBC, Hgb and Plt parameters If we're looking for the D code (Diff parameter block) or R code (Reticulocyte block), we have no parameters, and the code would not be displayed.
Now that we know which parameters to include, we will look for anything which causes an AutoValidation failure:
r Any active parameter which exceeds limits, where the limit has been configured as autoverification criteria. This could also be based on a definitive message, where the definitive set has been specified as autoverification criteria.
r H & H Check Failed is a separate check. Since it is not tied to any limit set, it can not be configured as autoverification criteria. It will always trigger a failure when both HGB and HCT are part of the active set.
r Any active parameter which has a nonnumeric value (+++++, :::::, ....., -----), a Review flag, Partial Aspiration (P), exceeds linearity (+), WBC backlight flag (*), or MCV exceeds threshold (*).
r Any suspect (non-research) flag, where the active parameter set includes at least one parameter from the suspect message parameter group. Suspect messages are associated with either CBC, Diff, or Retic parameters. If, for example, a CBC suspect message is triggered and at least one CBC parameter is in the active set, we have an autovalidation failure.
r Any reflex or delta rule, where ALL parameters included in the rule must be in the active set.
Autovalidation Example
Autovalidation Setup r Enable Validation Codes
r Enable AutoVerification Criteria for Action Limits
r Enable Decision rules = Reflex rule is defined as "If Retic % < 0.2 then Make Retic Smear and scan slide.”
Sample Setup: r Test Mode = CBC/Diff
IMPORTANT Several precautions have been taken to ensure integrity of Manual Validation. If new data is collated to a sample, if the sample is edited in a way that would cause a reflag, or if the profile is changed, manual validation for the sample is cleared.

PN 4237411 C 8
OPERATOR’S GUIDE--GEN•SAUTOVALIDATION OVERVIEW
r Patient Sample preassigned with a CBC and Retic Report Profile
Sample Results: (printed and transmitted)
Manual Validation:Once the results are reviewed and manually validated at the workstation the report appears as follows.
Comments: Make Retic Smear and scan slide
WBC 4.8 10^3/L RBC 2.53 10^6/L Plt 80 aL 10^3/L
Hgb 6.3 g/dL MPV 10.3 fL
Hct 19.6 %
MCV 77.4 fL
MCH 24.9 pg
MCHC 32.1 g/dL
RDW 16.1 %
Ret % %
Ret # /pL
End of Completed Report, Sample Not Validated, C NV, H AV, W NV
Comments:
WBC 4.8 10^3/L RBC 2.53 10^6/L Plt 80 aL 10^3/L
Hgb 6.3 g/dL MPV 10.3 fL
Hct 19.6 %
MCV 77.4 fL
MCH 24.9 pg
MCHC 32.1 g/dL
RDW 16.1 %
Ret % %
Ret # /pL
End of Completed Report, Sample Validated, C V, H AV, W V
PN 4237411 C 9
OPERATOR’S GUIDE--GEN•SAUTOVERIFICATION CRITERIA
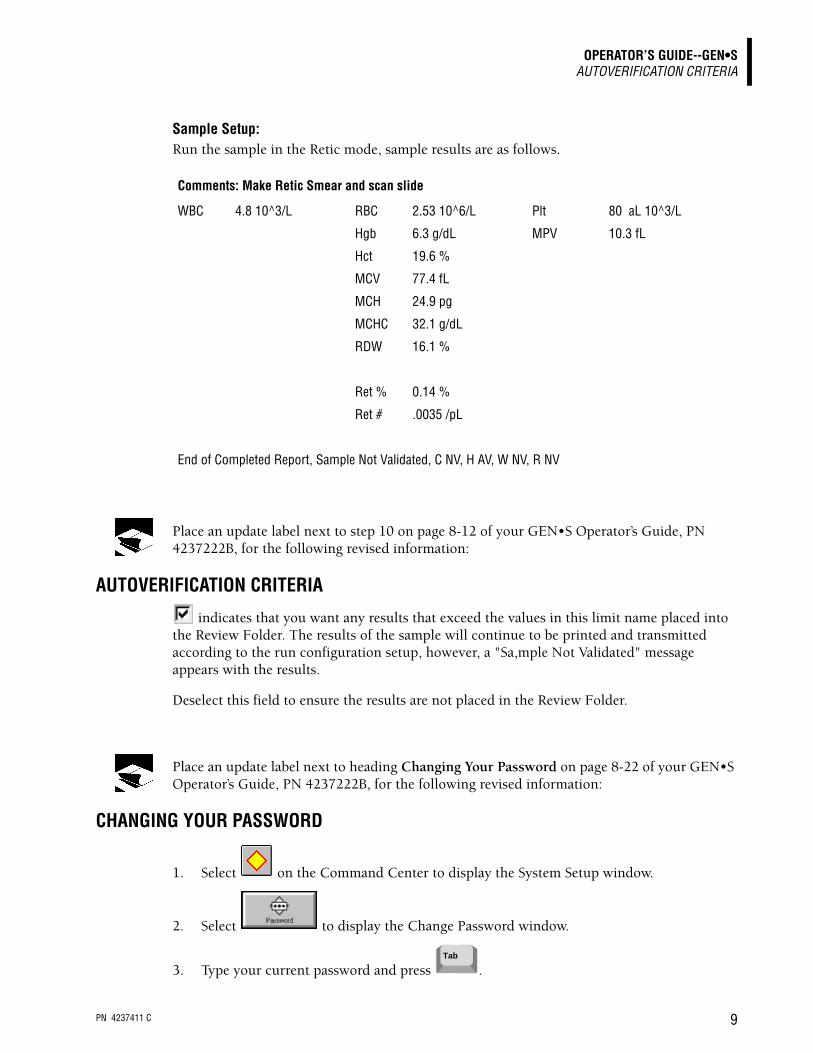
Sample Setup:Run the sample in the Retic mode, sample results are as follows.
Place an update label next to step 10 on page 8-12 of your GEN•S Operator’s Guide, PN 4237222B, for the following revised information:
AUTOVERIFICATION CRITERIA
indicates that you want any results that exceed the values in this limit name placed into the Review Folder. The results of the sample will continue to be printed and transmitted according to the run configuration setup, however, a "Sa,mple Not Validated" message appears with the results.
Deselect this field to ensure the results are not placed in the Review Folder.
Place an update label next to heading Changing Your Password on page 8-22 of your GEN•S Operator’s Guide, PN 4237222B, for the following revised information:
CHANGING YOUR PASSWORD
1. Select on the Command Center to display the System Setup window.
2. Select to display the Change Password window.
3. Type your current password and press .
Comments: Make Retic Smear and scan slide
WBC 4.8 10^3/L RBC 2.53 10^6/L Plt 80 aL 10^3/L
Hgb 6.3 g/dL MPV 10.3 fL
Hct 19.6 %
MCV 77.4 fL
MCH 24.9 pg
MCHC 32.1 g/dL
RDW 16.1 %
Ret % 0.14 %
Ret # .0035 /pL
End of Completed Report, Sample Not Validated, C NV, H AV, W NV, R NV
Tab
PN 4237411 C 10
OPERATOR’S GUIDE--GEN•SCHECKING DAILY TEST RESULTS
4. Type your new password and press .
5. Type your new password a second time for verification.
6. Select to save the new password and close the window.
If you want a blank password, perform the procedure above except,
r Step 4, type your new password then use the backspace key to erase the password
and press
r Step 5, type your new password a second time then use the backspace key to erase the password.
After you select to save the new password and close the window, you will be able to log on without using a password.
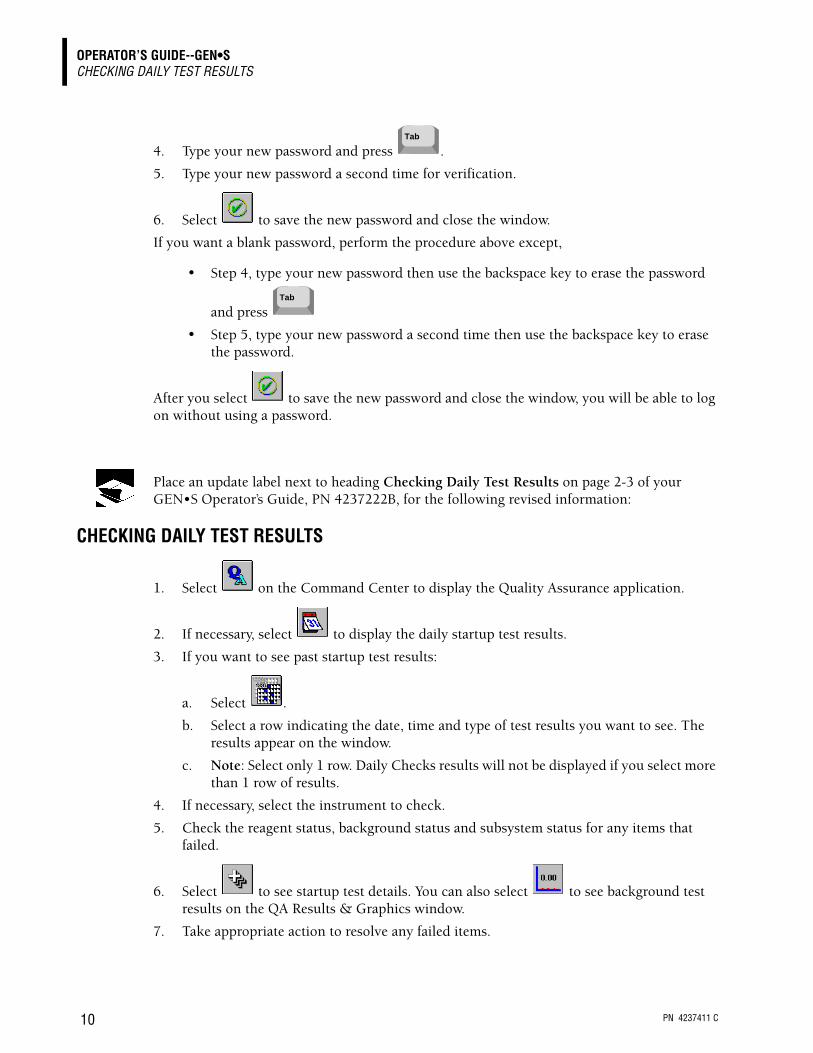
Place an update label next to heading Checking Daily Test Results on page 2-3 of your GEN•S Operator’s Guide, PN 4237222B, for the following revised information:
CHECKING DAILY TEST RESULTS
1. Select on the Command Center to display the Quality Assurance application.
2. If necessary, select to display the daily startup test results.
3. If you want to see past startup test results:
a. Select .
b. Select a row indicating the date, time and type of test results you want to see. The results appear on the window.
c. Note: Select only 1 row. Daily Checks results will not be displayed if you select more than 1 row of results.
4. If necessary, select the instrument to check.
5. Check the reagent status, background status and subsystem status for any items that failed.
6. Select to see startup test details. You can also select to see background test results on the QA Results & Graphics window.
7. Take appropriate action to resolve any failed items.
Tab
Tab

PN 4237411 C 11
OPERATOR’S GUIDE--GEN•SCONTROLS FIELD
Place an update label next to heading Turning Autostop Off/On on page 8-3 of your GEN•S Operator’s Guide, PN 4237222B, for the following new instrument function:
CONTROLS FIELD
indicates that the selected instrument stops if it comes across a control that is out of limits or expired and the control was set up as an AutoStop control. An expired control or non-numeric control results, such as voteouts and partial aspirations, will cause an AutoStop if enabled.
Note: Auto Stop must be selected on the controls setup window in order to activate the Auto Stop function.
Deselect this field to ensure the instrument continues processing when a control is out of limits, regardless of how the AutoStop option was specified when the control was set up.
Place an update label next to heading Cycling Controls In Automatic Aspiration Mode on page 3-4 of your GEN•S Operator’s Guide, PN 4237222B, for the following revised information:
CYCLING CONTROLS IN AUTOMATIC ASPIRATION MODE 1. Ensure the instrument is set up for the appropriate control.
2. Prepare the controls according to the directions in the package insert.
3. Ensure the controls are properly set up on the Workstation.
Note: If you run a Coulter control without setting it up, the Workstation automatically creates control setup information for you. The control information identifies the lot number, source, type and level of the control.
4. Load the cassette with the control material.
5. Place the cassette firmly and securely into the loading bay. The instrument begins to cycle the controls.
6. On the Command Center, select AUTO ANALYSIS as the processing control if your control tubes have bar-code labels. See processing control if you run controls without bar-code labels.
7. Review the control results.
Place an update label next to heading Cycling Controls In Manual Aspiration Mode on page 3-5 of your GEN•S Operator’s Guide, PN 4237222B, for the following revised information:
CYCLING CONTROLS IN MANUAL ASPIRATION MODE 1. Ensure the instrument is set up for the appropriate control.
2. Prepare the controls according to the directions in the package insert.
3. Ensure the controls are properly set up on the Workstation.
PN 4237411 C 12
OPERATOR’S GUIDE--GEN•SDATABASE & ToDo TREE LIST
4. Go to the Diluter Keypad.
5. Press .
6. Press .
7. Use the Keypad or the handheld scanner to provide the lot number of the control tube.
8. Press .
9. Remove the stopper from the tube.
10. Immerse the aspirator tip in the tube. The instrument automatically aspirates the control.
Tip: When using Manual aspiration mode, the instrument automatically aspirates the sample. If the instrument fails to aspirate the sample, the optical sensors on the activator may be malfunctioning.
Press the black activator that surrounds the aspirator tip to aspirate the sample, and call your Coulter Representative.
11. When you hear a beep, remove the tube from the aspirator tip. The probe cleaner retracts the aspirator and automatically cleans it.
12. At the Workstation, review the results from the control.
13. On the Command Center, select AUTO ANALYSIS as the processing control.
Place an update label next to heading 7.1, Database & ToDo Window on page 7-1 of your GEN•S Operator’s Guide, PN 4237222B, for the following additional information:
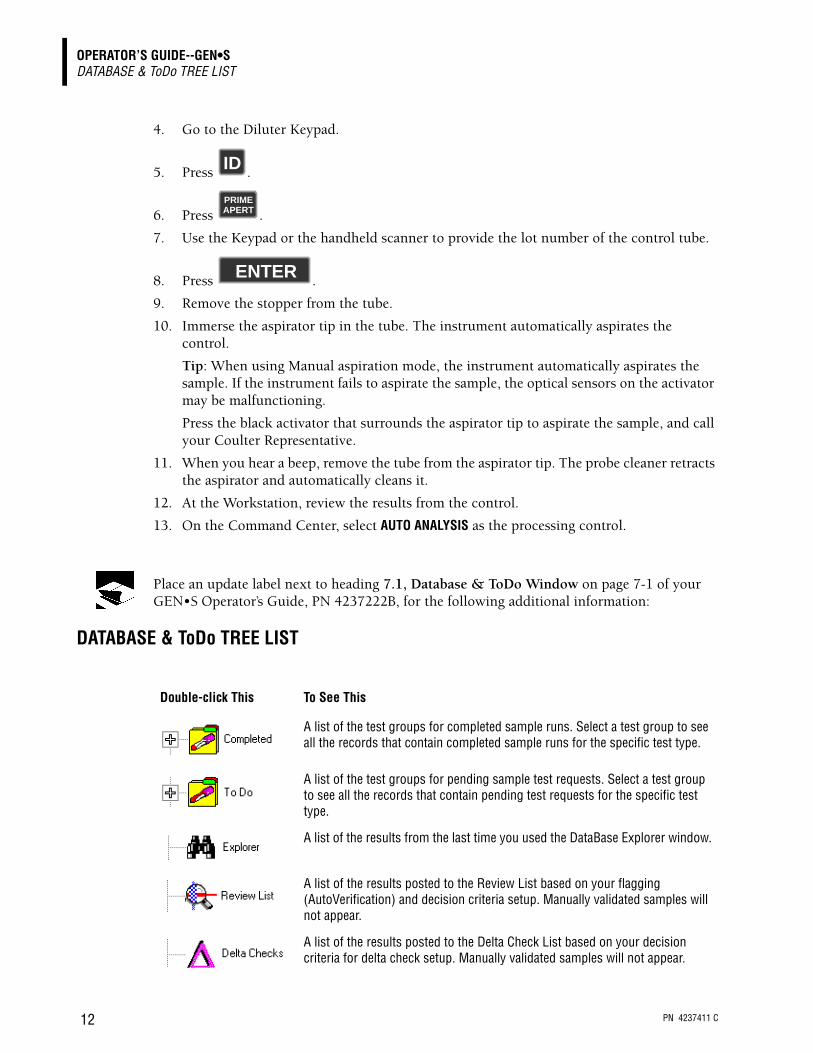
DATABASE & ToDo TREE LIST
ID
PRIMEAPERT
ENTER
Double-click This To See This
A list of the test groups for completed sample runs. Select a test group to see all the records that contain completed sample runs for the specific test type.
A list of the test groups for pending sample test requests. Select a test group to see all the records that contain pending test requests for the specific test type.
A list of the results from the last time you used the DataBase Explorer window.
A list of the results posted to the Review List based on your flagging (AutoVerification) and decision criteria setup. Manually validated samples will not appear.
A list of the results posted to the Delta Check List based on your decision criteria for delta check setup. Manually validated samples will not appear.

PN 4237411 C 13
OPERATOR’S GUIDE--GEN•SDATABASE NAVIGATION BUTTONS
Place an update label next to heading 7.1, Database & ToDo Window on page 7-1 of your GEN•S Operator’s Guide, PN 4237222B, for the following additional information:
DATABASE NAVIGATION BUTTONS These buttons enable you to move sequentially through the database folder selected in the Navigation field. Initially, the list is sorted by the date and time of sample analysis—the most recent sample results appear at the top of the list.
Note: If your Workstation is connected to more than one instrument the database displays results from all the instruments, not just the instrument selected on the Command Center.
Menu Access:
Sample tt First Patient
Sample tt Previous Patient
Sample tt Next Patient
Sample tt Last Patient
A list of the results posted to the Reflex Manager List based on your decision criteria for reflex manager setup. Manually validated samples will not appear.
A list of all the results that have been saved (marked with for later retrieval in the database.
A list of all the results that contain slide requests appears as a sub-folder in both the Completed and ToDo folders. The Completed Slide List contains all samples for which a slide has been made. The ToDo Slide List contains all samples for which not all requested slides have been made (sample could be pending or completed).
Select This To Display The
The first sample that appears on the list, which is the most recent sample in the database.
First sample that follows the currently displayed sample
First sample that precedes the currently displayed sample result
Last sample in the list, which is the oldest sample in the database.
PN 4237411 C 14
OPERATOR’S GUIDE--GEN•SDEFINING REFLEX MANAGER CRITERIA
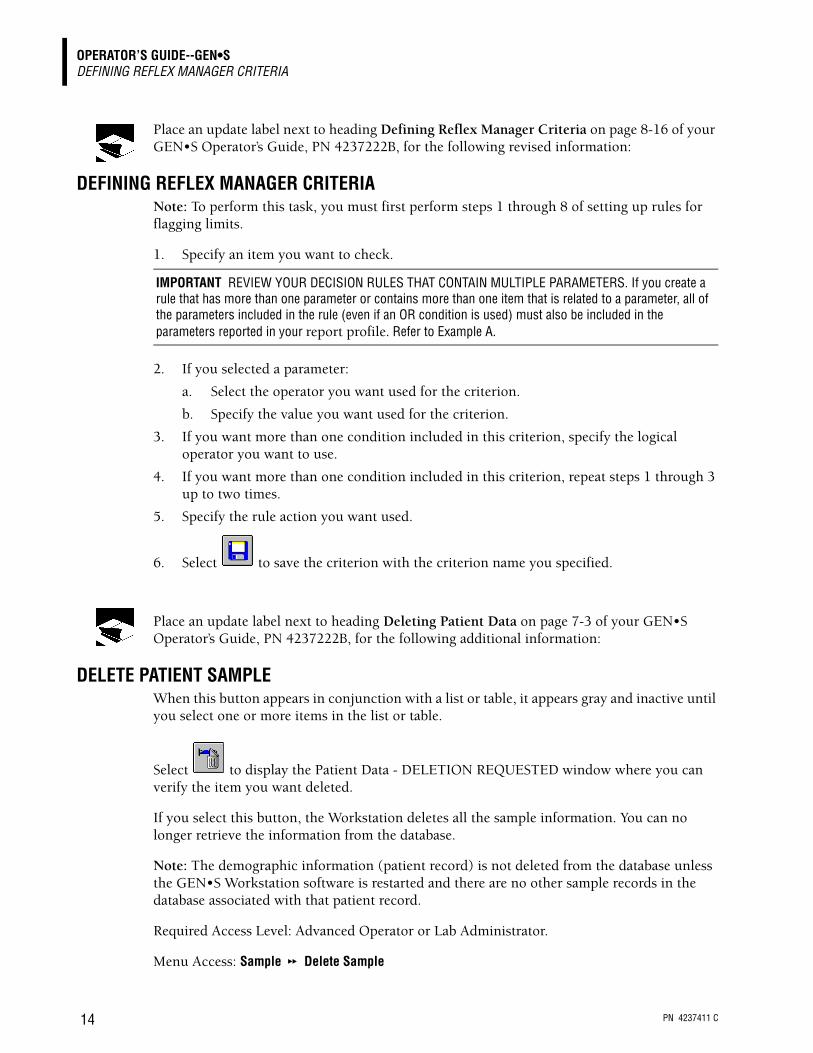
Place an update label next to heading Defining Reflex Manager Criteria on page 8-16 of your GEN•S Operator’s Guide, PN 4237222B, for the following revised information:
DEFINING REFLEX MANAGER CRITERIA Note: To perform this task, you must first perform steps 1 through 8 of setting up rules for flagging limits.
1. Specify an item you want to check.
2. If you selected a parameter:
a. Select the operator you want used for the criterion.
b. Specify the value you want used for the criterion.
3. If you want more than one condition included in this criterion, specify the logical operator you want to use.
4. If you want more than one condition included in this criterion, repeat steps 1 through 3 up to two times.
5. Specify the rule action you want used.
6. Select to save the criterion with the criterion name you specified.
Place an update label next to heading Deleting Patient Data on page 7-3 of your GEN•S Operator’s Guide, PN 4237222B, for the following additional information:
DELETE PATIENT SAMPLE When this button appears in conjunction with a list or table, it appears gray and inactive until you select one or more items in the list or table.
Select to display the Patient Data - DELETION REQUESTED window where you can verify the item you want deleted.
If you select this button, the Workstation deletes all the sample information. You can no longer retrieve the information from the database.
Note: The demographic information (patient record) is not deleted from the database unless the GEN•S Workstation software is restarted and there are no other sample records in the database associated with that patient record.
Required Access Level: Advanced Operator or Lab Administrator.
Menu Access: Sample tt Delete Sample
IMPORTANT REVIEW YOUR DECISION RULES THAT CONTAIN MULTIPLE PARAMETERS. If you create a rule that has more than one parameter or contains more than one item that is related to a parameter, all of the parameters included in the rule (even if an OR condition is used) must also be included in the parameters reported in your report profile. Refer to Example A.
PN 4237411 C 15
OPERATOR’S GUIDE--GEN•SDETAILED DESCRIPTION OF RULE FIELD
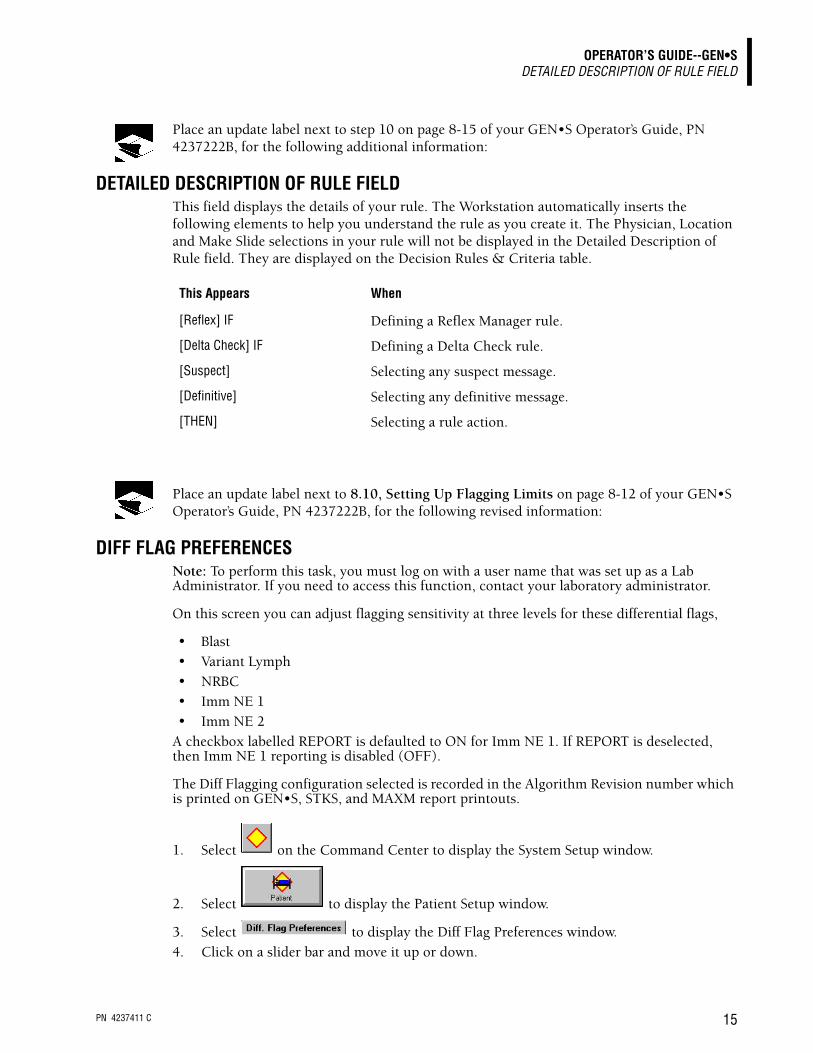
Place an update label next to step 10 on page 8-15 of your GEN•S Operator’s Guide, PN 4237222B, for the following additional information:
DETAILED DESCRIPTION OF RULE FIELD This field displays the details of your rule. The Workstation automatically inserts the following elements to help you understand the rule as you create it. The Physician, Location and Make Slide selections in your rule will not be displayed in the Detailed Description of Rule field. They are displayed on the Decision Rules & Criteria table.
Place an update label next to 8.10, Setting Up Flagging Limits on page 8-12 of your GEN•S Operator’s Guide, PN 4237222B, for the following revised information:
DIFF FLAG PREFERENCES Note: To perform this task, you must log on with a user name that was set up as a Lab Administrator. If you need to access this function, contact your laboratory administrator.
On this screen you can adjust flagging sensitivity at three levels for these differential flags,
r Blast r Variant Lymph r NRBC r Imm NE 1 r Imm NE 2 A checkbox labelled REPORT is defaulted to ON for Imm NE 1. If REPORT is deselected, then Imm NE 1 reporting is disabled (OFF).
The Diff Flagging configuration selected is recorded in the Algorithm Revision number which is printed on GEN•S, STKS, and MAXM report printouts.
1. Select on the Command Center to display the System Setup window.
2. Select to display the Patient Setup window.
3. Select to display the Diff Flag Preferences window.4. Click on a slider bar and move it up or down.
This Appears When
[Reflex] IF Defining a Reflex Manager rule.
[Delta Check] IF Defining a Delta Check rule.
[Suspect] Selecting any suspect message.
[Definitive] Selecting any definitive message.
[THEN] Selecting a rule action.
PN 4237411 C 16
OPERATOR’S GUIDE--GEN•SDRAWN DATE
Lower flagging rates are selected by moving the slider near the bottom of the control. The down arrow indicates lower flagging rates. Higher flagging rates are selected by moving the slider near the top of the control. The up arrow indicates higher flagging. The slider will not travel fully to the top or bottom of the control.
Place an update label next to heading 5.1, Reviewing Sample Results on page 5-1 of your GEN•S Operator’s Guide, PN 4237222B, for the following additional information:
DRAWN DATE
DescriptionThe date and time the sample was drawn from the patient. The date format for drawn date is the same date format set up for your laboratory.
EditingYou can edit this field on the Edit Sample window. Type the date and time the sample was drawn from the patient in the format set up for your laboratory.
Note: time is not a mandatory field.
Place an update label next to steep 5 on page 8-19 of your GEN•S Operator’s Guide, PN 4237222B, for the following new instrument function:
ENABLE VALIDATION
indicates the Workstation includes the new AutoValidation codes with the standard data set transmitted to your information system.
Place an update label next to heading 5.8, Flags And Codes on page 5-11 of your GEN•S Operator’s Guide, PN 4237222B, for the following revised information:
FLAGS AND CODES
IMPORTANT Flagging is evaluated when the sample is analyzed. Flagging is reevaluated for a sample when the results are manually edited, or when new results are received for a pending sample. Flagging is not reevaluated upon a change of flagging limits for results already in the database.
IMPORTANT Coulter suggests using all available flagging options to optimize the sensitivity of instrument results. All flagging options include reference ranges (H/L), action and critical limits, definitive flags, suspect flags, parameter codes, delta checks, decision rules and system alarms. Coulter recommends avoiding the use of single messages or outputs to summarize specimen results or patient conditions.
PN 4237411 C 17
OPERATOR’S GUIDE--GEN•SFLAGS AND CODES
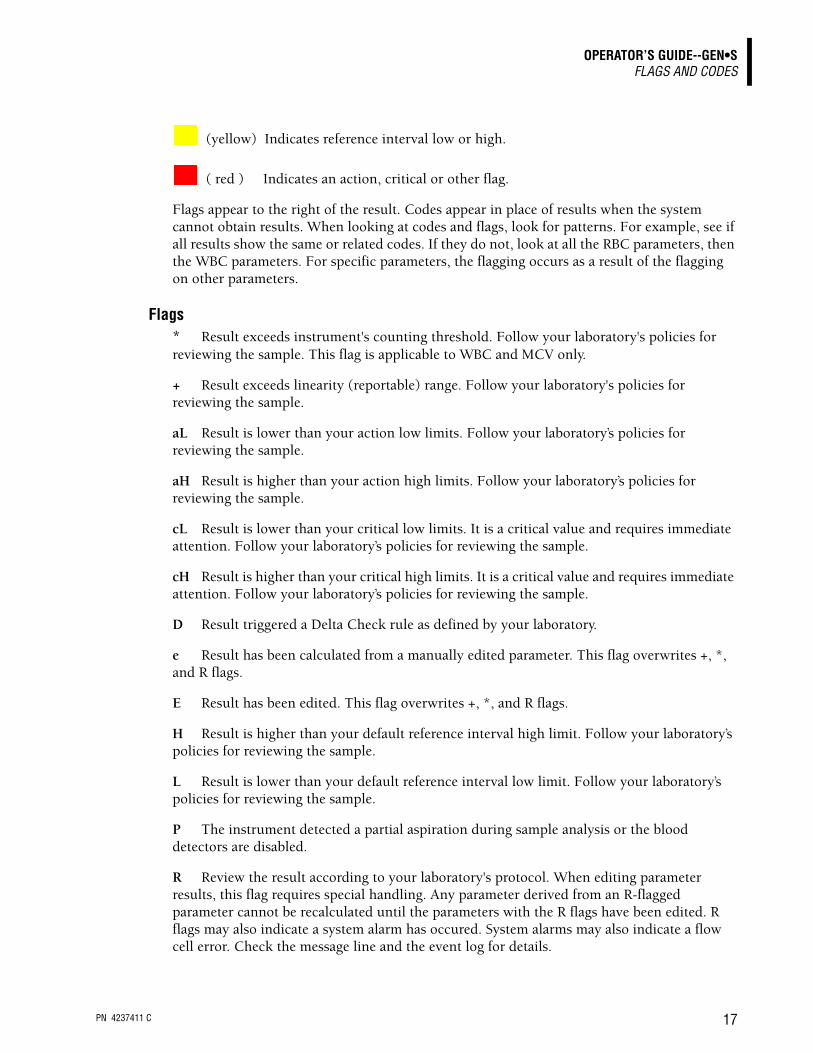
(yellow) Indicates reference interval low or high.
( red ) Indicates an action, critical or other flag.
Flags appear to the right of the result. Codes appear in place of results when the system cannot obtain results. When looking at codes and flags, look for patterns. For example, see if all results show the same or related codes. If they do not, look at all the RBC parameters, then the WBC parameters. For specific parameters, the flagging occurs as a result of the flagging on other parameters.
Flags* Result exceeds instrument's counting threshold. Follow your laboratory's policies for reviewing the sample. This flag is applicable to WBC and MCV only.
+ Result exceeds linearity (reportable) range. Follow your laboratory's policies for reviewing the sample.
aL Result is lower than your action low limits. Follow your laboratory’s policies for reviewing the sample.
aH Result is higher than your action high limits. Follow your laboratory’s policies for reviewing the sample.
cL Result is lower than your critical low limits. It is a critical value and requires immediate attention. Follow your laboratory’s policies for reviewing the sample.
cH Result is higher than your critical high limits. It is a critical value and requires immediate attention. Follow your laboratory’s policies for reviewing the sample.
D Result triggered a Delta Check rule as defined by your laboratory.
e Result has been calculated from a manually edited parameter. This flag overwrites +, *, and R flags.
E Result has been edited. This flag overwrites +, *, and R flags.
H Result is higher than your default reference interval high limit. Follow your laboratory’s policies for reviewing the sample.
L Result is lower than your default reference interval low limit. Follow your laboratory’s policies for reviewing the sample.
P The instrument detected a partial aspiration during sample analysis or the blood detectors are disabled.
R Review the result according to your laboratory's protocol. When editing parameter results, this flag requires special handling. Any parameter derived from an R-flagged parameter cannot be recalculated until the parameters with the R flags have been edited. R flags may also indicate a system alarm has occured. System alarms may also indicate a flow cell error. Check the message line and the event log for details.

PN 4237411 C 18
OPERATOR’S GUIDE--GEN•SGEN•S report format—chartable report
You may want to look at the messages that appear on the Research Data window. The Research Data window provides more detailed research data.
Codes
Place an update label next to heading 8.12 Setting Up Reports on page 8-17 of your GEN•S Operator’s Guide, PN 4237222B, for the following additional information:
GEN•S report format—chartable report
Algorithm Revision NumbersA value is printed below the Institution Name that indicates the revision of the differential and reticulocyte algorithm installed. The release is indicated as D:X.X [00000] R:X.X. The values in brackets indicate the Differential Preference selections made by Lab Administration. Differential Preference selections are the low level (1), mid level (2) or high level (3).
Report CommentsDecision Rules & Criteria messages appear in the comment area.
Printed Report FooterAny or all of the following footers can appear when you print a report:
IMPORTANT Incorrect results can occur. If the WBC, RBC, HGB, or PLT have +++++ when cycling in Manual mode, run a blank cycle before analyzing the next test sample to prevent carryover to the next sample. When cycling in Automatic mode, rerun the sample immediately following the one with the +++++. Sample dilutions may also result in wrong differential results. When WBC is overrange, if you dilute the sample to rerun it, ensure you set the instrument to CBC mode before you cycle the diluted sample.
..... Incomplete computation. This could occur on calculated parameters because of a voteout (- - - - -) or overrange results (+++++) for the parameters used in the calculation. Check other parameters, such as WBC, to ensure sufficient data was received for calculations.
- - - - - When this code appears for CBC parameter results and no average histogram appears for the affected parameter, it indicates a total voteout.
If this code appears for WBC, the WBC differential absolute number parameter results appear as ..... since they are calculated from the white count and the WBC result was non-numeric.
+++++ This result exceeds the instrument's operating range. Follow your laboratory’s policies for reviewing the sample
::::: The instrument detected a clog in the flow cell. PC1, PC2 or FC will be displayed on the y-axis of the dataplot
This footer Means This
End of completed report The sample was not preassigned in the ToDo list or all the test requests for the sample are completed.

PN 4237411 C 19
OPERATOR’S GUIDE--GEN•SGEN•S report format—chartable report
End of preliminary report At least one test request for the sample is pending.
End of additional tests report After the sample was run and printed with an End of completed report footer, an additional test was requested and run.
Blood Detector OFF The sample was run with the blood detector disabled.
SYSTEM ALARM A system alarm occured when this sample was run.
Validation Messages System reports Sample Validated, Sample Not Validated or AutoValidated.

PN 4237411 C 20
OPERATOR’S GUIDE--GEN•SGEN•S REPORT FORMAT—IN-LAB REPORT
Place an update label next to heading 8.12 Setting Up Reports on page 8-17 of your GEN•S Operator’s Guide, PN 4237222B, for the following additional information:
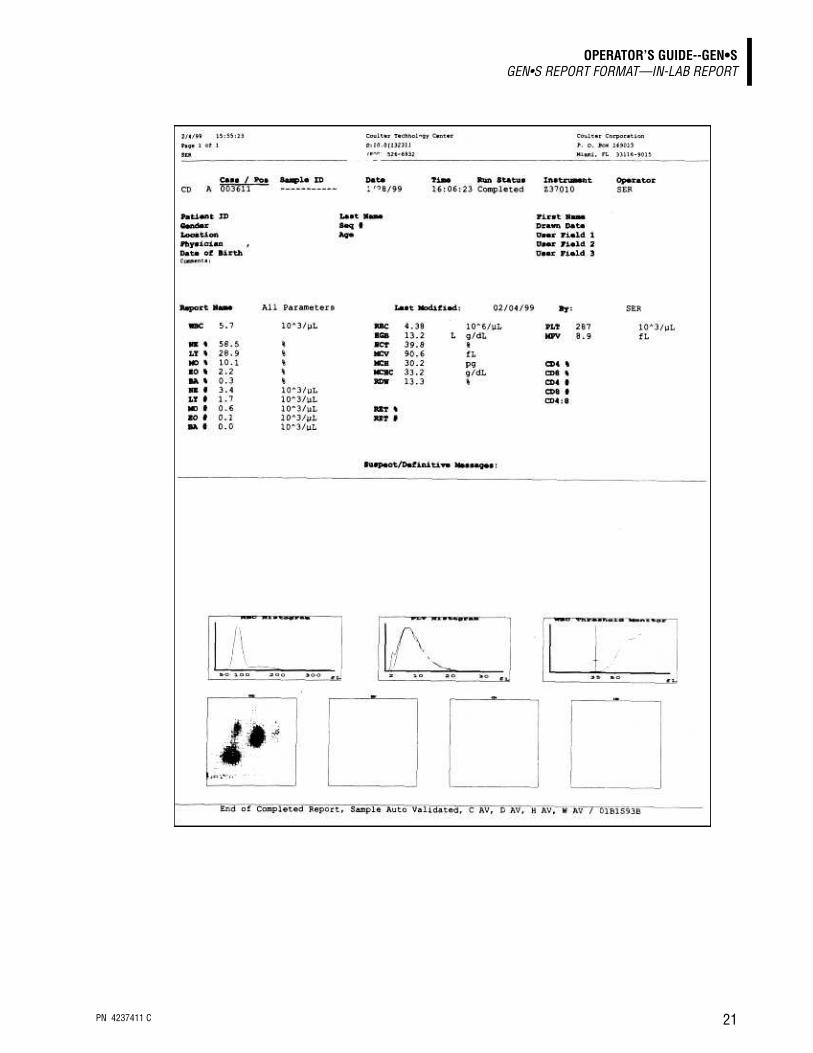
GEN•S REPORT FORMAT—IN-LAB REPORT
Algorithm Revision NumbersA value is printed below the Institution Name that indicates the revision of the differential and reticulocyte algorithm installed. The release is indicated as D:X.X [00000] R:X.X. The values in brackets indicate the Differential Preference selections made by Lab Administration. Differential Preference selections are the low level (1), mid level (2) or high level (3).
Report CommentsDecision Rules & Criteria messages appear in the comment area.
Printed Report FooterAny or all of the following footers can appear when you print a report:
This footer Means This
End of completed report The sample was not preassigned in the ToDo list or all the test requests for the sample are completed.
End of preliminary report At least one test request for the sample is pending.
End of additional tests report After the sample was run and printed with an End of completed report footer, an additional test was requested and run.
Blood Detector OFF The sample was run with the blood detector disabled.
SYSTEM ALARM A system alarm occured when this sample was run.
Validation Messages System reports Sample Validated, Sample Not Validated or AutoValidated.
PN 4237411 C 21
OPERATOR’S GUIDE--GEN•SGEN•S REPORT FORMAT—IN-LAB REPORT
PN 4237411 C 22
OPERATOR’S GUIDE--GEN•SMAXM-LIKE REPORT FORMAT
Place an update label next to heading 8.12 Setting Up Reports on page 8-17 of your GEN•S Operator’s Guide, PN 4237222B, for the following additional information:
MAXM-LIKE REPORT FORMAT Note: MAXM A and MAXM B report formats have different header styles and MAXM B format is slightly larger.
Retic DataplotThe retic dataplot selection is not available on MAXM A or MAXM B report formats.
Algorithm Revision NumbersA value is printed below the Institution Name that indicates the revision of the differential and reticulocyte algorithm installed. The release is indicated as D:X.X [00000] R:X.X. The values in brackets indicate the Differential Preference selections made by Lab Administration. Differential Preference selections are the low level (1), mid level (2) or high level (3).
Report CommentsDecision Rules & Criteria messages appear in the comment area.
Printed Report FooterAny or all of the following footers can appear when you print a report:
This footer Means This
End of completed report The sample was not preassigned in the ToDo list or all the test requests for the sample are completed.
End of preliminary report At least one test request for the sample is pending.
End of additional tests report After the sample was run and printed with an End of completed report footer, an additional test was requested and run.
Blood Detector disabled The sample was run with the blood detector disabled.
SYSTEM ALARM A system alarm occured when this sample was run.
PN 4237411 C 23
OPERATOR’S GUIDE--GEN•SNO MATCH
Place an update label next to heading Turning Autostop Off/On on page 8-3 of your GEN•S Operator’s Guide, PN 4237222B, for the following new instrument function:
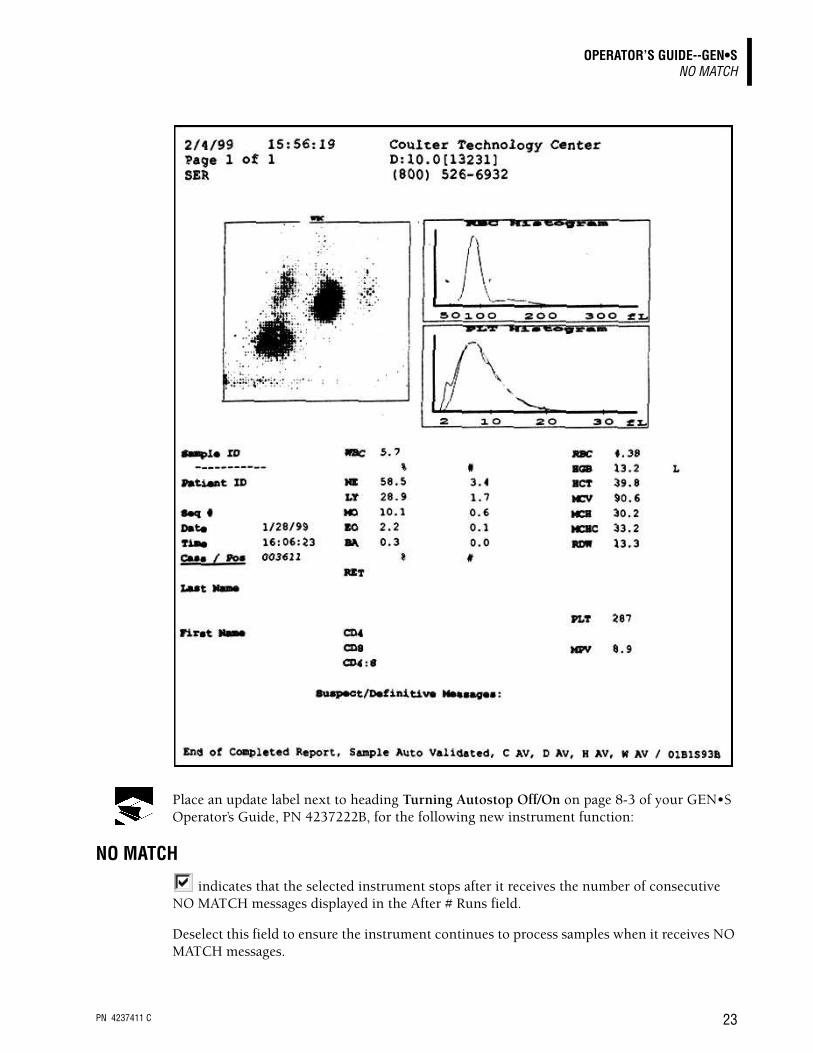
NO MATCH
indicates that the selected instrument stops after it receives the number of consecutive NO MATCH messages displayed in the After # Runs field.
Deselect this field to ensure the instrument continues to process samples when it receives NO MATCH messages.
PN 4237411 C 24
OPERATOR’S GUIDE--GEN•SNO READ
Place an update label next to heading Turning Autostop Off/On on page 8-3 of your GEN•S Operator’s Guide, PN 4237222B, for the following new instrument function:
NO READ
indicates that the selected instrument stops after it receives the number of consecutive NO READ messages displayed in the After # Runs field.
This AutoStop cannot be disabled.
Place an update label next to heading 8.12 Setting Up Reports on page 8-17 of your GEN•S Operator’s Guide, PN 4237222B, for the following additional information:
ONYX-LIKE REPORT FORMAT--CHARTABLE REPORT
Algorithm Revision NumbersA value is printed below the Institution Name that indicates the revision of the differential and reticulocyte algorithm installed. The release is indicated as D:X.X [00000] R:X.X. The values in brackets indicate the Differential Preference selections made by Lab Administration. Differential Preference selections are the low level (1), mid level (2) or high level (3).
Report CommentsDecision Rules & Criteria messages appear in the comment area.
Printed Report FooterAny or all of the following footers can appear when you print a report:
This footer Means This
End of completed report The sample was not preassigned in the ToDo list or all the test requests for the sample are completed.
End of preliminary report At least one test request for the sample is pending.
End of additional tests report
After the sample was run and printed with an End of completed report footer, an additional test was requested and run.
Blood Detector OFF The sample was run with the blood detector disabled.
SYSTEM ALARM A system alarm occured when this sample was run.
Validation Messages System reports Sample Validated, Sample Not Validated or AutoValidated.

PN 4237411 C 25
OPERATOR’S GUIDE--GEN•SONYX-LIKE REPORT FORMAT--CHARTABLE REPORT

PN 4237411 C 26
OPERATOR’S GUIDE--GEN•SONYX-LIKE REPORT FORMAT-IN LAB REPORT
Place an update label next to heading 8.12 Setting Up Reports on page 8-17 of your GEN•S Operator’s Guide, PN 4237222B, for the following additional information:
ONYX-LIKE REPORT FORMAT-IN LAB REPORT
Algorithm Revision NumbersA value is printed below the Institution Name that indicates the revision of the differential and reticulocyte algorithm installed. The release is indicated as D:X.X [00000] R:X.X. The values in brackets indicate the Differential Preference selections made by Lab Administration. Differential Preference selections are the low level (1), mid level (2) or high level (3).
Report CommentsDecision Rules & Criteria messages appear in the comment area.
Printed Report FooterAny or all of the following footers can appear when you print a report:
This footer Means This
End of completed report The sample was not preassigned in the ToDo list or all the test requests for the sample are completed.
End of preliminary report At least one test request for the sample is pending.
End of additional tests report After the sample was run and printed with an End of completed report footer, an additional test was requested and run.
Blood Detector disabled The sample was run with the blood detector disabled.
SYSTEM ALARM A system alarm occured when this sample was run.

PN 4237411 C 27
OPERATOR’S GUIDE--GEN•SONYX-LIKE REPORT FORMAT-IN LAB REPORT

PN 4237411 C 28
OPERATOR’S GUIDE--GEN•SPARTIAL ASPIRATION
Place an update label next to heading Turning Autostop Off/On on page 8-3 of your GEN•S Operator’s Guide, PN 4237222B, for the following new instrument function:
PARTIAL ASPIRATION
indicates that the selected instrument stops after it receives the number of consecutive PARTIAL ASPIRATION displayed in the After # Runs field. Control runs will not AutoStop if the only flag encountered during the run is ‘P’.
This AutoStop cannot be disabled.
Place an update label next to heading Deleting Patient Data on page 7-3 of your GEN•S Operator’s Guide, PN 4237222B, for the following revised information:
PATIENT RECORDS DELETION WINDOW You requested to delete sample information. The requested information has not yet been deleted. To Delete Data
1. On the Patient Data - DELETION REQUESTED window, verify the data you want to delete:
2. Select . A PATIENT RECORD(S) DELETION window appears. The requested information has still not been deleted.
3. Select to delete the sample information. You will no longer be able to retrieve the information.
To Keep the Data
Select on either patient deletion window to keep the sample information. The deletion windows close.
If you Select This Data is Deleted
All Data For Record(s) All histogram, DataPlot, 3D, 2D, numeric data and demographic information.
Note: The demographic information (patient record) is not deleted from the database unless the GENS Workstation software is restarted and there are no other sample records in the database associated with that patient record.
Delete Only Partial Data For Record(s)
List Mode Data 3D Dataplot data originally transmitted from the Analyzer. Numeric data remains in the database.
Graphics Data All histogram and 2D DataPlot data. 3D Dataplot data and Numeric data remains in the database.

PN 4237411 C 29
OPERATOR’S GUIDE--GEN•SPRINTING
Place an update label next to heading Printing on page 7-4 of your GEN•S Operator’s Guide, PN 4237222B, for the following revised information:
PRINTING 1. Select the items you want to print.
r If you are currently viewing the Results & Graphics window, only the current results can be printed.
r If you are currently viewing the DataBase & ToDo window, you can select several items that appear in the list and print them as a batch.
2. Select to display the Output Selection window.
3. Verify that the Output Selection window identifies the items you want to print.
4. Select to print the items. The Workstation sends the selected items to the default printer based on the settings your verified.
Printing Help Topics
To print a Help topic you are currently viewing select .
To print a popup Help window, use your right mouse button to click inside the popup window, and then select Print Topic.
Note: Reference Information, Cleaning Procedure, and Replacing Procedure Help Topics that display full screen should be printed using Landscape Orientation.
Place an update label next to heading 5.7, Processing Results Overview on page 5-7 of your GEN•S Operator’s Guide, PN 4237222B, for the following revised information:
PROCESSING RESULTS OVERVIEW The COULTER GEN•S System provides many functions to help you identify and process results quickly and effectively. The Workstation includes flags and codes with results to help you. You can also customize the flagging of results and define rules for flagging sample results.
FlaggingThe Workstation assigns priorities to flags. Critical flags (cH/cL) are the most important. They are followed by action flags (aH/aL) and then default flags(H/L).
IMPORTANT Flagging is evaluated when the sample is analyzed. Flagging is reevaluated for a sample when the results are manually edited, or when new results are received for a pending sample. Flagging is not reevaluated upon a change of flagging limits for results already in the database. Delta Check and Reflex Decision Rules are not reevaluated.
PN 4237411 C 30
OPERATOR’S GUIDE--GEN•SPROCESSING RESULTS OVERVIEW
You can customize many of the flags to suit the needs of your laboratory. You can define:
r Default high/low limits
r Different high/low limits based on gender and age
r Different high/low limits based on location
r Action limits that exceed the default limits. These appear with a unique aH (action high) and aL (action low) flags
r Critical limits that exceed the action limits. These appear with a unique cH (critical high) and cL (critical low) flags
r Limits (action) that force the display of definitive messages
r Limits that route results to a special Review Folder (AutoVerification).
Of course, you do not need to define these all at once, you can use the default set and gradually add additional limits based on your laboratory's assessment.
Rules for Flagging Results (Decision Rules & Criteria)You can define rules for delta checking. When the Workstation finds a sample for a patient that already has sample results in the DataBase, it uses the rules you define to determine how to flag the sample.
You can also define rules (Reflex Manager) to identify sample results that meet a set of criteria. For example, you can automatically generate the message "Perform Retic Count" in the comment field if the Workstation receives a sample result with Hgb <= 10.5 or RBC <= 3.2 and MCV <= 65.
As part of your rule definition, you can specify where you want the results that satisfy the rule to appear. For example, the Workstation can route results to special Reflex Manager, Delta Check and Review folders.
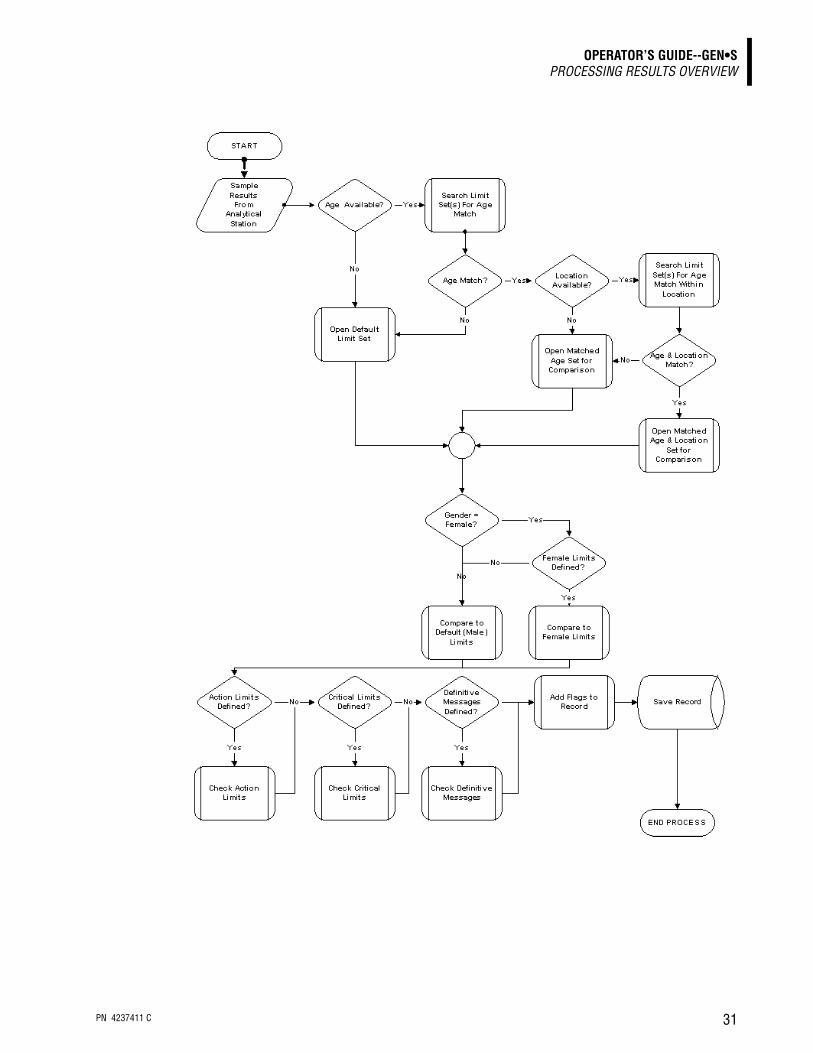
Processing Flagging LimitsThe following flow chart illustrates how the system processes flagging limits.
IMPORTANT Coulter Corporation does not claim to identify every abnormality in all samples. Coulter suggests using all available flagging options to optimize the sensitivity of instrument results. All flagging options include reference ranges (H/L), action and critical limits, definitive flags, suspect flags, parameter codes, delta checks, decision rules and system alarms. Coulter recommends avoiding the use of single messages or outputs to summarize specimen results or patient conditions.
PN 4237411 C 31
OPERATOR’S GUIDE--GEN•SPROCESSING RESULTS OVERVIEW
PN 4237411 C 32
OPERATOR’S GUIDE--GEN•SREPLACE DLE E WITH DLE C
Place an update label next to step 5 on page 8-19 of your GEN•S Operator’s Guide, PN 4237222B, for the following new instrument function:
REPLACE DLE E WITH DLE C
indicates the Workstation replaces DLE E with DLE C in the standard data set transmitted to your information system.
Place an update label next to step 4 on page 8-17 of your GEN•S Operator’s Guide, PN 4237222B, for the following new information:
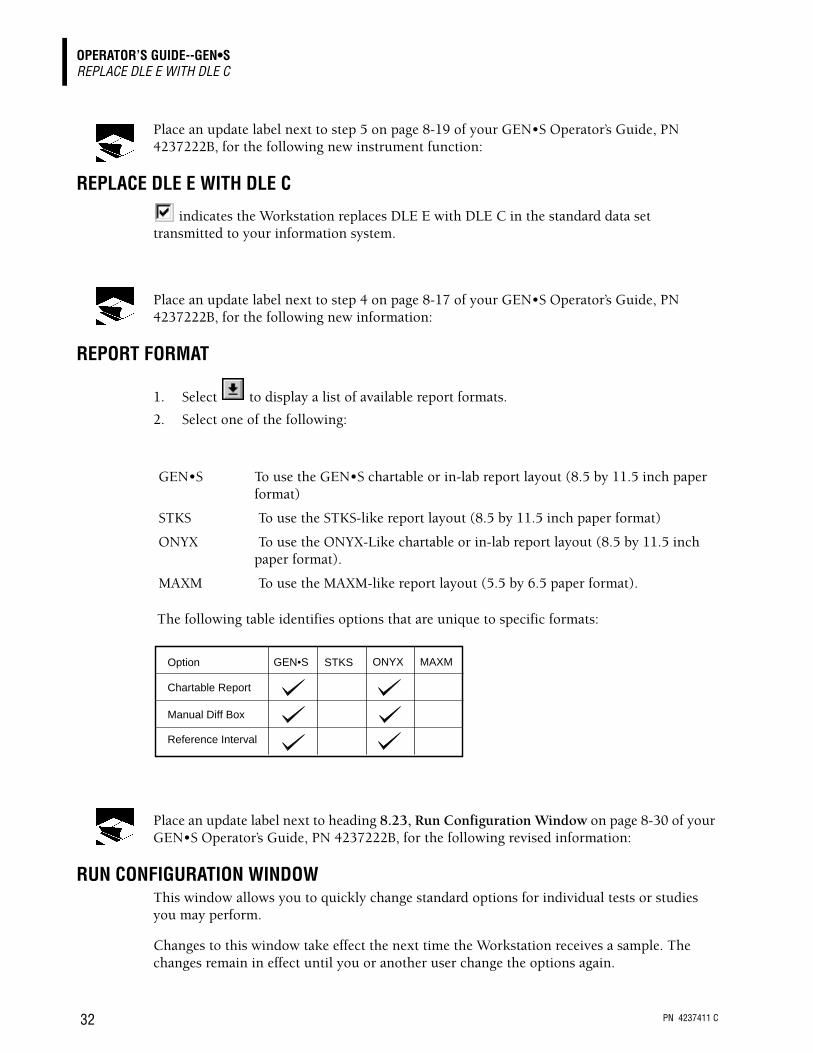
REPORT FORMAT
1. Select to display a list of available report formats.
2. Select one of the following:
The following table identifies options that are unique to specific formats:
Place an update label next to heading 8.23, Run Configuration Window on page 8-30 of your GEN•S Operator’s Guide, PN 4237222B, for the following revised information:
RUN CONFIGURATION WINDOW This window allows you to quickly change standard options for individual tests or studies you may perform.
Changes to this window take effect the next time the Workstation receives a sample. The changes remain in effect until you or another user change the options again.
GEN•S To use the GEN•S chartable or in-lab report layout (8.5 by 11.5 inch paper format)
STKS To use the STKS-like report layout (8.5 by 11.5 inch paper format)
ONYX To use the ONYX-Like chartable or in-lab report layout (8.5 by 11.5 inch paper format).
MAXM To use the MAXM-like report layout (5.5 by 6.5 paper format).
Option
Chartable Report
Manual Diff Box
Reference Interval
GEN•S STKS ONYX MAXM

PN 4237411 C 33
OPERATOR’S GUIDE--GEN•SRUNNING LATEX CONTROL—DIFF
You can change:
r Which results to print
r Which default report you want to use
r Which results to transmit to your information system
r When to make a slide
r Whether results are stored as part of quality assurance information
r Which results should cause the instrument to stop processing
r Whether the Decision Criteria Rules are used
r Whether the AutoNumbering option is used
r Whether the AutoCollation option is used.
r Whether to enable SlideMaker Communication
r Whether to limit independent flags H&H Check Failed and Pancytopenia.
No Match, No Read and Partial Aspiration are not flags, but Run Status messages. As a selectable item within Run Configuration, these Run Status messages are not included in ‘Any Flags’. If you wish to implement a function based on all flags and the Run Status message, select Specific Flags, then select all the pertinent checkboxes.
Research flags are included in ‘Any Flags’, but are not included in ‘Suspect’. If you wish to implement a function based on all Suspect flags, including the Research flags, select Specific Flags, then select all the pertinent checkboxes.
Place an update label next to heading Running Latex Control—Diff on page 3-1 of your GEN•S Operator’s Guide, PN 4237222B, for the following revised information:
RUNNING LATEX CONTROL—DIFF 1. Check the instrument processing control on the Command Center.
2. Ensure the latex primer and control are within the correct temperature range. For COULTER LATRON primer and control the correct temperature range is 18-30°C/64-86°F.
3. Verify the lot number of the primer and control. If you must use a new lot number, ensure that it has been set up properly.
4. Go to the Diluter Keypad.
5. Press to aspirate latex for the Diff test mode. The Diluter Keypad displays PRESS MANUAL OR CLEAR APERTURE.
6. Press . The Diluter Keypad displays PRESS MANUAL OR PRESENT SAMPLE.
CAUTION Possible system damage could occur if you aspirate anything except latex control or latex primer using this function. Do not aspirate any other materials with this function.
F 5 5 ENTER
CLEARAPERT

PN 4237411 C 34
OPERATOR’S GUIDE--GEN•SRUNNING LATEX CONTROL—DIFF
7. Remove the cap of the latex primer vial.
8. Immerse the aspirator tip in the latex primer vial. The instrument automatically aspirates the primer. The Diluter Keypad displays DIFF PRIMER while the instrument performs this function. When this function completes processing, the Diluter Keypad displays FUNCTION = 55.
Tip: When using Manual aspiration mode, the instrument automatically aspirates the sample. If the instrument fails to aspirate the sample, the optical sensors on the activator may be malfunctioning.
Press the black activator that surrounds the aspirator tip to aspirate the sample, and call your Coulter Representative.
9. Remove the vial from the aspirator tip when you hear a beep and the Analyzer Status line displays PREPARING SAMPLE. The probe cleaner retracts the aspirator and automatically cleans it.
10. At the Workstation, check the results from the primer.
11. If the results in the PRIMER column are less than or equal to 500, proceed to step 12. Otherwise, if the results in the PRIMER column are greater than 500:
a. At the Diluter Keypad, press to reactivate the function for the control. The Diluter Keypad displays PRESS MANUAL OR CLEAR APERTURE.
b. Perform steps 7 through 9 up to three more times.
c. If you do not get a result below 500, cycle a new vial of primer.
d. If you still do not get a result below 500, call your Coulter Representative.
12. At the Diluter Keypad, press to reactivate the function for the latex control. The Diluter Keypad displays PRESS MANUAL OR CLEAR APERTURE.
13. Gently mix the latex control according to the directions in the package insert.
14. Immerse the aspirator tip in the latex control vial. The instrument automatically aspirates the control.
The Diluter Keypad displays LATEX—DIFF while the instrument performs this function. When this function completes processing, the Diluter Keypad displays FUNCTION = 55.
15. At the Workstation, verify the results from the control.
16. At the Diluter Keypad, press to exit this function. The Diluter Keypad displays READY.
IMPORTANT Erroneous results could occur if you press CLEAR APERTURE before aspirating latex control. CLEAR APERTURE is only used before aspirating latex primer in this procedure.
ENTER
ENTER
STOP
PN 4237411 C 35
OPERATOR’S GUIDE--GEN•SRUNNING LATEX CONTROL—DIFF AND RETIC
Place an update label next to heading Running Latex Control—Diff And Retic on page 3-3 of your GEN•S Operator’s Guide, PN 4237222B, for the following revised information:
RUNNING LATEX CONTROL—DIFF AND RETIC 1. Check the instrument processing control on the Command Center.
2. Ensure the latex primer and control are within the correct temperature range. For COULTER LATRON primer and control the correct temperature range is 18-30°C/64-86°F.
3. Verify the lot number of the primer and control. If you must use a new lot number, ensure that it has been set up properly.
4. Go to the Diluter Keypad.
5. Press to aspirate LATEX primer and LATEX control for combined Diff and Retic test modes. The Diluter Keypad displays PRESS MANUAL OR CLEAR APERTURE.
6. Press . The Diluter Keypad displays PRESS MANUAL OR PRESENT SAMPLE.
7. Remove the cap of the latex primer vial.
8. Immerse the aspirator tip in the latex primer vial. The instrument automatically aspirates the RETIC+DIFF primer. The Diluter Keypad displays RETIC+DIFF PRIMER while the instrument performs this function. When this function completes processing, the Diluter Keypad displays FUNCTION = 57.
Tip: When using Manual aspiration mode, the instrument automatically aspirates the sample. If the instrument fails to aspirate the sample, the optical sensors on the activator may be malfunctioning.
Press the black activator that surrounds the aspirator tip to aspirate the sample, and call your Coulter Representative.
9. Remove the vial from the aspirator tip when you hear a beep and the Analyzer Status line displays PREPARING SAMPLE. The probe cleaner retracts the aspirator and automatically cleans it.
10. At the Workstation, check the results from the primer.
11. If the results in the PRIMER column are less than or equal to 500, proceed to step 12. Otherwise, if the results in the PRIMER column are greater than 500:
a. At the Diluter Keypad, press to reactivate the function for the control. The Diluter Keypad displays PRESS MANUAL OR CLEAR APERTURE.
b. Perform steps 7 through 9 up to three more times.
c. If you do not get a result below 500, cycle a new vial of primer.
d. If you still do not get a result below 500, call your Coulter Representative.
CAUTION Possible system damage could occur if you aspirate anything except latex control or latex primer using this function. Do not aspirate any other materials with this function.
F 5 7 ENTER
CLEARAPERT
ENTER
PN 4237411 C 36
OPERATOR’S GUIDE--GEN•SRUNNING LATEX CONTROL—RETIC
12. At the Diluter Keypad, press to reactivate the function for the latex control. The Diluter Keypad displays PRESS MANUAL OR CLEAR APERTURE.
13. Gently mix the latex control according to the directions in the package insert.
14. Immerse the aspirator tip in the latex control vial. The instrument automatically aspirates the control. The Diluter Keypad displays RETIC+DIFF--LATEX while the instrument performs this function. When this function completes processing, the Diluter Keypad displays FUNCTION = 57.
15. At the Workstation, verify the results from the control.
16. At the Diluter Keypad, press to exit this function. The Diluter Keypad displays READY.
Place an update label next to heading Running Latex Control—Retic on page 3-2 of your GEN•S Operator’s Guide, PN 4237222B, for the following revised information:
RUNNING LATEX CONTROL—RETIC 1. Check the instrument processing control on the Command Center.
2. Ensure the latex primer and control are within the correct temperature range. For COULTER LATRON primer and control the correct temperature range is 18-30°C/64-86°F.
3. Verify the lot number of the primer and control. If you must use a new lot number, ensure that it has been set up properly.
4. Go to the Diluter Keypad.
5. Press to aspirate latex for Retic test mode. The Diluter Keypad displays PRESS MANUAL OR CLEAR APERTURE.
6. Press . The Diluter Keypad displays PRESS MANUAL OR PRESENT SAMPLE.
7. Remove the cap of the latex primer vial.
8. Immerse the aspirator tip in the latex primer vial. The instrument automatically aspirates the primer. The Diluter Keypad displays RETIC PRIMER while the instrument performs this function. When this function completes processing, the Diluter Keypad displays FUNCTION = 56.
IMPORTANT Erroneous results could occur if you press CLEAR APERTURE before aspirating latex control. CLEAR APERTURE is only used before aspirating latex primer in this procedure.
ENTER
STOP
CAUTION Possible system damage could occur if you aspirate anything except latex control or latex primer using this function. Do not aspirate any other materials with this function.
F 5 6 ENTER
CLEARAPERT
PN 4237411 C 37
OPERATOR’S GUIDE--GEN•SRUNNING LATEX CONTROL—RETIC
Tip: When using Manual aspiration mode, the instrument automatically aspirates the sample. If the instrument fails to aspirate the sample, the optical sensors on the activator may be malfunctioning.
Press the black activator that surrounds the aspirator tip to aspirate the sample, and call your Coulter Representative.
9. Remove the vial from the aspirator tip when you hear a beep and the Analyzer Status line displays PREPARING SAMPLE. The probe cleaner retracts the aspirator and automatically cleans it.
10. At the Workstation, check the results from the primer.
11. If the results in the PRIMER column are less than or equal to 500, proceed to step 12. Otherwise, if the results in the PRIMER column are greater than 500:
a. At the Diluter Keypad, press to reactivate the function for the control. The Diluter Keypad displays PRESS MANUAL OR CLEAR APERTURE.
b. Perform steps 7 through 9 up to three more times.
c. If you do not get a result below 500, cycle a new vial of primer.
d. If you still do not get a result below 500, call your Coulter Representative.
12. At the Diluter Keypad, press to reactivate the function for the latex control. The Diluter Keypad displays PRESS MANUAL OR CLEAR APERTURE.
13. Gently mix the latex control according to the directions in the package insert.
14. Immerse the aspirator tip in the latex control vial. The instrument automatically aspirates the control. The Diluter Keypad displays RETIC--LATEX while the instrument performs this function. When this function completes processing, the Diluter Keypad displays FUNCTION = 56.
15. At the Workstation, verify the results from the control.
16. At the Diluter Keypad, press to exit this function. The Diluter Keypad displays READY.
IMPORTANT Erroneous results could occur if you press CLEAR APERTURE before aspirating latex control. CLEAR APERTURE is only used before aspirating latex primer in this procedure.
ENTER
ENTER
STOP

PN 4237411 C 38
OPERATOR’S GUIDE--GEN•SSETTING UP AUTOVALIDATION
Place an update label next to heading 8.11, Setting Up Rules for Flagging Sample Results on page 8-15 of your GEN•S Operator’s Guide, PN 4237222B, for the following new instrument function:
SETTING UP AUTOVALIDATION Before performing this procedure, read the Autovalidation Overview so that you understand how the GEN•S software assigns validation codes to sample results.
Enable AutoValidation Codes Enable the AutoValidation codes on the Communications screen if you want the validation codes to be transmitted to your information system. These codes will always print on the patient reports even if disabled on this screen. To enable transmission of the validation codes:
1. Select on the Command Center to display the System Setup window.
2. Select to display the System Setup Communications window.
3. Select the tab.
4. Select Enable Validation Codes.
5. Select to save the changes.
Enable AutoVerification CriteriaThe system allows you to configure AutoVerification for Reference, Action and Critical limits and also for Definitive messages for each Flagging Range that you set up in the Workstation.
If you have not set up flagging limits for your laboratory, follow the steps in Setting Up Flagging Limits to assign limits and enable Verification criteria.
If your flagging limits have already been set up and you want to enable Verification Criteria for either Reference, Action and Critical limits or Definitive messages, then perform the following.
1. Select on the Command Center to display the System Setup window.
2. Select to display the System Setup - Patient window.
3. Select to display the limits table.
4. Select the limit name you want to configure with Verification Criteria.
PN 4237411 C 39
OPERATOR’S GUIDE--GEN•SSETTING UP AUTOVALIDATION
5. Select to display the Laboratory Flagging Limits Setup window.
6. Select the limits tab that you want Verification Criteria enabled on.
7. Select AutoVerification Criteria.
8. Select to save the changes.
Repeat steps 3 through 8 for each limit that you want enabled.
Setup Decision RulesSetup Decision rules for your laboratory. If Decision Rules are enabled and a decision rule is met for a sample, this will cause an AutoValidation failure.
Example A:
IMPORTANT REVIEW DECISION RULES THAT CONTAIN MULTIPLE PARAMETERS. If you create a rule that has more than one parameter or contains more than one item that is related to a parameter, all of the parameters included in the rule (even if an OR condition is used) must also be included in the parameters reported in your report profile. Refer to Example A.
Rule Setup:Reflex rule is defined as "If WBC is < 2.0 OR Hgb is < 6.0 then Repeat sample and call results".
Sample Setup: Test Mode = CBC
Preassigned Sample: includes only Hgb and Hct (Report Name)
Sample Results:
(As printed and transmitted to LIS.)Hgb 5.8 g/dLHct 17.8 %
Note: The decision rule will not be applied to this sample even though the Hgb value is below 6.0. This is because the WBC parameter is not reported. In order for the Decision Rule to be applied to the sample, all parameters in the rule have to be reported. Therefore this sample would not result in an autovalidation failure since the decision rule was not applied.
IMPORTANT If the Validation Codes are going to be used on either the printout or in the LIS, all parameters specified in a rule must be included in a parameter block in order for all of the Validation codes to be CORRECT. Refer to Example B.
PN 4237411 C 40
OPERATOR’S GUIDE--GEN•SSETTING UP CONTROLS
Example B:
Place an update label next to heading 8.3, Setting Up Controls on page 8-2 of your GEN•S Operator’s Guide, PN 4237222B, for the following revised information:
SETTING UP CONTROLS Note: To perform this task, you must log on with a user name that was set up as an Advanced Operator or a Lab Administrator. If you need to access this function, contact your laboratory administrator.
1. Select on the Command Center to display the System Setup window.
2. Select to display the Quality Assurance Setup window.
3. Select to display the control information already set up for your instrument.
4. Select . The Setup New Controls Folder window appears.
5. Select the source of the control materials.
6. Select the type of control.
Rule Setup:Reflex rule is defined as "If Hgb < 6.5 OR Hct < 19.5 then Rerun Sample and Phone Results”.
Sample Setup: Test Mode = CBC
Preassigned Sample: Report all CBC parameters (Report Name),
Sample Results: (As printed and transmitted to LIS.)
WBC 4.8 10^3/LRBC 2.53 10^6/LHgb 6.3 g/dLHct 19.6 %MCV 77.4 fLMCH 24.9 pgMCHC 32.1 g/dLRDW 16.1 %Plt 80 10^3/LMPV 10.3 fL
Note: The parameter blocks that will be evaluated against the Decision Rule are the H and C blocks, because both Hgb and Hct are included in these blocks. The Decision Rule is not applied to the W block because Hct is not included in this block. Therefore, the AutoValidation message/codes will print and transmit "Sample Not Validated, C NV, H NV, W AV”. In order for the Decision Rule to be applied to the W block, you must create a Decision rule for Hgb and then a Decision rule for Hct, in order to get "Sample Not Validated, C NV, H NV, W NV”. .

PN 4237411 C 41
OPERATOR’S GUIDE--GEN•SSETTING UP DATE AND TIME
7. Select the level of the control you want to set up.
8. Select to specify the reference values and ranges for the control. The window you see varies depending on the source and type of control you selected.
Note: A reference RBC is used to calculate the reticulocyte absolute number for Retic only samples. All other samples use the RBC value obtained during CBC, CR or CDR analysis.
9. Perform one of the following depending on the source and type of control:
10. If desired, select to set up lab limits for the control.
11. Select
Place an update label next to heading Setting Up Date And Time on page 8-28 of your GEN•S Operator’s Guide, PN 4237222B, for the following revised information:
SETTING UP DATE AND TIME Note: To perform this task, you must log on with a user name that was set up as an Advanced Operator or Lab Administrator. If you need to access this function, contact your laboratory administrator.
1. Select to display the System Setup window.
2. Select to display the Windows NT™ Control Panel.
3. Double-click to display the Windows NT Date/Time window.
This Control Do This
Coulter (non-latex) Follow the instructions on the Diskette Entry of Lot Specific Information window.
Patient or Other (non-latex) Specify non-latex reference values.
Latex Specify latex reference values.
To return to the System Setup window.
Another tab To change additional Quality Assurance Setup information. The Workstation asks you if you want to save the changes you made to
the current information. Select to proceed.

PN 4237411 C 42
OPERATOR’S GUIDE--GEN•SSETTING UP FLAGGING LIMITS
4. Specify the details for date and time. If you need additional information about the fields
on the Date/Time window, select .
5. Shutdown and restart the Workstation after adjusting clock time.
Note: Service selects workstation regional, date and time settings at installation. Call Service if you desire modification of a regional setting. Modifications attempted at the LabAdmin security level may cause incorrect displays of information such as date format in some applications.
6. Read about GEN•S Year 2000 features.
Place an update label next to heading 8.10, Setting Up Flagging Limits on page 8-12 of your GEN•S Operator’s Guide, PN 4237222B, for the following revised information:
SETTING UP FLAGGING LIMITS Note: To perform this task, you must log on with a user name that was set up as a Lab Administrator. If you need to access this function, contact your laboratory administrator.
1. Select on the Command Center to display the System Setup window.
2. Select to display the Patient Setup window.
3. Select to display the list of flagging limits set up for your laboratory.
4. Select to create a new limit.
5. Type the name you want associated with the attributes you specify.
6. Specify the location you want associated with the limit.
7. Specify the age range you want associated with the limit.
Note: Use the age range monitor to ensure you do not specify overlapping ranges for the same location.
IMPORTANT Flagging is evaluated when the sample is analyzed. Flagging is reevaluated for a sample when the results are manually edited, or when new results are received for a pending sample. Flagging is not reevaluated upon a change of flagging limits for results already in the database. Delta check and Reflex Decision Rules are not reevaluated.
IMPORTANT Coulter suggests using all available flagging options to optimize the sensitivity of instrument results. All flagging options include reference ranges (H/L), action and critical limits, definitive flags, suspect flags, parameter codes, delta checks, decision rules and system alarms. Coulter recommends avoiding the use of single messages or outputs to summarize specimen results or patient conditions.

PN 4237411 C 43
OPERATOR’S GUIDE--GEN•SSETTING UP FLAGGING LIMITS
8. Select on the Setup New Limit Set window to save the limit name, location and age range.
9. Select the limit name that you want to set the flagging limits for.
10. Select and display the Laboratory Flagging Limits Setup window.
11. Specify whether you want to AutoVerify the results that match this limit.
12. Type the lower and upper limits for each parameter of the default Male category. Use
to move between fields.
13. Select:
14. Repeat steps 9 through 12 for each category you want to use for this limit name.
15. Select . The Workstation saves the limit information with the limit name and returns you to the Flagging Limits tab on the Patient Setup window. The Workstation flags future sample results based on the attributes you specified. If you review existing results in the database, they appear with the OLD attributes.
16. Select:
Female To define low and high limits for samples originating from a female and whether you want to AutoVerify the results that match this list.
Action Limits To define low and high limits for samples that require action by your laboratory and whether you want to AutoVerify the results that match this list.
Critical Limits To define low and high limits for samples that are critical and require immediate action by your laboratory and whether you want to AutoVerify the results that match this list.
Definitive Limits To identify the definitive messages you want to appear and whether you want to AutoVerify the results that match this list.
To close the Patient Setup window and return to the System Setup window.
Another tab To change additional Patient Setup information. The Workstation asks you if you want to save the changes you made to the current
information. Select to proceed.
Tab
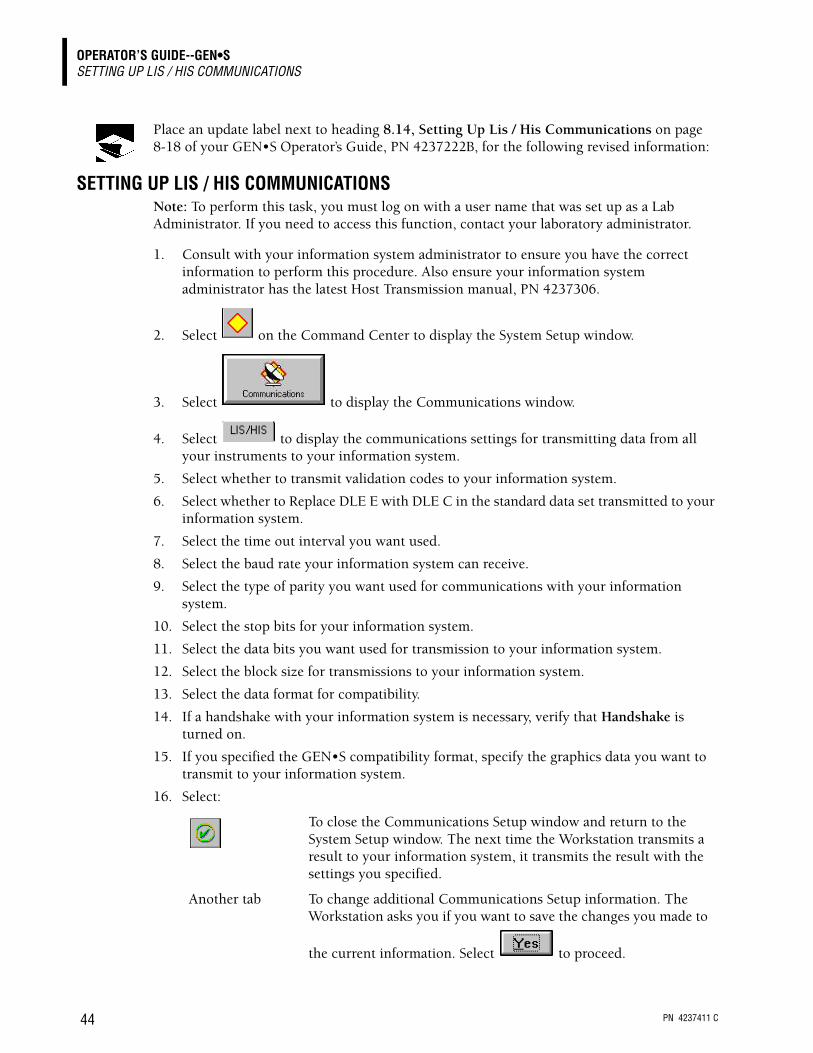
PN 4237411 C 44
OPERATOR’S GUIDE--GEN•SSETTING UP LIS / HIS COMMUNICATIONS
Place an update label next to heading 8.14, Setting Up Lis / His Communications on page 8-18 of your GEN•S Operator’s Guide, PN 4237222B, for the following revised information:
SETTING UP LIS / HIS COMMUNICATIONS Note: To perform this task, you must log on with a user name that was set up as a Lab Administrator. If you need to access this function, contact your laboratory administrator.
1. Consult with your information system administrator to ensure you have the correct information to perform this procedure. Also ensure your information system administrator has the latest Host Transmission manual, PN 4237306.
2. Select on the Command Center to display the System Setup window.
3. Select to display the Communications window.
4. Select to display the communications settings for transmitting data from all your instruments to your information system.
5. Select whether to transmit validation codes to your information system.
6. Select whether to Replace DLE E with DLE C in the standard data set transmitted to your information system.
7. Select the time out interval you want used.
8. Select the baud rate your information system can receive.
9. Select the type of parity you want used for communications with your information system.
10. Select the stop bits for your information system.
11. Select the data bits you want used for transmission to your information system.
12. Select the block size for transmissions to your information system.
13. Select the data format for compatibility.
14. If a handshake with your information system is necessary, verify that Handshake is turned on.
15. If you specified the GEN•S compatibility format, specify the graphics data you want to transmit to your information system.
16. Select:
To close the Communications Setup window and return to the System Setup window. The next time the Workstation transmits a result to your information system, it transmits the result with the settings you specified.
Another tab To change additional Communications Setup information. The Workstation asks you if you want to save the changes you made to
the current information. Select to proceed.

PN 4237411 C 45
OPERATOR’S GUIDE--GEN•SSETTING UP REPORTING UNITS
Place an update label next to heading 8.9, Setting Up Reporting Units on page 8-12 of your GEN•S Operator’s Guide, PN 4237222B, for the following revised information:
SETTING UP REPORTING UNITS Note: To perform this task, you must log on with a user name that was set up as a Lab Administrator. If you need to access this function, contact your laboratory administrator.
1. Select on the Command Center to display the System Setup window.
2. Select to display the Patient Setup window.
3. Select to display the reporting information for your Workstation.
4. Select the reporting units format for your laboratory. You can create formats SI5, SI6 and SI7 by selecting CUSTOM and then specify the units for each parameter.
5. Specify the groups of parameters you want to display with an extra digit.
Note: You must reset the Workstation after each time you select or deselect extra digit.
6. Select:
Place an update label next to heading 8.11, Setting Up Rules for Flagging Sample Results on page 8-15 of your GEN•S Operator’s Guide, PN 4237222B, for the following revised information:
SETTING UP RULES FOR FLAGGING SAMPLE RESULTS Note: To perform this task, you must log on with a user name that was set up as a Lab Administrator. If you need to access this function, contact your laboratory administrator.
To save the changes. The Workstation stores the changes and updates the date last modified and the user name. The Workstation updates the reporting units immediately.
Another tab To change additional Patient Setup information. The Workstation asks you if you want to save the changes you made to the current
information. Select to proceed.
IMPORTANT Flagging is evaluated when the sample is analyzed. Flagging is reevaluated for a sample when the results are manually edited, or when new results are received for a pending sample. Flagging is not reevaluated upon a change of flagging limits for results already in the database. Delta check and Reflex Decision Rules are not reevaluated.
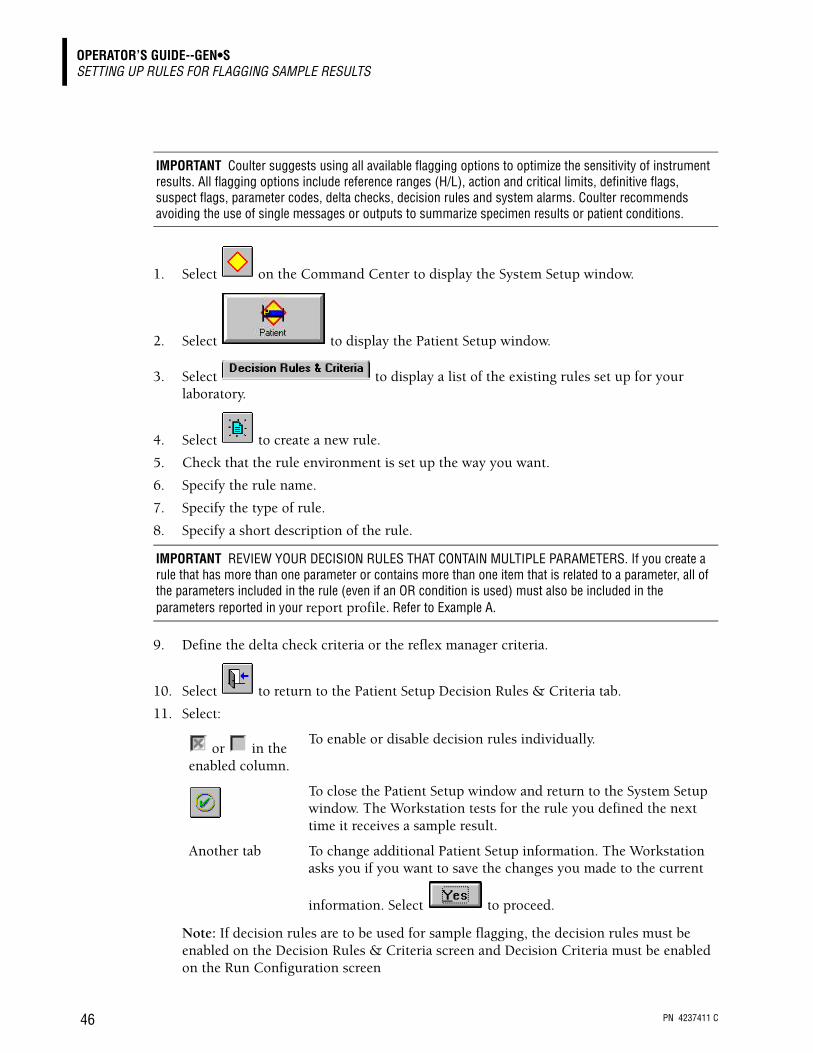
PN 4237411 C 46
OPERATOR’S GUIDE--GEN•SSETTING UP RULES FOR FLAGGING SAMPLE RESULTS
1. Select on the Command Center to display the System Setup window.
2. Select to display the Patient Setup window.
3. Select to display a list of the existing rules set up for your laboratory.
4. Select to create a new rule.
5. Check that the rule environment is set up the way you want.
6. Specify the rule name.
7. Specify the type of rule.
8. Specify a short description of the rule.
9. Define the delta check criteria or the reflex manager criteria.
10. Select to return to the Patient Setup Decision Rules & Criteria tab.
11. Select:
Note: If decision rules are to be used for sample flagging, the decision rules must be enabled on the Decision Rules & Criteria screen and Decision Criteria must be enabled on the Run Configuration screen
IMPORTANT Coulter suggests using all available flagging options to optimize the sensitivity of instrument results. All flagging options include reference ranges (H/L), action and critical limits, definitive flags, suspect flags, parameter codes, delta checks, decision rules and system alarms. Coulter recommends avoiding the use of single messages or outputs to summarize specimen results or patient conditions.
IMPORTANT REVIEW YOUR DECISION RULES THAT CONTAIN MULTIPLE PARAMETERS. If you create a rule that has more than one parameter or contains more than one item that is related to a parameter, all of the parameters included in the rule (even if an OR condition is used) must also be included in the parameters reported in your report profile. Refer to Example A.
or in the enabled column.
To enable or disable decision rules individually.
To close the Patient Setup window and return to the System Setup window. The Workstation tests for the rule you defined the next time it receives a sample result.
Another tab To change additional Patient Setup information. The Workstation asks you if you want to save the changes you made to the current
information. Select to proceed.
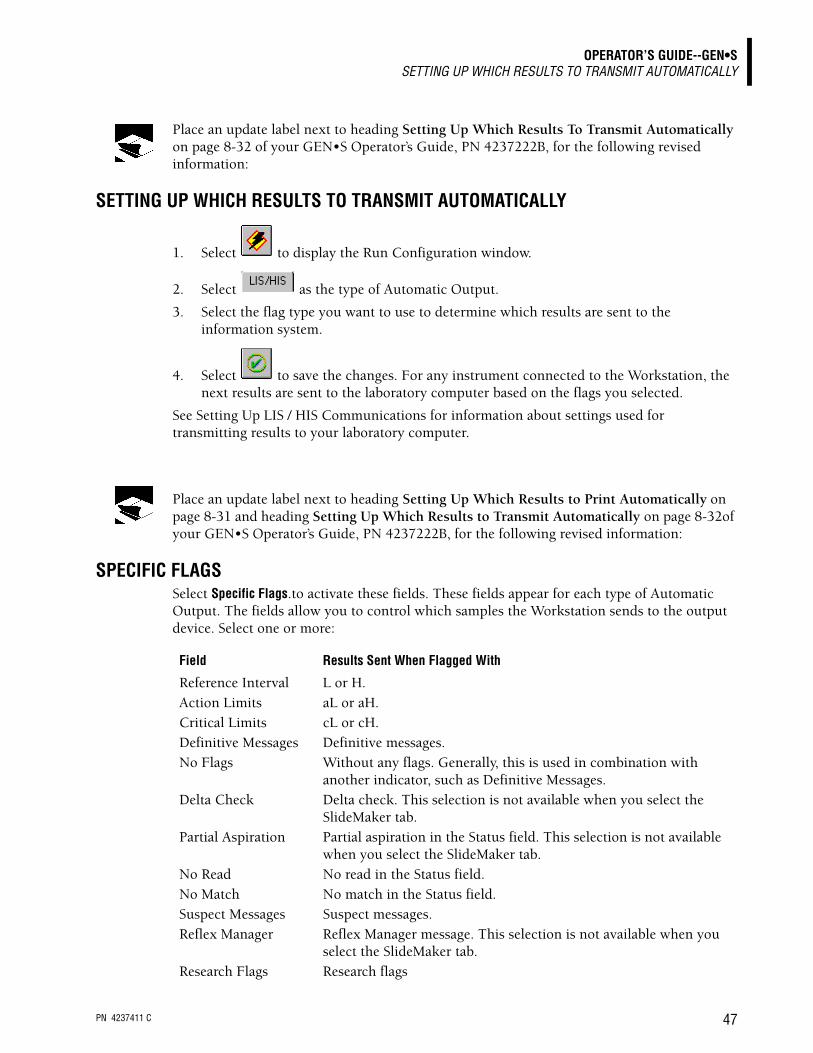
PN 4237411 C 47
OPERATOR’S GUIDE--GEN•SSETTING UP WHICH RESULTS TO TRANSMIT AUTOMATICALLY
Place an update label next to heading Setting Up Which Results To Transmit Automatically on page 8-32 of your GEN•S Operator’s Guide, PN 4237222B, for the following revised information:
SETTING UP WHICH RESULTS TO TRANSMIT AUTOMATICALLY
1. Select to display the Run Configuration window.
2. Select as the type of Automatic Output.
3. Select the flag type you want to use to determine which results are sent to the information system.
4. Select to save the changes. For any instrument connected to the Workstation, the next results are sent to the laboratory computer based on the flags you selected.
See Setting Up LIS / HIS Communications for information about settings used for transmitting results to your laboratory computer.
Place an update label next to heading Setting Up Which Results to Print Automatically on page 8-31 and heading Setting Up Which Results to Transmit Automatically on page 8-32of your GEN•S Operator’s Guide, PN 4237222B, for the following revised information:
SPECIFIC FLAGS Select Specific Flags.to activate these fields. These fields appear for each type of Automatic Output. The fields allow you to control which samples the Workstation sends to the output device. Select one or more:
Field Results Sent When Flagged With
Reference Interval L or H.Action Limits aL or aH.Critical Limits cL or cH.Definitive Messages Definitive messages.No Flags Without any flags. Generally, this is used in combination with
another indicator, such as Definitive Messages.Delta Check Delta check. This selection is not available when you select the
SlideMaker tab.Partial Aspiration Partial aspiration in the Status field. This selection is not available
when you select the SlideMaker tab.No Read No read in the Status field.No Match No match in the Status field.Suspect Messages Suspect messages.Reflex Manager Reflex Manager message. This selection is not available when you
select the SlideMaker tab.Research Flags Research flags

PN 4237411 C 48
OPERATOR’S GUIDE--GEN•SSPECIFYING LATEX REFERENCE VALUES
Place an update label next to heading Specifying Latex Reference Values on page 8-3 of your GEN•S Operator’s Guide, PN 4237222B, for the following revised information:
SPECIFYING LATEX REFERENCE VALUES Note: Before performing this procedure, you must perform steps 1 through 8 of Setting Up Controls.
1. Specify whether or not you want results automatically transmitted to your information system.
2. Type the lot number of the latex control and press .
3. Type the expiration date of the control and press .4. Specify whether you want to use this lot number as a default. 5. Type the values in the appropriate fields:
r Diff Mode Parameters r Retic Mode Parameters
6. Select
Place an update label next to heading 8.12 Setting Up Reports on page 8-17 of your GEN•S Operator’s Guide, PN 4237222B, for the following additional information:
STKS-LIKE REPORT FORMAT
Algorithm Revision NumbersA value is printed above the Institution Name that indicates the revision of the differential and reticulocyte algorithm installed. The release is indicated as D:X.X [00000] R:X.X. The values in brackets indicate the Differential Preference selections made by Lab Administration. Differential Preference selections are the low level (1), mid level (2) or high level (3).
Report CommentsDecision Rules & Criteria messages appear in the comment area.
Printed Report FooterAny or all of the following footers can appear when you print a report:
To save the reference values and return to the Setup New Control Folder window.
To return to the Setup New Control Folder window without saving changes.
Tab
Tab
This footer Means This
End of completed report The sample was not preassigned in the ToDo list or all the test requests for the sample are completed.
End of preliminary report At least one test request for the sample is pending.
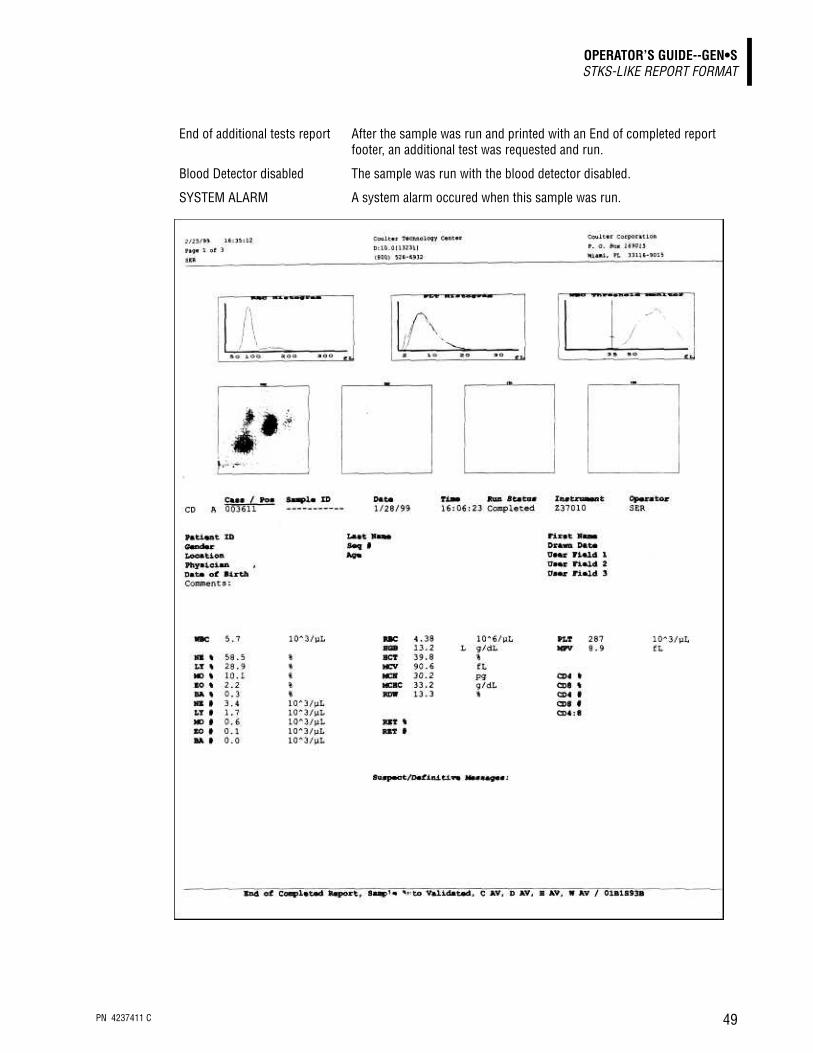
PN 4237411 C 49
OPERATOR’S GUIDE--GEN•SSTKS-LIKE REPORT FORMAT
End of additional tests report After the sample was run and printed with an End of completed report footer, an additional test was requested and run.
Blood Detector disabled The sample was run with the blood detector disabled.
SYSTEM ALARM A system alarm occured when this sample was run.
PN 4237411 C 50
OPERATOR’S GUIDE--GEN•SSTORING SPECIMENS
Place an update label next to heading 4.2, Storing Specimens on page 4-1 of your GEN•S Operator’s Guide, PN 4237222B, for the following revised information:
STORING SPECIMENS Analyze specimens as soon as possible for optimum accuracy.
Tip: For more information on handling and processing blood specimens, refer to NCCLS publication H18-A.
Venipuncture SpecimensFor CBC and DIFF:
r Run within 24 hours after collection if stored at room temperature (23.9°C or 75°F).
r Run within 48 hours after collection if stored at 2 to 8°C (35.6 to 46.4°F).
For Reticulocytes:
r Run within 24 hours after collection if stored at room temperature (23.9°C or 75°F).
r Run within 72 hours after collection if stored at 2 to 8°C (35.6 to 46.4°F).
Capillary SpecimensFollow the manufacturer's recommendations for the microcollection device.
Place an update label next to heading 5.9, Suspect And Definitive Messages on page 5-12 of your GEN•S Operator’s Guide, PN 4237222B, for the following revised information:
SUSPECT AND DEFINITIVE MESSAGES
Suspect MessagesSuspect messages appear for sample results based on an abnormal cell distribution or population. The system generates these messages according to an internal algorithm.
All sample results with suspect messages automatically appear in the Review Folder. Review the sample according to your laboratory's procedures. If you observe a higher rate of suspect flags than usual call your Coulter Representative.
IMPORTANT Coulter Corporation does not claim to identify every abnormality in all samples. Coulter suggests using all available flagging options to optimize the sensitivity of instrument results. All flagging options include reference ranges (H/L), action and critical limits, definitive flags, suspect flags, parameter codes, delta checks, decision rules and system alarms. Coulter recommends avoiding the use of single messages or outputs to summarize specimen results or patient conditions.
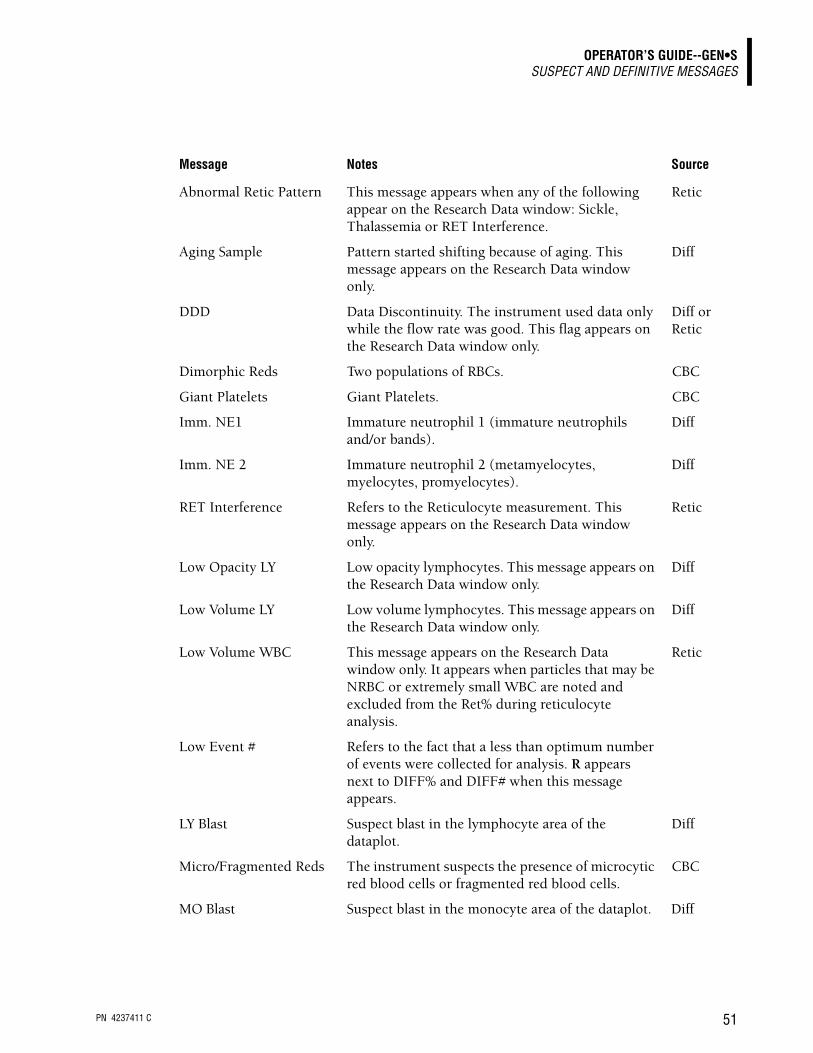
PN 4237411 C 51
OPERATOR’S GUIDE--GEN•SSUSPECT AND DEFINITIVE MESSAGES
Message Notes Source
Abnormal Retic Pattern This message appears when any of the following appear on the Research Data window: Sickle, Thalassemia or RET Interference.
Retic
Aging Sample Pattern started shifting because of aging. This message appears on the Research Data window only.
Diff
DDD Data Discontinuity. The instrument used data only while the flow rate was good. This flag appears on the Research Data window only.
Diff or Retic
Dimorphic Reds Two populations of RBCs. CBC
Giant Platelets Giant Platelets. CBC
Imm. NE1 Immature neutrophil 1 (immature neutrophils and/or bands).
Diff
Imm. NE 2 Immature neutrophil 2 (metamyelocytes, myelocytes, promyelocytes).
Diff
RET Interference Refers to the Reticulocyte measurement. This message appears on the Research Data window only.
Retic
Low Opacity LY Low opacity lymphocytes. This message appears on the Research Data window only.
Diff
Low Volume LY Low volume lymphocytes. This message appears on the Research Data window only.
Diff
Low Volume WBC This message appears on the Research Data window only. It appears when particles that may be NRBC or extremely small WBC are noted and excluded from the Ret% during reticulocyte analysis.
Retic
Low Event # Refers to the fact that a less than optimum number of events were collected for analysis. R appears next to DIFF% and DIFF# when this message appears.
LY Blast Suspect blast in the lymphocyte area of the dataplot.
Diff
Micro/Fragmented Reds The instrument suspects the presence of microcytic red blood cells or fragmented red blood cells.
CBC
MO Blast Suspect blast in the monocyte area of the dataplot. Diff
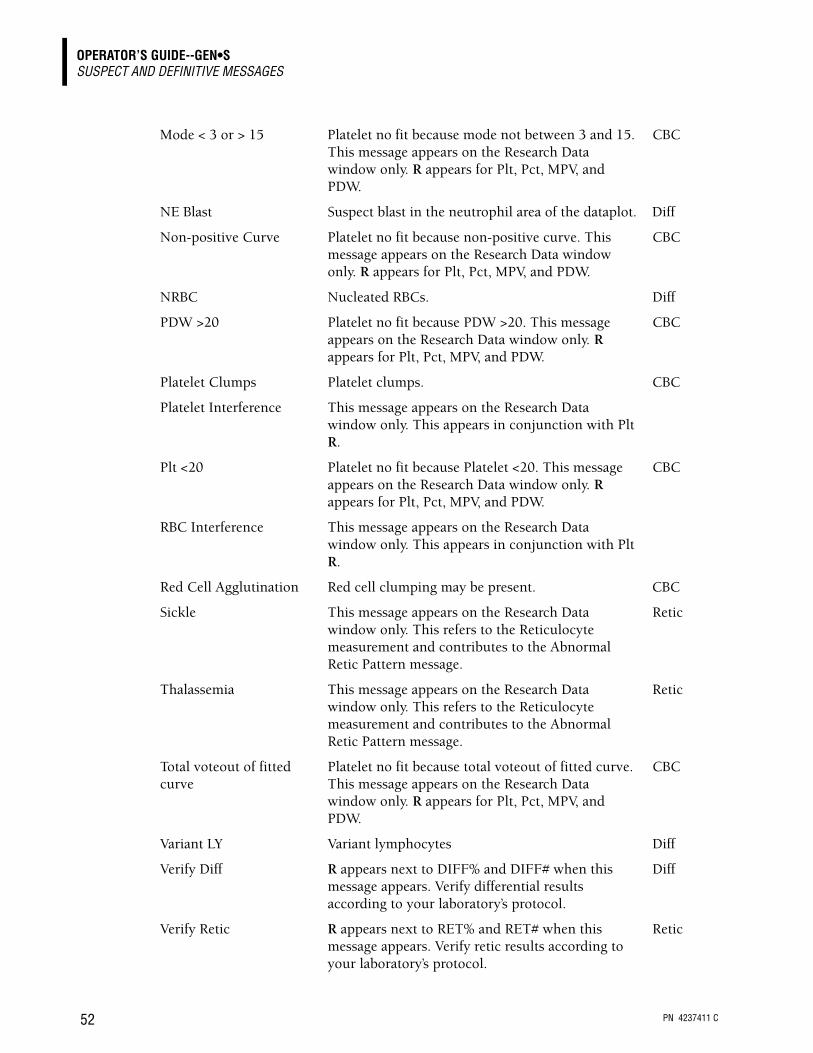
PN 4237411 C 52
OPERATOR’S GUIDE--GEN•SSUSPECT AND DEFINITIVE MESSAGES
Mode < 3 or > 15 Platelet no fit because mode not between 3 and 15. This message appears on the Research Data window only. R appears for Plt, Pct, MPV, and PDW.
CBC
NE Blast Suspect blast in the neutrophil area of the dataplot. Diff
Non-positive Curve Platelet no fit because non-positive curve. This message appears on the Research Data window only. R appears for Plt, Pct, MPV, and PDW.
CBC
NRBC Nucleated RBCs. Diff
PDW >20 Platelet no fit because PDW >20. This message appears on the Research Data window only. R appears for Plt, Pct, MPV, and PDW.
CBC
Platelet Clumps Platelet clumps. CBC
Platelet Interference This message appears on the Research Data window only. This appears in conjunction with Plt R.
Plt <20 Platelet no fit because Platelet <20. This message appears on the Research Data window only. R appears for Plt, Pct, MPV, and PDW.
CBC
RBC Interference This message appears on the Research Data window only. This appears in conjunction with Plt R.
Red Cell Agglutination Red cell clumping may be present. CBC
Sickle This message appears on the Research Data window only. This refers to the Reticulocyte measurement and contributes to the Abnormal Retic Pattern message.
Retic
Thalassemia This message appears on the Research Data window only. This refers to the Reticulocyte measurement and contributes to the Abnormal Retic Pattern message.
Retic
Total voteout of fitted curve
Platelet no fit because total voteout of fitted curve. This message appears on the Research Data window only. R appears for Plt, Pct, MPV, and PDW.
CBC
Variant LY Variant lymphocytes Diff
Verify Diff R appears next to DIFF% and DIFF# when this message appears. Verify differential results according to your laboratory’s protocol.
Diff
Verify Retic R appears next to RET% and RET# when this message appears. Verify retic results according to your laboratory’s protocol.
Retic
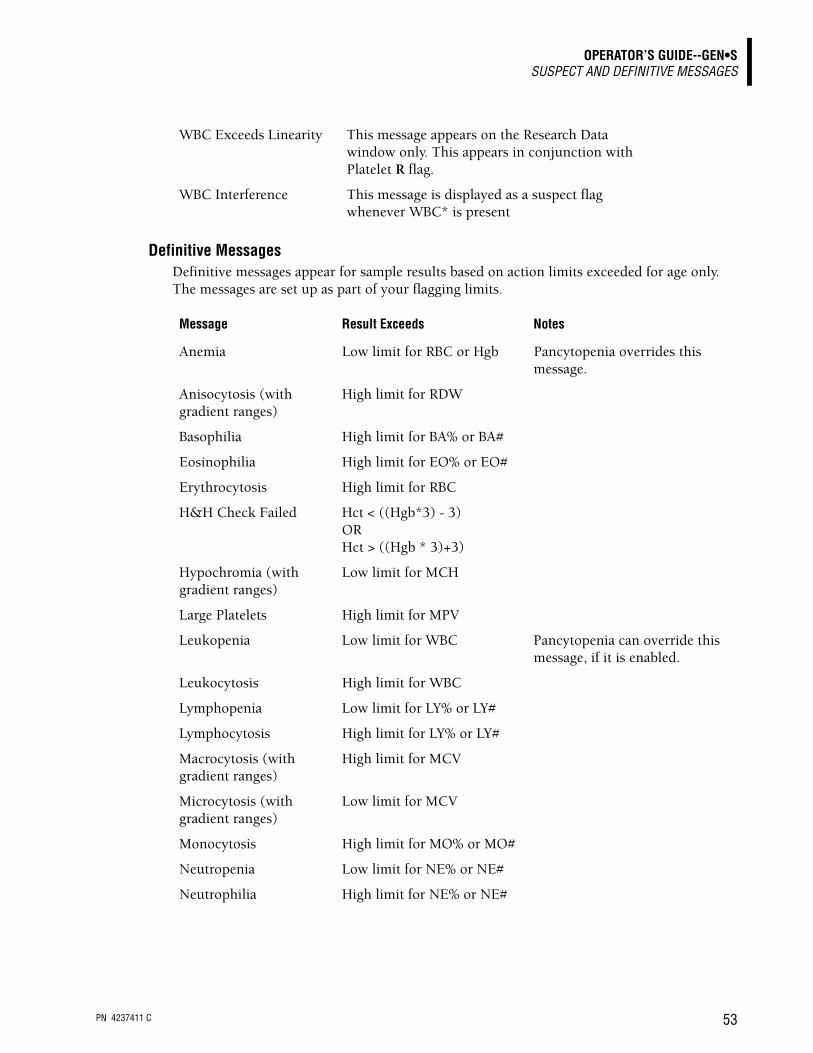
PN 4237411 C 53
OPERATOR’S GUIDE--GEN•SSUSPECT AND DEFINITIVE MESSAGES
Definitive MessagesDefinitive messages appear for sample results based on action limits exceeded for age only. The messages are set up as part of your flagging limits.
WBC Exceeds Linearity This message appears on the Research Data window only. This appears in conjunction with Platelet R flag.
WBC Interference This message is displayed as a suspect flag whenever WBC* is present
Message Result Exceeds Notes
Anemia Low limit for RBC or Hgb Pancytopenia overrides this message.
Anisocytosis (with gradient ranges)
High limit for RDW
Basophilia High limit for BA% or BA#
Eosinophilia High limit for EO% or EO#
Erythrocytosis High limit for RBC
H&H Check Failed Hct < ((Hgb*3) - 3) ORHct > ((Hgb * 3)+3)
Hypochromia (with gradient ranges)
Low limit for MCH
Large Platelets High limit for MPV
Leukopenia Low limit for WBC Pancytopenia can override this message, if it is enabled.
Leukocytosis High limit for WBC
Lymphopenia Low limit for LY% or LY#
Lymphocytosis High limit for LY% or LY#
Macrocytosis (with gradient ranges)
High limit for MCV
Microcytosis (with gradient ranges)
Low limit for MCV
Monocytosis High limit for MO% or MO#
Neutropenia Low limit for NE% or NE#
Neutrophilia High limit for NE% or NE#

PN 4237411 C 54
OPERATOR’S GUIDE--GEN•SSYSTEM STOP CRITERIA
Place an update label next to heading Turning Autostop Off/On on page 8-3 of your GEN•S Operator’s Guide, PN 4237222B, for the following additional information:
SYSTEM STOP CRITERIA The GEN•S System includes several functions that enable you to stop processing samples. You can specify any of the following for AutoStop:
r Flow cell
r Controls
r XB/XM
r SlideMaker
r No Match
r No Read
r Partial Aspiration
Place an update label next to heading Archiving on page 7-6 of your GEN•S Operator’s Guide, PN 4237222B, for the following additional information:
TIP: ARCHIVING INFORMATION When you archive information, the Workstation copies the information from the DataBase into a comma separated text file. The file can be read by any spreadsheet application. It is often referred to as a .CSV or a .TXT file.
The file can be retrieved into any spreadsheet application. Use your spreadsheet program’s instructions to transpose the information if it is not in a readable format.
Pancytopenia Low limit for WBC, RBC and Plt
This message can override messages for Anemia, Leukopenia and Thrombocytopenia, if it is enabled. The system generates this message automatically.
Reticulocytosis High limit for RET% or RET#
Small Platelets Low limit for MPV
Thrombocytopenia Low limit for Plt Pancytopenia overrides this message.
Thrombocytosis High limit for Plt
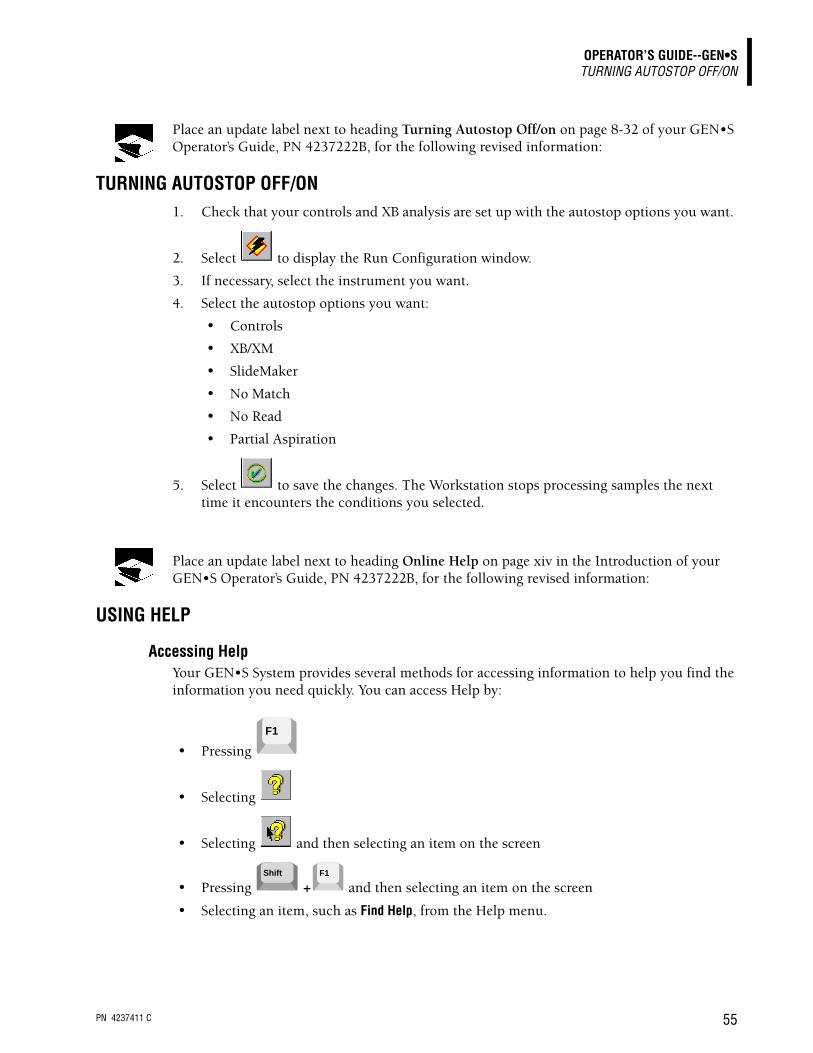
PN 4237411 C 55
OPERATOR’S GUIDE--GEN•STURNING AUTOSTOP OFF/ON
Place an update label next to heading Turning Autostop Off/on on page 8-32 of your GEN•S Operator’s Guide, PN 4237222B, for the following revised information:
TURNING AUTOSTOP OFF/ON 1. Check that your controls and XB analysis are set up with the autostop options you want.
2. Select to display the Run Configuration window.
3. If necessary, select the instrument you want.
4. Select the autostop options you want:
r Controls
r XB/XM
r SlideMaker
r No Match
r No Read
r Partial Aspiration
5. Select to save the changes. The Workstation stops processing samples the next time it encounters the conditions you selected.
Place an update label next to heading Online Help on page xiv in the Introduction of your GEN•S Operator’s Guide, PN 4237222B, for the following revised information:
USING HELP
Accessing HelpYour GEN•S System provides several methods for accessing information to help you find the information you need quickly. You can access Help by:
r Pressing
r Selecting
r Selecting and then selecting an item on the screen
r Pressing + and then selecting an item on the screen
r Selecting an item, such as Find Help, from the Help menu.
F1
Shift F1

PN 4237411 C 56
OPERATOR’S GUIDE--GEN•SUSING HELP
Related InformationMany help topics contain hypertext lists of related information. If you see this graphic in the
header , you can select it to display a hypertext list of related information.
Jumping to Additional InformationWithin a Help topic, there may be one or more jumps to other help topics. Jumps appear blue. Select the blue text with your light pen, mouse, or your finger (if you have a touch screen) to jump to additional information.
Many help topics also contain pop-up graphics. If you see this graphic , you can select it to display a pop-up graphic.
Tips
in a help is a special jump. If you select this graphic, a tip appears that can make your job easier.
Printing Help Topics
To print a Help topic you are currently viewing select .
To print a popup Help window, use your right mouse button to click inside the popup window, and then select Print Topic.
Note: Reference Information, Cleaning Procedure, and Replacing Procedure Help Topics that display full screen should be printed using Landscape Orientation.
Working with the Help WindowDrag the title bar to move the Help window. Use the border on the Help window to resize the window. Use the scroll bar to view information not visible in the Help window.
If the bottom of the scroll bar is covered by the command center, you can select Options Keep Help On Top On Top to uncover it.
If you need more information about using the Help system, press when the Help window is open. The Windows NT Using Help window appears. You can use it to find out more about the help system.
VideosYour GEN•S System provides online videos for selected cleaning, replacement and troubleshooting tasks. This information can assist you in performing these tasks. To see a video, your Help CD must be in the CD-ROM drive on the Workstation.
If you see this graphic , you can select it to jump to a video.
F1
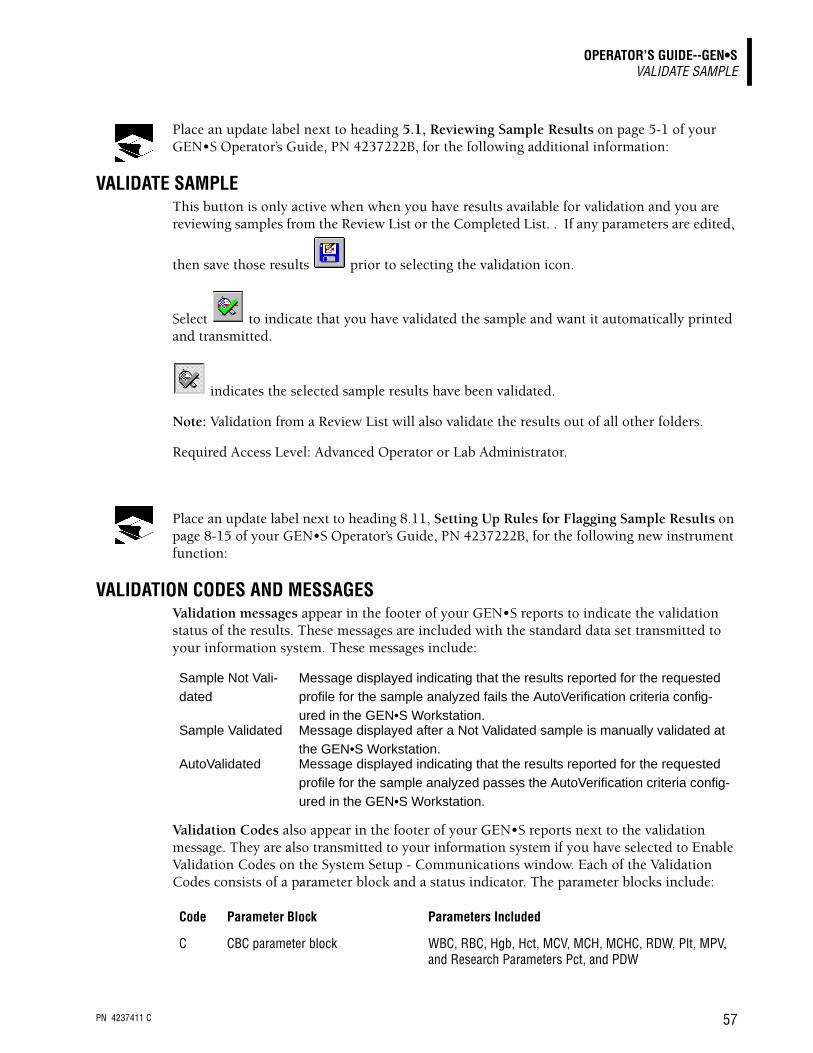
PN 4237411 C 57
OPERATOR’S GUIDE--GEN•SVALIDATE SAMPLE
Place an update label next to heading 5.1, Reviewing Sample Results on page 5-1 of your GEN•S Operator’s Guide, PN 4237222B, for the following additional information:
VALIDATE SAMPLE This button is only active when when you have results available for validation and you are reviewing samples from the Review List or the Completed List. . If any parameters are edited,
then save those results prior to selecting the validation icon.
Select to indicate that you have validated the sample and want it automatically printed and transmitted.
indicates the selected sample results have been validated.
Note: Validation from a Review List will also validate the results out of all other folders.
Required Access Level: Advanced Operator or Lab Administrator.
Place an update label next to heading 8.11, Setting Up Rules for Flagging Sample Results on page 8-15 of your GEN•S Operator’s Guide, PN 4237222B, for the following new instrument function:
VALIDATION CODES AND MESSAGES Validation messages appear in the footer of your GEN•S reports to indicate the validation status of the results. These messages are included with the standard data set transmitted to your information system. These messages include:
Validation Codes also appear in the footer of your GEN•S reports next to the validation message. They are also transmitted to your information system if you have selected to Enable Validation Codes on the System Setup - Communications window. Each of the Validation Codes consists of a parameter block and a status indicator. The parameter blocks include:
Sample Not Vali-dated
Message displayed indicating that the results reported for the requested profile for the sample analyzed fails the AutoVerification criteria config-ured in the GEN•S Workstation.
Sample Validated Message displayed after a Not Validated sample is manually validated at the GEN•S Workstation.
AutoValidated Message displayed indicating that the results reported for the requested profile for the sample analyzed passes the AutoVerification criteria config-ured in the GEN•S Workstation.
Code Parameter Block Parameters Included
C CBC parameter block WBC, RBC, Hgb, Hct, MCV, MCH, MCHC, RDW, Plt, MPV, and Research Parameters Pct, and PDW
PN 4237411 C 58
OPERATOR’S GUIDE--GEN•SVALIDATION CODES AND MESSAGES
Note: In order for the Research Parameters to be included in the parameter block, the Research Parameters must be unlocked and included in the report profile.
The status indicators that can exist for any parameter block are:
All of the combinations that can exist are listed below. A minimum of one, up to a maximum of 7, parameter codes may exist for a sample. The number of parameter codes is dependent upon the report profile requested for a sample.
A parameter block is present if at least one of the parameters in the block is included in the patient report.
D Diff (differential) parameter block NE%, NE#, LY%, LY#, MO%, MO#, EO%, EO#, BA% and BA#
H H&H parameter block Hgb and Hct
R Retic (reticulocyte) parameter block Retic%, Retic#, and Research Parameters MRV, MSCV, IRF, HLR% and HLR#
W WBC/Hgb/Plt parameter block WBC, Hgb and Plt
4 CD4 Subset parameter block CD4% and CD4#
8 CD8 Subset parameter block CD8% and CD8#
AV AutoValidated
V Validated (manual validation was performed at the GEN•S Workstation)
NV Not Validated
C NV C V C AV
D NV D V D AV
H NV H V H AV
R NV R V R AV
W NV W V W AV
4 NV 4 V 4 AV
8 NV 8 V 8 AV
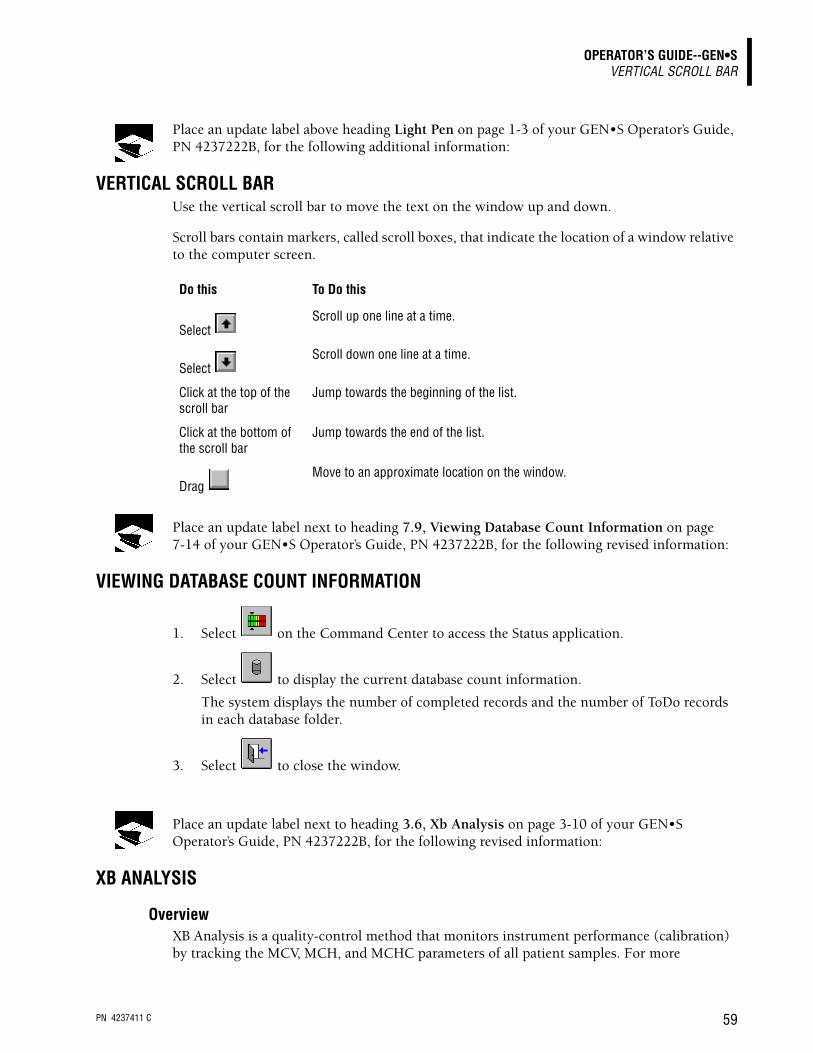
PN 4237411 C 59
OPERATOR’S GUIDE--GEN•SVERTICAL SCROLL BAR
Place an update label above heading Light Pen on page 1-3 of your GEN•S Operator’s Guide, PN 4237222B, for the following additional information:
VERTICAL SCROLL BAR Use the vertical scroll bar to move the text on the window up and down.
Scroll bars contain markers, called scroll boxes, that indicate the location of a window relative to the computer screen.
Place an update label next to heading 7.9, Viewing Database Count Information on page 7-14 of your GEN•S Operator’s Guide, PN 4237222B, for the following revised information:
VIEWING DATABASE COUNT INFORMATION
1. Select on the Command Center to access the Status application.
2. Select to display the current database count information.
The system displays the number of completed records and the number of ToDo records in each database folder.
3. Select to close the window.
Place an update label next to heading 3.6, Xb Analysis on page 3-10 of your GEN•S Operator’s Guide, PN 4237222B, for the following revised information:
XB ANALYSIS
OverviewXB Analysis is a quality-control method that monitors instrument performance (calibration) by tracking the MCV, MCH, and MCHC parameters of all patient samples. For more
Do this To Do this
Select Scroll up one line at a time.
Select Scroll down one line at a time.
Click at the top of the scroll bar
Jump towards the beginning of the list.
Click at the bottom of the scroll bar
Jump towards the end of the list.
Drag Move to an approximate location on the window.

PN 4237411 C 60
OPERATOR’S GUIDE--GEN•SXB ANALYSIS
information about XB Analysis, refer to the Operation Principles topic in the Reference Information section of the Help.
Using XB/XMWhen using XB/XM Analysis, it is important to process samples randomly; for example, chemotherapy or neonate patient samples, if processed as a group, can cause XB/XM to be OUT.
When XB/XM Analysis is on, the Workstation compares the mean values with the target values and the percent limits. If the mean values are within the percent limits of the target values, then the XB/XM is IN.
Setup OptionsWhen you set up XB/XM Analysis, you have options:
r You can specify that you want XB/XM to automatically stop processing on an instrument. Otherwise, XB/XM status appears in the XB/XM history log, and it is up to you to investigate it. You should investigate any batch that is out of the XB/XM limits.
r You can specify if you want to automatically print XB/XM Analysis information.
The options you specify are applied to the XB/XM Analysis of results the Workstation receives from all instruments attached to it.
Reviewing XB/XM Analysis InformationThe Workstation displays the batch means for each parameter in graph form. The lines on the graph are from point to point, but when printed on the Graphic Printer, a horizontal bar represents each mean.
The Workstation determines if results should be included in a batch by considering several factors. The following factors cause results to be excluded from a batch:
r RBC value is less than r Flow cell clog or partial aspiration r Non-numeric value for MCV, MCH, and MCHC r Non-numeric value for MCV and MCH and at least 25% of the samples have been
excluded for MCHC, or manually excluded by the operator r Non-numeric value for MCV and MCHC and at least 25% of the samples have been
excluded for either MCHC or MCV, or manually excluded by the operator r Non-numeric value for MCV and at least 25% of the samples have been excluded for
MCV, or manually excluded by the operator r Non-numeric value for MCH and MCHC and at least 25% of the samples have been
excluded for either MCH or MCHC, or manually excluded by the operator r Non-numeric value for MCV and at least 25% of the samples have been excluded for
MCH, or manually excluded by the operator r Non-numeric value for MCHC and at least 25% of the samples have been excluded for
MCHC, or manually excluded by the operatorYou can delete individual samples from the batch. The total number of deletes in a batch must not exceed 5 out of a batch size of 20 for XB; otherwise, the batch means calculation becomes invalid and is automatically removed from the Batch Means screen.
1.0 106×

PN 4237411 C 61
OPERATOR’S GUIDE--GEN•SYEAR 2000
Place an update label next to heading Setting Up Date and Time on page 8-28 of your GEN•S Operator’s Guide, PN 4237222B, for the following revised information:
YEAR 2000 All dates are stored numerically, in their entirety, including centuries.
Dates are displayed in two (2)-digit year format, except where ambiguity exists, such as date-of-birth which is displayed as four (4)-digit year format. The 4-digit date format also includes the date sample was drawn.
Dates edited through the User Interface or through the host are parsed with the following inference rule, as performed by Windows NT: two digit years <= 30 are part of century 2000, two digit years > 30 are part of century 1900.
The host transmission formats dates like the display, with 2-digit years for all dates except date of birth, which uses 4-digit years. Similarly, host requests for all dates must use the 2-digit format, except for date of birth which must use the 4-digit format and include date sample was drawn.
All aspects of the Workstation will continue to work properly through the millenium.

PN 4237411 C 62
OPERATOR’S GUIDE--GEN•SYEAR 2000
PN 4237411C 63
SPECIAL PROCEDURES AND TROUBLESHOOTING--GEN•S
Place an update label next to Heading 1.7, Calibrating CBC Parameters With Whole Blood on page 1-8 of your GEN•S Special Procedures and Troubleshooting Manual, PN 4237223D, for the following revised information:
CALIBRATING CBC PARAMETERS WITH WHOLE BLOOD
1. Ensure the apertures are clean and the instrument is functioning properly.
2. Perform a 10-sample reproducibility study on the CBC parameters using the Automatic aspiration mode.
3. Perform a carryover study.
4. Obtain 20 normal, fresh whole-blood specimens. You need enough of each to cycle three samples on the GEN•S System and three samples on a reference instrument.
5. Using the same whole-blood specimens you used in step 4, obtain reference values from other instruments. The following methods are suggested:
6. Using the reference values, set up the CBC calibration information at the Workstation.
7. Run a prime sample. This sample will automatically be removed from statistics.
8. Cycle each of the 20 samples three consecutive times in CBC Automatic aspiration mode.
9. Review results on the Workstation Calibration window.
10. Adjust parameters as needed.
11. On the Command Center, select AUTO ANALYSIS as the processing control.
12. Verify calibration by cycling each level of COULTER 5C® cell control in Automatic aspiration mode.
WBC and RBC
COULTER ZBI analyzer used with ISOTON® II diluent and ZAP-OGLOBIN® II lytic reagent; use large volume dilutions made with calibrated glassware.
Hgb Hemoglobincyanide spectrophotometric procedure that follows NCCLS Standard H15-A7. This method employs modified Drabkins (Ziljstra) Reagent and is referenced to NIST-certified filters and ICSH standards.
MCV Packed cell volume measured by a hematocrit procedure that follows NCCLS Standard H7-A8. The PCV is not corrected for trapped plasma. MCV is calculated: PCV/RBC x 10.
Plt Phase-contrast microscopy.MPV Reference against latex particles.
PN 4237411C 64
SPECIAL PROCEDURES AND TROUBLESHOOTING--GEN•SCALIBRATING CBC PARAMETERS WITH S-CAL® CALIBRATOR
Place an update label next to heading 1.6, Calibrating CBC Parameters With S-CAL® Calibrator on page 1-4 of your GEN•S Special Procedures and Troubleshooting Manual, PN 4237223D, for the following revised information:
CALIBRATING CBC PARAMETERS WITH S-CAL® CALIBRATOR
1. Ensure the apertures are clean.
2. Ensure the instrument is functioning properly.
3. Perform a 10-sample reproducibility study on the CBC parameters using Automatic aspiration mode.
4. Perform carryover.
5. Prepare the instrument for calibration.
6. Set up the CBC calibration information at the Workstation.
7. Run S-CAL calibrator.
8. Review results on the Calibration window.
9. Adjust parameters as needed.
10. On the Command Center, select AUTO ANALYSIS as the processing control.
11. Verify calibration by cycling each level of COULTER 5C cell control in Automatic aspiration mode.
Place an update label next to heading 1.4, Performing Carryover Check on page 1-3 of your GEN•S Special Procedures and Troubleshooting Manual, PN 4237223D, for the following revised information:
PERFORMING CARRYOVER CHECK
1. Ensure pneumatics are on.
2. Ensure the blood detector is disabled.
3. Ensure the mode of operation is set to CBC.You can perform carryover check using other operating modes, however the procedure will take longer and use excess reagents.
4. Ensure the number of aspirations per tube is set to 1.
5. If necessary, select the instrument name on the Command Center.
6. Select CARRYOVER as the processing control on the Command Center.
7. If necessary, select on the Carryover window to clear out the values that appear on the results table.
Note: If you want to view the carryover results as the Workstation receives them, you can access the Carryover window (step 14) before proceeding. The background of the Carryover window, for the selected instrument, changes to the same background as the Command Center when you change the processing control to CARRYOVER.
8. Obtain a normal whole-blood specimen.
9. Separate the well-mixed normal whole-blood specimen into two 5 mL tubes.
PN 4237411C 65
SPECIAL PROCEDURES AND TROUBLESHOOTING--GEN•SPERFORMING REPRODUCIBILITY CHECK -- CBC (N=10)
10. Place the tubes into consecutive positions in a cassette.
11. Dispense 2 mL of diluent into three separate 5 mL tubes.
12. Place the three diluent tubes in the same cassette. Place the tubes after the whole-blood specimens.
13. Place the cassette in the loading bay. The instrument begins processing the cassette automatically.
14. On the Command Center, select AUTO ANALYSIS as the processing control if you are not continuing to either Reproducibility or Calibration.
15. Verify the carryover results.
16. Enable the blood detector.
Place an update label next to heading 1.2, Performing Reproducibility Check -- CBC (N=10) on page 1-1 of your GEN•S Special Procedures and Troubleshooting Manual, PN 4237223D, for the following revised information:
PERFORMING REPRODUCIBILITY CHECK -- CBC (N=10)
1. Ensure you have enough normal whole blood from a single donor for 11 cycles.
2. Ensure pneumatics are on.
3. Ensure the blood detector is enabled.
4. Ensure the number of aspirations per tube is set to 1.
5. Ensure the mode of operation is set to CBC. You can perform carryover check using other operating modes, however the procedure will take longer and use excess reagents.
6. If necessary, select the instrument name on the Command Center.
7. Select REPRODUCIBILITY as the processing control on the Command Center.
8. If necessary, select on the Reproducibility window to clear out the values that appear on the results table.
Note: If you want to view the reproducibility results as the Workstation receives them, you can access the Reproducibility window (step 14) before proceeding. The background of the Reproducibility window, for the selected instrument, changes to the same background as the Command Center when you change the processing control to REPRODUCIBILITY.
9. Allocate approximately 1 ml of the well mixed normal whole blood sample into one tube.
10. Cycle one sample of normal whole blood in Automatic aspiration mode.
11. Set the number of aspirations per tube to 5.
12. Separate the well-mixed normal whole-blood sample into two tubes.
CAUTION Needle damage can occur if you pierce a specimen tube more than five times. Do not pierce a specimen tube more than five times.
PN 4237411C 66
SPECIAL PROCEDURES AND TROUBLESHOOTING--GEN•SENABLING/DISABLING BLOOD DETECTOR
13. Place the tubes into consecutive positions in a cassette and place the cassette in the loading bay. The system automatically begins processing the cassette. It pierces, aspirates, and analyzes the samples.
14. On the Command Center, select AUTO ANALYSIS as the processing control if you are not continuing to either Carryover or Calibration.
15. Review the reproducibility results.
Place an update label next to heading 4.6, Enabling/disabling Blood Detector on page 4-2 of your GEN•S Special Procedures and Troubleshooting Manual, PN 4237223D, for the following revised information:
ENABLING/DISABLING BLOOD DETECTOR
1. Go to the Analyzer screen.
2. Press MAIN MENU.
3. Press SYSTEM CONFIGURATION.
4. Press BLOOD DETECTOR until the appropriate setting appears.
Note: The system flags all parameters with a P (partial aspiration) when samples are analyzed with blood detectors disabled.P flagged control run results are automatically removed from statistical calculations, and there is no way to reintroduce the flagged runs into the calculations.
5. Press one of the following:
Place an update label next to heading 4.7, Setting Up Analyzer Date And Time on page 4-3 of your GEN•S Special Procedures and Troubleshooting Manual, PN 4237223D, for the following revised information:
SETTING UP ANALYZER DATE AND TIME
1. Go to the Analyzer screen.
2. Press MAIN MENU.
3. Press ANALYZER FUNCTIONS.
4. Press DATE AND TIME.
5. Press SET DATE & TIME.
6. Press the button for the setting you want to set up. Example: Press MONTH.
7. Go to the Diluter Keypad.
SYSTEM RUN To cycle samples.
RETURN To display the Analyzer MAIN MENU screen.

PN 4237411C 67
SPECIAL PROCEDURES AND TROUBLESHOOTING--GEN•SSETTING UP WORKSTATION CALIBRATION INFORMATION
8. Press the value associated with the setting you want to specify. Each setting must be
entered as a two-digit number. Example: Press and then press
.
9. Repeat steps 6 through 8 for each setting you want to specify.
10. Press one of the following:
11. Read about GEN•S Year 2000 features.
Place an update label next to heading F Set Up CBC Calibration Information at the Workstation on page 1-6 of your GEN•S Special Procedures and Troubleshooting Manual, PN 4237223D, for the following revised information:
SETTING UP WORKSTATION CALIBRATION INFORMATION
Note: To perform this task, you must log on with a user name that was set up as an Advanced Operator or Lab Administrator. If you need to access this function, contact your laboratory administrator.
1. On the Command Center, select the instrument you want to calibrate if you have more than one instrument connected to your Workstation.
2. On the Command Center, select CALIBRATION as the processing control.
3. Select to display the Quality Assurance application.
4. Select to display the Calibration window.
Note: The background of the Calibration window, for the selected instrument, changes to the same background as the Command Center when you change the processing control to CALIBRATION.
5. If necessary, select the instrument you want to calibrate.
6. If necessary, select to record the old calibration information in its history log and delete the information from the database. The values on the window change to 0.00.
7. If you have already set up calibration information, check that the appropriate lot number for calibration is selected; otherwise, set up new calibration information.
Note: Calibration runs will be rejected if the calibrator information has not been set up, or if the calibrator is expired. If expired, the Expiration field will be backlighted red, and a message ‘Calibrator expired. No statistics will be calculated.’ appears in the task bar.
SYSTEM RUN To cycle samples.
RETURN To display the DATE & TIME screen.
0 9
ENTER
PN 4237411C 68
SPECIAL PROCEDURES AND TROUBLESHOOTING--GEN•STROUBLESHOOTING OVERVIEW
Place an update label next to heading 5.1, Overview on page 5-1 of your GEN•S Special Procedures and Troubleshooting Manual, PN 4237223D, for the following revised information:
TROUBLESHOOTING OVERVIEW
Data ReviewA review of instrument data, such as background, control and blood sample results, is helpful in detecting problems. Sometimes a questionable blood sample result is the only symptom of subtle reagent or pneumatic problems. In that case, you can use the questionable parameter result as a clue to the location of the malfunction.
Specimen-Related ProblemsAn instrument problem is differentiated from a specimen-related problem by running a control. If the control results are acceptable, the problem is probably specimen-related.
Instrument ProblemsIf the control results show similar problems, it indicates an instrument problem. The next step is to determine the subsystem (electronic, pneumatic/hydraulic, or reagent) causing the problem. Because it is easiest to detect a problem in the electronic subsystem and hardest to detect a problem in the reagent subsystem, the subsystems are usually checked in the following order: electronic, pneumatic/hydraulic, reagent.
Workstation TroubleshootingIf the Workstation encounters a problem, it tries to display a message. The message describes the problem and provides information about how to avoid or fix the problem. For best results, follow the instructions with the messages.
Some messages appear from the Windows NT™ operating system and other software packages that are included on your Workstation. Because these messages may not be logged by the Workstation and may not have online help available for them, it is important that you write these down and call your Coulter Representative.
If your Workstation is connected to a network, some messages may be caused by your network configuration. If you have a local network administrator or a Windows NT Administrator, contact your administrator prior to calling your Coulter Representative. Your administrator may be able to resolve the problem.
Note: During the course of testing the Workstation, specific intermittent problems have been reported and corrective actions have been determined. You may want to review the Problem List periodically to help avoid these problems.
Electronic TroubleshootingDetecting a problem in the electronic subsystem--or eliminating the electronic subsystem as the source of the problem--is simplified by indicators and electronic tests.
PN 4237411C 69
SPECIAL PROCEDURES AND TROUBLESHOOTING--GEN•STROUBLESHOOTING OVERVIEW
IndicatorsAn indicator may inform you that a problem exists; it may also pinpoint the source of a problem. For example, the pneumatic light on the power supply appears red when a problem exists.
Electronic TestsThe ramp pulse, and precision pulse tests are electronic subsystem checks that the system performs without using the pneumatic/hydraulic and reagent subsystems. Therefore, when these test results are out of tolerance, the problem is in the electronic subsystem.
Correcting Electronic ProblemsAlthough you may be able to correct minor problems, such as loose cables, most electronic problems require the assistance of your Coulter Representative.
Pneumatic/Hydraulic TroubleshootingMost pneumatic/hydraulic problems are detected by observing the Diluter section in operation. When you identify a symptom of a malfunction, try to isolate the malfunction to the specific part of the cycle, for example, during preparation, counting, or cleanup. Then, try to isolate the malfunction to the specific components and tubing. Next, look for one of four possible problems--pinched tubing, plugs, leaks, or defective components.
Pinched TubingWhen tubing is pinched, flow is either restricted or stopped. Tubing most often pinches where it passes through, between, or around something, or where it attaches to a fitting. Examples: tubing passing through a pinch valve, around a panel, or between two hard objects.
PlugA plug, like a pinch, restricts or stops a flow. A plug can be composed of liquid, salt, or debris. This type of problem may be hard to find because it often occurs inside other components. A plug can occur in tubing, in a fitting, at an aperture, or in a choke.
Plugs are most common in vacuum lines and waste paths that involve the use of fluids and air.
LeakA leak allows fluid to escape before reaching its destination. If there is a leak in a pneumatic line, the pneumatic signal may fail to operate a component, such as a pinch valve, pump, or diluent dispenser. A leak generally occurs where one component attaches to another, such as where tubing attaches to a fitting, a housing, a pilot actuator, a pump, or the Blood Sampling Valve. Leaks can also be the result of cracks in components, such as pumps or glassware.
Defective ComponentsThe interrelationship of components performing a pneumatic/hydraulic process can make it difficult to determine which component, if any, is defective. For example, if a pinch valve does not open, it is possible the pinch valve is defective. But it is also possible that the solenoid responsible for activating the pinch valve is defective.
PN 4237411C 70
SPECIAL PROCEDURES AND TROUBLESHOOTING--GEN•SWORKING WITH ELECTRONIC HISTORY LOGBOOKS
Correcting Pneumatic/Hydraulic ProblemsYou can correct most pneumatic/hydraulic problems, including defective components.
Reagent TroubleshootingA reagent problem can be as obvious as precipitate in the reagent tubing. In the less obvious cases, the most effective way of detecting a problem is by keeping a log of the lot numbers with the opening and expiration dates of the reagents in use, and knowing how each reagent affects the data. Refer to the labeling information with your reagents for details.
Correcting Reagent ProblemsYou can correct most reagent problems by changing the container of reagent and priming the instrument with the new reagent.
Place an update label next to heading 5.14, Working With Electronic History Logbooks on page 5-29 of your GEN•S Special Procedures and Troubleshooting Manual, PN 4237223D, for the following revised information:
WORKING WITH ELECTRONIC HISTORY LOGBOOKS
Select on the Command Center to access the History Log Viewer application.
The tabs on this window present an organized view of the logbook information stored in the database. The Workstation logs messages automatically whenever you perform startup or shutdown. It logs messages when you process key events, such as changing reagent information or calibrating. If the Workstation encounters a problem, it also logs the problem.
Each time maintenance or corrective actions are performed on an instrument, the person performing the actions can update the Maintenance log with text describing the maintenance or corrective action performed.
Each log presents identification information, such as the date and time a message was logged, and system messages. You can access detailed descriptions and corrective actions for system messages from the Message List.
The most current message appears at the top of the window. . First-in events will be first out (removed) when the event log reaches its capacity. The first-in first-out functionality applies to all logs, not the entries within an individual log. An extremely active event log can cause items to be removed from other logs, e.g. the maintenance log. Periodic printout of the History Logs is suggested.
You can add comments to a logbook to help describe a problem or a corrective action you have taken. The Workstation saves the comments in the database along with the specific message.
PN 4237411C 71
OPERATOR’S GUIDE--SLIDEMAKER
Place an update label next to error message Auto Slide on page 7-34 of your SlideMaker Operator’s Guide, PN 4237212A, for the following additional information:
AUTO CLEAR
The Analytical Station will perform an Auto Clear during any of the following conditions:
r Full Clog. When a Full Clog error condition occurs, the SlideMaker creates an Auto Slide during the same cycle. Auto Clear is displayed on the Analyzer and Diluter status lines.
r Partial Clog. When a Partial Clog error condition occurs, the SlideMaker creates an Auto Slide during the next sample because the Partial Clog condition lengthens the cycle subsequent to the cycle in which the error occurred. This makes it possible for an Auto Slide to then be created during a normal cycle. Auto Clear is displayed on the Analyzer and Diluter status lines.
Place an update label next to heading 5.4, Checking Smear Quality on page 5-10 of your SlideMaker Operator’s Guide, PN 4237212A, for the following revised information:
CHECKING SMEAR QUALITY
Smear quality may be affected by several factors, including the quality of the glass slide, the condition of the blood specimen, and the instrument's performance. A discussion of these factors follows.
r Slide quality: BECKMAN COULTER slides have been manufactured to maximize compatibility with your SlideMaker. They are double-washed to ensure cleanliness and specially packaged to reduce humidity and debris. Our slides have also been designed with strategically placed frosted areas to help prevent multiple slides from sticking together. But because excessive humidity could cause even these slides to stick together, you should load the cassettes with only those slides needed for one day of SlideMaker operation. Be sure to store the slides in a low-humidity environment and bring them to ambient room temperature before you open the slide package. You should also take precaution to avoid touching the smearing surface of the slides when you are loading slides into the cassettes to avoid fingerprints, which could cause vacuoles in your smears. Lesser quality slides could result in excessive debris, multiple streaks, irregular vacuoles, or an increase in slide jams.
r Specimen condition: Morphological artifacts on the smear could be the result of prolonged storage or inadequate mixing.
r Instrument performance: Mechanical problems could result in smears that are too short, too thick, or too thin. Streaks on the smears could also be an indication of an instrument problem.
r Discard any slides that do not have labels on them after processing by the SlideMaker.
r Blood collection and handling techniques as well as film fixation and staining methods, while generally controllable when closely monitored, may be a source of random variability.
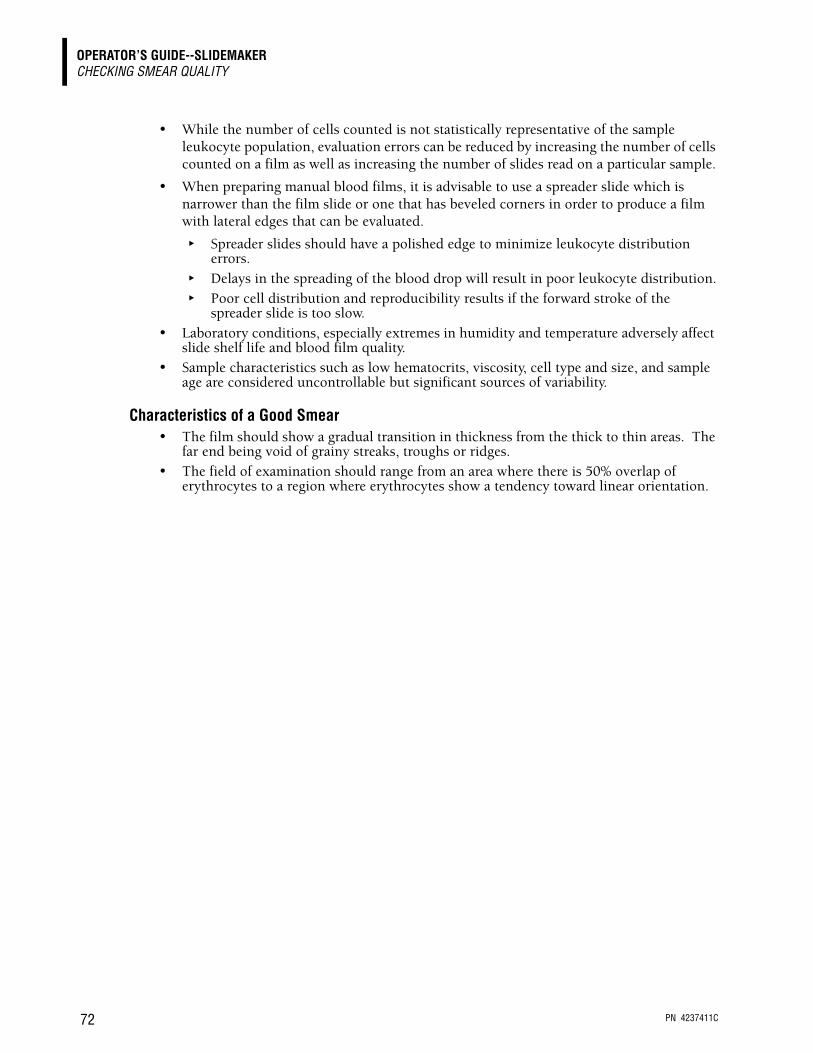
PN 4237411C 72
OPERATOR’S GUIDE--SLIDEMAKERCHECKING SMEAR QUALITY
r While the number of cells counted is not statistically representative of the sample leukocyte population, evaluation errors can be reduced by increasing the number of cells counted on a film as well as increasing the number of slides read on a particular sample.
r When preparing manual blood films, it is advisable to use a spreader slide which is narrower than the film slide or one that has beveled corners in order to produce a film with lateral edges that can be evaluated.
t Spreader slides should have a polished edge to minimize leukocyte distribution errors.
t Delays in the spreading of the blood drop will result in poor leukocyte distribution. t Poor cell distribution and reproducibility results if the forward stroke of the
spreader slide is too slow. r Laboratory conditions, especially extremes in humidity and temperature adversely affect
slide shelf life and blood film quality. r Sample characteristics such as low hematocrits, viscosity, cell type and size, and sample
age are considered uncontrollable but significant sources of variability.
Characteristics of a Good Smear r The film should show a gradual transition in thickness from the thick to thin areas. The
far end being void of grainy streaks, troughs or ridges. r The field of examination should range from an area where there is 50% overlap of
erythrocytes to a region where erythrocytes show a tendency toward linear orientation.
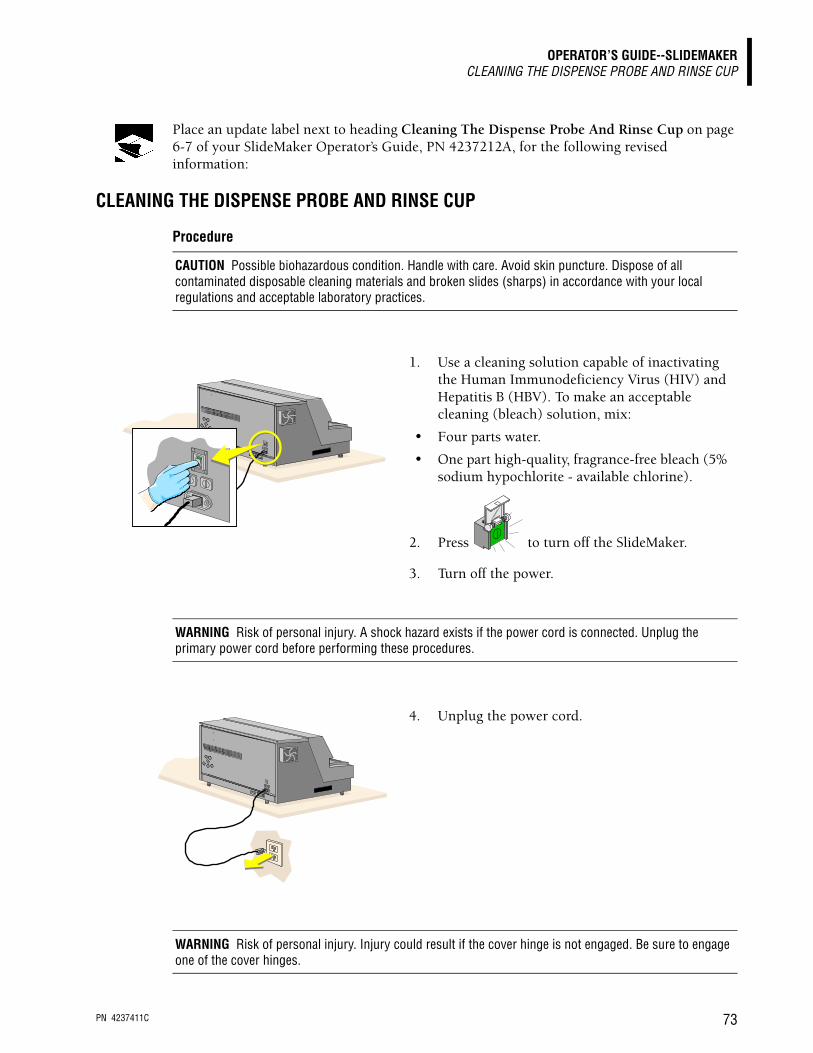
PN 4237411C 73
OPERATOR’S GUIDE--SLIDEMAKERCLEANING THE DISPENSE PROBE AND RINSE CUP
Place an update label next to heading Cleaning The Dispense Probe And Rinse Cup on page 6-7 of your SlideMaker Operator’s Guide, PN 4237212A, for the following revised information:
CLEANING THE DISPENSE PROBE AND RINSE CUP
Procedure
CAUTION Possible biohazardous condition. Handle with care. Avoid skin puncture. Dispose of all contaminated disposable cleaning materials and broken slides (sharps) in accordance with your local regulations and acceptable laboratory practices.
1. Use a cleaning solution capable of inactivating the Human Immunodeficiency Virus (HIV) and Hepatitis B (HBV). To make an acceptable cleaning (bleach) solution, mix:
r Four parts water.
r One part high-quality, fragrance-free bleach (5% sodium hypochlorite - available chlorine).
2. Press to turn off the SlideMaker.
3. Turn off the power.
WARNING Risk of personal injury. A shock hazard exists if the power cord is connected. Unplug the primary power cord before performing these procedures.
4. Unplug the power cord.
WARNING Risk of personal injury. Injury could result if the cover hinge is not engaged. Be sure to engage one of the cover hinges.
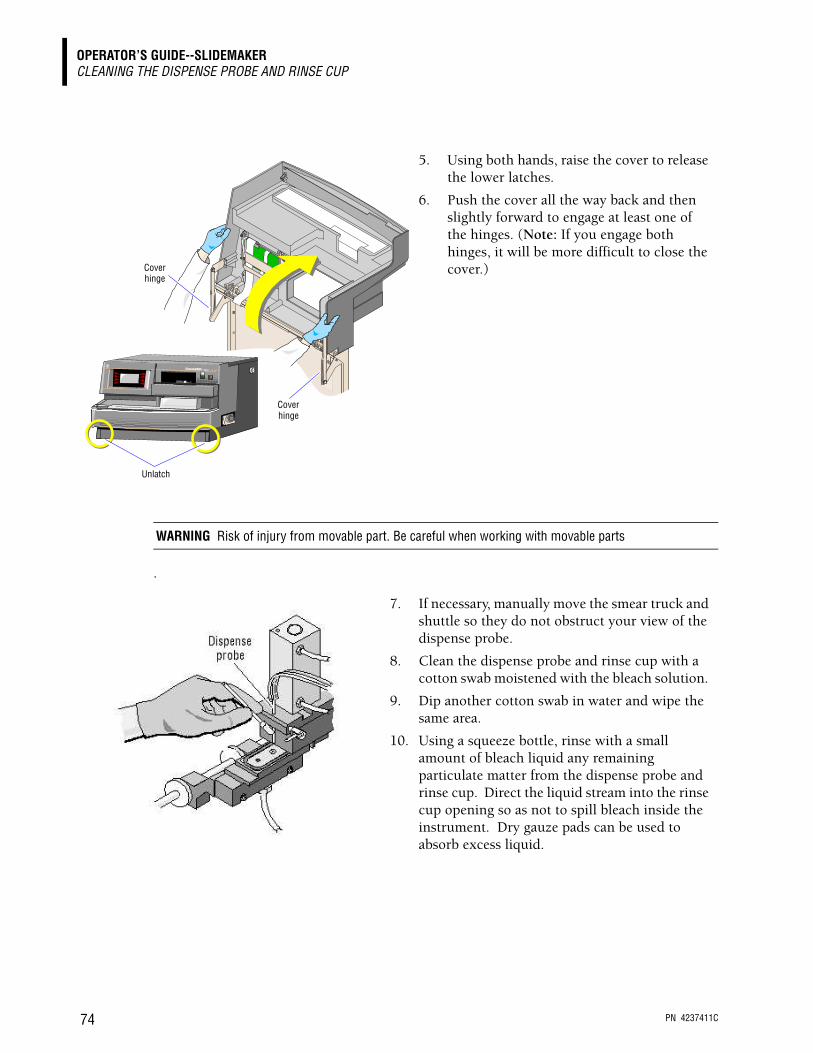
PN 4237411C 74
OPERATOR’S GUIDE--SLIDEMAKERCLEANING THE DISPENSE PROBE AND RINSE CUP
.
5. Using both hands, raise the cover to release the lower latches.
6. Push the cover all the way back and then slightly forward to engage at least one of the hinges. (Note: If you engage both hinges, it will be more difficult to close the cover.)
Unlatch
TM
GEN S SM®
Coverhinge
Coverhinge
WARNING Risk of injury from movable part. Be careful when working with movable parts
7. If necessary, manually move the smear truck and shuttle so they do not obstruct your view of the dispense probe.
8. Clean the dispense probe and rinse cup with a cotton swab moistened with the bleach solution.
9. Dip another cotton swab in water and wipe the same area.
10. Using a squeeze bottle, rinse with a small amount of bleach liquid any remaining particulate matter from the dispense probe and rinse cup. Direct the liquid stream into the rinse cup opening so as not to spill bleach inside the instrument. Dry gauze pads can be used to absorb excess liquid.

PN 4237411C 75
OPERATOR’S GUIDE--SLIDEMAKERCLEANING THE DISPENSE PROBE AND RINSE CUP
.
11. Access the sample probe by releasing the locking mechanism for the sample probe. Pull out on the handle-like device located at the front of the sample probe housing while simultaneously grasping the sample probe at the probe/tubing junction and pulling upward.
12. Use a gauze square moistened in bleach to remove any blood residue from the external surfaces of the sample probe.
13. Inspect the sample probe orifice for any obstructions and, if necessary, remove the instrument sample tubing from the probe. Clear the sample probe with several forceful jets of bleach from the plastic squeeze bottle.
14. Rinse any remaining bleach from the sample probe with ISOTON® and replace the sample probe tubing, if removed.
15. Return the sample probe to the sample probe housing by pulling out the handle-like device to allow minimal entry of the sample probe into the housing. Once entry has been achieved, gentle downward force will allow the probe to travel to its locked position. A small "click" may be audible upon securing the sample probe in the proper locked position.
WARNING Risk of personal injury. Injury could result if the cover falls while the hinges are being disengaged. Be sure to steady the cover with one hand while disengaging the hinge with the other hand.
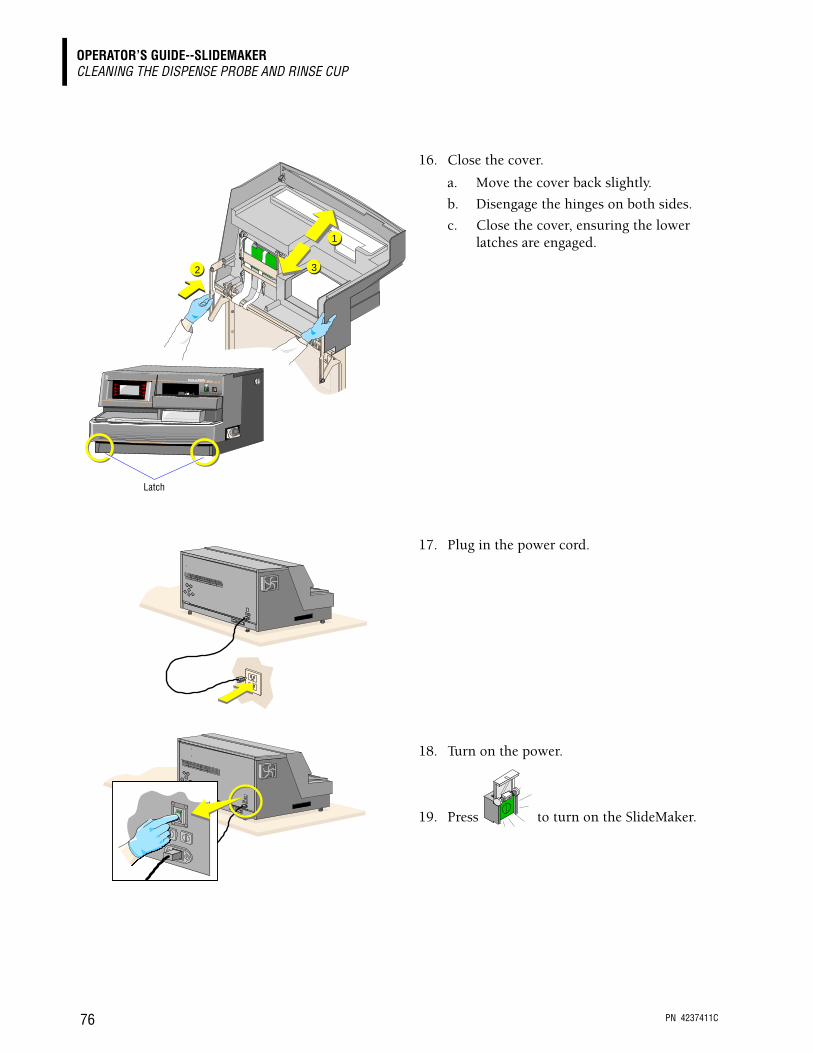
PN 4237411C 76
OPERATOR’S GUIDE--SLIDEMAKERCLEANING THE DISPENSE PROBE AND RINSE CUP
16. Close the cover.
a. Move the cover back slightly.
b. Disengage the hinges on both sides.
c. Close the cover, ensuring the lower latches are engaged.
2 3
1
TM
GEN S SM®
Latch
17. Plug in the power cord.
18. Turn on the power.
19. Press to turn on the SlideMaker.
PN 4237411C 77
OPERATOR’S GUIDE--SLIDEMAKERDEFINE SMEAR SPEED OVERVIEW
Place an update label above heading 5.5, Shutdown on page 5-4 of your SlideMaker Operator’s Guide, PN 4237212A, for the following additional information:
DEFINE SMEAR SPEED OVERVIEW
The DEFINE SMEAR SPEED screen allows for modification of speed profiles and wicking times used by the spreader slides to produce blood films. If no previous modifications exist, pointers for each selectable parameter are set initially at mid scale (Position 5).
Spreader slide speed and delay ratio of the spreader is critical to the length, shape and cell density of a whole blood film. Spreader speed and delay also affects cell distribution and the overall quality of whole blood films.
The GEN•S SlideMaker has embedded within its special function software menu an option (DEFINE SMEAR SPEED screen) that enables the laboratory to vary the speed used by spreader slides to process blood films. The speed functions are used to correct blood films that are either too long or too short due to extremes in sample viscosity. These functions enable the laboratory to customize the film profile to meet their own requirements. The wick time function is useful in compensating for variability in lot-to-lot slide surface wettability. By delaying the forward motion of the spreader slide when in the wicking position, more favorable square-end profiles are provided. Duplicate slides, due to narrow blood films, are minimized by allowing the blood droplet to move along the entire forward edge of the slide.
Wettability: The ability of any solid surface to be wetted when in contact with a liquid. Wettability affects the smear quality:
r Dirty slides concentrate the blood droplet in one location resulting in a poor quality smear.
r Clean slides allow for the blood droplet to disperse evenly across the slide providing for a good quality smear.
Place an update label above heading 5.5, Shutdown on page 5-4 of your SlideMaker Operator’s Guide, PN 4237212A, for the following additional information:
DEFINE SMEAR SPEED
1. Ensure:
r SlideMaker is ready to make smears.
r GEN•S System is ready to process samples.
2. Press EXIT on the SlideMaker display until you reach the MAIN MENU screen.
3. Press SPECIAL FUNCTIONS.
4. Press DEFINE SMEAR SPEED.

PN 4237411C 78
OPERATOR’S GUIDE--SLIDEMAKERDEFINE SMEAR SPEED
5. The following options are available from the DEFINE SMEAR SPEED screen:
6. Press the arrow keys to either decrease (lengthen film) or increase (shorten film) the Speed and Default speed factors.
7. Press the arrow keys to either decrease (shorten wicking) or increase (lengthen wicking) the Wick ratio.
8. Press SAVE VALUE to use the new speed and wick settings in the next processed sample.
9. Press EXIT to return to the RUN MODE screen.
SPEED 1 The Speed function allows the blood film to be lengthened or shortened.
SPEED 2 The Default speed function is used in conjunction with the Speed function and allows for blood film length adjustments to be made on samples having extremely high or low viscosities.
Wick The Wick function is used to compensate for variations in slide surface wettability.
Save Value
The SAVE VALUE option saves any modifications to the speed and wick positions.
Exit This option returns you to the RUN MODE screen.

PN 4237411C 79
OPERATOR’S GUIDE--SLIDEMAKERENSURING THE SLIDEMAKER IS ENABLED
Place an update label next to heading Ensuring The Slidemaker Is Enabled on page 5-3 of your SlideMaker Operator’s Guide, PN 4237212A, for the following revised information:
ENSURING THE SLIDEMAKER IS ENABLED
In order for SlideMaker to be enabled, the Communications window of System Setup and the SlideMaker tab from the Run Configuration window must be properly configured.
System Setup – [Communications]
1. Select to display the Communications window.
2. Select to display the settings for the instruments attached to your Workstation.
3. Select the instrument with the SlideMaker attached.
4. Check that appears in the SlideMaker field.
5. Check that the serial number for the SlideMaker appears on the window.
Run Configuration – SlideMaker tab
1. Select to display the Run Configuration window.
2. Check that appears in the SlideMaker field.
3. Select the preferred Automatic Output option for controls and samples.
Place an update label next to step 6 on page 5-2 of your SlideMaker Operator’s Guide, PN 4237212A, for the following revised information:
LABORATORY ID
Text entry field for lines 2 through 7 on the label.
Note: Do not use the “?” character. It is a reserved character and will not print on the label.
PN 4237411C 80
OPERATOR’S GUIDE--SLIDEMAKERMAIN MENU SCREEN (SLIDEMAKER)
Place an update label next to heading Main Menu Screen on page 5-1 of your SlideMaker Operator’s Guide, PN 4237212A, for the following revised information:
MAIN MENU SCREEN (SLIDEMAKER)
Use this screen to access the functions you want to perform.
Routine Functions
Special Functions
Press This Menu Item To
Pneumatic/Power Supplies
View SlideMaker pneumatic and power supply levels.
Advance Basket Advance a slide basket one basket position.
Unlock Cassette Release the slide cassette.
Lock Cassette Lock the slide cassette.
Printer Label Functions Access functions to:
Decrease printer intensity.
Increase printer intensity.
Save printer intensity.
System Settings View SlideMaker settings, such as the slide counter and cycle counter.
Routine Fluidics Access functions to:
Prime Reagent Reservoirs.
Drain the SlideMaker.
Rinse the SlideMaker vacuum accumulator.
Prime the SlideMaker.
Start up the SlideMaker.
Shut down the SlideMaker.
Press This Menu Item To
Define Smear Speed Modify speed and wicking times used by the spreader slides.
Dryer Temperature View the dryer temperature status.
Display Test Test the SlideMaker display screen.
Dryer Function Test Access functions to test the dryer and heater motors.
Reboot Printer Reinitialize the SlideMaker printer.
Sensor Status Displays the state (on/off) of each sensor.
Keypad Test Test the SlideMaker keypad.
PN 4237411C 81
OPERATOR’S GUIDE--SLIDEMAKERSENSOR STATUS
Place an update label next to heading Special Functions on page 5-1 of your SlideMaker Operator’s Guide, PN 4237212A, for the following revised information:
SENSOR STATUS
The Sensor Status screen displays each sensor and its state (on/off). Navigation through the table is facilitated by the directional arrow keys. The name of each sensor is displayed in the lower left-hand corner of the SlideMaker screen. Typically, this display is used for troubleshooting by Coulter Service personnel.
Place an update label next to heading 5.2, SlideMaker Setup on page 5-2 of your SlideMaker Operator’s Guide, PN 4237212A, for the following revised information:
SETTING UP WHEN TO MAKE A SLIDE
1. Select to display the Run Configuration window.
2. Select .
Note: These selections are currently available only for samples that are processed in CBC or CBC/Diff mode.
3. Ensure decision criteria is enabled then select the flag type you want to use to determine when a slide is made.
Note: Select SlideMaker Decision Rules Only and enable decision criteria if you want to use only your decision rules to determine when a slide is made. Select Specific Flags if you want to make slides on specific conditions that cause a sample result to be sent - slides will also be made using the SlideMaker Decision Rules.
4. Select to save the changes.
Place an update label next to heading 7.1, Overview on page 7-1 of your SlideMaker Operator’s Guide, PN 4237212A, for the following revised information:
TROUBLESHOOTING OVERVIEW (SLIDEMAKER)
OverviewSlide quality is often the source of problems with the SlideMaker. When slides jam frequently on the SlideMaker, check your slides. Checking the SlideMaker for possible slide jams is also helpful in detecting problems. Make sure to check the:
r Slide cassette
r Slide Ejector module
r Shuttle
r Dryer
PN 4237411C 82
OPERATOR’S GUIDE--SLIDEMAKERVIEWING SLIDEMAKER SETTINGS
r Smear truck
r Slide platen and elevator
r Pusher bars
Smear quality can be affected in several ways.
r Cleaning the Dispense Probe and Rinse Cup
The SlideMaker screen allows you to perform several troubleshooting and general functions:
r Slide label problems
t Increasing printer label intensity
t Decreasing printer label intensity
t Rebooting the printer
t Saving printer label intensity
t Testing label printing
r Fluidic problems
t Draining the SlideMaker
t Rinsing the SlideMaker vacuum accumulator
t Priming/Backwashing the SlideMaker
t Priming reagent reservoirs
t Starting up the SlideMaker
t Shutting down the SlideMaker
r Advancing a slide basket
r Checking pneumatic/power supplies
r Testing SlideMaker Keypad
r Testing SlideMaker Display
If you suspect a problem in any of these areas, you can attempt to perform these functions before calling your Coulter Representative. If requested to do so by a Coulter Representative, you can also use the reset switch on the SlideMaker.
Place an update label next to heading Viewing Slidemaker Settings on page 7-30 of your SlideMaker Operator’s Guide, PN 4237212A, for the following revised information:
VIEWING SLIDEMAKER SETTINGS
Procedure
1. Ensure:
r SlideMaker is either making or ready to make smears.
r GEN•S System is either processing or ready to process samples.
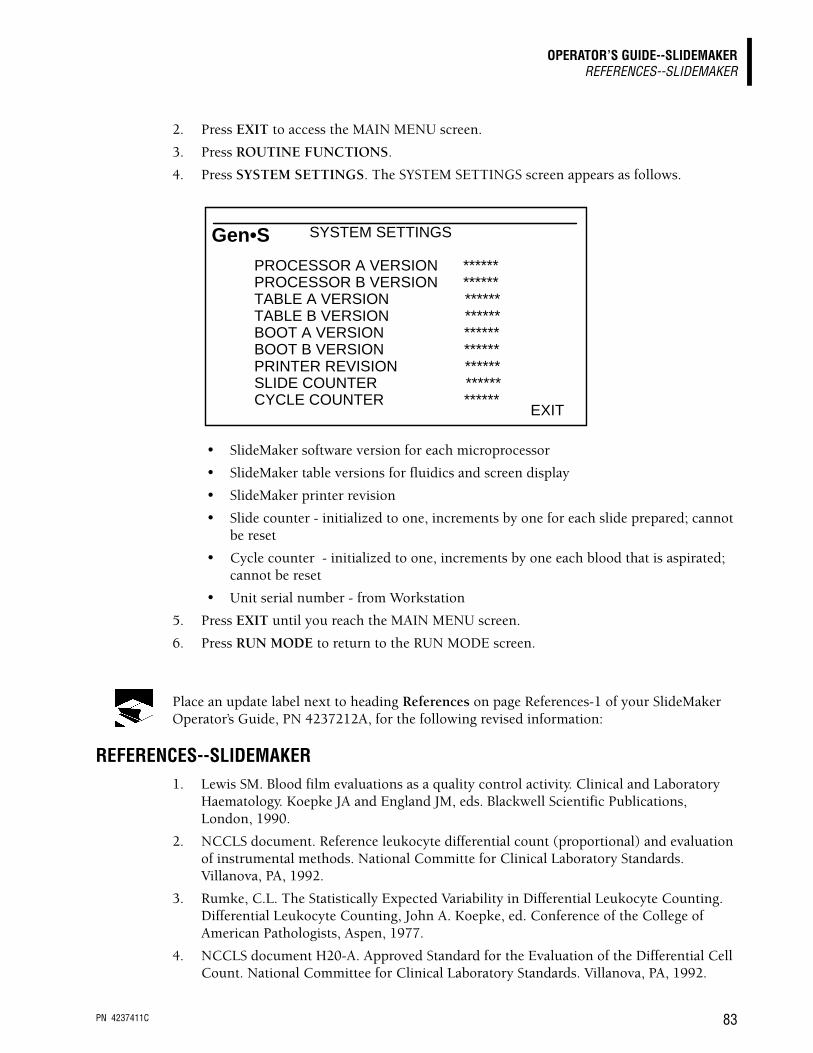
PN 4237411C 83
OPERATOR’S GUIDE--SLIDEMAKERREFERENCES--SLIDEMAKER
2. Press EXIT to access the MAIN MENU screen.
3. Press ROUTINE FUNCTIONS.
4. Press SYSTEM SETTINGS. The SYSTEM SETTINGS screen appears as follows.
r SlideMaker software version for each microprocessor
r SlideMaker table versions for fluidics and screen display
r SlideMaker printer revision
r Slide counter - initialized to one, increments by one for each slide prepared; cannot be reset
r Cycle counter - initialized to one, increments by one each blood that is aspirated; cannot be reset
r Unit serial number - from Workstation
5. Press EXIT until you reach the MAIN MENU screen.
6. Press RUN MODE to return to the RUN MODE screen.
Place an update label next to heading References on page References-1 of your SlideMaker Operator’s Guide, PN 4237212A, for the following revised information:
REFERENCES--SLIDEMAKER
1. Lewis SM. Blood film evaluations as a quality control activity. Clinical and Laboratory Haematology. Koepke JA and England JM, eds. Blackwell Scientific Publications, London, 1990.
2. NCCLS document. Reference leukocyte differential count (proportional) and evaluation of instrumental methods. National Committe for Clinical Laboratory Standards. Villanova, PA, 1992.
3. Rumke, C.L. The Statistically Expected Variability in Differential Leukocyte Counting. Differential Leukocyte Counting, John A. Koepke, ed. Conference of the College of American Pathologists, Aspen, 1977.
4. NCCLS document H20-A. Approved Standard for the Evaluation of the Differential Cell Count. National Committee for Clinical Laboratory Standards. Villanova, PA, 1992.
PROCESSOR A VERSION ******PROCESSOR B VERSION ******TABLE A VERSION ******TABLE B VERSION ******BOOT A VERSION ******BOOT B VERSION ******PRINTER REVISION ******SLIDE COUNTER ******CYCLE COUNTER ******
SYSTEM SETTINGSGen•S
EXIT

PN 4237411C 84
OPERATOR’S GUIDE--SLIDEMAKERREFERENCES--SLIDEMAKER
5. International Standard ISO 8037/1, Optics and Optical Instruments-Microscope-Slides-Part 1: Dimensions, Optical Properties and Markings.
6. NCCLS document H20-A, Volume 12, Number 1. Reference Leukocyte Differential Count (Proportional) and Evaluation of Instrumental methods. Approved Standard March 1992, Section 3.1.2.
7. Steine-Martin, E. Anne, Causes for Poor Leukocyte Distribution in Manual Spreader Slide Blood Films, Am Jour. of Med. Tech. 46-9-80 pg. 624-632.

PN 4237411C 85
REFERENCE MANUAL--GEN•S
Place an update label next to heading Pneumatic/hydraulic Tubing Connections on page 2-4 of your GEN•S Reference Manual, PN 4237221B, for the following revised information:
PNEUMATIC/HYDRAULIC TUBING CONNECTIONS
Figure 2.3 shows the tubing connections between the Diluter and the:
r Reagent containers
r Waste container
r Power Supply pressure and vacuum supplies.
Figure 2.3 Pneumatic/Hydraulic Connections
CAUTION Possible reagent siphoning effect and priming problems can occur if a reagent container is placed above the level of the Analyzer. Do not place reagent containers above the level of the Analyzer.
IMPORTANT Placing Reagent Paks in any location other than on the counter next to the instrument may cause erroneous results.
POWERSUPPLY
DILUENTCLEANINGAGENT
VAC5 PSI30 PSI
CBCLYSE
RETICCLEAR
RETICSTAIN
PACKPRESERVE
PACKLYSE CLEANER
VAC
30 PSI 5 PSI
DILUENTWASTEFLUSH
WASTELEVEL
SENSOR
WASTE
SCATTERPAK
BACK OFDILUTER
1 2 3 4 5
2RETICCLEAR
RETICSTAIN
3
1CBCLYSE
PAKPRESERVE
4
5PAKLYSE
B
A
A
B
RETICPAK
PN 4237411C 86
REFERENCE MANUAL--GEN•SLOADING SPECIMENS
Place an update label next to heading Loading Specimens on page 3-2 of your GEN•S Reference Manual, PN 4237221B, for the following revised information:
LOADING SPECIMENS1. The operator places specimen tubes, which can be identified by bar-code labels, into
cassettes. Each cassette and the tube positions in the cassette are identified by bar-code labels.
2. You can load up to 12 standard or Hemogard cassettes with 144 samples into the loading bay at one time. Figure 3.2 shows the loading bay filled with cassettes.
Place an update label next to heading Aspiration on page 3-4 of your GEN•S Reference Manual, PN 4237221B, for the following revised information:
ASPIRATIONAt the sampling station, after the cap is pierced:
1. A pump draws a maximum of 300 µL of sample through the needle and through the Blood Sampling Valve (BSV).
2. The blood detectors monitor the passage of sample through the BSV and aspiration lines.
3. The needle is withdrawn and the sample tube is reseated in the cassette.
Delivery
CBCAfter the sample is aspirated:
r The center section of the BSV rotates and segments the sample into two separate volumes.
r Beginning a few seconds before the delivery of the dilutions to the appropriate baths, 5 psi of pressure is sent to the WBC bath. This pressure allows drainage of any residual liquid in the WBC bath, thus preventing carryover.
r The pressure continues during delivery and forms bubbles that mix each cell suspension before sensing begins.
r At the beginning of the delivery, any residual rinse in the Hgb cuvette drains into the waste chamber and the waste chamber drains.
r Diluent from the diluent dispensers drives the separated volumes of sample from the BSV to the baths.
r One volume of sample, 1.6 µL, is delivered with 10 mL of diluent to the RBC bath. This dilution is used for RBC/Plt counting and MCV/Plt sizing.
r The other volume, 28 µL, is delivered with 6 mL of diluent to the WBC bath. This dilution is used to count WBC and develop Hgb.
r During delivery to the WBC bath, 1 mL of lytic reagent is added to the dilution to lyse the red cells and convert Hgb.
PN 4237411C 87
REFERENCE MANUAL--GEN•SASPIRATION
r At the same time the lytic reagent is dispensed, 5 mL of diluent from the backwash tank is transferred into the Hgb cuvette for the Hgb blank reading.
r The final dilution in the WBC bath is 1 part whole blood in a total volume of 251 parts. The final dilution in the RBC bath is 1 part whole blood in a total volume of 6250 parts.
r The vent section of the piercing needle is rinsed, then dried by high vacuum.
r The center section of the BSV returns to the aspirate position.
Differential (Diff) and ReticAt the same time as the segmented parts of the sample are being delivered to the baths, the Diff and Retic segmenting modules segment additional 31 µL samples of the blood for analysis.
r For the WBC differential, the sample and approximately 0.506 mL of heated Diff lytic reagent are delivered to the mixing chamber, which agitates to mix them thoroughly.
r During the mixing process, approximately 0.2 mL of Diff preservative enters the mixing chamber to preserve the leukocyte populations, and the instrument initiates the sheath stream of diluent in the triple-transducer flow cell.
r For the Retic analysis, the sample and approximately 166 µL of Retic stain are delivered to the Stain chamber, where they are mixed, heated and incubated for 31 seconds.
A 2-µL segment of the stain/blood mixture and 2.00 mL of heated or cooled Retic clearing solution are delivered to the Retic chamber, where they are mixed and incubated for 25 seconds.
The sample line between the Retic chamber and the flow cell is primed with the stain/blood/clearing solution before cell counting begins. After the sample line is primed, the flow cell is cleaned and primed with diluent, and the sheath stream of diluent begins.
For both the WBC differential and the Retic analysis, the instrument injects the sample into the center of the sheath stream and activates the flow cell aperture current. The laminar flow guides the sample through the center of the flow cell aperture; the sheath stream on the exit side of the flow cell aperture prevents the sample's cells from re-entering the aperture.
CBC Sensing SystemVacuum, equal to 6 in. of mercury, draws a precise volume of suspension from each bath through the three apertures. At the same time, sweep flow is drawn behind the RBC apertures to prevent cells from re-entering the sensing zone.
When the vacuum starts to draw the suspension, current is supplied to the electrode. The electrical path allows sensing of the number and volume of each cell pulled through the apertures.
While the sample in each bath is sensed, the photometer reads the Hgb-blank and the Analyzer retains this reference voltage.
PN 4237411C 88
REFERENCE MANUAL--GEN•SHEMOGLOBIN (Hgb) CONCENTRATION
Place an update label next to heading Hemoglobin (Hgb) Concentration on page 3-14 of your GEN•S Reference Manual, PN 4237221B, for the following revised information:
HEMOGLOBIN (Hgb) CONCENTRATIONThe transmittance of light (525 nm wavelength) through the lysed WBC solution in the hemoglobin cuvette is compared to the transmittance of the same light through a reagent blank. The system converts this ratio to an Hgb value in g/dL using a calibration factor.
Weight (mass) of hemoglobin determined from the degree of absorbance found through photocurrent transmittance is:
Place an update label next to heading Sample Stability on page 4-1 of your GEN•S Reference Manual, PN 4237221B, for the following revised information:
SAMPLE STABILITY
Reticulocyte Parameters r Stored at room temperature (23.9°C or 75°F), up to 24 hours after collection
r Stored between 2 and 8°C (35.6 and 46.4°F), up to 72 hours after collection
Place an update label next to heading Throughput, Automatic Mode on page 4-2 of your GEN•S Reference Manual, PN 4237221B, for the following revised information:
THROUGHPUT, AUTOMATIC MODETypical throughput performance is described as "average" for samples exhibiting parameter levels within the normal range, and "maximum" for samples with elevated parameter levels. Approximate throughput performance data, not including sample preparation, is:
The GEN•S System throughput in CBC and CBC/Diff mode is slightly lower when interfaced with the GEN•S SlideMaker. Throughput requirements are based on the sample criteria in Table 4.1.
Table 4.1 Throughput Sample Criteria
HGB (g / dL) = Constant x log10
Reference %TSample %T
Average Maximum
CBC 105 120
CBC/Diff 105 110
CBC/Diff/Retic 50 55
Parameter RETIC modes CBC CBC/DIFF
WBC N/A > 7.0 x 10^3/µL > 7.0 x 10^3/µL
RBC > 5.0 x 10^6/µL > 5.0 x 10^6/µL > 5.0 x 10^6/µL
Plt N/A > 300.0 x 10^3/µL > 300.0 x 10^3/µL
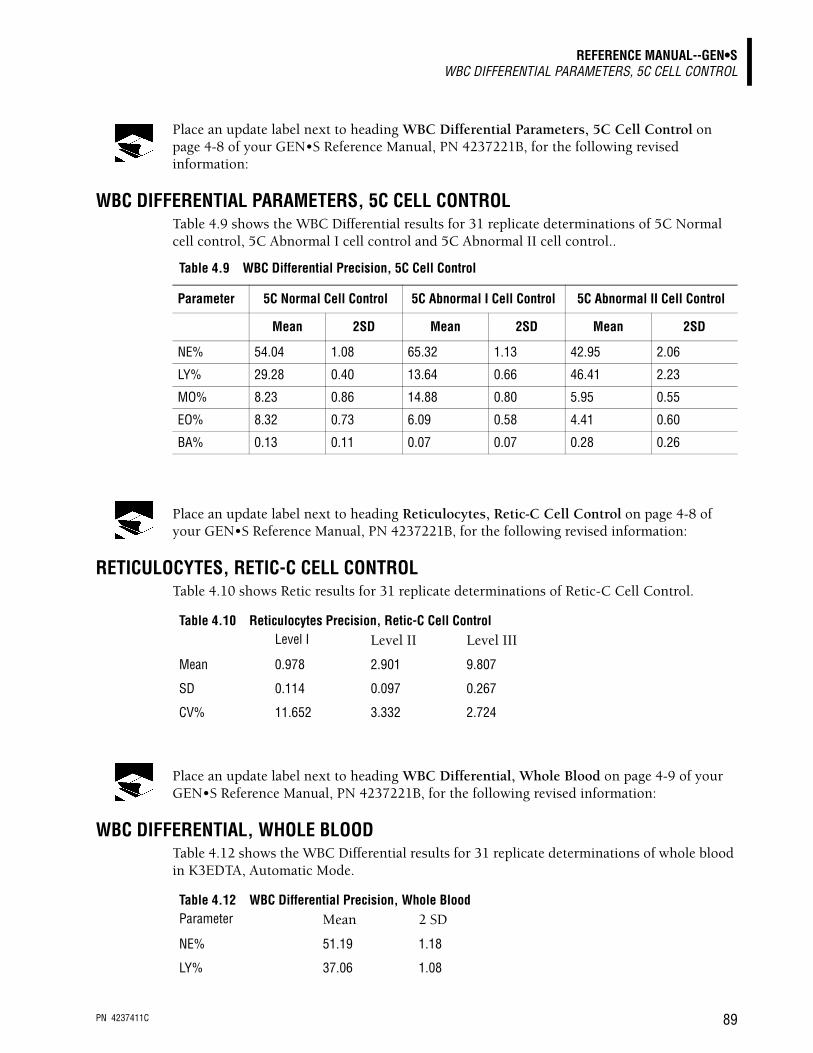
PN 4237411C 89
REFERENCE MANUAL--GEN•SWBC DIFFERENTIAL PARAMETERS, 5C CELL CONTROL
Place an update label next to heading WBC Differential Parameters, 5C Cell Control on page 4-8 of your GEN•S Reference Manual, PN 4237221B, for the following revised information:
WBC DIFFERENTIAL PARAMETERS, 5C CELL CONTROL Table 4.9 shows the WBC Differential results for 31 replicate determinations of 5C Normal cell control, 5C Abnormal I cell control and 5C Abnormal II cell control..
Place an update label next to heading Reticulocytes, Retic-C Cell Control on page 4-8 of your GEN•S Reference Manual, PN 4237221B, for the following revised information:
RETICULOCYTES, RETIC-C CELL CONTROLTable 4.10 shows Retic results for 31 replicate determinations of Retic-C Cell Control.
Table 4.10 Reticulocytes Precision, Retic-C Cell Control
Place an update label next to heading WBC Differential, Whole Blood on page 4-9 of your GEN•S Reference Manual, PN 4237221B, for the following revised information:
WBC DIFFERENTIAL, WHOLE BLOODTable 4.12 shows the WBC Differential results for 31 replicate determinations of whole blood in K3EDTA, Automatic Mode.
Table 4.12 WBC Differential Precision, Whole Blood
Table 4.9 WBC Differential Precision, 5C Cell Control
Parameter 5C Normal Cell Control 5C Abnormal I Cell Control 5C Abnormal II Cell Control
Mean 2SD Mean 2SD Mean 2SD
NE% 54.04 1.08 65.32 1.13 42.95 2.06
LY% 29.28 0.40 13.64 0.66 46.41 2.23
MO% 8.23 0.86 14.88 0.80 5.95 0.55
EO% 8.32 0.73 6.09 0.58 4.41 0.60
BA% 0.13 0.11 0.07 0.07 0.28 0.26
Level I Level II Level III
Mean 0.978 2.901 9.807
SD 0.114 0.097 0.267
CV% 11.652 3.332 2.724
Parameter Mean 2 SD
NE% 51.19 1.18
LY% 37.06 1.08
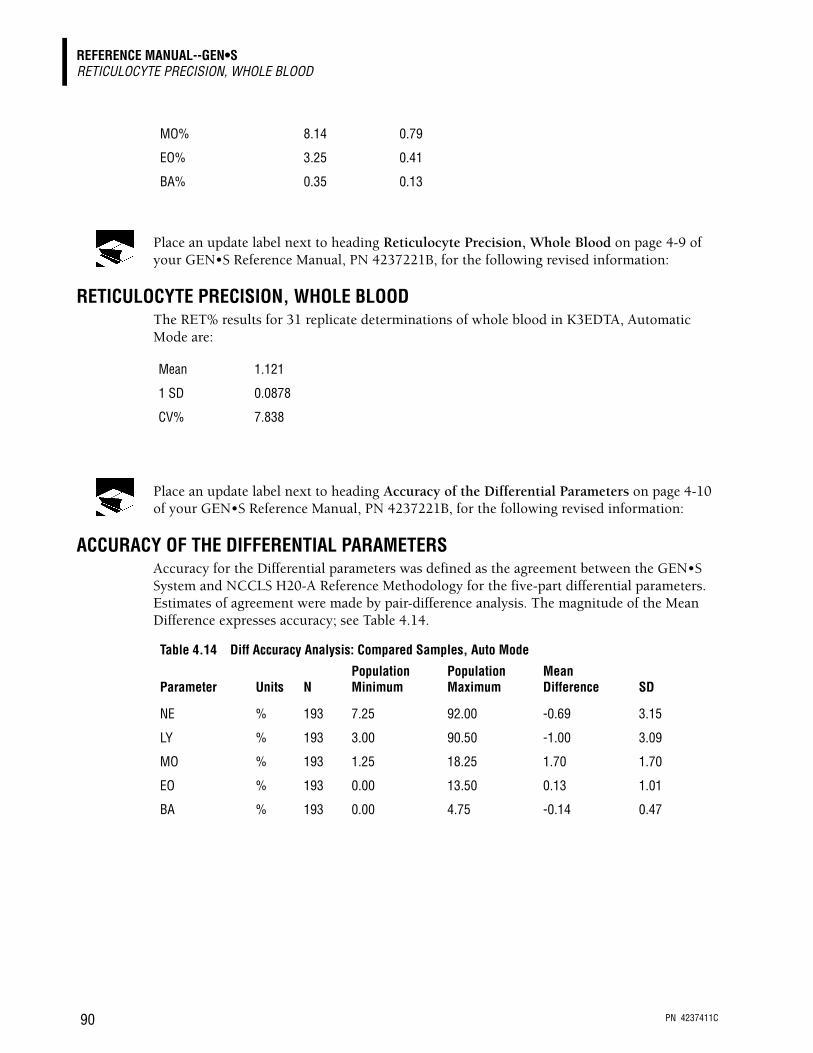
PN 4237411C 90
REFERENCE MANUAL--GEN•SRETICULOCYTE PRECISION, WHOLE BLOOD
Place an update label next to heading Reticulocyte Precision, Whole Blood on page 4-9 of your GEN•S Reference Manual, PN 4237221B, for the following revised information:
RETICULOCYTE PRECISION, WHOLE BLOODThe RET% results for 31 replicate determinations of whole blood in K3EDTA, Automatic Mode are:
Place an update label next to heading Accuracy of the Differential Parameters on page 4-10 of your GEN•S Reference Manual, PN 4237221B, for the following revised information:
ACCURACY OF THE DIFFERENTIAL PARAMETERSAccuracy for the Differential parameters was defined as the agreement between the GEN•S System and NCCLS H20-A Reference Methodology for the five-part differential parameters. Estimates of agreement were made by pair-difference analysis. The magnitude of the Mean Difference expresses accuracy; see Table 4.14.
Table 4.14 Diff Accuracy Analysis: Compared Samples, Auto Mode
MO% 8.14 0.79
EO% 3.25 0.41
BA% 0.35 0.13
Mean 1.121
1 SD 0.0878
CV% 7.838
Parameter Units NPopulation Minimum
Population Maximum
Mean Difference SD
NE % 193 7.25 92.00 -0.69 3.15
LY % 193 3.00 90.50 -1.00 3.09
MO % 193 1.25 18.25 1.70 1.70
EO % 193 0.00 13.50 0.13 1.01
BA % 193 0.00 4.75 -0.14 0.47

PN 4237411C 91
REFERENCE MANUAL--GEN•SACCURACY OF RETICULOCYTES
Place an update label next to heading Accuracy Of Reticulocytes on page 4-11 of your GEN•S Reference Manual, PN 4237221B, for the following revised information:
ACCURACY OF RETICULOCYTESAccuracy for Reticulocyte parameters was defined as the agreement between the GEN•S System with the comparator Flow Cytometry instrument and NCCLS H16-P manual reference methodology. Estimates of agreement were made by pair-difference analysis. The magnitude of the Mean Difference and SD of the difference expresses accuracy. See Table 4.15.
Table 4.15 Retic Accuracy Analysis: Compared Samples, Auto Mode
Place an update label next to Table 4.17 on page 4-12 of your GEN•S Reference Manual, PN 4237221B, for the following revised information:
TABLE 4.17 Table 4.17 shows the clinical sensitivity for morphologic abnormals.
Parameter Units NPopulation Minimum
Population Maximum
Mean Difference SD
RET* % 262 0.00 18.50 -0.27 0.85
RET** % 261 0.00 13.40 -0.45 0.62
* NCCLS
** Flow Cytometer
Table 4.17 Clinical Sensitivity for Morphologic Abnormals, Default Differential Flagging Preferences*
Positive (Abnormal) Negative (Normal) Total
GEN•S System A
GEN•S System B
GEN•S System A
GEN•S System B
GEN•S System A
GEN•S System B
Reference Positive (Abnormal)
38 (TP) 38 (TP) 13 (FN) 11 (FN) 51 51
Reference Negative (Normal) 13 (FP) 20 (FP) 202 (TN) 195 (TN) 215 215
Total 51 60 215 206 266 266
*Instrument Positive selections = Blast, Variant LY, NRBC, Imm NE 1,and Imm NE 2 at mid-level.
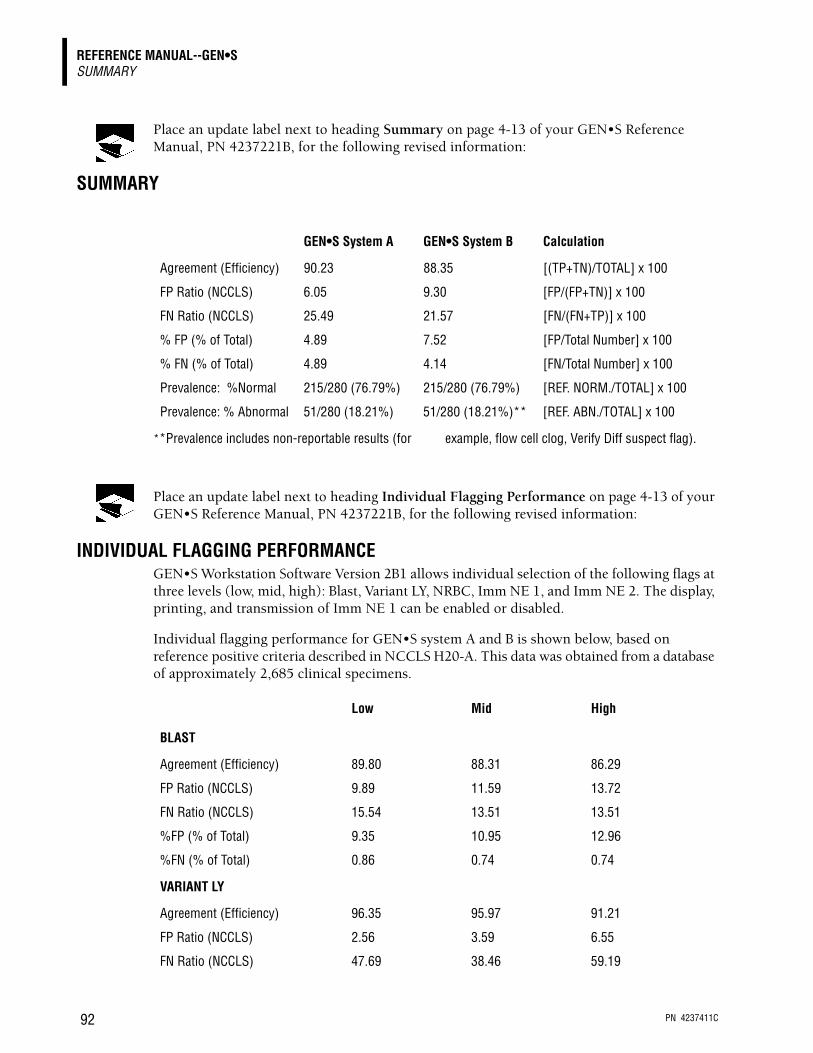
PN 4237411C 92
REFERENCE MANUAL--GEN•SSUMMARY
Place an update label next to heading Summary on page 4-13 of your GEN•S Reference Manual, PN 4237221B, for the following revised information:
SUMMARY
**Prevalence includes non-reportable results (for example, flow cell clog, Verify Diff suspect flag).
Place an update label next to heading Individual Flagging Performance on page 4-13 of your GEN•S Reference Manual, PN 4237221B, for the following revised information:
INDIVIDUAL FLAGGING PERFORMANCEGEN•S Workstation Software Version 2B1 allows individual selection of the following flags at three levels (low, mid, high): Blast, Variant LY, NRBC, Imm NE 1, and Imm NE 2. The display, printing, and transmission of Imm NE 1 can be enabled or disabled.
Individual flagging performance for GEN•S system A and B is shown below, based on reference positive criteria described in NCCLS H20-A. This data was obtained from a database of approximately 2,685 clinical specimens.
GEN•S System A GEN•S System B Calculation
Agreement (Efficiency) 90.23 88.35 [(TP+TN)/TOTAL] x 100
FP Ratio (NCCLS) 6.05 9.30 [FP/(FP+TN)] x 100
FN Ratio (NCCLS) 25.49 21.57 [FN/(FN+TP)] x 100
% FP (% of Total) 4.89 7.52 [FP/Total Number] x 100
% FN (% of Total) 4.89 4.14 [FN/Total Number] x 100
Prevalence: %Normal 215/280 (76.79%) 215/280 (76.79%) [REF. NORM./TOTAL] x 100
Prevalence: % Abnormal 51/280 (18.21%) 51/280 (18.21%)** [REF. ABN./TOTAL] x 100
Low Mid High
BLAST
Agreement (Efficiency) 89.80 88.31 86.29
FP Ratio (NCCLS) 9.89 11.59 13.72
FN Ratio (NCCLS) 15.54 13.51 13.51
%FP (% of Total) 9.35 10.95 12.96
%FN (% of Total) 0.86 0.74 0.74
VARIANT LY
Agreement (Efficiency) 96.35 95.97 91.21
FP Ratio (NCCLS) 2.56 3.59 6.55
FN Ratio (NCCLS) 47.69 38.46 59.19

PN 4237411C 93
REFERENCE MANUAL--GEN•SREFERENCE RANGES
Place an update label next to heading Reference Ranges on page 4-14 of your GEN•S Reference Manual, PN 4237221B, for the following revised information:
REFERENCE RANGESA Normal Range study was conducted to assess the Reference Ranges for the GEN•S System. Whole-blood samples were collected from 240 donors (equal numbers of males and females). The selection of donors was consistent with guidelines stated in NCCLS, C28-A. See Table 4.18. Normal Population Study
Table 4.18 Normal Population Study
%FP (% of Total) 2.50 3.50 5.88
%FN (% of Total) 1.15 0.93 0.60
NRBC
Agreement (Efficiency) 95.16 91.10 75.75
FP Ratio (NCCLS) 3.43 8.49 25.42
FN Ratio (NCCLS) 28.29 15.79 4.61
%FP (% of Total) 3.24 8.01 23.99
%FN (% of Total) 1.60 0.89 0.26
Imm NE 1
Agreement (Efficiency) 82.12 81.56 80.82
FP Ratio (NCCLS) 17.50 18.40 19.43
FN Ratio (NCCLS) 19.73 18.63 17.96
%FP (% of Total) 14.56 15.31 16.16
%FN (% of Total) 3.31 3.13 3.02
Imm NE 2
Agreement (Efficiency) 88.19 86.59 85.47
FP Ratio (NCCLS) 6.76 9.52 11.98
FN Ratio (NCCLS) 47.59 40.96 32.53
%FP (% of Total) 5.92 8.34 10.50
%FN (% of Total) 5.88 5.07 4.02
Parameter Units Gender Mean95% Confidence Low Limit
95% Confidence High Limit
WBC x 10^3 cells/µL M/F 6.11 3.58 11.07
RBC x 10^6 cells/µL F 4.241 3.691 4.877
RBC x 10^6 cells/µL M 4.829 4.270 5.493
Hgb g/dL F 12.82 11.35 14.35

PN 4237411C 94
REFERENCE MANUAL--GEN•SREFERENCE RANGES
Hgb g/dL M 14.56 12.92 16.12
Hct Ratio F 37.10 33.27 41.39
Hct Ratio M 42.08 37.65 46.48
MCV fL M/F 87.36 79.30 94.80
MCH pg M/F 30.23 26.80 33.16
MCHC g/dL M/F 34.56 33.51 35.54
RDW % M/F 13.16 11.99 15.14
Plt x 10^3 cells/µL M/F 242.16 165.40 352.90
MPV fL M/F 8.87 7.51 10.65
NE % M/F 58.25 43.33 71.94
LY % M/F 30.07 16.75 43.51
MO % M/F 7.89 4.56 12.37
EO % M/F 2.73 0.70 7.80
BA % M/F 0.59 0.22 1.13
NE x 10^3 cells/µL M/F 3.59 1.87 7.18
LY x 10^3 cells/µL M/F 1.81 1.10 2.73
MO x 10^3 cells/µL M/F 0.47 0.29 0.82
EO x 10^3 cells/µL M/F 0.17 0.04 0.48
BA x 10^3 cells/µL M/F 0.04 0.02 0.08
RET % M/F 0.95 0.09 1.81
RET x 10^6 cells/µL M/F 0.04 0.00 0.08

PN 4237411C 95
UPDATE LABEL INSTRUCTIONS
ABOUT THE UPDATE LABELS
The update labels (located on a separate page) flag you that the information in a manual has been updated, and the new information is located in this addendum. Place the update labels into your GEN•S System Operator’s Guide or Reference manual as instructed.
INSTRUCTIONS
1. Locate a label icon in this addendum and you will find related instructions where to place an update label.
2. Open up the manual to the page number listed in the instructions.
3. Peel off an update label.
4. Place the label on the page near the location mentioned (such as, heading or table number). See the example below.
EXAMPLE
Place an update label in the Operator’s Guide on page 165 near heading 8.91, System Setup.

PN 4237411C 96
UPDATE LABEL INSTRUCTIONSEXAMPLE
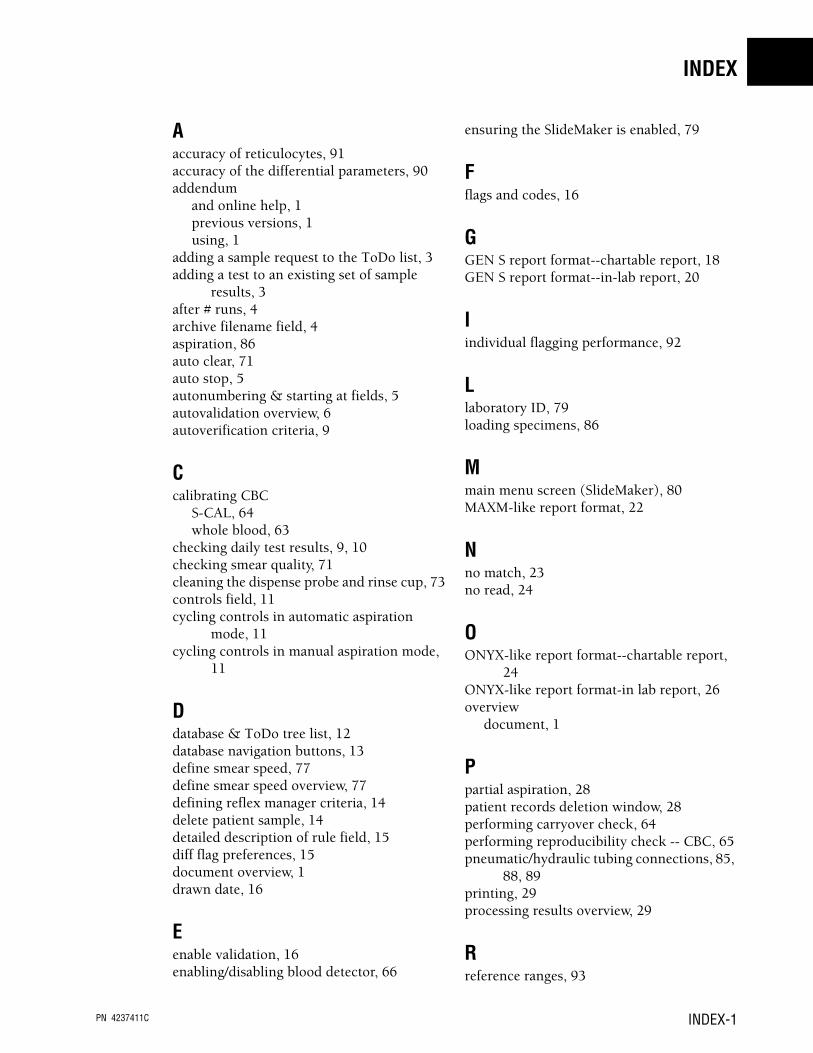
PN 4237411C INDEX-1
INDEX
Aaccuracy of reticulocytes, 91accuracy of the differential parameters, 90addendum
and online help, 1previous versions, 1using, 1
adding a sample request to the ToDo list, 3adding a test to an existing set of sample
results, 3after # runs, 4archive filename field, 4aspiration, 86auto clear, 71auto stop, 5autonumbering & starting at fields, 5autovalidation overview, 6autoverification criteria, 9
Ccalibrating CBC
S-CAL, 64whole blood, 63
checking daily test results, 9, 10checking smear quality, 71cleaning the dispense probe and rinse cup, 73controls field, 11cycling controls in automatic aspiration
mode, 11cycling controls in manual aspiration mode,
11
Ddatabase & ToDo tree list, 12database navigation buttons, 13define smear speed, 77define smear speed overview, 77defining reflex manager criteria, 14delete patient sample, 14detailed description of rule field, 15diff flag preferences, 15document overview, 1drawn date, 16
Eenable validation, 16enabling/disabling blood detector, 66
ensuring the SlideMaker is enabled, 79
Fflags and codes, 16
GGEN S report format--chartable report, 18GEN S report format--in-lab report, 20
Iindividual flagging performance, 92
Llaboratory ID, 79loading specimens, 86
Mmain menu screen (SlideMaker), 80MAXM-like report format, 22
Nno match, 23no read, 24
OONYX-like report format--chartable report,
24ONYX-like report format-in lab report, 26overview
document, 1
Ppartial aspiration, 28patient records deletion window, 28performing carryover check, 64performing reproducibility check -- CBC, 65pneumatic/hydraulic tubing connections, 85,
88, 89printing, 29processing results overview, 29
Rreference ranges, 93
PN 4237411C 2-INDEX
INDEX
references--SlideMaker, 83replace dle e with dle c, 32report format, 32results, 45reticulocyte precision, whole blood, 90run configuration window, 32running latex control--diff, 33running latex control--diff and retic, 35running latex control--retic, 36
Ssample stability, 88S-CAL, 64sensor status, 81setting up analyzer date and time, 66setting up autovalidation, 38setting up controls, 40setting up date and time, 41setting up flagging limits, 42setting up lis / his communications, 44setting up rules for flagging sample results,
45setting up when to make a slide, 81setting up which results to transmit
automatically, 47setting up workstation calibration
information, 67specific flags, 47specifying latex reference values, 48STKS-like report format, 48storing specimens, 50summary, 92suspect and definitive messages, 50system stop criteria, 54
Ttable 4.17, 91throughput, automatic mode, 88tip
archiving information, 54troubleshooting overview (GEN S), 68troubleshooting overview (SlideMaker), 81turning autostop off/on, 55
Uusing help, 55
Vvalidate sample, 57validation codes and messages, 57vertical scroll bar, 59viewing database count information, 59viewing SlideMaker settings, 82
WWBC differential, whole blood, 89working with electronic history logbooks, 70
Xxb analysis, 59
Yy2k, 61year 2000, 61
TRADEMARKS
PN 4237411C
5C the “CC” logo, COULTER, COULTER CLENZ, EPICS, GEN•S, GEN•S SM, ISOTON, S-CAL, and ZAP-OGLOBIN are trademarks of Coulter International Corp.
All other trademarks, service marks, products, or services are trademarks or registered trademarks of their respective holders.
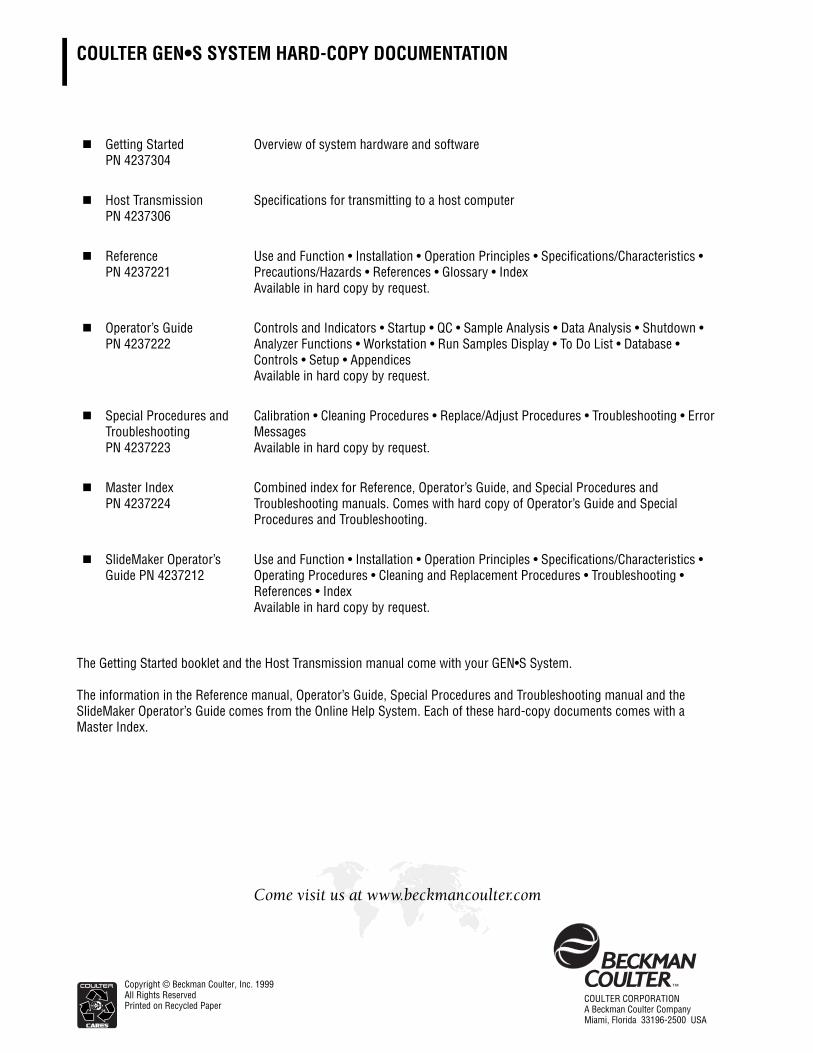
Copyright © Beckman Coulter, Inc. 1999All Rights ReservedPrinted on Recycled Paper
®
COULTER CORPORATIONA Beckman Coulter CompanyMiami, Florida 33196-2500 USA
Come visit us at www.beckmancoulter.com
COULTER GEN•S SYSTEM HARD-COPY DOCUMENTATION
S Getting StartedPN 4237304
Overview of system hardware and software
S Host TransmissionPN 4237306
Specifications for transmitting to a host computer
S ReferencePN 4237221
Use and Function • Installation • Operation Principles • Specifications/Characteristics • Precautions/Hazards • References • Glossary • IndexAvailable in hard copy by request.
S Operator’s GuidePN 4237222
Controls and Indicators • Startup • QC • Sample Analysis • Data Analysis • Shutdown • Analyzer Functions • Workstation • Run Samples Display • To Do List • Database • Controls • Setup • AppendicesAvailable in hard copy by request.
S Special Procedures and TroubleshootingPN 4237223
Calibration • Cleaning Procedures • Replace/Adjust Procedures • Troubleshooting • Error MessagesAvailable in hard copy by request.
S Master IndexPN 4237224
Combined index for Reference, Operator’s Guide, and Special Procedures and Troubleshooting manuals. Comes with hard copy of Operator’s Guide and Special Procedures and Troubleshooting.
S SlideMaker Operator’sGuide PN 4237212
Use and Function • Installation • Operation Principles • Specifications/Characteristics • Operating Procedures • Cleaning and Replacement Procedures • Troubleshooting • References • IndexAvailable in hard copy by request.
The Getting Started booklet and the Host Transmission manual come with your GEN•S System.
The information in the Reference manual, Operator’s Guide, Special Procedures and Troubleshooting manual and the SlideMaker Operator’s Guide comes from the Online Help System. Each of these hard-copy documents comes with a Master Index.