acronis cloud migration
TRANSCRIPT

Acronis CloudMigrationVersion 9.1
R E V I S I O N : 1 1 / 1 0 / 2 0 2 1Getting Started Guide
acronis.com
Table of contents1 Summary 3
2 System requirements 4
2.1 Supported conversion source systems 4
2.2 Supported conversion target systems 4
2.3 Supported conversion target cloud systems 5
2.4 Installation supported systems 5
3 Installation 6
4 vSphere ESXi to Hyper-V conversion wizard 9
4.1 Hyper-V conversion process 14
5 AWS conversion wizard 15
5.1 Hyper-V to AWS conversion wizard - connecting to Hyper-V host and selecting VMs 15
5.2 vSphere ESXi to AWS conversion wizard - connecting to VMware host and selecting VMs 18
5.3 Conversion to Amazon Web Services (AWS) 20
5.4 AWS conversion process 23
6 Microsoft Azure conversion wizard 24
6.1 Hyper-V to Azure conversion wizard - connecting to Hyper-V host and selecting VMs 24
6.2 vSphere ESXi to Azure conversion wizard - connecting to VMware host and selecting VMs 27
6.3 Conversion to Microsoft Azure 29
7 Acronis Cloud Migration PowerShell cmdlets 33
7.1 VMware to Hyper-V conversion 33
7.1.1 Invocation 33
7.1.2 Getting offline help 33
7.1.3 Supported options 33
7.1.4 Conversion process 34
7.2 Hyper-V to Microsoft Azure conversion 35
7.2.1 Requirements 35
7.2.2 Syntax 35
7.2.3 Using with Microsoft Azure Classic 35
7.2.4 Using with Mirosoft Azure Resource Manager 36
7.2.5 Troubleshooting 37
2 © Acronis International GmbH, 2003-2021
1 SummaryAcronis Cloud Migration quickly, easily and noninvasively migrates virtual machines to private, public and hybrid cloud environments. Built on a non-intrusive, agentless architecture, Acronis Cloud Migration enables automated migrations of virtual machines to Hyper-V, AWS and Azure. Any operating system that runs on Hyper-V can be converted, including virtual machines running Windows/Windows Server, RedHat, CentOS, and SUSE. Our low cost, ease of use, and agentless deployment model ensures that you complete your migration project on time and under budget.
3 © Acronis International GmbH, 2003-2021

2 System requirements
2.1 Supported conversion source systemsVMware vSphere ESXi
l vSphere ESXi 6.7
l vSphere ESXi 6.5
l vSphere ESXi 6.0
l vSphere ESXi 5.5
l vSphere ESXi 5.1
l vSphere ESXi 5.0
l vSphere ESXi 4.1
Guest VM
l Any ESXi supported guest OS
Hyper-V host
l Microsoft Windows Server 2019
l Microsoft Windows Server 2016
l Microsoft Windows Server 2012 R2
l Microsoft Windows Server 2012
l Microsoft Windows 8 Professional with the Hyper-V role enabled
l Microsoft Windows 8.1 Professional with the Hyper-V role enabled
l Microsoft Windows 10 Enterprise with the Hyper-V role enabled
l Microsoft Windows 10 Professional with the Hyper-V role enabled
l Microsoft Windows 10 Education with the Hyper-V role enabled
Guest VM
l Any Hyper-V supported guest OS
2.2 Supported conversion target systemsHyper-V host
l Microsoft Windows Server 2019
l Microsoft Windows Server 2016
l Microsoft Windows Server 2012 R2
l Microsoft Windows Server 2012
l Microsoft Windows Server 2008 R2 SP1
l Microsoft Windows 8 Professional with the Hyper-V role enabled
l Microsoft Windows 8.1 Professional with the Hyper-V role enabled
4 © Acronis International GmbH, 2003-2021

l Microsoft Windows 10 Enterprise with the Hyper-V role enabled
l Microsoft Windows 10 Professional with the Hyper-V role enabled
l Microsoft Windows 10 Education with the Hyper-V role enabled
2.3 Supported conversion target cloud systems l Amazon Web Services (AWS)
l Microsoft Azure
2.4 Installation supported systemsWindows
l Microsoft Windows Server 2019
l Microsoft Windows Server 2016
l Microsoft Windows Server 2012 R2
l Microsoft Windows Server 2012
l Microsoft Windows 8 Professional
l Microsoft Windows 8.1 Professional
l Microsoft Windows 10 Enterprise
l Microsoft Windows 10 Professional
l Microsoft Windows 10 Education
5 © Acronis International GmbH, 2003-2021

3 InstallationTo install Acronis Cloud Migration:
1. Run the .msi file that you got with the product installation package. The setup wizard will open. Click Next on the first page:
2. Read and accept the Acronis software license agreement. Click Next:
6 © Acronis International GmbH, 2003-2021
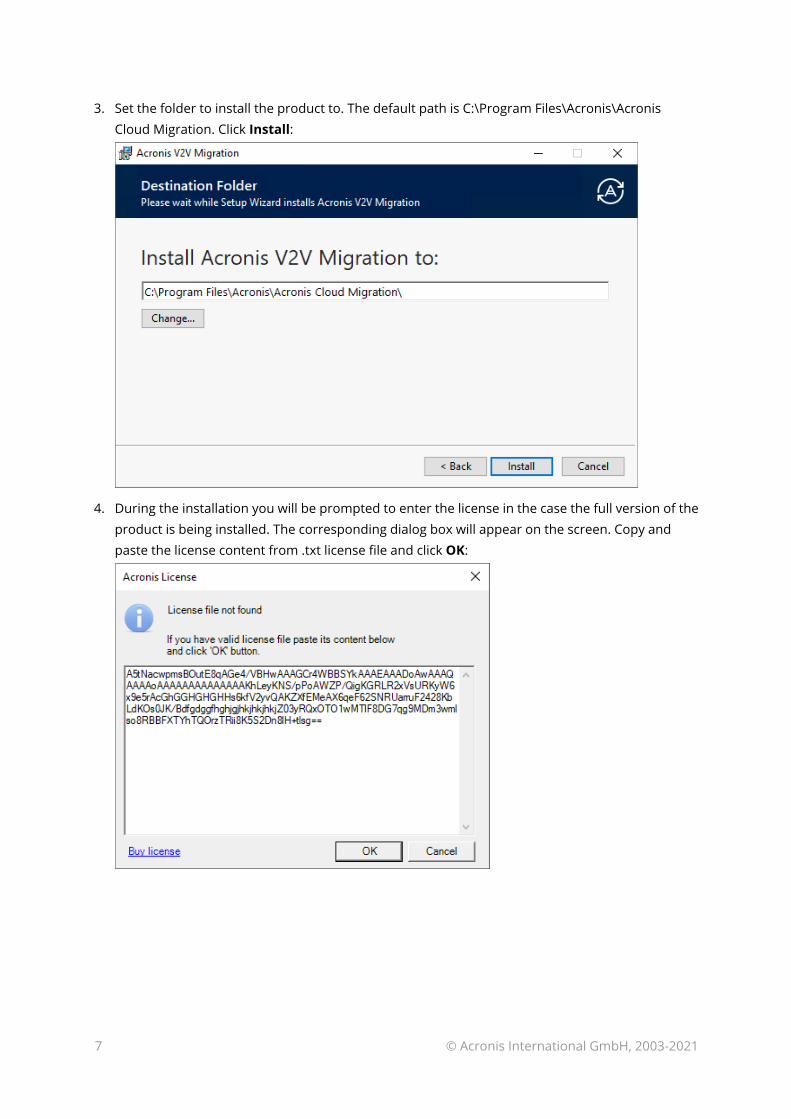
3. Set the folder to install the product to. The default path is C:\Program Files\Acronis\Acronis Cloud Migration. Click Install:
4. During the installation you will be prompted to enter the license in the case the full version of the product is being installed. The corresponding dialog box will appear on the screen. Copy and paste the license content from .txt license file and click OK:
7 © Acronis International GmbH, 2003-2021
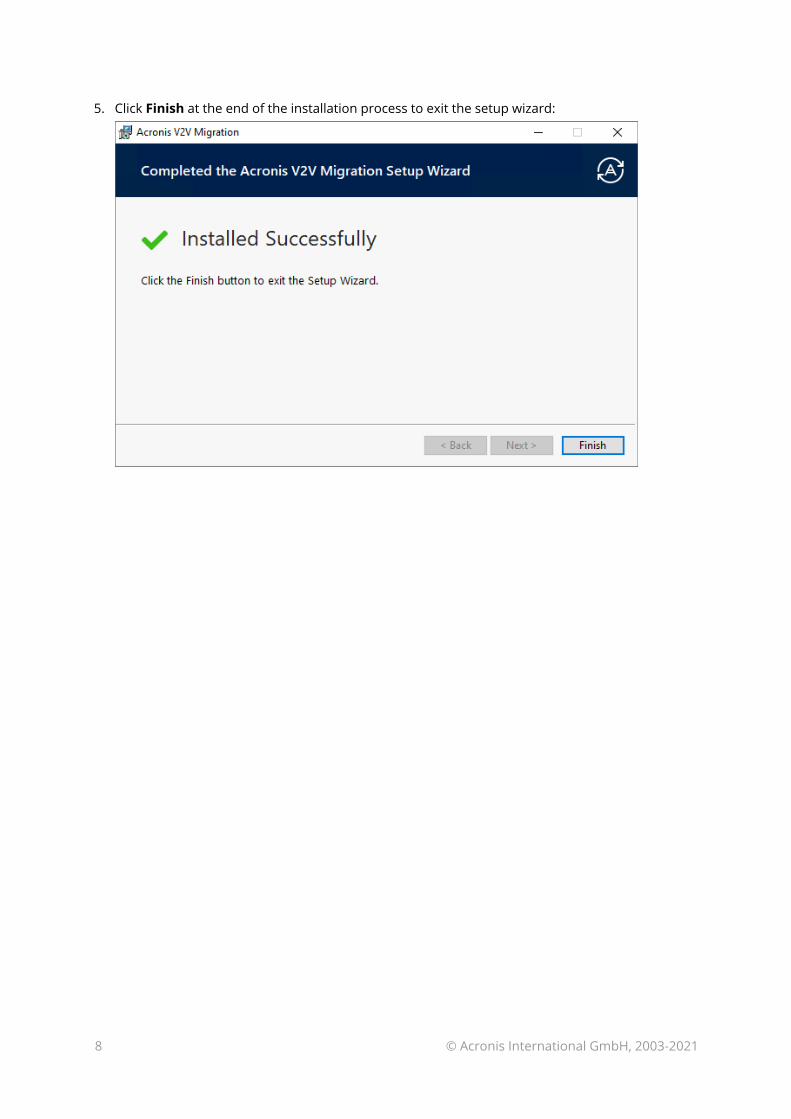
5. Click Finish at the end of the installation process to exit the setup wizard:
8 © Acronis International GmbH, 2003-2021
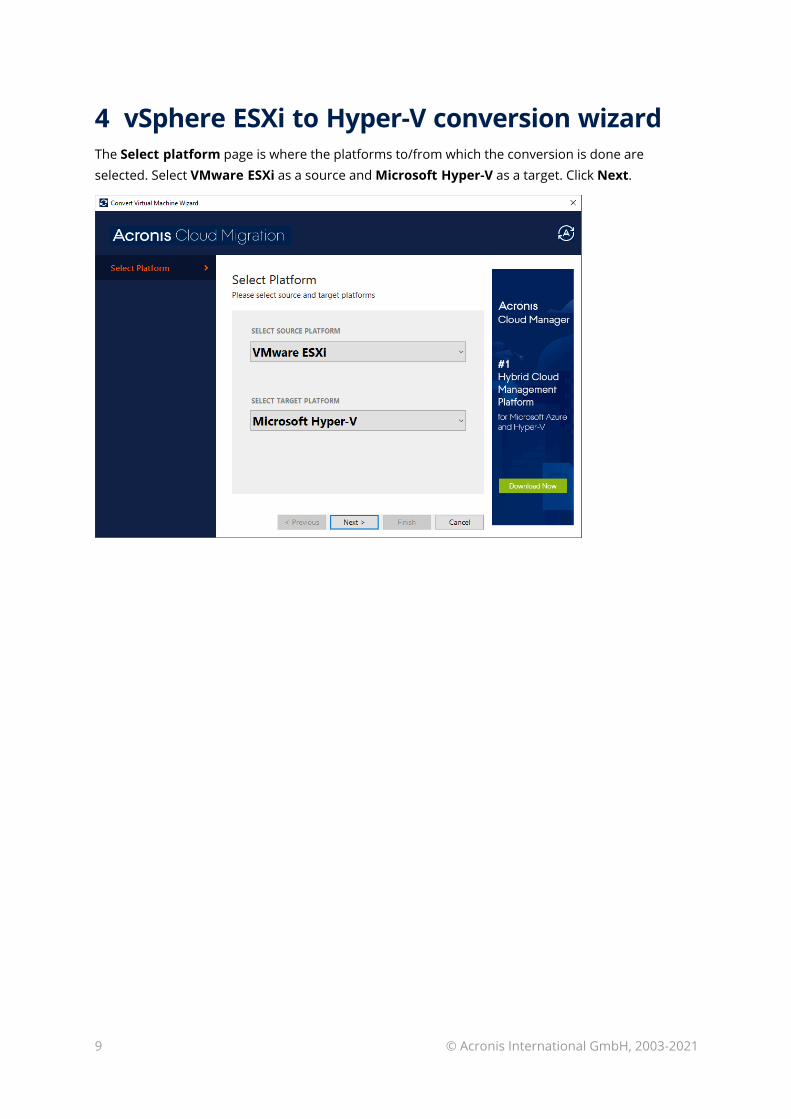
4 vSphere ESXi to Hyper-V conversion wizardThe Select platform page is where the platforms to/from which the conversion is done are selected. Select VMware ESXi as a source and Microsoft Hyper-V as a target. Click Next.
9 © Acronis International GmbH, 2003-2021
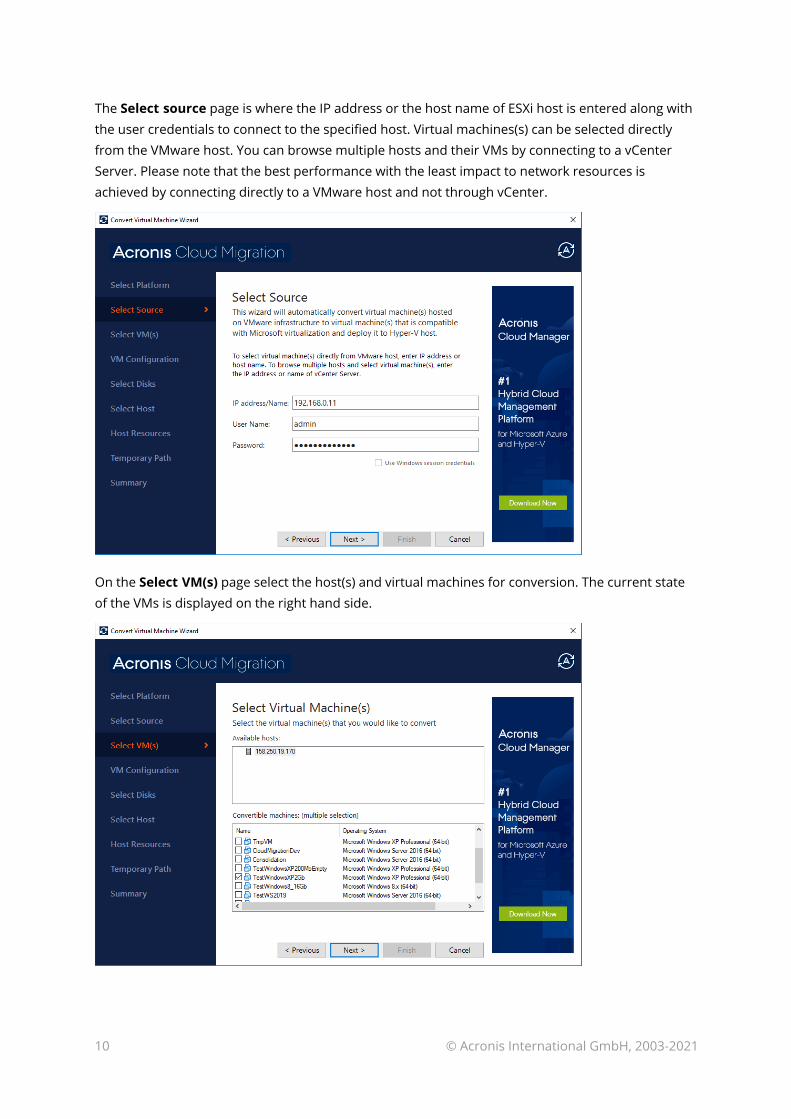
The Select source page is where the IP address or the host name of ESXi host is entered along with the user credentials to connect to the specified host. Virtual machines(s) can be selected directly from the VMware host. You can browse multiple hosts and their VMs by connecting to a vCenter Server. Please note that the best performance with the least impact to network resources is achieved by connecting directly to a VMware host and not through vCenter.
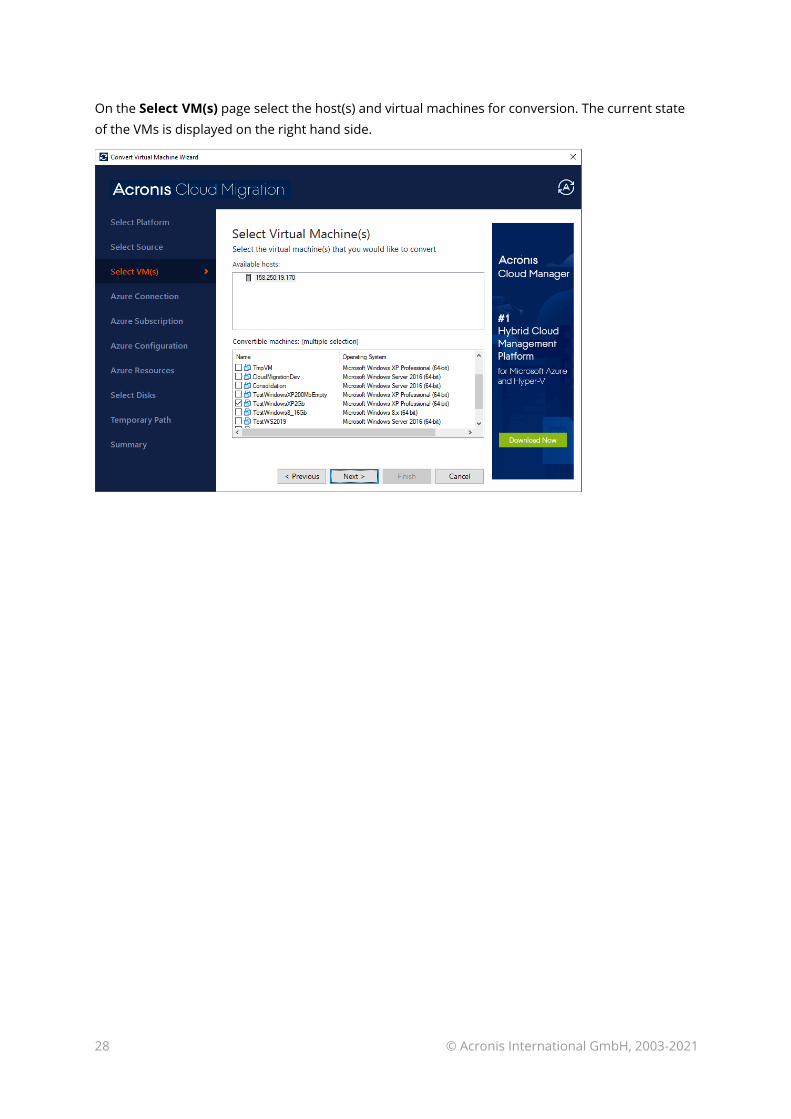
On the Select VM(s) page select the host(s) and virtual machines for conversion. The current state of the VMs is displayed on the right hand side.
10 © Acronis International GmbH, 2003-2021

The VM configuration page allows you to modify the selected VM’s settings.
The Select disks page allows you to choose VM's virtual disks for conversion.
11 © Acronis International GmbH, 2003-2021
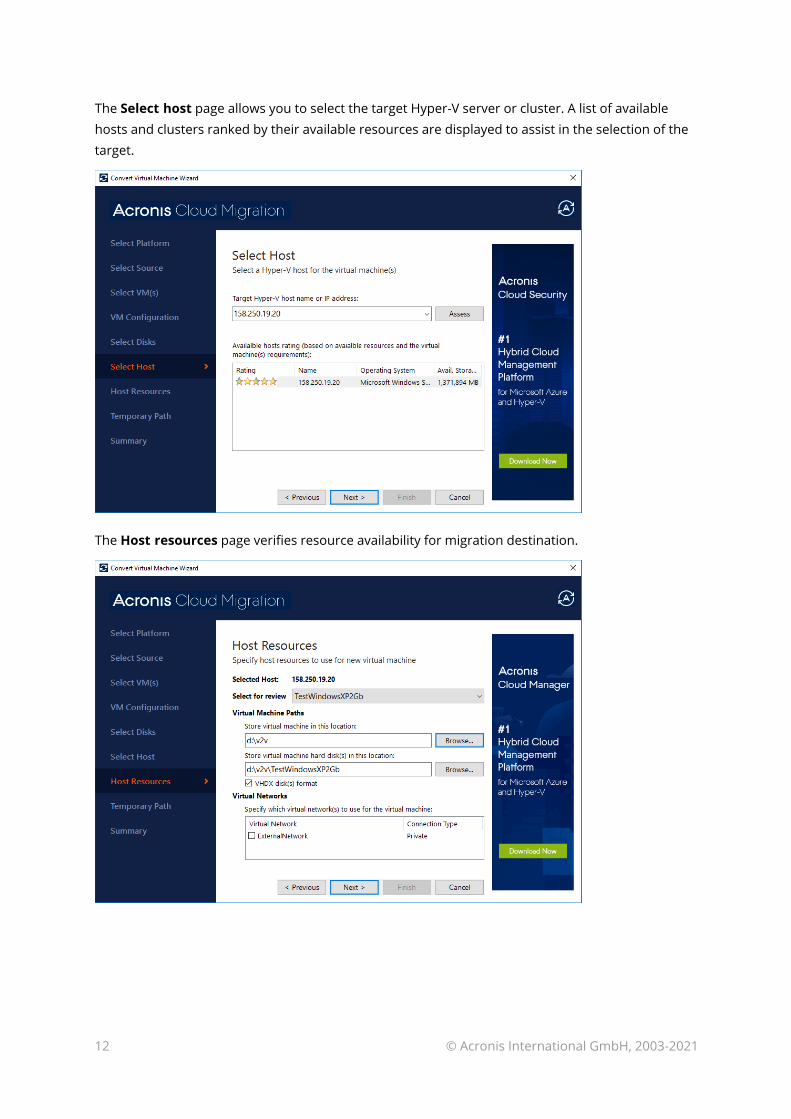
The Select host page allows you to select the target Hyper-V server or cluster. A list of available hosts and clusters ranked by their available resources are displayed to assist in the selection of the target.
The Host resources page verifies resource availability for migration destination.
12 © Acronis International GmbH, 2003-2021

The Temporary path page allows you to configure where the VM is copied to as a part of the conversion process.
The Summary page shows the settings defined by the wizard before starting the conversion process.
13 © Acronis International GmbH, 2003-2021

4.1 Hyper-V conversion process 1. The VM is shutdown and then its configuration settings are remapped from VMware (.vmx) to
Hyper-V (.xml) including the name, memory, virtual networks, virtual disks, etc. set in the wizard.
2. The VM’s hard disk is copied to a temporary location from the VMware (.vmdk) to the Hyper-V (.vhd/x) format. This includes the OS and data disks.
3. A new VM is created on Hyper-V by combining the configuration file and disk.
14 © Acronis International GmbH, 2003-2021
5 AWS conversion wizard
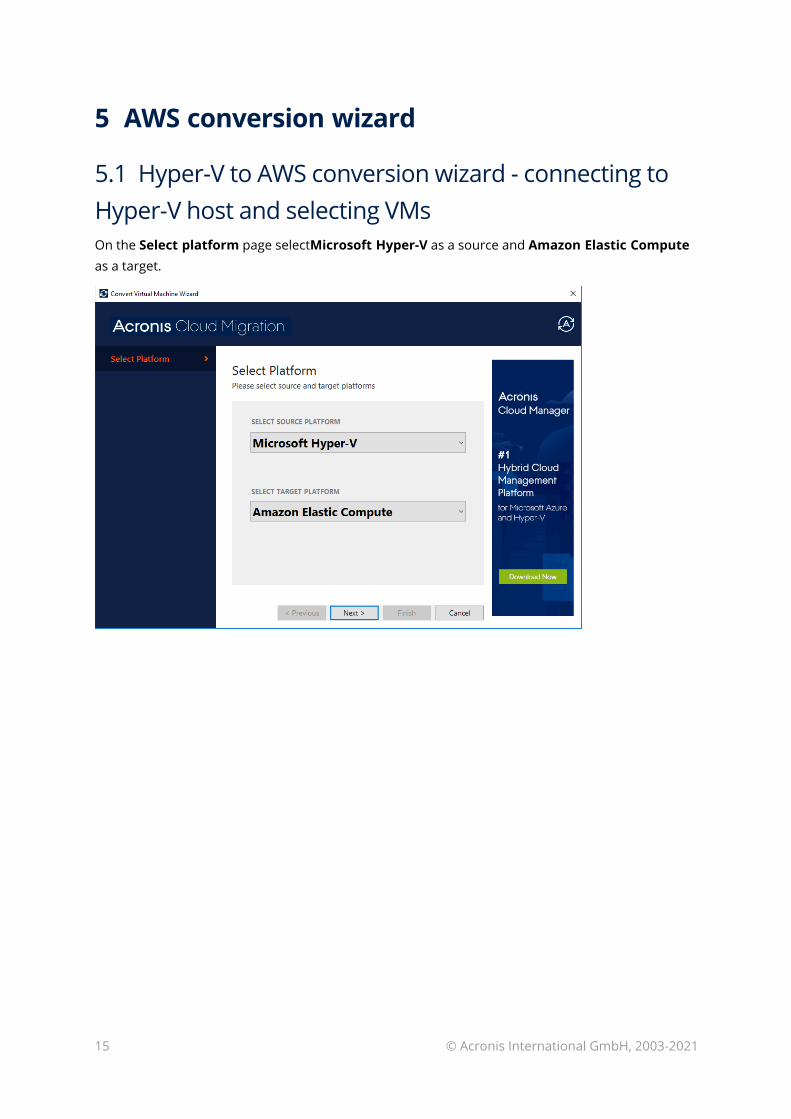
5.1 Hyper-V to AWS conversion wizard - connecting to Hyper-V host and selecting VMsOn the Select platform page selectMicrosoft Hyper-V as a source and Amazon Elastic Compute as a target.
15 © Acronis International GmbH, 2003-2021

On the Select source page enter the IP address or the host name of the Hyper-V host along with the user credentials to connect to the specified host.
The Select VM(s) page lists the available generation 1 virtual machines for conversion. The user can select one or more virtual machines.
l VHDX/VHD virtual disk conversions are supported.
l Amazon Elastic Compute (EC2) does not support second generation VMs (with EFI and GPT).
l If the selected virtual machines are on – they will automatically be turned off before the conversion starts.
16 © Acronis International GmbH, 2003-2021
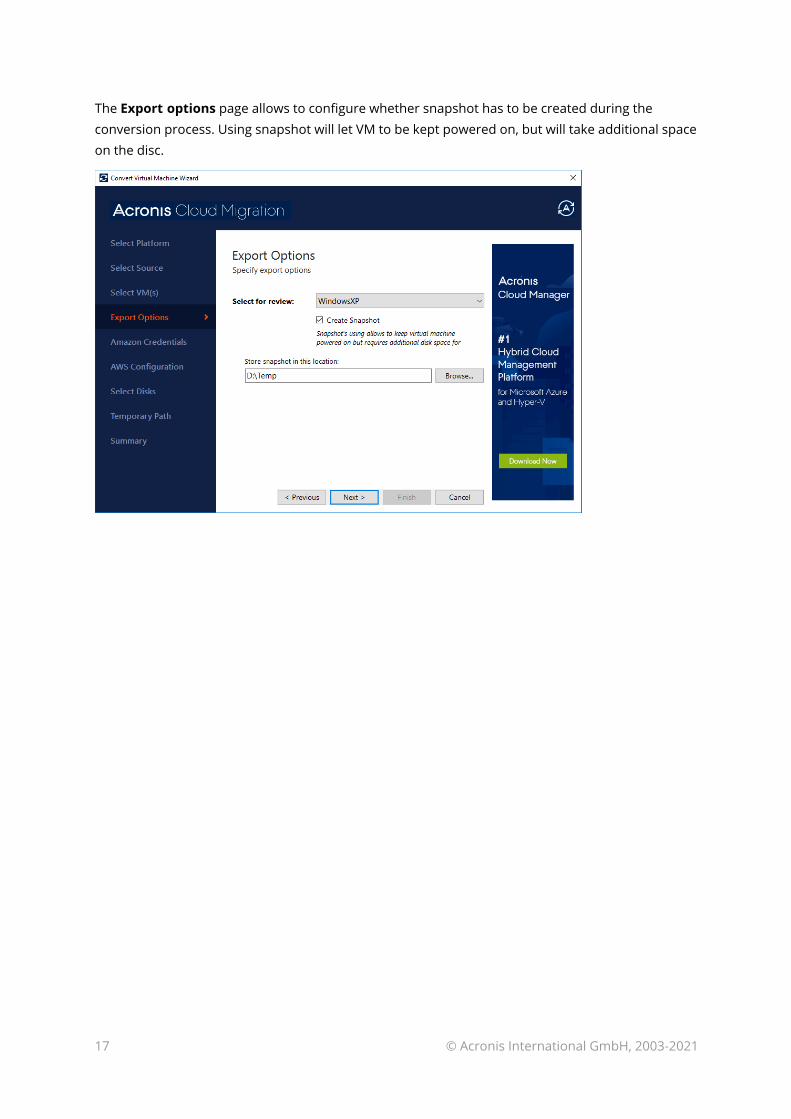
The Export options page allows to configure whether snapshot has to be created during the conversion process. Using snapshot will let VM to be kept powered on, but will take additional space on the disc.
17 © Acronis International GmbH, 2003-2021

5.2 vSphere ESXi to AWS conversion wizard - connecting to VMware host and selecting VMsOn the Select platform page selectVMware ESXi as a source and Amazon Elastic Compute as a target.
On the Select source page enter the IP address or the host name of the ESXi host along with the user credentials to connect to the specified host.
18 © Acronis International GmbH, 2003-2021

On the Select VM(s) page select the host(s) and virtual machines for conversion. The current state of the VMs is displayed on the right hand side.
19 © Acronis International GmbH, 2003-2021

5.3 Conversion to Amazon Web Services (AWS)On the Amazon credentials page select the desired conversion target region for Amazon Elastic Compute and provide their AWS access key ID and AWS secret key.
Please note that each region is isolated from the others. There is a fixed list of regions for Amazon Web Services based on what was available at the time of the release. Access keys (access key IDs and secret access keys) for your AWS account are required before performing conversions.
To get the access keys:
1. Use your AWS account email address and password to sign in to the AWS Management Console. If you previously signed in to the console with IAM user credentials, your browser might open your IAM user sign-in page. You can't use the IAM user sign-in page to sign in with your AWS account credentials. Instead, choose Sign-in using root account credentials to go to the AWS account sign-in page.
2. In the top right of the console, choose your account name or number. Then choose My security credentials.
3. Choose Continue to security credentials.
4. Expand the Access keys (access key ID and secret access key) section.
5. Choose Create new access key. Then choose Download key file to save the access key ID and secret access key to a file on your computer. After you close the dialog box, you can't retrieve this secret access key again.
20 © Acronis International GmbH, 2003-2021

On the AWS configuration page set the VM storage, name, instance type and network adapter:
Select S3 bucket (Amazon Simple Storage Service)
Please select an Amazon S3 bucket from the list or type in a new bucket name. The selected
virtual machine’s disk images will be uploaded to this bucket and will be stored there.
Select for review
Please select the virtual machine from the drop down menu to configure it. If desired, modify
the name of S3 bucket item and instance type in the Name field. If the item already exists in the S3 bucket with the same name, it will be replaced.
Instance type
The instance type represents the configuration of Amazon Elastic Compute instances such as
processor type and number of vCPUs, memory size, storage, network and GPU options etc.
Migrate network adapters
If you want to add network adapters from the source virtual machine, select the Migrate network adapters checkbox, and then select the subnet and network adapters. If you select the default network adapter, the virtual instance will be created. Subnets are managed in the Amazon networking & content delivery service.
21 © Acronis International GmbH, 2003-2021

On the Select disks page select controllers and disks for conversion:
On the Temporary path page specify the folder to store temporary files during the conversion process. You will need about 9860 MB of free space. This space should be doubled if your destination VM virtual disk is stored on the same drive.
22 © Acronis International GmbH, 2003-2021
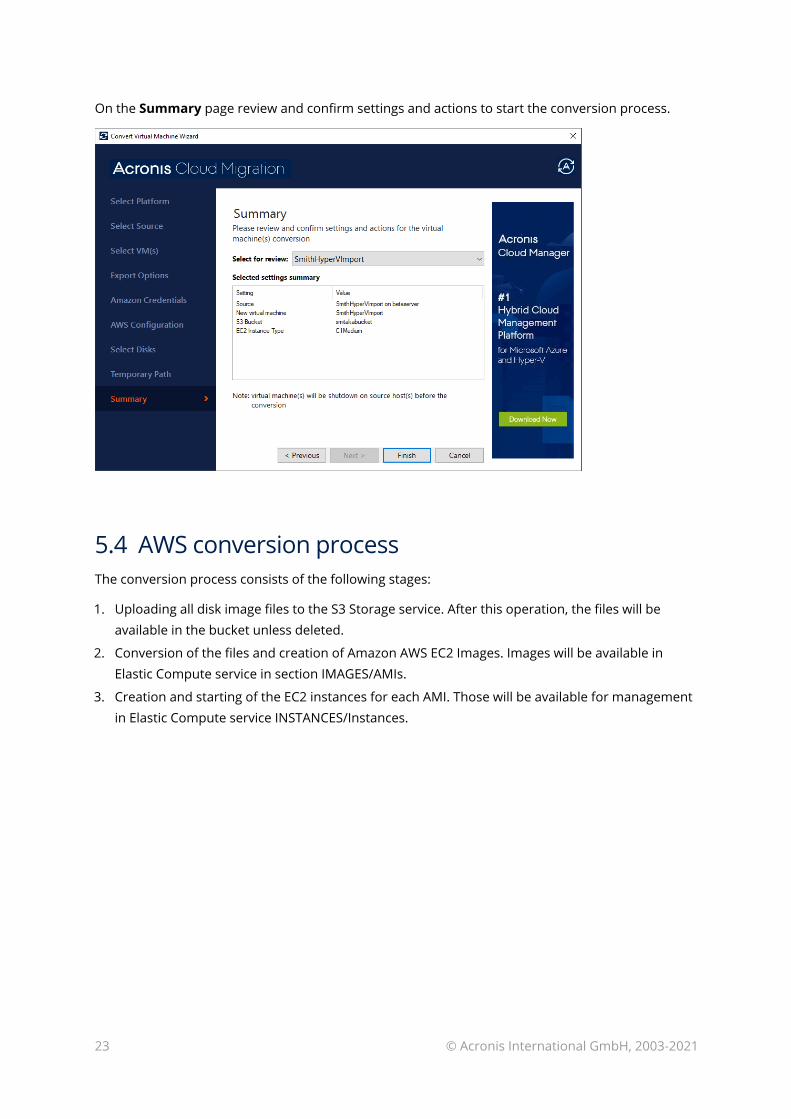
On the Summary page review and confirm settings and actions to start the conversion process.
5.4 AWS conversion processThe conversion process consists of the following stages:
1. Uploading all disk image files to the S3 Storage service. After this operation, the files will be available in the bucket unless deleted.
2. Conversion of the files and creation of Amazon AWS EC2 Images. Images will be available in Elastic Compute service in section IMAGES/AMIs.
3. Creation and starting of the EC2 instances for each AMI. Those will be available for management in Elastic Compute service INSTANCES/Instances.
23 © Acronis International GmbH, 2003-2021
6 Microsoft Azure conversion wizard
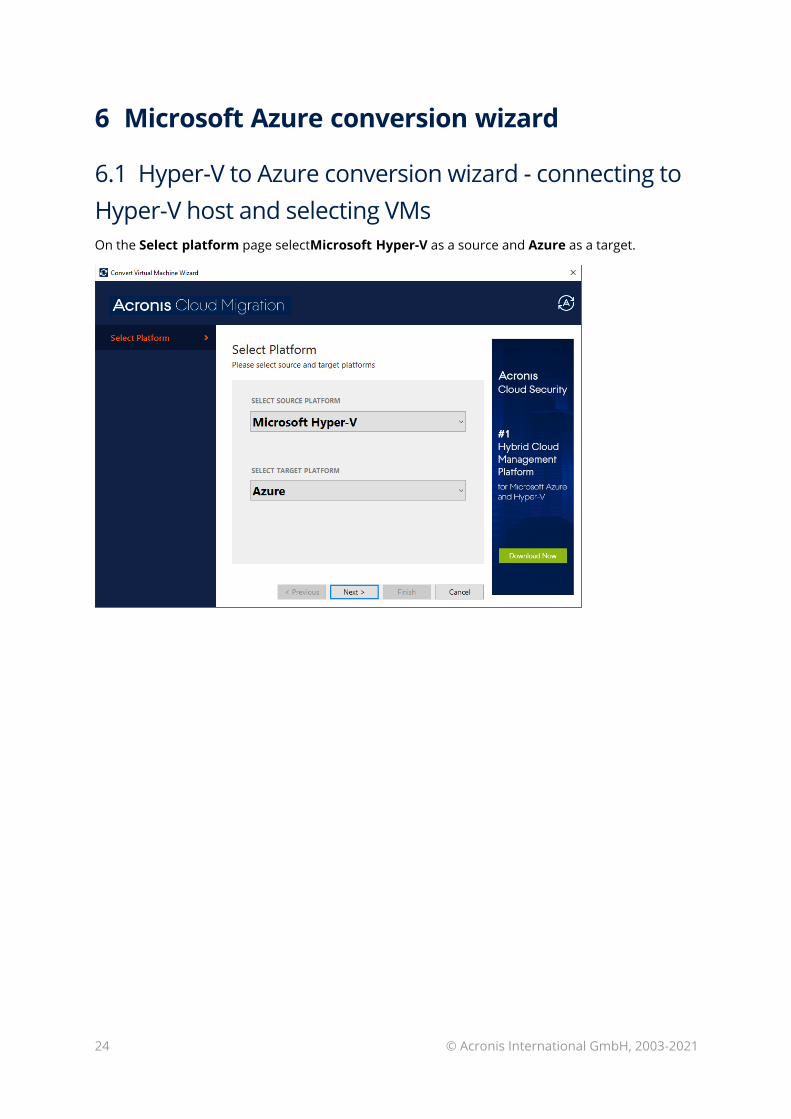
6.1 Hyper-V to Azure conversion wizard - connecting to Hyper-V host and selecting VMsOn the Select platform page selectMicrosoft Hyper-V as a source and Azure as a target.
24 © Acronis International GmbH, 2003-2021

On the Select source page enter the IP address or the host name of the Hyper-V host along with the user credentials to connect to the specified host.
The Select VM(s) page lists the available generation 1 virtual machines for conversion. The user can select one or more virtual machines.
l VHDX/VHD virtual disk conversions are supported.
l Azure supports only generation 1 VMs that are in the VHD file format and have a fixed sized disk.
l If the selected virtual machines are on – they will automatically be turned off before the conversion starts.
25 © Acronis International GmbH, 2003-2021

The Export options page allows to configure whether snapshot has to be created during the conversion process. Using snapshot will let VM to be kept powered on, but will take additional space on the disc.
26 © Acronis International GmbH, 2003-2021
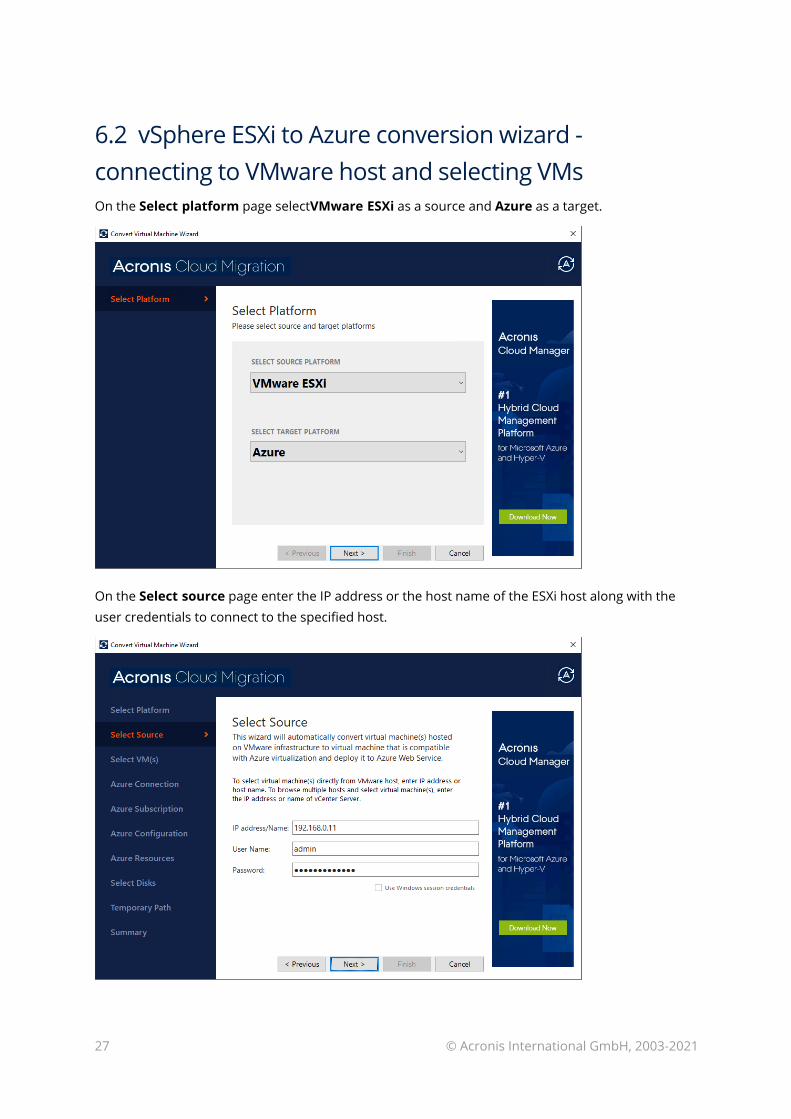
6.2 vSphere ESXi to Azure conversion wizard - connecting to VMware host and selecting VMsOn the Select platform page selectVMware ESXi as a source and Azure as a target.
On the Select source page enter the IP address or the host name of the ESXi host along with the user credentials to connect to the specified host.
27 © Acronis International GmbH, 2003-2021
On the Select VM(s) page select the host(s) and virtual machines for conversion. The current state of the VMs is displayed on the right hand side.
28 © Acronis International GmbH, 2003-2021
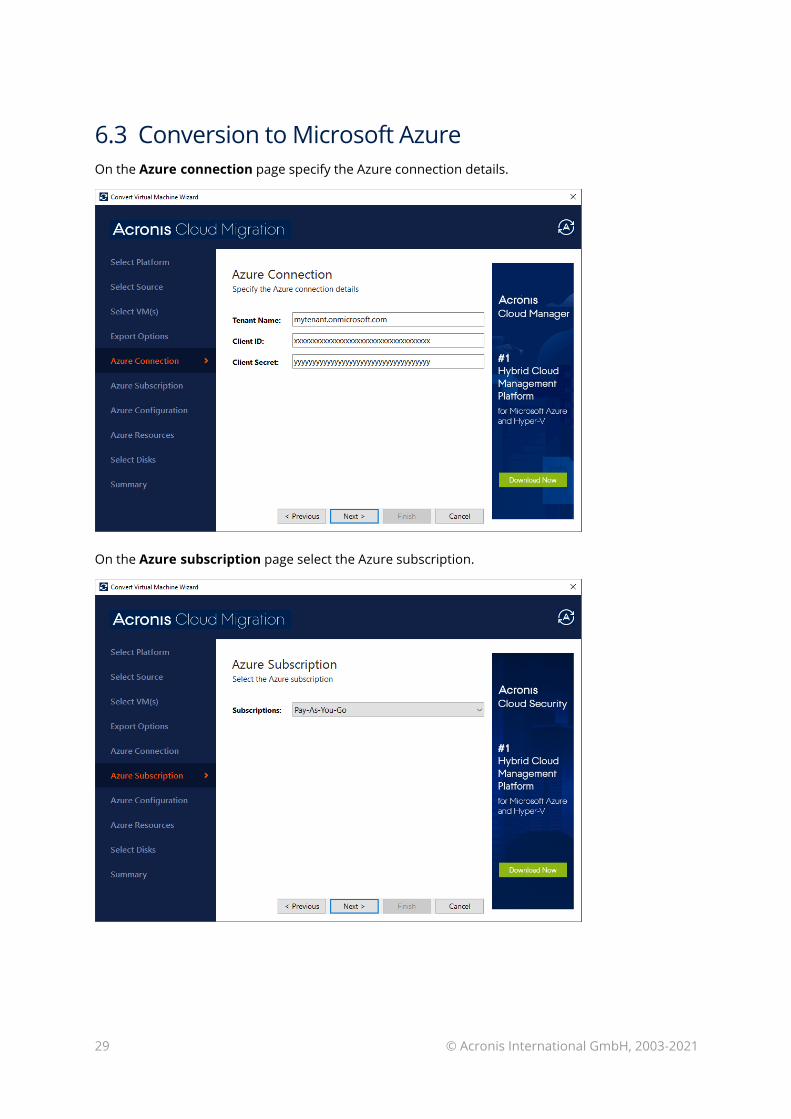
6.3 Conversion to Microsoft AzureOn the Azure connection page specify the Azure connection details.
On the Azure subscription page select the Azure subscription.
29 © Acronis International GmbH, 2003-2021
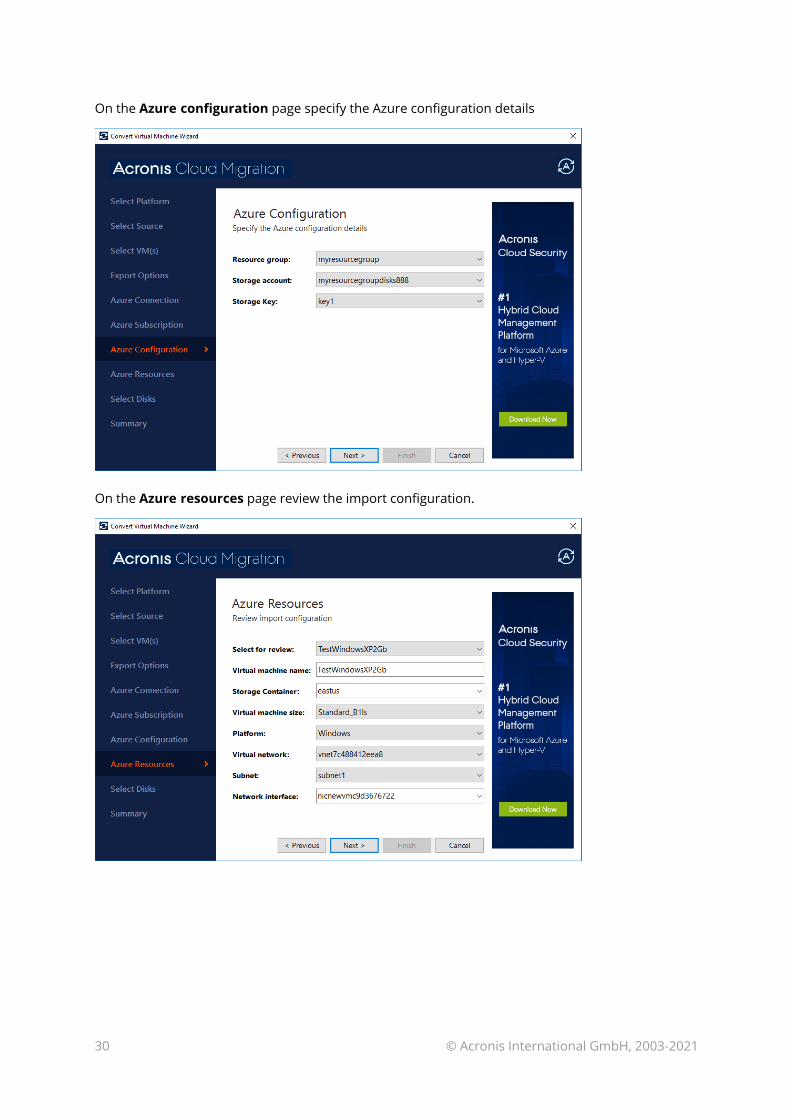
On the Azure configuration page specify the Azure configuration details
On the Azure resources page review the import configuration.
30 © Acronis International GmbH, 2003-2021
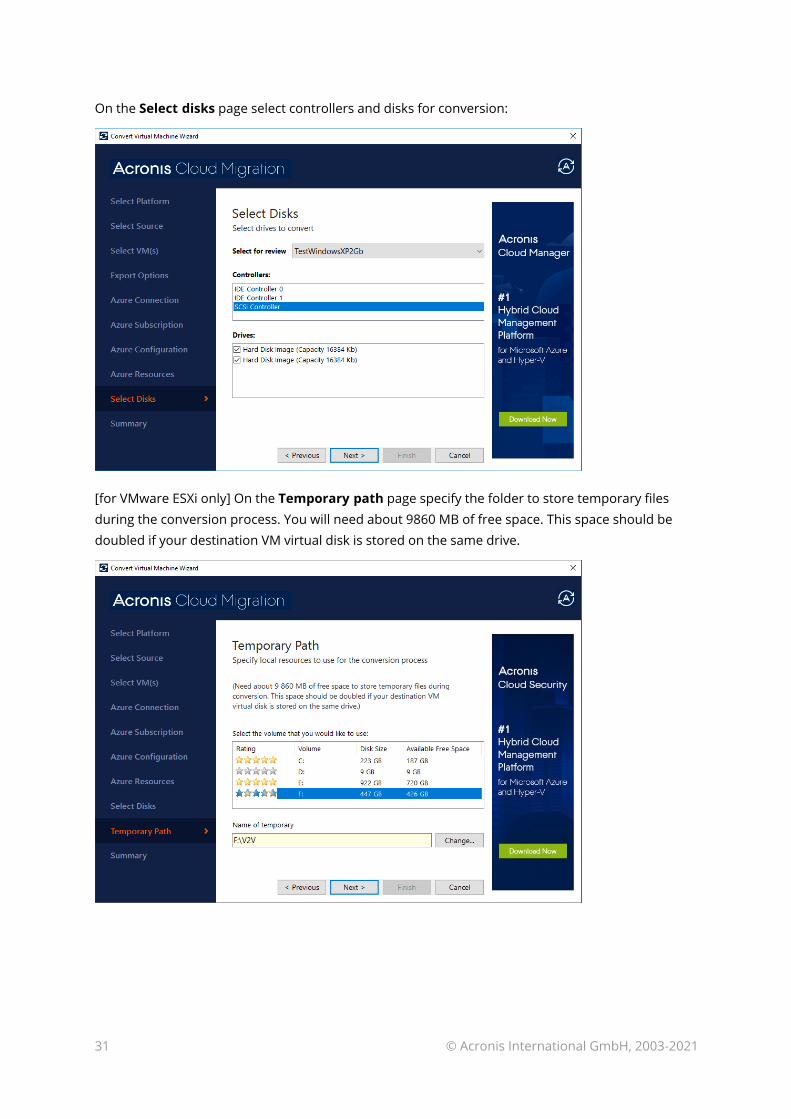
On the Select disks page select controllers and disks for conversion:
[for VMware ESXi only] On the Temporary path page specify the folder to store temporary files during the conversion process. You will need about 9860 MB of free space. This space should be doubled if your destination VM virtual disk is stored on the same drive.
31 © Acronis International GmbH, 2003-2021
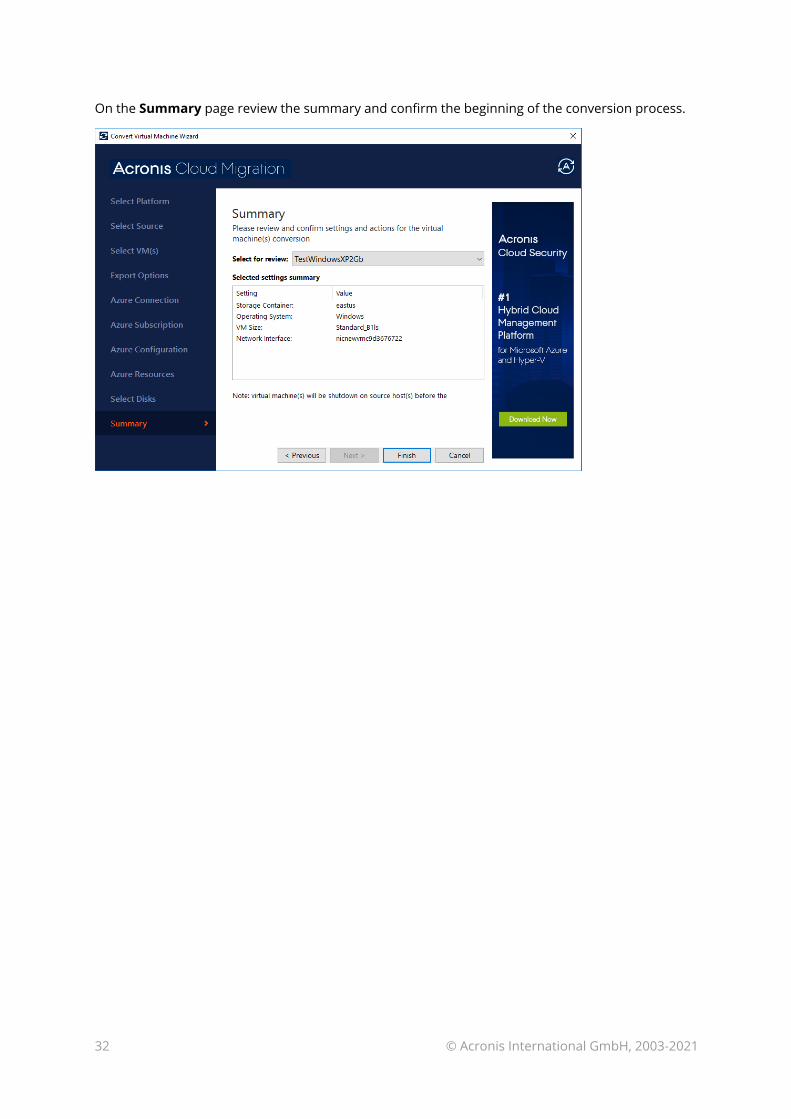
On the Summary page review the summary and confirm the beginning of the conversion process.
32 © Acronis International GmbH, 2003-2021

7 Acronis Cloud Migration PowerShell cmdletsNoteThis functionality is only available in the full (paid) edition of Acronis Cloud Migration.
7.1 VMware to Hyper-V conversion
7.1.1 Invocation 1. Open PowerShell Window.
2. Execute the following command to load the snapin:
PS C:\Users\Administrator>Add-PSSnapin 59v2v
3. Use theConvert-VM cmdlet to perform conversion.
Once conversions succeed, theConvert-VMcmdlet will pass the Virtual Machine Id and Hyper-V ComputerName to the pipeline, so you could use it later to configure VM.
7.1.2 Getting offline helpTo list supported options use the following cmdlet:
PS C:\Users\Administrator> Get-Help Convert-VM -full
7.1.3 Supported optionsMandatory parameters:
l -s <string> Source ESX/ESXi server.
l -sp <string> Source host admin password.
l -su <string> Source host admin login.
l -sv <string> Source VM name to convert.
Optional parameters:
l -t <string> Destination Hyper-V host (defaults to local host).
l -tp <string> Hyper-V host admin pass.
l -tu <string> Hyper-V host admin login.
l -tv <string> Destination VM name (defaults to source name).
l -cpu <int> Override number of CPUs to value (1-4).
l -mem <int> Override memory size to value MB (1-32768).
l -net <string> Connect VM to specified virtual network.
l -vhd Use vhd disk format (vhdx is default).
l -start <int> Override automatic startup action (0 - None, 1 - Restart, 2 - Always).
33 © Acronis International GmbH, 2003-2021
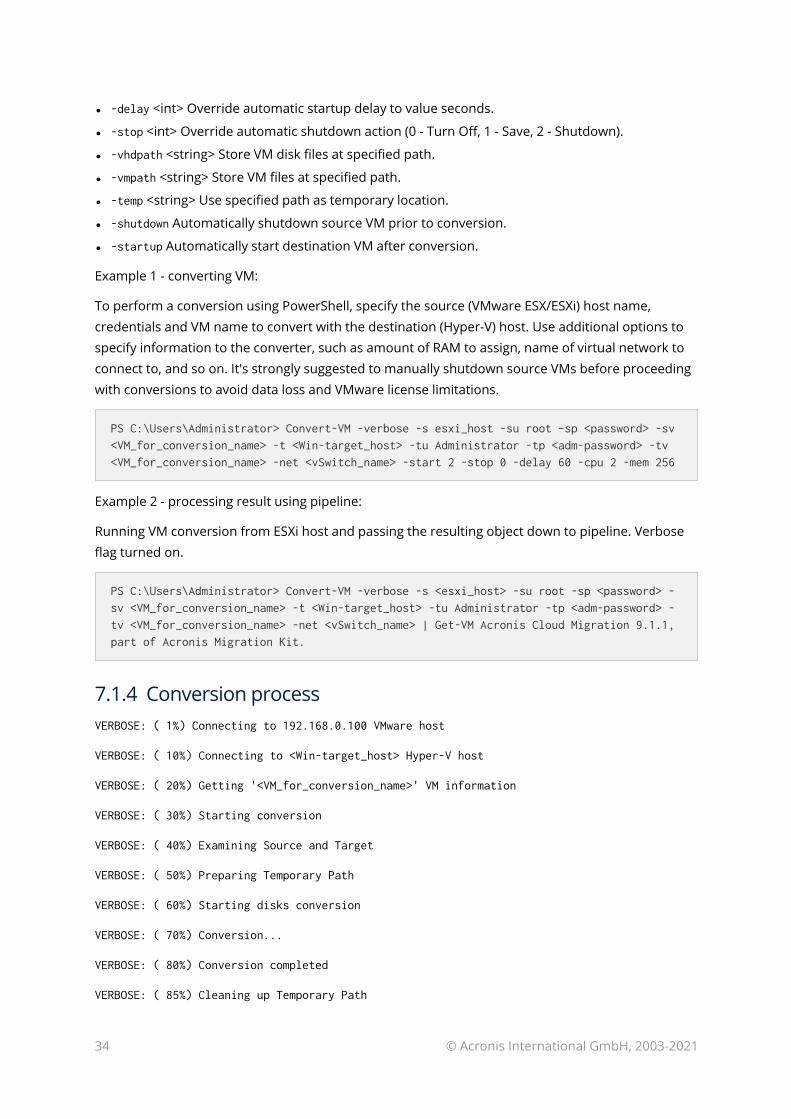
l -delay <int> Override automatic startup delay to value seconds.
l -stop <int> Override automatic shutdown action (0 - Turn Off, 1 - Save, 2 - Shutdown).
l -vhdpath <string> Store VM disk files at specified path.
l -vmpath <string> Store VM files at specified path.
l -temp <string> Use specified path as temporary location.
l -shutdown Automatically shutdown source VM prior to conversion.
l -startup Automatically start destination VM after conversion.
Example 1 - converting VM:
To perform a conversion using PowerShell, specify the source (VMware ESX/ESXi) host name, credentials and VM name to convert with the destination (Hyper-V) host. Use additional options to specify information to the converter, such as amount of RAM to assign, name of virtual network to connect to, and so on. It's strongly suggested to manually shutdown source VMs before proceeding with conversions to avoid data loss and VMware license limitations.
PS C:\Users\Administrator> Convert-VM -verbose -s esxi_host -su root –sp <password> -sv <VM_for_conversion_name> -t <Win-target_host> -tu Administrator -tp <adm-password> -tv <VM_for_conversion_name> -net <vSwitch_name> -start 2 -stop 0 -delay 60 -cpu 2 -mem 256
Example 2 - processing result using pipeline:
Running VM conversion from ESXi host and passing the resulting object down to pipeline. Verbose flag turned on.
PS C:\Users\Administrator> Convert-VM -verbose -s <esxi_host> -su root -sp <password> -sv <VM_for_conversion_name> -t <Win-target_host> -tu Administrator -tp <adm-password> -tv <VM_for_conversion_name> -net <vSwitch_name> | Get-VM Acronis Cloud Migration 9.1.1, part of Acronis Migration Kit.
7.1.4 Conversion processVERBOSE: ( 1%) Connecting to 192.168.0.100 VMware host
VERBOSE: ( 10%) Connecting to <Win-target_host> Hyper-V host
VERBOSE: ( 20%) Getting '<VM_for_conversion_name>' VM information
VERBOSE: ( 30%) Starting conversion
VERBOSE: ( 40%) Examining Source and Target
VERBOSE: ( 50%) Preparing Temporary Path
VERBOSE: ( 60%) Starting disks conversion
VERBOSE: ( 70%) Conversion...
VERBOSE: ( 80%) Conversion completed
VERBOSE: ( 85%) Cleaning up Temporary Path
34 © Acronis International GmbH, 2003-2021

VERBOSE: ( 90%) Creating Generation 2 VM
VERBOSE: (100%) Done
Virtual machine 'VM_For_Conversion_Name' (137EF963-522D-44B0-8101-E420896FA84C) has been
converted.
Name State CPUUsage(%) MemoryAssigned(M) Uptime Status
---- ----- ----------- ----------------- ------ ------
VM_For_Conversion_Name Off 0 0 00:00:00 Operating normally
7.2 Hyper-V to Microsoft Azure conversionTwo Acronis Cloud Migration cmdlets are to deal with migration to Microsoft Azure Classic and Mirosoft Azure Resource Manager type deployments.
7.2.1 Requirements 1. Acronis Cloud Migration needs to be installed on the Hyper-V server to access guest virtual hard
disks.
2. Azure-powershell 1.7.0 or later needs to be installed (https://github.com/Azure/azure-powershell/releases/download/v1.7.0-August2016/azure-powershell.1.7.0.msi).
3. .Net Framework 4.5 needs to be installed.
7.2.2 Syntax
Import-VMDisks -OS <string> -Container <uri> -StorageKey <string> -Source <string> [-VM <IPersistentVM>] Import-VMDisksRM -OS <OperatingSystemTypes> {Windows | Linux} -Container <uri> -StorageKey <string> -Source <string> [-VM <PSVirtualMachine>]
Parameters:
l -OS - Operating System Type (Windows on Linux) of the Hyper-V guest Container - Full Uri of container used to store imported virtual hard disk of the Azure Storage Account,
e.g. https://<storage_account>.blob.core.windows.net/vhds/.
l -StorageKey - Key used to Access Storage Account.
l -Source - Hyper-V host name.
While exporting disk drives first IDE drive will be assigned as OS disk, while remaining as data disks.
7.2.3 Using with Microsoft Azure Classic 1. Preparation - you need to be registered on Microsoft Azure, with an active subscription. You
should have created Azure Storage Account (classic) using the azure portal (portal.azure.com)
2. Start powershell and load snap-in Add-PSSnapin 59v2v.
35 © Acronis International GmbH, 2003-2021
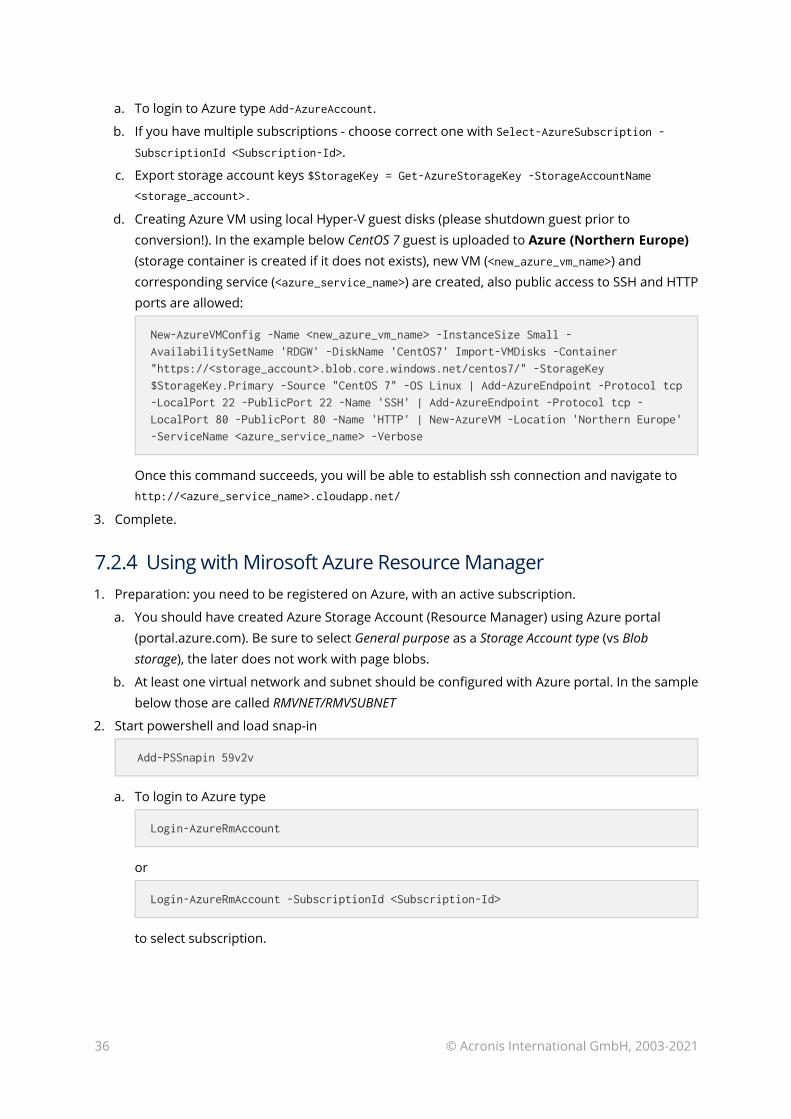
a. To login to Azure type Add-AzureAccount.
b. If you have multiple subscriptions - choose correct one with Select-AzureSubscription -SubscriptionId <Subscription-Id>.
c. Export storage account keys $StorageKey = Get-AzureStorageKey -StorageAccountName <storage_account>.
d. Creating Azure VM using local Hyper-V guest disks (please shutdown guest prior to conversion!). In the example below CentOS 7 guest is uploaded to Azure (Northern Europe) (storage container is created if it does not exists), new VM (<new_azure_vm_name>) and corresponding service (<azure_service_name>) are created, also public access to SSH and HTTP ports are allowed:
New-AzureVMConfig -Name <new_azure_vm_name> -InstanceSize Small -AvailabilitySetName 'RDGW' -DiskName 'CentOS7' Import-VMDisks -Container "https://<storage_account>.blob.core.windows.net/centos7/" -StorageKey $StorageKey.Primary -Source "CentOS 7" -OS Linux | Add-AzureEndpoint -Protocol tcp -LocalPort 22 -PublicPort 22 -Name 'SSH' | Add-AzureEndpoint -Protocol tcp -LocalPort 80 -PublicPort 80 -Name 'HTTP' | New-AzureVM -Location 'Northern Europe' -ServiceName <azure_service_name> -Verbose
Once this command succeeds, you will be able to establish ssh connection and navigate to http://<azure_service_name>.cloudapp.net/
3. Complete.
7.2.4 Using with Mirosoft Azure Resource Manager 1. Preparation: you need to be registered on Azure, with an active subscription.
a. You should have created Azure Storage Account (Resource Manager) using Azure portal (portal.azure.com). Be sure to select General purpose as a Storage Account type (vs Blob storage), the later does not work with page blobs.
b. At least one virtual network and subnet should be configured with Azure portal. In the sample below those are called RMVNET/RMVSUBNET
2. Start powershell and load snap-in
Add-PSSnapin 59v2v
a. To login to Azure type
Login-AzureRmAccount
or
Login-AzureRmAccount -SubscriptionId <Subscription-Id>
to select subscription.
36 © Acronis International GmbH, 2003-2021
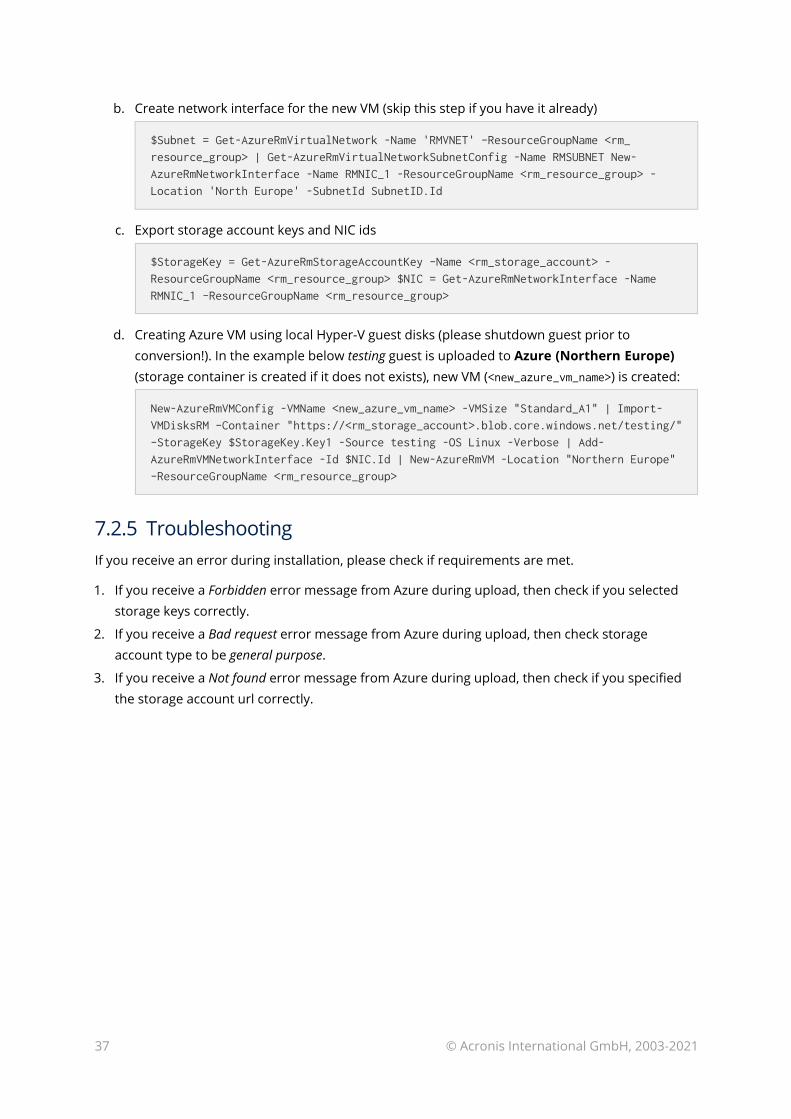
b. Create network interface for the new VM (skip this step if you have it already)
$Subnet = Get-AzureRmVirtualNetwork -Name 'RMVNET' –ResourceGroupName <rm_resource_group> | Get-AzureRmVirtualNetworkSubnetConfig -Name RMSUBNET New-AzureRmNetworkInterface -Name RMNIC_1 -ResourceGroupName <rm_resource_group> -Location 'North Europe' -SubnetId SubnetID.Id
c. Export storage account keys and NIC ids
$StorageKey = Get-AzureRmStorageAccountKey –Name <rm_storage_account> -ResourceGroupName <rm_resource_group> $NIC = Get-AzureRmNetworkInterface -Name RMNIC_1 –ResourceGroupName <rm_resource_group>
d. Creating Azure VM using local Hyper-V guest disks (please shutdown guest prior to conversion!). In the example below testing guest is uploaded to Azure (Northern Europe) (storage container is created if it does not exists), new VM (<new_azure_vm_name>) is created:
New-AzureRmVMConfig -VMName <new_azure_vm_name> -VMSize "Standard_A1" | Import-VMDisksRM –Container "https://<rm_storage_account>.blob.core.windows.net/testing/" –StorageKey $StorageKey.Key1 -Source testing -OS Linux -Verbose | Add-AzureRmVMNetworkInterface -Id $NIC.Id | New-AzureRmVM -Location "Northern Europe" –ResourceGroupName <rm_resource_group>
7.2.5 TroubleshootingIf you receive an error during installation, please check if requirements are met.
1. If you receive a Forbidden error message from Azure during upload, then check if you selected storage keys correctly.
2. If you receive a Bad request error message from Azure during upload, then check storage account type to be general purpose.
3. If you receive a Not found error message from Azure during upload, then check if you specified the storage account url correctly.
37 © Acronis International GmbH, 2003-2021