acer al2216w power supply capacitor replacement · acer al2216w power supply capacitor replacement...
TRANSCRIPT
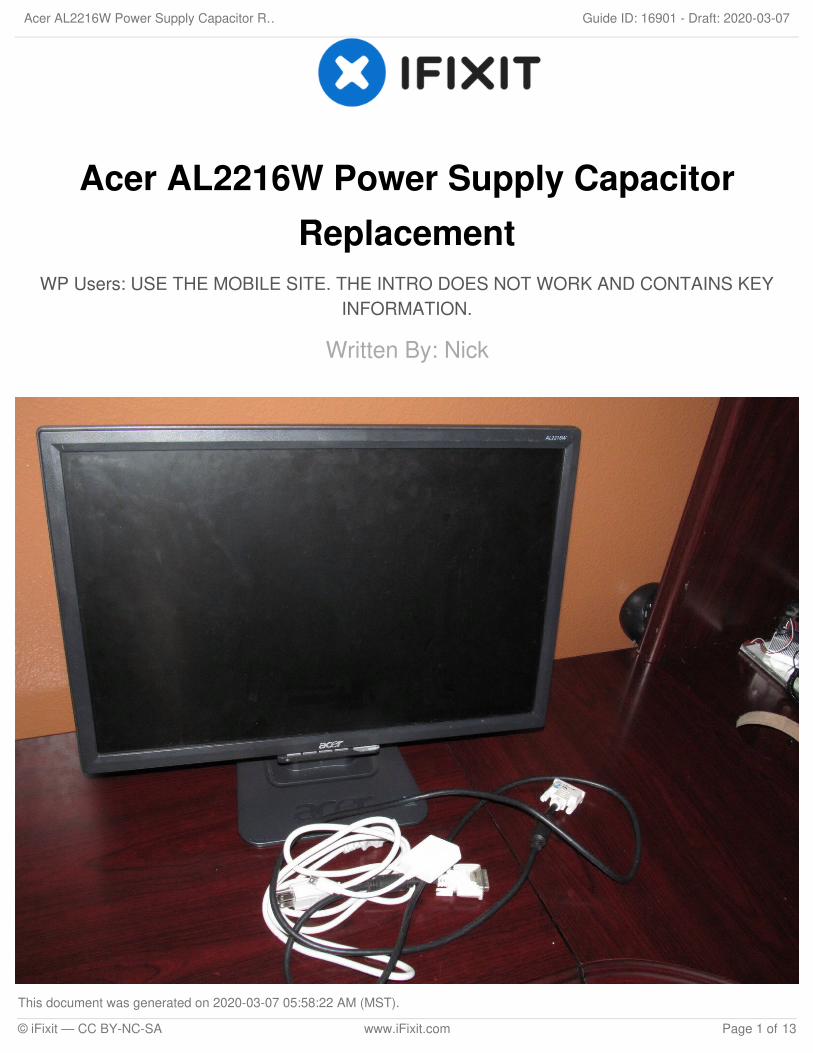
Acer AL2216W Power Supply CapacitorReplacement
WP Users: USE THE MOBILE SITE. THE INTRO DOES NOT WORK AND CONTAINS KEYINFORMATION.
Written By: Nick
Acer AL2216W Power Supply Capacitor R… Draft: 2020-03-07Guide ID: 16901 -
This document was generated on 2020-03-07 05:58:22 AM (MST).
© iFixit — CC BY-NC-SA www.iFixit.com Page 1 of 13

INTRODUCTION
If your AL2216W is having problems, it is likely a capacitor fault. Here are some signs of badcapacitors:
Note: While some issues may be corrected with a partial repair, this is NOT RECOMMENDEDsince one bad capacitor usually means the entire set will fail. Change them all in one repair!
Power issues (Present issue)Excessive transformer hum (Present issue)Excessive inverter hum (Present issue)VGA auto adjust problems (Present issue)Backlight problemsPower problemsVideo issues (Ex: Unstable image, PC connection issues/native resolution instability)Random power issues that only resolve if the monitor is unplugged.
Original capacitor values (Delta 00A power supply ONLY)
NOTE: Most of these values are obsolete/revision specific - check your board for thecapacitors you need. MANY CAPACITORS WILL NEED TO BE UPGRADED as most of theseare obsolete or hard to get.
25V 1000uF (x2)10V 1000uF (x1)25V 220uF (x2)16V 2200uF inverter (x1/Early power supplies)
TOOLS:Soldering Workstation (1)60/40 Leaded Solder (1)Jimmy (1)
May prove useful on revisions like the AL2216WBL
64 Bit Driver Kit (1)helping hands (1)
Makes capacitor removal easierFlathead Screwdriver (1)
This WILL damage plastic, but works well onstubborn monitors.
PARTS:35v 1000uf capacitor (2)
Replaces 25V 1000uF capacitor10v 1000uf capacitor (1)35v 220uf capacitor (2)
Replaces 25V 220uF capacitor16v 2200uf capacitor (1)
Inverter coil capacitor - early supplies only.
Acer AL2216W Power Supply Capacitor R… Draft: 2020-03-07Guide ID: 16901 -
This document was generated on 2020-03-07 05:58:22 AM (MST).
© iFixit — CC BY-NC-SA www.iFixit.com Page 2 of 13

Step 1 — Discharge the old capacitors
Caution: If you are uncertainabout holding high voltage parts,follow all provided warnings anduse common sense. A capacitordischarge tool is STRONGLYRECOMMENDED.
The filter capacitor will hold themost residual charge. Usecaution around this capacitor!
Unplug the monitor for 24-48 hours.Wait 5-7 days if the filter capacitoris replaced.
Step 2 — Remove the stand
This monitor never came with a hinge cap. If yours has one, snap it off from the marked points.
Remove the stand from the monitor. Remove the 4 screws that hold the stand on. The bottomscrews should be removed first, but this can be done in any order.
Acer AL2216W Power Supply Capacitor R… Draft: 2020-03-07Guide ID: 16901 -
This document was generated on 2020-03-07 05:58:22 AM (MST).
© iFixit — CC BY-NC-SA www.iFixit.com Page 3 of 13
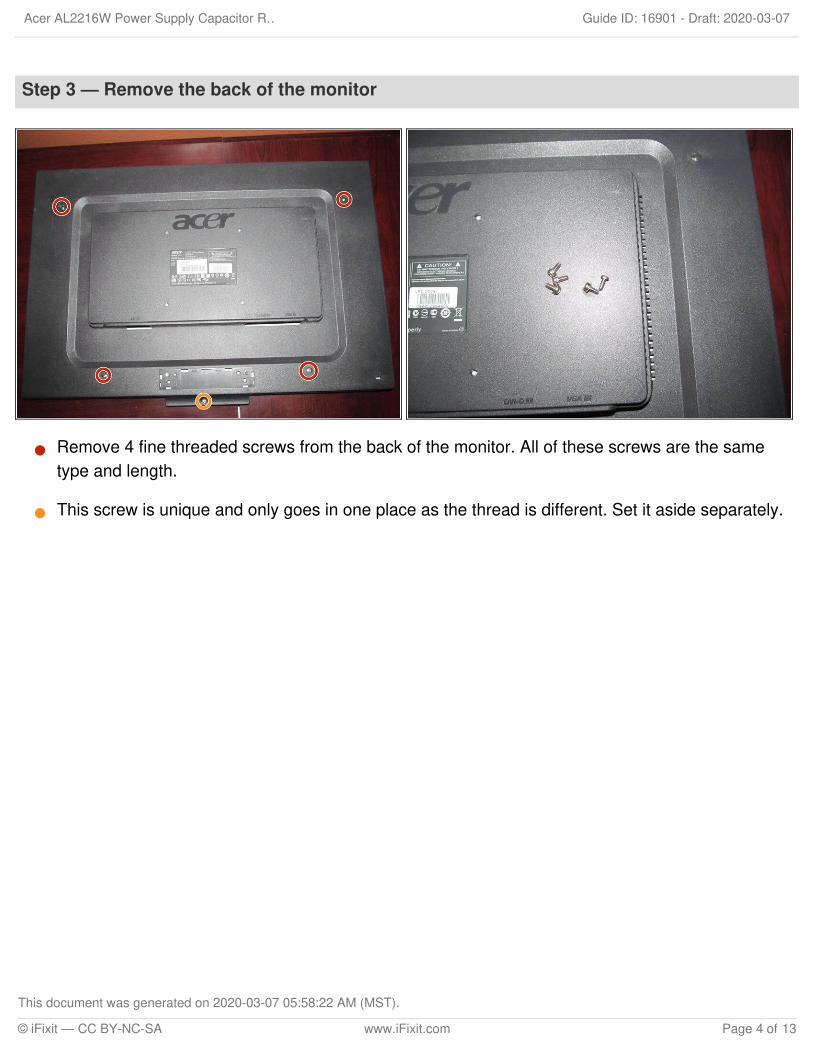
Step 3 — Remove the back of the monitor
Remove 4 fine threaded screws from the back of the monitor. All of these screws are the sametype and length.
This screw is unique and only goes in one place as the thread is different. Set it aside separately.
Acer AL2216W Power Supply Capacitor R… Draft: 2020-03-07Guide ID: 16901 -
This document was generated on 2020-03-07 05:58:22 AM (MST).
© iFixit — CC BY-NC-SA www.iFixit.com Page 4 of 13

Step 4 — Unlatch the clips (Bottom)
If the monitor has never been serviced, a flathead screwdriver may be needed. This will damagethe plastic casing.
On the bottom of the monitor, there are four slots to open the monitor. To release these clips, use aJimmy or flathead screwdriver.
Step 5 — Unlatch the clips (Side)
If you are having trouble doing this,use a pry tool. Unserviced monitorscan be stubborn.
With the monitor unclipped on thebottom, pull the sides of the monitorup. Do this slowly to avoid damagingthe plastics and LCD.
Acer AL2216W Power Supply Capacitor R… Draft: 2020-03-07Guide ID: 16901 -
This document was generated on 2020-03-07 05:58:22 AM (MST).
© iFixit — CC BY-NC-SA www.iFixit.com Page 5 of 13

Step 6 — Remove the IEC socket screws
After these screws are removed,the power supply will be exposed.
With the back of the monitor off,remove the 2 screws on the IECpower connector.
Step 7 — Remove the video connection screws
If you do not have a nut driver onhand, needlenoose plyers can alsobe used.
Remove the 4 screw pins for thevideo cables from the monitor. Usea 5mm Nut bit/driver to remove thescrew pins from the power supplyshield.
Acer AL2216W Power Supply Capacitor R… Draft: 2020-03-07Guide ID: 16901 -
This document was generated on 2020-03-07 05:58:22 AM (MST).
© iFixit — CC BY-NC-SA www.iFixit.com Page 6 of 13

Step 8 — Disconnect the backlight cables
Disconnect the CCFL cables from the power supply board.
Step 9 — Disconnect the button board
Power button board removal is optional.
Disconnect the flat flex cable that goes to the control board.
Acer AL2216W Power Supply Capacitor R… Draft: 2020-03-07Guide ID: 16901 -
This document was generated on 2020-03-07 05:58:22 AM (MST).
© iFixit — CC BY-NC-SA www.iFixit.com Page 7 of 13

Step 10 — Remove the power supply shield (Part 1)
Remove the 2 lower screws that hold the power supply shield to the monitor.
Step 11 — Remove the power supply shield (Part 2)
Removal of the lower shield is not required but makes the job easier. To remove it, unclip theplastic tabs on the LCD bezel.
On the right side of the monitor, remove the remaining screws holding the shield in place.
Lift the lower plate up while removing the power supply shield to remove it from the monitor. Oncethis is done, you will have access to the power supply.
Acer AL2216W Power Supply Capacitor R… Draft: 2020-03-07Guide ID: 16901 -
This document was generated on 2020-03-07 05:58:22 AM (MST).
© iFixit — CC BY-NC-SA www.iFixit.com Page 8 of 13

Step 12 — Remove the power supply
If you see bulged capacitors, treat the power supply as if the capacitors are holding aresidual charge.
If the filter capacitor is replaced, IT MUST BE DISCHARGED. In addition, the black screw(Blue marker) is for grounding and cannot be lost.
Only lift the power supply board at a slight angle. Lifting it any higher may damage the processingboard or interface.
If you cannot find the original capacitors, the original parts can be substituted.
This capacitor is only found on older power supplies. Replacement is not required, butrecommended.
With the power supply shield removed from the monitor, identify the power supply. Take note ofthe values, including the inverter cap if present.
Remove the 4 screws from the power supply. Once this is done, lift up the power supply at a slightangle to clear the chassis.
Acer AL2216W Power Supply Capacitor R… Draft: 2020-03-07Guide ID: 16901 -
This document was generated on 2020-03-07 05:58:22 AM (MST).
© iFixit — CC BY-NC-SA www.iFixit.com Page 9 of 13

Step 13 — (Optional) Capacitor polarity marking
If the PCB is marked to avoid mis-installation, the flux will washthese marks off.
If you are unsure of the position ofthe capacitors, mark the polarity witha permanent marker. If thecapacitors are installedincorrectly, they will explodewhen power is applied.
Step 14 — Add flux to the capacitor leads
If you do not have flux on hand,solder can be used. The flux maybe difficult to clean if overused.
To prepare the board for capacitorreplacement, add flux or solder toease removal.
Acer AL2216W Power Supply Capacitor R… Draft: 2020-03-07Guide ID: 16901 -
This document was generated on 2020-03-07 05:58:22 AM (MST).
© iFixit — CC BY-NC-SA www.iFixit.com Page 10 of 13

Step 15 — Remove the old capacitors
Use of a Helping Hands is recommended to avoid soldering iron contact. If you do not haveone, hold the board at an angle.
While a partial replacement may work, the remaining capacitors will fail. Change the entireset while it is apart. Refer to this guide for soldering tips: How To Solder and DesolderConnections.
Move to a workspace with ventilation or use a fume extractor. Once in an appropriateworkspace, desolder the old capacitors. Heat up each leg and remove it.
After removing the capacitors, clean up the old solder with a desoldering braid. Lift it with the ironwhen removing it.
Acer AL2216W Power Supply Capacitor R… Draft: 2020-03-07Guide ID: 16901 -
This document was generated on 2020-03-07 05:58:22 AM (MST).
© iFixit — CC BY-NC-SA www.iFixit.com Page 11 of 13

Step 16 — Installing brand new capacitors
Check the capacitor polaritybefore soldering the newcapacitors in. If they are installedincorrectly, they will explode!
Install the new capacitors. Check thepolarity/placement and bend theleads so they do not come looseduring installation.
Step 17 — Solder the new capacitors in
Once the polarity is verified, solder the capacitors in. After installation, cut off any excess lead.
Acer AL2216W Power Supply Capacitor R… Draft: 2020-03-07Guide ID: 16901 -
This document was generated on 2020-03-07 05:58:22 AM (MST).
© iFixit — CC BY-NC-SA www.iFixit.com Page 12 of 13

To reassemble your device, follow these instructions in reverse order.
Step 18 — Clean the flux off of the board
After verifying there are no coldsolder joints, clean the board. Thiscan be cleaned with 91%+Isopropyl or Denatured alcohol.
Step 19 — Test the monitor
Put the monitor back together andtest the repair.
Acer AL2216W Power Supply Capacitor R… Draft: 2020-03-07Guide ID: 16901 -
This document was generated on 2020-03-07 05:58:22 AM (MST).
© iFixit — CC BY-NC-SA www.iFixit.com Page 13 of 13