‘97-’03 volkswagen 1.9l tdi injector nozzles · vw injector nozzles removing stock injectors 1....
TRANSCRIPT

‘97-’03 Volkswagen 1.9L TDI Injector Nozzles
Product Description Part Number.205 Injector Nozzels #44200
.216 Injector Nozzels #44201

�
IntroductIon
These instructions outline how to install the Bully Dog Volkswagen Injector Nozzles. It is very important that these injectors are installed by an experienced mechanic. If the install is not done correctly, damage to the injectors and possibly engine components can occur. These injectors should only be installed on volkswagen 1.9L TDI diesels 1997-2003 and should not be used for any other application. Bully Dog offers two different sizes of nozzles, the first is a 205 which is rated to add 20 horsepower over stock, and our 216 race only injector nozzles rate at 30 horsepower. The size 216 injector nozzles are not recommended for every day driving. The 216 will cause excess smoke that needs to be accounted for with additional racing parts. Installation for the 205 and 216 flow injectors is exactly the same so no additional precautions need to be taken for the instal-lation of either injector.
VW INJECTOR NOZZLES
BILL OF MATERIALS
4 Injector Nozzles
TOOLS NEEDED
•�7mm wrench • �5 mm wrench• �3 mm wrench• Torque wrench
• Vice• Flat head screw driver
2
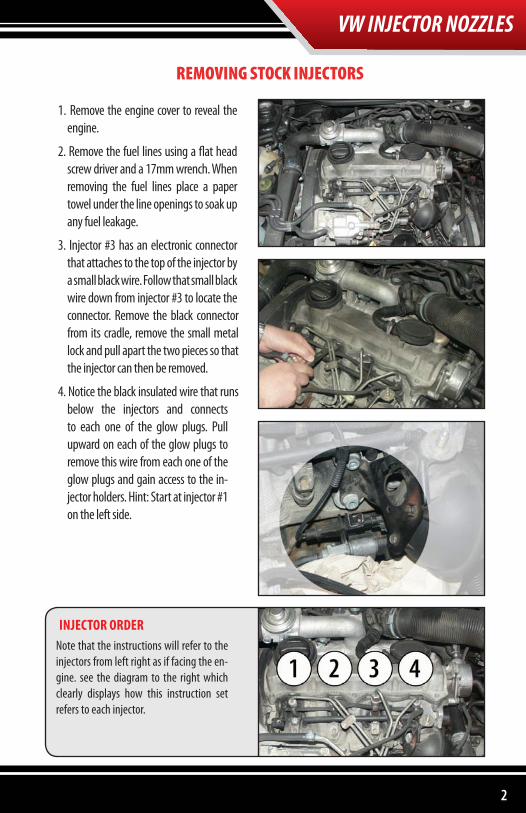
INjEcTOR ORDERNote that the instructions will refer to the injectors from left right as if facing the en-gine. see the diagram to the right which clearly displays how this instruction set refers to each injector.
VW INJECTOR NOZZLES
removIng Stock InjectorS
1. Remove the engine cover to reveal the engine.
2. Remove the fuel lines using a flat head screw driver and a 17mm wrench. When removing the fuel lines place a paper towel under the line openings to soak up any fuel leakage.
3. Injector #3 has an electronic connector that attaches to the top of the injector by a small black wire. Follow that small black wire down from injector #3 to locate the connector. Remove the black connector from its cradle, remove the small metal lock and pull apart the two pieces so that the injector can then be removed.
4. Notice the black insulated wire that runs below the injectors and connects to each one of the glow plugs. Pull upward on each of the glow plugs to remove this wire from each one of the glow plugs and gain access to the in-jector holders. Hint: Start at injector #1 on the left side.

3
5. Pull the fuel injector return lines off one side of each injector to separate the injectors from each other, which will make it possible to remove each injector individually.
6. Use a 13mm socket to remove each injector holder bolt. Remove the injector holder along with each bolt.
7. Remove the injectors by simply pulling upward on the injector while giving it a little wiggle. Use a wrench, with descresion, if there is difficulty removing the injector by hand. As each injector is re-moved note that there is a washer on the end of the injector that must be saved, this washer will be reused. Be sure to cover up the injector holes in the head with paper towels. This system is direct injec-tion so anything that falls into those holes goes straight into the cylinder.
8. Once each injector has been removed the nozzles can be swapped.
VW INJECTOR NOZZLES
4
VW INJECTOR NOZZLES
changIng the Injector nozzleS
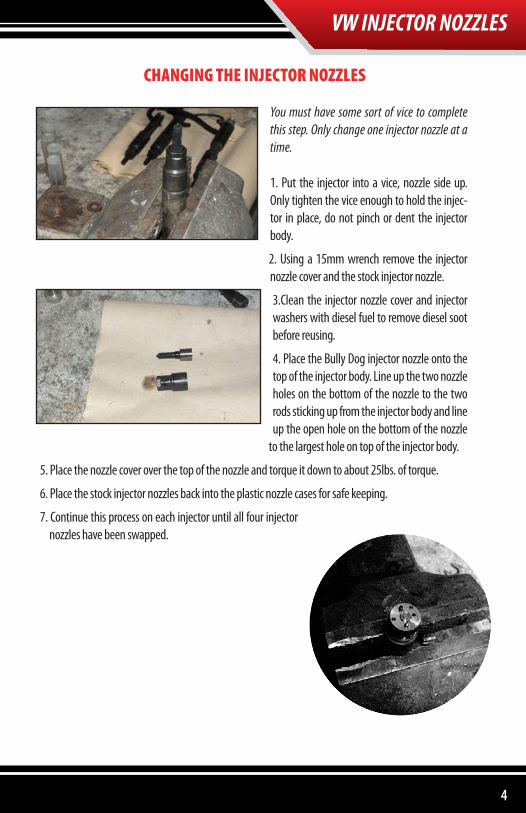
You must have some sort of vice to complete this step. Only change one injector nozzle at a time.
1. Put the injector into a vice, nozzle side up. Only tighten the vice enough to hold the injec-tor in place, do not pinch or dent the injector body.
2. Using a 15mm wrench remove the injector nozzle cover and the stock injector nozzle.
3.Clean the injector nozzle cover and injector washers with diesel fuel to remove diesel soot before reusing.
4. Place the Bully Dog injector nozzle onto the top of the injector body. Line up the two nozzle holes on the bottom of the nozzle to the two rods sticking up from the injector body and line up the open hole on the bottom of the nozzle
to the largest hole on top of the injector body.
5. Place the nozzle cover over the top of the nozzle and torque it down to about 25lbs. of torque.
6. Place the stock injector nozzles back into the plastic nozzle cases for safe keeping.
7. Continue this process on each injector until all four injector nozzles have been swapped.

5
VW INJECTOR NOZZLES
InStallIng the InjectorS
1. Before putting any of the injectors back in place put a small spot of oil or grease on each washer so they will stick to the injector and not fall off during placement of the injectors.
2. Place each injector back in its original location. Make sure each injector is placed firmly.
3. Reconnect the fuel injector return lines.
4. Put the injector holders in place and hand tighten each injector holder bolt. Once all are in place torque the holder bolts to 20lbs. This step is important if the injectors are not placed and tightened correctly the engine may leak exhaust gas past the sides of the injectors.
5. Install the rest of the components that were removed during the removal of the injectors.
6. Bleeding the fuel lines: Before attempting to start the vehicle, the fuel lines need to be bled to get all of the air out of the fuel lines. Bleeding the lines takes two people, one to watch the fuel lines and one to turn over the engine.
a. Bleed one line at a time: Start with line one, disconnect line one from the top of the injector and turn the vehicle engine over. Continue turning the engine until fuel comes out of the line. After fuel comes out of the line, that line can be connected to the top of the injector. Continue to bleed each line on every injector line until all are bled, and then start the engine.
b. Once the engine has been started let it run and observe the injector ports, be sure that the engine sounds normal and that there is no exhaust gas moving upward past the injectors.
INjEcTOR FLOw TESTThe injectors should be flow tested at a certi-fied Bosch dealer. This should be done to verify that the injectors are all flowing at the same rate and to also verify that the injector nozzles are meeting their specified flow rate. The nozzles rated at 205 should flow close to .205 liters/minute and the 216 should flow close to .216 liters/ minute. The injectors can be in-stalled without flow testing, but they may not work to their full potential and efficiency.
6
VW INJECTOR NOZZLES
warranty & dISclaImer
REMEMBER, THIS IS A PERFORMANCE PRODUCT, USE AT YOUR OWN RISK.This product is not intended to be used to break the law.
Do not use this product until you have carefully read the following agreement. This agreement sets forth the terms and conditions for the use of this product. The installation of this product indicates that the buyer has read and understands this agreement and accepts the terms and conditions. Never exceed recommended vehicle or tire top speed ratings.
DISCLAIMER OF LIABILITYBully Dog Technologies, LLC. Its distributors, jobbers, and dealers (hereafter Seller) shall be in no way responsible for the product’s proper use and service. THE BUYER HERBY WAIVES ALL LIABILITY CLAIMS.
The Buyer acknowledges that he is not relying on the Sellers skill or judgment to select or furnish goods suitable for any particular purpose and that there are no liabilities which extend beyond the description on the face hereof, and the Buyers hereby waivers all remedies or liabilities expressed or implied, arising by law or otherwise, (including without any obligation of the Seller with respect fitness, merchantability and consequential damages) or whether or not occasioned by the Seller’s negligence.
The Seller disclaims any warranty and expressly disclaims any liability for personal injury or damages. The Buyer acknowledges and agrees that the disclaimer of any liability for personal injury is a material term for this agreement and the Buyer agrees to indemnify the Seller and to hold the Seller harmless from any claim related to the item of the equipment purchased. Under no circumstances will the Seller be liable for any damages or expenses by reason of use or sale of any such equipment.
The Seller assumes no liability regarding the improper installation or misapplication of its products. It is the installer’s responsibil-ity to check for proper installation and if in doubt contact the manufacturer.
The Buyer is solely responsible for all warranty issues from the manufacturer.
LIMITATION OF WARRANTYBULLY DOG TECHNOLOGIES, LLC. (Hereafter “Seller”) gives Limited Warranty as to description, quality, merchantability, and fitness for any particular purpose, productiveness, or any other matter of Seller’s product sold herewith. The Seller shall be in no way re-sponsible for the products proper use and service and the Buyer hereby waives all rights other than those expressly written herein. This warranty shall not be extended, altered or varied except be a written instrument signed by Seller and Buyer.
The Warranty is Limited to one (1) year from the date of sale and limited solely to the parts contained within the products kit. All products that are in question of Warranty must be returned prepaid to the Seller and must be accompanied by a dated proof of purchase receipt. All Warranty claims are subject to approval by BULLY DOG TECHNOLOGIES, LLC.
Under no circumstances will the Seller be liable for any labor charged or travel time incurred in diagnosis for defects, removal, or reinstallation of this product or any other contingent expenses.
Under no circumstances will the Seller be liable for any damage or expenses incurred by reason of the use or sale of any such equip-ment.
IN THE EVENT THAT THE BUYER DOES NOT AGREE WITH THIS AGREEMENT: THE BUYER MAY PROMPTLY RETURN THIS PRODUCT, IN A NEW AND UNUSED CONDITION, WITH A DATED PROOF OF PURCHASE TO THE PLACE OF PURCHASE WITHIN TEN (10) DAYS FROM DATE OF PURCHASE FOR A FULL REFUND.
THE INSTALLATION OF THIS PRODUCT INDICATES THAT THE BUYER HAS READ AND UNDERSTANDS THIS AGREEMENT AND ACCEPTS ITS TERMS AND CONDITIONS.
For Free Technical Support Call: 866-bullydog (866-285-5936)
®
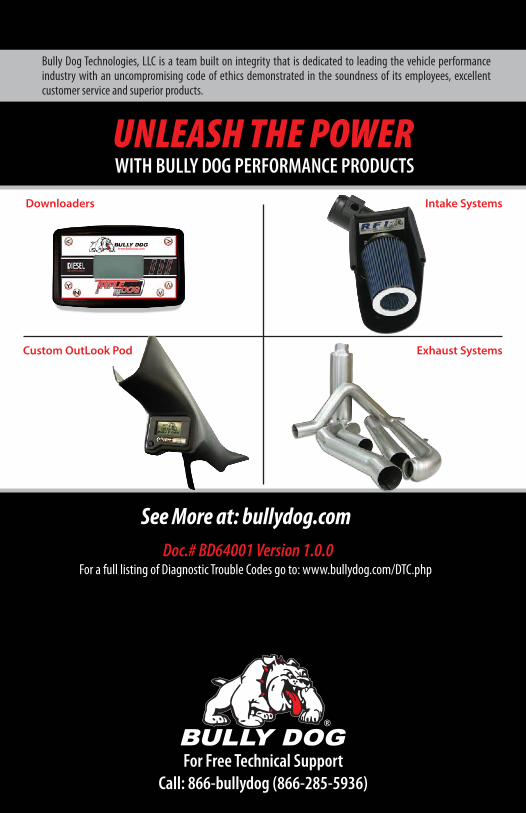
See More at: bullydog.comDoc.# BD64001 Version 1.0.0
For a full listing of Diagnostic Trouble Codes go to: www.bullydog.com/DTC.php
Intake Systems
Exhaust SystemsCustom OutLook Pod
Downloaders
UNLEASH THE POWER WITH BULLY DOG PERFORMANCE PRODUCTS
Bully Dog Technologies, LLC is a team built on integrity that is dedicated to leading the vehicle performance industry with an uncompromising code of ethics demonstrated in the soundness of its employees, excellent customer service and superior products.