a gradient effect done using wig dye
TRANSCRIPT

106 The World of Wigcraft
A gradient effect done using Wig Dye.

Intermediate Lessons 107
Custom Coloring
This golden blonde can only be achieved through
Custom Coloring.
Wig Dye made the elusive “Powder Blue” an easily
available color.
Darker “roots” were added to this wig for realism.
This topic has been under hot debate on cosplay message boards for al-most exactly as long as I’ve been making wigs. That’s probably not a coin-cidence. In fact, some of you reading this book might be thinking that this whole section is an advertisement for the wig dye I created in 2003. For those of you who have been lucky enough to miss the flame wars, let me give you a brief history of wig coloring.
Since the introduction of synthetic hair (wig fiber), there has always been the problem of lack of unnatural colors. The industry offered only 12 “rain-bow” colors for quite some time, because the cost of more variety out-weighed the potential for profit. After all, there are always a few crayons in the box that just don’t get any love, right? Imagine if they had to pay to make special boxes just for those colors?
Now, this is fine and dandy if you just want “Blue” and aren’t that picky about the exact shade. But Rei Ayanami’s hair isn’t Light Turquoise, and it isn’t Royal Blue. It’s Powder Blue. But the fiber industry didn’t make Powder Blue, so costumers just “settled” for one of the two wrong colors.
In the theater and movie industry, where they are costuming for profit, they could afford to use human hair, which can be bleached and dyed conven-tionally for their wigs. They could also afford to have a custom synthetic shade made just for them. But the casual costumer needed to find a solu-tion for their less expensive, but “undyeable” synthetic wigs.
This gave rise to many, um… creative ideas about how to tackle the prob-lem, usually having some major undesirable drawback. I researched all of the methods people said had “worked”, and tested them myself. Every method fell short in one aspect or another, and some didn’t work at all.
So, I decided I’d have to find a solution on my own, one that only produced a permanent color change, and none of the other side effects.
Chapter 8: Custom ColoringIntroduction
108 The World of Wigcraft
Chapter 8: Custom ColoringA Brief History of Mishaps
Starting with the idea that “Wigs are not Hair” and can’t be dyed the way that hair is, I used the first thing I knew was permanent on plastic: Sharpie Markers. By hand-coloring the strands, then rinsing out the excess pigment with cold water, I’d custom colored a wig without any of the negative side effects. Of course, it took a really long time to do, and at least five markers to color one wig.
I tested the method using other types of markers as well (Prismacolor, Copic, Tombo), but found that the Sharpies gave the best result. I posted my findings on a major cosplay site in order to help out other costumers, and even began offering a special “custom coloring” service for those who wanted a color change, but didn’t want to do it themselves.
The process was very time consuming, especially on longer wigs, and with the volume of orders I had, I knew I needed to find a faster method.
I began researching permanent ink technology, and working on my own formula for a liquid wig dye. After about a year of experimen-tation, I found a stable combination and began to phase out the “Marker Method” on longer wigs in favor of the spray-on dye. A few months after that, I made it available to the public as Petting Zoo Wig Dye for Synthetic Wigs. The cost is comparable to hair dye for human hair, which is actually pretty reasonable for a handmade product. (I’m a costumer too, and I know how expensive this hobby can get!)
However, because of the fact that the dye isn’t free, some costum-ers have actually made a point of not using it, and instead are going back to the older methods that still don’t give good results. It’s just wacky.
Anyway, since you are reading this book, it’s probably safe to assume that you are the type of person who is interested in learning, and improving your skills. So, for the sake of objectivity, here are the most common “alternate” methods used, and the results they give. In all of the examples, I am using white Kanekalon fiber.
“What about the FW ink method?”“FW Ink Dye” or “Homemade Wig Dye” is, effectively, (I don’t know a nicer way to say this...) “imitation” wig dye. It’s made by cracking open markers or using FW ink (which is diluted acrylic paint...) and mixing it with rubbing alcohol to make “free wig dye”. Of course, it’s not free, and it’s not wig dye. By using FW ink, you are painting your wig, not dyeing it, and the rubbing alcohol is too strong for the pig-ment, causing fading and degradation after a few months. (Things I found out during that year of experimentation.) It also rinses out of many wigs with plain old water, since Sharpie ink doesn’t mix well with rubbing alcohol. (That’s what we use to remove it.)
I asked the original poster of this method if she’d like to contribute a tutorial to this book, but got no response. (She’s still an awesome lady, all the same!)
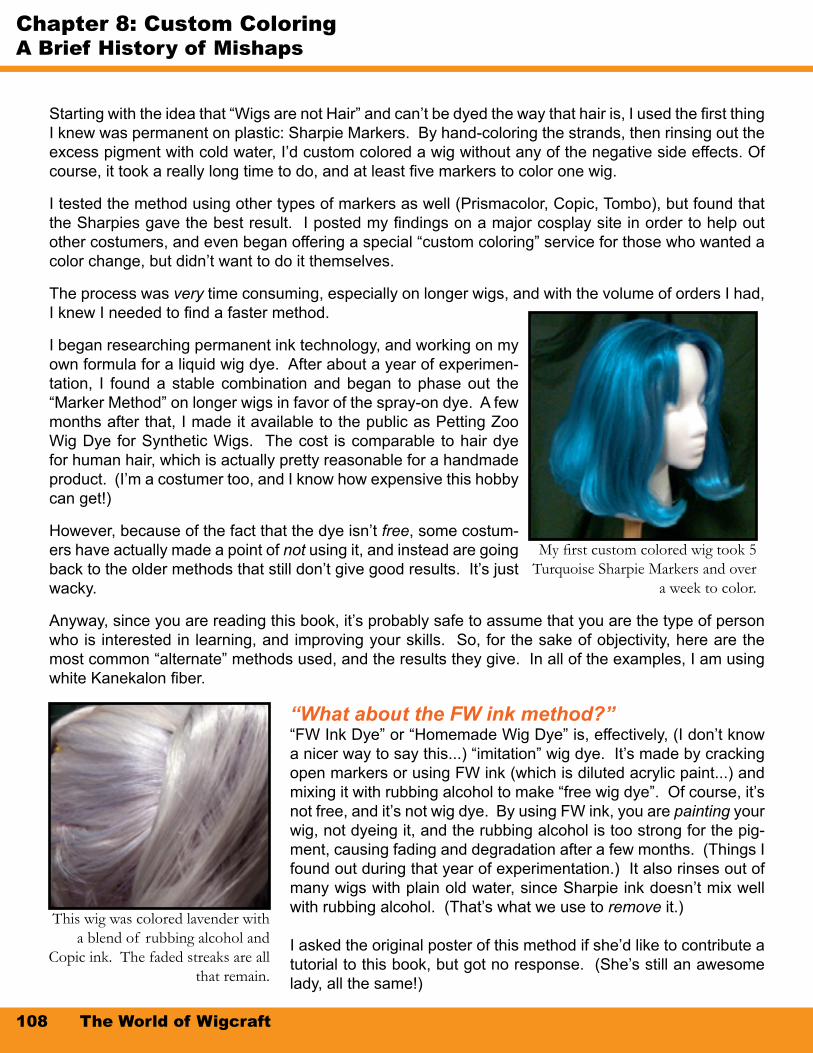
My first custom colored wig took 5 Turquoise Sharpie Markers and over
a week to color.
This wig was colored lavender with a blend of rubbing alcohol and
Copic ink. The faded streaks are all that remain.

Intermediate Lessons 109
Alternate Coloring Methods: Pros and Cons
RIT Dyefor Synthetic Fabrics (Royal Blue)
The premise behind using this dye isn’t bad, since the formula is made to dye syn-thetic fabrics instead of natural blends. Unfor-tunately, wig fiber isn’t woven fabric, it’s loose strands. When RIT dye is used on fabric, the pigment is trapped in the weave. With wig fiber, it just runs right off. The most it can do is lightly stain it.
Pros: It’s cheap.
Cons: Dyeing pro-cess requires hot water, and relaxes or removes existing style. Also, the color doesn’t embed into the fiber very well, but DOES dye the mesh, causing a “plaid” ef-fect.
Diluted Acrylic Paint (Red)
This was the method I found was in most popular use when I began my research. It uses acrylic paint, highly diluted with cold water, which the wig is dunked into.
Pros: Inexpensive. stays on fiber fairly well, available in any shade, easy to do.
Cons: Fiber loses shine, and texture be-comes coarse, leading to increased chances of fiber damage from normal combing and styling.
Also, in scalped wigs, the paint can some-times build up near the roots.
Vegetable BasedHuman Hair Color(Royal Purple)
I’m surprised how many times I get asked if this will work right after I get done explaining that Wigs Are Not Hair. Any kind of dye designed for hair uses the hair’s porosity as the embed-ding method for the col-or. Much like with RIT dye, the pigment has nothing to hold onto with synthetic fiber, and at most, will only stain it several shades lighter than the color you use.
Pros: No harsh chem-icals. Doesn’t harm fiber texture.
Cons: Absorbs into the mesh and con-tinues to rub off onto skin and clothes, even after several rinses.
Spray on Temporary Hair Color(Royal Blue)
This is the spray-on stuff you find during Halloween season. It’s a cheap, commitment free way for casual costumers to color their hair. It’s basically su-per-diluted spraypaint, with weak lacquer.
Pros: It’s cheap and fast.
Cons: Color flakes off, rubs off, and gen-erally looks like crud.
NOTE: This is the same result as “hair mascara”.
Chapter 8: Custom ColoringA Brief History of Mishaps

110 The World of Wigcraft
Alternate Coloring Methods: Pros and Cons
Spray Paint(Red)
This one is only listed here because someone was actually suggesting that other people do this to their wigs. I think that person wanted to see how gullible other people were, and should be run over with a hot dog cart many, many times.
Pros: It’s cheap, fast, and permanent.Cons: It turns your wig into a stiff, disgusting haystack.
Kool-Aid / Jell-o(Grape?)
Remember how the early punk scene was putting just about anything in their hair because they didn’t have the hair product technology we do to-day? Well, Kool-Aid was the predecessor to Vegetable Based Hair Dye for unusual hair colors. The food coloring provided a temporary stain, at best.
Pros: It sure smells tasty!Cons: It doesn’t dye synthetic fiber at all.
Chapter 8: Custom ColoringA Brief History of Mishaps
Necessity is the Mother of Invention......but if the Father isn’t Education, then those inventions might start eating dirt clods when Mommy isn’t watching. Then Child Protective Services shows up and drags the in-ventions off to foster homes, and it’s just a sad situation.
Now don’t get me wrong, I’m all for trying new things out. Pretty much every technique I’ve perfected started as trial and error. However, you can save yourself time and money if you apply logic to a situation before you start applying anything else. In the case of most of these methods, just the basic knowledge that wig fiber is non-porous would have been enough to know that they wouldn’t work out very well. (And many wigs would have been saved!)
Anyway, now that we’ve seen these methods, let’s move on to the two methods I recommend and use regularly.

Intermediate Lessons 111
Marker Coloring Techniques
The term I use for hand-coloring the fiber with a permanent marker is “The Marker Method”. In the sim-plest terms, you are using a marker to “draw” on the fiber itself. Even though I now use wig dye for all of my major dye jobs, there are still some times where the Marker Method is best, and I still keep a big box of various colors in the studio. This method is incredibly time consuming for full wigs, but provides precise coloring results. This makes it ideal for high-contrast streaks, “roots”, or coloring small sections that are difficult to mask off from the rest of the wig.
Just like with wig dye, it is a good idea to blow dry and rinse (cold water only!) the fiber after coloring it to remove the excess pigment resting on the fiber.
Since the “technique” for using markers can be grasped, literally, by anyone who can hold a pen, I’ll just show some examples here of application.
Sectional ColorSome characters have only a section of their hair colored differently from the rest. This is kind of like chunking, but over a much larger area. In this ex-ample, I’m using a black Sharpie marker on a Alabaster Blonde (Color 613a) wig.
Step 1:First, divide off the section you would like to color. Put it in a hair clip to keep it contained.
Step 2:Next, pin some paper towel over the adjacent portions of the wig. (Red or black are notoriously bad for rubbing off on other surfaces before being rinsed, so we’re protecting the rest of the wig while we do this section.) As an extra precaution , you can pin a piece of plastic wrap (Say that five times fast!) over the paper towel. If you are using a lighter color, or one closer to your wig’s color, you can skip this step.
Once you get the towel in place, unclip the section you’ll be coloring, and hold a tiny ribbon piece of it between your fingers.
Chapter 8: Custom ColoringThe Marker Method
Step 3:Starting from the root, rub the marker on the fiber, moving in long downward strokes. Try to avoid short overlapping strokes, as this will cause excess pig-ment to build up on the fiber, making it sticky. As you get toward the end of the ribbon, switch your grip so you can color the tips. (Your hands are going to be all markered up by the end of this, so just get used to it.)
Continue this for the rest of the section, until it is entirely covered. Don’t for-get to color the underside of the fiber as well!

Step 8:You can either allow the section to air dry, or use a blow dryer. I air dried mine in the example. It might look stiff at first, but once you run a comb through it, it’ll be back to normal.
You can now safely remove the paper towel (and plastic wrap if you used it) from the rest of the wig.
112 The World of Wigcraft
Marker Coloring Techniques
Step 4:Although the fiber wont feel wet, blowdry the section you colored for about two minutes, while combing. This will help spread the excess pigment around for a more consistent color, and evaporate any re-maining extender (the alcohol in Sharpies).
Step 5:Now we need to rinse off the excess pigment that didn’t embed into the fiber. If we were coloring the whole wig, we would just soak it in cold water. How-ever, since we’re only doing a chunk, and black stains things so easily, we need to be a bit more precise.
Using a paper towel soaked in cold water, start wiping the excess pigment off of the section you just colored. The paper towel will pick up quite a bit of color initially, but this is normal. Make sure to get the undersides of the fiber too.
◄ Step 6:Switch off to a new soaked towel when your first one gets saturated with color. You will know you’ve rinsed off all the excess when the towel stays white when you wipe it on the colored section.
Step 7: ►I follow this up with a little bit of wig conditioner to elimi-nate any residual “sticky” fiber, but it’s optional. (Depend-ing on the color of Sharpie you use, some of them don’t leave that sticky feeling at all.) Work the conditioner in with your fingers, but don’t comb the wet fiber.
Chapter 8: Custom ColoringThe Marker Method

Intermediate Lessons 113
Marker Coloring Techniques
Low-lightingLike the name suggests, “low-lighting” is the opposite of “high-lighting”. To add definition and the illu-sion of depth to the fiber, we add streaks of a darker color to sections of the wig. Use this technique on light colored wigs when you want them to look more realistic, or to simulate “sun bleaching”.
Step 1:Start at the bottom of the wig, clipping the top hair up out of your way. The lower you are on the wig, the closer and wider the streaks should be.
As you work your way up toward the top, the streaks should get less broad and more sparsely spaced, until you are col-oring only a few strands at a time.
Step 2:Blow dry the entire wig, then rinse it in cold wa-ter. It’s ok if the pigment blends a bit at the bot-tom; it’ll just make it look more realistic.
You can allow it to air dry, or blow dry it again, just don’t comb it while wet.
Chapter 8: Custom ColoringThe Marker Method
Sectional Color - ChunkingThis look has become popular recently, as a way to have a “wild” look to your hairstyle, while still conforming to corporate dress code. Unlike with low-light-ing, the color is only added to the top layer of the wig, with no blending under-neath. (Or you can combine the two techniques for a more dynamic style.)
Start by separating out wide, flat “chunks” of fiber from the top portions of the wig. (This looks best on wigs with scalps.) I used a yarn needle in this example, but you can also use a rat tail comb, or a toothpick. Don't forget to tuck a piece of paper towel under the chunk, and pin it to the foam head before you start coloring.
Using a chisel-tip Sharpie will save time when doing this technique, and also helps give it that “square” edge at the roots. Don’t forget to color the underside of the chunk as well!
Just like with large Sectional Color, blow dry and rinse the chunks completely after you’re done color-ing them.

114 The World of Wigcraft
Chapter 8: Custom ColoringSynthetic Wig Dye
The Petting Zoo Wig Dye formula currently comes in 20 colors, which can be directly mixed with one another (like Easter egg dye!) to create one-of-a-kind shades. The color is translucent, like cellophane, so the original color of the wig will only be tinted to a new shade, not cancelled out. This means that you can create virtually any shade by combining the different colors of starting fibers and the dye. Wig dye also plays well with Sharpie markers, so you can use them in conjunction with one another without stripping the color of either.
I have swatches and sample vials of dye available on my website if you want to test with a specific color combination before buying a wig. (Taking the time to test your colors can save you a lot of money and mixups!)
Coloring a wig with wig dye is very easy. However, it will just as easily dye your carpet. So make sure to cover the floor of your work area with a drop cloth or newspaper. (Or do it outside.) Also, read and fol-low the warnings and instructions included with the dye. (As with any smelly airborne substance, make sure you have adequate ventilation.)
If you need to remove wig dye from any surface, use 70% Isopropyl Rubbing Alcohol. (You can find it in the first aid section of your local drug or grocery store.) Rubbing Alcohol is the nemesis of wig dye, and it will take it out or off of practically anything.
Brief instructions of some of these techniques are included with the dye, but this version has pictures! I can dye a shoulder length wig
using one 4oz bottle, but your milage may vary.
Full Wig Color ChangeIf you would like to evenly dye your entire wig, then follow these instructions.
Step 1:Pin your wig to a foam head. (Use pins all the way around the edges, not just in the top.) You will be flipping the wig upside down and combing it, so the pins need to be able to keep it on the foam head during this treatment.
Step 2:Flip the head upside down and gently shake it to loosen the wig fibers.
Holding the neck of the foam head in one hand and the dye in the other, be-gin misting the dye on from about six to eight inches away. Rotate the wig back and forth (like a turning a doorknob…) while you spray. Keep the wig moving to avoid uneven color.

IMPORTANT!Do not blow dry the wig until you are done coloring the entire thing! Doing this will set the color, and any overspray will create dark spots. As long as the dye is still wet, it is still “mobile”, and combing the fi-ber thoroughly will help spread the color more evenly. While the dye is still wet, look for uncovered spots and touch them up. Do not pro-ceed to the next step until you are satisfied that you have complete coverage.
Intermediate Lessons 115
Wig Dye Techniques
Step 3:Every once in a while, put down the spray bottle and comb the color though the fiber. (I’m using the Magic Brush in this example.) One trick to get the color more evenly distributed is to comb it sideways. (Parallel to the wefts.)
Continue spraying and combing, slowly working your way towards the front hairline.
Step 4:Once you have finished the back, flip the wig right side up and comb out any major tangles. The wig might be a little sticky at this stage, so be careful when detangling or you’ll risk pulling the fibers and causing frizz.
Step 5:Now to do the top. Clip most of the fiber up and out of the way, and only part out small sections at a time. Start spraying from the roots, and comb the color through toward the tips. Continue until you have dyed all of the top.
Step 6:Now that all of the wig is covered in dye, we will use heat to set it. You can use a blow dryer on “low”, but I’m using a bonnet dryer. (Because I bought it, and I might as well use it!)
The dye will lighten as it dries, which will look more or less dramatic depend-ing on how light the starting fiber was.
Chapter 8: Custom ColoringSynthetic Wig Dye

116 The World of Wigcraft
Wig Dye Techniques
Step 7:After the wig is completely dry, (If you’re not sure, let it sit for a couple of hours…) it’s time to rinse out the excess pigment. This is especially impor-tant with dark colors, as they contain much more pigment than the lighter colors, (and will take considerably longer to rinse clear).
In this example, I’m using a bucket full of cold water, but you can also just set the wig up in the shower and let it rinse that way. A two liter bottle full of water makes a great impromptu wig stand for this sort of thing.
Step 8:Rinse the wig with cold water (no soap, but conditioner is ok) until it runs completely clear. (If the water never runs clear, then unfortunately, you need to skip ahead to the next section: “Undyeable Fiber”)
Once it’s rinsed, you can either allow it to air dry, or blow dry it. (I’m going to use my snazzy bonnet dryer again!)
After it’s dry, you can add a bit of wig conditioner to make it easier to comb, or just leave it as is.
A few things to look out for when coloring a wig with Markers or Wig Dye…Both the Marker Method and Wig Dye use alcohol based pigments to tint the plastic fiber of syn-thetic wigs. Everyone knows permanent markers are smelly, but usually people don’t lean over them while meticulously coloring fiber for hours at time. If at any time when you are coloring a wig you feel dizzy, light headed, or short of breath, leave the area and get some fresh air. There’s no need to kill your brain cells for costuming. (That also goes for spray paint, resin, and every other wacky chemical we costumers expose ourselves to…)
Before styling your freshly dyed wig...While the rinsed and dried color should not rub off under normal circumstances, there are a few things to look out for. Firstly, products that contain alcohol will have a chance of lifting some pig-ment off of the fiber.
The biggest culprit is our old buddy hairspray. If you apply it lightly, and allow it to dry completely before handling the fiber, the effect on the pigment will be minimal. However, if you put on a thick coat, the pigment may be completely lifted from the fiber and embedded in the lacquer itself. It might also be a good idea to wipe the affected areas with a moistened paper towel after they have dried to remove the lifted pigments that didn’t re-embed into the fiber.
Also, our sweat contains acids which can attack the pigments in Sharpie ink or Wig Dye. You can help minimize rub-off by lightly powdering your face and neck before wearing the wig.
Chapter 8: Custom ColoringSynthetic Wig Dye

Intermediate Lessons 117
Wig Dye Techniques
Gradient DyeingOne technique you can do with Wig Dye that isn’t as easy with markers is gradient or fade effects.
This is a simple matter of spraying the color over only a portion of the wig (the top, for instance...) and then combing it through and heat setting it. If the color is considerably darker than the fiber color, try wiping off the excess with a damp towel instead of rinsing it under running water.
A second color can also be applied, either directly on top of the first, or slightly overlapping it.
If using more than one color of wig dye for gradient effects, always apply the lightest color first, since the alcohol in the wig dye will temporarily re-mobilize the pigment from the previous color. If you put the dark color on first, it will spread into the alcohol of the light color when it’s sprayed on, causing a “halo” effect where the two meet.
Coloring Pre-Made CurlsColoring ringlets or curls with a marker can be a pain, especially when it means unravelling them as you go. However, we can cheat a bit with Wig Dye since the pigment is more easily delivered into the nooks and crannies of curly fiber.
Just spray the dye onto the curls, then gently mash it into the fiber with your gloved fingers. Put the wig into a hairnet (like the one it came with...) while you blow dry and rinse it, and that will prevent the curls from being relaxed by the heat.
Quick StreakingAnother neat trick you can do with wig dye is to add natural looking color variations and lowlights in the fiber without much effort. (As-suming you use a coordinating color of dye... Concord Purple prob-ably won’t look that natural over light brown.)
Instead of spraying the dye on from six to eight inches, do it from nearly point blank range, and comb through with a wide toothed comb instead of a fine toothed one. This will create streaks of color, instead of an even blending. Blow dry and rinse normally.
Chapter 8: Custom ColoringSynthetic Wig Dye

118 The World of Wigcraft
Quick Tip: Shuffling
Step 1:BladdfjghdkfjgRerosto do do exer si tionse-quatie magnis acil utat nosto dolorem irillam iuscin henit iriuscil et lutat. Na feugiatie dolobore venit ip eugait laore min verostin
Step 1:BladdfjghdkfjgRerosto do do exer si tionse-quatie magnis acil utat nosto dolorem irillam iuscin henit iriuscil et lutat. Na feugiatie dolobore venit ip eugait laore min verostin
Step 1:BladdfjghdkfjgRerosto do do exer si tionse-quatie magnis acil utat nosto dolorem irillam iuscin henit iriuscil et lutat. Na feugiatie dolobore venit ip eugait laore min verostin
Step 1:BladdfjghdkfjgRerosto do do exer si tionse-quatie magnis acil utat nosto dolorem irillam iuscin henit iriuscil et lutat. Na feugiatie dolobore venit ip eugait laore min verostin
Step 1:BladdfjghdkfjgRerosto do do exer si tionse-quatie magnis acil utat nosto dolorem irillam iuscin henit iriuscil et lutat. Na feugiatie dolobore venit ip eugait laore min verostin
Step 1:BladdfjghdkfjgRerosto do do exer si tionse-quatie magnis acil utat nosto dolorem irillam iuscin henit iriuscil et lutat. Na feugiatie dolobore venit ip eugait laore min verostin
Step 1:BladdfjghdkfjgRerosto do do exer si tionse-quatie magnis acil utat nosto dolorem irillam iuscin henit iriuscil et lutat. Na feugiatie dolobore venit ip eugait laore min verostin
Step 1:BladdfjghdkfjgRerosto do do exer si tionse-quatie magnis acil utat nosto dolorem irillam iuscin henit iriuscil et lutat. Na feugiatie dolobore venit ip eugait laore min verostin
Chapter 8: Custom ColoringUndyeable Fiber?
While Petting Zoo Wig Dye is formulated to work on even “undyeable fiber”, markers and “homemade” wig dye are not as fortunate.
There are a few types of fiber that are stain-resistant. In technical terms, the fiber's surface hardness is too high for the alcohol to soften and embed pigment into. In layman’s terms, it’s like the fiber has ScotchGard™ built into it.
One of these fibers is called “Eleora” fiber, and it is used in many wigs in the New Look line. Some websites might mistakenly list this as a type of Kanekalon or Toyo-kalon, but it is not either of those fibers. Wigs made with this fiber may still be cus-tom colored using Petting Zoo Wig Dye, but Sharpies, or homemade wig dye will just keep rinsing out. On the plus side, this fiber is available in a lot of colors, so you may not need to custom color it at all.
Although they may look similar at first, close inspection reveals visible differences in the fibers. In the examples below, the samples on the left are Kanekalon, the samples on the right are Eleora.
Both pieces have good shine, and the fiber lays nicely. It’s not hard to see why most wig shop owners would assume that they are the same fi-ber type.
The most obvious difference can only be detected by touching the fiber. The undyeable fiber has tiny, but detectable “waves” in it. Kanekalon feels perfectly smooth and round.
However, most wig shops will not allow customers to touch their wigs. (Health code reasons, usually.) And touching a wig from an online shop is impossible. However, some online sellers may send you a sample swatch of the fiber if you explain why you need to touch the fiber. If they don’t, you can at least ask them to tell you the brand name of the fiber. (If they won’t even help you out with this, then don’t shop there.)
When we zoom in, you can see the texture differ-ence. The Kanekalon looks very silky up close. (Hence where the term “Silky” extension fiber comes from…) The undyeable fiber looks a bit coarse, more like “non-supermodel” human hair.

Intermediate Lessons 119
Doing a Swatch Test
But what if you already bought a wig? If you are not sure if the wig you want to color is made with undyeable fiber or not, I strongly suggest do-ing a swatch test before any sort of custom coloring.
Step 1:Snip a tiny bit of fiber off an inconspicuous section of your wig. (I’d sug-gest using a piece from the third of fourth weft from the bottom in the back.) Secure the end of the piece with a rubber band.
Step 2:Use a Sharpie in a dark color (I suggest red or black) to coat the entire swatch. Blow dry the swatch for about a minute to set the color.
Once dry, rinse the swatch under cold running water until the water runs clear. (Or doesn’t run clear.)
Step 3:Wipe the swatch with a dry paper towel. If color comes off on the towel, rinse the swatch again, then wipe again.
If the color keeps coming off, the fiber is undyeable by the Marker Method or Homemade Wig Dye. (Sorry!)
Other Coloring Methods...If custom coloring isn’t an option for your wig for one reason or an-other, don’t lose hope. There are other ways to modify the color ap-pearance of a wig without markers or wig dye.For instance, streaking, low-lighting, high-lighting, and sectional col-or can all be performed using loose fiber or wefts. In addition, the rising popularity of synthetic fiber wigs and extensions is prompting the industry to expand their color range.
So hold on to that wig, even if it’s not perfect for this project. Once you’re done with this book, I’m sure you’ll be able to put it to good use.
Chapter 8: Custom ColoringUndyeable Fiber?