a comprehensive introduction to python programming and...
TRANSCRIPT

A Comprehensive Introduction to Python Programmingand GUI Design Using Tkinter
Bruno Dufour
McGill Univeristy SOCS

Contents
1 Overview of the Python Language 21.1 Main Features. . . . . . . . . . . . . . . . . . . . . . . . . . . . . . 21.2 Language Features. . . . . . . . . . . . . . . . . . . . . . . . . . . 2
1.2.1 Literals . . . . . . . . . . . . . . . . . . . . . . . . . . . . . 21.2.2 Variables . . . . . . . . . . . . . . . . . . . . . . . . . . . . 41.2.3 Operators. . . . . . . . . . . . . . . . . . . . . . . . . . . . 51.2.4 Data Structures. . . . . . . . . . . . . . . . . . . . . . . . . 61.2.5 Control Structures and therange( ) Function . . . . . . . . 101.2.6 Function Definitions and Function Calls. . . . . . . . . . . . 121.2.7 Classes. . . . . . . . . . . . . . . . . . . . . . . . . . . . . 13
2 Python and Tkinter for RAD and Prototyping 162.1 Designing User Interfaces. . . . . . . . . . . . . . . . . . . . . . . . 162.2 What is Tkinter? . . . . . . . . . . . . . . . . . . . . . . . . . . . . 162.3 Why Tkinter? . . . . . . . . . . . . . . . . . . . . . . . . . . . . . . 172.4 Nothing is perfect . . .. . . . . . . . . . . . . . . . . . . . . . . . . . 182.5 Show me what you can do!. . . . . . . . . . . . . . . . . . . . . . . 18
3 Overview of Tkinter Widgets 243.1 What is a Widget . . . . . . . . . . . . . . . . . . . . . . . . . . . . 243.2 The Different Widgets . . . . . . . . . . . . . . . . . . . . . . . . . 24
3.2.1 Toplevel. . . . . . . . . . . . . . . . . . . . . . . . . . . . . 243.2.2 Button. . . . . . . . . . . . . . . . . . . . . . . . . . . . . . 253.2.3 Checkbutton . . . . . . . . . . . . . . . . . . . . . . . . . . 253.2.4 Entry . . . . . . . . . . . . . . . . . . . . . . . . . . . . . . 263.2.5 Frame. . . . . . . . . . . . . . . . . . . . . . . . . . . . . . 263.2.6 Label . . . . . . . . . . . . . . . . . . . . . . . . . . . . . . 273.2.7 Listbox . . . . . . . . . . . . . . . . . . . . . . . . . . . . . 273.2.8 Menu . . . . . . . . . . . . . . . . . . . . . . . . . . . . . . 283.2.9 Message. . . . . . . . . . . . . . . . . . . . . . . . . . . . . 293.2.10 OptionMenu . . . . . . . . . . . . . . . . . . . . . . . . . . 293.2.11 Radiobutton. . . . . . . . . . . . . . . . . . . . . . . . . . . 293.2.12 Scale . . . . . . . . . . . . . . . . . . . . . . . . . . . . . . 303.2.13 Scrollbar . . . . . . . . . . . . . . . . . . . . . . . . . . . . 323.2.14 Text . . . . . . . . . . . . . . . . . . . . . . . . . . . . . . . 343.2.15 Canvas . . . . . . . . . . . . . . . . . . . . . . . . . . . . . 35
Contents 2 /77
3.3 Additional Widgets: the Python Mega Widgets (PMW). . . . . . . . 39
4 Geometry Managers and Widget Placement 404.1 What is Geometry Management?. . . . . . . . . . . . . . . . . . . . 404.2 The “Pack” Geometry Manager. . . . . . . . . . . . . . . . . . . . . 404.3 The “Grid” Geometry Manager. . . . . . . . . . . . . . . . . . . . . 424.4 The “Place” Geometry Manager. . . . . . . . . . . . . . . . . . . . 43
5 Tkinter-specific Topics 455.1 Specifying colors. . . . . . . . . . . . . . . . . . . . . . . . . . . . 455.2 Specifying Fonts . . . . . . . . . . . . . . . . . . . . . . . . . . . . 455.3 Tkinter Variables . . . . . . . . . . . . . . . . . . . . . . . . . . . . 47
5.3.1 The Need for New Variables. . . . . . . . . . . . . . . . . . 475.3.2 Using Tkinter Variables. . . . . . . . . . . . . . . . . . . . 47
6 Event Handling: bringing applications to life 506.1 The Idea. . . . . . . . . . . . . . . . . . . . . . . . . . . . . . . . . 506.2 Event Types and Properties. . . . . . . . . . . . . . . . . . . . . . . 516.3 Event Descriptors. . . . . . . . . . . . . . . . . . . . . . . . . . . . 526.4 Binding Callbacks to Events. . . . . . . . . . . . . . . . . . . . . . 546.5 Unit testing and Graphical User Interfaces: Simulating Events. . . . 55
A Tkinter color names 57

1Overview of the Python Language
1.1 Main Features
Python is an interpreted, interactive, object-oriented high-level language. Its syntaxresembles pseudo-code, especially because of the fact that indentation is used to in-dentify blocks. Python is a dynamcally typed language, and does not require variablesto be declared before they are used. Variables “appear” when they are first used and“disappear” when they are no longer needed.
Python is a scripting language like Tcl and Perl. Because of its interpreted nature,it is also often compared to Java. Unlike Java, Python does not require all instructionsto reside inside classes.
Python is also a multi-platform language, since the Python interpreter is availablefor a large number of standard operating systems, including MacOS, UNIX, and Mi-crosoft Windows. Python interpreters are usually written in C, and thus can be portedto almost any platform which has a C compiler.
1.2 Language Features
1.2.1 Literals
1.2.1.1 Integers
There are 3 kinds of integer literals:
Decimal integers: integers not starting with a ’0’ digit or the integer 0 (eg: 205).
Octal integers: integers which have a leading 0 as a prefix (eg: 0205).

1.2 Language Features 4 /77
Hexadecimal integers: integers which have 0x (or 0X) as a prefix (eg: 0x00FF0205).
Standard integers occupy 32 bits of memory, but Python allows appending ’L’ (or’l’) to the integer to make it a long integer, which is unlimited in size (that is, as withall unlimited things in computer science, it is only limited by the amount of availablememory).
1.2.1.2 Floats
There are two kinds of float literals:
Point Floats : floats containing a period followed by one or more digits (eg: 123.456).
Exponent Floats: floats in exponential form, ie which end with ’e’ (or ’E’) followedby a decimal integer exponent. Note that even if the integer part has a leadingzero, it is still considered as decimal (eg: 123.456e78).
1.2.1.3 Strings
String constants in Python are enclosed either within two single quotes or within twodouble quotes, interchangeably.
Prefix Descriptionu or U Defines a Unicode stringr or R Defines a Raw string (backslash characters are not in-
terpreted as escape characters). Mostly used for regu-lar expressions.
If a prefix must contain both a ’U’ and an ’R’, then the ’U’ must appear before the ’R’.
Standard C escape sequences are also accepted as part of the string constants, inaddition to some escape sequences that are added by Python,as indicated below:

1.2 Language Features 5 /77
Sequence Description\newline Ignored\\ \\’ Single quote\" Double quote\a ASCII Bell Character (BEL)\b ASCII Backspace Character (BS)\f ASCII Form Feed Character (FF)\n ASCII Line Feed Character (LF)\Nname Unicode character named ’name’ (Unicode only)\r ASCII Carriage Return Character (CR)\t ASCII Horizontal Tab Character (TAB)\uhhhh Character with the 16-bit Hexadecimal value hhhh
(Unicode Only)\Uhhhhhhhh Character with the 32-bit Hexadecimal value
hhhhhhhh (Unicode Only)\v ASCII Vertical Tab Character (VT)\ooo ASCII Character with the octal value ooo\hh ASCII Character with the hexadecimal value hh
Notes:
1. Two string adjacent string literals will be concatenated at compile time. Forexample,"Hello"" world!" will be concatenated into"Hello world!". Thisallows to easily break string literals across multiple lines. Comments are allowedbetween the parts of the string. Also, different quotation marks can be used foreach part. The different parts of the string must be enclosed in parantheses if thestring is to span multiple lines, if it is not already the case (eg for function calls).
2. String literals can also be enclosed within three double quotes, in which casenewlines within the string are become part of it.
1.2.1.4 Imaginary Numbers
Python provides built-in support for imaginary numbers. It defines1j to be equalto√−1. Imaginary numbers can be written in the forma + bj, wherea andb are
integers or floats.
1.2.2 Variables
Variables are not declared in Python. Since Python is a dnamically typed language,any variable can be assigned any value, regardless of its previous type. This also holdsfor instance variables in classes. Therefore, it is a good idea to initialize all instancevariables in the constructor to make sure that memory has been allocated for them, andin order to make sure that they can safely be used inside the class. Python used to relyon a reference counting algorithm to free the unused variables. The newer versions ofPython (ie 2.0 beta and above) rely on a more traditional garbage collection technique.

1.2 Language Features 6 /77
This thus implies that allocated memory is automatically freed when it is no longerused.
It is usually very useful to think of Python variables as objects, since it is in essencehow they are implemented.
1.2.2.1 Private Instance Variables
By default, all instance variables are declared as public variables. However, there is apossibly to use name mangling to make a variable “pseudo-private”. This is done bypreceding the variable name with 2 or more underscores. In this case, the actual nameof the variable will be a combination of the class name and the variable name, withoutthe leading underscores removed from the class name and a single underscore beingadded as a prefix to the new name. For example, inside a class named ’myclass’, avariable named ’ my var’ would actually be internally known asmy class my var.
1.2.3 Operators
Python supports the standard C operators, along with some new operators, as describedbelow.
1.2.3.1 Unary Operators
Operator Description+ Unary plus+ Unary minus∼ Bit inversion

1.2 Language Features 7 /77
1.2.3.2 Binary Operators
Operator DescriptionArithmetic Operators
+ Binary addition- Binary subtraction* Binary multiplication/ Binary division% Remainder of the integer division** Power
Bitwise Operators<<, >> Bit shift& Bitwise AND| Bitwise ORˆ Bitwise XOR
Logical Operators== Equal!=, <> Not equal< Greater than> Less than>= Greater than or equal<= Less than or equalis, is not Object identityin, not in Set membership
Boolean Operatorsand Boolean ANDor Boolean ORnot Boolean NOT
Python allows combining multiple logical operators into a more intuitive form toavoid the use of the keywordand. For example, instead of writing(x > 10 and x <=20, one could write(10 < x <= 20).
1.2.4 Data Structures
The Python language provides built-in support for some very interesting data struc-tures: lists, tuples and dictionaries. These data structures can be classified within twomain categories: sequences and mappings. Sequences are finite ordered sets of ele-ments. The elements of a sequence can be accessed byindexingusing non-negativenumbers. This indexing starts from 0 in Python. Mappings are also finite sets, but theway elements of a mapping are accessed differs. Mappings use arbitrary index sets foraccessing the elements.
The Python language defines 3 main types of sequences: lists, tuples and strings(for simplicity, I gather under the term strings ordinary strings and unicode objects).At the current time, only one mapping type is available: the dictionary. Each of theseis discussed in details below.

1.2 Language Features 8 /77
1.2.4.1 Lists
Lists are composed of an arbitrary number of elements. Each of these elements canhave any valid type. Lists in Python are defined by enumerating the elements of alist, separated by commas, and enclosed within square brackets. Note that lists can benested. For example:
[0, 1, 2, 4], [’arial’, 20, ’bold’], [1, ’a string’, [3, 4, 5]]
are valid lists.To access an element of the list, it is necessary to know its index. The first element
has index 0. Accessing elements using their index is done using square brackets, justlike for an array reference in C or Java. For example:
Listing 1: Accessing List Elements
>> list = [’a’, ’b’, ’c’]>> list[0]’a’>> list[2]’c’ 5
>>[’a’, ’b’, ’c’][1]’b’>>
The elements of a list can also be modified by assigning a value to a selection, justlike it would be done for arrays in C or Java. For example:
Listing 2: Modifying lists
>> list = [’a’, ’b’, ’c’]>> list[1] = ’d’>> list[’a’, ’d’, ’c’]>> 5
When anegativeindex is specified, the length of the list is added to it before itis used. This make a negative index “wrap” around. Therefore, -1 denotes the lastelement of the list, -2 the second to last element, and so on.
It is also possible to select multiple elements of a list at a time by taking a “slice”of the original list. Slicings are of the formlist [lower :upper ]. This creates anew sub-list contanining the elements of the original list having an indexk, lower<=k< upper. For example:
Listing 3: Slicing

1.2 Language Features 9 /77
>> list = [0, 1, 2, 3, 4, 5, 6, 7, 8, 9, 10]>> list[1:7][1, 2, 3, 4, 5, 6]>>
It is possible to assign a list to a slice to modify part of an existing list, as shownbelow. Assigning an empty list to a slice deleted the slice from the original list.
Listing 4: Slice Assignment
>> list = [0, 1, 2, 3, 4, 5, 6, 7, 8, 9, 10]>> list[1:6] = [’a’, ’b’][0, ’a’, ’b’, 6, 7, 8, 9, 10]>>
The colon operator has some interesting defaults. When its left-hand side is notspecified, it defaults to 0. When its right-hand side is not specified, it defaults to thelength of the list. Therefore, the Python instructionlist name[:] will return theentire list.
The built-in functionlen( ) can be used to obtain the length of a list. It is alsopossible to concatenate lists by using the’+’ operator.
1.2.4.2 Tuples
Tuples simply consist of a series of values enclosed within parentheses. Here is anexample of a tuple:
(’arial’, 10, ’bold’)
Tuples work exactly like lists, except for the fact that they areimmutable, whichmeans that their elements cannot be modified in place. However, the values stored inthe components of a tuplecanbe modified. In other words, a tuple should be thoughtof as holding references (or pointers) to other objects. Consider the following twoexamples. The first one shows that trying to change the elements of a tuple is notallowed. The second one shows that it is possible to modify a mutable element whichis inside of a tuple. Note the fundamental difference between the two examples.
Listing 5: Tuple Example 1
>> list = [’a’, ’f’, ’c’]>> tuple = (10, list, ’string constant’)>> tuple[1][’a’, ’f’, ’c’]>> tuple[1] = [’some’, ’other’, ’list’] 5

1.2 Language Features 10 /77
Traceback (innermost last):File "<stdin>", line 1, in ?
TypeError: object doesn’t support item assignment
Listing 6: Tuple Example 2
>> list = [’a’, ’f’, ’c’]>> tuple = (10, list, ’string constant’)>> tuple[1][’a’, ’f’, ’c’]>> tuple[1][1] = ’b’ 5
>> list[’a’, ’b’, ’c’]>> tuple(10, [’a’, ’b’, ’c’], ’string constant’)>> 10
Tuples, just like lists, can be concatenated using the’+’ operator.
1.2.4.3 Dictionaries
Dictionaries are mutable objects similar to lists, but are not restricted to integers forindexing purposes. For example, using dictionaries allows tomap string values toobjects, and reference these objects using their associated string. This is similar towhat is done in a common english dictionary, where definitions are looked up by word.The index for a dictionary is called akey, and can be anything except a list, a dictionary,or other mutable types that are compared by value rather than by identity, since Pythonrequires that keys have a constant hash value.
Dictionaries in Python are declared by listing an arbitrary number of key/datumpairs sperated by a comma, all enclosed within curly brackets. Key/datum pairs are ofthe formkey : datum. Thus, a dictionary declaration has the following form:
{key0 : datum0, key1 : datum1, ..., keyN : datumN}The square brackets are again used to access elements of a dictionary. However, thistime, a key is used instead of an integer index.
Here is a Python example using dictionaries:
Listing 7: Dictionary Examples
>> dict = \{"alice":"123-4567", "bob":"234-5678", "charlie":"N/A"\}>> dict[’alice’]’123-4567’>> dict[’charlie’]’N/A’ 5
>> dict[’charlie’] = ’987-6543’>> dict\{’alice’: ’123-4567’, ’bob’: ’234-5678’, ’charlie’: ’987-6543’\}>>
1.2 Language Features 11 /77
1.2.5 Control Structures and therange( ) Function
Python supports all of the tradional control structures. They are described in detail inthis section.
1.2.5.1 If statement
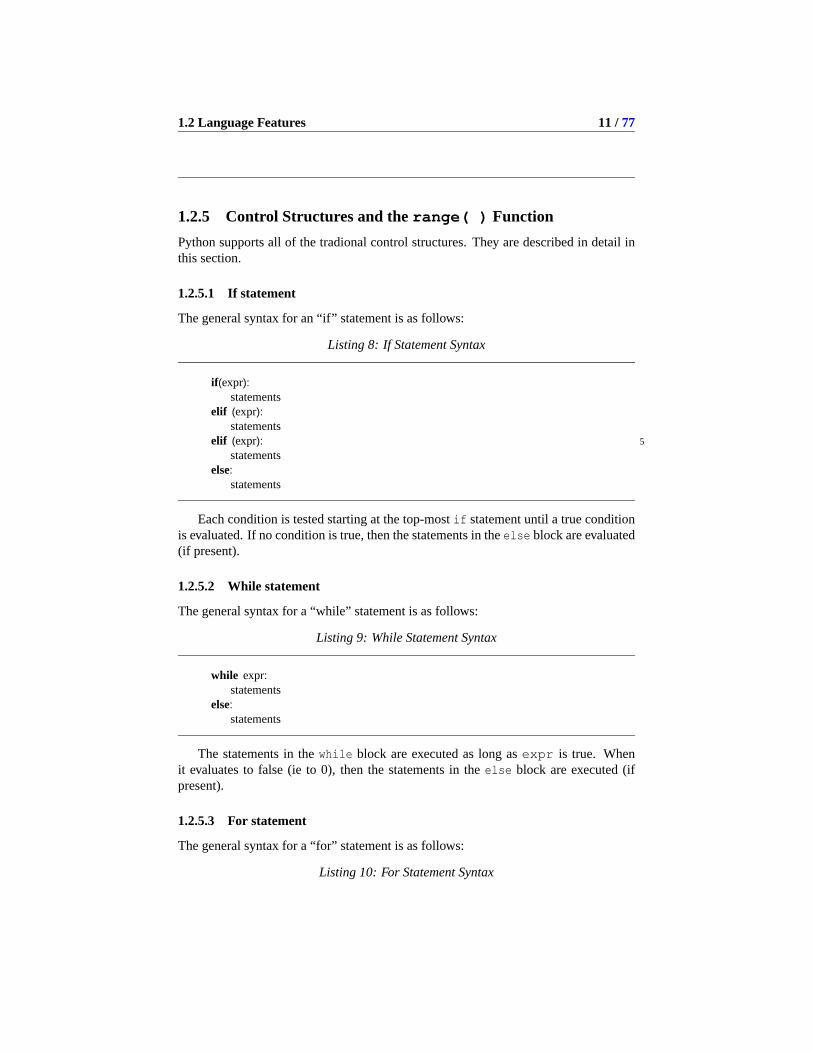
The general syntax for an “if” statement is as follows:
Listing 8: If Statement Syntax
if (expr):statements
elif (expr):statements
elif (expr): 5
statementselse:
statements
Each condition is tested starting at the top-mostif statement until a true conditionis evaluated. If no condition is true, then the statements in theelse block are evaluated(if present).
1.2.5.2 While statement
The general syntax for a “while” statement is as follows:
Listing 9: While Statement Syntax
while expr:statements
else:statements
The statements in thewhile block are executed as long asexpr is true. Whenit evaluates to false (ie to 0), then the statements in theelse block are executed (ifpresent).
1.2.5.3 For statement
The general syntax for a “for” statement is as follows:
Listing 10: For Statement Syntax

1.2 Language Features 12 /77
for target in list:statements
else:statements
The statements in thefor block are evaluated for each element oflist . Thecurrent element oflist an any given iteration is accessible in thetarget variable.Once all elements have been processed, theelse clause is executed (if present).
Since for loops in Python are required to work on lists, the language provides thebuilt-in functionrange( ), which is used to generate a list of numbers. Its has threemajor forms, each of which returns a list of integers.
• range(upper ): returns a list of consecutive integersx such that 0<= x <upper. For example
Listing 11:
>> range(5)[0, 1, 2, 3, 4]>>
• range(lower, upper ): returns a sorted list of consecutive integersx suchthat lower<= x< upper. For example
Listing 12:
>> range(2, 8)[2, 3, 4, 5, 6, 7]>> range(8, 2)[ ]>> 5
• range(from, to, increment ): returns a sorted list of integers startingfrom from and ending atto but separated byincrement . Note that the valueof to is not included in the bound. For example,
Listing 13:
>> range(8, 4, −1)[8, 7, 6, 5]>> range(1, 7, 2)[1, 3, 5]>> 5

1.2 Language Features 13 /77
1.2.6 Function Definitions and Function Calls
Function in Python are declared using thedef keyword. The basic syntax is as follows:
Listing 14: Functions
def func name(arg1, arg2, . . ., argN):statements
Since the language is untyped, no function definition has a return type, and param-eters are simply listed. If a function is to return a value, the keywordreturn can beused to return it. The same keyword used without a value will stop the excution of thefunction. This also the convention that C and Java use.
Python also supports some interesting features relative to function calls. The first ofthese features is that arguments can be passed and filled in two distinct ways: the tradi-tional (ie C and Java) way, which is by position. Alternatively, Python supports fillingin arguments by name. When arguments are provided by name, then their placement inthe argument list does not matter, since the name has precedence over the place in thelist. To make this concept clearer, here are two examples illustrating the two methodspreviously described:
Listing 15: Arguments Example 1 - filled in by position
>> def foo(w, x, y, z):return (w, x, y, z)
>> foo(1, 2, 3, 4)(1, 2, 3, 4)>> 5
Listing 16: Arguments Example 2 - filled in by name
>> def foo(w, x, y, z):return (w, x, y, z)
>> foo(x = 2, z = 4, w = 1, y = 3)(1, 2, 3, 4)>> 5
It is also possible to combine the two methods in the same function call, providedthat all arguments following the first one that is passed by name are also passed byname. The arguments before the first one that is passed by name will all be passed byposition.
Note that multiple definitions of a single argument will raise an exception. Anexception is also raised if not all arguments receive a value, the arguments that areignored have been assigned a default value, as explained next.

1.2 Language Features 14 /77
The second feature of the Python language relative to function calls is that argu-ments can receive a default value, in which case no value needs to be explicitely spec-ified for the arguement. If a value is indeed specified, it replaces the default valuefor the argument. Default values are simply assigned to the arguments in the functiondeclaration. Here is a very simple examples to illustrate this feature:
Listing 17: Mixed Argument Passing
>> def power(base, exp = 2):return x ** exp
>> power(2, 3)8>> power(5) 5
25>>
The only restriction imposed by the language relative to default arguments is that allarguments following the first one that is assigned a default value must also be assigneda default value.
By combining default arguments and named arguments, it is easy to observe thatfunction calls can be drastically reduced in length. This allows for faster prototypingand can simplify repetitive calls.
Python also allows functions to be declared using *arg and **arg as arguments.An argument of the form *arg will match any of the remaining non-named arguments(and will be a tuple), while **arg will match the remaining named arguments, and beof type Dictionary. This allows to define methods which can take an arbitrary numberof parameters.
1.2.7 Classes
Python being an object-oriented language, it allows to create new object types in theform of classes. Declaring classes in Python is trivial. Here is the general syntax for aclass declaration:
Listing 18: Class Declaration Syntax
classclassname inheritancelist:classvariables
method0(arg0, arg1, . . ., argN):statements 5
method0(arg0, arg1, . . ., argN):statements
methodM(arg0, arg1, . . ., argN): 10
statements

1.2 Language Features 15 /77
The inheritance list argument is optional. It must be included in bracketsif present. It can contain one or more class names, separated by commas. It will mostoften contain only one class name: the base class of the current class, ie the class thatit inherits from.
Python supports multiple inheritance in the form ofmixin classes. These classesinherit from multiple base classes (ie theinheritance list contains more thanone class. Python uses a depth-first search, left-to-right strategy to find attributes inmultiple inheritance cases. Whenever a list of base classes is specified, the leftmostclass will be searched first for a specific attribute, followed by all of its base classes.If nothing is found in these classes, then the second base class will be searched in thesame way, and so on.
Python has no access specifier (like private, public or protected in Java). By default,all methods declared within a class are public. Simulating private methods is stillpossible by using the same name mangling feature as it was done for variables (seesection1.2.2.1on page5). This is done by preceding the method name by two or moreunderscores.
Inside a class, theself keyword refers to the current instance of this class.
1.2.7.1 Special function names
Python defines some special function names that have a predefined meaning. These re-served names all have the formspecial name , so as to minimize the possibilityof name conflicts. The following table lists the most common ones and describes theirmeaning.

1.2 Language Features 16 /77
Method Descriptioninit The class constructor. Use this method to assign val-
ues to instance variables in order to allocate space forthem and thus avoid runtime errors that could occur ifa use occurs before a definition. This method can takeparameters if needed.If the base class defines aninit method, call it us-ing the form baseclass name. init (self[,args] ).Constructors cannot return a value.
del (self) The class destructor. If the base class defines thismethod, then it must be called to ensure proper destr-cution of the instance.
str (self) String representation of a class. It is the equivalentof thetoString( ) method in Java. It must return astring object describing the instance.
repr (self) “Official” string representation of a class. This methodshould also return a string, but the description returnedby this method should be more complete and useful,since it is usually used for debugging purposes. ThePython Language Reference states that this represen-tation should usually be a valid python statement thatallows to recreate the instance of a class.
cmp (self, other) Used to compare two instances of a class. Must re-turn a negative integer ifself < other, zero ifself= other and a positive integer ifself > other.NOTE: Python 2.1 introduces thelt , le ,eq , ne , gt and ge methods, which
allow to extend comparions to common operators.This is very similar to operator overloading in C++.
nonzero (self) Truth value testing. Should return 0 or 1 only, depend-ing on whether the instance should evaluate to false ornot.

2Python and Tkinter for RAD and
Prototyping
2.1 Designing User Interfaces
User interfaces are what allows end users to interact with an application. An applicationcan be excellent, but without a good user interface, it becomes more difficult to use,and less enjoyable. It is thus very important to design good user interfaces.
Designing user interface takes place at two different levels: the graphical level andthe event level. Graphical elements of a user interface are calledwidgets. Widgets arebasic components like buttons, scrollbars, etc. But user interfaces involve more than acollection of widgets placed in a window. The application must be able to respond tomouse clicks, keyboard actions or system events such as minimizing the window. Forthis to happen, events must be associated to some pieces of code. This process is calledbinding. The next two chapters will cover each level in more details, but this chapterwill present an overview of Tkinter and explain why it has become the leading GUItoolkit for the Python language.
2.2 What is Tkinter?
Tkinter is an open source, portable graphical user interface (GUI) library designedfor use in Python scripts. Tkinter relies on the Tk library, the GUI library used byTcl/Tk and Perl, which is in turn implemented in C. Thus, Tkinter is implementedusing multiple layers.
Several competing GUI toolkits are available to use with the Python language,namely:

2.3 Why Tkinter? 18 / 77
wxPython : a wrapper extension for wxWindows, a portable GUI library originallydeveloped for the C++ language. It is the second most popular GUI toolkit forPython since it is considered excellent for complex interface design.
JPython (Jython): since it is implemented in java, JPython has access to Java GUIlibraries, namely SWING and AWT. Recently, JTkinter has been implementedand provides a Tkinter port to JPython using the Java Native Interface (JNI).
PyKDE / PyQt, PyGTK: these packages provide an access to KDE and Gnome GUIlibraries to python scripts.
Win32all.exe: provides access to Microsoft Foundation Classes (MFC) to pythonscripts. It is limited to run on MS Windows only.
WPY : a GUI library that can be used on both Microsoft Windows and UNIX X Win-dows. This library uses the MFC coding style.
X11 : a library based on the X Windows and Motif libraries allowing excellent controlof the X11 environment, but is limited to run on X Windows OS’s only.
2.3 Why Tkinter?
With all the competing GUI toolkits available for the Python language, what makesTkinter stand out of the rest? Why is it the most popular toolkit for use interfacedesign?
To find the answer, one must look at the advantages that it offers.
1. Layered designThe layered approach used in designing Tkinter gives Tkinterall of the advantages of the TK library. Therefore, at the time of creation, Tkinterinherited from the benefits of a GUI toolkit that had been given time to mature.This makes early versions of Tkinter a lot more stable and reliable than if it hadbeen rewritten from scratch. Moreover, the conversion from Tcl/Tk to Tkinter isreally trivial, so that Tk programmers can learn to use Tkinter very easily.
2. AccessibilityLearning Tkinter is very intuitive, and therefore quick and painless.The Tkinter implementation hides the detailed and complicated calls in simple,intuitive methods. This is a continuation of the Python way of thinking, since thelanguage excels at quickly building prototypes. It is therefore expected that itspreferred GUI library be implemented using the same approach. For example,here is the code for a typical “Hello world”-like application:
Listing 19: A Simple Application
from Tkinter import *root = Tk( )root.title(’A simple application’)root.mainloop( )

2.4 Nothing is perfect . . . 19 /77
The first 2 lines allow to create a complete window. Compared to MFC pro-gramming, it makes no doubt that Tkinter is simple to use. The third line sets thecaption of the window, and the fourth one makes it enter its event loop.
3. Portability Python scripts that use Tkinter do not require modifications to beported from one platform to the other. Tkinter is available for any platformthat Python is implemented for, namely Microsoft Windows, X Windows, andMacintosh. This gives it a great advantage over most competing libraries, whichare often restricted to one or two platforms. Moreover, Tkinter will provide thenative look-and-feel of the specific platform it runs on.
4. Availability Tkinter is now included in any Python distribution. Therefore, nosupplementary modules are required in order to run scripts using Tkinter.
2.4 Nothing is perfect . . .
Tkinter has many advantages that make it the primary choice for UI design. However,it has a drawback which originates directly from its imlementation: it has a significantoverhead due to its layered implementation. While this could constitute a problem witholder, slower machines, most modern computers are fast enough so as to cope with theextra processing in a reasonable amount of time. When speed is critical, however,proper care must be taken so as to write code that is as efficient as possible.
Even if the overhead tends to become less relevant with time, there is still a dis-advantage to this layered implementation that is not going to fade away: the sourcecode for the Tkinter library is only a shell that provides Tk’s functionality to Pythonprograms. Therefore, in order to understand what the Tkinter source code does, pro-grammers need to understand the source code of the Tk library, which is in turn writtenin C. While certainly not impossible, this requires more work from programmers andcan be quite time consuming.
2.5 Show me what you can do!
In order to fully understand the advantages that Tkinter has to offer, it is necessary tosee some examples demonstrating just how simple programming using this toolkit canbe. Let’s start with a more detailed explanation of the example presented above. Forsimplicity, the listing of the complete source of the example is reproduced again below.
Listing 20: A very simple application
from Tkinter import *root = Tk( )root.title(’A simple application’)root.mainloop( )

2.5 Show me what you can do! 20 /77
While this example is almost the smallest Tkinter program that can be written (thethird line is optional, but was added to make the application slightly more interesting).Let’s analyze the code line by line.
from Tkinter import *
This line imports the whole Tkinter library. It must present in every Tkinter program.
root = Tk()
This line creates a complete window, called theTk root widget. There should be onlyone root widget per application, and it must be created before all other widgets. Thisdoes not mean that Tkinter applications cannot have multiple windows at the sametime. More complex examples showing how to create multiple windows within a singleapplication will be discussed later.
root.title(’A simple application’)
This line invokes a method of the Tk root widget instance to set its title to ’A simpleapplication’. For the purposes of this example, this is the simplest way of displayingtext in the window. The next example will use another widget to achieve a similar goal.
root.mainloop( )
The call tomainloop makes the application enter itsevent loop, ie it makes it able torespond to user events, such as mouse events and keyboard events.
The next example is very similar to the first example, but it uses newwidgets(visualcomponents) to display some text and exit the application. Widgets will be discussedin the next chapter.
Listing 21: Creating widgets
from Tkinter import *
def quit():import sys; sys.exit()
5root = Tk( )lbl = Label(root, text="Press the button below to exit")lbl.pack()btn = Button(root, text="Quit", command=quit)btn.pack() 10root.mainloop( )
This example introduces some new concepts. First of all, it creates new widgets toput on the root window. Also, it responds to a specific user event (a click on the “Quit”button) by exiting the program.
def quit():import sys; sys.exit()
2.5 Show me what you can do! 21 /77
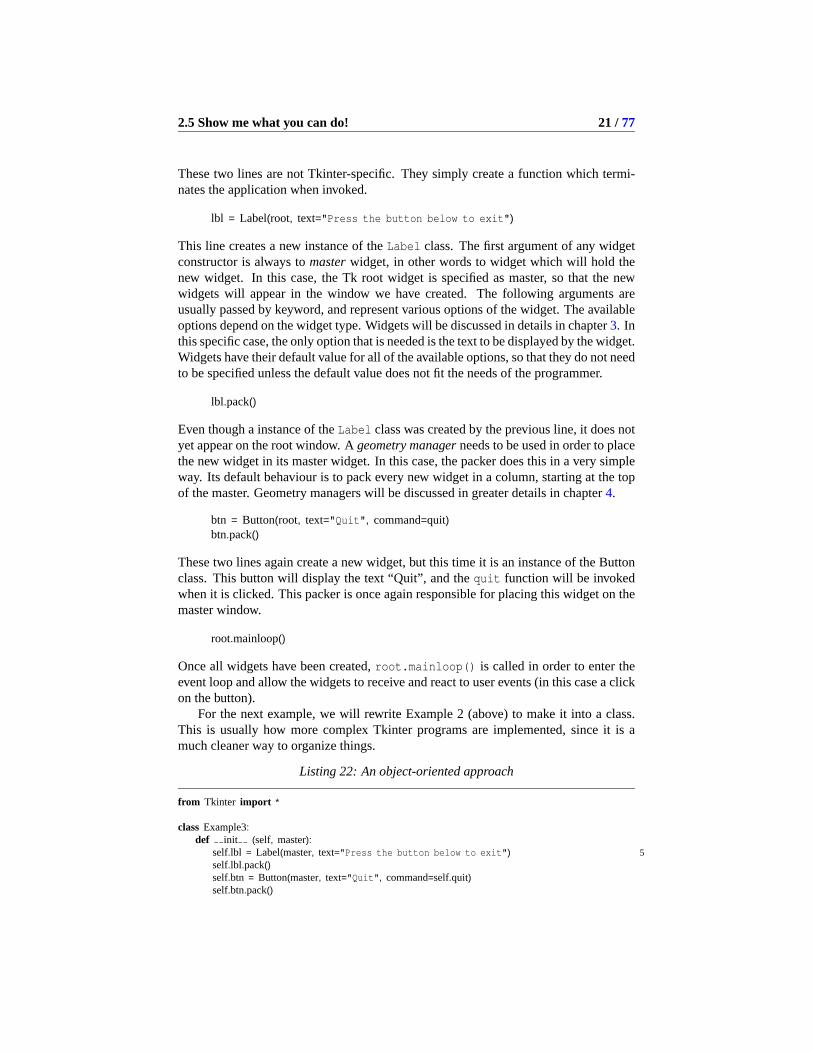
These two lines are not Tkinter-specific. They simply create a function which termi-nates the application when invoked.
lbl = Label(root, text="Press the button below to exit")
This line creates a new instance of theLabel class. The first argument of any widgetconstructor is always tomasterwidget, in other words to widget which will hold thenew widget. In this case, the Tk root widget is specified as master, so that the newwidgets will appear in the window we have created. The following arguments areusually passed by keyword, and represent various options of the widget. The availableoptions depend on the widget type. Widgets will be discussed in details in chapter3. Inthis specific case, the only option that is needed is the text to be displayed by the widget.Widgets have their default value for all of the available options, so that they do not needto be specified unless the default value does not fit the needs of the programmer.
lbl.pack()
Even though a instance of theLabel class was created by the previous line, it does notyet appear on the root window. Ageometry managerneeds to be used in order to placethe new widget in its master widget. In this case, the packer does this in a very simpleway. Its default behaviour is to pack every new widget in a column, starting at the topof the master. Geometry managers will be discussed in greater details in chapter4.
btn = Button(root, text="Quit", command=quit)btn.pack()
These two lines again create a new widget, but this time it is an instance of the Buttonclass. This button will display the text “Quit”, and thequit function will be invokedwhen it is clicked. This packer is once again responsible for placing this widget on themaster window.
root.mainloop()
Once all widgets have been created,root.mainloop() is called in order to enter theevent loop and allow the widgets to receive and react to user events (in this case a clickon the button).
For the next example, we will rewrite Example 2 (above) to make it into a class.This is usually how more complex Tkinter programs are implemented, since it is amuch cleaner way to organize things.
Listing 22: An object-oriented approach
from Tkinter import *
classExample3:def init (self, master):
self.lbl = Label(master, text="Press the button below to exit") 5self.lbl.pack()self.btn = Button(master, text="Quit", command=self.quit)self.btn.pack()

2.5 Show me what you can do! 22 /77
def quit(self): 10import sys; sys.exit()
root = Tk( )ex3 = Example3(root)root.mainloop( ) 15
This example defines a new class:Example3. This class only has a constructorand aquit method. Thequit method is almost identical to thequit function fromExample 2, except that it must take a parameter,self, to receive a reference to theclass instance when invoked. For more details, see section1.2.7on page13.
For the last example in this section, let’s build a larger interface. This fourth ex-ample will include many widgets and more complex widget placement. Do not worryabout the implementation details for now, since everything will be covered in the sub-sequent sections. The code for this example is as follows:
Listing 23: A more complex example
from Tkinter import *
classExample4:def init (self, master):
# showInfo needs to know the master 5self.master= master# Create a frame to hold the widgetsframe = Frame(master)
# Create a Label to display a header 10self.headLbl= Label(frame, text="Widget Demo Program", relief=RIDGE)self.headLbl.pack(side=TOP, fill =X)
# Create a border using a dummy frame with a large border widthspacerFrame= Frame(frame, borderwidth=10) 15
# Create another frame to hold the center part of the formcenterFrame= Frame(spacerFrame)leftColumn = Frame(centerFrame, relief=GROOVE, borderwidth=2)rightColumn= Frame(centerFrame, relief=GROOVE, borderwidth=2) 20
# Create some colorful widgetsself.colorLabel= Label(rightColumn, text="Select a color")self.colorLabel.pack(expand=YES, fill =X)
25entryText= StringVar(master)entryText.set("Select a color")self.colorEntry = Entry(rightColumn, textvariable=entryText)self.colorEntry.pack(expand=YES, fill =X)
30# Create some Radiobuttonsself.radioBtns= [ ]self.radioVal = StringVar(master)btnList = ("black", "red", "green", "blue", "white", "yellow")for color in btnList: 35
self.radioBtns.append(Radiobutton(leftColumn, text=color, value=color, indicatoron=TRUE,

2.5 Show me what you can do! 23 /77
variable=self.radioVal, command=self.updateColor))else:
if (len(btnList) > 0):self.radioVal.set(btnList[0]) 40self.updateColor()
for btn in self.radioBtns:btn.pack(anchor=W)
45# Make the frames visibleleftColumn.pack(side=LEFT, expand=YES, fill =Y)rightColumn.pack(side=LEFT, expand=YES, fill =BOTH)centerFrame.pack(side=TOP, expand=YES, fill =BOTH)
50# Create the Indicator Checkbuttonself.indicVal = BooleanVar(master)self.indicVal.set(TRUE)self.updateIndic()Checkbutton(spacerFrame, text="Show Indicator", command=self.updateIndic, 55
variable=self.indicVal).pack(side=TOP, fill =X)
# Create the Color Preview Checkbuttonself.colorprevVal= BooleanVar(master)self.colorprevVal.set(FALSE) 60self.updateColorPrev()Checkbutton(spacerFrame, text="ColorPreview", command=self.updateColorPrev,
variable=self.colorprevVal).pack(side=TOP, fill =X)
# Create the Info Button 65Button(spacerFrame, text="Info", command=self.showInfo).pack(side=TOP, fill =X)
# Create the Quit ButtonButton(spacerFrame, text="Quit!", command=self.quit).pack(side=TOP, fill =X)
70spacerFrame.pack(side=TOP, expand=YES, fill =BOTH)frame.pack(expand=YES, fill =BOTH)
def quit(self):import sys; sys.exit() 75
def updateColor(self):self.colorLabel.configure(fg=self.radioVal.get())self.colorEntry.configure(fg=self.radioVal.get())
80def updateIndic(self):
for btn in self.radioBtns:btn.configure(indicatoron=self.indicVal.get())
def updateColorPrev(self): 85if (self.colorprevVal.get()):
for btn in self.radioBtns:color = btn.cget("text")btn.configure(fg=color)
else: 90for btn in self.radioBtns:
btn.configure(fg="black")

2.5 Show me what you can do! 24 /77
def showInfo(self):toplevel = Toplevel(self.master, bg="white") 95toplevel.transient(self.master)toplevel.title("Program info")Label(toplevel, text="A simple Tkinter demo", fg="navy", bg="white").pack(pady=20)Label(toplevel, text="Written by Bruno Dufour", bg="white").pack()Label(toplevel, text="http://www.cs.mcgill.ca/˜bdufou1/", bg="white").pack() 100Button(toplevel, text="Close", command=toplevel.withdraw).pack(pady=30)
root = Tk()ex4 = Example4(root) 105root.title(’A simple widget demo’)root.mainloop()
This example may look long at first, but it is only about 100 lines long, includ-ing comments and blank lines. Considering the fact that it creates two windows andnumerous widgets, and that it responds to user events, the source is on fact relativelyshort. It could have been written in a yet shorter form, but this would have made thesource more difficult to understand. An interesting experiment innvolves running thisprogram and trying to resize its window. Widgets modify their size to accomodate thenew window size as much as possible. This behaviour is a demonstration of Tkinter’sgeometry managers at work.
Finally, this application demonstrates how easy widget configuration is in Tkinter.The Checkbuttons even reconfigure widgets on the fly, using only a few lines of code.Note how the window is resized when the indicator option for the Radiobuttons isturned on and off.

3Overview of Tkinter Widgets
3.1 What is a Widget
According to the Free On-Line Dictionary of Computing, the definition of a widget is:
widget: [possibly evoking ”window gadget”] In graphical user interfaces,a combination of a graphic symbol and some program code to perform aspecific function. E.g. a scroll-bar or button. Windowing systems usuallyprovide widget libraries containing commonly used widgets drawn in acertain style and with consistent behaviour.
A widget is therefore a graphical object that is available from the Tkinter library. Itis a kind of graphical building block. Intuitively, widgets are implemented as classes inTkinter. Each widget therefore has a constructor, a destructor, its own set of propertiesand methods, and so on. While most other GUI toolkits have a very complex widgethierarchy, Tkinter’s hierarchy is extremely simple. All widgets (like Button, Checkbut-ton, etc.) are dereived from the Widget class. All widget subclasses occupy the samelevel in the hierachy tree.
3.2 The Different Widgets
3.2.1 Toplevel
The Toplevel is technically not a widget, although this is more or less transparent to theuser.

3.2 The Different Widgets 26 /77
3.2.2 Button
The Button widget is a rectangular widget that is able to display text. This text canoccupy several lines (if the text itself contains newlines or if wrapping occurs). More-over, this text can have an underlined character (usually indicating a keyboard shortcut).Buttons are usually used to execute an action when they are clicked, so they offer thecommand option which associates a callback with the event corresponding to a mouseclick with the left mouse button on the widget.
The Button widget provides the following options:
Option Descriptiondefault Specifies one of three states (DISABLED, NORMAL,
ACTIVE) which determines if the button should bedrawn with the style used for default buttons.
The Button widget provides the following methods:
Method Descriptionflash() Redraws the button several times, alternating between
active and normal appearance.invoke() Invokes the callback associated with the button widget.
3.2.3 Checkbutton
The Checkbutton displays some text (or image) along with a small square called in-dicator. The indicator is drawn differently depending on the state of the checkbutton(selected or not). The Checkbutton widget supports the following option:
Option Descriptionindicatoron Specifies wheter the indicator should be drawn or not.
If false, the Checkbutton acts like a toggle button.offvalue Specifies the value to store in the variable associated
with the Checkbutton when it is not selected.onvalue Specifies the value to store in the variable associated
with the Checkbutton when it is selected.selectcolor Specifies the background color to use for the widget
whenever it is selected. This color applies to the indi-cator only ifindicatoron is TRUE. It applies to thewhole widget when this option is turned off.
variable Specifies the name of a Tkinter variable that is tobe assigned the values specified by theonvalue andoffvalue options.
The Checkbutton widget defines the following methods:

3.2 The Different Widgets 27 /77
Method Descriptiondeselect() Deselects the checkbutton and stores the value speci-
fied by the offvalue option to its associated variable.flash() Redraws the button several times, alternating between
active and normal colors.invoke() Simulates a click on the widget (toggles the state, up-
dates the variable and invokes the callback associatedwith the checkbutton, if any).
select() Selects the checkbutton and stores the value specifiedby the onvalue option to its associated variable.
toggle() Similar to invoke(), but does not invoke the callbackassociated with the checkbutton.
3.2.4 Entry
The Entry widget allows users to type and edit a single line of text. A portion of thistext can be selected.
The Entry widget provides the following options:
Option Descriptionshow Controls how to display the contents of the widget.
If non-empty, the widget will replace characters to bedisplayed by the first character the specified string. Toget a password entry widget, use ”*”.
The Entry widget defines the following methods:
Method Descriptiondelete(index), delete(from,to) Delete the character at index, or within the given range.
Use delete(0, END) to delete all text in the widget.get() Returns the current contents of the widget.insert(index, text) Inserts text at the given index. Use insert(INSERT,
text) to insert text at the cursor, insert(END, text) toappend text to the widget.
3.2.5 Frame
The Frame widget is a rectangular container for other widgets. It is primarily used asa gemometry master since it allows to group widgets. It can have an unvisible borderwhich is useful to space widgets. It can also have a visible border with a 3D effect, orno border at all.
The Frame widget provides the following options:

3.2 The Different Widgets 28 /77
Option Descriptioncursor Specifies the mouse cursor to be used when the cursor
is within the frame.takefocus Specifies whether the user should be able to move the
focus to this widget by using the tabulation key (Tab).width, height Specifies the size of the widget.
The Frame widget does not provide any methods except the standard Widget meth-ods.
3.2.6 Label
The Label widget is used to display text. It can only display text in a single font at atime. The text can span more than one line. In addition, one character in the text canbe underlined, usually indicating a keyboard shortcut.
The Label widget provides the following options:
Option Descriptionanchor Specifies how the text should be placed in a widget.
Use one of N, NE, E, SE, S, SW, W, NW, W, NW,CENTER.
bitmap Specifies the bitmap to be displayed by the widget. Ifthe image option is given, this option is ignored.
image Specifies the image to be displayed by the widget.If specified, this takes precedence over the text andbitmap options.
justify Defines how to align multiple lines of text relative toeach others. Use LEFT, RIGHT, or CENTER. Differsfrom anchor in that justify specifies how to align mul-tiple lines of text relative to each other.
text Specifies the text to be displayed by the widget.textvariable Specifies the name of a variable that contains the text
to be displayed by the widget. If the contents of thevariable is modified, the widget will be updated ac-cordingly.
The Label widget does not provide any methods except the standard Widget meth-ods.
3.2.7 Listbox
The Listbox widget displays a list of strings. Each string is displayed on a separateline. It allows to insert, modify or delete strings from the list. The listbox can onlycontain text items, and all items must have the same font and colour. Depending on thewidget configuration, the user can choose one or more alternatives from the list.
The Listbox widget provides the following options:

3.2 The Different Widgets 29 /77
Option Descriptionselectmode Specifies the selection mode. One of SINGLE,
BROWSE, MULTIPLE, or EXTENDED. Default isBROWSE. Use MULTIPLE to get checklist behavior,EXTENDED if the user usually selects one item, butsometimes would like to select one or more ranges ofitems.
xscrollcommand,yscrollcommand Used to connect a listbox to a scrollbar. These options
should be set to theset methods of the correspondingscrollbars.
The Listbox widget defines the following methods:
Method Descriptiondelete(index),delete(first, last) Deletes one or more items. Use delete(0, END) to
delete all items in the list.get(index) Gets one or more items from the list. This function
returns the string corresponding to the given index (orthe strings in the given index range). Use get(0, END)to get a list of all items in the list. Use ACTIVE to getthe selected (active) item(s).
insert(index, items) Inserts one or more items at given index (index 0 isbefore the first item). Use END to append items to thelist. Use ACTIVE to insert items before the selected(active) item.
size( ) Returns the number of items in the list.
3.2.8 Menu
The Menu widget is used to implement toplevel, pulldown, and popup menus.The Menu widget provides the following options:
Option Descriptionpostcommand If specified, this callback is called whenever Tkinter
is about to display this menu. If you have dynamicmenus, use this callback to update their contents.
tearoff If set, menu entry 0 will be a “tearoff entry”, which isusually a dashed separator line. If the user selects thisentry, Tkinter creates a small Toplevel with a copy ofthis menu.
tearoffcommand If specified, this callback is called when this menu isteared off.
title Specifies the title of menu.
The Menu widget defines the following methods:

3.2 The Different Widgets 30 /77
Method Descriptionadd(type, options. . . ) Appends an entry of the given type to the menu. The
type argument can be one of “command”, “cascade”(submenu), “checkbutton”, “radiobutton”, or “separa-tor”.
insert(index, type, options. . . ) Same as add and friends, but inserts the new item atthe given index.
entryconfig(index, options. . . ) Reconfigures the given menu entry. Only the givenoptions are changed.
delete(index) Deletes one or more menu entries.
3.2.9 Message
The Message widget is used to display multiple lines of text. It is very similar to a plainlabel, but can adjust its width to maintain a given aspect ratio.
The Message widget provides the following option:
Option Descriptionaspect Specifies a non-negative integer describing the aspect
ratio of the widget. This integer is taken to be thevalue of 100 * width / height. Default is 150, i.e.width:height = 1.5:1.
The Label widget does not provide any methods except the standard Widget meth-ods.
3.2.10 OptionMenu
OptionMenu inherits from Menubutton. It is used to display a drop-down list of op-tions. It only defines a constructor of the form:
OptionMenu(master, variable, value, *values)
where master is themasterwidget of this OptionMenu,variable is a Tkinter Variable(see section5.3on page47), valueand*valuesare the values displayed by the Option-Menu. The documentation states thatvaluewill be the default variable, but it is notthe case. The only point in having a separatevalueargument is to ensure that at leastone value is to be displayed. To set the default value (or any value at any point of theexecution), usevariable.set(value ).
3.2.11 Radiobutton
The Radiobutton widget used to implement one-of-many selections. Radiobuttons cancontain text or images, and you can associate a callback with each button to be excutedwhen the button is pressed. Each group of Radiobutton widgets should be associatedwith a single variable. Each button then represents a single value for that variable.
The Radiobutton widget provides the following options:

3.2 The Different Widgets 31 /77
Option Descriptionindicatoron Specifies whether the indicator should be drawn or not.
If false, the Radiobutton behaves like a toggle Button.selectcolor Specifies a background color to use when the widget is
selected. If “indicatoron” is true, then the color appliesto the indicator, otherwise it applies to the backgroundof the widget.
value Specifies the value to store in the variable when thisbutton is selected (see “variable” below)
variable Specifies a Tkinter Variable (see section5.3 on page47) that holds the value for the currently selected Ra-diobutton
The Radiobutton widget defines the following methods:
Method Descriptionselect() Selects the Radiobutton and stores its value in its Tk-
inter variable.deselect() Deselects the Radiobutton. The value of its associated
variable cannot be used (variable.get() will throw anexeception).
invoke() Simulates a mouse click on the Radiobutton. Same asselect() but also executes the callback, if there is one.
3.2.12 Scale
The Scale widget is used to display a slider which allows the user to select a valuewithin a specified range.
The Scale widget provides the following options:

3.2 The Different Widgets 32 /77
Option Descriptiondigits Specifies the number of significant digits used when
converting a value to a string. If negative, Tkinter en-sures that every possible slider position will be con-verted to a different string while using the minimumnumber of digits.
from , to Specifies the range of values for the Scalelabel Specifies a string to be displayed by the Scale.length Specifies the width or height of the Scale, in screen
pixels, depending on its orientation.orient Defines the orientation of the scale. One of HORI-
ZONTAL or VERTICAL.resolution If greater than zero, then all Scale values will be
rounded to multiples of this value. If less than zero,no rouding occurs. Default is 1 (scale takes integervalues only).
showvalue Specifies whether the scale should display its currentvalue. Default is TRUE.
sliderlength Specifies the length of the slider, in screen units. De-fault is 30.
sliderrelier Specifies the relief used to draw the slider.tickinterval Specifies the spacing between tick marks displayed by
the Scale. If it is 0, no tick marks are displayed.troughcolor Specifies the color used to fill the trough area.variable Specifies a Tkinter variable to hold the value of the
scale.
The Scale widget defines the following methods:
Method Descriptioncoords(value=None) Returns the coordinates of a point along the center of
the trough that corresponds tovalue. The current valueof the scale is used ifvalueis not specified.
get() Gets the current scale value. Tkinter returns an integerif possible, otherwise a floating point value is returned.
identity(x, y) Returns a string describing which part of the Scale issituated at the location (x, y). TROUGH1 indicates aposition above or on the left of the slider, TROUGH2 aposition down or right of the slider, SLIDER a positionon the SLIDER, and an empty string a position outsidethe Scale.
set() Sets the scale value.

3.2 The Different Widgets 33 /77
3.2.13 Scrollbar
The Scrollbar widget is a typical scrollbar, with arrows at both ends and a slider portionin the middle. Unlike typical scrollbars, its color can be modified.
The Scrollbar widget provides the following options:
Option Descriptioncommand Used to update the associated widget. This is typically
the xview or yview method of the scrolled widget.If the user drags the scrollbar slider, the command iscalled as callback(MOVETO, offset) where offset 0.0means that the slider is in its topmost (or leftmost) po-sition, and offset 1.0 means that it is in its bottommost(or rightmost) position. If the user clicks the arrow but-tons, or clicks in the trough, the command is called ascallback(SCROLL, step, what). The second argumentis either ”-1” or ”1” depending on the direction, andthe third argument is UNITS to scroll lines (or otherunits relevant for the scrolled widget), or PAGES toscroll full pages.
activerelief Specifies the relief used to display the Scrolbar. De-faults to RAISED.
elementborderwidth Specifies the width of the borders drawn around theslider and the arrow buttons. If less than 0, the valueof “borderwidth” is used instead.
jump Specifies whether the associated widget sould be no-tified of changes while the user is draggin the slider(FALSE) or only after the slider has been released(TRUE).
orient Specifies the orientation of the scrollbar (one of HOR-IZONTAL or VERTICAL).
troughcolor Specifies the color to use for drawing the trough area.
The Scrollbar widget defines the following methods:

3.2 The Different Widgets 34 /77
Method Descriptionactivate(element) Sets an element to be active. One of ARROW1, AR-
ROW2, SLIDER. Other values will result in no ele-ment being active. If no element is specified, returnsthe name of the currently active element.
delta(deltaX, deltaY) Returns a float indicating the fractional change in thescrollbar value required to move the slider by deltaXpixels if the scrollbar is horizontal or deltaY pixel if itis vertical. Arguments may also be negative to movein opposite directions.
set(first, last) Invoked by the scrollbar’s associated widget. It is usedto specifiy which portion of the document must be vis-ible.
The Scrollbar widget is very easy use with other, scrollable widgets. The followingexample demonstrates how to use a Scrollbar widget with a Listbox widget.
Listing 24: A Scrollbar example
from Tkinter import *
classScrolledList(Frame):def init (self, options, parent=None):
# Create a frame for the application 5Frame. init (self, parent)self.pack(expand=YES, fill =BOTH)# Create the widgets in the frameself.createWidgets(options)
10def handleList(self, event):
index = self.listbox.curselection()label = self.listbox.get(index)self.runCommand(label)
15def createWidgets(self, options):
# Create the Scrollbarssbary= Scrollbar(self)sbarx= Scrollbar(self)# Create the Listbox 20list = Listbox(self, relief=SUNKEN)# Setup for the Scrollbarssbary.config(command=list.yview)sbarx.config(command=list.xview, orient=HORIZONTAL)list.config(yscrollcommand=sbary.set, xscrollcommand=sbarx.set) 25# Make the widgets visiblesbary.pack(side=RIGHT, fill =Y)sbarx.pack(side=BOTTOM, fill =X)list.pack(side=LEFT, expand=YES, fill =BOTH)# Add the items to the Listbox 30pos = 0for label in options:
list.insert(pos, label)pos = pos + 1

3.2 The Different Widgets 35 /77
# Handle some keyboard events 35list.bind(’<Double-1>’, self.handleList)list.bind all(’<Up>’, self.ListUp)list.bind all(’<Down>’, self.ListDown)self.listbox = list
40def runCommand(self, selection):
print ’You selected:’, selection
def ListUp(self, event):# KeyPress: up arrow key 45# Move the selection upwardsindex = self.listbox.curselection()number= self.listbox.index(index)if number> 0:
self.listbox.select clear(number) 50self.listbox.select set(number− 1)self.listbox.see(number− 1)
def ListDown(self, event):# KeyPress: down arrow key 55# Move the selection downwardsindex = self.listbox.curselection()number= self.listbox.index(index)if number< self.listbox.size() − 1:
self.listbox.select clear(number) 60self.listbox.select set(number+ 1)self.listbox.see(number+ 1)
# Generate some dataoptions= map((lambda x: ’Sample Data - ’ + str(x)), range(20)) 65# Create and run the applicationScrolledList(options).mainloop()
3.2.14 Text
The Text widget is a very powerful multiline that is used to display and edit text. Likethe Canvas widget, it relies on tags for its avanced functionality. The Text widgetsupports numerous options and methods. The essential ones are discussed below:
The Text widget provides the following options:
Option Descriptionsetgrid If true, Tkinter attempts to resize the window contain-
ing the text widget in full character steps (based on thefont option).
spacing1,spacing2,spacing3 Specifies the spacing to use above the first line, be-
tween the lines and after the last line, respectively, in ablock of text. Default is 0 (no extra spacing).
wrap Word wrap mode. Use one of NONE, CHAR, orWORD. Default is NONE.

3.2 The Different Widgets 36 /77
The Text widget defines the following methods:
Method Descriptioninsert(index, text),insert(index, text, tags) Inserts text at the given position (typically INSERT or
END). If you provide one or more tags, they are at-tached to the new text.
delete(index),delete(start, stop) Deletes the character (or embedded object) at the given
position, or all text in the given range. Any markswithin the range are moved to the beginning of therange.
index(index) Returns the “line.column” index corresponding to thegiven index.
3.2.15 Canvas
The canvas widget provides the basic graphics facilities for Tkinter, and so more ad-vanced functions. Drawing on the canvas is done by creating various items on it. It isimportant to note at this stage that items arenot widgets, even though they are similarin many ways. Each item on a canvas is enclosed by a bounding box, which is definedusing 2 points: the top-left corner and the bottom-right corner of the box. Tkinter usestwo coordinate systems simultaneously: the canvas coordinate system and the windowcoordinate system. Both systems express positions relative to the top-left corner, withX-coordinates increasing to the right and Y-coordinates increasing downwards. How-ever, the origin for the two systems is different. The window system expresses thecoordinates by placing the origin at the top-left corner of the visible portion of the can-vas, while the canvas system places its origin at the top-corner of the canvas widget,even it is not visible. The difference is important when handling mouse events boundto the canvas since the event object receives its coordinates in the window system.Luckily, the canvas widget provides the necessary methods to convert coordinates tothe canvas system, through calls to the canvasx( ) and canvasy( ) methods.
The Tkinter canvas supports the following standard items (more can also be added):
• Arc: arc, chord, pieslice
• Bitmap: builtin or read from an XBM file
• Image: a BitmapImage or PhotoImage instance
• Line
• Oval: circle or ellipse
• Polygon
• Resctangle
• Text

3.2 The Different Widgets 37 /77
• Window: used to place other widgets on the canvas (makes the canvas widget actlike a geometry manager)
Apart from their bounding box, all canvas items can be referenced using theirunique item ID, which is assigned at the time they are created, and is returned by anyof the item constructors. Tkinter also provides a usefull way of working with items:the tags. A number of strings, called tags, can be associated with a canvas item, andmore than one item can have the same tag. Items can then be referenced using thosetags (see section3.2.15.1on page38 for details). Canvas items can also be bound toevents, using the tagbind( ) method.
The Canvas widget provides the following options:
Option Descriptioncloseenough Specifies a float defining how close to an item the
mouse cursor has to be before it is considered to beover it (a higher value means that the item will selectedmore readily). Default is 1.0.
confine If TRUE (default), it is not allowed to set the canvasview outside of the region defined by “scrollregion”(see below).
scrollregion Defines the region that is considered to be the bound-ary of all items in the canvas. It is used for scrollingpurposes, in order to limit the scroll actions to a defi-nite area.
xscrollcommand,yscrollcommand Specifies the function used to interact with a scrollbar.xscrollincrement, yscrollincrement Specifies the increment for horizontal and vertical
scrolling, respectively.
The Canvas widget defines the following methods:
Method Descriptioncreatearc(bbox, options) Creates anarc canvas item and returns its item ID.createbitmap(position, options) Creates abitmapcanvas item and returns its item ID.createimage(position, options) Creates animagecanvas item and returns its item ID.createline(coords, options) Creates aline canvas item and returns its item ID.createoval(bbox, options) Creates anovalcanvas item and returns its item ID.createpolygon(coords, options) Creates apolygoncanvas item and returns its item ID.createrectangle(coords, options) Creates arectanglecanvas item and returns its item ID.createtext(position, options) Creates atextcanvas item and returns its item ID.createwindow(position, options) Places a Tkinter widget in a canvas window item and
returns its item ID.Continued on next page...

3.2 The Different Widgets 38 /77
Canvas Widget Methods - ContinuedMethod Descriptiondelete(items) Deletes all matching items, if any.itemcget(item, option) Returns the current value for an option from a canvas
item.itemconfig(item, options),itemconfigure(item, options) Modifies one or more options for all matching items.coords(item) Returns a tuple containing the coordinates for the item.coords(items, x0, y0, x1, y1, . . . , xn, yn) Changes the coordinates for all matching items.bbox(items),bbox( ) Returns the bounding box for the given items. If the
specifier is omitted, the bounding box for all items arereturned.
canvasx(screenx),canvasy(screeny) Converts a window coordinate to a canvas coordinate.tag bind(item, sequence, callback),tag bind(item, sequence, callback,"+") Adds an event binding to all matching items. Using the
“+” option, it adds the binding to the previous ones,otherwise all previous bindings are replaced.
tag unbind(item, sequence) Removes the binding, if any, for the given event se-quence on all the matching items.
type(item) Returns the type of the given item as a string (one of“arc”, “bitmap”, “image”, “line”, “oval”, “polygon”,“rectangle”, “text”, “window”).
lift(item),tkraise(item)/ lower(item) Moves the given item to the top / bottom of the can-
vas stack. If multiple items match, they are all movedwhile preserving their relative order.
move(item, dx, dy) Moves all matching items dx canvas units to the right,and dy canvas units downwards. Negative coordinatesspecify a displacement in the other direction.
scale(item, xscale, yscale, xoffset, yoffset) Scales matching items according to the given scale fac-tors. The coordinates for each item are first moved by-offset, then multiplied with the scale factor, and thenmoved back again.
Continued on next page...

3.2 The Different Widgets 39 /77
Canvas Widget Methods - ContinuedMethod Descriptionaddtagabove(newtag, item) Adds newtag to the item just above the given item in
the stacking order.addtagall(newtag) Adds newtag to all items on the canvas. This is a short-
cut for addtagwithtag(newtag, ALL).addtagbelow(newtag, item) Adds newtag to the item just below the given item, in
the stacking order.addtagclosest(newtag, x, y) Adds newtag to the item closest to the given coordi-
nate.addtagenclosed(newtag, x1, y1, x2, y2) Adds newtag to all itemscompletelyenclosed by the
given rectangle.addtagoverlapping(newtag, x1, y1, x2, y2) Adds newtag to all items enclosed by or touching the
given rectangle.addtagwithtag(newtag, tag) Adds newtag to all items having the given tag.dtag(item, tag) Removes the given tag from all matching items. If the
tag is omitted, all tags are removed from the matchingitems. It is not an error to give a specifier that doesn’tmatch any items.
gettags(item) Returns all tags associated with the item, in a tuple.find above(item) Finds the item just above the given item in the stacking
order.find all(tag) Finds all items on the canvas. This is a shortcut for
find withtag(tag, ALL).find below(item) Finds the item just below the given item, in the stack-
ing order.find closest(x, y) Finds the item closest to the given coordinate.find enclosed(x1, y1, x2, y2) Finds all itemscompletelyenclosed by the given rect-
angle.find overlapping(x1, y1, x2, y2) Finds all items enclosed by or touching the given rect-
angle.find withtag(tag) Finds all items having the given tag.postscript(options) Generates a postscript representation of the canvas
items. Images and widgets are not included in the out-put.
Just like widgets, canvas items also have a number of options. All items can, forexample, have their fill color and their border color changed, or set to transparent. Thecomplete list can be found athttp://www.python.org/.
3.2.15.1 Tagging in Tkinter
Tags represent a very powerful, yet very easy to use feature of Tkinter. The idea behindthem is really simple, and it is not surprising to see them used in the implementationof sereval widgets, such as the Canvas and the Text widgets. In the Text widget, tagscan be used to mark parts of the text for easier reference. In the canvas widget, the tags

3.3 Additional Widgets: the Python Mega Widgets (PMW) 40 /77
serve to mark on or more widgets for future reference. This discussion will focus onthe use of tags in the Canvas widget.
As was previously mentioned, tags can be used in a many:many relationship: mul-tiple canvas items can have the same tag and one item can have multiple different tags.This can be used to create groups of widgets. The most interesting point to make abouttags is that canvas methods acting on items can receive as parameters item IDs or tagsinterchangeably. One might wonder what happens to methods that only apply to a sin-gle item at a time (such as bbox( )). Tkinter provides the best possible approach forthese situations by only taking the first item that matches the specified tag. When themethod must be applied to several or all of the items having the tag, Tkinter also pro-vides an easy solution. The findwithtag( ) method produces a list of all items havingthe tag passed as only parameter. This information can then be used inside a simple forloop.
In addition to the tags that are added by the user, Tkinter supports two special,built-in tags, CURRENT and ALL. As expected, the ALL tag identifies all items inthe canvas, while the CURRENT tag is automatically updated, indicating the item overwhich the mouse pointer is located. Therefore, a call to canvas.findall( ) is the same asa call to findwithtag(ALL). Those two tags are simply handled like any other tag. TheCURRENT constant simply evaluates to the string “current”, while the ALL constantevaluates to “all”. Therefore, those tags should not be used by the user. Doing so willnot raise any exception, but setting these tags manually will silently fail since they aremanaged by Tkinter.
Moreover, the tagbind( ) and tagunbind( ) methods can be used to associate eventcallbacks to canvas items, thus freeing the canvas from the task of dispatching the eventto the proper item(s). These methods reduce the gap between canvas items and widgets.
3.3 Additional Widgets: the Python Mega Widgets (PMW)
While Tkinter provides a good set of widgets to work with, it does not offer a com-plete set yet. For example, there is no combo box (an Entry widget combined witha drop-down list) widget in Tkinter. Luckily enough, there is another package that iscompatible with Tkinter and that provides the elements that are missing: the PythonMega Widgets. It is available fromhttp://pmw.sourceforge.net/.

4Geometry Managers and Widget
Placement
4.1 What is Geometry Management?
Geometry management consists of placing widget placement and size on the screen.Tkinter provides three geometry managers, therefore allowing the user to quickly andefficiently build user interfaces, with maximal control over the disposition of the wid-gets. The geometry managers also allow the user make abstraction of the specificimplementation of the GUI on each platform that Tkinter supports, thus making thedesign truly portable.
Geometry management implies a great deal of negotiations between the differentwidgets and their containers, as well as the windows they are placed in. Geometrymanagement is not only responsible for the precise position and size of a widget, butalso of this widget’s position and size relative to the other widgets, and of renegotiatingthese factors when conditions change, for example when the window is resized.
The subsequent sections will discuss each of the geometry managers in details.
4.2 The “Pack” Geometry Manager
The packer is the quickest way to design user interfaces using Tkinter. It allows theuser the place the widgets relative to their contained widget. It is the most commonlyused geometry manager since it allows a fair amount of flexibility.
The packer positions the slave widgets on the master widget (container) from theedges to the center, each time using the space left in the master widget by previouspacking operations. The options that can be used in thepack() method are:

4.2 The “Pack” Geometry Manager 42 /77
Option Values Effectexpand YES (1), NO(0) Specifies whether the widget should
expand to fill the available space (atpacking time and on window resize)
fill NONE, X, Y,BOTH
Specifies how the slave should be re-sized to fill the available space (ifthe slave is smaller than the avail-able space)
side TOP (default),BOTTOM, LEFT,RIGHT
Specifies which side of the mastershould be used for the slave.
in (’in’) Widget Packs the slaves inside the widgetpassed as a parameter. This optionis usually left out, in which case thewidgets are packed in their parent.Restriction: widgets can only bepacked inside their parents or de-scendants of their parent.
padx,pady Integer values Specifies the space that must be leftout between two adjacent widgets.
ipadx, ipady Integer values Specifies the size of the optional in-ternal border left out when packing.
anchor N, S, W, E,NW, SW, NE,SE, NS, EW,NSEW, CENTER(default)
Specifies where the widget shouldbe placed in the space that it hasbeen allocated by the packer, if thisspace is greater than the widget size.
The “Pack” geometry manager defines the following methods for working with wid-gets:
Method Effectpack(option=value,. . . )packconfigure(option=value,. . . )
Packs the widget with the specifiedoptions.
pack forget() The widget is no longer managedby the Pack manager, but is not de-stroyed.
pack info() Returns a dictionary containing thecurrent options for the widget.
packslaves() Returns a list of widget IDs, in thepacking order, which are slaves ofthe master widget.

4.3 The “Grid” Geometry Manager 43 / 77
4.3 The “Grid” Geometry Manager
The grid geometry manager is used for more complex layouts. It allows the user tovirtually divide the master widget into several rows and columns, which can then beused to place slave widgets more precisely. The pack geometry manager would requirethe use of multiple nested frames to obtain the same effect.
The grid geometry manager allows the user to build a widget grid using an approachthat is very similar to building tables using HTML. The user builds the table specifyingnot only the row and column at which to place the widget, but also the rwo span andcolumn span values to use for the widget. In addition to that, the sticky option canallow almost any placement of the widget inside a cell space (if it is bigger than thewidget itself). Combinations of values for the sticky option also allow to resize thewidget, such as EW value, equivalent to an expand option combined with a fill=X forthe packer. The options that can be used in thegrid() method are:
Option Values Effectrow, column Integer values Specifies where the widget should
be positioned in the master grid.rowspan, columnspan Integer values Specifies the number of rows /
columns the widget must spanacross.
in (’in’) Widget Uses the widget passed as a parame-ter as the master. This option is usu-ally left out, in which case the wid-gets are packed in their parent.Restriction: widgets can only bepacked inside their parents or de-scendants of their parent.
padx,pady Integer values Specifies the space that must be leftout between two adjacent widgets.
ipadx, ipady Integer values Specifies the size of the optional in-ternal border left out when packing.
sticky N, S, W, E, NW,SW, NE, SE, NS,EW, NSEW
Specifies where the widget shouldbe placed in the space that it hasbeen allocated by the grid manager,if this space is greater than the wid-get size. Default is to center thewidget, but thegrid() method doesnot support the CENTER value forsticky.
The “Grid” geometry manager defines the following methods for working with wid-gets:

4.4 The “Place” Geometry Manager 44 /77
Method Effectgrid(option=value,. . . ),grid configure(option=value,. . . )
Places the widget in a grid, using thespecified options.
grid forget(), gridremove() The widget is no longer managedby the Grid manager, but is not de-stroyed.
grid info() Returns a dictionary containing thecurrent options.
grid slaves() Returns a list of widget IDs whichare slaves of the master widget.
grid location(x,y) Returns a (column, row) tuple whichrepresents the cell in the grid that isclosest to the point (x, y).
grid size() Returns the size of the grid, in theform of a (column, row) tuple, inwhich column is the index of thefirst empty column and row the in-dex of the first empty row.
It is important to note that empty rows and columns are not displayed by the gridgeometry manager, even if a minimum size is specified. Note: The grid manager cannotbe used in combination with the pack manager, as this results in an infinite negociationloop.
4.4 The “Place” Geometry Manager
The place geometry manager is the most powerful manager of all since it allows ex-act placement of the widgets inside a master widget (container). However, it is moredifficult to use and usually represents a great amount of overhead that is rarely needed.
The Place geometry manager allows placement of widgets using either exact coor-dinates (with the x and y options), or as a percentage relative to the size of the masterwindow (expressed as a float in the range [0.0, 1.0]) with the relx and rely options.The same principle holds for the widget size (using width / height and/or relwidth /relheight). The options that can be used in theplace() method are:

4.4 The “Place” Geometry Manager 45 /77
Option Values Effectanchor N, NE, E, SE,
SW, W, NW (De-fault), CENTER
Specifies which part of the widgetshould be placed at the specfied po-sition.
bordermode INSIDE,OUTSIDE
Specifies if the outside bordershould be taken into considerationwhen placing the widget.
in (’in’) Widget Places the slave in the master passedas the value for this option.
relwidth, relheight Float [0.0, 1.0] Size of the slave widget, relative tothe size of the master.
relx, rely Float [0.0, 1.0] Relative position of the slave wid-get.
width, hieght Integer values Absolute width and height of theslave widget.
x, y Integer Values Absolute position of the slave wid-get.
The “Place” geometry manager defines the following methods for working with wid-gets:
Method Effectplace(option=value,. . . )placeconfigure(option=value,. . . )
Places the widget with the specifiedoptions.
placeforget() The widget is no longer managedby the Place manager, but is not de-stroyed.
placeinfo() Returns a dictionary containing thecurrent options for the widget.
placeslaves() Returns a list of widget IDs whichare slaves of the master widget.

5Tkinter-specific Topics
5.1 Specifying colors
Tkinter defines several color names that can be easily used as color values in Pythonprograms. These color names are taken from the names that are provided by X Win-dows. The complete list is prodided in AppendixA on page57. For a more precisedescription of colors, Tkinter allows the use ofcolor strings. These strings start with anumber sign (#) and specify the precise values of the red, green and blue componentsof the color. There are three forms of color strings, depending on how many levels eachcomponent is allowed:
#RGB : 4-bit components (12 bits total), 16 levels per component.
#RRGGBB: 8-bit components (24 bits total), 256 levels pre component.
#RRRRGGGGBBBB: 16-bit components, (48 bits total), 65536 levels per component.
R, G and B are single hexadecimal digits (0..F, or 0..f).For example, “#F00”, “#FF0000” and “#FFFF00000000” all specify a pure red
color. Similarly, “#48A”, “#4080A0” and “#40008000A000” represent the same color.
5.2 Specifying Fonts
Tkinter provides several ways of defining fonts. It provides font descriptors that areeasier to work with than the very precise but too confusing X Window System fontdescriptor. X Window System font descriptors are still supported, but they will not bediscussed here since they should be rarely needed. There are two other major kinds offont descriptors that are available: in Tkinter:

5.2 Specifying Fonts 47 /77
Tuples or Strings: Font can be decribed using an n-tuple of the form:
(family, size, [option1], [option2], . . . ).
The font family is in fact its name. It is a string describing the font. For example,“arial”, “courier”, or “times new roman” are all valid font families. The size isgiven as an integer. The remaining options are facultative, and there can be asmany of them as required. The valid options are: normal, roman, bold, italic,underline and overstrike.
It is also possible to specify a font using a single string if the font name does notcontain any spaces. For example, (“arial”, 10, “italic”, “bold”) is equivalent to“arial 10 italic bold”.
Font instances: This requires to import a separate module, namedtkFont. This mod-ules defines theFont class. An instance of this class can be used anywhere astandard Tkinter font descriptor is valid. The options that are available in thefont class are listed below:
Option Possible valuesfamily String specifying the name of the
font.size Positive int for size in points, neg-
tive int for size on pixels.weight One of tkFont.BOLD or tk-
Font.NORMALslant One of tkFont.ITALIC or tk-
Font.NORMALunderline 1 or 0overstrike 1 or 0
These Font objects have two major advantages over the tuple font descriptors.First of all, it is possible to use theconfig() method of theFont class to mod-ify only one property of a font. Using tuples, it is necessary to redescribe thewhole font. This can become useful when responding to mouse movements forexample, where a particular a font could alternate between normal and bold,keeping every other property fixed.
Also, these fonts can be assigned to variables, which make it possible to assignthe same font to multiple objects. In the eventuality that the font is modifedusingconfig(), then all widgets sharing the font will reflect the change simul-taneously.
Here is a small example which demonstrates how to work with Font objects:
Listing 25: A tkFont.Font Example

5.3 Tkinter Variables 48 / 77
from Tkinter import *import tkFont
root = Tk()myfont = tkFont.Font(family="arial", size=20, weight=tkFont.BOLD) 5
b1 = Button(root, text="Button 1", font=myfont)b1.pack()b2 = Button(root, text="Button 2", font=myfont)b2.pack()myfont.config(slant=tkFont.ITALIC ) 10
root.mainloop()
This example is much more interesting when coded interactively, so that it is pos-sible to see both buttons reflect the change in the font.
5.3 Tkinter Variables
Tkinter has a specialVariable class that all other variable subclasses inherit from.Various Tkinter widgets have options that rely on theVariable class, such as the“variable” option for Radiobuttons, the “textvariable” option for the Label, etc.
5.3.1 The Need for New Variables
When the Tkinter variables are used for simple tasks, they do not behave differentlythan the regular Python variables, apart from the fact that their values have to be han-dled through method calls, such asget() andset(). The choice behind the imple-mentation of this master variable class is therefore not obvious. However, by taking acloser look at what the Variable class offers, the motivation behind it becomes muchmore apparent. Tkinter variables provide, in true Tkinter style, the possibility to adda callback which will be executed when read and write operations are performed onthe variable, and also when the value associated with the variable is undefined. Thisallows, for example, to bind aStringVar() instance to aLabel widget, which thenautomatically updates its caption when the value of the variable changes.
5.3.2 Using Tkinter Variables
Tkinter provides four descendants of theVariable class:
• StringVar
• IntVar
• DoubleVar
• BooleanVar

5.3 Tkinter Variables 49 / 77
TheVariable class provides the following methods:
Method DescriptionPrivate Methods
init (self, master=None) Constructor (an exception is raisedif the master is None, since the con-structor calls master.tk)
del (self) Destructorstr (self) Returns the name of the variable
Public Methodsset(self,value) Assignsvalue to the variabletrace variable(self, mode, callback) Assigns a callback to the variable.
Mode must be one of ”r”, ”w”, or”u”. Depending on the value ofmode, callback is executed whena value is read from the variable,written to the variable or when itsvalue becomes undefined, respec-tively. This method returns the nameof the callback, which is needed todelete it.
trace vdelete(self, mode, cbname) Deletes the callback with the speci-fied name and mode.
trace vinfo(self) Returns a list of all of the callbacknames associated with the variableand their respective modes (eachmode - callback name pair is storedas a tuple).
The Variable class does not implement the get( ) method. It is only the base classfor all variables, and is not intended for direct use. Instead, each descendant of theVariable class implements its specific get( ) method.
Notes:
• Tkinter variables have a del method which frees their associated memorywhen they are no longer referenced. Therefore, one should always keep a refer-ence to a Tkinter variable instance as a global reference or a instance variable.While this is almost always the case, it might make a difference in some veryspecific situations.
• It should be noted that variable options only take parameters which are instancesof theVariable class (or one of its subclasses). If a regular Python variable ispassed as parameter, then it will never receive the appropriate value. That is, thestore and retrieve calls will silently fail. Moreover, it must be mentioned thatthe set() method does not do type or range checking on its parameter value.

5.3 Tkinter Variables 50 / 77
It simply stores it, even if it is not of the proper type (Python is untyped, sothis is possible). Therefore, it cannot be used as is inside a try..execute block tovalidate data. The get( ) method, however, will fail if the value associated withthe variable is erroneous. However, at this point, the previous value is lost.

6Event Handling: bringing applications to
life
Every GUI does not do much without a way to handle events that are generated by theuser. In fact, most of the execution time of graphical applications is spent in the eventloop.
Tkinter provides a very simple mechanism for event handling, but a nonethelessvery precise and powerful one.
6.1 The Idea
Tkinter provides an easy and convenient way to handle events by allowing callbackfunctions to be associated with any event and any widget. In addition, very preciseevents can be directly described and associated with actions. For example, one coulddecide to only respond two two specific key press events, pressing the tabulation keyor the carriage return key. While in most other languages / GUI toolkits this wouldrequire responding to the “Key Press” event and checking if the event that occuredmatches one of the keys we are interested in, and then executing some code dependingon the result we obtained, Tkinter does it differently. It allows to bind distinct callbacksto distinct key press events, in our case one event (and one callback) for the tabulationkey and one event for the carriage return key. Thus, Tkinter events do not necessarilycorrespond to the common event types, but they can be much more specific. Needlessto say, this is a great advantage, and allows for a much cleaner implementation.

6.2 Event Types and Properties 52 /77
6.2 Event Types and Properties
While event descriptors can be very specific, Tkinter also supports more general events.Currently, the following event types are available, and can be classified into tree majorcategories:
Keyboard events: KeyPress, KeyRelease
Mouse events: ButtonPress, ButtonRelease, Motion, Enter, Leave, MouseWheel
Window events: Visibility, Unmap, Map, Expose, FocusIn, FocusOut, Circulate, Colourmap,Gravity, Reparent, Property, Destroy, Activate, Deactivate
Each callback that is bound to an event reveices and an instance of the Event classas parameter when it is invoked. The Event class defines the following properties:
Property Descriptionchar pressed character (as a char)(KeyPress, KeyRelease
only)delta delta of wheel movement (MouseWheel)focus boolean which indicates whether the window has the
focus (Enter, Leave only)height height of the exposed window (Configure, Expose
only)keycode keycode of the pressed key (KeyPress, KeyRelease
only)keysym keysym of the the event as a string (KeyPress, KeyRe-
lease only)keysymnum keysym of the event as a number (KeyPress, KeyRe-
lease only)num number of the mouse button pressed (1=LEFT,
2=CENTER, 3=RIGHT, etc.) (ButtonPress, Button-Release only)
serial serial number of the eventstate state of the event as a number (ButtonPress, Button-
Release, Enter, KeyPress, KeyRelease, Leave, Motiononly) or string indicating the source of the Visibilityevent (one of “VisibilityUnobscured”, “VisibilityPar-tiallyObscured”, and “VisibilityFullyObscured”
time time at which the event occurred. Under MicrosoftWindows, this is the value returned by the GetTick-Count( ) API function.
Continued on next page

6.3 Event Descriptors 53 /77
Continued from previous pageProperty Descriptiontype type of the event as a numberx x-position of the mouse relative to the widgetx root x-position of the mouse on the screen relative to the
root (ButtonPress, ButtonRelease, KeyPress, KeyRe-lease, Motion only)
y y-position of the mouse relative to the widgety root y-position of the mouse on the screen relative to the
root (ButtonPress, ButtonRelease, KeyPress, KeyRe-lease, Motion only)
widget widget for which the event occurredwidth width of the exposed window (Configure, Expose
only)
6.3 Event Descriptors
In Tkinter, all event handling requires a string description of the event to be bound.Each of these strings can be divided into three sections, and is usually enclosed inangular brackets. The general format is as follows:
<Modifier - Type - Qualifier>
Not all three sections are required in order for an event descriptor string to be valid.In fact, event descriptors only rarely include the three sections. The meaning and thepossible values for each section will de discussed next.
1. Type: The type is often the only required section in an event descriptor. It spec-ifies the kind or class of the event. The values that it can take are as follows:

6.3 Event Descriptors 54 /77
Value Triggered when . . .Key a key is pressed while the widget has the focusKeyRelease a key is pressed while the widget has the focusButton, ButtonPress a mouse button is pressed on the widgetButtonRelease a mouse button is released on the widgetMotion the mouse is moved over the widgetEnter the mouse enters a widgetLeave the mouse leaves a widgetFocusIn a widget gets the focusFocusOut a widget loses the focusExpose a widget or part of a widget becomes visibleVisibility the visibility of a widget or part of a widget
changes (the state value is one of “VisibilityUnob-scured”, “VisibilityPartiallyObscured”, and “Visibili-tyFullyObscured”
Destroy a widget is destroyedMouseWheel the mouse wheel is activated over a widget
Other event types include Activate, Circulate, Colormap, Configure, Deactivate,Gravity, Map, Reparant and Unmap.
2. Modifier : The modifier section is optional. If present, it is used to make theevent description more precise by requiring that certain keys or mouse buttonsshould be down while for the event to occur. It can also be used to specify thata particular event has to occur multiple times before its associated callback isexecuted. There can be more than one modifier specified for an event descriptor,provided that they are seperated by spaces or dashes. Whenever modifiers arepresent, events mustat leastmatch all of the specified modifiers in order fortheir associated callbacks to be executed. That is, if extra modifiers are present,the callback will still be executed. The values that it can take are as follows:

6.3 Event Descriptors 55 /77
Value DescriptionAny Event can be triggered in any modeAlt Alt key must be down for event to be triggered.Lock Caps Lock must be enabled for event to fire.Control Control key must be down for event to be triggered.Meta, M Meta key must be down for event to be triggered.Mod1, M1 Mod1 key should be help down for event to be trig-
gered.Mod2, M2 Mod2 key should be help down for event to be trig-
gered....Mod5, M5 Mod5 key should be help down for event to be trig-
gered.Shift Shift key must be down for event to be triggered.Button1, B1 Mouse button 1 should be help down for event to be
triggered.Button2, B2 Mouse button 2 should be help down for event to be
triggered....Button5, B5 Mouse button 5 should be help down for event to be
triggered.Double The event should occur twice (in a short time period)
before its callback is executed.Triple The event should occur three times (in a short time pe-
riod) before its callback is executed.
3. Qualifier The qualifier can be any integer from 1 to 5, in which case it specifiesa mouse button. Mouse buttons are numbered from 1 to 5 starting from the leftbutton (left = 1, center = 2, right = 3, etc.).It can also be a keysym1. Keysyms arenames attributed to specific keys, such as “backslash” or “backspace”.Whenevera qualifier is specified, the type is not strictly required. It is omitted, then thedefault type will be KeyPress for keysym qualifiers and ButtonPress for mousebutton qualifiers.
The event descriptor “< keysym>” is equivalent to “keysym” (without the angularbrackets), provided thatkeysymis not a space or an angular bracket.
Some example of common event descriptors are:
1The current version of Tk defines more than 900 keysyms

6.4 Binding Callbacks to Events 56 /77
<Any-Enter> Triggered when the mouse enters a widget<Button-1>, <1> Triggered when a left click is done in a widget<B1-Motion> Triggered when the mouse is dragged over
the widget with the left mouse button beingheld down.
<Double-Button-1> Triggered when a widget is double-clickedwith the left mouse button
<Key-A>, <KeyPress-A>, <A>, A Triggered when the key producing the letterA (caps) is pressed.
6.4 Binding Callbacks to Events
For the application to be able to respond to events, methods or functions have to be as-sociated with events, so that they are called whenever the events occur. These methodsand functions are referred to ascallbacks. Binding is the process by which a callbackis associated to an event by means of an event descriptor.
There are 3 methods that can be used to bind events to widgets in Tkinter:
1. The bind() method, which can be called on any widget, and in particular aToplevel widget (Tkinter makes a difference between Toplevel widgets and otherwidgets)
2. Thebind class() method, which binds events to a particular widget class. Thisis used internally in order to provide standard bindings for Tkinter widgets. Thisfunction should usually be avoided, as it can often be replaced by implementinga descendant of the particular widget, and by binding it to the desired callback.
3. Thebind all() method, which binds events for the whole application.
Thebind() method is declared as follows:
bind(self, sequence=None, func=None, add=None)
wheresequence is an event descriptor (as a string),func is the name of the functionto be associated with the event (ie the callback), andadd is a boolean which specifiesthatfunc should be called in addition to the current callback for this event instead ofreplacing it. This method returns a function ID which can be used withunbind toremove a particular binding. Theunbind method is defined as follows:
unbind(self, sequence, funcid=None)
Similarly, thebind class() method is defined as follows:
bind class(self, className, sequence=None, func=None, add=None)
and has its associatedunbind class method which is defined as follows:
undind class(self, className, sequence)

6.5 Unit testing and Graphical User Interfaces: Simulating Events 57 /77
Finally, thebind all() method is defined as follows:
bind(self, sequence=None, func=None, add=None)
while theunbind all() method is defined as follows:
unbind class(self, sequence=None)
The callbacks will receive an Event object as parameter, so they must include thisobject in their parameter list. The Event object should be the first parameter for call-backs which are not part of a class, and the second parameter for class methods (sincethe class reference, self, is always the first parameter).
When an event occurs in Tkinter, the event callbacks are called according to theirlevel of specificity. The most specific event handler is always used, the others are notcalled (eg when Return is pressed, a callback associated with the<Return> event willbe executed and one associated with the<KeyPress> event will not be called in thecase where both have been bound to the same widget). Moreover, the callbacks for the4 different levels of Tkinter’s event handling will be called in sequence, starting withthe widget level, then the Toplevel, the class and then the Application.
If, at a given level, the callback handling must stop, the callback should return thestring “break”. This will prevent any other callbacks from being executed for a givenevent. This is especially useful for overriding default behaviour of certain keys (eg.backspace and tab) which occur at the application level.
6.5 Unit testing and Graphical User Interfaces: Simu-lating Events
While unit testing is generally simple in usual, console applications, it may be moredifficult to apply this concept in Tkinter applications. How to simulate the effect of theuser clicking buttons and interacting with the widgets? Let’s examine a simple casefirst. Assume that the application to be tested only consists of Buttons and one Entrywidget. Also, suppose that each button is associated to adistinct callback, specifiedusing the “command” option. In this case, it easy to simulate a click on a Button, sincea call tobtn.invoke() would do the trick.
In the case where event binding has taken place, all is not lost. Generating “fake”events in Tkinter is relatively easy. The Event class acts as some kind of record (orstruct, for those with a C background) which holds all of its information within itsfields. So, by creating a new instance of the event class and specifying the values ofthe required fields, it is possible to invoke the methods with a reference to this eventinstance as parameter, thus simulating Tkinter’s behaviour.
There is still one minor problem: usually, Tkinter programs are implemented asclasses, and initialization is done in theinit method. So it isnot sufficient toimport the module for the Tkinter application we which to test, we must also have aninstance of its primary class. This is in fact very easy to achieve. First, observe that ifa Tkinter does not call mainloop() at some point, the root window that it creates willnot show up. So, by including all calls to root.mainloop() (and usually root = Tk() and

6.5 Unit testing and Graphical User Interfaces: Simulating Events 58 /77
app = MyApp(root) too) inside a conditional of the formif name == ’ main ’,we are guaranteed that we can safely create an instance of the MyApp class withouthaving to worry about it waiting for events indefinitely.
Here is an example from “calctest.py” illustrating this:
Listing 26: Unit testing for Tkinter applications
from Tkinter import *import calcimport unittest
calcinst= calc.App(Tk()) 5
classDigitTest(unittest.TestCase):def testDigBtns(self):
"""C + num ==> num for all num"""self.DigitBtns = calcinst.btnDigits 10
for btn in self.DigitBtns:calcinst.btnCClick()# Here, invoke() does not work since# the callback is bound to an event, and was not# specified using the “command” option 15
e = Event()e.widget = btncalc.btnDigitClick(e)self.assertEqual(calc.display.get(), btn.cget("text"))
20
if name == ’__main__’:unittest.main()

ATkinter color names
Color Name Red Green Bluealice blue 240 248 255AliceBlue 240 248 255antique white 250 235 215AntiqueWhite 250 235 215AntiqueWhite1 255 239 219AntiqueWhite2 238 223 204AntiqueWhite3 205 192 176AntiqueWhite4 139 131 120aquamarine 127 255 212aquamarine1 127 255 212aquamarine2 118 238 198aquamarine3 102 205 170aquamarine4 69 139 116azure 240 255 255azure1 240 255 255azure2 224 238 238azure3 193 205 205azure4 131 139 139beige 245 245 220bisque 255 228 196bisque1 255 228 196
Continued on next page...

60 /77
Tkinter color names - ContinuedColor Name Red Green Blue
bisque2 238 213 183bisque3 205 183 158bisque4 139 125 107black 0 0 0blanched almond 255 235 205BlanchedAlmond 255 235 205blue 0 0 255blue violet 138 43 226blue1 0 0 255blue2 0 0 238blue3 0 0 205blue4 0 0 139BlueViolet 138 43 226brown 165 42 42brown1 255 64 64brown2 238 59 59brown3 205 51 51brown4 139 35 35burlywood 222 184 135burlywood1 255 211 155burlywood2 238 197 145burlywood3 205 170 125burlywood4 139 115 85cadet blue 95 158 160CadetBlue 95 158 160CadetBlue1 152 245 255CadetBlue2 142 229 238CadetBlue3 122 197 205CadetBlue4 83 134 139chartreuse 127 255 0chartreuse1 127 255 0chartreuse2 118 238 0chartreuse3 102 205 0chartreuse4 69 139 0chocolate 210 105 30chocolate1 255 127 36chocolate2 238 118 33
Continued on next page...

61 /77
Tkinter color names - ContinuedColor Name Red Green Blue
chocolate3 205 102 29chocolate4 139 69 19coral 255 127 80coral1 255 114 86coral2 238 106 80coral3 205 91 69coral4 139 62 47cornflower blue 100 149 237CornflowerBlue 100 149 237cornsilk 255 248 220cornsilk1 255 248 220cornsilk2 238 232 205cornsilk3 205 200 177cornsilk4 139 136 120cyan 0 255 255cyan1 0 255 255cyan2 0 238 238cyan3 0 205 205cyan4 0 139 139dark blue 0 0 139dark cyan 0 139 139dark goldenrod 184 134 11dark gray 169 169 169dark green 0 100 0dark grey 169 169 169dark khaki 189 183 107dark magenta 139 0 139dark olive green 85 107 47dark orange 255 140 0dark orchid 153 50 204dark red 139 0 0dark salmon 233 150 122dark sea green 143 188 143dark slate blue 72 61 139dark slate gray 47 79 79dark slate grey 47 79 79dark turquoise 0 206 209
Continued on next page...

62 /77
Tkinter color names - ContinuedColor Name Red Green Blue
dark violet 148 0 211DarkBlue 0 0 139DarkCyan 0 139 139DarkGoldenrod 184 134 11DarkGoldenrod1 255 185 15DarkGoldenrod2 238 173 14DarkGoldenrod3 205 149 12DarkGoldenrod4 139 101 8DarkGray 169 169 169DarkGreen 0 100 0DarkGrey 169 169 169DarkKhaki 189 183 107DarkMagenta 139 0 139DarkOliveGreen 85 107 47DarkOliveGreen1 202 255 112DarkOliveGreen2 188 238 104DarkOliveGreen3 162 205 90DarkOliveGreen4 110 139 61DarkOrange 255 140 0DarkOrange1 255 127 0DarkOrange2 238 118 0DarkOrange3 205 102 0DarkOrange4 139 69 0DarkOrchid 153 50 204DarkOrchid1 191 62 255DarkOrchid2 178 58 238DarkOrchid3 154 50 205DarkOrchid4 104 34 139DarkRed 139 0 0DarkSalmon 233 150 122DarkSeaGreen 143 188 143DarkSeaGreen1 193 255 193DarkSeaGreen2 180 238 180DarkSeaGreen3 155 205 155DarkSeaGreen4 105 139 105DarkSlateBlue 72 61 139DarkSlateGray 47 79 79
Continued on next page...

63 /77
Tkinter color names - ContinuedColor Name Red Green Blue
DarkSlateGray1 151 255 255DarkSlateGray2 141 238 238DarkSlateGray3 121 205 205DarkSlateGray4 82 139 139DarkSlateGrey 47 79 79DarkTurquoise 0 206 209DarkViolet 148 0 211deep pink 255 20 147deep sky blue 0 191 255DeepPink 255 20 147DeepPink1 255 20 147DeepPink2 238 18 137DeepPink3 205 16 118DeepPink4 139 10 80DeepSkyBlue 0 191 255DeepSkyBlue1 0 191 255DeepSkyBlue2 0 178 238DeepSkyBlue3 0 154 205DeepSkyBlue4 0 104 139dim gray 105 105 105dim grey 105 105 105DimGray 105 105 105DimGrey 105 105 105dodger blue 30 144 255DodgerBlue 30 144 255DodgerBlue1 30 144 255DodgerBlue2 28 134 238DodgerBlue3 24 116 205DodgerBlue4 16 78 139firebrick 178 34 34firebrick1 255 48 48firebrick2 238 44 44firebrick3 205 38 38firebrick4 139 26 26floral white 255 250 240FloralWhite 255 250 240forest green 34 139 34
Continued on next page...

64 /77
Tkinter color names - ContinuedColor Name Red Green BlueForestGreen 34 139 34gainsboro 220 220 220ghost white 248 248 255GhostWhite 248 248 255gold 255 215 0gold1 255 215 0gold2 238 201 0gold3 205 173 0gold4 139 117 0goldenrod 218 165 32goldenrod1 255 193 37goldenrod2 238 180 34goldenrod3 205 155 29goldenrod4 139 105 20gray 190 190 190gray0 0 0 0gray1 3 3 3gray10 26 26 26gray100 255 255 255gray11 28 28 28gray12 31 31 31gray13 33 33 33gray14 36 36 36gray15 38 38 38gray16 41 41 41gray17 43 43 43gray18 46 46 46gray19 48 48 48gray2 5 5 5gray20 51 51 51gray21 54 54 54gray22 56 56 56gray23 59 59 59gray24 61 61 61gray25 64 64 64gray26 66 66 66gray27 69 69 69
Continued on next page...

65 /77
Tkinter color names - ContinuedColor Name Red Green Bluegray28 71 71 71gray29 74 74 74gray3 8 8 8gray30 77 77 77gray31 79 79 79gray32 82 82 82gray33 84 84 84gray34 87 87 87gray35 89 89 89gray36 92 92 92gray37 94 94 94gray38 97 97 97gray39 99 99 99gray4 10 10 10gray40 102 102 102gray41 105 105 105gray42 107 107 107gray43 110 110 110gray44 112 112 112gray45 115 115 115gray46 117 117 117gray47 120 120 120gray48 122 122 122gray49 125 125 125gray5 13 13 13gray50 127 127 127gray51 130 130 130gray52 133 133 133gray53 135 135 135gray54 138 138 138gray55 140 140 140gray56 143 143 143gray57 145 145 145gray58 148 148 148gray59 150 150 150gray6 15 15 15gray60 153 153 153
Continued on next page...

66 /77
Tkinter color names - ContinuedColor Name Red Green Bluegray61 156 156 156gray62 158 158 158gray63 161 161 161gray64 163 163 163gray65 166 166 166gray66 168 168 168gray67 171 171 171gray68 173 173 173gray69 176 176 176gray7 18 18 18gray70 179 179 179gray71 181 181 181gray72 184 184 184gray73 186 186 186gray74 189 189 189gray75 191 191 191gray76 194 194 194gray77 196 196 196gray78 199 199 199gray79 201 201 201gray8 20 20 20gray80 204 204 204gray81 207 207 207gray82 209 209 209gray83 212 212 212gray84 214 214 214gray85 217 217 217gray86 219 219 219gray87 222 222 222gray88 224 224 224gray89 227 227 227gray9 23 23 23gray90 229 229 229gray91 232 232 232gray92 235 235 235gray93 237 237 237gray94 240 240 240
Continued on next page...

67 /77
Tkinter color names - ContinuedColor Name Red Green Bluegray95 242 242 242gray96 245 245 245gray97 247 247 247gray98 250 250 250gray99 252 252 252green 0 255 0green yellow 173 255 47green1 0 255 0green2 0 238 0green3 0 205 0green4 0 139 0GreenYellow 173 255 47grey 190 190 190grey0 0 0 0grey1 3 3 3grey10 26 26 26grey100 255 255 255grey11 28 28 28grey12 31 31 31grey13 33 33 33grey14 36 36 36grey15 38 38 38grey16 41 41 41grey17 43 43 43grey18 46 46 46grey19 48 48 48grey2 5 5 5grey20 51 51 51grey21 54 54 54grey22 56 56 56grey23 59 59 59grey24 61 61 61grey25 64 64 64grey26 66 66 66grey27 69 69 69grey28 71 71 71grey29 74 74 74
Continued on next page...

68 /77
Tkinter color names - ContinuedColor Name Red Green Bluegrey3 8 8 8grey30 77 77 77grey31 79 79 79grey32 82 82 82grey33 84 84 84grey34 87 87 87grey35 89 89 89grey36 92 92 92grey37 94 94 94grey38 97 97 97grey39 99 99 99grey4 10 10 10grey40 102 102 102grey41 105 105 105grey42 107 107 107grey43 110 110 110grey44 112 112 112grey45 115 115 115grey46 117 117 117grey47 120 120 120grey48 122 122 122grey49 125 125 125grey5 13 13 13grey50 127 127 127grey51 130 130 130grey52 133 133 133grey53 135 135 135grey54 138 138 138grey55 140 140 140grey56 143 143 143grey57 145 145 145grey58 148 148 148grey59 150 150 150grey6 15 15 15grey60 153 153 153grey61 156 156 156grey62 158 158 158
Continued on next page...

69 /77
Tkinter color names - ContinuedColor Name Red Green Bluegrey63 161 161 161grey64 163 163 163grey65 166 166 166grey66 168 168 168grey67 171 171 171grey68 173 173 173grey69 176 176 176grey7 18 18 18grey70 179 179 179grey71 181 181 181grey72 184 184 184grey73 186 186 186grey74 189 189 189grey75 191 191 191grey76 194 194 194grey77 196 196 196grey78 199 199 199grey79 201 201 201grey8 20 20 20grey80 204 204 204grey81 207 207 207grey82 209 209 209grey83 212 212 212grey84 214 214 214grey85 217 217 217grey86 219 219 219grey87 222 222 222grey88 224 224 224grey89 227 227 227grey9 23 23 23grey90 229 229 229grey91 232 232 232grey92 235 235 235grey93 237 237 237grey94 240 240 240grey95 242 242 242grey96 245 245 245
Continued on next page...

70 /77
Tkinter color names - ContinuedColor Name Red Green Blue
grey97 247 247 247grey98 250 250 250grey99 252 252 252honeydew 240 255 240honeydew1 240 255 240honeydew2 224 238 224honeydew3 193 205 193honeydew4 131 139 131hot pink 255 105 180HotPink 255 105 180HotPink1 255 110 180HotPink2 238 106 167HotPink3 205 96 144HotPink4 139 58 98indian red 205 92 92IndianRed 205 92 92IndianRed1 255 106 106IndianRed2 238 99 99IndianRed3 205 85 85IndianRed4 139 58 58ivory 255 255 240ivory1 255 255 240ivory2 238 238 224ivory3 205 205 193ivory4 139 139 131khaki 240 230 140khaki1 255 246 143khaki2 238 230 133khaki3 205 198 115khaki4 139 134 78lavender 230 230 250lavender blush 255 240 245LavenderBlush 255 240 245LavenderBlush1 255 240 245LavenderBlush2 238 224 229LavenderBlush3 205 193 197LavenderBlush4 139 131 134
Continued on next page...

71 /77
Tkinter color names - ContinuedColor Name Red Green Blue
lawn green 124 252 0LawnGreen 124 252 0lemon chiffon 255 250 205LemonChiffon 255 250 205LemonChiffon1 255 250 205LemonChiffon2 238 233 191LemonChiffon3 205 201 165LemonChiffon4 139 137 112light blue 173 216 230light coral 240 128 128light cyan 224 255 255light goldenrod 238 221 130light goldenrod yellow 250 250 210light gray 211 211 211light green 144 238 144light grey 211 211 211light pink 255 182 193light salmon 255 160 122light sea green 32 178 170light sky blue 135 206 250light slate blue 132 112 255light slate gray 119 136 153light slate grey 119 136 153light steel blue 176 196 222light yellow 255 255 224LightBlue 173 216 230LightBlue1 191 239 255LightBlue2 178 223 238LightBlue3 154 192 205LightBlue4 104 131 139LightCoral 240 128 128LightCyan 224 255 255LightCyan1 224 255 255LightCyan2 209 238 238LightCyan3 180 205 205LightCyan4 122 139 139LightGoldenrod 238 221 130
Continued on next page...

72 /77
Tkinter color names - ContinuedColor Name Red Green Blue
LightGoldenrod1 255 236 139LightGoldenrod2 238 220 130LightGoldenrod3 205 190 112LightGoldenrod4 139 129 76LightGoldenrodYellow 250 250 210LightGray 211 211 211LightGreen 144 238 144LightGrey 211 211 211LightPink 255 182 193LightPink1 255 174 185LightPink2 238 162 173LightPink3 205 140 149LightPink4 139 95 101LightSalmon 255 160 122LightSalmon1 255 160 122LightSalmon2 238 149 114LightSalmon3 205 129 98LightSalmon4 139 87 66LightSeaGreen 32 178 170LightSkyBlue 135 206 250LightSkyBlue1 176 226 255LightSkyBlue2 164 211 238LightSkyBlue3 141 182 205LightSkyBlue4 96 123 139LightSlateBlue 132 112 255LightSlateGray 119 136 153LightSlateGrey 119 136 153LightSteelBlue 176 196 222LightSteelBlue1 202 225 255LightSteelBlue2 188 210 238LightSteelBlue3 162 181 205LightSteelBlue4 110 123 139LightYellow 255 255 224LightYellow1 255 255 224LightYellow2 238 238 209LightYellow3 205 205 180LightYellow4 139 139 122
Continued on next page...

73 /77
Tkinter color names - ContinuedColor Name Red Green Blue
lime green 50 205 50LimeGreen 50 205 50linen 250 240 230magenta 255 0 255magenta1 255 0 255magenta2 238 0 238magenta3 205 0 205magenta4 139 0 139maroon 176 48 96maroon1 255 52 179maroon2 238 48 167maroon3 205 41 144maroon4 139 28 98medium aquamarine 102 205 170medium blue 0 0 205medium orchid 186 85 211medium purple 147 112 219medium sea green 60 179 113medium slate blue 123 104 238medium spring green 0 250 154medium turquoise 72 209 204medium violet red 199 21 133MediumAquamarine 102 205 170MediumBlue 0 0 205MediumOrchid 186 85 211MediumOrchid1 224 102 255MediumOrchid2 209 95 238MediumOrchid3 180 82 205MediumOrchid4 122 55 139MediumPurple 147 112 219MediumPurple1 171 130 255MediumPurple2 159 121 238MediumPurple3 137 104 205MediumPurple4 93 71 139MediumSeaGreen 60 179 113MediumSlateBlue 123 104 238MediumSpringGreen 0 250 154
Continued on next page...

74 /77
Tkinter color names - ContinuedColor Name Red Green Blue
MediumTurquoise 72 209 204MediumVioletRed 199 21 133midnight blue 25 25 112MidnightBlue 25 25 112mint cream 245 255 250MintCream 245 255 250misty rose 255 228 225MistyRose 255 228 225MistyRose1 255 228 225MistyRose2 238 213 210MistyRose3 205 183 181MistyRose4 139 125 123moccasin 255 228 181navajo white 255 222 173NavajoWhite 255 222 173NavajoWhite1 255 222 173NavajoWhite2 238 207 161NavajoWhite3 205 179 139NavajoWhite4 139 121 94navy 0 0 128navy blue 0 0 128NavyBlue 0 0 128old lace 253 245 230OldLace 253 245 230olive drab 107 142 35OliveDrab 107 142 35OliveDrab1 192 255 62OliveDrab2 179 238 58OliveDrab3 154 205 50OliveDrab4 105 139 34orange 255 165 0orange red 255 69 0orange1 255 165 0orange2 238 154 0orange3 205 133 0orange4 139 90 0OrangeRed 255 69 0
Continued on next page...

75 /77
Tkinter color names - ContinuedColor Name Red Green Blue
OrangeRed1 255 69 0OrangeRed2 238 64 0OrangeRed3 205 55 0OrangeRed4 139 37 0orchid 218 112 214orchid1 255 131 250orchid2 238 122 233orchid3 205 105 201orchid4 139 71 137pale goldenrod 238 232 170pale green 152 251 152pale turquoise 175 238 238pale violet red 219 112 147PaleGoldenrod 238 232 170PaleGreen 152 251 152PaleGreen1 154 255 154PaleGreen2 144 238 144PaleGreen3 124 205 124PaleGreen4 84 139 84PaleTurquoise 175 238 238PaleTurquoise1 187 255 255PaleTurquoise2 174 238 238PaleTurquoise3 150 205 205PaleTurquoise4 102 139 139PaleVioletRed 219 112 147PaleVioletRed1 255 130 171PaleVioletRed2 238 121 159PaleVioletRed3 205 104 137PaleVioletRed4 139 71 93papaya whip 255 239 213PapayaWhip 255 239 213peach puff 255 218 185PeachPuff 255 218 185PeachPuff1 255 218 185PeachPuff2 238 203 173PeachPuff3 205 175 149PeachPuff4 139 119 101
Continued on next page...

76 /77
Tkinter color names - ContinuedColor Name Red Green Blueperu 205 133 63pink 255 192 203pink1 255 181 197pink2 238 169 184pink3 205 145 158pink4 139 99 108plum 221 160 221plum1 255 187 255plum2 238 174 238plum3 205 150 205plum4 139 102 139powder blue 176 224 230PowderBlue 176 224 230purple 160 32 240purple1 155 48 255purple2 145 44 238purple3 125 38 205purple4 85 26 139red 255 0 0red1 255 0 0red2 238 0 0red3 205 0 0red4 139 0 0rosy brown 188 143 143RosyBrown 188 143 143RosyBrown1 255 193 193RosyBrown2 238 180 180RosyBrown3 205 155 155RosyBrown4 139 105 105royal blue 65 105 225RoyalBlue 65 105 225RoyalBlue1 72 118 255RoyalBlue2 67 110 238RoyalBlue3 58 95 205RoyalBlue4 39 64 139saddle brown 139 69 19SaddleBrown 139 69 19
Continued on next page...

77 /77
Tkinter color names - ContinuedColor Name Red Green Bluesalmon 250 128 114salmon1 255 140 105salmon2 238 130 98salmon3 205 112 84salmon4 139 76 57sandy brown 244 164 96SandyBrown 244 164 96sea green 46 139 87SeaGreen 46 139 87SeaGreen1 84 255 159SeaGreen2 78 238 148SeaGreen3 67 205 128SeaGreen4 46 139 87seashell 255 245 238seashell1 255 245 238seashell2 238 229 222seashell3 205 197 191seashell4 139 134 130sienna 160 82 45sienna1 255 130 71sienna2 238 121 66sienna3 205 104 57sienna4 139 71 38sky blue 135 206 235SkyBlue 135 206 235SkyBlue1 135 206 255SkyBlue2 126 192 238SkyBlue3 108 166 205SkyBlue4 74 112 139slate blue 106 90 205slate gray 112 128 144slate grey 112 128 144SlateBlue 106 90 205SlateBlue1 131 111 255SlateBlue2 122 103 238SlateBlue3 105 89 205SlateBlue4 71 60 139
Continued on next page...

78 /77
Tkinter color names - ContinuedColor Name Red Green BlueSlateGray 112 128 144SlateGray1 198 226 255SlateGray2 185 211 238SlateGray3 159 182 205SlateGray4 108 123 139SlateGrey 112 128 144snow 255 250 250snow1 255 250 250snow2 238 233 233snow3 205 201 201snow4 139 137 137spring green 0 255 127SpringGreen 0 255 127SpringGreen1 0 255 127SpringGreen2 0 238 118SpringGreen3 0 205 102SpringGreen4 0 139 69steel blue 70 130 180SteelBlue 70 130 180SteelBlue1 99 184 255SteelBlue2 92 172 238SteelBlue3 79 148 205SteelBlue4 54 100 139tan 210 180 140tan1 255 165 79tan2 238 154 73tan3 205 133 63tan4 139 90 43thistle 216 191 216thistle1 255 225 255thistle2 238 210 238thistle3 205 181 205thistle4 139 123 139tomato 255 99 71tomato1 255 99 71tomato2 238 92 66tomato3 205 79 57
Continued on next page...

79 /77
Tkinter color names - ContinuedColor Name Red Green Bluetomato4 139 54 38turquoise 64 224 208turquoise1 0 245 255turquoise2 0 229 238turquoise3 0 197 205turquoise4 0 134 139violet 238 130 238violet red 208 32 144VioletRed 208 32 144VioletRed1 255 62 150VioletRed2 238 58 140VioletRed3 205 50 120VioletRed4 139 34 82wheat 245 222 179wheat1 255 231 186wheat2 238 216 174wheat3 205 186 150wheat4 139 126 102white 255 255 255white smoke 245 245 245WhiteSmoke 245 245 245yellow 255 255 0yellow green 154 205 50yellow1 255 255 0yellow2 238 238 0yellow3 205 205 0yellow4 139 139 0YellowGreen 154 205 50