92000319_a
TRANSCRIPT
7/29/2019 92000319_A
http://slidepdf.com/reader/full/92000319a 1/22
92000319A
RealPort
on
SCO UnixWare
Setup Guide

7/29/2019 92000319_A
http://slidepdf.com/reader/full/92000319a 2/22
Digi International Inc. 2002. All Rights Reserved
The Digi logo is a trademark of Digi International Inc. All other brand and product names are thetrademarks of their respective holders.
Information in this document is subject to change without notice and does not represent acommitment on the part of Digi International.
Digi provides this document “as is,” without warranty of any kind, either expressed or implied,including, but not limited to, the implied warranties of fitness or merchantability for a particular
purpose. Digi may make improvements and/or changes in this manual or in the product(s) and/or the program(s) described in this manual at any time.
This product could include technical inaccuracies or typographical errors. Changes are periodicallymade to the information herein; these changes may be incorporated in new editions of the
publication.
7/29/2019 92000319_A
http://slidepdf.com/reader/full/92000319a 3/22
iii
Contents
Chapter 1 About This Guide
Purpose ...........................................................................................................................................1-2Audience.........................................................................................................................................1-2Conventions ....................................................................................................................................1-2
Chapter 2 Planning and RequirementsRequirements and Considerations ..................................................................................................2-2Information to Gather .....................................................................................................................2-2Configuring a Digi One RealPort or PortServer for RealPort ........................................................2-2Configuring EtherLite for RealPort ................................................................................................2-3Related Documentation ..................................................................................................................2-4
Chapter 3 RealPort SetupMaster Setup Process......................................................................................................................3-2
Installing the Driver: CD ................................................................................................................3-2Installing the Driver: Downloaded .................................................................................................3-2Uninstalling RealPort......................................................................................................................3-3Configuring a Device for a Terminal..............................................................................................3-3Configuring a Device for a Modem................................................................................................3-4Configuring a Device for a Printer .................................................................................................3-4Setting TTY Options.......................................................................................................................3-6Transparent Printer Setup ...............................................................................................................3-9

7/29/2019 92000319_A
http://slidepdf.com/reader/full/92000319a 4/22
iv

7/29/2019 92000319_A
http://slidepdf.com/reader/full/92000319a 5/22
About This Guide 1-1
chapter 1 About This Guide
In This Chapter
• Purpose . . . . . . . . . . . . . . . . . . . . . . . . . . . . . . . . . . . . . . . . . . . . . . . . . . . . . . . . 1-2• Audience . . . . . . . . . . . . . . . . . . . . . . . . . . . . . . . . . . . . . . . . . . . . . . . . . . . . . . . 1-2
• Conventions. . . . . . . . . . . . . . . . . . . . . . . . . . . . . . . . . . . . . . . . . . . . . . . . . . . . . 1-2
7/29/2019 92000319_A
http://slidepdf.com/reader/full/92000319a 6/22
1-2 Purpose
Purpose
Use this guide for the following:
• An introduction to RealPort, how to install, configure and use RealPort and, how to troubleshootshould you encounter a problem
• Configuration examples
• Administration procedures
Audience
This manual is intended for the person responsible for configuring and administering RealPort. This person should have experience configuring network devices and be familiar with networkingconcepts.
Conventions
Following are the conventions used in this document:
Special Fonts
A special font is used for any input you need to enter. For example,
set config
Square Brackets
Optional parameters are displayed within square brackets. For example,
set config [dhcp=on]
Note: The square brackets themselves are not actually part of the command, and should not be entered.
Italics
Variables are displayed in italics. For example,
set config ip=ip-address
Note: Substitute an appropriate IP address for ip-address in the above command.
Vertical Bar
A vertical bar character (|) is used to denote a choice (logical "or"). For example,set flow=on|off
Note: The above command would be entered as either:set flow=on or set flow=off
7/29/2019 92000319_A
http://slidepdf.com/reader/full/92000319a 7/22
Planning and Requirements 2-1
chapter 2 Planning and Requirements
In This Chapter
• Requirements and Considerations. . . . . . . . . . . . . . . . . . . . . . . . . . . . . . . . . . . . 2-2• Information to Gather . . . . . . . . . . . . . . . . . . . . . . . . . . . . . . . . . . . . . . . . . . . . . 2-2
• Configuring a Digi One IA RealPort or PortServer for RealPort . . . . . . . . . . . . 2-2
• Configuring EtherLite for RealPort . . . . . . . . . . . . . . . . . . . . . . . . . . . . . . . . . . 2-3
• Related Documentation. . . . . . . . . . . . . . . . . . . . . . . . . . . . . . . . . . . . . . . . . . . . 2-4
7/29/2019 92000319_A
http://slidepdf.com/reader/full/92000319a 8/22
2-2 Requirements and Considerations
Requirements and Considerations
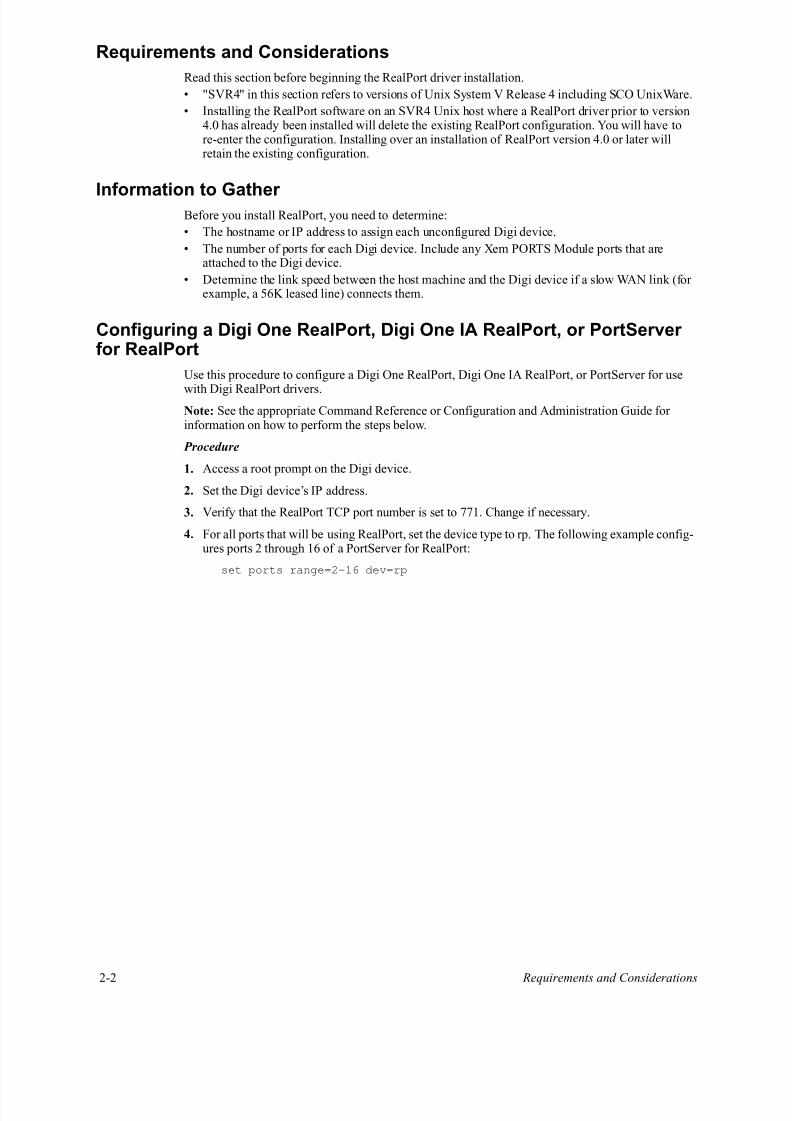
Read this section before beginning the RealPort driver installation.
• "SVR4" in this section refers to versions of Unix System V Release 4 including SCO UnixWare.
• Installing the RealPort software on an SVR4 Unix host where a RealPort driver prior to version4.0 has already been installed will delete the existing RealPort configuration. You will have tore-enter the configuration. Installing over an installation of RealPort version 4.0 or later willretain the existing configuration.
Information to Gather Before you install RealPort, you need to determine:
• The hostname or IP address to assign each unconfigured Digi device.
• The number of ports for each Digi device. Include any Xem PORTS Module ports that areattached to the Digi device.
• Determine the link speed between the host machine and the Digi device if a slow WAN link (for example, a 56K leased line) connects them.
Configuring a Digi One RealPort, Digi One IA RealPort, or PortServer for RealPort
Use this procedure to configure a Digi One RealPort, Digi One IA RealPort, or PortServer for use
with Digi RealPort drivers.Note: See the appropriate Command Reference or Configuration and Administration Guide for information on how to perform the steps below.
Procedure
1. Access a root prompt on the Digi device.
2. Set the Digi device’s IP address.
3. Verify that the RealPort TCP port number is set to 771. Change if necessary.
4. For all ports that will be using RealPort, set the device type to rp. The following example config-ures ports 2 through 16 of a PortServer for RealPort:
set ports range=2-16 dev=rp

7/29/2019 92000319_A
http://slidepdf.com/reader/full/92000319a 9/22
Planning and Requirements 2-3
Configuring EtherLite for RealPort
Use this procedure to install and configure an EtherLite Terminal Server for use with Digi RealPortdrivers.
Procedure
1. Attach the EtherLite module to the network using an appropriate cable.
2. Assign an IP address to the EtherLite module (see the following topic).
Assigning an IP AddressEtherLite IP addresses may be set by either of two methods:
• dgipserv, a UNIX utility for setting EtherLite IP addresses (see below)
• EtherLite Boot Console (see the EtherLite Administration Card)
Using dgipserv to Assign an IP Address
dgipserv is a Digi utility used to set the IP addresses for Digi devices. It will also set the gateway and subnet mask addresses when needed to upgrade the Digi device's firmware. For more information ondgipserv consult the man pages.
Note: dgipserv will only work with firmware version 7.9 or later.
Procedure
1. Enter the command:dgipserv
2. To store an IP addresses in your Digi device enter:
dgipserv -store MAC_address(IP_address)
where the MAC address and the IP address are the addresses of the Digi device. An example of this command is:
dgipserv -store 10:e0:f7:15:20:8g 143.182.5.63

7/29/2019 92000319_A
http://slidepdf.com/reader/full/92000319a 10/22
2-4 Related Documentation
Related Documentation
PortServer Documentation
• PortServer Configuration and Reference Guide
• Digi One/PortServer Cable Guide
PortServer II Documentation
• PortServer II Hardware Installation Guide
• PortServer II Command Reference• PortServer II Configuration and Administration Guide
• Digi One/PortServer Cable Guide
• Digi Port Authority--Remote Device Monitor Setup Guide
PortServer TS 8/16 Documentation
• PortServer TS 8/16 Command Reference
• PortServer TS 8/16 Configuration and Administration Guide
• Digi One/PortServer Cable Guide
• Digi Port Authority--Remote Device Monitor Setup Guide
Digi One RealPort/PortServer TS 2/4 Documentation
• Digi One/PortServer TS 2/4 Quick Reference Card • Digi One/PortServer TS 2/4 Command Reference
• Digi One/PortServer TS 2/4 Configuration and Administration Guide
• Digi One/PortServer Cable Guide
• Digi Port Authority--Remote Device Monitor Setup Guide
Digi One IA RealPort Documentation
• Digi One/PortServer TS 2/4 Command Reference
• Digi One/PortServer TS 2/4 Configuration and Administration Guide
• Digi One/PortServer Cable Guide
• Digi Port Authority--Remote Device Monitor Setup Guide
EtherLite Documentation
• EtherLite Hardware Information Guide
• EtherLite Administration Card
• EtherLite Cable Guide

7/29/2019 92000319_A
http://slidepdf.com/reader/full/92000319a 11/22
Planning and Requirements 2-5

7/29/2019 92000319_A
http://slidepdf.com/reader/full/92000319a 12/22
2-6
7/29/2019 92000319_A
http://slidepdf.com/reader/full/92000319a 13/22
RealPort Setup 3-1
chapter 3 RealPort Setup
In This Chapter
• Master Setup Process . . . . . . . . . . . . . . . . . . . . . . . . . . . . . . . . . . . . . . . . . . . . . 3-2• Installing the Driver: Downloaded . . . . . . . . . . . . . . . . . . . . . . . . . . . . . . . . . . . 3-2
• Uninstalling RealPort . . . . . . . . . . . . . . . . . . . . . . . . . . . . . . . . . . . . . . . . . . . . . 3-2
• Configuring a Device for a Terminal . . . . . . . . . . . . . . . . . . . . . . . . . . . . . . . . . 3-3
• Configuring a Device for a Modem . . . . . . . . . . . . . . . . . . . . . . . . . . . . . . . . . . 3-4
• Configuring a Device for a Printer . . . . . . . . . . . . . . . . . . . . . . . . . . . . . . . . . . . 3-4
• Setting TTY Options . . . . . . . . . . . . . . . . . . . . . . . . . . . . . . . . . . . . . . . . . . . . . . 3-6
• Transparent Printer Setup . . . . . . . . . . . . . . . . . . . . . . . . . . . . . . . . . . . . . . . . . . 3-9
7/29/2019 92000319_A
http://slidepdf.com/reader/full/92000319a 14/22
3-2 Master Setup Process
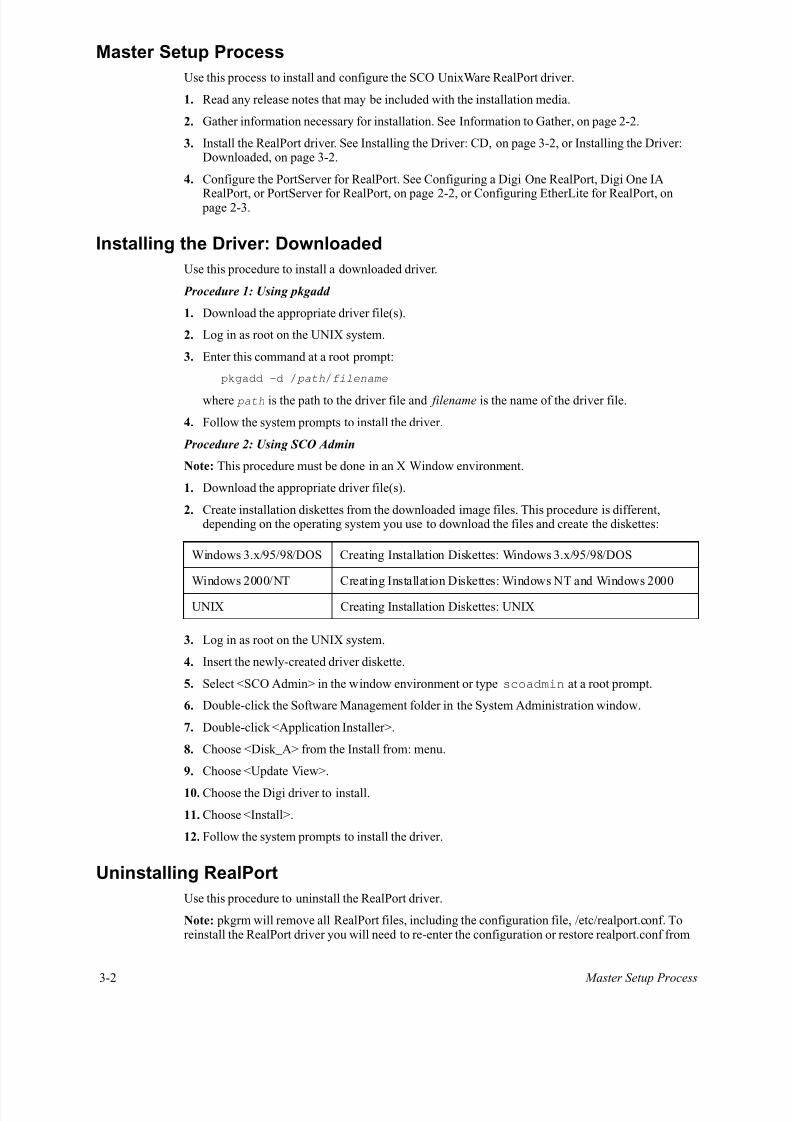
Master Setup Process
Use this process to install and configure the SCO UnixWare RealPort driver.
1. Read any release notes that may be included with the installation media.
2. Gather information necessary for installation. See Information to Gather, on page 2-2.
3. Install the RealPort driver. See Installing the Driver: CD, on page 3-2, or Installing the Driver:Downloaded, on page 3-2.
4. Configure the PortServer for RealPort. See Configuring a Digi One RealPort, Digi One IA
RealPort, or PortServer for RealPort, on page 2-2, or Configuring EtherLite for RealPort, on page 2-3.
Installing the Driver: Downloaded
Use this procedure to install a downloaded driver.
Procedure 1: Using pkgadd
1. Download the appropriate driver file(s).
2. Log in as root on the UNIX system.
3. Enter this command at a root prompt:
pkgadd -d / path/filename
where path is the path to the driver file and filename is the name of the driver file.
4. Follow the system prompts to install the driver.
Procedure 2: Using SCO Admin
Note: This procedure must be done in an X Window environment.
1. Download the appropriate driver file(s).
2. Create installation diskettes from the downloaded image files. This procedure is different,depending on the operating system you use to download the files and create the diskettes:
3. Log in as root on the UNIX system.
4. Insert the newly-created driver diskette.
5. Select <SCO Admin> in the window environment or type scoadmin at a root prompt.
6. Double-click the Software Management folder in the System Administration window.
7. Double-click <Application Installer>.
8. Choose <Disk_A> from the Install from: menu.
9. Choose <Update View>.
10. Choose the Digi driver to install.
11. Choose <Install>.
12. Follow the system prompts to install the driver.
Uninstalling RealPort
Use this procedure to uninstall the RealPort driver.
Note: pkgrm will remove all RealPort files, including the configuration file, /etc/realport.conf. Toreinstall the RealPort driver you will need to re-enter the configuration or restore realport.conf from
Windows 3.x/95/98/DOS Creating Installation Diskettes: Windows 3.x/95/98/DOS
Windows 2000/NT Creating Installation Diskettes: Windows NT and Windows 2000
UNIX Creating Installation Diskettes: UNIX

7/29/2019 92000319_A
http://slidepdf.com/reader/full/92000319a 15/22
RealPort Setup 3-3
a backup.
To stop RealPort devices temporarily, use realport_stop and then realport_start to restartthem. To remove the RealPort driver from the kernel temporarily, use realport_uninstall and then realport_install to re-install the driver in the kernel. In both cases the configurationinformation will be retained. For more information on realport_stop, realport_start,realport_uninstall, and realport_install, consult the UNIX man pages.
Procedure
1. Enter the following command at a root prompt:
pkgrm ncxa
2. Follow the subsequent prompts.
You should receive a message reporting a successful removal. If any problem or error occursduring the execution of the pkgrm command, reboot the system and try repeating the command.
Configuring a Device for a Terminal
Use this information to configure serial ports, which includes configuring port direction (incomingand outgoing), transmission speed, and other port attributes.
1. Start the SCO Serial Manager by entering this command at a SCO UnixWare command prompt:
scoadmin serial
2. Choose View and change the selection from Ports to Boards.
3. Choose the ncxa daemon for Digi RealPort.
4. Choose View and change from Boards to Ports. The ports will be listed.
5. Configure the ports as needed. Use the SCO UnixWare online help for additional information.
6. Exit the SCO Serial Manager.
Note: There is a bug in the SCO UnixWare Serial Manager that causes it to incorrectly set the "o"and "P" ttymon flags for a RealPort modem port. If the port does not work for logins, you may need to remove these flags. Use the realport_pm_flags program to list all non-console ttymon portmonitor flags and change them appropriately.

7/29/2019 92000319_A
http://slidepdf.com/reader/full/92000319a 16/22
3-4 Configuring a Device for a Modem
Configuring a Device for a Modem
Use this procedure to configure a RealPort device for a Dial-in/Dial-out modem connection.Configuring a device for a modem requires familiarity with both the operating system and themodem being used. While the following procedure is sufficient for most cases, it may be necessaryto take additional steps to properly configure your modem or to set up the operating system for aspecific application.
The Digi device should be properly installed, configured and functioning before proceeding.
Procedure
1. Connect a proper cable between the port and modem.
2. Disable both the modem and non-modem control ports. This can be done through sysadm. SCOUnixWare users can enable and disable ports through scoadmin>Hardware>Serial Manager.
3. Modify the file /usr/lib/uucp/Devices. Create an entry look like this:
Direct term/a01m,M - 38400 direct_modem
The device ttya01m used here is just an example.
Comment out any ACU lines relating to this device until dial-in is working properly.
An ACU line is necessary for correct operation of the modem in dial-out applications. Refer tothe modem manual or to the modem manufacturer for the correct modem initialization string touse for your modem. Refer to the SCO UnixWare Administration handbook for guidance on set-
ting up an appropriate ACU entry that uses this initialization string.4. Connect to the modem by entering this command at a Unix root prompt:
cu -l /dev/term/a01m -s 38400
It may be necessary to use a01s instead:
cu -l /dev/term/a01s -s 38400
5. Train the modem to the port speed with this at command:
at&w
6. Depending on the modem, it may be necessary to enable auto-answer with this at command:
ats0=1&w
7. Disconnect from the modem by entering tilde-period.~.
8. Enable and configure the port using the SCO Serial Manager, scoadmin.
Configuring a Device for a Printer
Use this procedure to configure a RealPort device for a printer. See your operating systemdocumentation for more information on configuring a serial device for a printer and configuring anlp device.
The Digi device and RealPort should be properly installed, configured and functioning before proceeding.
If you are using a printer attached to a terminal on a RealPort, use the corresponding RealPorttransparent print device. For example, if your terminal is on /dev/term/a01s then the attached printer would be on /dev/pra01s.
Procedure
1. Connect a proper cable between the port and printer.
2. Insert either of following commands at the end of the file /etc/rc2.d/S99printer:
cat < /dev/term/a01s > /dev/null &
or
sleep 999999 < /dev/term/a01s &

7/29/2019 92000319_A
http://slidepdf.com/reader/full/92000319a 17/22
RealPort Setup 3-5
These commands force the specified port to stay open, thus preserving any "non-sticky" options.This example uses the port /dev/term/a01s. Substitute your port name in the command.
The file S99printer is just an example. This file may need to be created. An "S99" file with a dif-ferent name may be used instead.
3. Insert any other necessary ditty commands at the end of the file /etc/rc2.d/S99printer. The com-mand ditty can be used to change the settings of a port. For additional information on ditty, seeSetting TTY Options, on page 3-6.
For example, the following command will set the port a01s to a speed of 38400, disable softwareflow control, enable forced carrier, and enable hardware flow control on the port:
ditty 38400 forcedcd -ixon -ixany -ixoff ctspace a01s
Note: The Data Carrier Detect (DCD) signal needs to be active (high) on the port for the port tofunction properly for a printer. The ditty forcedcd option can be used to accomplish this whenthe DCD signal is not made active through cabling.
4. If you are configuring a transparent print device, add ditty commands to set the transparent print parameters. See Transparent Printer Setup, on page 3-9, for more information.
5. For the ditty command to take effect immediately, enter the command manually at a system root prompt, or reboot the system.
6. Configure the device as a printer by running scoadmin printer.
7. The printer should be ready for use. To print a file, use the command
lp -d PRINTER_NAME FILE_TO_PRINT
where PRINTER_NAME is replaced with the name given to the printer in sysadm or scoadmin, and FILE_TO_PRINT is replaced with the name of the file to print.

7/29/2019 92000319_A
http://slidepdf.com/reader/full/92000319a 18/22
3-6 Setting TTY Options
Setting TTY Options
RealPort UNIX device driver packages include a command, ditty, which is a superset of stty, and may be used to set and display the device options for Digi RealPort devices.
The general command format is:
ditty [-a] [-n ttyname] [option(s)] [ttyname]
With no options, ditty displays all Digi special driver settings, modem signals, and all standard parameters displayed by stty(1) for the TTY device referenced by standard input.
Command options are provided to change flow control settings, set transparent print options, forcemodem control lines, and display all TTY settings. Any unrecognized options are passed to stty(1)for interpretation.
ditty commands may be executed from the command line, or placed in a startup script to be runwhenever the system is booted.
The options are:
The following options specify transient actions to be performed immediately:
The following options specify actions which are not sticky, meaning that the changes are cancelled when the device is closed, and that the device will use the default values the next time it is opened.
-a Display all of the unique Digi option settings, as well as all of the standard TTYsettings reported by stty -a.
-n ttyname Set and display options for the given TTY device, instead of standard input. Thisoption may be specified multiple times to perform the same operation onmultiple TTYs.
ttyname Set and display options for the specified TTY device. Replace ttyname with theTTY pathname (such as /dev/ttya01s, /dev/term/a01 or /dev/dty/a001s,depending on your operating system). This option may be used on a modemcontrol line when no carrier is present.
break Send a 250 MS break signal out on the TTY line.
clear Clear the tbusy flag in the channel structure to free the port.
flush Immediately flush (discard) TTY input and output.
flushin Flush TTY input only.
flushout Flush TTY output only.
stopout Stop output exactly as if an XOFF character were received.
startout Restart stopped output exactly as if an XON character were received.
stopin Activate flow control to stop input.
startin Release flow control to resume stopped input.
[-]dtr Raise [drop] the DTR modem control line, unless DTR hardware flow control isselected.
[-]rts Raise [drop] the RTS modem control line, unless RTS hardware flow control isselected.
7/29/2019 92000319_A
http://slidepdf.com/reader/full/92000319a 19/22
RealPort Setup 3-7
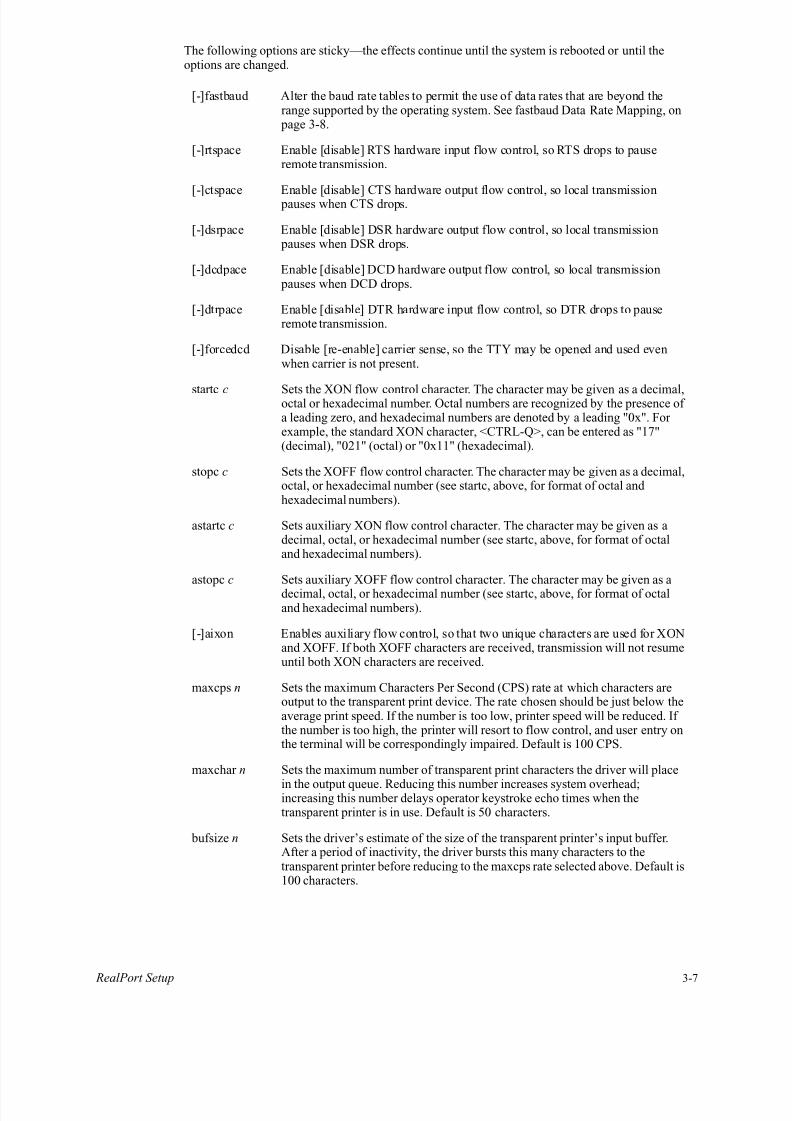
The following options are sticky—the effects continue until the system is rebooted or until theoptions are changed.
[-]fastbaud Alter the baud rate tables to permit the use of data rates that are beyond therange supported by the operating system. See fastbaud Data Rate Mapping, on
page 3-8.
[-]rtspace Enable [disable] RTS hardware input flow control, so RTS drops to pauseremote transmission.
[-]ctspace Enable [disable] CTS hardware output flow control, so local transmission pauses when CTS drops.
[-]dsrpace Enable [disable] DSR hardware output flow control, so local transmission pauses when DSR drops.
[-]dcdpace Enable [disable] DCD hardware output flow control, so local transmission pauses when DCD drops.
[-]dtrpace Enable [disable] DTR hardware input flow control, so DTR drops to pauseremote transmission.
[-]forcedcd Disable [re-enable] carrier sense, so the TTY may be opened and used evenwhen carrier is not present.
startc c Sets the XON flow control character. The character may be given as a decimal,octal or hexadecimal number. Octal numbers are recognized by the presence of a leading zero, and hexadecimal numbers are denoted by a leading "0x". For example, the standard XON character, <CTRL-Q>, can be entered as "17"(decimal), "021" (octal) or "0x11" (hexadecimal).
stopc c Sets the XOFF flow control character. The character may be given as a decimal,octal, or hexadecimal number (see startc, above, for format of octal and hexadecimal numbers).
astartc c Sets auxiliary XON flow control character. The character may be given as adecimal, octal, or hexadecimal number (see startc, above, for format of octaland hexadecimal numbers).
astopc c Sets auxiliary XOFF flow control character. The character may be given as adecimal, octal, or hexadecimal number (see startc, above, for format of octaland hexadecimal numbers).
[-]aixon Enables auxiliary flow control, so that two unique characters are used for XONand XOFF. If both XOFF characters are received, transmission will not resumeuntil both XON characters are received.
maxcps n Sets the maximum Characters Per Second (CPS) rate at which characters areoutput to the transparent print device. The rate chosen should be just below theaverage print speed. If the number is too low, printer speed will be reduced. If the number is too high, the printer will resort to flow control, and user entry onthe terminal will be correspondingly impaired. Default is 100 CPS.
maxchar n Sets the maximum number of transparent print characters the driver will place
in the output queue. Reducing this number increases system overhead;increasing this number delays operator keystroke echo times when thetransparent printer is in use. Default is 50 characters.
bufsize n Sets the driver’s estimate of the size of the transparent printer’s input buffer.After a period of inactivity, the driver bursts this many characters to thetransparent printer before reducing to the maxcps rate selected above. Default is100 characters.

7/29/2019 92000319_A
http://slidepdf.com/reader/full/92000319a 20/22
3-8 Setting TTY Options
fastbaud Data Rate MappingUse the table below to see how setting fastbaud affects RealPort data rates.
onstr " s" Defines the terminal escape sequence to direct subsequent data to thetransparent printer.
s is a string of ASCII characters, enclosed in quotes, that command the terminalto enter transparent printing mode. An arbitrary octal character xxx may begiven as \xxx.
For example, the sequence <Esc>[5i would be entered as: "\033[5i".
offstr " s" Defines the terminal escape sequence to stop directing data to the printer.
s is a string of ASCII characters, enclosed in quotes, that command the terminalto enter transparent printing mode. An arbitrary octal character xxx may begiven as \xxx.
For example, the sequence <Esc>[5i would be entered as: "\033[5i".
term t Sets the transparent printer on/off strings to values found in the internal defaulttable. Internal defaults are used for the following terminals: adm31, ansi, dg200,dg210, hz1500, mc5, microterm, multiterm, pcterm, tvi, vp-a2, vp-60, vt52,vt100, vt220, wyse30, wyse50, wyse60, or wyse75. If the terminal type is notfound in the internal default table, then ditty reads the terminfo entry for theterminal type and sets transparent print on/off strings to values given by themc5/mc4 attributes found there.
Specified Data Rate: Data Rate Mapped to:
50 57600
75 76800
110 115200
134 131657
150 153600
200 230400
300 460800
7/29/2019 92000319_A
http://slidepdf.com/reader/full/92000319a 21/22
RealPort Setup 3-9
Transparent Printer Setup
About Transparent Printing
Most terminals have an auxiliary port that can be connected to a serial printer. When this port isconfigured as a transparent printer port, print jobs may be run simultaneously with normal terminaloperation.
Data bound for the printer is preceded by a terminal escape sequence which turns on transparent printing, and followed by a sequence which turns transparent printing off.
Set up a transparent printer in the same way you would set up a printer wired directly to a serial port.Data sent to a transparent printer device is automatically "wrapped" in the transparent print on/off command strings for the specified printer.
Configuring Transparent Printers
Use this procedure to set up transparent printers on terminals.
Note: This procedure sets up the communication characteristics for transparent printers. Once atransparent printer has been set up, you can use it as you would a printer connected directly to aserial port. See your UNIX documentation for information on setting up print queues.
Procedure
At the command prompt, enter:
ditty -n ttyname [options]
where ttyname is the name of the terminal device and options are selected from the list below.
Note: Depending on your operating system, the ditty program may be named differently. See SettingTTY Options, on page 3-6, for the correct command line format for your operating system.
maxcps n Limits the maximum printer port character-per-second data rate. n should be set tothe minimum character rate the printer can sustain in typical use.
maxchar n Limits the number of characters queued to the printer ahead of terminal output.Lower numbers increase system overhead, higher numbers result in keystrokeecho delays. A value of 50 is generally a good compromise at 9600 baud.
bufsize n This parameter should be set to a value just below the printer's buffer size. After a
period of inactivity, the driver will burst up to this many characters to the printer to fill the print buffer before slowing to the maxcps rate.
onstr " s" Defines the terminal escape sequence to direct subsequent data to the transparent printer.
s is a string of ASCII characters, enclosed in quotes, that command the terminal toenter transparent printing mode. An arbitrary octal character xxx may be given as\xxx.
For example, the sequence "<Esc>[5i" would be entered as: "\033[5i".
offstr " s" Defines the terminal escape sequence to stop directing data to the printer.
s is a string of ASCII characters, enclosed in quotes, that command the terminal to
enter transparent printing mode. An arbitrary octal character xxx may be given as\xxx.
For example, the sequence "<Esc>[4i" would be entered as: "\033[4i".
term t Sets the transparent printer on/off strings to values found in the internal defaulttable. Internal defaults are used for the following terminal types: adm31, ansi,dg200, dg210, hz1500, mc5, vt100, vt220, vt320, vt420, wang2x36, wyse30,wyse50, wyse60 or wyse75.
If the terminal type is not found in the internal default table, then ditty reads theterminfo entry for the terminal type and sets the transparent print on/off strings tothe values given by the mc5/mc4 attributes found there.

7/29/2019 92000319_A
http://slidepdf.com/reader/full/92000319a 22/22