7945 traffic pro euen operation guide
DESCRIPTION
7945 Traffic Pro EuEn Operation GuideTRANSCRIPT

Operation Guide
Manual de usuario
Manual de instruções

2
Contents
Safety instructions 7Information regarding general road safety 8Overview of controls Traffic Pro 9
Overview of controls Traffic Pro with Bluetooth® 10
General operation 11Menu basics 11
Fast access function 11Main menu 11Status display 12Options menu 12How to use the menus 12Data entry menus 13
Anti-theft device 14Entering unit code numbers 14
What to do if an incorrect code number has been entered 14
Removing/Inserting the control panel 15
Removal 15Insertion 16
Inserting/Removing the cover 16Inserting the cover 16Removing the cover 16
Switching the unit on/off 17Switching on 17Switching off 17
Setting the volume 18Sound settings 18
Calling up the sound settings 18Setting the equalizer 19
Defining the equalizer setting 19Setting balance and fader 20
Balance setting 20Fader setting 20
Switching loudness on/off 20Becker Surround 21Subwoofer 21Crossover 21Reset settings 22
Mute 22
Navigation mode 24What is navigation? 24Navigation CDs 24Selecting navigation 26Calling up the Navigation main menu 26Entering a destination 27
Selecting a country 28Entering a destination town 28Selecting destination via postcode 29Entering the destination road 30Entering the destination town centre 31Entering house number for destination road 32Selecting junction for destination road 32Setting the route options 33
Saving/Deleting route options 34Saving a destination 34
Navigation fast access 35Navigating from fast access 35Protecting an entry 35Deleting an entry 36Deleting a list 36Saving an entry in the address book 36
Creating a new entry 37Adding data to entries 37
Selecting a destination from the address book 38Point of interest 39
Local 40In country 40Local area of destination 41In place 41Information about points of interest 42
During route guidance 43Navigation status screen 43Example navigation displays 44Options menu 45
Cancelling route guidance 46Traffic announcements 47Route list 47Stopover 47Blocking a route 49Modifying route options 49Switching navigation announcements on/off 50
*Only available for the Traffic Pro with Bluetooth® wireless technology.

3
Contents
Information during route guidance 50Displaying destination information 50Displaying/Storing position 51Displaying traffic announcements 51Displaying/Changing route settings 52
Information during non-active route guidance 52
Displaying/Storing a position 52Displaying TMC messages 52
Dynamic route guidance withTMC 52
What is dynamic route guidance? 52Dynamic route guidance 53Displaying traffic information 54
Settings 55Traffic announcements 55Announcing the time of arrival 56ETA setting 56Measuring unit 57
Radio mode 58Switching on radio mode 58Calling up the Radio main menu 58Selecting a waveband 59FM mode 60
Possible settings for FM stations 60Station list 60Scan function 61Manual station tuning 62
Filter function 62Switching the filter function on/off 62Filtering stations 63Filtering stations 63Cancel filtering 63
Programme type 64Switching the programme type function on/off 64Selecting the programme type 64
Regionalisation 65Radio text 65Voice entries 66Reception optimisation 66Bandwidth control 67
Traffic programme 67Switching a traffic programme on/off 68Selecting a TP station 68
Automatic 68Manual TP station selection 68
TP volume 69Cancelling traffic announcements 69
AM mode 69Possible settings for AM stations 69
Scan search 70Scan function 70
Station memory 71Calling up the station memory 71Storing stations 71
Different waveband set 71Station already in memory 72
Moving stations 72Deleting stations 73Naming stations 73Creating/Deleting voice entries 74
Create 74Deleting 74
Reading out voice entries 74
Media mode 75Activating media mode 75
Media fast access functions 75Media status display 76
Track jump/Track skip 77Fast forward/rewind 77
Play mode 78Calling up the Play Mode menu 78Track mix (random play function) 78Scan 79Repeat track 79CD mix 79Repeat CD 80Directory mix 80
Calling up the Media main menu 80Switching detailed track display on/off 81
CD mode 81Notes on compact discs (CD) 81Inserting/Ejecting CDs 82Notes on CD-R and CD-RWs 82Notes on copy-protected CDs 82Temperature protection circuit 82
*Only available for the Traffic Pro with Bluetooth® wireless technology.

4
Contents
MP3 mode 83General notes on MP3 83Creating an MP3 storage medium 83MP3 CD mode 84MP3 memory cards/Micro-drive mode 84
Inserting a micro-drive/memory card 85Removing a micro-drive/memory card 85
CD changer mode 86Operational readiness of CD changer 86Loading/Ejecting the CD magazine 86
External units/AUX mode 86
Telephone mode 87Calling up the telephone 88
Bluetooth not yet switched on 88Bluetooth mobile phone not yet connected 88
Calling up the Telephone main menu 89
Dialling numbers 90Selecting a number from the address book 91Call lists 92
Calling a number from the list 93Retrieving information about the entry 93Deleting a call list 93
Emergency call 93Settings 94
Automatic call answering 94Dialogue with call 94
Telephone calls 95Status display 95Accepting/ rejecting a call 95
Accepting a call 95Rejecting a call 96
Ending a call 96Options menu 96
End call 97DTMF 97Private 97
Fast access telephone functions 98Direct calling 98Protecting an entry 99Deleting an entry 99Deleting a list 99Saving a number in the address book 100
Creating a new entry 100Adding data to entries 101
Address book 102Calling up the address book 102Calling up the Address Book main menu 102Creating an entry 102Creating an entry which supports navigation 104
Find entry 105Setting the search criterion 106
Editing entries 107Modifying an entry 107Deleting an entry 108Creating/Deleting voice entries 108
Create 108Delete 109
Reading out voice entries 109Exporting an address book* 109Exporting an address book entry* 110Importing an address book entry* 110Navigating to an address book entry 112Voice entries 112Calling an address book entry* 113Fast access functions 113
Protecting an entry 113Deleting an entry 114Deleting a list 114
Settings 115Calling up general settings 115Bluetooth* 115
Opening the device list* 115Always allow connection* 116Name device* 117Deleting a device from the list* 117
*Only available for the Traffic Pro with Bluetooth® wireless technology.

5
ContentsConnecting and disconnecting devices* 117
Connecting devices (Traffic Pro BT)* 118Connecting a device (external device)* 119Disconnecting devices* 121
Calling up Bluetooth settings* 121Activating/ deactivating Bluetooth* 122Searching for Bluetooth devices* 122Making devices visible to others* 123Device name* 123
Voice mode 123Calling up voice mode settings 123
Setting the system language 124Displaying voice settings 125Volume for voice output 125Automatic dialogue 126Voice entries 126Voice output 126Extended PTT 127Repeating a voice announcement 127
System settings 128Calling up the system settings 129Audio 129
GAL (speed dependent volume) 129Settings for left-hand/ right-hand drive vehicles 129Volume for acoustic signals 130Displaying the volume 130Digital level 130
External device 131Display brightness 131Day/ night design 131Reset function 132Direction of rotation of the rotary control/push button 132Clock 133
Software update 133
Voice mode 135What is voice mode? 135
Symbols 135General information about the voice control system 136
Activating the voice control system 136Ending voice dialogue prematurely 137
Voice entries 137Settings 138
Examples for a voice dialogue 138Example operation in radio mode 139Example for entering a navigation destination 140Example for entering a telephone number* 142
General commands 142Help function (online help) 143Aborting voice dialogue 143Navigation in lists 143Calling up the status display 143
Commands for status displays, fast access functions and main menus 144
Commands for radio mode 145Commands for the radio status display 145Commands for radio fast access mode 147
Commands in the Edit Station menu 148
Commands for the Radio mainmenu 149
Commands in the Waveband menu 150Commands in the Programme Type menu 151Commands in the Filter menu 151Commands in the TP menu 152Commands in the Voice Entries menu 152Commands in the Reception Optimisation menu 153
Commands for media mode 153Commands for the media status display 154Commands for media fast access 155Commands for the Media main menu 156Commands for the media Play Mode menu 156
*Only available for the Traffic Pro with Bluetooth® wireless technology.
6
Contents
Navigation commands 157Correction option for incorrect destination entry 157
Commands for the navigation status display 158Commands for navigation fast access 159
Commands in the Fast Access/Edit Destinations menu 160
Commands for the Navigation main menu 160Commands for the Destination menu 161Commands for the POI menu 162
POI categories (page 39) 163Commands for the Route Options menu 163Commands for the Stopover menu 164
Prompt: Is the new destination a main destination or a stopover? 165
Commands for telephone mode* 165Commands for telephone fast access mode* 165
Commands in the Fast Access/ Edit Telephone Numbers menu* 167
Commands for the Telephone main menu* 167
Commands in the input menu for telephone numbers* 168Commands in the Call Lists menu* 168Commands in the call lists* 169Commands in the Settings menu* 170
Commands for the address book 170Commands for address book fast access 170
Commands in the Fast Access/Edit Entries menu 173Commands in the Edit menu 173Commands in the Edit Data menu 174Commands in the menu for selecting a Bluetooth device for export* 174Commands when an entry is open 174
Commands for the AddressBook main menu 174
Commands in the Voice Entries menu 175Commands in the Search Criterion menu 176
Technical terminology 177
Technical data 188
NOTICE 189
*Only available for the Traffic Pro with Bluetooth® wireless technology.

7
Safety instructions
Operation of the unit is permitted only if traffic conditions are suitable and you are absolutely sure that you, yourpassengers or other motorists are not endangered, obstructed or inconvenienced.
In all cases, all applicable road traffic regulations must be obeyed. Destinations may only be entered when the vehicle isstationary.
The country-specific regulations apply for telephone operations.
The navigation system is only an aid. Errors may occur in individual data items/entries. At all times, the driver mustdecide whether or not to heed the information provided. We do not accept liability for erroneous data provided by thenavigation system.
Due to continual changes in traffic routing or deviations in the data, it may occur that imprecise or erroneous informationis given. Therefore, actual road signs and traffic regulations must always be observed. In particular, the navigation systemcannot be used as an orientation aid at times of poor visibility.
The unit may only be used for its intended purpose. The volume of the radio, navigation system and telephone should beadjusted so that external noise is still audible.
Do not activate the telephone near petrol stations, fuel depots, chemical plants or blasting areas.
In the case of a malfunction (i.e. smoke or other noticeable odours) the unit is to be turned off immediately.
For safety reasons, the unit must only be opened by a trained technician. Please refer to your dealer for repair.
G

8
Information regarding general road safety
This car radio device is intended and approved for installation and operation in passenger cars, commercial vehicles andbuses (vehicle classes M, N and O) whose electric system has a rated voltage of 12V.
Installation and maintenance should only be carried out by specialists. Faulty installation or maintenance can result inthe malfunctioning of the motor vehicle’s electronic systems. The vehicle manufacturer’s safety instructions must beobserved.
The vehicle’s electronics (e.g. speedometer signal) must only be worked on by an authorised service garage. We assumeno liability for any impairment of the vehicle’s electronics.
This device is only intended for installation in the area provided for this purpose by the vehicle manufacturer.
The method of attachment used must ensure that the device will remain properly attached, should the vehicle be involvedin a crash.
The power supply must be properly fused.
Using mobile phones without an external antenna in the proximity of the radio unit may cause interference.
Familiarise yourself with the device and how it works before embarking on your journey. Whilst on the move, only operatethe device in appropriate traffic conditions. The volume of the device should be set at a level that enables external noises(e.g. police sirens) to be easily heard.

9
Overview of controls Traffic Pro
2 4 6 751
15 10
12
3
1314 11
8 9
Overview of controls Traffic Pro
1 Information button ( )2 On / off switch ( )3 Select radio ( )4 Select CD/CDC/memory card ( )5 Select navigation ( )6 Select sound settings ( )7 Select address book ( )8 CD eject button ( )9 Status button ( )
10 Right-hand rotary control/push button ( )Press = ConfirmTurn = Scroll through lists and menus
11 Back button ( )12 Button for unlocking removable control panel13 Display14 Arrow keys ( and )
Change radio station and audio track
15 Left-hand rotary control/push button ( )Press = Activate voice dialogueTurn = Set volume

10
Overview of controls Traffic Pro with Bluetooth®
2 4 6 751
15 10
12
3
1314 11
8 9
Overview of controls Traffic Pro with Bluetooth®
1 Information button 2 On / off switch 3 Select radio 4 Select CD/CDC/memory card 5 Select navigation 6 Select telephone 7 Select address book 8 CD eject button 9 Status button
10 Right-hand rotary control/push button Press = ConfirmTurn = Scroll through lists and menus
11 Back button 12 Release slide for removable control panel13 Display14 Arrow keys and
Change radio station and audio track
15 Left-hand rotary control/push button Press = Activate voice dialogueTurn = Set volume

11
General operationGeneral operationMenu basics
Fast access functionThe fast access function provides fastaccess to the major functions in thevarious operating modes. In most cases,you may then make selections from lists(radio stations, navigation destinations,etc.). Select the first entry in the list to goto the Operating Mode main menu.
The fast access function for the radio isshown here by way of example.Press the various operating elements toaccess:• The radio fast access function• The media fast access function
(CD, CD changer and memory card)• The navigation fast access
function• * the telephone fast access func-
tion (if Bluetooth is activated and atelephone is connected).
• The address book fast accessfunction
Main menuThe main menu for each operating modeprovides access to the various functionsand possible settings for that mode.
The Radio main menu is shown here byway of example.The main menu for the various operatingmodes can be called up in two differentways:• Activate the fast access function (press
, , , * or).
Turn the rotary control/push button to select the first entry in the fast accesslist.
Press the rotary control/push button.
or Press the button for which you have
called up the fast access function again( , , , * or
).
NoteIf an entry in the list is abbreviatedbecause it is too long (three dots appearat the end of the text), you can displaythe entry in full briefly by pressing andholding down the button.
NoteIf no selections are made for a shortperiod of time when the fast accessfunction is displayed, the display willautomatically switch to the status dis-play for the active operating mode.
1001
1002
*Only available for the Traffic Pro with Bluetooth® wireless technology.

12
General operation
Status displayAll the information you need about thecurrent operating mode appears on thestatus screen.
If navigation is also active in addition tothe current radio or media operatingmode, a combined display may appear.
The radio status display is shown hereby way of example.
The radio status display with active nav-igation route guidance is shown here.
The status display can always be accessedby pressing .If route guidance is active, you cantoggle between the combined displayand the status display by pressing repeatedly.
Options menuYou can call up the Options menu in thestatus display.
Press the rotary control/push button.
The Options menu appears.
You can access the major functions forthe active operating mode directly in theOptions menu. Some of the possiblesettings and functions in the Optionsmenu can also be set/activated via themain menu.
The Options menu for the radio functionis shown here by way of example.
How to use the menusThe commands are the same for allmenus.
The Options menu for the radio functionis shown here by way of example.Turn the rotary control/push button to scroll through the menus.
Once you have made an entry in a menu,the next menu will appear or you canselect the entry (by turning the rotarycontrol/push button ) to activate/deactivate a function.
NoteThe address book does not have a statusdisplay.
1003
1004
1005
1005

13
General operation
If the menu entry is concealing anothermenu, a small triangle will appear afterthe menu entry.
or in front of a menu entry indi-cates that a function can be activated ordeactivated. The symbol stands foroff and the symbol for on.
Data entry menusIf data can be entered, special data entrymenus appear.
The data entry menu for the surname inan address book entry appears in theexample. Turn the rotary control/push button
and then press the rotary control/pushbutton to select each letter one after theother.
You can change the character set for theavailable characters by selecting varioussymbols.• Switch to lowercase• Switch to uppercase• Switch to numbers• Switch to special characters• Switch to lowercase international• Switch to uppercase international
Accept entry: In the data entry menu, select the
symbol.or Press the rotary control/push button
and hold it down for at least 2 seconds.
NoteYou can always press to go backone step in the menu hierarchy.
NoteSelect the symbol to delete the lastcharacter in the entry.If, when selecting the symbol , therotary control/push button ispressed for longer than 2 seconds, thecomplete entry is deleted.
6003
14
General operation
Anti-theft deviceYour Traffic Pro features two anti-theftdevices:• Protection by means of a five-digit
unit code number• Protection by means of a removable
control panel
Entering unit code numbersIf the Traffic Pro is disconnected fromthe electrical supply source, the anti-theft device prevents it against unauthor-ised use once it has been reconnected. You need the five-digit code numberprinted on the CODE CARD to start upthe Traffic Pro.
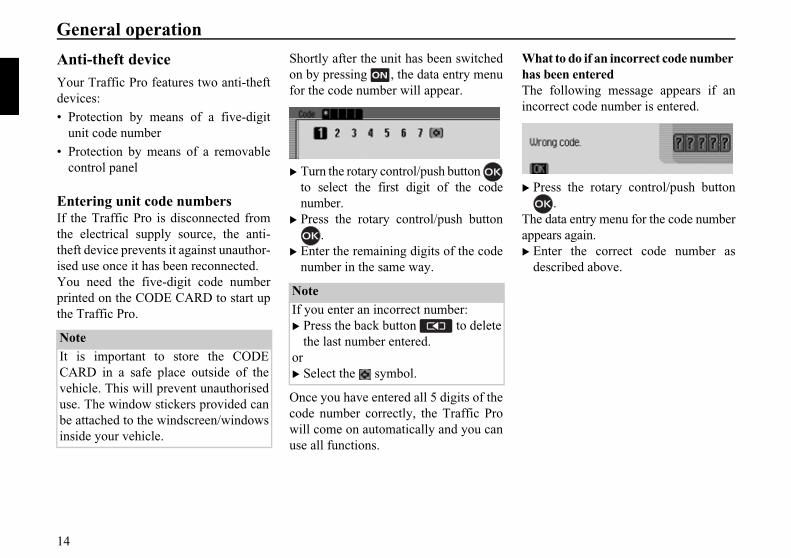
Shortly after the unit has been switchedon by pressing , the data entry menufor the code number will appear.
Turn the rotary control/push button to select the first digit of the codenumber.
Press the rotary control/push button.
Enter the remaining digits of the codenumber in the same way.
Once you have entered all 5 digits of thecode number correctly, the Traffic Prowill come on automatically and you canuse all functions.
What to do if an incorrect code number has been enteredThe following message appears if anincorrect code number is entered.
Press the rotary control/push button.
The data entry menu for the code numberappears again. Enter the correct code number as
described above.
NoteIt is important to store the CODECARD in a safe place outside of thevehicle. This will prevent unauthoriseduse. The window stickers provided canbe attached to the windscreen/windowsinside your vehicle.
NoteIf you enter an incorrect number: Press the back button to delete
the last number entered.or Select the symbol.
10061007

15
General operation
Removing/Inserting the control panelPart of the control panel can be removedto provide additional effective protectionagainst theft.The Traffic Pro cannot be switched onwithout this removable control panel.
Removal
Push the release slide for the controlpanel (A) to the right.
The control panel is released. Remove the control panel from the
mount.If the Traffic Pro is still switched onwhen the control panel is removed, it isswitched to mute and disabled.
If the control panel is reinserted within45 seconds, the Traffic Pro will automat-ically switch itself back on.
NoteEntering an incorrect code number threetimes will disable the unit for approx.1 hour.
The time remaining until anotherattempt can be made to enter the codenumber is displayed. Leave the ignition switched on.Switching the ignition off resets thewaiting time of one hour to zero.Once the waiting time has elapsed, thedata entry menu for the code numberappears again.
1008
A
Notes• Please insert the control panel into the
accompanying protective cover afterremoval.Do not touch the metal contacts on thecontrol panel or on the Traffic Pro.
• If you move your vehicle once thecontrol panel has been removed, onceyou insert the control panel, it willtake some time for the navigationsystem to ascertain your position.
1009

16
General operation
Insertion Take the control panel out of its pro-
tective cover. Insert the left-hand side of the control
panel. Push the control panel into place.The Traffic Pro is now ready for opera-tion and can be switched on, or it willswitch itself on automatically.
Inserting/Removing the coverThe scope of supply of the Traffic Proincludes a red plastic insert. This plasticinsert can be snapped into the gap whichappears once the control panel has beenremoved.As well as serving as a protective coverfor any CF card/micro-drive, the red col-our of the plastic insert clearly indicatesthat the control panel has been removed.
Inserting the cover Remove the control panel as described
in “Removing/Inserting the controlpanel” on page 15.
Insert the plastic insert into the gapwith the hole at the top and the smoothside facing outwards.
Push the lower section of the plasticinsert into the gap until it snaps intoplace.
The cover has now been inserted. Reinsert the control panel as described
in “Removing/Inserting the controlpanel” on page 15.
Removing the cover Remove the control panel as described
in “Removing/Inserting the controlpanel” on page 15.
Insert your finger into the hole in theplastic insert.
Carefully push the plastic insert down-wards.
Pull the plastic insert forwards.The cover has now been removed. Reinsert the control panel as described
in “Removing/Inserting the controlpanel” on page 15.
NoteIf a new control panel or the control panelfor a different Traffic Pro is inserted, thecode number for the Traffic Pro must beentered as described in “Entering unitcode numbers” on page 14.

17
General operation
Switching the unit on/off
Switching on Press .or If the Traffic Pro was switched off via
the ignition, the Traffic Pro willswitch back on once the ignition hasbeen switched on.
Confirm the warning which appearsby pressing the rotary control/pushbutton .
Switching off Press .If the ignition is switched on, the TrafficPro is switched to standby mode. Thedisplay goes dark and the Traffic Prosound is switched off.
or Switch off the vehicle ignition.
The shutdown display appears forapprox. 5 seconds.During this period of approx. 5 seconds,shutdown can be aborted by pressingone of the buttons on the Traffic Pro orby switching the ignition back on. The Traffic Pro then switches itself backon and plays back the last sourceselected (radio or media).
1010
Notes• Unless the warning message is con-
firmed, the Traffic Pro will remaindisabled.
• Once it has been switched on, theTraffic Pro will play back the lastsource selected (radio or media). Anymute or pause function activated willbe cancelled.
• If fewer than approx. 2 hours haveelapsed since the unit was lastswitched off, active route guidancewill be restarted.
• If the volume was set to a very loudvalue before the unit was last switchedoff, it will be reset to setting 26 whenthe unit is switched back on.
1010

18
General operation
Setting the volumeThere are 50 volume settings. The vol-ume setting applies to all radio and audiosources.You can specify whether changes in vol-ume should be displayed in graphics for-mat or not in “Displaying the volume”on page 130.
Turn the rotary control/push button clockwise/counter clockwise.
The volume increases or decreases.
Sound settingsYou can configure the sound of yourTraffic Pro to meet your requirements inthe sound settings. The settings are alsovalid for all radio/audio sources.
Calling up the sound settings Press .*or Press or until the sound
settings appear.or
Select in the radio or Audiomain menu (Radio main menuPage 58/Audio main menu Page 80).
Turn the rotary control/push button to select one of the following options: , ,, , , and
Confirm your selection by pressingthe rotary control/push button .
1011
Note:Subsequent sections of the operationguide describe how to set the volume for:• Traffic announcements (page Page 69)• Navigation announcements and other
voice messages (Page 125)• Acoustic signals (Page 130)
Note:Press one of the buttons , ,
, or in order to quitthe sound settings.
1012
*Only available for the Traffic Pro with Bluetooth® wireless technology.

19
General operation
Setting the equalizerYou can switch the acoustic pattern on 5frequency bands with the equalizersetting.4 equalizer presets are also available forselection. An additional option alsoallows you to make another 3 equalizersettings.
or Select in the sound settings.
Next, turn the rotary control/pushbutton to select one of the fourequalizer presets (, !and ) or one of the three user-defined equalizer settings (" # - " $ or ).
Turn the rotary control/push button to apply the required equalizer setting.
Defining the equalizer setting Select " #, " % or " $. Press and hold down the rotary control/
push button .
The cursor jumps to the first frequencyband. Turn the rotary control/push button
to select the frequency band to bechanged.
Confirm your selection by pressingthe rotary control/push button .
Turn the rotary control/push button to select the required setting for theselected frequency band.
Confirm the setting by pressing therotary control/push button .
You may now change other settings. Once you have made the required set-tings: Press and hold down the rotary control/
push button .or Turn the rotary control/push button
to select the arrow next to thefrequency bands and press the rotarycontrol/push button .
You may now make other equalizersettings or select one of the presets.
1013
Note:The equalizer presets ( , ! and ) cannot be modified.Select to set the equalizer settingsto an average value.
1014
1015

20
General operation
Setting balance and faderYou can shift the tone centre in the vehi-cle using the balance and fader setting.
Select in the soundsettings.
An image of the vehicle interior in thedirection of travel appears on the dis-play. The small triangle indicates thecurrent position of the tone centre.The Balance setting is active.
Turn the rotary control/push button to select or & .
Balance setting Turn the rotary control/push button
clockwise/counter clockwise.
The tone centre moves to the right/left.
Fader setting Turn the rotary control/push button
clockwise/counter clockwise.
The tone centre moves forwards/back-wards.
Switching loudness on/offWith loudness, the sound is improved byincreasing the bass volumes (especiallysuitable for low-volume settings).
Select in the sound settings.
Press the rotary control/push button to switch loudness on ( ) or off ( ).
1016
1016
1017
1018

21
General operation
Becker SurroundYou can use this function to activate vir-tual surround sound and select the vehi-cle size to optimise the surround soundfunction.
Select in the soundsettings.
Select and press therotary control/push button toswitch virtual surround sound on ( )or off ( ).
Select ' or !() ') (on = ).
SubwooferYou can set the volume level of thesubwoofer output/ deactivate thesubwoofer output.
Select in the sound settings.
Turn the rotary control/push button to select the required value.
CrossoverUse this function to set the thresholdfrequencies for the front loudspeakers,the rear loudspeakers and the subwoofer.
Select in the sound settings.
You may now select & , or .
• & and You can set the lower thresholdfrequency of the front and rearloudspeakers to a value of between 20and 150 Hz.
•
You can set the upper thresholdfrequency of the subwoofer to a valueof between 50 and 150 Hz.
Note:The Becker Surround function is notavailable for medium wave or shortwave.
Note:Only one of the vehicle types in the listcan be active ( ).
1019
Note:A setting of "+10" indicates an increasein the volume of the subwoofer.Select to deactivate the subwooferoutput.In addition, is deactivatedwith the crossover setting.
1024 1025

22
General operation
In this example you can see the settingsfor the front loudspeakers.
Turn the rotary control/push button to select the required value.
Reset settingsYou can reset all sound settings to thedefault settings.The following settings are reset to therelevant default value:• : All default settings are reset
to the initial value. The user-definedsetting is reset to zero.
• to centre setting• to off• to off• to 0.• front and rear loudspeakers
to 50 Hz, subwoofer to 100 Hz.
Select in the sound set-tings.
Select * to reset the sound settingsor + to continue without making anychanges.
Select * to reset the sound settings.
MuteYou can switch your Traffic Pro to mute,i.e. switch off the sound from the currentradio/media source.However, navigation announcements,traffic announcements (if TP has beenactivated) and other voice announce-ments on the Traffic Pro continue to betransmitted unaffected.
Press the rotary control/push button and hold it down for at least
2 seconds.
Example of muted radio mode.
Example of muted media mode.
1026
1020
1021
1022

23
General operation
You can deactivate the mute function asfollows:• Press the rotary control/push button
again and hold it down for at least2 seconds.
• Change the volume by turning therotary control/push button .
• Press or .• Select another station or track.• Switch the Traffic Pro off and back on
again.

24
Navigation modeNavigation modeWhat is navigation?The term “navigation” (lat. navigare = totravel by sea) is generally understood tomean the location of a vehicle, the deter-mination of the direction and distancefrom the desired destination and therequired route. As navigation aids, stars,prominent landmarks, compass and sat-ellites are used.With Traffic Pro, location is determinedwith the GPS receiver (GPS = GlobalPositioning System). The direction anddistance from the destination are deter-mined using a digital road map, a navi-gation computer and sensors. A speed-ometer signal and a reverse signal areadditionally used to calculate the route. For safety reasons, navigation is pre-dominantly in spoken form supportedby a direction indicator on the display.
Navigation CDsTwo navigation CDs are supplied withthe navigation unit.These CDs contain a digitised road map.One CD for Northern/Eastern Europe(CD no. 1) and one CD for Southern/Western Europe (CD no. 2) are supplied. The complete trunk road network in thedigitised area of Northern and SouthernEurope are available on the CDs. All digitised roads of the northern/east-ern countries are also included on theNorthern/Eastern Europe CD. All digi-tised roads of the southern/westerncountries are also included on the South-ern/Western Europe CD.In these detailed areas of the Northern/Eastern or Southern/Western Europe CDroad map, motorways, regional roads andunclassified roads as well as countryroads are stored. Larger cities and com-munities are comprehensively covered.For smaller towns and communities, theregional and unclassified roads or accessroads and the town centres are included.
Safety instructions
• Road traffic regulations always takepriority. The navigation system isonly an aid. Errors may occur in indi-vidual data items/entries. At all times,the driver must decide whether or notto heed the information provided. We do not accept liability for errone-ous data provided by the navigationsystem.
• Observation of traffic signs and localtraffic regulations must always takepriority.
• Traffic guidance is restricted to pas-senger vehicles only. Special drivingrecommendations and regulations forother vehicles (e.g. commercial vehi-cles) are not included.
• Destinations may only be enteredwhen the vehicle is stationary.
G

25
Navigation mode
One-way streets, pedestrian zones, turnbans and other traffic regulations aretaken into account as far as possible. There may be discrepancies between thedata on the navigation CD and the actuallocal situation, due to permanent changesto road systems and their traffic regula-tions.
Navigation with two European CDs For example, if you wish to navigatefrom a town on the Southern/WesternEurope CD (D) to a town on the North-ern/Eastern Europe CD (B), enter yourdestination address. After entering thetown, you will be prompted to insertnavigation CD 1 by the display , -# ./0 Afterinserting the relevant CD, enter thetown, the road and, if required, the housenumber or the town centre. The required map data is loaded andstored internally after route calculationhas started.
Note:For Norway, Sweden, Finland and Den-mark, non-verified data has been usedto achieve a high depth of digitisation;i.e. with this data, the navigation systemcannot refer to information such asmotorway, trunk road, 30 zone, one-way street or other traffic regulations,as this is not recorded. All roads can be used, but optimumroute guidance cannot be guaranteed.
A Area of Northern/Eastern Europe CD with all digitised roads.
B For example, a town or an address in Germany (on the Northern/Eastern Europe CD).
C Area of Southern/Western Europe CD with all digitised roads.
D For example, a town or an address in France (on the Southern/Western Europe CD).
A
B
C
D

26
Navigation mode
Selecting navigation Press .
Navigation is activated. The display onlyappears if navigation has not been acti-vated since the last time the Traffic Prowas switched on or if it is not yet ready.
The Fast Access menu then appears. Thenumber of satellites received appears onthe right-hand side of the display (in theexample, 5 of the maximum of 8 receiv-able satellites are being received).In fast access mode, you can select andnavigate to the last destinations entered/the destinations you have stored in fastaccess mode.For more information, see “Navigationfast access” on page 35.
Calling up the Navigation main menu Press twice.or Press .The Fast Access menu appears. Select the +( entry.
The Navigation menu appears. Turn the rotary control/push button
to select one of the following options: ,-0 (0,- or
Confirm your selection by pressingthe rotary control/push button .
The required function is called up.
2001
2002
Note:The navigation CD must be loadedwhen starting navigation mode for thefirst time.If calibration of the navigation systemhas not yet been completed, the systemwill prompt you to take a drive for cali-bration (see Installation Guide).A navigation CD containing the data forthe target country is required for navi-gation operations.The navigation CD must be inserted tostart the calculation of a route. Duringcalculation, the symbol appears onthe right-hand side of the display. Oncethe calculation has been completed, the
symbol disappears, the navigationCD can be removed and an audio CDmay be inserted.When entering destinations, driving offshould be delayed until the symbolhas disappeared.For distant destinations, you may beprompted to re-insert the navigation CDat a later time.
Oldversion

27
Navigation mode
•
Accesses the data entry menu for thedestination. See “Entering a destina-tion” on page 27.
• -0 (0
You can select a destination from theaddress book. See “Selecting a desti-nation from the address book” onpage 38.
• -
Access the POI selection menu. POIsinclude petrol stations, airports or hos-pitals, for example. See “Point ofinterest” on page 39.
•
Accesses the Navigation Settings menu.See “Settings” on page 55.
Entering a destination In the Navigation main menu, select
the entry.
The Enter Destination menu appears.The last country selected and the lasttown selected appear first. Turn the rotary control/push button
to select one of the following options:123,32,+(country as example),12145(town as example), , ,6( ,, , , (postcode),7' /7 or 78(and
Confirm your selection by pressingthe rotary control/push button .
NoteIf route guidance is already active, youcan start to enter another destination byselecting , -0 ( 0 and -.Once the destination has been selected,the Traffic Pro will prompt you to con-firm if the new destination is to be usedas the main destination or a stopover.
Turn the rotary control/push button to select ) or !0.
Confirm your selection by pressingthe rotary control/push button .
Depending on the selection, the newdestination is now used as a stopover orthe new main destination.
2096
2004

28
Navigation mode
The corresponding menu appears or therequired action is initiated.
Selecting a countryIf your destination is located in a differentcountry (123 ,32,+ in the exampledisplay) you must first select the requiredcountry. In the Enter Destination menu, select
the country (123,32,+ in the exam-ple).
Turn the rotary control/push button to select your destination country.
Confirm your selection by pressingthe rotary control/push button .
Entering a destination town In the Enter Destination menu, select
the town (12145 in the example).
Confirm your selection by pressingthe rotary control/push button .
The data entry menu for the townappears. Turn the rotary control/push button
and then press the rotary control/push button to select each letter oneafter the other.
NoteSome entries in the Enter Destinationmenu cannot be selected directly. Forexample, a house number cannot beentered unless the name of a road hasbeen entered first. These non-selectableentries are greyed out in the display andcannot be selected.The entry will also be greyed out if nohouse numbers are available for aspecific road.
2005
NoteIf your destination is in the same townas that displayed, you can continuedirectly with entering the road/centre.
2004
2006

29
Navigation mode
The last letter entered is highlighted. Tohelp, the name of the location closest tothe previous entry appears. The TrafficPro offers only the possible remainingletters for selection. If no other entriesare available, the Traffic Pro completesthe town name automatically.
Accept entry: In the data entry menu, select the
symbol.or Press the rotary control/push button
and hold it down for at least 2 seconds.
If the complete town name has alreadybeen entered or completed automatically,the unit will either switch automaticallyto either the town distinguishing list oryou can continue directly with enteringthe road/centre.If an incomplete town entry has been con-firmed, the town selection list appears.
Turn the rotary control/push button and then press the rotary control/pushbutton to select the required town.
If the entry made is unambiguous, youcan continue directly with entering theroad/centre.
The town distinguishing list appears ifthe selection is ambiguous.
Turn the rotary control/push button and then press the rotary control/pushbutton to select the required town.
You can now continue with entering theroad/centre.
Selecting destination via postcodeYou can also select a destination via itspostcode. In the Enter Destination menu, select
.
Confirm your selection by pressingthe rotary control/push button .
NoteSelect the symbol to delete the lastcharacter in the entry.
2007
2008
2008
2009

30
Navigation mode
The data entry menu for the postcodeappears. Turn the rotary control/push button
and then press the rotary control/push button to select the numbers andletters one after the other.
Accept entry: In the data entry menu, select the
symbol.or Press the rotary control/push button
and hold it down for at least 2 seconds.
If you have entered an incomplete post-code, the postcode selection list appears.
Turn the rotary control/push button and then press the rotary control/
push button to select the required post-code.
The display then shows either the desti-nation corresponding to the postcode inthe Enter Destination menu or, if thepostcode is shared among several towns,a list containing these towns.
Turn the rotary control/push button and then press the rotary control/pushbutton to select the required town.
You can now continue with entering theroad/centre.
Entering the destination road In the Enter Destination menu, select
.
Confirm your selection by pressingthe rotary control/push button .
The data entry menu for the road appearsor, if fewer than 10 roads are available inthe town, the unit switches directly to theroad list. Turn the rotary control/push button
and then press the rotary control/pushbutton to select each letter one after theother.
2010
2011
2012
2013
2014
2015

31
Navigation mode
The last letter entered is highlighted. Tohelp, the name of the road closest to theprevious entry is displayed. The TrafficPro offers only the possible remainingletters for selection. If no other entriesare available, the Traffic Pro completesthe road name automatically.
Accept entry: In the data entry menu, select the
symbol.or Press the rotary control/push button
and hold it down for at least 2 seconds.
If you have entered an incomplete roadname, the road list appears.
Turn the rotary control/push button and then press the rotary control/pushbutton to select the required road.
You can now start route guidance byselecting or enter ahouse number/junction for the roadentered.
Entering the destination town centreInstead of navigating directly to a road,you can also navigate to a town centre.
In the Enter Destination menu, select .
Confirm your selection by pressingthe rotary control/push button .
The data entry menu for the centreappears or, if fewer than 10 centres areavailable in the town, the unit switchesdirectly to the centre list. Turn the rotary control/push button
and then press the rotary control/pushbutton to select each letter one after theother.
2016
2017
2018

32
Navigation mode
The last letter entered is highlighted. Tohelp, the name of the centre closest tothe previous entry is displayed. TheTraffic Pro offers only the possibleremaining letters for selection. If noother entries are available, the TrafficPro completes the centre name automat-ically.
Accept entry: In the data entry menu, select the
symbol.or Press the rotary control/push button
and hold it down for at least 2 seconds.
If you have entered an incomplete centrename, the centre list appears.
Turn the rotary control/push button and then press the rotary control/pushbutton to select the required centre.
You can now start route guidance byselecting .
Entering house number for destination road
In the Enter Destination menu, select6( .
Confirm your selection by pressingthe rotary control/push button .
A list containing ranges of house num-bers appears. Turn the rotary control/push button
and then press the rotary control/pushbutton to select the required range.
You can now start route guidance byselecting .
Selecting junction for destination road
In the Enter Destination menu, select, .
2019
NoteA house number can only be selected ifthis information is stored on the naviga-tion CD.
2020
2021
NoteA junction can only be selected if thisinformation is stored on the navigationCD.
2022

33
Navigation mode
Confirm your selection by pressingthe rotary control/push button .
A list of junctions appears.
Turn the rotary control/push button and then press the rotary control/pushbutton to select the required junction.
Setting the route optionsYou can use the route options to specifyhow the Traffic Pro calculates the routeto the destination. In the Enter Destination menu,
depending on the previous setting,select 7 ' , 7 or 78(.
Confirm your selection by pressing therotary control/push button .
The Route Options menu appears.
Turn the rotary control/push button to select one of the following options:-8( ,9 ,' ,2( 8,2,2,2 8 or8
Turn the rotary control/push button to switch the required function on ( )or off ( ).
• -8(
The route is calculated taking intoaccount the traffic announcementsreceived.If dynamic route guidance is active,the routes are calculated on the basisof the fastest route to the destination.
NoteIf the destination road entered crossesmore than 9 roads, a data entry menucorresponding to the data entry menufor roads appears.
2023
2024
2025
2026
Note:Only one of the three settings (-8( ,9 or' ) may beactive ( ) at the same time.

34
Navigation mode
• 9
With this setting, the route with theshortest possible travel time to thedestination is calculated.
• '
With this setting, the route with theshortest possible distance to the desti-nation is calculated.
• 2 ( 8, 2 , 2 and2 8You can use these entries for exampleto exclude ferries or motorways fromthe route calculation. The Traffic Prowill then attempt to calculate a routewhich does not contain any motor-ways or ferries.
Saving/Deleting route options In the Route Options menu, select
8. Confirm your selection by pressing
the rotary control/push button .or Press .You can now start route guidance
Saving a destinationOnce you have entered a destination,you can save it in the address book. Thismay be useful if you wish to travel tothis destination again at a later date.
In the Enter Destination menu, select.
Confirm your selection by pressingthe rotary control/push button .
Proceed as described in “Saving an entryin the address book” on page 36.
Notes:• Dynamic route guidance is not possi-
ble in all countries at present.• When new route calculations are
made with active dynamic route guid-ance, the Traffic Pro may request thenavigation CD (if it is not alreadyinserted).
Notes:• Routes without motorways can only
be calculated for short distances (upto 200 km depending on digitalisationdensity).
• Even if 2 is selected, toll roads(e.g. in Switzerland or Austria) willbe included in the route calculation.
2027
35
Navigation mode
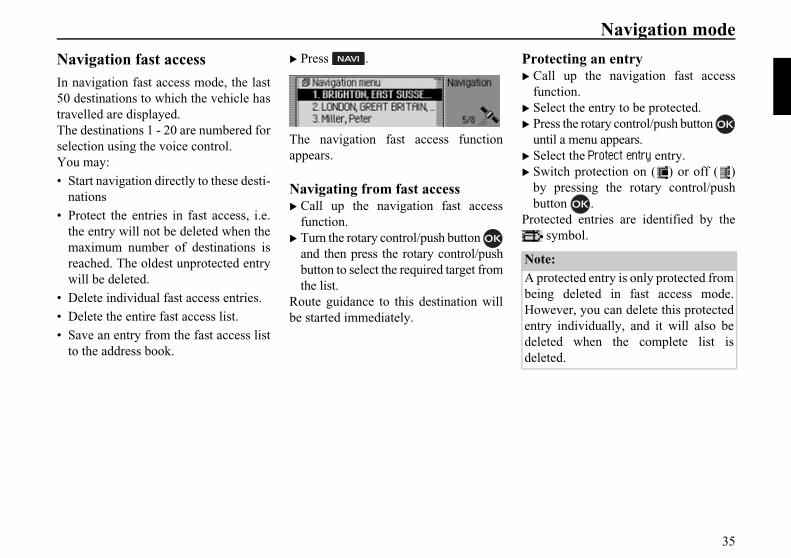
Navigation fast accessIn navigation fast access mode, the last50 destinations to which the vehicle hastravelled are displayed. The destinations 1 - 20 are numbered forselection using the voice control.You may:• Start navigation directly to these desti-
nations• Protect the entries in fast access, i.e.
the entry will not be deleted when themaximum number of destinations isreached. The oldest unprotected entrywill be deleted.
• Delete individual fast access entries.• Delete the entire fast access list.• Save an entry from the fast access list
to the address book.
Press .
The navigation fast access functionappears.
Navigating from fast access Call up the navigation fast access
function. Turn the rotary control/push button
and then press the rotary control/pushbutton to select the required target fromthe list.
Route guidance to this destination willbe started immediately.
Protecting an entry Call up the navigation fast access
function. Select the entry to be protected. Press the rotary control/push button
until a menu appears. Select the 8 entry. Switch protection on ( ) or off ( )
by pressing the rotary control/pushbutton .
Protected entries are identified by the symbol.
2002
Note:A protected entry is only protected frombeing deleted in fast access mode.However, you can delete this protectedentry individually, and it will also bedeleted when the complete list isdeleted.

36
Navigation mode
Deleting an entry Call up the navigation fast access
function. Select the entry to be deleted. Press the rotary control/push button
until a menu appears. Turn the rotary control/push button
and then press the rotary control/pushbutton to select the - 8 entry.
The entry is deleted from the fast accesslist.
Deleting a list Call up the navigation fast access
function. Press the rotary control/push button
until a menu appears. Turn the rotary control/push button
and then press the rotary control/pushbutton to select the - entry.
When the prompt appears, select *to delete the list or + to retain it.
If you select *, the list will be deletedin the fast access function.
Saving an entry in the address book Call up the navigation fast access
function. Select the entry to be saved. Press the rotary control/push button
until a menu appears. Turn the rotary control/push button
and then press the rotary control/pushbutton to select the entry.
Turn the rotary control/push button to select one of the following options: 8 or2( 8
Confirm your selection by pressingthe rotary control/push button .
2028
2029

37
Navigation mode
• 8
Select this option to create a new entryin the address book.
• 2( 8
Select this option to add the currentaddress to an existing entry in theaddress book.
Creating a new entry Select the 8 entry.
Turn the rotary control/push button and then press the rotary control/pushbutton to select each letter in the sur-name one after the other.
In the data entry menu, select the symbol.
or Press the rotary control/push button
and hold it down for at least 2 seconds.The entry is adopted.
Turn the rotary control/push button and then press the rotary control/pushbutton to select each letter in the firstname one after the other.
In the data entry menu, select the symbol.
or Press the rotary control/push button
and hold it down for at least 2 seconds.
The address book entry appears.
Turn the rotary control/push button and then press the rotary control/pushbutton to select the entry.
A confirmation that the entry has beensaved appears. Press the rotary control/push button
.
Adding data to entries Select the 2( 8 entry.
Turn the rotary control/push button and then press the rotary control/pushbutton to select the entry to which youwish to add data.
Note:Please also refer to the description in“Data entry menus” on page 13.
2030
2031
2032
Note:If there are more than 10 entries in theaddress book, the data entry menu forlocating the required name appears.
2032

38
Navigation mode
The navigation address previouslyselected is added to the selected addressbook entry.
If the selected address book entry alreadycontains an address, the following promptappears:
In the prompt, select * to overwritethe existing address or + to retain theaddress.
If you select *, the existing addresswill be overwritten.
Selecting a destination from the address bookYou can find a destination in the addressbook and start navigation to it.
In the Navigation main menu, selectthe -0 (0 entry.
Confirm your selection by pressingthe rotary control/push button .
The address book entries which supportnavigation appear.
Turn the rotary control/push button and then press the rotary control/pushbutton to select the required entry.
Route guidance to this destination willbe started immediately.
2034
Note:If there are more than 9 entries in theaddress book, the data entry menu forlocating the required name appears.
2035
2036
39
Navigation mode
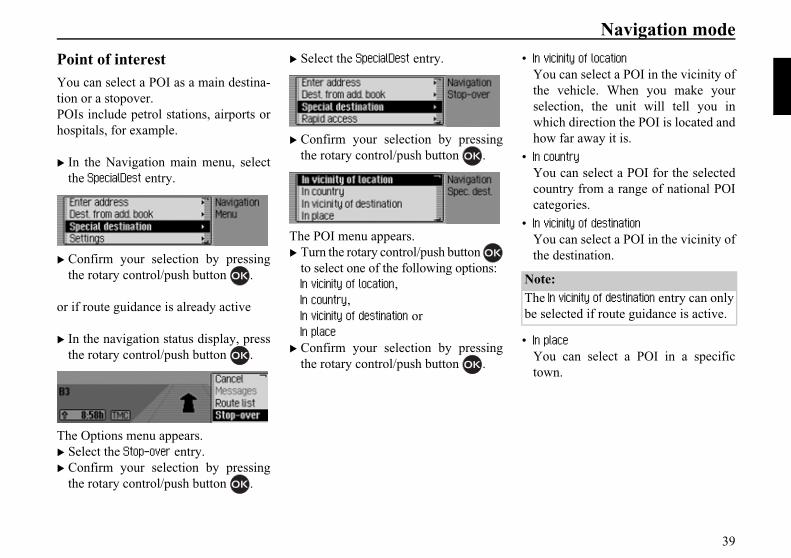
Point of interestYou can select a POI as a main destina-tion or a stopover.POIs include petrol stations, airports orhospitals, for example.
In the Navigation main menu, selectthe - entry.
Confirm your selection by pressingthe rotary control/push button .
or if route guidance is already active
In the navigation status display, pressthe rotary control/push button .
The Options menu appears. Select the ) entry. Confirm your selection by pressing
the rotary control/push button .
Select the - entry.
Confirm your selection by pressingthe rotary control/push button .
The POI menu appears. Turn the rotary control/push button
to select one of the following options:,8,, 8,,8 or,
Confirm your selection by pressingthe rotary control/push button .
• ,8
You can select a POI in the vicinity ofthe vehicle. When you make yourselection, the unit will tell you inwhich direction the POI is located andhow far away it is.
• , 8
You can select a POI for the selectedcountry from a range of national POIcategories.
• ,8
You can select a POI in the vicinity ofthe destination.
• ,
You can select a POI in a specifictown.
2037
2038
2039
2040
Note:The ,8 entry can onlybe selected if route guidance is active.

40
Navigation mode
Local In the POI menu, select the ,8
entry.
Confirm your selection by pressingthe rotary control/push button .
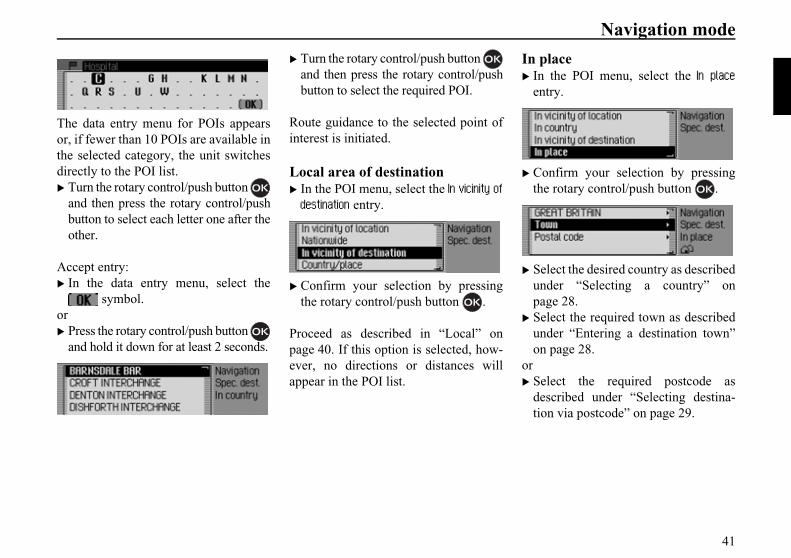
Turn the rotary control/push button and then press the rotary control/pushbutton to select the required POI cate-gory.
The data entry menu for POIs appearsor, if fewer than 10 POIs are available inthe selected category, the unit switchesdirectly to the POI list.
Turn the rotary control/push button and then press the rotary control/pushbutton to select each letter one after theother.
Accept entry: In the data entry menu, select the
symbol.or Press the rotary control/push button
and hold it down for at least 2 seconds.
Turn the rotary control/push button and then press the rotary control/pushbutton to select the required POI.
Route guidance to the selected point ofinterest is initiated.
In country In the POI menu, select the , 8
entry.
Confirm your selection by pressingthe rotary control/push button .
Turn the rotary control/push button and then press the rotary control/pushbutton to select the country in whichyou are looking for a national POI.
Turn the rotary control/push button and then press the rotary control/pushbutton to select the required POI cate-gory.
Oldversion
2042
2043
2044
2045
2046
2047
41
Navigation mode
The data entry menu for POIs appearsor, if fewer than 10 POIs are available inthe selected category, the unit switchesdirectly to the POI list. Turn the rotary control/push button
and then press the rotary control/pushbutton to select each letter one after theother.
Accept entry: In the data entry menu, select the
symbol.or Press the rotary control/push button
and hold it down for at least 2 seconds.
Turn the rotary control/push button and then press the rotary control/pushbutton to select the required POI.
Route guidance to the selected point ofinterest is initiated.
Local area of destination In the POI menu, select the ,8
entry.
Confirm your selection by pressingthe rotary control/push button .
Proceed as described in “Local” onpage 40. If this option is selected, how-ever, no directions or distances willappear in the POI list.
In place In the POI menu, select the ,
entry.
Confirm your selection by pressingthe rotary control/push button .
Select the desired country as describedunder “Selecting a country” onpage 28.
Select the required town as describedunder “Entering a destination town”on page 28.
or Select the required postcode as
described under “Selecting destina-tion via postcode” on page 29.
2053
2049
2055
2050
2051

42
Navigation mode
Turn the rotary control/push button and then press the rotary control/pushbutton to select the required POI cate-gory.
The data entry menu for POIs appearsor, if fewer than 10 POIs are available inthe selected category, the unit switchesdirectly to the POI list. Turn the rotary control/push button
and then press the rotary control/pushbutton to select each letter one after theother.
Accept entry: In the data entry menu, select the
symbol.or Press the rotary control/push button
and hold it down for at least 2 seconds.
Turn the rotary control/push button and then press the rotary control/pushbutton to select the required POI.
Route guidance to the selected point ofinterest is initiated.
Information about points of interestYou can call up additional informationabout many POIs, e.g. a brief descriptionor a telephone number. You can thenalso call this number directly.To do this, you must be in the POI list.
Press and hold it down until theinformation appears.
2052
2053
20542044
2056
*Only available for the Traffic Pro with Bluetooth® wireless technology.

43
Navigation mode
Turn the rotary control/push button to scroll through the information.
Press to return to the list of POIs.
During route guidanceDuring route guidance, navigation infor-mation is displayed on the status screenin all operating modes.However, complete navigation informa-tion is only displayed in the navigationstatus screen.
Examples:
The navigation status screen.
The radio status screen with active navi-gation. The display for other sources issimilar. When you are approaching aturn, the navigation status screen appearsautomatically. Once you have completedthe turn, the unit reverts to the previousstatus screen.
Navigation status screenAll information relevant to informationis displayed on the navigation statusscreen.
The distance to the next turn and the esti-mated time of arrival are shown on theright-hand side of the display.The name of the road the vehicle is turn-ing into appears in the first line on theupper left of the display. The name ofthe road the vehicle is currently travel-ling along appears in the second line.Depending on the setting, the currenttime, estimated journey time remainingor distance remaining to be travelledappear on the bottom left of the display.
Note:To call a displayed number directly,select the number and press the rotarycontrol/push button .
2057
1004
2057

44
Navigation mode
Turn the rotary control/push button to select the various displays in thestatus display.
Display with current time.
Display with estimated journey timeremaining.
Display with distance remaining to betravelled.
Example navigation displays
• “If possible, please turn back.”
You are driving in the wrong directionand should turn around at the earliestopportunity.
• “Please turn left after 100 metres.”
The name of the road the vehicle isturning into appears in the first line onthe upper left of the display. The nameof the road the vehicle is currentlytravelling along appears in the secondline.
• “Please leave the roundabout at thethird exit on the right.”
This display shows you the exit youshould take on the roundabout.
2057
2058
2059
WarningAccident hazard
Road traffic regulations always take pri-ority when a vehicle is being driven intraffic. The navigation system is only anaid. Errors may occur in individual dataitems/entries. At all times, the drivermust decide whether or not to heed theinformation provided. We do not accept liability for erroneousdata provided by the navigation system.
GG
2060
2061
2062

45
Navigation mode
• “Please follow the direction arrows.”
This display tells you that you are cur-rently on a non-digitised road (i.e. carpark, garage, multi-storey car park).Your location therefore does notappear on the digitised road map. Thearrow indicates the direction of thedestination as the crow flies.
• Active stopover:
• Block active:
• Recalculating route:
• Destination reached:
Options menuDuring route guidance, you can call upthe Options menu in the navigation statusscreen. Press the rotary control/push button
.
The Options menu appears on the right-hand side. Turn the rotary control/push button
to select one of the following options:,!,,) (stopover),,0 or2
Confirm your selection by pressingthe rotary control/push button .
2063
2064
2065
2066
2067 2068

46
Navigation mode
•
You can abort the current route guid-ance. See “Cancelling route guidance”on page 46.
• !
You can display/listen to a list oftraffic announcements relevant to theroute. See “Traffic announcements”on page 47.
•
You can display the route planned bythe Traffic Pro. See “Route list” onpage 47.
• )
You can enter another destination as astopover during active navigation. See“Stopover” on page 47.
•
You can block a section of the routestill to be travelled. See “Blocking aroute” on page 49.
• 0
You can modify the route options dur-ing navigation. See “Modifying routeoptions” on page 49.
• 2
You can switch navigation announce-ments off and then back on again. See“Switching navigation announcementson/off” on page 50.
Cancelling route guidanceYou can use this function to cancel routeguidance before reaching the actual des-tination.
In the Options menu, select the entry.
Select * (cancel navigation) or +(continue with navigation).
Note:If no operator inputs are made, themenu will automatically disappear aftera few seconds and navigation will con-tinue.
2068

47
Navigation mode
Traffic announcementsYou can display/listen to a list of trafficannouncements relevant to the route.
In the Options menu, select the !) entry.
The list of traffic announcements rele-vant to the route appears. To listen to all announcements, select
the ( entry.or Select the required announcement. Confirm your selection by pressing
the rotary control/push button .The announcement appears in full.
For more information about trafficannouncements, see “Displaying trafficinformation” on page 54.
Route listYou can display the route planned by theTraffic Pro.
In the Options menu, select the entry.
A list of the roads to the destinationappears. The distance to be travelledalong each road appears after its name. Turn the rotary control/push button
to scroll through the list.
Press to exit the route list.
StopoverYou can enter another destination as astopover during active navigation.
In the Options menu, select the ) entry.
Turn the rotary control/push button to select one of the following options: ,20,- or
Confirm your selection by pressingthe rotary control/push button .
2069
Note:Once route guidance has started, ittakes a little while for the route list toappear in full.If the route list is not available due torecalculation, +
appears. For technical reasons, distanceinformation cannot be displayed for theroad currently being driven on.
2070
2039

48
Navigation mode
•
You can enter a complete address as astopover as described in “Entering adestination” on page 27.
• 20
You can enter an address book entry asa stopover as described in “Selecting adestination from the address book” onpage 38.
• -
You can enter a POI as a stopover asdescribed in “Point of interest” onpage 39.
•
You can enter a fast access destinationas a stopover as described in “Naviga-tion fast access” on page 35.
Once the stopover has been selected, theroute is recalculated and route guidancestarted to the stopover.
Deleting a stopoverIf you have entered a stopover, you candelete it before reaching it.
In the Options menu, select the ) entry again.
Select * (delete stopover) or +
(retain stopover).
If * is selected, the stopover is deletedand route guidance to the main destina-tion started automatically.
Note:Once the stopover has been reached, thefollowing display appears.
Route guidance to the main destinationis started automatically.
2071
2072
Note:If no operator inputs are made, themenu will automatically disappear aftera few seconds and the stopover will beretained.

49
Navigation mode
Blocking a routeYou can use this function to block a sec-tion of the route still to be travelled whenthe next junction is reached. If possible,the Traffic Pro will then calculate adiversion route. This may be useful if atraffic jam or road block lies immedi-ately ahead.
In the Options menu, select the entry.
Turn the rotary control/push button to select the required distance to beblocked.
Confirm your selection by pressingthe rotary control/push button .
The route is recalculated.
Unblocking a routeOnce a block has been entered, it can beremoved again.
In the Options menu, select the entry.
Select * (delete block) or + (retainblock).
Modifying route optionsYou can modify the route options duringnavigation.
In the Options menu, select the 0 entry.
Select -8( 9 , ' or the avoid functions (on = ).
In the Route Options menu, select8.
The route is calculated with the newroute options.
2073Note:If no operator inputs are made, themenu will automatically disappear aftera few seconds and the block will beretained.
2074
Note:Only one of the three settings (-8( 9 , ' ) may beactive ( ) at the same time.For more information about routeoptions, see “Setting the route options”on page 33.
2075
50
Navigation mode
Switching navigation announcementson/offYou can switch navigation announce-ments off and then back on again.
In the Options menu, select the20 entry.
Press the rotary control/push button to switch navigation announcements on( ) or off ( ).
Information during route guidance
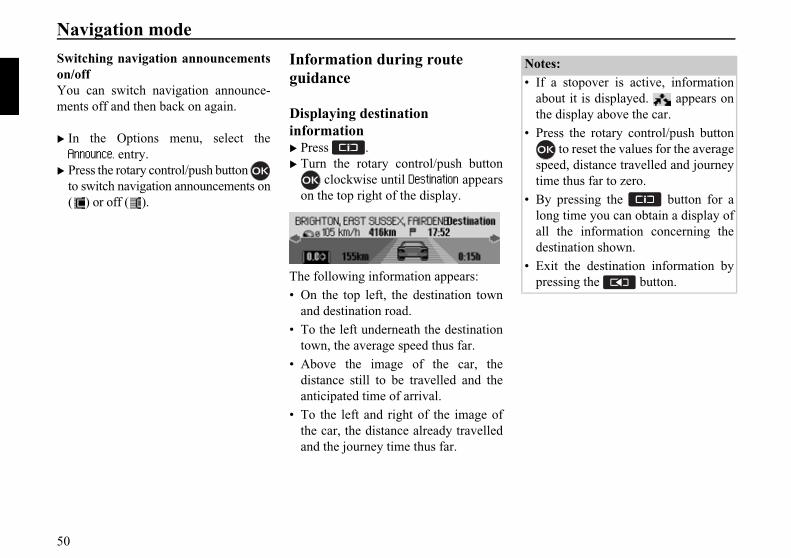
Displaying destination information Press . Turn the rotary control/push button
clockwise until - appearson the top right of the display.
The following information appears:• On the top left, the destination town
and destination road.• To the left underneath the destination
town, the average speed thus far.• Above the image of the car, the
distance still to be travelled and theanticipated time of arrival.
• To the left and right of the image ofthe car, the distance already travelledand the journey time thus far.
2076
Notes:• If a stopover is active, information
about it is displayed. appears onthe display above the car.
• Press the rotary control/push button to reset the values for the average
speed, distance travelled and journeytime thus far to zero.
• By pressing the button for along time you can obtain a display ofall the information concerning thedestination shown.
• Exit the destination information bypressing the button.

51
Navigation mode
Displaying/Storing position Press . Turn the rotary control/push button
clockwise until appears on thetop right of the display.
The following information appears:• If possible, the town and road/geo-
graphical coordinates and height abovesea level (only in the event of sufficientsatellite reception) appear on the left-hand side of the display.
• The number of satellites which havebeen/can be received appears abovethe image of the car.
Press the rotary control/push button to store the current position.
The current position was saved in fastaccess mode.
Displaying traffic announcements Press . Turn the rotary control/push button
clockwise until 3! appears onthe top right of the display.
The following information appears:• The number of TMC messages
received.• The number of TMC messages rele-
vant to the route.
Press the rotary control/push button.
All TMC messages are displayed. To listen to all announcements, select
the ( entry.or Select the required announcement. Confirm your selection by pressing
the rotary control/push button .The announcement appears in full.
For more information about trafficannouncements, see “Displaying trafficinformation” on page 54.
2077
2078
2079
2069

52
Navigation mode
Displaying/Changing route settings Press . Turn the rotary control/push button
clockwise until appears on the topright of the display.
The current route settings are displayed.
Press the rotary control/push button.
Select -8( 9 , ' or the avoid functions (on = ).
The route is calculated with the newroute options.
Information during non-active route guidance
Displaying/Storing a positionYou can display and store the currentposition. See “Displaying/Storing posi-tion” on page 51.
Displaying TMC messagesYou can display TMC messages as de-scribed in “Displaying traffic announce-ments” on page 51. Of course, no trafficannouncements are displayed for theroute.
Dynamic route guidance with TMC
What is dynamic route guidance?Dynamic route guidance is used to cal-culate the route, taking current trafficannouncements into account.The traffic announcements are transmit-ted by a TMC radio station in addition tothe radio programme and are receivedand analysed by the navigation system.The reception of traffic announcementsis free of charge.
2081
2082
Note:Only one of the three settings (-8( 9 , ' ) may beactive ( ) at the same time.For more information about routeoptions, see “Setting the route options”on page 33.
Note:Dynamic route guidance is not possiblein all countries.When Dynamic Route Guidance isactive, the navigation system mayrequest the navigation CD for possibleroute calculation (if the navigation CDis not inserted).

53
Navigation mode
Dynamic route guidanceYou can activate dynamic route guid-ance by selecting -8( in theroute options.If dynamic route guidance has been acti-vated, a continuous check is made forthe presence of relevant announcementsfor the selected route. The route is thencalculated using the “fast route” option,while taking into account current trafficannouncements. If it is determined dur-ing these continuous checks that a trafficannouncement is of relevance for theroute guidance, the unit will automati-cally re-calculate a new route to the des-tination. + is shown on the display. Thereis also the voice announcement “Theroute is being recalculated due to cur-rent traffic announcements”.
Your navigation system can receiveTMC information, whether a TMC sta-tion is selected or not. However, in orderto guarantee optimal reception of TMCinformation, we recommend the selec-tion of a TMC station.
Note:As the traffic announcements are trans-mitted by radio stations, we cannotassume responsibility for the complete-ness or accuracy of the announcements.
Austria: The location and event codewas made available by ASFINAG andBMVIT.
Note:If no TMC stations are received for10 minutes, +3! 0-80 0 0 is displayedand a short signal tone sounds.

54
Navigation mode
Displaying traffic informationCurrent traffic announcements can bedisplayed in text form. There are severaloptions for requesting current trafficinformation. You can call up traffic announcementsvia the navigation Options menu and bypressing . Please refer to thedescription in “Traffic announcements”on page 47 and “Displaying trafficannouncements” on page 51.
In both cases, the Traffic Pro displays alist of the up-to-date traffic informationcurrently available.
All TMC messages are displayed.
To listen to all announcements, selectthe ( entry.
or Select the required announcement. Confirm your selection by pressing
the rotary control/push button .
The announcement appears in full. To listen to the announcement, select
the entry.or Turn the rotary control/push button
to scroll through the traffic announce-ment.
A typical traffic announcement appearsas follows:• a motorway or road number• Approximate direction information• Detailed location and direction infor-
mation• The event• The cause, if known
Note:If no up-to-date traffic information isavailable, +3!( and +3! are displayed.
Note:Traffic announcements are displayedsorted according to category and road.Various symbols appear in front of eachtraffic announcement to indicate thecategory.
indicates a warning. indicates building sites and other
obstacles. indicates traffic jams in general.
2069
Note:The reading out of traffic announce-ments can be aborted by pressing therotary control/push button .
2084

55
Navigation mode
SettingsYou can make various settings for navi-gation in the settings.
In the Navigation main menu, selectthe entry.
Confirm your selection by pressingthe rotary control/push button .
The Settings menu appears. Turn the rotary control/push button
to select one of the following options:3 (,2 (,32 or"(
Confirm your selection by pressingthe rotary control/push button .
• 3 (
You can specify whether or not trafficannouncements should be read outautomatically by the unit and, if so,which ones.
• 2 (
You can specify whether the calculatedtime of arrival should be announcedautomatically once the route has beencalculated/recalculated.
• 32
You can configure the calculation ofthe ETA. ETA stands for EstimatedTime of Arrival.
• "(
You can convert the calculation of thedistances from metric (display in metresand kilometres) to imperial (display inyards and miles) system and vice versa.
Traffic announcementsYou can specify whether or not trafficannouncements should be read out auto-matically by the Traffic Pro and, if so,which ones. In the Settings menu, select the 3
( entry.
Confirm your selection by pressingthe rotary control/push button .
You may now select 2 (), 4 8 or 5 8.
2085
2086 2086
2087

56
Navigation mode
• 2(
If this function is active, all trafficannouncements are made automati-cally on receipt.
• 4 8
If you activate this function ( ),only the traffic announcements rele-vant to the route are made.
• 5 8
Activate this function ( ) to haveonly warnings announced.
Turn the rotary control/push button to switch the required function on ( )or off ( ).
Announcing the time of arrivalYou can specify whether the calculatedtime of arrival should be announcedautomatically once the route has beencalculated/ recalculated or after pressingthe button. In the Settings menu, select the
2 ( entry.
Press the rotary control/push button to switch the announcement of the timeof arrival on ( ) or off ( ).
ETA settingYou can configure the calculation of theETA. ETA stands for Estimated Timeof Arrival. In the Settings menu, select the 32
entry.
Confirm your selection by pressingthe rotary control/push button .
You may now select , ,: or 8.
•
This setting indicates to the Traffic Prothat you tend to drive rather quickly.An earlier ETA is calculated.
Note:This setting must be active ( ) in orderto be able to activate the two othersettings.
2088
2091
2092

57
Navigation mode
•
This is the default setting. It offerssufficiently accurate calculation of theETA for most drivers.
• :
This setting indicates to the Traffic Prothat you will need a little longer for theplanned route. This setting could beselected, for example, for a slowervehicle or in dense traffic areas.
• 8
Select this option to modify the calcu-lation of the ETA to suit your require-ments.
Turn the rotary control/push button to activate the required setting ( ).
If 8 is selected, you still need toselect the required setting. The availablerange is between 50% and 200%.A value of 100% indicates the set-ting. A later ETA will be calculated if ahigher percentage value is selected.
Turn the rotary control/push button to set the required percentage value.
Confirm your selection by pressingthe rotary control/push button .
Measuring unitYou can convert the calculation of thedistances from metric (display in metresand kilometres) to imperial (display inyards and miles) system and vice versa.
In the Settings menu, select the "( entry.
Confirm your selection by pressingthe rotary control/push button .
Select ! or ,( (on = ).
Note:Only one of the two settings may beactive ( ) at the same time.
2093
Note:Only one of the two settings may beactive ( ).
2094
2095

58
Radio modeRadio modeSwitching on radio mode Press .Radio mode is activated. The last wave-band selected and the last station selectedare set.
Calling up the Radio main menuYou can make settings for radio mode inthe Radio main menu.The following description assumes thatyou are in the status display.
Press twice in succession.or Press .The Fast Access menu appears. Select the ( entry.
The Radio main menu appears.The example shows the Radio mainmenu for VHF. Turn the rotary control/push button
to select one of the following options:5, ((8,& ,3 ,,: ,,( or2'
Confirm your selection by pressingthe rotary control/push button .
The required function is called up.
• 5
Accesses the selection menu for thewaveband. See “Selecting a wave-band” on page 59.
• ((8
Accesses the selection menu for theprogramme type. See “Programmetype” on page 64.
• &
Accesses the selection menu for thefilter function. See “Filter function”on page 62.
• 3
Accesses the selection menu for trafficprogrammes. See “Traffic programme”on page 67.
•
Accesses the sound settings. See“Sound settings” on page 18.
• :
Accesses the selection menu for voiceentries. See “Voice entries” onpage 66.
•
You can switch regionalisation on/off.See “Regionalisation” on page 65.
3001

59
Radio mode
• (
Accesses the selection menu forreception optimisation. See “Recep-tion optimisation” on page 66.
• 2'
You can switch bandwidth control on/off. See “Bandwidth control” onpage 67.
Selecting a waveband In the Radio main menu, select 5)
.
Turn the rotary control/push button to select one of the following options:&!)'8,&!)88,(( 8,2! or'
Confirm your selection by pressingthe rotary control/push button .
The selected waveband is set.
• &!)'8
If an FM station was selected previ-ously, it will remain selected or, if anAM station was selected, the last FMstation selected will be set.The Fast Access menu appears. Allreceivable stations which are not fil-tered out, appear in the list in alpha-betical order.The waveband set is indicated by the
symbol in the status display.• &!)88
If an FM station was selected previ-ously, it will remain selected or, if anAM station was selected, the last FMstation selected will be set.The Fast Access menu appears. Allreceivable stations which are not fil-tered out, appear in the list in order ofquality.The waveband set is indicated by the
symbol in the status display.
• (( 8
The last station set is retained.The station memory, which can storeup to 20 FM and AM waveband sta-tions, is displayed.The waveband set is indicated by the
symbol in the status display.See “Station memory” on page 71.
• 2!
The last medium wave station selectedis set.The status display appears.The waveband set is indicated by the
symbol in the status display.• '
The last short wave station selected isset.The status display appears.The waveband set is indicated by the
symbol in the status display.
3002

60
Radio mode
FM modeFM mode combines the two wavebands&!)'8 and &!)88.
Possible settings for FM stationsA number of possible settings may bemade for selecting stations in FM mode:
• Tuning via station list. See “Stationlist” on page 60.
• Scan function. See “Scan function” onpage 61.
• Manual station tuning. See “Manualstation tuning” on page 62.
• Via the station memory. See “Stationmemory” on page 71.
Station listAll stations which can be received/iden-tified appear in the station list.The display sequence is determined bythe selected waveband &!)'8or &!)88.
Stations can be selected using the stationlist in two ways:
Selection in status display: Turn the rotary control/push button
clockwise or counter clockwise.or In the status display, press or
.
Press or turn the rotary control/push button to the right to select thenext station on the station list. The nameof the station appears underneath the sta-tion currently selected.
Press or turn the rotary control/
push button to the left to select theprevious station on the station list. Thename of the station appears above thestation currently selected.
Selection via fast access. Press .
The Fast Access menu appears. Turn the rotary control/push button
to select the required station and pressthe rotary control/push button .
The selected station is set.
3003
3004

61
Radio mode
Scan functionAll stations in the station list are scannedbriefly to enable you to select the oneyou require.
In the status display, press and holddown or .
or In the status display, press the rotary
control/push button .The Options menu appears. Select the entry. Press the rotary control/push button
to activate the function ( ).The stations in the station list arescanned briefly in descending/ascendingorder.
Aborting the scan function In the status display, press or
. or Turn the rotary control/ push button
.or In the status display, press the rotary
control/push button .The Options menu appears. Select the entry. Press the rotary control/push button
to deactivate the function ( ).The station currently being scanned isset and the scan function is aborted.
Notes:• If the selected entry is a station chain,
this is indicated by a small triangle onthe right-hand edge of the list.Once a station has been selected, asecond list appears from which youmay select the required station fromthe station chain.Press to return to the previousmenu without selecting a station.
• Similarly, if a station transmits anumber of different regional pro-grammes and regionalisation has beenactivated as described in “Regionali-sation” on page 65, a list will appearfrom which you may select therequired station. Stations of this typeare identified in the station list by.1/.
Note:If the station memory is active and anFM station is selected, then onlystations which have not yet been storedare played when using the scanfunction.

62
Radio mode
Manual station tuningYou can set the required frequencymanually.
In the status display, press the rotarycontrol/push button until & 8) or & 8; appears on the displayinstead of the previous/next station.
Turn the rotary control/push button to select the required frequency.
To exit manual station tuning, press andhold down the rotary control/pushbutton until & 8) or & 8; disappears.The selected frequency remains set.
Filter functionYou can use this function to filterstations or entire station chains out of thestation list.
In the Radio main menu, select & .
The Filter menu appears. Turn the rotary control/push button
to select one of the following options:& , orthe stations and station chains whichcan currently be received.
Switching the filter function on/off In the Filter menu, select the &
entry. Turn the rotary control/push button
to switch the function on ( ) or off( ).
If the function is active ( ), only thestations and station chains which havenot been filtered out will appear in theFM station lists.
Note:Press or to initiate thesearch for the next receivable station.Pressing and holding button or
results in a fast frequency searchuntil the button is released.
3005
3006
Note:If the function is not active, the filtersettings will continue to be maintained.

63
Radio mode
Filtering stations In the Filter menu, select the station
chain to be filtered out and press therotary control/push button .
Select the ' entry. Turn the rotary control/push button
to switch the function on ( ).or Press . In the Fast Access menu which
appears, select the station chain to befiltered.
Press the rotary control/push button until a menu appears.
Select the & ' entry.The selected station chain no longerappears in the station list.
Filtering stations In the Filter menu, select the station to
be filtered. Turn the rotary control/push button
to activate the filter for this station ( ).or Press . In the Fast Access menu which
appears, select the station to be filtered. Press the rotary control/push button
until a menu appears. Select the & entry.or To filter the station currently playing,
press the rotary control/push button in the status display.
Select the & entry. Turn the rotary control/push button
to activate the filter for this station ( ).The selected station no longer appears inthe station list.
Cancel filteringCancel all filters In the Filter menu, select the
entry.
Deleting station chain filters In the Filter menu, select the station
chain to be activated and press therotary control/push button .
Select the ' entry. Turn the rotary control/push button
to switch the filter off ( ).
Deleting station filters In the Filter menu, select the station to
be activated. Turn the rotary control/push button
to deactivate the filter for this station( ).

64
Radio mode
Programme typeProgramme type (PTY) is a serviceoffered by many stations within theradio data system (RDS). It can be usedto define which specific stations shouldbe displayed with the correspondingprogramme types in the station list.
In the Radio main menu, select ) ((8.
The Programme Type menu appears. Turn the rotary control/push button
to select one of the following options: ((8,,+3* orthe PTY categories displayed.
Switching the programme type function on/off In the Programme Type menu, select
the ((8 entry. Turn the rotary control/push button
to switch the function on ( ) or off( ).
If the function is active ( ), only thestations with the selected programmetypes appear in the FM station lists. Theprogramme type of the selected stationalso appears on the right of the statusdisplay.
Selecting the programme type In the Programme Type menu, select
the entry for the required programmetype.
Turn the rotary control/push button to switch the individual programmetypes on ( ) or off ( ).
Select in the programme typemenu to reset all programme types tooff.
3007Note:If the function is not active, the settingswill continue to be maintained.
Note:Highlighting and subsequentlypressing and holding the rotary control/push button , all programme typesare reset to on.All PTY categories are displayed in theProgramme Type menu. A greyed-outcategory indicates that no stations inthis category can be received at thecurrent time. However, the categorycan still be activated/deactivated.Activate the +3* entry to add stationswhich do no transmit any PTY informa-tion to the station list display.

65
Radio mode
RegionalisationDuring the transmission time, certainRDS programmes are divided intoregional programmes with differentprogramme content.Switching on regionalisation preventsthe Traffic Pro from switching betweenregional programmes with different con-tent.
In the Radio main menu, select the entry.
Turn the rotary control/push button to switch the function on ( ) or off( ).
Radio textFM stations supply additional informa-tion, e.g. news or information about thecurrent programme, via the RDS datastream. This information can be dis-played.
In the status display, press the rotarycontrol/push button .
The Options menu appears.
Select the < entry.
Press the rotary control/push button to activate the function ( ).
The radio text for the current FM stationis displayed.
Deactivating radio text In the status display, press the rotary
control/push button . Select the < entry. Press the rotary control/push button
to deactivate the function ( ).
Note:Stations with regional programmes areidentified in the station list by .1/.If you switch the regional function offwhilst listening to a regional station, theunit will switch to the associated basestation.
3008
WarningAccident hazard
Since information transmitted via radiotext display varies constantly, we rec-ommend tuning in the radio text onlywhen the vehicle is stationary to avoidunnecessary distraction for the driver.This is a necessary precaution for acci-dent prevention.
GG
3009
Note:Unfavourable reception conditions, in-cluding interference, can garble or evenblock the radio text display.
3010

66
Radio mode
Voice entriesYou can delete or listen to voice entriesassigned to the station. You can alsoactivate or deactivate the voice dialoguefor creating new voice entries (see alsopage 74).
In the Radio main menu, select : .
Select , - or - .
•
Select to listen to allvoice entries associated with radio sta-tions.
• -
If - is selected, a promptwill appear asking you to confirmwhether or not all voice entries shouldactually be deleted.Select * to delete the voice entries or+ to continue without deletion.
• -
If the function is active, when a stationis stored, an automatic dialogue willappear for assigning a voice entry.Turn the rotary control/push button to switch the function on ( ) or off( ).
Reception optimisationYou can select one of three settings tosuppress reception-related interference.
In the Radio main menu, select )(.
Select 2(, 28 or 28( (on = ).
3011
Note:This setting is irrelevant for the wave-band medium wave and short wave.
Note:Only one of the entries in the list can beactive ( ).
3012

67
Radio mode
• 2(
Setting for normal operation, i.e.depending on reception, the unitswitches back and forth from stereo tomono (offers the optimum setting foralmost all reception areas).
• 28
Setting for exceptional reception con-ditions - i.e. the unit is constantly setto stereo.
• 28(
Setting for reception situations inwhich reflections constantly occur;i.e. the unit is constantly set to mono.
Bandwidth controlBandwidth control can be used to im-prove station reception in difficult recep-tion areas (station A has a neighbouringstation B in its immediate vicinity).
In the Radio main menu, select the2' entry.
Turn the rotary control/push button to switch the function on ( ) or off( ).
Traffic programmeIf an RDS station broadcasts trafficannouncements, it is possible to inter-rupt audio mode (CD, MP3, etc.), AMmode or mute mode and to switch to thetraffic announcements. Moreover, youcan listen to one FM station whilereceiving traffic announcements trans-mitted by another FM station.
In the Radio main menu, select 3 .
The TP menu appears. Turn the rotary control/push button
to select one of the following options:3 ,:(,( orthe TP stations displayed.
3013

68
Radio mode
Switching a traffic programme on/off In the TP menu, select the 3
entry. Turn the rotary control/push button
to switch the function on ( ) or off( ).
or In the status display, press the rotary
control/push button . Select the 3 entry. Turn the rotary control/push button
to switch the function on ( ) or off( ).
If the TP function is active ( ), the symbol appears in the status display toindicate this.
Selecting a TP stationYou can specify whether or not you wishto listen to the traffic news on a specificstation.
Automatic In the TP menu, select the )
( entry. Turn the rotary control/push button
to switch the function on ( ) or off( ).
Manual TP station selection In the TP menu, select the station on
which you wish to listen to trafficnews.
Turn the rotary control/push button to activate the station as the TP station( ).
or Press . In the Fast Access menu which
appears, select the required TP station. Press the rotary control/push button
until a menu appears. Select the 3 entry.
Note:When you activate the function, theTraffic Pro will select the station youare currently listening to as the TP sta-tion. If this station does not transmittraffic programmes or reception is poor,another station will be selected from thestation list.
Note:If the TP station can no longer bereceived, the Traffic Pro will activateautomatic TP station selection.This will remain active until the selectedTP station becomes available again.

69
Radio mode
TP volumeYou can use this function to control theincrease in volume for traffic announce-ments.
In the TP menu, select the :(
entry.
Turn the rotary control/push button to select the required value.
Cancelling traffic announcementsYou can cancel the reception of trafficannouncements.
The following display appears during atraffic announcement.
Press the rotary control/push button.
or Press .Traffic announcements are cancelled.
AM modeAM mode combines the two wavebands2! and ' .
Possible settings for AM stationsA number of possible settings may bemade for selecting stations in AM mode:
• Tuning via scan search. See “Scansearch” on page 70.
• Scan function. See “Scan function” onpage 70.
• Via the station memory. See “Stationmemory” on page 71.
Notes:• A setting of “0” indicates no increase
in volume.• A setting of “10” indicates a signifi-
cant increase in volume.
3014 3015

70
Radio mode
Scan search In the status display, press or
.or Turn the rotary control/ push button
.
Press to search for the next stationin ascending frequency order.Press to search for the next stationin descending frequency order.
Scan functionAll stations which can be received arescanned briefly to enable you to selectthe one you require.
In the status display, press and holddown or .
or In the status display, press the rotary
control/push button .The Options menu appears. Select the entry. Press the rotary control/push button
to activate the function ( ).The stations which can be received arescanned briefly in descending/ascendingfrequency order.
Aborting the scan function In the status display, press or
.or Turn the rotary control/ push button
.or In the status display, press the rotary
control/push button .The Options menu appears. Select the entry. Press the rotary control/push button
to deactivate the function ( ).The station currently being scanned isset permanently and the scan function isaborted.
3016
Note:If the station memory is active and anAM station is selected, then onlystations which have not yet been storedare played when using the scanfunction.

71
Radio mode
Station memoryUp to 20 FM, medium wave and shortwave stations can be stored in the stationmemory.
Calling up the station memory In the Radio main menu, select 5)
. In the Waveband menu, select the )
(( 8entry.The stations stored so far are displayedin the fast access station memory.
Storing stationsYou can store the current station if youare already in the station memory or if adifferent waveband has been selected.
Different waveband set In the Fast Access menu (not for AM
waveband), select the station to bestored.
Press the rotary control/push button until a menu appears.
Select the entry.or In the status display, press the rotary
control/push button .The Options menu appears. Select the entry.
In both cases, the station memory will bedisplayed. The station to be stored appearsas the first entry in the list and is identifiedby an arrow.
Notes:• If all 20 memory slots are occupied
and a new station is added, the 20thstation is deleted from the stationmemory without warning.
• If a voice entry has been assigned to astation, this is indicated by the sym-bol in front of the name of the station.
• A station can only be stored once inthe memory.
3017
3018

72
Radio mode
Turn the rotary control/push button to select the required memory position.
Confirm the memory position by press-ing the rotary control/push button .
Depending on the setting in “Voiceentries” on page 66, the procedure forsaving a voice entry for the stationstored will now start.
The station is now stored in the stationmemory.
Station already in memoryThe station to be stored is already set andyou are in station memory fast accessmode.
Turn the rotary control/push button to select the position in the memory listin which the station to be stored is to bestored.
Press the rotary control/push button until a menu appears.
Select the '
entry.
The station is now stored in the stationmemory.
Depending on the setting in “Voiceentries” on page 66, the procedure forsaving a voice entry for the stationstored will now start.
Moving stationsYou can move the position of a stationstored in the station memory.
Turn the rotary control/push button to select the memory to be moved.
Press the rotary control/push button until a menu appears.
Select the ! entry.The station to be moved is marked withan arrow.
Turn the rotary control/push button to select the required memory position.
Confirm the memory position by press-ing the rotary control/push button .
3019
3020

73
Radio mode
Deleting stationsYou can delete a station stored in thestation memory.
Fast access mode Turn the rotary control/push button
to select the station to be deleted. Press the rotary control/push button
until a menu appears.
Select the - entry.The selected station is deleted.
Status display In the status display, press the rotary
control/push button .The Options menu appears. Select the - entry.
The station is deleted from the stationmemory.
Naming stationsYou can assign a user-defined name ofup to 8 characters in length to a storedstation. Turn the rotary control/push button
to select the station to be named. Press the rotary control/push button
until a menu appears.
Select the +( entry.
Select the letters in the required nameone after the other and confirm thename entered.
The station named now appears in thestation memory (also in other wave-bands) with the name entered.
Note:If a voice entry has been assigned to thedeleted station, it will also be deleted.
3021
3022
Note:Please also refer to the description in“Data entry menus” on page 13.
3023

74
Radio mode
Creating/Deleting voice entriesYou can create a voice entry/delete anexisting voice entry for a station storedin the station memory.
Create
In fast access mode, turn the rotarycontrol/push button to select thestation for which you wish to create avoice entry.
Press the rotary control/push button until a menu appears.
Select the 8 entry.The procedure for saving a voice entry islaunched.
Deleting In fast access mode, turn the rotary
control/push button to select thestation for which you wish to delete avoice entry.
Press the rotary control/push button until a menu appears.
Select the - 8 entry.A prompt appears for you to confirm ifthe voice entry should really be deleted. Select * to delete the voice entry or
+ to continue without deletion.
Reading out voice entriesYou can listen to the voice entry for astation stored in the station memory.
In fast access mode, turn the rotarycontrol/push button to select thestation for which you wish to listen toa voice entry.
Press the rotary control/push button until a menu appears.
Select the 8 entry.The voice entry is read out.
Note:If a voice entry has already beenassigned to this station ( symbol) andyou wish to change it, you must firstdelete it before assigning a new entry.
3024
30253026

75
Media modeMedia modeMedia mode includes all sources on theTraffic Pro which can be used to playback audio or MP3 media.
Activating media mode Press .The last source active in media mode isactivated if possible.
or
Insert an audio CD or MP3 CD.The Traffic Pro will start to play theinserted CD.
or
Insert a micro-drive/memory cardcontaining audio/MP3 tracks into thedesignated slot.
The Traffic Pro will start to play thetracks on the micro-drive/memory cardinserted.
In all three cases, the media fast accessfunctions will appear on the displaybriefly.The display will then switch to the statusdisplay.
Media fast access functionsThe media fast access function displaysa list of available CDs and directories forselection.The following description assumes thatyou are in the status display.
Press .
The media fast access function appears. Turn the rotary control/push button
to select the required medium/sourceand press the rotary control/push button
.
4001
Notes:• In fast access mode, the individual
CDs, memory cards, sources anddirectories available are identified bythe following symbols:
indicates a CD in the internaldrive. SCD stands for Single CD.
indicates memory cards. indicates a CD in the CD changer. indicates AUX source. indicates directories.
• If for example there is only one audioCD in the internal drive, in fast accessmode, the tracks on that CD are dis-played immediately.
• Press and hold down to displaythe full names (if available) of theindividual entries in fast access mode.For a directory, the number of tracksand total playback time are also dis-played.

76
Media mode
The required CD, micro-drive/memorycard, source or directory is called and, ifavailable, the name of the track on theCD or in the directory is displayed.
Turn the rotary control/push button to select the required track and pressthe rotary control/push button .
The selected track is played.
Media status displayThe media status display is the “standarddisplay” for audio mode. All relevantdata for audio mode appears in the statusdisplay. This includes the following information:• Type of medium (CD, CD changer
and micro-drive/memory card)• Type of track (audio or MP3)• Status of scan function, track mix, etc.• Next and previous track• Playback time
The example shows the status displayfor MP3 media on a memory card.
Note:Once the last track on a CD/in a direc-tory has been played, if possible, thenext track played by the Traffic Pro willbe the first track in the next directory/onthe next CD. If no other tracks are avail-able, the first track in the current direc-tory/on the current CD is played.
4002
Notes:Press and hold to display the fullnames (if available) of the track entriesin fast access mode. The track number and the length of thetrack will also be displayed. Information on the medium on whichthe current track is stored will also beshown. If a CD name or directory nameis available, it will be displayed. The total number of tracks on the CD/directory and the total playing time willalso be displayed.The track lengths of tracks which havenot yet been played back are estimatedon the basis of a bit rate of 128 kbit/s. 4003

77
Media mode
Track jump/Track skip
Press to select the next track or to select the previous track.
or
Turn the rotary control/push button to select the required track.
Fast forward/rewindYou can start audible fast forward/rewind.
Forward Press until you reach the re-
quired point. Release .Playback will continue at normal speed.
Rewind Press until you reach the re-
quired point. Release .Playback will continue at normal speed.
Notes:• You can also select tracks in fast
access mode. See “Media fast accessfunctions” on page 75.
• If the current track has only beenplaying for approximately 10 secondswhen track jump is selected, the unitwill jump immediately to the previ-ous track.If the current track has been playingfor longer than 10 seconds, the unitjumps to the beginning of the currenttrack.
Note:If track skip reaches the first or the lasttrack in a directory or on a CD, the unitskips to the first or the last track in thecurrent directory or on the CD.
Notes:Forward/ reverse is not audible for MP3tracks.
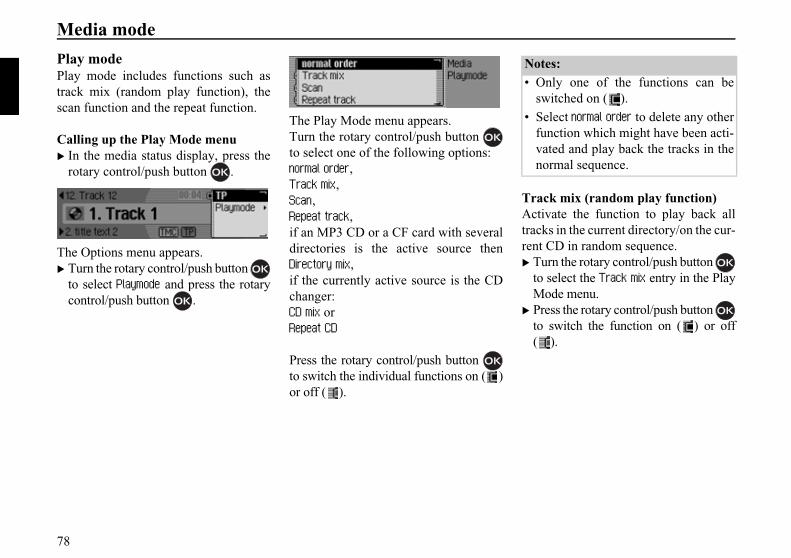
78
Media mode
Play modePlay mode includes functions such astrack mix (random play function), thescan function and the repeat function.
Calling up the Play Mode menu In the media status display, press the
rotary control/push button .
The Options menu appears. Turn the rotary control/push button
to select 8( and press the rotarycontrol/push button .
The Play Mode menu appears.Turn the rotary control/push button to select one of the following options: ( , 3 (<, , ,if an MP3 CD or a CF card with severaldirectories is the active source then- 8(<,if the currently active source is the CDchanger:-(< or -
Press the rotary control/push button to switch the individual functions on ( )or off ( ).
Track mix (random play function)Activate the function to play back alltracks in the current directory/on the cur-rent CD in random sequence. Turn the rotary control/push button
to select the 3 (< entry in the PlayMode menu.
Press the rotary control/push button to switch the function on ( ) or off( ).
4004
4005
Notes:• Only one of the functions can be
switched on ( ).• Select ( to delete any other
function which might have been acti-vated and play back the tracks in thenormal sequence.
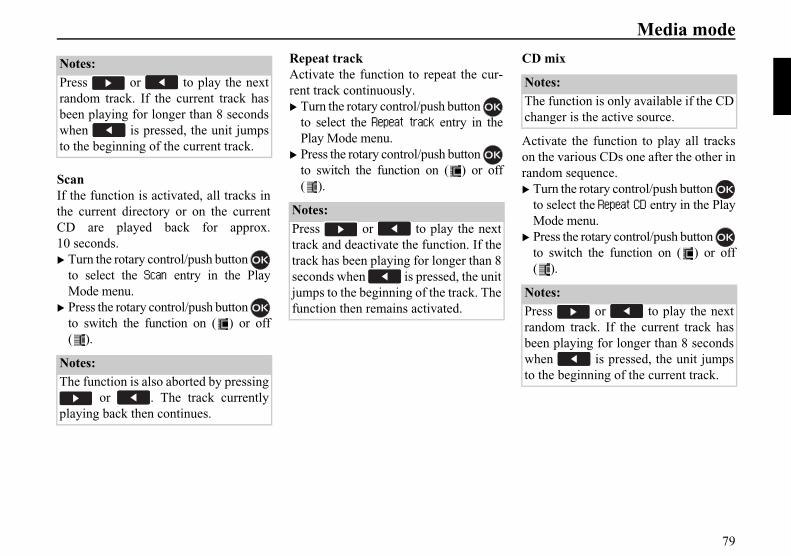
79
Media mode
ScanIf the function is activated, all tracks inthe current directory or on the currentCD are played back for approx.10 seconds. Turn the rotary control/push button
to select the entry in the PlayMode menu.
Press the rotary control/push button to switch the function on ( ) or off( ).
Repeat trackActivate the function to repeat the cur-rent track continuously. Turn the rotary control/push button
to select the entry in thePlay Mode menu.
Press the rotary control/push button to switch the function on ( ) or off( ).
CD mix
Activate the function to play all trackson the various CDs one after the other inrandom sequence. Turn the rotary control/push button
to select the - entry in the PlayMode menu.
Press the rotary control/push button to switch the function on ( ) or off( ).
Notes:Press or to play the nextrandom track. If the current track hasbeen playing for longer than 8 secondswhen is pressed, the unit jumpsto the beginning of the current track.
Notes:The function is also aborted by pressing
or . The track currentlyplaying back then continues.
Notes:Press or to play the nexttrack and deactivate the function. If thetrack has been playing for longer than 8seconds when is pressed, the unitjumps to the beginning of the track. Thefunction then remains activated.
Notes:The function is only available if the CDchanger is the active source.
Notes:Press or to play the nextrandom track. If the current track hasbeen playing for longer than 8 secondswhen is pressed, the unit jumpsto the beginning of the current track.

80
Media mode
Repeat CD
Activate the function to repeat the cur-rent CD continuously. Turn the rotary control/push button
to select the - entry in the PlayMode menu.
Press the rotary control/push button to switch the function on ( ) or off ( ).
Directory mix
Activate the function to play all trackson the various directories one after theother in random sequence. Turn the rotary control/push button
to select the - 8(< entry inthe Play Mode menu.
Press the rotary control/push button
to switch the function on ( ) or off ( ).
Calling up the Media main menuYou can make settings for media modein the Media main menu.The following description assumes thatyou are in the status display.
Press twice in succession.or Press .You are now in media fast access mode. Select the !( entry.
The Media main menu appears.
Notes:The function is only available if the CDchanger is the active source.
Notes:This function is only available if anMP3 CD or a CF card with directories isthe current audio source.
Notes:Press or to play the nextrandom track. If the current track hasbeen playing for longer than 8 secondswhen is pressed, the unit jumpsto the beginning of the current track.
4006

81
Media mode
Switching detailed track display on/offIf detailed track display is activated, apreviously abbreviated track name/ID3tag is displayed in full, if possible.
In the Media main menu, select the- 8 entry.
Turn the rotary control/push button to switch the function on ( ) or off( ).
CD mode
Notes on compact discs (CD)Sound interruptions may occur if the CDis soiled. In order to ensure the highesttone quality, please note the following:
• Always touch the CD at the edgesonly. Keep the disc clean and nevertouch the surface.
• Never stick anything on the CD.• Protect the CDs against direct sunlight
and from heat sources such as heatersetc.
• Before playing the CD, it should becleaned with a special, commerciallyavailable cleaning cloth, wiping fromthe centre outwards. Solvents such asbenzene, thinners or other commer-cially available cleaners and anti-static sprays must not be used.
4007Correct
Incorrect
Incorrect
Correct
Notes:• The Traffic Pro cannot play back
DVD-plus media (one side audio CD,the other DVD).Due to its increased thickness, insert-ing a DVD-plus may damage theTraffic Pro.
• Please note that foreign bodies suchas coins or other objects must not beinserted into the CD slot on theTraffic Pro. Foreign bodies in the unit can damagethe Traffic Pro.

82
Media mode
Inserting/Ejecting CDsInsertion Insert the disc into the CD slot with
the printed side up.The unit pulls in the CD automaticallyand begins to play the disc from the firsttrack.
Ejecting Press .The CD is ejected. Remove the CD.
Notes on CD-R and CD-RWsYou can play CD-Rs (writeable CDs)and CD-RWs (rewriteable CDs) on thisunit. However, please comply with legalrestrictions. These restrictions may varyfrom one country to another.Depending upon the recording deviceused to record the CD-R/CD-RW or thestate of the CD-R/CD-RW itself, it maynot be possible to play some CD-Rs/CD-RWs on this unit.A CD-R/CD-RW must be manufacturedaccording to the “Red Book” standard(not applicable for MP3 CDs).
Notes on copy-protected CDsIn some cases, problems may arise whenattempting to play copy-protected CDs,such as long reading times or a total ina-bility to perform playback.
Temperature protection circuitA temperature protection circuit in theTraffic Pro protects the laser diode fromexcessive heat.If this protection circuit is triggered,a warning message will appear and asignal tone will sound.The internal CD drive will then be disa-bled until a cooling down phase haselapsed.
Notes:• The CD is not ejected when the unit is
switched off but remains in the CDslot.
• If, once it has been ejected, the CD isnot removed from the CD slot, it willbe pulled back in after a short time.

83
Media mode
MP3 mode
General notes on MP3The music that can be played when yourunit is in MP3 mode is generally copy-right-protected under applicable interna-tional and national laws. In severalcountries, the reproduction of copy-righted material is not permitted, even ifonly for personal use, without theexpress prior consent of the copyrightholder. Please check the current copy-right laws for your country and complywith them. These restrictions naturallydo not apply to your own compositionsand recordings, or for recordings forwhich authorisation has been obtainedfrom the copyright holder.
Creating an MP3 storage medium• A maximum of 63 folders, each of
which can contain up to 50 tracks, canbe stored on a storage medium. How-ever, a maximum of 1000 tracks permedium are supported. If a folder con-tains more than 50 tracks, a secondfolder will be created automaticallywhich can also contain up to 50 tracks.Only folder names with 45 charactersor fewer can be displayed. Only tracknames with 63 characters or fewer canbe displayed.
• Only MP3 tracks stored on a storagemedium in compliance with ISO 9660can be played.
• If the artist’s name and track title areto be displayed, an ID3 tag must beadded to the MP3 file. This unit sup-ports versions ID3v1 and ID3v2.The ID3 tag can only be displayed ifthe corresponding track is beingplayed. The file name appears first(trackname.MP3).
• The display of artist’s name and tracktitle is restricted to a total maximumlength of 63 characters.
• The MP3 formats MPEG1 and MPEG2Layer3 are supported by the unit.Fixed and variable bit rates of 8 - 320kbps and scan rates of 16-48 kHz aresupported. We recommend the use ofthe Fraunhofer MP3 Encoder whencreating MP3 files.
• We recommend a bit rate of at least160 kbps for compressing MP3 files.It should be noted that with MP3 fileshaving a variable bit rate, the displayof the elapsed playing time maydeviate from real time.
• In the case of a mixed-mode medium(partly conventional audio tracks andpartly data), only the audio tracks areplayed back. The data part is notplayed back, even if MP3 tracks areincluded.

84
Media mode
For further information about creatingMP3 files and ID3 tags, please consultyour dealer or check on the Internet.
MP3 CD modeThe following points, described in “CDmode” on page 81 apply to MP3 CDmode:
• “Notes on compact discs (CD)” onpage 81.
• “Inserting/Ejecting CDs” on page 82.• “Notes on CD-R and CD-RWs” on
page 82.• “Temperature protection circuit” on
page 82.
MP3 memory cards/Micro-drive mode
Note:Due to the abundance of different kindsof CD burning software and their asso-ciated settings we cannot guarantee theplayback quality of MP3 CDs and/ormicro-drive/storage cards.
Note:• Micro-drives with a capacity of up to
4 GB can be used.• Type 1 and type 2 CF cards can be
used as memory cards. Memory cardsup to a capacity of 4 GB can be used.
• Please note that the storage mediumwas formatted with the FAT 16 filesystem.
• Short file names are displayed (8characters and 3 characters for fileextension).

85
Media mode
Inserting a micro-drive/memory cardThe slot for micro-drive/memory cards islocated underneath the removable controlpanel on the Traffic Pro or underneath thecover.
Remove the control panel as describedin “Removing/Inserting the controlpanel” on page 15.
Remove the cover as described in“Inserting/Removing the cover” onpage 16.
Insert the micro-drive/memory cardinto the visible slot on the right-handside.
Push the micro-drive/memory cardcarefully into the slot.
This pushes the eject button locatedabove and to the left of the slot out-wards.
Reinsert the cover as described in“Inserting/Removing the cover” onpage 16.
Reinsert the control panel as describedin “Removing/Inserting the controlpanel” on page 15.
The micro-drive/memory card is nowready for operation and, if MP3 tracksappear on the micro-drive/memory card,the first track in the first directory isplayed automatically.If the content of the micro-drive/mem-ory card has not been changed since itwas last inserted, playback begins withthe last track played.
Removing a micro-drive/memory card Remove the control panel as described
in “Removing/Inserting the controlpanel” on page 15.
Remove the cover as described in“Inserting/Removing the cover” onpage 16.
Press the eject button located to thetop left of the slot.
The micro-drive/memory card ispushed forwards out of the slot.
Pull the micro-drive/memory card outof the slot.
Reinsert the cover as described in“Inserting/Removing the cover” onpage 16.
Reinsert the control panel as describedin “Removing/Inserting the controlpanel” on page 15.
Notes:The memory card/micro-drive can onlybe inserted in one direction. The reverseof the memory card/micro-drive pointsto the left.

86
Media mode
CD changer modeThe following points, described in “CDmode” on page 81 apply to CD changermode:
• “Notes on compact discs (CD)” onpage 81.
• “Notes on CD-R and CD-RWs” onpage 82.
Operational readiness of CD changerIf a CD changer is connected to the TrafficPro, it will be ready for operation as soonas the CD magazine, loaded with CDs, isinserted. Close the sliding cover afterloading. All further operation is per-formed from the Traffic Pro control panel.
Loading/Ejecting the CD magazineTo eject the CD magazine, open the slid-ing cover on the changer and press theeject button. The magazine is ejectedand can be removed. When inserting CDs into the magazine,please note the instructions printed onthe magazine.
External units/AUX modeYou can call up units connected exter-nally to the Traffic Pro as described in“Media fast access functions” onpage 75.However, AUX mode must be activatedas described in “External device” onpage 131.
The external unit cannot be operated.You can only make volume and noisesettings for this source.
Attention:Incorrectly inserted CDs will not beplayed.
Note:To allow for the fastest possible changeof CDs, the magazine should be loadedsuccessively, beginning with compart-ment 1.

*Only available for the Traffic Pro with Bluetooth® wireless technology. 87
Telephone mode*Telephone modeBelow, you will find information onoperating a mobile phone withBluetooth® wireless technology,connected to the Traffic Pro.
Notes:• The Traffic Pro can operate a mobile
phone equipped with Bluetooth®wireless technology. We support theBluetooth® wireless technologyprofile HFP1.0. Mobile phoneswithout Bluetooth® wirelesstechnology cannot be operated.
• It is possible that some of the func-tions described are not available withsome mobile phones equipped withBluetooth® wireless technology. The Internet page www.becker.decontain additional informations.
• If your mobile telephone is connectedto the Traffic Pro and the Traffic Prois switched off (ignition is stillswitched on or the ignition key is inthe radio position), the Traffic Pro isactivated by an incoming call.
Notes:• The call lists and fast access entries
described below always only apply tothe time during which the mobilephone, equipped with Bluetooth®wireless technology, was connectedto the Traffic Pro. The entries in thecall lists of the Traffic Pro are notsynchronised with the call lists on themobile phone.
• The Traffic Pro cannot access themobile phone’s number memory orthe SIM card. However you canimport address book entries from themobile phone, as described in“Importing an address book entry*”on page 110.
• It is only possible to display the nameof a caller if the caller is listed in theaddress book on the Traffic Pro.
WarningRisk of injury
Please ensure that you keep the mobilephone in an appropriate, safe holder.Only then can injuries be prevented inthe event of an accident or due tosudden braking.
GG

88 *Only available for the Traffic Pro with Bluetooth® wireless technology.
Telephone mode*
Calling up the telephone
Press .
Telephone mode is activated. The telephone mode fast accessfunctions are displayed. In fast access mode the last 20 numbersor names which have been dialled,answered or rejected will be displayed inchronological order.Further information on fast access canbe found under “Fast access telephonefunctions” on page 98.
Bluetooth not yet switched onIf Bluetooth has not been switched onwhen you try to call up telephone mode,you will be shown the followingmessage.
Press the rotary control/push button.
Switch on the Bluetooth function asdescribed in “Activating/ deactivatingBluetooth*” on page 122.
Bluetooth mobile phone not yetconnectedIf the mobile phone has not beenconnected when you try to call uptelephone mode, the following messageis displayed.
You will see a list containing all thepreviously connected devices and theentry '.If +3is displayed in the list, orif the device to be connected is notdisplayed, select the 'entry to search for the device. This is also described in “Searching forBluetooth devices*” on page 122.
Note:To call up telephone mode directly, it isessential that Bluetooth has beenactivated and that the device isconnected to a mobile phone withBluetooth® wireless technology. Thisis described in “Bluetooth*” onpage 115.
5001
50025003

*Only available for the Traffic Pro with Bluetooth® wireless technology. 89
Telephone mode*
Select the device to be connected fromthe list.
Press the rotary control/push button.
Then proceed as described in“Connecting devices (Traffic Pro)*” onpage 118.
The telephone mode fast accessfunctions are displayed after the mobilephone has been connected successfully.
Calling up the Telephone main menuIn the Telephone main menu, you canenter/ select telephone numbers, call upthe call lists, connect a telephone, callthe emergency services and call up thetelephone settings.
Press twice in succession.or Press .The Fast Access menu appears. Select the 3'( entry.
The Telephone main menu appears.
Turn the rotary control/push button to select between
-( , ( ,,',( 8 and.
Confirm your selection by pressingthe rotary control/push button .
The desired function is called up.
• -(
Accesses the input menu for atelephone number. See “Diallingnumbers” on page 90.
5001
Note:To call up the telephone main menudirectly it is essential that Bluetooth hasbeen activated and that the mobilephone is connected to Bluetooth®wireless technology. This is describedin “Bluetooth*” on page 115.
5004

90 *Only available for the Traffic Pro with Bluetooth® wireless technology.
Telephone mode*
• (
You can select a telephone numberfrom the address book. See “Selectinga number from the address book” onpage 91.
•
You can obtain a display of the calllists for missed calls, answered callsand numbers dialled. See “Call lists”on page 92.
• '
You can connect a telephone viaBluetooth® wireless technology orstart a device search. The operatingprocedure is the same as described in“Bluetooth mobile phone not yetconnected” on page 88.
• ( 8
You can establish a connection to the“112” emergency number. See“Emergency call” on page 93.
•
You can select call answering settingsas well as settings for automaticactivation of voice mode. See“Settings” on page 94.
Dialling numbersUse this function to enter a telephonenumber and to call this number.
In the Telephone main menu, selectthe entry -( .
The input menu for the telephonenumber appears. Turn the rotary control/push button
and then press the rotary control/push button to select the digits in thedesired telephone number, one afterthe other.
Establishing a connection: In the input menu, select the - entry.or press the rotary control/push button
and hold for at least 2 seconds.
The Traffic Pro indicates that aconnection is being established bydisplaying the following message.
Press the rotary control/push button to abort the call.
NoteSelect the symbol to delete the lastcharacter in the entry.Please also refer to the description in“Data entry menus” on page 13.
5005
5006

*Only available for the Traffic Pro with Bluetooth® wireless technology. 91
Telephone mode*
If the person called answers thetelephone the Traffic Pro switches to thestatus display for active telephone calls.
Selecting a number from the address bookUse this function to select a telephonenumber from an address book and to callthis number.
In the Telephone main menu, selectthe entry ( .
The address book entries which have atelephone number are displayed.
Turn the rotary control/push button and then press the rotary control/
push button to select the desired entry.
If several telephone numbers have beensaved in the address book entry thefollowing appears on the display.
Turn the rotary control/push button and then press the rotary control/
push button to select the desirednumber.
The connection will be established.
Note:If the number called is busy, thefollowing message appears:
Press the rotary control/push button.
5007
Note:If there are more than 9 entries in theaddress book, for which one or moretelephone numbers are stored, the dataentry menu for locating the requiredname appears.
5008
Note:Up to three telephone numbers aredisplayed and marked with differentsymbols:
stands for the mobile number. stands for the business number. stands for the private number.
5009

92 *Only available for the Traffic Pro with Bluetooth® wireless technology.
Telephone mode*
The Traffic Pro indicates that aconnection is being established bydisplaying the following message.
Press the rotary control/push button to abort the call.
If the person called answers thetelephone the Traffic Pro switches to thestatus display for active telephone calls.
Call listsYou can obtain a display of the call listsfor missed calls, answered calls andnumbers dialled.
In the Telephone main menu, select.
Turn the rotary control/pushbutton to select between!,-( and2.
Confirm your selection by pressingthe rotary control/push button .
The desired list is called up.
• !
In this list you will find calls whichyou missed or which you rejected.
• -(
In this list you will find calls whichyou made yourself.
• 2
In this list you will find calls whichyou answered.
Note:If the number called is busy, thefollowing message appears:
Press the rotary control/push button.
5010
5007
Notes:• The call lists described below always
only apply to the time during whichthe mobile phone was connected tothe Bluetooth® wireless technologywith the Traffic Pro. The entries inthe call lists of the Traffic Pro are notsynchronised with the call lists in themobile phone.
• It is only possible to display the nameof a caller if the caller is listed in theaddress book of the Traffic Pro.
• The lists are limited to a maximum of20 entries.
• If a number is not known it willappear in the list as ".
5011

*Only available for the Traffic Pro with Bluetooth® wireless technology. 93
Telephone mode*
In the right-hand section of the displayyou can see the time of the entry for thevarious entries in the list. The date will be displayed if the entriesare older.
Calling a number from the list Select the list entry you wish to call. Press the rotary control/push button
.A connection will be established to thedesired number.
Retrieving information about theentry Select the list entry on which you wish
to receive more information. Press and hold until the
information appears. Press to return to the list.
Deleting a call listYou can delete the entire call list.
Select - in the call list to bedeleted.
Select * (delete) or + (do notdelete).
If you select *, the call list will bedeleted.
Emergency callThe function makes it possible toestablish a connection to the emergencyservices number “112”.
In the Telephone main menu, select( 8.
Select * (start emergency call) or +(do not start emergency call).
If you select *, the emergency call willbe triggered.
5012
5013
Note:In order to trigger an emergency call,the mobile phone must be switched on,connected to the Traffic Pro and thereception must be adequate.Harman/ Becker cannot generally beheld liable for the emergency callfunction.
5014
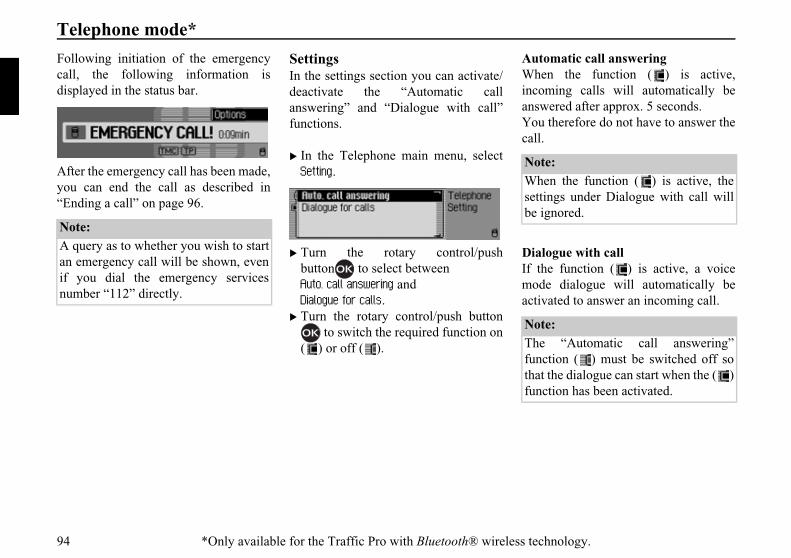
94 *Only available for the Traffic Pro with Bluetooth® wireless technology.
Telephone mode*
Following initiation of the emergencycall, the following information isdisplayed in the status bar.
After the emergency call has been made,you can end the call as described in“Ending a call” on page 96.
SettingsIn the settings section you can activate/deactivate the “Automatic callanswering” and “Dialogue with call”functions.
In the Telephone main menu, select.
Turn the rotary control/pushbutton to select between20 and - .
Turn the rotary control/push button to switch the required function on
( ) or off ( ).
Automatic call answeringWhen the function ( ) is active,incoming calls will automatically beanswered after approx. 5 seconds. You therefore do not have to answer thecall.
Dialogue with callIf the function ( ) is active, a voicemode dialogue will automatically beactivated to answer an incoming call.
Note:A query as to whether you wish to startan emergency call will be shown, evenif you dial the emergency servicesnumber “112” directly.
5015
5016
Note:When the function ( ) is active, thesettings under Dialogue with call willbe ignored.
Note:The “Automatic call answering”function ( ) must be switched off sothat the dialogue can start when the ( )function has been activated.

*Only available for the Traffic Pro with Bluetooth® wireless technology. 95
Telephone mode*
Telephone callsBelow, you can find information on theoperating options available to youduring an active telephone call.
Status displayThe status display appears automaticallyduring an active telephone call.
The status display shows the followinginformation:• Top left 1!0, to indicate that the
Telephone status display is active.• A telephone symbol will be displayed
in the centre left and, if available, thename of the caller/ the person you arecalling. If the name is not available thenumber will be displayed. If thenumber has not been transmitted" will be displayed.
• The name of the telephone currentlyconnected will be displayed at thebottom left.
• The length of the call will be shown onthe centre right of the display.
• The strength of the received telephonesignal is displayed at the bottom right,if available.
Press to switch to the statusdisplay for radio mode or media mode.You can also switch to the navigationstatus display if route guidance is active.
Accepting/ rejecting a callYou can accept or reject incoming calls.
Accepting a callThe Traffic Pro announces an incomingcall by means of a signal tone and thefollowing display.
Select the 2 entry and press therotary control/push button .
The call will be accepted and the statusdisplay will be shown.
5017
Note:If the “Call waiting” function is activeon the mobile phone the same signalsare used to indicate that another call iswaiting if a call is already taking place.If you accept the call the previous callwill be ended without a query beingmade.
5018

96 *Only available for the Traffic Pro with Bluetooth® wireless technology.
Telephone mode*
Rejecting a callYou can reject an incoming call. Theperson calling will hear a busy signal.
Select the = entry and press therotary control/push button .
The call will be rejected. The statusdisplay of the previously active radio ormedia source will be shown.
Ending a callActive calls can be terminated. For thispurpose, status display must be first beaccessed.
Press the rotary control/push button.
The Options menu appears.
Select the 6 entry. Press the rotary control/push button
.The call is terminated.
Options menuThe Options menu can be displayedduring an active call. You can end thecall, send DTMF tones or divert the callto the mobile phone.
In the Telephone status display, pressthe rotary control/push button .
The Options menu appears. Turn the rotary control/push button
to select between 6,-3!& and .
Note:Selecting ! deactivates the signaltone and the previously active source,radio or media, will be reactivated.However the call will be indicated untilthe caller ends the call.
5019
5017
5020
5020

*Only available for the Traffic Pro with Bluetooth® wireless technology. 97
Telephone mode*
End callSelect 6 in the Options menu toend the active call. See “Ending a call”on page 96.
DTMFSo-called DTMF dialling tones can betransmitted. For example, these tonesare required to retrieve information froman answering machine.
Open the Options menu.
Select the -3!& entry.
Enter the required sequence ofnumbers by turning and pressing therotary control/push button .
The entries must not be confirmed. Theindividual DTMF tones will be sentimmediately after selection.
Press to exit the input menu.or In the input menu, select the
symbol.
PrivateYou can divert calls received via TrafficPro to the mobile phone. The hands-freeunit is then deactivated.
Open the Options menu. Select the entry. Press the rotary control/push button
to switch the function on ( ) oroff ( ).
5028
5021
Notes:• With some mobile phones, the
connection from the mobile phone tothe Traffic Pro will be interruptedwhen this function is activated. If thisis the case you will have to reconnectthe mobile phone to the Traffic Pro asdescribed in “Connecting anddisconnecting devices*” onpage 117.
• If, at the end of the call, the function was activated, it will bedeactivated again for the next call.

98 *Only available for the Traffic Pro with Bluetooth® wireless technology.
Telephone mode*
Fast access telephone functionsIn fast access mode the last 20 numbersor names which have been dialled,answered or rejected will be displayed inchronological order.
You may:• Call numbers and names listed in fast
access mode directly.• Protect the fast access entries, i.e. the
entry will not be deleted when themaximum number of entries isreached. The oldest unprotected entrywill be deleted.
• Delete individual fast access entries.• Delete the entire fast access list.• Save an entry from the fast access list
in the address book.
Press .
The telephone fast access functionappears.
Direct calling Call up the telephone fast access
function. Turn the rotary control/push button
and then press the rotary control/push button to select the requirednumber or name from the list.
The call connection to the requiredperson will be started immediately.
Notes:The fast access entries have been givensymbols (the symbols are displayed infollowing order – number not inmemory, mobile phone number,business number, private number).• The symbols , , and
stand for answered calls.• The symbols , , and
stand for rejected calls.• The symbols , , and
stand for outgoing calls.5001

*Only available for the Traffic Pro with Bluetooth® wireless technology. 99
Telephone mode*
Protecting an entry Call up the telephone fast access
function. Select the entry to be protected. Press the rotary control/push button
until a menu appears. Select the 8 entry. Switch protection on ( ) or off ( )
by pressing the rotary control/pushbutton .
Protected entries are identified by the symbol.
Deleting an entry Call up the telephone fast access
function. Select the entry to be deleted. Press the rotary control/push button
until a menu appears. Turn the rotary control/push button
and then press the rotary control/push button to select the - 8entry.
The entry is deleted from the fast accesslist.
Deleting a list Call up the telephone fast access
function. Press the rotary control/push button
until a menu appears. Turn the rotary control/push button
and then press the rotary control/push button to select the - entry.
When the prompt appears, select *to delete the list or + to retain it.
If you select * the list will be deletedin the fast access function.
Note:A protected entry is only protected frombeing deleted in fast access mode.However, you can delete this protectedentry individually, and it will also bedeleted when the complete list isdeleted.
5022

100 *Only available for the Traffic Pro with Bluetooth® wireless technology.
Telephone mode*
Saving a number in the address book Call up the telephone fast access
function. Select the entry to be saved. Press the rotary control/push button
until a menu appears. Turn the rotary control/push button
and then press the rotary control/push button to select the entry.
Turn the rotary control/push button to select between
8 and2( 8.
Confirm your selection by pressingthe rotary control/push button .
• 8
Select this option to create a new entryin the address book.
• 2( 8
Select this option to add the currentnumber to an existing entry in theaddress book.
Creating a new entry Select the 8 entry.
Turn the rotary control/push button to select between!0,0 and 0.
Confirm your selection by pressingthe rotary control/push button .
Turn the rotary control/push button and then press the rotary control/
push button to select each letter in thesurname one after the other.
Select the symbol from theinput menu.
or press the rotary control/push button
and hold for at least 2 seconds.The entry is adopted.
50235024
Note:Please also refer to the description in“Data entry menus” on page 13.
2030
2031

*Only available for the Traffic Pro with Bluetooth® wireless technology. 101
Telephone mode*
Turn the rotary control/push button and then press the rotary control/
push button to select each letter in thefirst name one after the other.
Select the symbol from theinput menu.
or press the rotary control/push button
and hold for at least 2 seconds.
The address book entry appears. Turn the rotary control/push button
and then press the rotary control/push button to select the entry.
A confirmation that the entry has beensaved appears. Press the rotary control/push button
.
Adding data to entries Select the 2( 8 entry.
Turn the rotary control/push button and then press the rotary control/
push button to select the entry towhich you wish to add data.
Turn the rotary control/push button to select between!0,0 and 0.
Confirm your selection by pressingthe rotary control/push button .
A confirmation that the entry has beensaved appears. Press the rotary control/push button
.
5025Note:If there are more than 10 entries in theaddress book, the input menu forlocating the required name appears.
5026
5027

102
Address bookAddress bookYou can store complete addresses withtelephone numbers and other informa-tion in the address book. You can set upaddress book entries so that navigationto the selected address can be starteddirectly from the address book. Theaddress book then also serves as a desti-nation memory for navigation.
Calling up the address book Press .
The address book is called up.The address book fast access list appears.The last 20 address book entries used inthe address book appear here.
Calling up the Address Book main menuYou can create new entries, find entriesand make voice entries in the AddressBook main menu.
Press twice in succession.or Press .The Fast Access menu appears. Select the 2 ( entry.
The Address Book main menu appears.
Creating an entry In the Address Book main menu,
select the + 8)<8 entry.
You are prompted to enter a surname.
Turn the rotary control/push button and then press the rotary control/pushbutton to select each letter one after theother.
NoteAny address book entries to whichroute guidance was started via the navi-gation system will not appear in the fastaccess list.
6001 6002 NoteSelect the symbol to delete the lastcharacter in the entry.Please also refer to the description in“Data entry menus” on page 13.
6003

103
Address book
Accept entry: In the data entry menu, select the
symbol.or Press the rotary control/push button
and hold it down for at least 2 seconds.
You are prompted to enter a first name.
Enter a first name in the same way asa surname.
You can now enter additional data: Turn the rotary control/push button
to select one of the following options:!0,0, 0, '( ,, 8,)(, )( and555
Confirm your selection by pressing therotary control/push button . Theappropriate data entry menu appears.
Enter the required information.
Once you have entered all the informa-tion, you must save the entry. Select the entry.
Confirm your selection by pressingthe rotary control/push button .
NoteIf you do not wish to enter a surname orfirst name, select the symbol inthe data entry menu or press the rotarycontrol/push button and hold itdown for at least 2 seconds.However, a name must be stored withthe entry (first name or surname).
6004
6005
NoteIf for example a telephone number hasbeen entered for ! 0, this willappear in the menu instead of !0.To enable you to identify numbers sub-sequently, symbols appear in front ofthe individual entries.
stands for !0. stands for 0. stands for 0. stands for )(. stands for )(.
6006
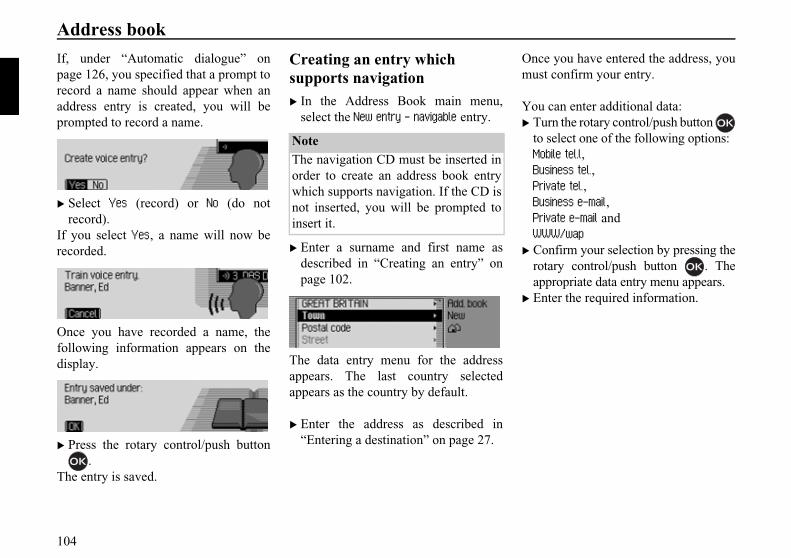
104
Address book
If, under “Automatic dialogue” onpage 126, you specified that a prompt torecord a name should appear when anaddress entry is created, you will beprompted to record a name.
Select * (record) or + (do notrecord).
If you select *, a name will now berecorded.
Once you have recorded a name, thefollowing information appears on thedisplay.
Press the rotary control/push button.
The entry is saved.
Creating an entry which supports navigation In the Address Book main menu,
select the + 8) entry.
Enter a surname and first name asdescribed in “Creating an entry” onpage 102.
The data entry menu for the addressappears. The last country selectedappears as the country by default.
Enter the address as described in“Entering a destination” on page 27.
Once you have entered the address, youmust confirm your entry.
You can enter additional data: Turn the rotary control/push button
to select one of the following options:!0,0, 0,)(, )( and555
Confirm your selection by pressing therotary control/push button . Theappropriate data entry menu appears.
Enter the required information.
6007
6008
6009
NoteThe navigation CD must be inserted inorder to create an address book entrywhich supports navigation. If the CD isnot inserted, you will be prompted toinsert it.
6010

105
Address book
Once you have entered all the informa-tion, you must save the entry. Select the entry.
Confirm your selection by pressingthe rotary control/push button .
If, under “Automatic dialogue” onpage 126, you specified that a prompt torecord a name should appear when anaddress entry is created, you will beprompted to record a name.
Select * (record) or + (do notrecord).
If you select *, a name will now berecorded.
Once you have recorded a name, thefollowing information appears on thedisplay.
Press the rotary control/push button.
The entry is saved.
Find entryWhen searching for an address bookentry, you can search based on names ortowns. Please also refer to the descrip-tion in “Setting the search criterion” onpage 106.
In the Address Book main menu,select the ' 8 entry.
The data entry menu for the name/loca-tion appears. Turn the rotary control/push button
and then press the rotary control/pushbutton to select each letter one after theother.
6006
6007
6008
6009NoteIf less than 10 address book entries havebeen saved, a list of entries appears.You can then select the required entryfrom the list.
6011

106
Address book
The last letter entered is highlighted. Tohelp, the name closest to the previousentry is displayed. The Traffic Pro offersonly the possible remaining letters forselection. If no other entries are available,the Traffic Pro completes the name auto-matically.
Accept entry: In the data entry menu, select the
symbol.or Press the rotary control/push button
and hold it down for at least 2 seconds.
If the complete name/location has alreadybeen entered and/or added automatically,the address book entry appears.If an incomplete name/location entry wasconfirmed, the selection list appears.
Turn the rotary control/push button and then press the rotary control/
push button to select the requiredname/location.
The address book entry selected appears.
Setting the search criterion In the Address Book main menu,
select the ' entry.
Select '8( or '8(on = ).
NoteSelect the symbol to delete the lastcharacter in the entry.
6012
NoteIf more than one address entry has beensaved for one location, another selectionmenu appears. Select the required address book entry.
6013
Note:Only one of the two settings may beactive ( ) at the same time.
6014

107
Address book
Editing entries Find the address book entry to be
modified.
Select the entry.
Turn the rotary control/push button to select one of the following options:',< 8.3/*,- 8, 8 or - 8and 8
Confirm your selection by pressingthe rotary control/push button .
• '
You can modify the data entered foran entry. See “Modifying an entry” onpage 107.
• < 8.3/*Use this function to transfer a singleaddress book entry in vCard format toanother device which is equipped withBluetooth® wireless technology.
• - 8
You can delete the selected entry. See“Deleting an entry” on page 108.
• 8 or - 8You can create a voice entry for theselected entry or delete an existingvoice entry. See “Creating/Deletingvoice entries” on page 108.
• 8
Once you have made this selection,the voice entry saved is read out.
Modifying an entry In the Edit Entries menu, select the
' entry.
Modify the required data as describedin “Creating an entry” on page 102.
Once you have entered all the informa-tion, you must save the entry. Select the entry.
Confirm your selection by pressingthe rotary control/push button .
Note:You can modify individual entries. To dothis, select the entry to be modified andpress and hold down the rotary control/push button until the appropriatedata entry menu appears.
6015
6016
6017
6006
*Only available for the Traffic Pro with Bluetooth® wireless technology.
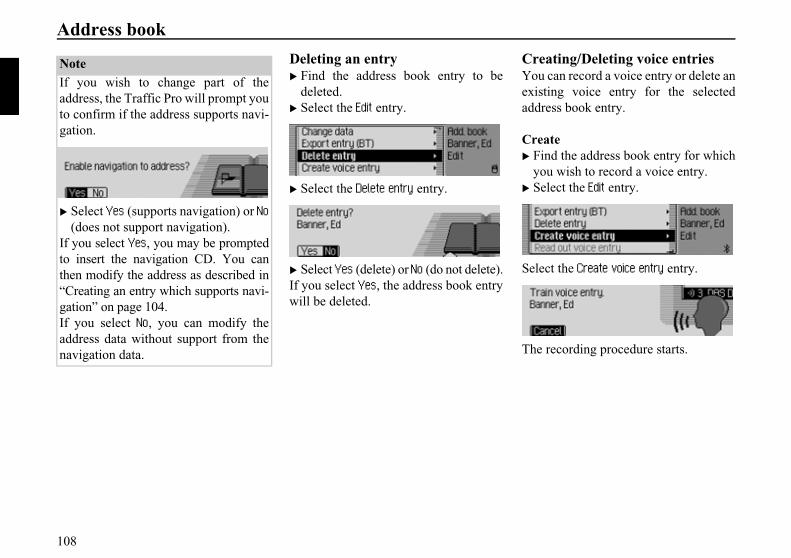
108
Address book
Deleting an entry Find the address book entry to be
deleted. Select the entry.
Select the - 8 entry.
Select * (delete) or + (do not delete).If you select *, the address book entrywill be deleted.
Creating/Deleting voice entriesYou can record a voice entry or delete anexisting voice entry for the selectedaddress book entry.
Create Find the address book entry for which
you wish to record a voice entry. Select the entry.
Select the 8 entry.
The recording procedure starts.
NoteIf you wish to change part of theaddress, the Traffic Pro will prompt youto confirm if the address supports navi-gation.
Select * (supports navigation) or +(does not support navigation).
If you select *, you may be promptedto insert the navigation CD. You canthen modify the address as described in“Creating an entry which supports navi-gation” on page 104.If you select +, you can modify theaddress data without support from thenavigation data.
60186019
6020 6021
6008

109
Address book
Delete Find the address book entry for which
you wish to delete a voice entry. Select the entry.
Select the - 8 entry. When the next prompt appears, select
* (delete) or + (do not delete).If you select *, the voice entry will bedeleted.
Reading out voice entries Find the address book entry, the voice
entry of which you wish to have readout.
Select the entry. Select the 8 entry.The voice entry is read out.
Exporting an address book* Use this function to transfer the entireaddress book in vCard format to anotherdevice which is equipped withBluetooth® wireless technology.
In the Address Book main menu,select the < .3/ entry.
Select the device to which the addressbook is to be transferred.
Press the rotary control/push button.
The Traffic Pro tries to establish aconnection to the required device. If authentication is required, you willhave to connect/ authenticate the deviceas described in “Connecting devices(Traffic Pro)*” on page 118.
Press the rotary control/push button to abort the transfer. No data will betransferred.
The address book has been sent. Press the rotary control/push button
.
6022 NoteThe recipient Bluetooth device must beable to receive several addresses. If thisis not supported, it is possible that onlythe first entry in the address book willbe transferred.
6030
6031
6032
*Only available for the Traffic Pro with Bluetooth® wireless technology.

110
Address book
Exporting an address book entry*Use this function to transfer a singleaddress book entry in vCard format toanother device which is equipped withBluetooth® wireless technology.
Find the address book entry which youwish to export.
Select the entry.
Select the < 8.3/ entry.
Select the device to which the entry isto be sent.
Press the rotary control/push button.
The Traffic Pro tries to establish aconnection to the required device. If authentication is required, you willhave to connect/ authenticate the deviceas described in “Connecting devices(Traffic Pro)*” on page 118.
Press the rotary control/push button to abort the transfer. No data will betransferred.
The address book entry has been sent. Press the rotary control/push button
.
Importing an address book entry*Addresses in vCard format can beimported from other devices.This function is initiated by an externalBluetooth device. Please also refer to theinstructions for your device.
The procedure is as follows:The external device sends a connectionrequest.If authentication is required, you willhave to connect/ authenticate the deviceas described in “Connecting devices(Traffic Pro)*” on page 118.
6033
6034
6035
6036
Note If a connection to a Bluetooth device
has already been established aconnection request from anotherBluetooth device will be rejectedwithout information being sent by theTraffic Pro.
*Only available for the Traffic Pro with Bluetooth® wireless technology.

111
Address book
Then, depending on the settings in“Always allow connection*” onpage 116, the following query is sent or,if the function is active, this step will beskipped.
Select between*, + and 28.• *
Connection of the external device isallowed.
• +
Connection of the external device isrejected.
• 28
Connection to the external device isallowed. The function described in“Always allow connection*” onpage 116 will also be activated.Further connection requests will beaccepted without a query.
If you have allowed the connection bymeans of * or 28, the address datawill be sent.2 > appears on thedisplay.Press the rotary control/push button to abort the transfer. No data will betransferred.
The following information will bedisplayed if the transfer was successful.
Select between 2 (addresses will besaved in address book) and - (transferred addresses will not besaved).
The following information will bedisplayed if 2 was selected.
Press the rotary control/push button.
6037
6038
6039
*Only available for the Traffic Pro with Bluetooth® wireless technology.

112
Address book
Navigating to an address book entryYou can start route guidance to anaddress for an address book entry fromthe address book.
Find the address book entry for whichyou wish to start route guidance.
Select the name or a part of the address. Press the rotary control/push button
.Route guidance to the destination will beinitiated.
Voice entries In the Address Book main menu,
select the : entry.
Turn the rotary control/push button to select one of the following options: ,- and-
Confirm your selection or switch thefunction on/off by pressing the rotarycontrol/push button .
•
All voice entries stored are read out.
• -
You can delete all stored voice entries.
When the next prompt appears,select * to delete the entry or +not to delete.
• -
You can switch the automatic dialoguefor recording a voice entry on/off.
Switch the function on ( ) or off( ) by pressing the rotary control/push button .
Note:Route guidance is only possible if anaddress which supports navigation hasbeen assigned to the address bookentry.If an address book entry supports navi-gation, + appears on the right ofthe display.
6024
6025

113
Address book
Calling an address book entry*From the address book you can start acall to a telephone number stored in theaddress book.
Find the address book entrycontaining the telephone number youwish to call.
Select the desired telephone number.
Press the rotary control/push button.
The call to the required number will beestablished.
Fast access functionsThe last 20 address book entries used inthe address book appear here.You may:• Protect the fast access entries, i.e. the
entry will not be deleted when themaximum number of entries isreached. The oldest unprotected entrywill be deleted.
• Delete individual fast access entries.• Delete the entire fast access list.
Press .
The address book fast access functionappears.
Protecting an entry Call up the address book fast access
function. In the Fast Access menu which
appears, select the address book entryto be protected.
Press the rotary control/push button until a menu appears.
Select the 8 entry.
Switch protection on ( ) or off ( )by pressing the rotary control/pushbutton .
Protected entries are identified by the symbol.
Note:Up to three telephone numbers can besaved. These are marked with differentsymbols.
stands for the mobile number. stands for the business number. stands for the private number.
6040
6001
6026
*Only available for the Traffic Pro with Bluetooth® wireless technology.*Only available for the Traffic Pro with Bluetooth® wireless technology.

114
Address book
Deleting an entry Call up the address book fast access
function. In the Fast Access menu which appears,
select the entry to be deleted. Press the rotary control/push button
until a menu appears.
Turn the rotary control/push button and then press the rotary control/pushbutton to select the - 8 entry.
The entry is deleted from the fast accesslist.
Deleting a list Call up the address book fast access
function. Press the rotary control/push button
until a menu appears.
Turn the rotary control/push button and then press the rotary control/pushbutton to select the - entry.
When the prompt appears, select *to delete the list or + to retain it.
If you select *, the list will be deletedin the fast access function.
Note:The entry is only deleted from the fastaccess list. It remains available in theaddress book.
6027
Note:The entries are only deleted from thefast access list. They remain availablein the address book.
6028
6029

115
SettingsSettingsCalling up general settingsYou can configure your Traffic Pro tomeet your requirements in the generalsettings. Press .
The Information menu appears.
Bluetooth*Bluetooth® wireless technology is asystem which allows radio contactbetween electronic devices within amax. range of 10 metres. Connecting individual devices underBluetooth® wireless technology doesnot incur any charges. A mobile phonewith Bluetooth® wireless technologycan be operated via the Traffic Pro if theconnection was made via Bluetooth®wireless technology. The Traffic Pro then also serves as ahands-free unit.
Opening the device list* Press . Turn the rotary control/push button
anti-clockwise until '
appears at the top right of the display.Three different displays could be shown,depending on the current status of theBluetooth function.
• Bluetooth is switched off.
• Bluetooth is switched on but atelephone is not connected to theTraffic Pro.
Note:The General Settings menus will disap-pear automatically once they have beenidle for a short period of time. Any changes made will be saved.
7001
Note:In some countries there could berestrictions on the use of devices withBluetooth® wireless technology. Theauthorities of the relevant country canprovide you with further information.
7020
7029
*Only available for the Traffic Pro with Bluetooth® wireless technology.

116
Settings
• Bluetooth is switched on and atelephone is connected to the TrafficPro.
Press the rotary control/push button.
The Bluetooth device list is displayed. The devices recognised by the TrafficPro are displayed in this list. The currentstatus is indicated by means of a symbolnext to the name of the devices.• Connected device (marked with the
symbol)• Device with Standard status (marked
with the symbol)• Coupled devices (marked with the
symbol)
• The symbol is shown on thedisplay if an error occurred inestablishing a connection. It is thenonly possible to disconnect the device.
Always allow connection*When this function is activated thecorresponding external device canestablish a connection to the Traffic Prowithout you authorising it.
In the device list, select the device forwhich the “Always allow connection”setting is to be changed.
Press the rotary control/push button and hold until the following menu
appears.
Select the 28 entry. Press the rotary control/push button
to switch the function on ( ) oroff ( ).
7030
7031
Notes:• The device which was stored in the
device list last will be shown at theend of the list.
• Devices stored in the list are retaineduntil the entry is deleted.
• If no devices have yet been stored inthe device list, +3 will bedisplayed. You can then start a searchfor Bluetooth devices in “Searchingfor Bluetooth devices*” aufSeite 122.
7032
*Only available for the Traffic Pro with Bluetooth® wireless technology.

117
Settings
Name device*You can change the name of a devicedisplayed in the Bluetooth device list.
Select the device to be named from thedevice list.
Press the rotary control/push button and hold until the following menu
appears.
Select the +( entry.
Enter the desired name. For thispurpose, proceed as described in“Data entry menus” auf Seite 13.
The changed name will be shown in thedevice list.
Deleting a device from the list*You can delete devices from theBluetooth device list which are not usedor which are outdated.
Select the device to be deleted fromthe device list.
Press the rotary control/push button and hold until the following menu
appears.
Select the - ( entry. When the next prompt appears, select
* to delete the entry or + to retain it.The device will be deleted or retained onthe basis of the selection.
Connecting and disconnecting devices*Before a Bluetoothdevice is able tocommunicate with the Traffic Pro, itmust be connected to the system.
You can initiate this connection from theTraffic Pro or from the external device.
7033
7034
7035
Note:It is not yet clear whether connection ispossible in both directions with alldevices using Bluetooth® wirelesstechnology. In the event that theconnection cannot be established fromthe Traffic Pro, try initiating theconnection from the external device,and vice versa.
*Only available for the Traffic Pro with Bluetooth® wireless technology.

118
Settings
Connecting devices (Traffic Pro)* Select the device to be connected from
the device list.
Press the rotary control/push button .
Select * to connect or + not toconnect.
If * is selected, the Traffic Pro willattempt to establish a connection to therequired device.
You may be required to enter a passworddepending on which device you aretrying to connect.
Enter the password by rotating/pressing the rotary control/pushbutton .
Select the symbol from theinput menu.
or press the rotary control/push button
and hold for at least 2 seconds.
A connection will be established to therequired device. The device has nowbeen now authenticated.If it was not possible to establish aconnection, the Traffic Pro will notifyyou of this on the display.
Notes:• A device that has not yet been
connected is identified by the symbol or . A device which is already
connected is identified by the symbol.
• If no devices have yet been stored inthe device list + 3 will bedisplayed. You can then start a searchfor Bluetooth devices as described in“Searching for Bluetooth devices*”auf Seite 122.
7036
Note:You will find further information onthis in the instructions for the devicewhich you are trying to connect.For some devices a fixed password hasbeen specified by the manufacturer.Enter this password. With other devicesyou can choose a number code with 1 -16 digits. This code must be entered inthe Traffic Pro and the device to beconnected.
7037
Note:If a different device was alreadyconnected, this will be disconnected.
7038
*Only available for the Traffic Pro with Bluetooth® wireless technology.

119
Settings
Connecting a device (externaldevice)*Connecting the Traffic Pro to an externaldevice can also be initiated by theexternal device.
Two different scenarios will bedescribed below.• The external device has previously
been connected to the Traffic Pro.• The external device has not been
connected to the Traffic Pro before.
The external device has previouslybeen connected to the Traffic Pro*
When the external device attempts toestablish a connection, a signal tone canbe heard and the following messageappears.
Select between *, + and 28.• *
Connection to the external device isallowed.
• +
Connection to the external device isrejected.
• 28
Connection to the external device isallowed. The function described in“Always allow connection*” aufSeite 116 will also be activated.Further connection requests will beaccepted without a query.
If the connection to the external deviceis established successfully, anothersignal tone can be heard and thefollowing message appears.
Press the rotary control/push button.
A connection has now been establishedto the external device.
Note:If a device is already connected to theTraffic Pro, the attempt made by theexternal device to establish aconnection will be ignored.
Note:If the function described in “Alwaysallow connection*” auf Seite 116 isactivated, a short signal tone can beheard and a message appears whichconfirms that the external device hasbeen connected.
7039
7040
*Only available for the Traffic Pro with Bluetooth® wireless technology.

120
Settings
The external device has not beenconnected to the Traffic Probefore*When the external device attempts toestablish a connection, a signal tone canbe heard and the following messageappears.
Select between* and +.If you select *, you will be requestedto enter a password.
Enter password by rotating/ pressingthe rotary control/push button .
Select the symbol from theinput menu.
or press the rotary control/push button
and hold for at least 2 seconds.
If the connection to the external deviceis established successfully, anothersignal tone can be heard and thefollowing message appears.
Press the rotary control/push button.
If the connection is terminated by theexternal device after authentication, thedevice list will be displayed. If the connection is not terminated, thefollowing message will appear.
Select between *, + and 28.• *
Connection to the external device isallowed.
• +
Connection to the external device isrejected.
• 28
Connection to the external device isallowed. The function described in“Always allow connection*” aufSeite 116 will also be activated.Further connection requests will beaccepted without a query.
If the connection to the external deviceis established successfully, anothersignal tone can be heard and thefollowing message appears.
Press the rotary control/push button.
A connection has now been establishedto the external device.
7041
7038
7042
7039
7040
*Only available for the Traffic Pro with Bluetooth® wireless technology.

121
Settings
Disconnecting devices* Select the device to be disconnected
from the device list.
Press the rotary control/push button.
Select * to disconnect or + not todisconnect.
If * is selected, the Traffic Pro willdisconnect the required device.
Calling up Bluetooth settings* Press . Turn the rotary control/push button
anti-clockwise until '
appears at the top right of the display.
Press the rotary control/push button.
The Bluetooth device list is displayed. Select the '( entry.
Turn the rotary control/push button to select between
', ' ,- ' and-(.
Confirm your selection by pressingthe rotary control/push button .
Note:A connected device is identified by the
symbol.
7031
7043
7030
7031
7044
*Only available for the Traffic Pro with Bluetooth® wireless technology.

122
Settings
Activating/ deactivating Bluetooth* You can activate or deactivateBluetooth.
Call up the Bluetooth settings.
Select the ' entry. Press the rotary control/push button
to switch Bluetooth on ( ) or off( ).
Searching for Bluetooth devices*Use this function to start a Traffic Prosearch for Bluetooth devices within thetransmission/ reception range. All the devices (including those alreadyconnected etc.) are displayed as a resultof the search.
Call up the Bluetooth settings.
Select the ' entry.The device displays '
'. If a device is found the followinginformation is displayed, for example.
Press the rotary control/push button to cancel the search.
If you do not cancel the search it willcontinue to run. If other devices are found, furthermessages will be displayed concerningthose devices.The devices found are displayed in a listafter the search has been completed.
You can then connect/ disconnect thedevices as described in “Connecting anddisconnecting devices*” auf Seite 117.
7044
7045
7046
7047
*Only available for the Traffic Pro with Bluetooth® wireless technology.

123
Settings
Making devices visible to others*Here you can specify whether otherBluetooth devices are to be able torecognise the Traffic Pro or not.
Call up the Bluetooth settings.
Select the - ' entry. Press the rotary control/push button
to switch recognisability on ( )or off ( ).
Device name*You can give your Traffic Pro a name.This name will be displayed by otherBluetooth devices.
Call up the Bluetooth settings.
Select the -( entry.
Enter the desired name. For thispurpose, proceed as described in“Data entry menus” auf Seite 13.
The changed name will be displayed inbrackets in the Bluetooth settings next tothe device name entry.
Voice modeYou can make settings for voice mode aswell as for traffic announcements andother announcements here.
Calling up voice mode settings Press . Turn the rotary control/push button
counter clockwise until : appears at the top right of the display.
This display provides information aboutthe number of free voice entries stillavailable for address book entries andradio stations. In the example, 30 areavailable for address book entries and 20for radio stations.
7048 7049
7050 7002
*Only available for the Traffic Pro with Bluetooth® wireless technology.

124
Settings
Press the rotary control/push button.
Turn the rotary control/push button to select one of the following options:8(,',:(,2(,: ,:,33< or (
Confirm your selection by pressingthe rotary control/push button .
Setting the system languageYou can select the language forannouncements and displays here.
Select 8( in the voicemode settings.
Turn the rotary control/push button and then press the rotary control/pushbutton to select the required language.
The speaker selection list appears. Turn the rotary control/push button
and then press the rotary control/pushbutton to select the required speaker.
The language and the selected speakerare installed.
7003Notes:• The navigation CD or system CD
must be inserted in order to changethe language or speaker. If necessary,the Traffic Pro will prompt you toinsert the navigation CD/system CD.
• It may take up to 10 minutes to installthe language.
• When the system language changes,voice entries created for stations andaddresses are deleted.
7004
Note:To update the voice dialogue, you maybe prompted to insert the system CD. Ifyou are, insert it.
7005

125
Settings
Displaying voice settingsThis function can be used to display thecurrently valid voice settings.
Select ' in the voice modesettings.
The voice settings are displayed.• !!, 7 indicates the current
setting for the display text language.• + 7 indicates the current set-
ting for the navigation announcementspeaker.
• -7 indicates the current setting forthe voice dialogue system speaker.
• 337 indicates the current languagesetting for reading out texts.
Volume for voice outputYou can set the volume for announce-ments from your Traffic Pro here.
Select :( in the voicemode settings.
Select ,8= or .
• ,8=
You can set the volume for announce-ments independently of the volume setfor the audio source.
•
The volume for announcements can beset in a specific range based on thevolume set for the active audio source.
For the setting, select:(.
Turn the rotary control/push button to select the required volume.
7006
Note:Only one of the two settings may beactive ( ) at the same time.
7007 Note:If you have previously selected , you can set the volume in therange between -10 and +10. In this case,a negative value means that announce-ments will be made more quietly thanthe selected volume for the audiosource.
7008

126
Settings
Automatic dialogueYou can specify which events shouldtrigger automatic voice dialogue. Auto-matic dialogues are automatic queriesfrom the Traffic Pro after particularevents, for example whether a voiceentry is to be created after a radio stationhas been stored.
Select 2( in the voicemode settings.
Next, select the required event. Turn the rotary control/push button
to switch the required function on ( )or off ( ).
Voice entriesYou can use this function to read out anddelete all voice entries already stored forthe radio and address book functions.
Select : in the voice modesettings.
Reading out: Select or 0
.The selected voice entries are read out.
Deleting: Select - or -
. When the next prompt appears, select
* to delete the entry or + not todelete.
Entries will be deleted or retained on thebasis of the selection.
Voice outputYou can configure voice outputs for theTraffic Pro here.
Select : in the voice modesettings.
You may now select the , ( and - functions.
7009
Note:The number of voice entries alreadyassigned appears on the right-hand sideof the display.
7010
7011

127
Settings
•
Once the function has been activated,in addition to being highlighted on theTraffic Pro, a beep tone sounds toindicate that the unit is ready for avoice command.
• (
If the function is active, the voicecommand is repeated by the TrafficPro for confirmation. However, pleasenote that the voice command repeatedmay not tally exactly with the voicecommand you entered, but with themain command. It may be the case, forexample, that you say “end” and theTraffic Pro repeats “cancel”. In voicemode, these two commands have thesame meaning.
• -
If the function is active, in some placesyou will receive detailed instructions(e.g. for entering a destination in voicemode).
Turn the rotary control/push button to switch the required function on ( )or off ( ).
Extended PTTIf the function is active, voice mode canbe activated automatically by pressing
, , , * or and you can input a voice commanddirectly.
Select 33< in the voice modesettings.
Turn the rotary control/push button to switch the function on ( ) or off( ).
Repeating a voice announcementIf the function has been switched on androute guidance is active, the last naviga-tion announcement can be repeated or anupdated navigation announcement out-put by pressing . Select ( in the
voice mode settings.
Turn the rotary control/push button to switch the function on ( ) or off( ).
Note:The abbreviation PTT stands for “PushTo Talk”.
7012
7013
*Only available for the Traffic Pro with Bluetooth® wireless technology.

128
Settings
System settingsYou can configure various basic settingson your Traffic Pro to meet your require-ments in the system settings.The following possible settings areavailable:For 2:• Setting for speed-dependent increase
in volume with )(.• Using , ( ',
you can specify whether your vehicleis a left-hand drive or right-hand drivevehicle.
• Setting for acoustic signal volumewith :(
• You can use -8 ( to selectwhether a change in volume should bedisplayed in graphics format.
• Setting for the volume level of digitalto analogue audio sources with -.
Other settings:• Using < , you can specify
whether an AUX source or an externalhands-free unit is connected to theTraffic Pro instead of a CD changer.
• Setting display brightness with -8 '.
• You can use -8' to config-ure the settings for changeoverbetween day and night design.
• You can use to reset theTraffic Pro to the factory settings.
• You can use - 8 to specify the direction in which listsand menus are scrolled when therotary control/push button is turned.
•
You can configure the GMT time sentby the satellite in terms of its formatand the current time zone.The time only needs to be set so that theTraffic Pro can supply navigationinformation correctly on routes withtime-dependent route guidance. Settingthe time also ensures that anticipatedtimes of arrival are announced/displayed correctly.

129
Settings
Calling up the system settings Press . Turn the rotary control/push button
counter clockwise until 8(
appears at the top right of thedisplay.
Press the rotary control/push button.
Turn the rotary control/push button to select one of the following options:2,< ,-8 ',-8',,- 8 or
Confirm your selection by pressingthe rotary control/push button .
AudioThe Audio section includes systemsettings for audio mode.
GAL (speed dependent volume)GAL is a control circuit on the TrafficPro. This control circuit automaticallyincreases the volume of the Traffic Prodepending on the speed of the vehicle.You can define the extent to which thevolume should be increased dependingon the speed of the vehicle here.
Select 2 in the system settings. Select )(.
Turn the rotary control/push button to select the required value.
Settings for left-hand/ right-handdrive vehiclesNavigation announcements andtelephone calls/ voice modeannouncements are transmitted viadifferent loudspeakers. Using thisfunction you can specify whether yourcar is a left-hand drive or right-handdrive vehicle and therefore set thetransmission accordingly.
Select 2 in the system settings. Select ,( '.
Select between ' and (on = ).
7014
7015
7016
Note:A setting of “0” indicates no increase involume.A setting of “10” indicates the maximumincrease in volume.
7052

130
Settings
Volume for acoustic signalsYou can change the volume for acousticsignals.
Select 2 in the system settings. Select :( .
Turn the rotary control/push button to select the required value.
Displaying the volumeYou can activate/deactivate the display ofa change in volume in graphics format.
Select 2 in the system settings. Select -8(.
Turn the rotary control/push button to switch the function on ( ) or off( ).
Digital levelYou can adapt the volume level of digitalaudio sources (CD and all MP3 sources)to analogue audio sources (radio).
Select 2 in the system settings. Select -.
Turn the rotary control/push button to select the required value.
Note:Only one of the two settings can beactive ( ) at one time.
Note:A low value indicates a low volume foracoustic signals.
7017
7018
Note:A setting of “0” indicates no decrease involume.A setting of “10” indicates a significantdecrease in the volume of the digitalaudio source.
7019

131
Settings
External deviceYou can specify whether an AUX sourceor an external hands-free unit isconnected to the Traffic Pro instead of aCD changer.
Select < in the systemsettings.
Select between - ' , 2< and< ') off (on = ).
Display brightnessYou can use this function to set thedisplay brightness to meet your require-ments.
Select -8 ' in the systemsettings.
Turn the rotary control/push button to select the required value.
Day/ night designYou can configure settings for thechangeover between day and nightdesign on your Traffic Pro.
Select -8' in the systemsettings.
Select - . Press the rotary control/push button
to switch the function on ( ) oroff ( ).
If the function is activated ( ), change-over between day and night design takesplace at short intervals during operation(under dim outside light conditions).This setting protects the display and pre-vents what is known as the “burning-ineffect”. If the function is deactivated ( ),changeover between day and nightdesign takes place automatically. Thenight design is automatically activatedunder dim outside light conditions.
Note:Only one of the three settings can beactive ( ) at one time.However, all three functions may beinactive ( ) at the same time. If the Traffic Pro recognises that a CDchanger is connected, - ' isactivated ( ). It is then not possible toswitch the function off manually.The microphone of the Traffic Procannot be used for external hands-freeoperation.
7021
Note:A negative value dims the display.A positive value brightens the display.
7022 7023

132
Settings
Reset functionYou can reset the Traffic Pro to thefactory settings.
Select in the system set-tings.
You may now select - 8 , or - .
• - 8
The Traffic Pro is reset to the factorysettings. All settings are reset. Personaldata is deleted.
•
All settings made are reset to originalvalues. Personal data is not deleted.
• -
Personal data is deleted. Settings arenot reset.
In the following prompt, select * toreset the settings or + to continuewithout a reset.
A reset is performed if * is selected.The Traffic Pro switches itself off brieflyand then back on again automatically.
Direction of rotation of the rotary control/push buttonYou can specify the direction in whichlists and menus are scrolled when therotary control/push button is turned.
Select - 8 in thesystem settings.
Select ? or )? (on = ).
7024
Note:Only one of the two settings may beactive ( ).
7025

133
Settings
ClockYou can configure the GMT time sentby the satellite in terms of its format andthe current time zone. The time needs to be set so that theTraffic Pro can supply navigationinformation correctly on routes withtime-dependent route guidance. Settingthe time also ensures that anticipatedtimes of arrival are announced/displayed correctly.
Select in the system settings.
The Clock Settings menu appears. Thecurrent time setting appears on the right-hand side of the display. You may now select between '
(7, & .;$@ (/ and .)$@(/.
• ' (7
You can switch the time displayformat from 12 to 24-hour and viceversa.
• & .;$@(/
You can put the time forward inintervals of 30 minutes.
• .)$@(/
You can put the time back in intervalsof 30 minutes.
Press the rotary control/push button to execute the relevant function.
Software updateA software update for your Traffic Procan be carried out by inserting a CD.New functions for your Traffic Pro canbe provided by means of a softwareupdate.
Insert the software update CD into theCD slot with the printed side up.
After a short time, the following displayappears:
Select * to install the update or + tocontinue without updating.
The software update starts when * isselected.
Note:The menu item cannot be selected ifGPS reception is not available.
7051
Note:Before carrying out an update, switchthe vehicle ignition on and leave it onduring the update.The Traffic Pro cannot be used duringthe software update.
7026
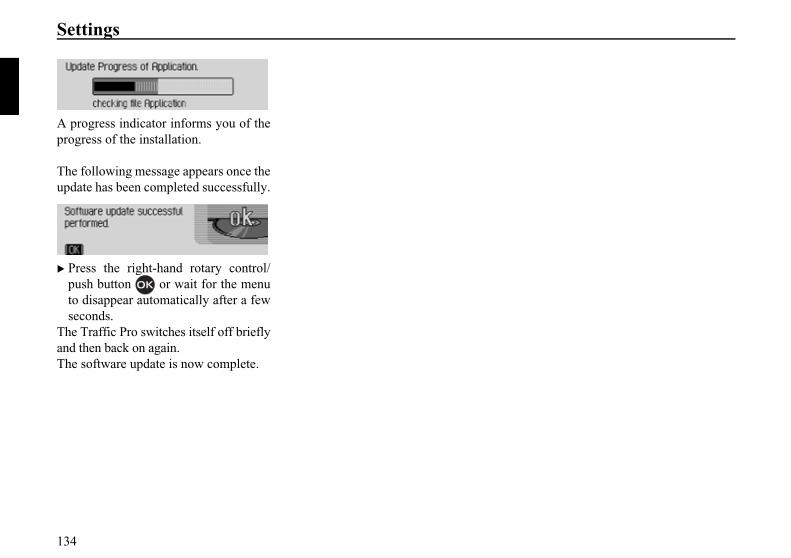
134
Settings
A progress indicator informs you of theprogress of the installation.
The following message appears once theupdate has been completed successfully.
Press the right-hand rotary control/push button or wait for the menuto disappear automatically after a fewseconds.
The Traffic Pro switches itself off brieflyand then back on again.The software update is now complete.
7027
7028

135
Voice modeVoice modeWhat is voice mode?In several instances, voice mode allowsyou to control your Traffic Pro simply bypressing a button and using your voice.This increases road safety many timesover.
SymbolsThis section of the operation guide con-tains a range of previously unknownsymbols which are outlined briefly here.
In the descriptions of the possible com-mands in voice mode, a cross-reference(page XX) to the page in the operationguide on which the corresponding func-tion is describe has been included, wherepossible.
Some of the voice commands activate adialogue between the user and the voicecontrol system. The operation guidecontains examples of such dialogues.
The following symbols are used in theexample dialogues:• ...*
You can use your voice control systemto store voice entries for stations,address book entries and/or navigationdestinations. These voice entries are acomponent of the various commandsand are represented in the operationguide by ...*, e.g. “[Listen to] station...*”.
• ... (1-X)If a set of brackets containing a numberrange appears after the three points,these three points indicate a numberwithin this range, e.g. “(1 - 9)”.
• [...]A word in square brackets in an exam-ple dialogue is optional. This word isnot absolutely necessary in order forthe command to be understood.
• Symbol In an example dialogue between thevoice control system and user, thissymbol indicates a user voice com-mand.
• Symbol In an example dialogue between thevoice control system and the user, thissymbol indicates a system announce-ment text.
• Signal tone symbol In an example dialogue between thevoice control system and the user, thissymbol indicates the signal tone whichindicates that the voice control systemis ready for commands to be entered.

136
Voice mode
General information about the voice control systemThe primary principle of voice mode isthat you can read out all the commandsyou can see in the display.
In order to optimise the ability of thevoice control system to understand thecommands, please note:• Speak continuously and at normal vol-
ume. Avoid long pauses and excessiveemphasis.
• Observe the instructions about theposition of the microphone in theinstallation guide.
• Make sure that you speak as directlyas possible into the microphone.
• Reduce interference by closing win-dows, doors and the sliding roof.
• Avoid ambient noise in the vehiclewhen entering voice commands (e.g.conversations between other passen-gers going on at the same time).
• Ambient noise increases the faster thevehicle is travelling. You shouldtherefore speak more loudly at higherspeeds.
• Do not enter voice commands whilstan announcement is being made.
Activating the voice control systemThe voice control system becomes avail-able shortly after the Traffic Pro isswitched on.
In order that conversations going oninside the vehicle do not trigger the unitaccidentally, the voice control systemmust first be activated before it can beused.
Press the rotary control/push button.
The Traffic Pro displays a border aroundthe current display and prompts you tomake an entry by emitting a signaltone . Voice dialogue starts.
Notes:Depending on the setting in “Automaticdialogue” on page 126, a voice dia-logue will be started automaticallywhen , , , *and are pressed.
*Only available for the Traffic Pro with Bluetooth® wireless technology.

137
Voice mode
Read out the required command.The Traffic Pro carries out the requiredcommand.If for example you call up a menu withthe command, voice mode remainsactive and you can enter another com-mand immediately.
Ending voice dialogue prematurelyA voice dialogue can be ended at anytime.
Read out one of the followingcommands: Cancel or End.
or Press the rotary control/push button
.
A voice dialogue can also be continuedby means of an operator input on theunit.However, to continue operation in voicemode, the rotary control/push button
must then be pressed again.
Voice entriesDepending on the setting in “Voiceentries” on page 137 for radio mode andin “Voice entries” on page 112 for theaddress book, when storing a station oraddress book entry, at the end of theprocess voice mode will ask you if youwish to enter a voice command.
This teaches voice mode how you usuallypronounce the name. This enables you tosubsequently call up a radio station, forexample, with the voice command Playstation ...* (where ...* stands for theassigned name, e.g. SWR). The same applies to address book entries:If you have assigned a voice entry to anaddress, you can start route guidance to...* with the voice command Navigate todestination ...* (where ...* stands for theassigned name, e.g. Franz Huber).
Notes:You can activate or deactivate thesounding of the signal tone as describedin “Automatic dialogue” on page 126.

138
Voice mode
SettingsYou can change the settings for voicemode in “Voice mode” on page 123. Thefactory settings are configured to makevoice mode as easy as possible to oper-ate for the most inexperienced users.Experienced users often want to usevoice mode to speed up the operation ofthe unit by assigning voice entries toother commands or reducing the amountof audible feedback. The followingsettings can be made: • In “Voice output” on page 126. Here
you can specify the amount of audiblefeedback.
• Voice entry signalYou can switch off the signal tonebefore each voice entry.
• Confirm voice entryYou can specify whether the com-mand should be confirmed after eachvoice entry.
• Detailed voice outputIn some places, voice mode respondswith a slightly longer voice output.You can switch off this voice output.
• Extended PTTIf you have activated “Extended PTT”(Push-To-Talk), voice recognitionwill also be activated every time oneof the buttons on the unit is pressed(e.g. ).
• Automatic dialoguesHere you can specify whether a(voice) dialogue should be startedwhen specific events occur.
Examples for a voice dialogueA number of examples of voice dialoguesappear below. To familiarise yourselfwith voice mode, we recommend that yourun through these examples once your-self.
You can use voice mode like a remotecontrol and operate the unit using itsmenu structure: If for example you saythe command Navigation, the naviga-tion screen will appear, as if you hadpressed the navigation button. Voicemode is subsequently reactivated andyou can say new commands. For exam-ple, you can now say Enter destination. Please note that some areas (e.g. soundsettings) do not support voice mode. Ifyou navigate to the sound settings usingvoice mode, you will not be able tocontinue to operate the unit in voicemode.
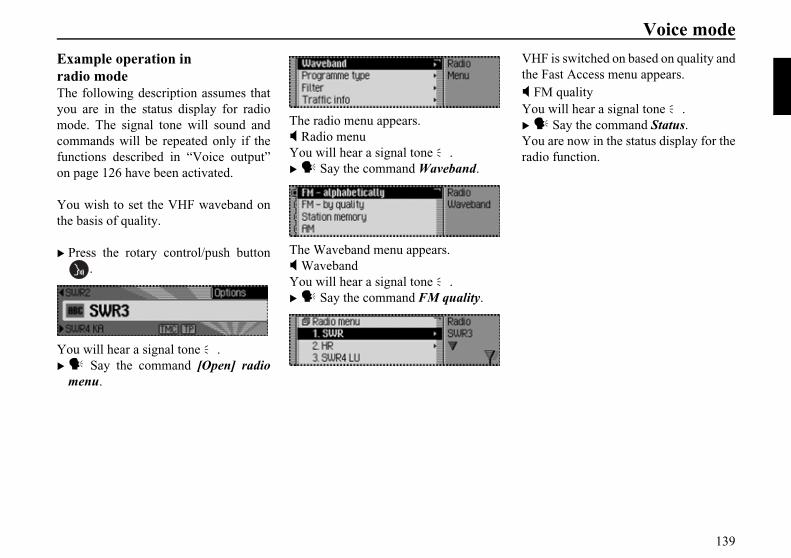
139
Voice mode
Example operation in radio modeThe following description assumes thatyou are in the status display for radiomode. The signal tone will sound andcommands will be repeated only if thefunctions described in “Voice output”on page 126 have been activated.
You wish to set the VHF waveband onthe basis of quality.
Press the rotary control/push button.
You will hear a signal tone . Say the command [Open] radio
menu.
The radio menu appears. Radio menu
You will hear a signal tone . Say the command Waveband.
The Waveband menu appears. Waveband
You will hear a signal tone . Say the command FM quality.
VHF is switched on based on quality andthe Fast Access menu appears.
FM qualityYou will hear a signal tone . Say the command Status.You are now in the status display for theradio function.
9001
9002
9003
9005

140
Voice mode
Example for entering a navigation destinationThe following description assumes thatyou are in the status display for radiomode. You wish to enter Lexington Street inLondon as a destination and start routeguidance to it.
Press the rotary control/push button.
You will hear a signal tone . Say the command Navigation.
The navigation Fast Access menuappears.
NavigationYou will hear a signal tone . Say the command Enter destina-
tion.
The destination input menu appears. Would you like to retain GLASGOW
(or another town)?You will hear a signal tone . Say the command No.
The data entry menu for the townappears.
Please say the first letter of the town.You will hear a signal tone .
Spell out London L - O - N - D.
The town selection list appears. Please select the line number for the
town.You will hear a signal tone .As the required town does not appear inthe list, you must scroll through it until itdoes.
9001
9005
9006
9007
9008

141
Voice mode
Say the command Scroll forwards.
The unit scrolls through the selectionlist.
ScrollYou will hear a signal tone .
London is displayed in the first line. Say the command Accept line
number 1.
The destination input menu appearsagain.
The town „LONDON“ is entered.Would you like to enter a road?You will hear a signal tone . Say the command Yes.
The data entry menu for the roadappears.
Please say the first letter of the road.You will hear a signal tone .
Spell out the first few letters ofLexington Street L - E - X - I - N - G -T - O - N.
The road selection list appears. Please select the line number for the
road.You will hear a signal tone .Lexington Street appears in the first line. Say the command Accept line
number 1. The road „LEXINGTON STREET“ is
entered.
Would you like to enter a junction or ahouse number? Say the command No.
Would you like to start route guidanceto London, Lexington Street? Say the command Yes.
Route calculation to the destination isinitiated.
9009
9010
9011
9012
9013

142
Voice mode
Example for entering a telephone number*The following description assumes thatyou are in the status display for radiomode. You wish to dial the telephone number“07241345678”.
Press the rotary control/push button.
You will hear a signal tone . Speak the command Communica-
tion.
The Telephone fast access menuappears.
CommunicationYou will hear a signal tone . Speak the command Dial number.
The input menu for a telephone numberappears. Speak the telephone number
0 - 7 - 2 - 4 - 1 - 3 - 4 - 5 - 6 - 7 - 8.
07241345678
The input menu for the telephonenumber spoken appears.
You will hear a signal tone . Speak the command Dial.
The number will be dialled
Connection will be made to the tele-phone number spoken.
General commandsGeneral commands are commands thatare common to different operatingmodes.For example, you can always call uponline help.A description of how to navigate on-screen lists also appears below.
9001
9014
Note:The telephone number can also bespoken in blocks.
9015
9015
*Only available for the Traffic Pro with Bluetooth® wireless technology.

143
Voice mode
Help function (online help)The online help provides informationabout voice commands currently sup-ported. Please note that the online helpwill only tell you about the voice com-mands supported for the current mode. If you have added a new command orpressed a button, a different set of com-mands will be available for selection.You can find out about these by callingup the help function again.
Press the rotary control/push button.
A border will appear around the currentdisplay and a signal tone will sound(if activated). Say the command Help or Operat-
ing instructions.The Traffic Pro reads out the commandsthat are supported for this function. Thepossible commands also appear on thedisplay in text format.
Aborting voice dialogueYou can abort a voice dialogue at anytime. Say the command Cancel or End.
Navigation in listsIf a list containing a number of pagesappears on the display, you can navigatethis list by using voice commands.
Scroll forward one page Say the command Scroll forwards.
Alternative commands:Next page or Forwards.
Scroll back one page Say the command Scroll back-
wards or Previous page.
Jump to top of list Say the command Top of list.
Alternative commands:Display top of list or Display start oflist.
Select a list entry Say the command Accept [line]
number ... (1 - 4) or [Select] [line]number ... (1 - 4).
Activate selected list entry Say the command Accept, Ok or
Add.
Calling up the status displayYou can switch to the status display forthe currently active source from allmenus. Say the command Status.
Alternative commands:Switch over or Main screen.
144
Voice mode
Commands for status displays, fast access functions and main menusThe following commands are each validfor almost all menus, the status displays,fast access functions and main menus.
• You can switch the Traffic Pro off. Say the command Deactivate or
Switch off radio.• You can call up radio mode.
Say the command Radio.Alternative commands:Radio on or Tuner on.
• You can call up media mode. Say the command Media.
Alternative commands:Media [player] [on], CD [player][on], CD [changer] [on] or Media[changer] [on].
• You can call up navigation mode. Say the command Navigation or
Navi.• You can call up the address book.
Say the command Address book orName.
• You can call up the information menu. Say the command Info or Infor-
mation.• You can call up Telephone mode.*
Speak the command Communica-tion.
• You can call up the sound menu (Onlyfor media and radio).
Say the command Tone.Alternative commands:Open tone [menu] or Open sound[menu].
*Only available for the Traffic Pro with Bluetooth® wireless technology.

145
Voice mode
Commands for radio modeIf radio mode has been set as the activesource, the following commands willalways be available:• Select next station.
Say the command Next station orPlay next station.
• Select previous station. Say the command Previous station
or Play previous station.• Select station with assigned voice
entry. Say the command Play station ...*.
Alternative commands:[Listen to] station ...* or [Set] [sta-tion] ...*.
• Switch on the mute function. Say the command Mute on.
Alternative commands:Mute radio, Mute audio or Mutemedia.
• Switch off the mute function. Say the command Mute off.
Alternative commands:Unmute radio, Unmute audio orUnmute media.
Commands for the radio status display
The following commands are availablein the radio status display:
• Call up the options menu. Say the command Options or
Open options [menu].
• Switch scan function on/off (page 61).Switch on:
Say the command Scan [on] orPlay sample [station].Switch off:
Say the command Scan off orDeactivate play sample [station].
• Call up Radio main menu (page 58). Say the command Radio menu.
Alternative commands:[Open] radio menu or [Open] menu.3003

146
Voice mode
• Switch radio text on/off (page 65).Switch on:
Say the command Radio text on or[Activate] radio text.Switch off:
Say the command Radio text off orDeactivate radio text.
• Call up TP menu (page 67). Say the command Traffic pro-
gramme.Alternative commands:Traffic info, Open traffic info [menu]or Open traffic programme [menu].
• Switch TP on/off (page 68).Switch on:
Say the command Traffic pro-gramme on.Alternative commands:Traffic info on, [Activate] trafficprogramme or [Activate] traffic info.
Switch off: Say the command Traffic pro-
gramme off.Alternative commands:Traffic info off, Deactivate trafficprogramme, Reset traffic pro-gramme, Deactivate traffic info orReset traffic info.
• Filter current station (page 62). Say the command Filter stations
or Filter current station.• Store current station (page 71).
Say the command Save station orSave station name.
• Delete current station (page 73). Say the command Delete [station].
• Deleting a voice entry (page 74). Speak the command Delete voice
entry.• Have a voice entry read out (page 74).
Speak the command Read outvoice entry or Listen to voice entry.
• Read out all voice entries. Speak the command [All] voice
entries. Alternative commands: Read out [all] entries or Read out[all] voice entries.

147
Voice mode
Commands for radio fast access mode
In radio fast access mode, the followingcommands are available:
• Select a station in fast access mode. Say the command Play station
number ... (1 - X).Alternative commands:[Play] station [number] ... (1 - X) or[Select] station [number] ... (1 - X).
• Edit a station in fast access mode -Call up the Edit Station menu.
Say the command Edit stationnumber ... (1 - X), Edit station ... (1 -X) or Edit number ... (1 - X).
• Call up Radio main menu (page 58). Say the command Radio menu.
Alternative commands:[Open] radio menu or [Open] menu.
• Call up Waveband menu (page 59). Say the command Waveband.
Alternative commands:[Open] waveband [menu] or [Open]station list [menu].
• Call up Programme Type menu (page 64).
Say the command Programmetype or Open programme type[menu].
• Call up Filter menu (page 58). Say the command Open filter
menu or [Change] [to the] filter.
• Call up TP menu (page 67). Say the command Traffic pro-
gramme.Alternative commands:Traffic info, Open traffic info [menu]or Open traffic programme [menu].
• Call up Voice Entries menu (page 74). Say the command Voice entries or
Open voice entries.• Call up Reception Optimisation menu
(page 66). Say the command Reception opti-
misation [menu] or [Open] receptionoptimisation [menu].
3004

148
Voice mode
Commands in the Edit Station menuThe following commands are availablein the Edit Station menu for the VHFwavebands - Alphabetical and VHF -according to quality:
• Filter station to be edited. Say the command Filter stations
or Filter current station.• Store station to be edited (page 71).
Say the command Save station orSave station name.
• Set station to be edited as TP station (page 68).
Say the command Set as trafficprogramme or [Set] station as trafficprogramme.
The following commands are availablein the Edit Station menu for the wave-band station memory:
• Set station to be edited as TP station (page 68).
Say the command Set as trafficprogramme or [Set] station as trafficprogramme.
• Store current station (page 71). Say the command Save current
station here or Save [[current] [sta-tion [here]]].
• Delete station (page 73). Say the command Delete [station].
• Move station in memory (page 72). Say the command Move station.
• Name station in memory (page 73). Say the command Name station.
• Create voice entry (page 74). Say the command Create voice
entry.• Delete voice entry (page 74).
Say the command Delete voiceentry.
• Listen to voice entry (page 74). Say the command Read out voice
entry or Listen to voice entry.
3017

149
Voice mode
Commands for the Radio main menu
In the Radio main menu, the followingcommands are available:
• Call up Waveband menu (page 59). Say the command Waveband.
Alternative commands:[Open] waveband [menu] or [Open]station list [menu].
• Call up Programme Type menu (page 64).
Say the command Programmetype or Open programme type[menu].
• Call up Filter menu (page 58). Say the command Open filter
menu or [Change] [to the] filter.
• Call up TP menu (page 67). Say the command Traffic pro-
gramme.Alternative commands:Traffic info, Open traffic info [menu]or Open traffic programme [menu].
• Call up Voice Entries menu (page 74). Say the command Voice entries or
Open voice entries.• Switch regionalisation on/off (page 65).
Switch on: Say the command Regionalisation
on or Activate regionalisation.Switch off:
Say the command Regionalisationoff or Regionalisation off.
• Call up Reception Optimisation menu (page 66).
Say the command Reception opti-misation [menu] or [Open] receptionoptimisation [menu].
• Switch bandwidth control on/off (page 67).Switch on:
Say the command Adaptive band-width control on or [Activate] adap-tive bandwidth control.Switch off:
Say the command Adaptive band-width control off or Deactivate adap-tive bandwidth control.
3001

150
Voice mode
Commands in the Waveband menu
In the Waveband menu, the followingcommands are available (page 59):
• Set VHF waveband according toquality.
Say the command FM quality.Alternative commands:[Activate] [very high frequency] byquality, [Activate] [VHF] by quality,[Activate] [FM] by quality, [Select][very high frequency] by quality,[Select] [VHF] by quality or [Select][FM] by quality.
• Set VHF waveband alphabetically. Say the command FM alphabeti-
cally.Alternative commands:[Activate] [FM] alphabetically, [Acti-vate] [very high frequency] alphabet-ically, [Activate] [VHF] alphabeti-cally, [Select] [FM] alphabetically,[Select] [very high frequenc] alpha-betically or [Select] [VHF] alphabeti-cally.
• Call up station memory. Say the command Station mem-
ory.Alternative commands:Activate station memory, Activatmememory list, Select station mem-ory or Select memory list.
• Select medium wave waveband. Say the command AM.
Alternative commands:[Activate] medium wave, [Select]medium wave, [Activate] AM or[Select] AM.
• Select short wave waveband. Say the command Short wave.
Alternative commands:[Activate] short wave, [Select] shortwave, [Activate] SW or [Select] SW.
3002
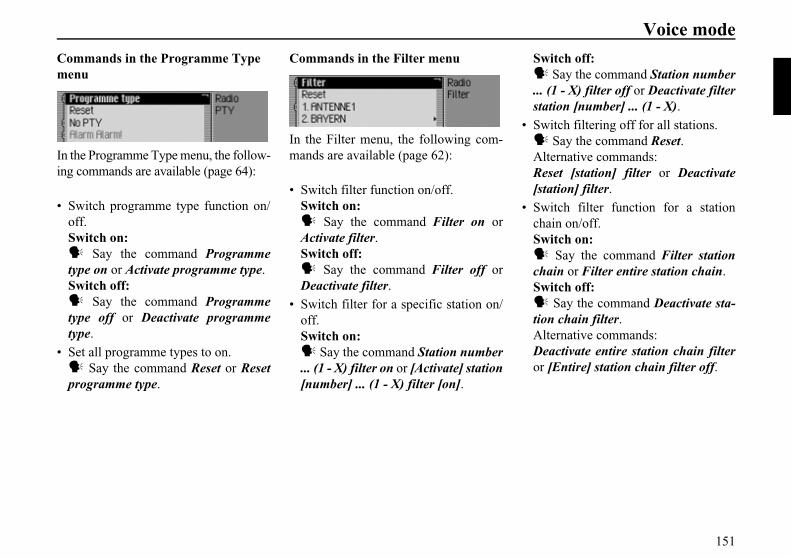
151
Voice mode
Commands in the Programme Type menu
In the Programme Type menu, the follow-ing commands are available (page 64):
• Switch programme type function on/off.Switch on:
Say the command Programmetype on or Activate programme type.Switch off:
Say the command Programmetype off or Deactivate programmetype.
• Set all programme types to on. Say the command Reset or Reset
programme type.
Commands in the Filter menu
In the Filter menu, the following com-mands are available (page 62):
• Switch filter function on/off.Switch on:
Say the command Filter on orActivate filter.Switch off:
Say the command Filter off orDeactivate filter.
• Switch filter for a specific station on/off.Switch on:
Say the command Station number... (1 - X) filter on or [Activate] station[number] ... (1 - X) filter [on].
Switch off: Say the command Station number
... (1 - X) filter off or Deactivate filterstation [number] ... (1 - X).
• Switch filtering off for all stations. Say the command Reset.
Alternative commands:Reset [station] filter or Deactivate[station] filter.
• Switch filter function for a stationchain on/off.Switch on:
Say the command Filter stationchain or Filter entire station chain.Switch off:
Say the command Deactivate sta-tion chain filter.Alternative commands:Deactivate entire station chain filteror [Entire] station chain filter off.
30073006

152
Voice mode
Commands in the TP menu
In the TP menu, the following com-mands are available (page 67):
• Switch TP on/off.Switch on:
Say the command Traffic pro-gramme on.Alternative commands:Traffic info on, [Activate] trafficprogramme or [Activate] traffic info.
• Switch off: Say the command Traffic pro-
gramme off.Alternative commands:Traffic info off, Deactivate trafficprogramme, Reset traffic pro-gramme, Deactivate traffic info orReset traffic info.
• Set TP station selection to automatic. Say the command Station auto-
matic.Alternative commands:[Search for] [traffic info] automati-cally or [Search for] [traffic info sta-tion] automatically.
• Select a TP station manually. Say the command Station number
... (1 - X).Alternative commands:[Set] traffic programme [number] ...(1 - X) or [Set] station [number] ... (1- X).
• Call up TP volume setting. Say the command Volume.
Alternative commands:Set traffic info volume, Set trafficprogramme volume or Set volume.
Commands in the Voice Entries menu
In the Voice Entries menu, the followingcommands are available (page 66):
• Switch voice dialogue on/off whensaving.Switch on:
Say the command Dialogue forvoice entries [on] or Activate dia-logue for voice entries.Switch off:
Say the command Dialogue forvoice entries off or Deactivate dia-logue for voice entries.
• Read out assigned voice entries. Say the command Read out
entries.Alternative commands:Read out [all] voice entries or Readout [all] entries.
3013 3024

153
Voice mode
• Delete all assigned voice entries. Say the command Delete entries.
Alternative commands:Delete [all] entries or Delete [all]voice entries.
Commands in the Reception Optimisation menu
In the Reception Optimisation menu, thefollowing commands are available(page 66):
• Set automatic. Say the command Automatic or
Select [automatic reception] optimi-sation [menu].
• Set stereo. Say the command Always stereo or
[Select] [always] stereo.• Set mono.
Say the command Always mono or[Select] [always] mono.
Commands for media modeIf media mode has been set as the activesource, the following commands willalways be available:
• Select next track in directory/on CD (page 77).
Say the command Next track orPlay next track.
• Select previous track in directory/on CD (page 77).
Say the command Previous trackor Play previous track.
• Select next CD (CD changer only) (page 75).
Say the command Next CD or Playnext CD.
3012

154
Voice mode
• Select previous CD (CD changer only)(page 75).
Say the command Previous CD.Alternative commands:Play last CD or Play previous CD.
• Select next directory (only for MP3media) (page 75).
Say the command Next directory.• Select previous directory (only for
MP3 media) (page 75). Say the command Previous direc-
tory.• Select track using track number.
Say the command Track number... (1 - X) or [Play] track [number] ...(1 - X).
• Select CD using CD number. Say the command CD number ...
(1 - X).Alternative commands:[Select] CD [number] ... (1 - X) or[Play] CD [number] ... (1 - X).
• Select directory using directorynumber.
Say the command Directory[number] ... (1 - X) or Folder[number] ... (1 - X).
• Switch on mute function (page 22). Say the command Mute on.
Alternative commands:Mute CD, Mute audio or Mute media.
• Switch off mute function (page 22). Say the command Mute off.
Alternative commands:Unmute CD, Unmute audio orUnmute media.
Commands for the media status display
The following commands are availablein the media status display:
• Call up the Options menu. Say the command Options or
Open options [menu].• Call up the Play Mode menu (scan
function) (page 78). Say the command Playmode or
Open playmode.
4003

155
Voice mode
• Call up the Media main menu (page 80).
Say the command Media menu.Alternative commands:[Open] media menu or [Open] menu.
• Switch on scan function. Say the command Scan or Scan
on.• Switch on track mix (random play
function) (page 78). Say the command Track mix.
Alternative commands:Track mix [on] or Activate track mix.
• Switch on repeat track (page 79). Say the command Repeat track.
• Switch on normal playback sequence. Say the command Normal order or
[Play] tracks in normal order.• Switch TP on/off (page 68).
Switch on: Say the command Traffic pro-
gramme on.Alternative commands:Traffic info on, [Activate] trafficprogramme or [Activate] traffic info.Switch off:
Say the command Traffic pro-gramme off.Alternative commands:Traffic info off, Deactivate trafficprogramme, Reset traffic pro-gramme, Deactivate traffic info orReset traffic info.
Commands for media fast access
In media fast access mode, the followingcommands are available:
• Call up Media main menu (page 80). Say the command Media menu.
Alternative commands:[Open] media menu or [Open] menu.
• Switch to the internal CD drive (page 77).
Say the command Internal CD orCD.
• Switch to memory card (page 77). Say the command Memory card.
4001

156
Voice mode
Commands for the Media main menu
In the Media main menu, the followingcommands are available (page 80):
• Switch detailed track display on/off.Switch on:
Say the command Detailed trackdisplay on or [Activate] [detailed]track display.Switch off:
Say the command Detailed trackdisplay off or Deactivate [detailed]track display.
Commands for the media Play Mode menu
In the Play Mode menu, the followingcommands are available:
• Switch on scan function. Say the command Scan or Scan
on.• Switch on track mix (random play
function) (page 78). Say the command Track mix.
Alternative commands:Track mix [on] or Activate track mix.
• Switch on repeat track (page 79). Say the command Repeat track.
• Switch on normal playback sequence. Say the command Normal order or
[Play] tracks in normal order.
Only if CD changer is an active mediasource:• Switch on track mix (random play
function) (page 79). Say the command CD mix.
Alternative commands:CD mix [on] or Activate CD mix.
4006 4005

157
Voice mode
• Switch on repeat CD (page 80). Say the command Repeat CD or
Activate repeat CD.
Only if MP3 is an active media source:• Activating directory mix (page 80).
Speak the command Directorymix. Alternative commands: Directory mix [on] or Activate direc-tory mix.
Navigation commandsIf navigation is active, the followingcommands are always available:
• Cancel route guidance (page 46). Say the command Stop route guid-
ance.Alternative commands:End route guidance, Stop navigationor End navigation.
• Enter a stopover (page 47). Say the command Stop-over or
Enter stop-over.• Switch directions on/off (page 50).
Switch on: Say the command Instructions on.
Alternative commands:Activate instructions or Activatevoice.
Switch off: Say the command Instructions
off.Alternative commands:Deactivate instructions or Deactivatevoice.
• Repeat direction. Say the command Instructions or
Repeat instructions.
Correction option for incorrect destination entry Say the command Correction or
Correct.The list display disappears and you canspell the name correctly.

158
Voice mode
Commands for the navigation status display
The following commands are availablein the navigation status display:
• Call up Navigation main menu (page 26).
Say the command Navigationmenu.Alternative commands:[Open] navigation menu or [Open]menu.
• Call up the Options menu (page 45). Say the command Options or
Open options [menu].
• Call up the Route Options menu (page 33).
Say the command Route optionsor Open route options.
• Call up the route list (page 47). Say the command Route list or
Open route list.• Call up the Traffic Announcements
menu (page 47). Say the command Messages.
Alternative commands:[Open] message, [Open] traffic mes-sages, [Edit] messages or [Edit] traf-fic messages.
• Call up the Block menu (page 49). Say the command Block.
Alternative commands:Edit block, Edit blocking, Open blockor Open blocking.
• Display current position (page 51). Say the command [Display] [cur-
rent] position.• Save current position (page 51).
Say the command Save currentposition or Save position.
• Switch TP on/off (page 68).Switch on:
Say the command Traffic pro-gramme on.Alternative commands:Traffic info on, [Activate] trafficprogramme or [Activate] traffic info.Switch off:
Say the command Traffic pro-gramme off.Alternative commands:Traffic info off, Deactivate trafficprogramme, Reset traffic pro-gramme, Deactivate traffic info orReset traffic info.
2057

159
Voice mode
Commands for navigation fast access
In navigation fast access mode, the fol-lowing commands are available:
• Call up Navigation main menu (page 26).
Say the command Navigationmenu.Alternative commands:[Open] navigation menu or [Open]menu.
• Call up the navigation settings (page 55).
Say the command Settings or Nav-igation settings.
• Call up the Enter Destination menu(page 27).
Say the command Enter addressor Address.
• Start destination input.
Say the command Enter destina-tion.Alternative commands:Enter town, Enter street, Spell town,Spell street or Spell destination.
• Select a destination from the addressbook (page 38).
Say the command From addressbook or [Select] [destination] fromaddress book.
• Select a POI as destination (page 39). Say the command Enter special
destination or Special destination.• Start navigation to a destination saved
with a voice entry. Say the command Navigate to des-
tination ...*.Alternative commands:Navigate to destination ...*, Navigateto entry ...*, Navigate to [destination]...* or Navigate to [address] ...*.
2002Note:Use this command to start a guideddialogue for entering a completeaddress. Please refer to the description under“Example for entering anavigation destination” on page 140.

160
Voice mode
• Start navigation to a fast access desti-nation.
Say the command [Navigate] [des-tination] number ... (1 - X).Alternative commands:[Navigate] to destination [number] ...(1 - X), [Navigate] to address[number] ... (1 - X), or [Navigate] toentry [number] ... (1 - X).
• Edit a fast access entry. Say the command Edit [destina-
tion] number ... (1 - X).Alternative commands:Edit destination [number] ... (1 - X),Edit address [number] ... (1 - X), orEdit entry [number] ... (1 - X).
Commands in the Fast Access/Edit Destinations menu• Save destination in address book
(page 36). Say the command Save to the
address book or Save [number] in theaddress book.
• Switch entry protection on/off (page 35).Switch on:
Say the command Protect entryon.Alternative commands:Activate protect entry or Activate pro-tect address.Switch off:
Say the command Protect entryoff.Alternative commands:Deactivate protect entry or Deactivateprotect address.
• Delete an entry (page 36). Say the command Delete entry or
Delete address.
• Delete entire list (page 36). Say the command Delete list or
Delete entire list.
Commands for the Navigation main menu
In the Navigation main menu, thefollowing commands are available:
• Call up the navigation settings (page 55).
Say the command Settings or Nav-igation settings.
• Start address input (page 27). Say the command Enter address.
or Address.
Oldversion

161
Voice mode
• Start destination input (page 27). Say the command Enter destina-
tion.Alternative commands:Enter town, Enter street, Spell town,Spell street or Spell destination.
• Select a destination from the addressbook (page 38).
Say the command From addressbook or [Select] [destination] fromaddress book.
• Select a POI as destination (page 39). Say the command Enter special
destination or Special destination.
Commands for the Destination menu
In the Destination menu, the followingcommands are available:
• Enter destination country (page 28). Say the command Country or
Enter country.• Enter town (page 28).
Say the command Town.Alternative commands:Enter place or Enter town.
• Enter town centre (page 31). Say the command Centre.
Alternative commands:Enter city centre, Enter suburb orEnter centre.
• Enter destination road (page 30). Say the command Street or Enter
street.• Enter junction (page 32).
Say the command Intersection orEnter [street] intersection.
• Enter house number (page 32). Say the command House number
or Enter house number.• Call up the Route Options menu
(page 33). Say the command Route options
or Open route options.
2004

162
Voice mode
• Start route guidance to destination. Say the command Start route
guidance or Start navigation.• Save destination in address book
(page 36). Say the command Save to the
address book or Save [number] in theaddress book.
Commands for the POI menu
In the POI menu, the following com-mands are available:
• Select local POI (page 40). Say the command Special destina-
tion [in] [the] vicinity or [Special des-tination] [in [the]] surrounding area.
• Selecting a POI in a specific country(page 41).
Speak the command Specialdestination in country or [Specialdestination] [in [a]] country.
• Selecting a POI in a specific town(page 41).
Speak the command Enter town or[Special destination] [in [a]] town.
• Selecting a POI in the destination area(page 41).
Speak the command Special desti-nation [in] [the] vicinity [of] [the]destination.
2040

163
Voice mode
POI categories (page 39)
• Motorway junction Say the command Motorway
intersection or Motorway exit.• Motorway exits
Say the command Motorway junc-tion, Motorway slip road or Motor-way access road.
• Railways Say the command Train station,
Central train station or Main station.• Airports
Say the command Airport or Air-field.
• Hotels Say the command Hotel or Motel.
• Hospitals Say the command Hospital.
• Options for parking Say the command Car park.
Alternative commands:Multi-storey, Layby or Parking site.
• Restaurants Say the command Restaurant.
• Petrol stations Say the command Petrol station.
Commands for the Route Options menu
In the Route Options menu, the followingcommands are available (page 33):
• Set dynamic route calculation. Say the command Dynamic or
[Select] dynamic route.• Set fast route.
Say the command Quick or[Select] quick route.
• Set short route. Say the command Short or [Select]
short route.
Note:The POI categories specified here arenot commands in their own right. Theycan be used in conjunction with thecommands In vicinity and In vicinity ofdestination.
E.g. speak the commands Trainstation and In vicinity of destinationone after the other. A selection list will then be displayedshowing the railway stations in thedestination area.
2026

164
Voice mode
• Switch avoid motorway on/off.Switch on:
Say the command Avoid motor-way.Alternative commands:Avoid motorway on or Activate avoidmotorway.Switch off:
Say the command Avoid motor-way off or Deactivate avoid motor-way.
• Switch avoid tunnel on/off.Switch on:
Say the command Avoid tunnel.Alternative commands:Avoid tunnel on or Activate avoidtunnel.Switch off:
Say the command Avoid tunnel offor Deactivate avoid tunnel.
• Switch avoid toll on/off.Switch on:
Say the command Avoid toll orAvoid toll on.Switch off:
Say the command Avoid toll off orDeactivate avoid toll.
• Switch avoid ferries on/off.Switch on:
Say the command Avoid ferry [on]or [Activate] avoid ferry.Switch off:
Say the command Avoid ferry offor Deactivate avoid ferry.
• Set route options Say the command Ready.
Commands for the Stopover menu
In the Stopover menu, the followingcommands are available (page 47):
• Enter full address as stopover. Say the command Enter address
or Address.• Select a stopover from the address
book. Say the command From address
book or [Select] [destination] fromaddress book.
2039

165
Voice mode
• Select a stopover as destination. Say the command Enter special
destination or Special destination.• Select a stopover from the fast access
list. Say the command Rapid access or
[Select] [destination] via rapidaccess.
Prompt: Is the new destination a main destination or a stopover?
• Set as main destination. Say the command Main destina-
tion or Enter main destination.• Set as stopover.
Say the command Stop-over orEnter stop-over.
Commands for telephone mode*
Commands for telephone fast access mode*
In telephone fast access mode, thefollowing commands are available:
• Calling up the Telephone main menu(page 89).
Speak the command Telephonemenu or Open telephone [menu].
• Calling up the input menu for atelephone number (page 90).
Speak the command Dial numberor Enter [telephone] number.
2096
5001
*Only available for the Traffic Pro with Bluetooth® wireless technology.

166
Voice mode
• Starting a redial to the number dialledlast.
Speak the command Redial or [Di-al] [the] last [dialled] number.
• Calling up a telephone number from avoice entry equipped address bookentry.
Speak the command Call [entry]...*. Alternative commands: [Call] entry ...* or [Call] address ...*.
• Calling up a mobile phone numberfrom a voice entry equipped addressbook entry.
Speak the command Call [entry]...* mobile. Alternative commands: [Call] entry ...* mobile or [Call]address ...* mobile.
• Calling up a work telephone numberfrom a voice entry equipped addressbook entry.
Speak the command Call [entry]...* business. Alternative commands: [Call] entry ...* business or [Call]address ...* business.
• Calling up a private telephone numberfrom a voice entry equipped addressbook entry.
Speak the command Call [entry]...* private. Alternative commands: [Call] entry ...* private or [Call]address ...* private.
• Calling a fast access telephonenumber.
Speak the command Call tele-phone number ... (1 - X). Alternative commands: [Call] telephone number ... (1 - X),[Call] [entry] number ... (1 - X) or[Call] entry ... (1 - X).
• Editing a fast access telephonenumber.
Speak the command Edit tele-phone number ... (1 - X). Alternative commands: Edit [[telephone] number] ... (1 - X)or Edit [[entry] number] ... (1 - X).
*Only available for the Traffic Pro with Bluetooth® wireless technology.

167
Voice mode
Commands in the Fast Access/ EditTelephone Numbers menu*• Switch entry protection on/ off
(page 99). Switch on:
Speak the command Protect entryon. Alternative commands: Activate protect entry or Activateprotect address. Switch off:
Speak the command Protect entryoff. Alternative commands: Deactivate protect entry or Deactivateprotect address.
• Deleting an entry (page 99). Speak the command Delete entry
or Delete address.• Deleting the entire list (page 99).
Speak the command Delete list orDelete entire list.
• Saving a fast access telephone numberin the address book.
Speak the command Save to theaddress book. Alternative commands: Save [number] to address book, Save[number] in the address book, Save[entry] to address book or Save[entry] in the address book.
Commands for the Telephone main menu*
In the Telephone main menu, thefollowing commands are available:
• Calling up the input menu for atelephone number (page 90).
Speak the command Dial numberor Enter [telephone] number.
• Selecting a telephone number from theaddress book (page 91).
Speak the command Call fromaddress book or [Call] number from[the] address book.
• Calling up the Call Lists menu(page 92).
Speak the command Call lists orOpen call lists.
5004
*Only available for the Traffic Pro with Bluetooth® wireless technology.

168
Voice mode
• Calling up the Settings menu(page 94).
Speak the command Settings. Alternative commands: Open settings or Open telephone set-tings.
Commands in the input menu fortelephone numbers*
• Establishing a connection to thetelephone number entered.
Speak the command Dial or Dialnumber.
• Redialling the number entered. Speak the command Repeat the
number or Repeat [telephone]number.
• Deleting the telephone numberentered.
Speak the command Delete input. Alternative commands: Delete [entire] input, Delete [entire]number or Delete all.
Commands in the Call Lists menu*
• Calling up the call list with the missedcalls (page 92).
Speak the command Missed callsor Select missed calls.
• Calling up the calls list with thedialled calls.
Speak the command Diallednumbers or Select dialled numbers.
• Calling up the calls list with the an-swered calls.
Speak the command Acceptedcalls or Select accepted calls.
Note:Please refer to the description under“Example for entering a telephonenumber*” on page 142.As well as digits, +, number sign orhash sign and asterisk can be spoken inthe entry menu.
5005
5011
*Only available for the Traffic Pro with Bluetooth® wireless technology.
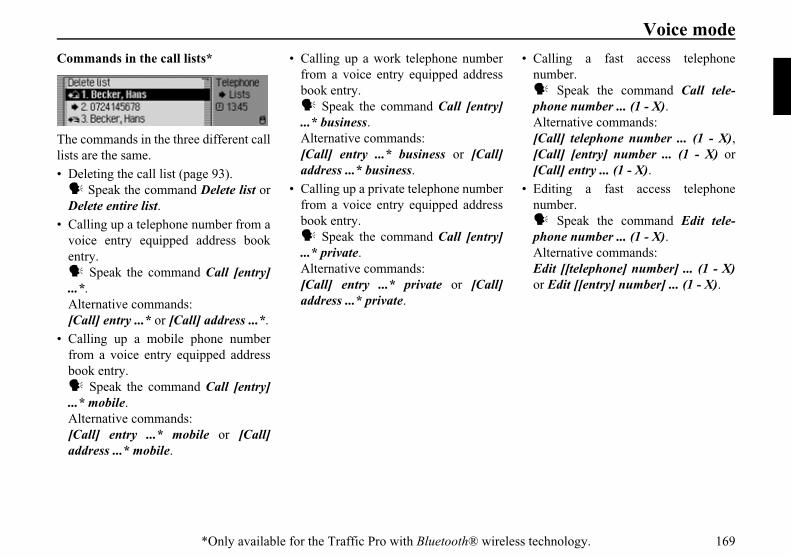
169
Voice mode
Commands in the call lists*
The commands in the three different calllists are the same.• Deleting the call list (page 93).
Speak the command Delete list orDelete entire list.
• Calling up a telephone number from avoice entry equipped address bookentry.
Speak the command Call [entry]...*. Alternative commands: [Call] entry ...* or [Call] address ...*.
• Calling up a mobile phone numberfrom a voice entry equipped addressbook entry.
Speak the command Call [entry]...* mobile. Alternative commands: [Call] entry ...* mobile or [Call]address ...* mobile.
• Calling up a work telephone numberfrom a voice entry equipped addressbook entry.
Speak the command Call [entry]...* business. Alternative commands: [Call] entry ...* business or [Call]address ...* business.
• Calling up a private telephone numberfrom a voice entry equipped addressbook entry.
Speak the command Call [entry]...* private. Alternative commands: [Call] entry ...* private or [Call]address ...* private.
• Calling a fast access telephonenumber.
Speak the command Call tele-phone number ... (1 - X). Alternative commands: [Call] telephone number ... (1 - X),[Call] [entry] number ... (1 - X) or[Call] entry ... (1 - X).
• Editing a fast access telephonenumber.
Speak the command Edit tele-phone number ... (1 - X). Alternative commands: Edit [[telephone] number] ... (1 - X)or Edit [[entry] number] ... (1 - X).
5012
*Only available for the Traffic Pro with Bluetooth® wireless technology.
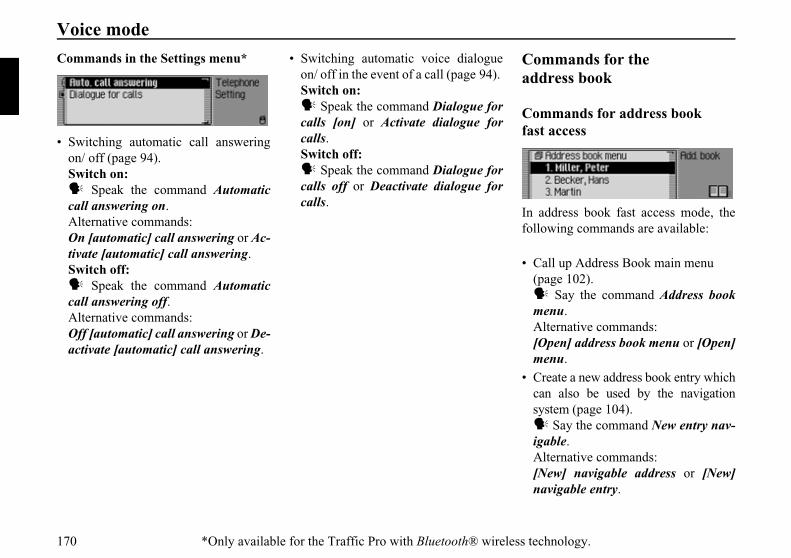
170
Voice mode
Commands in the Settings menu*
• Switching automatic call answeringon/ off (page 94). Switch on:
Speak the command Automaticcall answering on. Alternative commands: On [automatic] call answering or Ac-tivate [automatic] call answering. Switch off:
Speak the command Automaticcall answering off. Alternative commands: Off [automatic] call answering or De-activate [automatic] call answering.
• Switching automatic voice dialogueon/ off in the event of a call (page 94). Switch on:
Speak the command Dialogue forcalls [on] or Activate dialogue forcalls. Switch off:
Speak the command Dialogue forcalls off or Deactivate dialogue forcalls.
Commands for the address book
Commands for address book fast access
In address book fast access mode, thefollowing commands are available:
• Call up Address Book main menu (page 102).
Say the command Address bookmenu.Alternative commands:[Open] address book menu or [Open]menu.
• Create a new address book entry whichcan also be used by the navigationsystem (page 104).
Say the command New entry nav-igable.Alternative commands:[New] navigable address or [New]navigable entry.
5016
6001
*Only available for the Traffic Pro with Bluetooth® wireless technology.

171
Voice mode
• Create a new address book entry whichcannot be used by the navigationsystem (page 102).
Say the command New entry textonly or [New] entry text [only].
• Calling up a telephone number from avoice entry equipped address bookentry.*
Speak the command Call [entry]...*. Alternative commands: [Call] entry ...* or [Call] address ...*.
• Calling up a mobile phone numberfrom a voice entry equipped addressbook entry.*
Speak the command Call [entry]...* mobile. Alternative commands: [Call] entry ...* mobile or [Call]address ...* mobile.
• Calling up a work telephone numberfrom a voice entry equipped addressbook entry.*
Speak the command Call [entry]...* business. Alternative commands: [Call] entry ...* business or [Call]address ...* business.
• Calling up a private telephone numberfrom a voice entry equipped addressbook entry.*
Speak the command Call [entry]...* private. Alternative commands: [Call] entry ...* private or [Call]address ...* private.
• Start route guidance to an address towhich a voice entry has been assigned(page 112).
Say the command Navigate to[entry] ...*.Alternative commands:Navigate to entry ...*, Navigate toaddress ...* or Navigate to destination...*.
• Starting a call to a fast access entry. Speak the command Call [entry]
number ... (1 - X). Alternative commands: Call [entry] number ... (1 - X) or Call[address] number ... (1 - X).
• Starting a call to a mobile phonenumber from a fast access entry.*
Speak the command Call [entry] ...(1 - X) mobile. Alternative commands: [Call] [entry] [number] ... (1 - X)mobile or [Call] [address] [number]... (1 - X) mobile.
*Only available for the Traffic Pro with Bluetooth® wireless technology.

172
Voice mode
• Starting a call to a work telephonenumber from a fast access entry.*
Speak the command Call [entry] ...(1 - X) business. Alternative commands: [Call] [entry] [number] ... (1 - X)business or [Call] [address] [number]... (1 - X) business.
• Starting a call to a private telephonenumber from a fast access entry.*
Speak the command Call [entry] ...(1 - X) private. Alternative commands: [Call] [entry] [number] ... (1 - X) pri-vate or [Call] [address] [number] ...(1 - X) private.
• Edit an entry to which a voice entryhas been assigned (page 107).
Say the command Edit [entry] ...*.Alternative commands:Change entry ...* or Change address...*.
• Open an entry to which a voice entryhas been assigned (page 107).
Say the command Open [entry]...*.Alternative commands:[Open] entry ...* or [Open] address...*.
• Start route guidance to an address. Say the command Navigate to
[entry] number ... (1 - X).Alternative commands:Navigate to entry number ... (1 - X) orNavigate to address number ... (1 -X).
• Edit an entry/Call up the Edit menu (page 107).
Say the command Edit [entry]number ... (1 - X).Alternative commands:Change entry [number] ... (1 - X) orChange address [number] ... (1 - X).
• Open an entry (page 107). Say the command [Entry] number
... (1 - X).Alternative commands:[Open] [entry] number ... (1 - X) or[Open] [address] number ... (1 - X).
• Find an entry (page 105). Say the command Search for entry
or Search [for] address.
*Only available for the Traffic Pro with Bluetooth® wireless technology.

173
Voice mode
• Call up the Search Criterion menu (page 106).
Say the command Search crite-rion or Set search criterion.
• Call up Voice Entries menu(page 112).
Say the command Voice entries orOpen voice entries.
Commands in the Fast Access/Edit Entries menu
• Switch entry protection on/off (page 113).Switch on:
Say the command Protect entryon.Alternative commands:Activate protect entry or Activate pro-tect address.Switch off:
Say the command Protect entryoff.Alternative commands:Deactivate protect entry or Deactivateprotect address.
• Delete an entry (page 108). Say the command Delete entry or
Delete address.• Delete entire list (page 114).
Say the command Delete list orDelete entire list.
Commands in the Edit menu
• Call up menu for editing data (page 107).
Say the command Change data orChange address.
• Delete entry (page 108). Say the command Delete entry or
Delete address.• Create voice entry (page 108).
Say the command Create voiceentry.
• Delete voice entry (page 108). Say the command Delete voice
entry.• Listen to voice entry (page 108).
Say the command Read out voiceentry or Listen to voice entry.
• Exporting an address book entry(page 110).*
Speak the command Export entry.
60266016
*Only available for the Traffic Pro with Bluetooth® wireless technology.

174
Voice mode
Commands in the Edit Data menu• Save data entered.
Say the command Save.
Commands in the menu for selecting aBluetooth device for export*• Searching for a Bluetooth device
(page 109). Speak the command Search for
devices or Search for device.
Commands when an entry is open
• Call up the Edit menu. Say the command Edit [entry] or
Edit [address].• Start destination guidance to the open
entry (page 112). Say the command Navigate.
Alternative commands:Start navigation or Start route guid-ance.
Commands for the Address Book main menu
In the Address Book main menu, the fol-lowing commands are available:
• Create a new address book entry whichcan also be used by the navigationsystem (page 104).
Say the command New entry nav-igable.Alternative commands:[New] navigable address or [New]navigable entry.
60156002
*Only available for the Traffic Pro with Bluetooth® wireless technology.

175
Voice mode
• Create a new address book entry whichcannot be used by the navigationsystem (page 102).
Say the command New entry textonly or [New] entry text [only].
• Find an entry (page 105). Say the command Search for entry
or Search [for] address.• Call up the Search Criterion menu
(page 106). Say the command Search crite-
rion or Set search criterion.• Set search criterion to name
(page 106). Say the command Search by name
or Set search by name.
• Set search criterion to town(page 106).
Say the command Search by townor [Set] search by town.
• Call up Voice Entries menu(page 108).
Say the command Voice entries orOpen voice entries.
• Exporting an address book(page 109).*
Speak the command Exportaddress book.
Commands in the Voice Entries menu
In the Voice Entries menu, the followingcommands are available:
• Switch voice dialogues on/off whensaving (page 108).Switch on:
Say the command Dialogue forvoice entries [on] or Activate dia-logue for voice entries.Switch off:
Say the command Dialogue forvoice entries off or Deactivate dia-logue for voice entries.
• Read out assigned voice entries (page 108).
Say the command Read outentries.Alternative commands:Read out [all] voice entries or Readout [all] entries.
6025
*Only available for the Traffic Pro with Bluetooth® wireless technology.
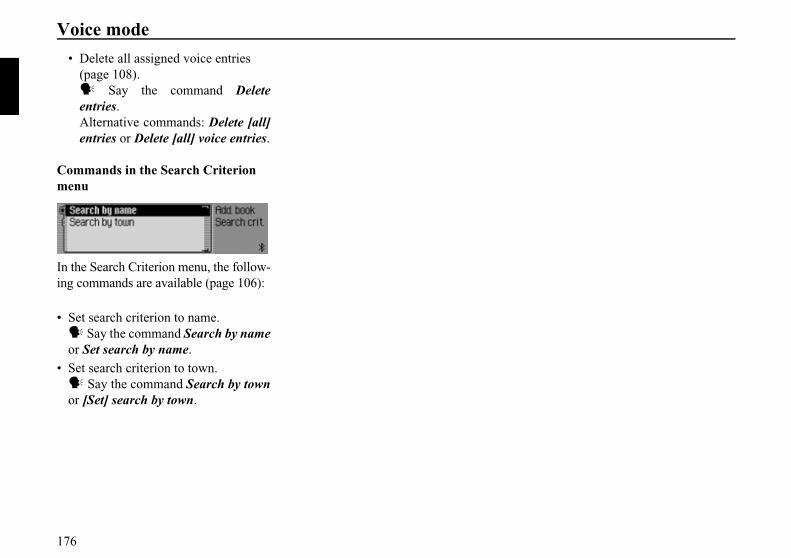
176
Voice mode
• Delete all assigned voice entries (page 108).
Say the command Deleteentries.Alternative commands: Delete [all]entries or Delete [all] voice entries.
Commands in the Search Criterion menu
In the Search Criterion menu, the follow-ing commands are available (page 106):
• Set search criterion to name. Say the command Search by name
or Set search by name.• Set search criterion to town.
Say the command Search by townor [Set] search by town.
6014

177
Technical terminologyTechnical terminologyAUX(Auxiliary)Option to connect external audio signals.
BalanceVolume setting between left and rightloudspeakers.
BluetoothTechnology for wireless data communi-cation over short distances of up toapprox. 10 metres.
CDC(Compact Disc Changer)CD changer.
CD-R(Compact Disc Recordable)CD which can be written once only.
CD-RW(Compact Disc ReWritable)CD which can be written more than once.
CF card(Compact Flash)Type of memory card, rewriteableremovable memory card developed in1994 by SanDisc.There are two different types of CF card,type 1 (3.3 mm thick) and type 2 (5 mmthick).
Code numberSecret number that must be entered toactivate the unit.
CrossoverAn adjustable dividing network whichdivides the frequency ranges before theoutput stage.
DTMF(Dual Tone MultiFrequency dialling) Amulti-frequency dialling procedure.
Fader(fader control)Volume setting between front and rearloudspeakers.
FolderDirectoryFolder on a CD/memory card/micro-drivecontaining MP3 tracks.
GAL(GeschwindigkeitsAbhängige Lautstärke-regelung) (speed-dependent volumecontrol)The volume increases as the speed of thevehicle increases.
GMT(Greenwich Mean Time)Central European timeStandard time at degree of longitude 0(the degree of longitude through Green-wich, Great Britain). This time is usedall over the world as the standard timefor synchronising data acquisition.
GPS(Global Positioning System)System for position determination. Basisfor navigation.

178
Technical terminology
ID3 tag“Table of contents” for an MP3 track.Contains information such as title, artist,album, year and genre.
LoudnessImproves sound at low volumes byincreasing bass and treble.
Micro-driveHard disk in Compact Flash II formatIn response to constant minimisation inthe size of multi-media formats, IBMdeveloped the smallest hard disk in theworld, the micro-drive. Although it is thesame size as a Compact Flash II memorycard, it conceals a real hard disk. It can bepurchased in various capacity ratings.
MP3Special process for compressing audiodata (e.g. music).
Off-roadWarning from the navigation systemif you are in an area not covered by thedigital road map.
PTT(Push To Talk)Describes the initiation of voice dialoguein voice mode.
PTY ID(Programme Type ID)Identification of the programme trans-mitted by a station.Possible PTYs are:
• ' A abbreviated to ' • 8! abbreviated to 8• abbreviated to • 2 abbreviated to 2 • -( 8 • - ( abbreviated to - (• 8 abbreviated to 8!0• • & abbreviated to &• &! • , ( abbreviated to ,• !
• B68 • '! abbreviated to '!0• +! abbreviated to +!• + abbreviated to +• 4! abbreviated to 4• 4' ! abbreviated to 4' !0• ', abbreviated to ',• ! abbreviated to !0• • ! abbreviated to !0• abbreviated to • ! abbreviated to • 2 • • 3 B3 abbreviated to 3 • : ' abbreviated to : • 5'

179
Technical terminology
Radio textAdditional information transmitted bymost VHF stations via RDS.
RDS(Radio Data System)A process for transmission of inaudibleinformation on the VHF band.
SurroundSurround sound function. Surroundsound can be simulated by means ofspecial settings.
TMC(Traffic Message Channel)Traffic announcements transmitted bymost VHF stations via RDS. Basis fordynamic navigation.
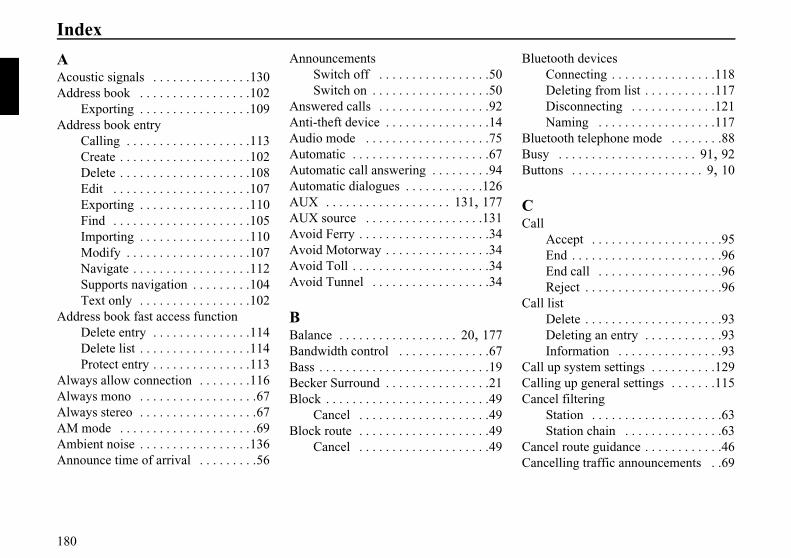
180
Index
AAcoustic signals . . . . . . . . . . . . . . .130Address book . . . . . . . . . . . . . . . . .102
Exporting . . . . . . . . . . . . . . . . .109Address book entry
Calling . . . . . . . . . . . . . . . . . . .113Create . . . . . . . . . . . . . . . . . . . .102Delete . . . . . . . . . . . . . . . . . . . .108Edit . . . . . . . . . . . . . . . . . . . . .107Exporting . . . . . . . . . . . . . . . . .110Find . . . . . . . . . . . . . . . . . . . . .105Importing . . . . . . . . . . . . . . . . .110Modify . . . . . . . . . . . . . . . . . . .107Navigate . . . . . . . . . . . . . . . . . .112Supports navigation . . . . . . . . .104Text only . . . . . . . . . . . . . . . . .102
Address book fast access functionDelete entry . . . . . . . . . . . . . . .114Delete list . . . . . . . . . . . . . . . . .114Protect entry . . . . . . . . . . . . . . .113
Always allow connection . . . . . . . .116Always mono . . . . . . . . . . . . . . . . . .67Always stereo . . . . . . . . . . . . . . . . . .67AM mode . . . . . . . . . . . . . . . . . . . . .69Ambient noise . . . . . . . . . . . . . . . . .136Announce time of arrival . . . . . . . . .56
AnnouncementsSwitch off . . . . . . . . . . . . . . . . .50Switch on . . . . . . . . . . . . . . . . . .50
Answered calls . . . . . . . . . . . . . . . . .92Anti-theft device . . . . . . . . . . . . . . . .14Audio mode . . . . . . . . . . . . . . . . . . .75Automatic . . . . . . . . . . . . . . . . . . . . .67Automatic call answering . . . . . . . . .94Automatic dialogues . . . . . . . . . . . .126AUX . . . . . . . . . . . . . . . . . . . 131, 177AUX source . . . . . . . . . . . . . . . . . .131Avoid Ferry . . . . . . . . . . . . . . . . . . . .34Avoid Motorway . . . . . . . . . . . . . . . .34Avoid Toll . . . . . . . . . . . . . . . . . . . . .34Avoid Tunnel . . . . . . . . . . . . . . . . . .34
BBalance . . . . . . . . . . . . . . . . . . 20, 177Bandwidth control . . . . . . . . . . . . . .67Bass . . . . . . . . . . . . . . . . . . . . . . . . . .19Becker Surround . . . . . . . . . . . . . . . .21Block . . . . . . . . . . . . . . . . . . . . . . . . .49
Cancel . . . . . . . . . . . . . . . . . . . .49Block route . . . . . . . . . . . . . . . . . . . .49
Cancel . . . . . . . . . . . . . . . . . . . .49
Bluetooth devicesConnecting . . . . . . . . . . . . . . . .118Deleting from list . . . . . . . . . . .117Disconnecting . . . . . . . . . . . . .121Naming . . . . . . . . . . . . . . . . . .117
Bluetooth telephone mode . . . . . . . .88Busy . . . . . . . . . . . . . . . . . . . . . 91, 92Buttons . . . . . . . . . . . . . . . . . . . . 9, 10
CCall
Accept . . . . . . . . . . . . . . . . . . . .95End . . . . . . . . . . . . . . . . . . . . . . .96End call . . . . . . . . . . . . . . . . . . .96Reject . . . . . . . . . . . . . . . . . . . . .96
Call listDelete . . . . . . . . . . . . . . . . . . . . .93Deleting an entry . . . . . . . . . . . .93Information . . . . . . . . . . . . . . . .93
Call up system settings . . . . . . . . . .129Calling up general settings . . . . . . .115Cancel filtering
Station . . . . . . . . . . . . . . . . . . . .63Station chain . . . . . . . . . . . . . . .63
Cancel route guidance . . . . . . . . . . . .46Cancelling traffic announcements . .69

181
Index
CDEject . . . . . . . . . . . . . . . . . . . . . .82Insert . . . . . . . . . . . . . . . . . . . . .82Notes . . . . . . . . . . . . . . . . . . . . .81
CD changer . . . . . . . . . . . . . . . . . . . .86CD magazine
Eject . . . . . . . . . . . . . . . . . . . . . .86Load . . . . . . . . . . . . . . . . . . . . . .86
CD mix . . . . . . . . . . . . . . . . . . . . . . .80CD mode . . . . . . . . . . . . . . . . . . . . . .81CD selection . . . . . . . . . . . . . . . . . . .75CDC . . . . . . . . . . . . . . . . . . . . 86, 177CD-R . . . . . . . . . . . . . . . . . . . . 82, 177CD-RW . . . . . . . . . . . . . . . . . . 82, 177Centre . . . . . . . . . . . . . . . . . . . . . . . .31CF card . . . . . . . . . . . . . . . . . . . . . .177Clock . . . . . . . . . . . . . . . . . . . . . . . .133Code number . . . . . . . . . . . . . . . . . . .14
Enter . . . . . . . . . . . . . . . . . . . . .14Incorrect number . . . . . . . . . . . .14
Confirm voice entry . . . . . . . . . . . .127Confirm warning message . . . . . . . .17Control panel
Insert . . . . . . . . . . . . . . . . . . . . .16Remove . . . . . . . . . . . . . . . . . . .15Unlock . . . . . . . . . . . . . . . . . . . .15
Controls . . . . . . . . . . . . . . . . . . . . 9, 10Coordinates . . . . . . . . . . . . . . . . . . . .51Copy protection . . . . . . . . . . . . . . . .82Country . . . . . . . . . . . . . . . . . . . . . . .28Crossover . . . . . . . . . . . . . . . . 21, 177Current position
Display . . . . . . . . . . . . . . . . 51, 52Store . . . . . . . . . . . . . . . . . . 51, 52
Current time . . . . . . . . . . . . . . . . . . .44
DDay/ night design . . . . . . . . . . . . . .131Deactivating the hands-free unit . . . .97Delete personal data . . . . . . . . . . . .132Deleting a stopover . . . . . . . . . . . . . .48Destination from address book . . . . .38Destination reached . . . . . . . . . . . . .45Destination road . . . . . . . . . . . . . . . .30Destination town . . . . . . . . . . . . 28, 31Detailed track display . . . . . . . . . . . .81Detailed voice output . . . . . . . . . . .127Dial number . . . . . . . . . . . . . . . . . . .90Difficult reception areas . . . . . . . . . .67Digital level . . . . . . . . . . . . . . . . . .130Direction arrows . . . . . . . . . . . . . . . .45
Direction of rotation . . . . . . . . . . . .132Directory mix . . . . . . . . . . . . . . . . . .80Disabled . . . . . . . . . . . . . . . . . . . . . .15Display
Current position . . . . . . . . . . . . .51Current time . . . . . . . . . . . . . . . .44Distance to travel . . . . . . . . . . . .44Journey time remaining . . . . . . .44Route Option . . . . . . . . . . . . . . .52Voice setting . . . . . . . . . . . . . .125
Display Traffic Information . . . . . . .54Display voice settings . . . . . . . . . . .125Displaying TMC messages . . . . . . . .54Distance to travel . . . . . . . . . . . . . . .44DTMF . . . . . . . . . . . . . . . . . . . . . . . .97Dynamic navigation . . . . . . . . . . . . .52Dynamic Route . . . . . . . . . . . . . . . . .33Dynamic route guidance . . . . . . . . . .52

182
Index
EEmergency call . . . . . . . . . . . . . . . . .93Enter
Centre . . . . . . . . . . . . . . . . . . . .31Code number . . . . . . . . . . . . . . .14Country . . . . . . . . . . . . . . . . . . .28Destination . . . . . . . . . . . . . . . . .27House number . . . . . . . . . . . . . .32Junction . . . . . . . . . . . . . . . . . . .32Point of interest . . . . . . . . . . . . .39Postcode . . . . . . . . . . . . . . . . . . .29Road . . . . . . . . . . . . . . . . . . . . . .30telephone number . . . . . . . . . . .90Town . . . . . . . . . . . . . . . . . . . . .28
Enter telephone number . . . . . . . . . .90Entering a destination . . . . . . . . . . . .27Equalizer . . . . . . . . . . . . . . . . . . . . . .18ETA . . . . . . . . . . . . . . . . . . . . . . . . . .56Extended PTT . . . . . . . . . . . . . . . . .127External device . . . . . . . . . . . . . . . .131External hands-free unit . . . . . . . . .131
FFactory settings . . . . . . . . . . . . . . . .132Fader . . . . . . . . . . . . . . . . . . . . 20, 177Fader control . . . . . . . . . . . . . . . . . . .20Fast access
Address Book . . . . . . . . . . . . .113Media mode . . . . . . . . . . . . . . . .75Navigation . . . . . . . . . . . . . . . . .35Radio mode . . . . . . . . . . . . . . . .60Telephone mode . . . . . . . . . . . .98
Fast forward . . . . . . . . . . . . . . . . . . .77Fast rewind . . . . . . . . . . . . . . . . . . . .77Fast Route . . . . . . . . . . . . . . . . . . . . .34Filter function . . . . . . . . . . . . . . . . . .62
Switch off . . . . . . . . . . . . . . . . .62Switch on . . . . . . . . . . . . . . . . . .62
Filter stations . . . . . . . . . . . . . . . . . .63Folder . . . . . . . . . . . . . . . . . . . . . . . .83Forward . . . . . . . . . . . . . . . . . . . . . . .77
GGAL . . . . . . . . . . . . . . . . . . . 129, 177General road safety . . . . . . . . . . . . . . .8GMT . . . . . . . . . . . . . . . . . . . 133, 177GPS . . . . . . . . . . . . . . . . . . . . . . . . .177
HHeight above sea level . . . . . . . . . . .51Help function . . . . . . . . . . . . . . . . .143House number . . . . . . . . . . . . . . . . . .32
IID3 tag . . . . . . . . . . . . . . . . . . 83, 178Imperial . . . . . . . . . . . . . . . . . . . . . . .57Information
About POIs . . . . . . . . . . . . . . . .42During route guidance . . . . . . . .50
InsertingMemory card . . . . . . . . . . . . . . .85Micro-drive . . . . . . . . . . . . . . . .85
Intended purpose . . . . . . . . . . . . . . . . .7
JJourney time remaining . . . . . . . . . .44Junction . . . . . . . . . . . . . . . . . . . . . . .32

183
Index
LLoudness . . . . . . . . . . . . . . . . . 20, 178
MMain menu
Address Book . . . . . . . . . . . . .102Media mode . . . . . . . . . . . . . . . .80Navigation . . . . . . . . . . . . . . . . .26Radio mode . . . . . . . . . . . . . . . .58Telephone mode . . . . . . . . . . . .89
Manual station tuning . . . . . . . . . . . .62Media mode . . . . . . . . . . . . . . . . . . .75
Switch on . . . . . . . . . . . . . . . . . .75Medium wave . . . . . . . . . . . . . . 59, 69Memory card . . . . . . . . . . . . . . . . . . .84
Insert . . . . . . . . . . . . . . . . . . . . .85Remove . . . . . . . . . . . . . . . . . . .85
MenuBasics . . . . . . . . . . . . . . . . . . . . .11Data entry . . . . . . . . . . . . . . . . .13Fast Access . . . . . . . . . . . . . . . .11Main menu . . . . . . . . . . . . . . . . .11Operation . . . . . . . . . . . . . . . . . .12Options . . . . . . . . . . . . . . . . . . .12Status display . . . . . . . . . . . . . . .12
Metrisch . . . . . . . . . . . . . . . . . . . . . .57Micro-drive . . . . . . . . . . . . . . . 84, 178
Insert . . . . . . . . . . . . . . . . . . . . .85Remove . . . . . . . . . . . . . . . . . . .85
Missed calls . . . . . . . . . . . . . . . . . . .92MP3 . . . . . . . . . . . . . . . . . . . . . 83, 178
Create data media . . . . . . . . . . .83Notes . . . . . . . . . . . . . . . . . . . . .83
MP3 mode . . . . . . . . . . . . . . . . . . . . .83Mute . . . . . . . . . . . . . . . . . . . . . . . . .22
Switch off . . . . . . . . . . . . . . . . .22Switch on . . . . . . . . . . . . . . . . . .22
Mute function . . . . . . . . . . . . . . . . . .22
NName station . . . . . . . . . . . . . . . . . . .73Navigation . . . . . . . . . . . . . . . . . . . . .24
Activate . . . . . . . . . . . . . . . . . . .26Cancel . . . . . . . . . . . . . . . . . . . .46Settings . . . . . . . . . . . . . . . . . . .55Switch off . . . . . . . . . . . . . . . . .46Switch on . . . . . . . . . . . . . . . . . .26
Navigation announcementsSwitch off . . . . . . . . . . . . . . . . .50Switch on . . . . . . . . . . . . . . . . . .50
Navigation CDs . . . . . . . . . . . . . . . .24
Navigation displays . . . . . . . . . . . . .44Navigation fast access
Delete entry . . . . . . . . . . . . . . . .36Delete list . . . . . . . . . . . . . . . . . .36Navigate . . . . . . . . . . . . . . . . . . .35Protect entry . . . . . . . . . . . . . . . .35
New route . . . . . . . . . . . . . . . . . . . . .45Number from address book . . . . . . .91Number is busy . . . . . . . . . . . . . 91, 92Numbers dialled . . . . . . . . . . . . . . . .92
OOff-road . . . . . . . . . . . . . . . . . 45, 178Options menu
Media mode . . . . . . . . . . . . . . . .78Navigation . . . . . . . . . . . . . . . . .45Radio . . . . . . . . . . . . . . . . . . . . .61Telephone mode . . . . . . . . . . . .96

184
Index
PPlay mode . . . . . . . . . . . . . . . . . . . . .78POI . . . . . . . . . . . . . . . . . . . . . . . . . .39Point of interest . . . . . . . . . . . . . . . . .39
In country . . . . . . . . . . . . . . . . . .40In place . . . . . . . . . . . . . . . . . . .41Information . . . . . . . . . . . . . . . .42Local . . . . . . . . . . . . . . . . . . . . .40Local area of destination . . . . . .41
PositionDisplay . . . . . . . . . . . . . . . . 51, 52Store . . . . . . . . . . . . . . . . . . 51, 52
Postcode . . . . . . . . . . . . . . . . . . . . . .29Private . . . . . . . . . . . . . . . . . . . . . . . .97Programme type . . . . . . . . . . . . . . . .64
Switch off . . . . . . . . . . . . . . . . .64Switch on . . . . . . . . . . . . . . . . . .64
PTY . . . . . . . . . . . . . . . . . . . . . . . . . .64Switch off . . . . . . . . . . . . . . . . .64Switch on . . . . . . . . . . . . . . . . . .64
Push To Talk . . . . . . . . . . . . . . . . . .127
RRadio mode . . . . . . . . . . . . . . . . . . . .58Radio text . . . . . . . . . . . . . . . . . . . .179
Switch off . . . . . . . . . . . . . . . . .65Switch on . . . . . . . . . . . . . . . . . .65
Random play . . . . . . . . . . . . . . . . . . .78Random play function . . . . . . . . . . . .78RDS . . . . . . . . . . . . . . . . . . . . . . . . .179Recalculating route . . . . . . . . . . . . . .45Reception optimisation . . . . . . . . . . .66Reception-related interference . . . . .66Regional programme . . . . . . . . . . . .65Regionalisation . . . . . . . . . . . . . . . . .65
Switch off . . . . . . . . . . . . . . . . .65Switch on . . . . . . . . . . . . . . . . . .65
RemovingMemory card . . . . . . . . . . . . . . .85Micro-drive . . . . . . . . . . . . . . . .85
Repeat CD . . . . . . . . . . . . . . . . . . . . .79Repeat track . . . . . . . . . . . . . . . . . . .79Repeat voice announcement . . . . . .127Reset function . . . . . . . . . . . . . . . . .132Reset settings . . . . . . . . . . . . . . . . .132Rewind . . . . . . . . . . . . . . . . . . . . . . .77Road . . . . . . . . . . . . . . . . . . . . . . . . .30Route list . . . . . . . . . . . . . . . . . . . . . .47
Route Option . . . . . . . . . . . . . . . 49, 52Avoid Ferry . . . . . . . . . . . . . . . .34Avoid Motorway . . . . . . . . . . . .34Avoid Toll . . . . . . . . . . . . . . . . .34Avoid Tunnel . . . . . . . . . . . . . . .34Display . . . . . . . . . . . . . . . . . . . .52Dynamic Route . . . . . . . . . . . . .33Fast Route . . . . . . . . . . . . . . . . .34Modify . . . . . . . . . . . . . . . . 49, 52Short Route . . . . . . . . . . . . . . . .34
Route option . . . . . . . . . . . . . . . . . . .33
SSafety instructions . . . . . . . . 7, 24, 44Saving a destination . . . . . . . . . . . . .34Saving a destination in the address book . . . . . . . . . . . . . . . . . .36Saving a number in the address book . . . . . . . . . . . . . . . . . .100Scan
FM . . . . . . . . . . . . . . . . . . . . . . .61Media . . . . . . . . . . . . . . . . . . . . .79Medium wave . . . . . . . . . . . . . .70Short wave . . . . . . . . . . . . . . . . .70

185
Index
Scan functionFM . . . . . . . . . . . . . . . . . . . . . . .61Media . . . . . . . . . . . . . . . . . . . . .79Medium wave . . . . . . . . . . . . . .70Short wave . . . . . . . . . . . . . . . . .70VHF . . . . . . . . . . . . . . . . . . . . . .61
Search for location . . . . . . . . . . . . .106Select
Centre . . . . . . . . . . . . . . . . . . . .31Country . . . . . . . . . . . . . . . . . . .28House number . . . . . . . . . . . . . .32Junction . . . . . . . . . . . . . . . . . . .32Point of interest . . . . . . . . . . . . .39Road . . . . . . . . . . . . . . . . . . . . . .30Telephone mode . . . . . . . . . . . .94Town . . . . . . . . . . . . . . . . . . . . .28
Select telephone mode . . . . . . . . . . .94Set
Balance . . . . . . . . . . . . . . . . . . .20Bass . . . . . . . . . . . . . . . . . . . . . .19Equalizer . . . . . . . . . . . . . . . . . .19ETA . . . . . . . . . . . . . . . . . . . . . .56ETA calculation . . . . . . . . . . . . .56Fader . . . . . . . . . . . . . . . . . . . . .20Language . . . . . . . . . . . . . . . . .124System language . . . . . . . . . . .124
Time . . . . . . . . . . . . . . . . . . . . .133Treble . . . . . . . . . . . . . . . . . . . . .19Voice mode . . . . . . . . . . . . . . .123Voice output . . . . . . . . . . . . . .126Waveband . . . . . . . . . . . . . . . . .59
Set language . . . . . . . . . . . . . . . . . .124Setting the system language . . . . . .124Setting voice output . . . . . . . . . . . .126Short Route . . . . . . . . . . . . . . . . . . . .34Short wave . . . . . . . . . . . . . . . . 59, 69Software update . . . . . . . . . . . . . . .133Sound setting . . . . . . . . . . . . . . . . . .18
Reset . . . . . . . . . . . . . . . . . . . . .22Set . . . . . . . . . . . . . . . . . . . . . . .18
Speed-dependent volume control . .129Standby mode . . . . . . . . . . . . . . . . . .17Station list . . . . . . . . . . . . . . . . . . . . .60Station memory . . . . . . . . . . . . . . . . .71
Delete entry . . . . . . . . . . . . . . . .73Move entry . . . . . . . . . . . . . . . . .72Name entry . . . . . . . . . . . . . . . .73
Status displayMedia mode . . . . . . . . . . . . . . . .76Navigation . . . . . . . . . . . . . . . . .43Radio mode . . . . . . . . . . . . . . . .60Telephone mode . . . . . . . . . . . .95
Stopover . . . . . . . . . . . . . . . . . . . . . .47Store
Current position . . . . . . . . . . . . .51Station . . . . . . . . . . . . . . . . . . . .71
Storing stations . . . . . . . . . . . . . . . . .71Subwoofer . . . . . . . . . . . . . . . . . . . . .21Surround . . . . . . . . . . . . . . . . . 21, 179Surround sound . . . . . . . . . . . . . . . . .21Switch off
Announcements . . . . . . . . . . . . .50Filter function . . . . . . . . . . . . . .62Navigation announcements . . . .50Programme type . . . . . . . . . . . . .64Radio text . . . . . . . . . . . . . . . . . .65Regionalisation . . . . . . . . . . . . .65Route guidance . . . . . . . . . . . . .46Traffic programme . . . . . . . . . . .68
Switch onAnnouncements . . . . . . . . . . . . .50Bluetooth telephone mode . . . . .88Filter function . . . . . . . . . . . . . .62Navigation announcements . . . .50Programme type . . . . . . . . . . . . .64Radio mode . . . . . . . . . . . . . . . .58Radio text . . . . . . . . . . . . . . . . . .65Regionalisation . . . . . . . . . . . . .65Telephone mode . . . . . . . . . . . .88Traffic programme . . . . . . . . . . .68

186
Index
Switching off . . . . . . . . . . . . . . . . . .17Switching on . . . . . . . . . . . . . . . . . . .17
Media mode . . . . . . . . . . . . . . . .75System settings . . . . . . . . . . . . . . . .128
TTechnical data . . . . . . . . . . . . . . . . .187Telephone fast access mode
Delete list . . . . . . . . . . . . . . . . . .99Deleting an entry . . . . . . . . . . . .99Direct call . . . . . . . . . . . . . . . . .98Protect entry . . . . . . . . . . . . . . . .99
Telephone mode . . . . . . . . . . . . . . . .88Telephone number from address book .91Temperature protection circuit . . . . .82Threshold frequency . . . . . . . . . . . . .21Time . . . . . . . . . . . . . . . . . . . . . . . .133Time format . . . . . . . . . . . . . . . . . .133TMC . . . . . . . . . . . . . . . . . . . . 52, 179TMC messages . . . . . . . 47, 51, 52, 54Tone . . . . . . . . . . . . . . . . . . . . . . . . .18Tone centre . . . . . . . . . . . . . . . . . . . .20Tone distribution . . . . . . . . . . . . . . . .20Town . . . . . . . . . . . . . . . . . . . . . . . . .28TP . . . . . . . . . . . . . . . . . . . . . . . . . . .67
Track jump . . . . . . . . . . . . . . . . . . . .77Track mix . . . . . . . . . . . . . . . . . . . . .78Track skip . . . . . . . . . . . . . . . . . . . . .77Traffic announcements . 47, 51, 52, 54
Read out . . . . . . . . . . . . 47, 54, 55Set . . . . . . . . . . . . . . . . . . . . . . .55
Traffic ProMute . . . . . . . . . . . . . . . . . . . . . .22Reset . . . . . . . . . . . . . . . . . . . .132Switch off . . . . . . . . . . . . . . . . .17Switch on . . . . . . . . . . . . . . . . . .17
Traffic programme . . . . . . . . . . . . . .67Announcement . . . . . . . . . . . . . .69Automatic . . . . . . . . . . . . . . . . .68Select station . . . . . . . . . . . . . . .68Switch off . . . . . . . . . . . . . . . . .68Switch on . . . . . . . . . . . . . . . . . .68Volume . . . . . . . . . . . . . . . . . . .69
Treble . . . . . . . . . . . . . . . . . . . . . . . .19
UUnit
Disabled . . . . . . . . . . . . . . . . . . .15Mute . . . . . . . . . . . . . . . . . . . . . .22Reset . . . . . . . . . . . . . . . . . . . .132Switch off . . . . . . . . . . . . . . . . .17Switch on . . . . . . . . . . . . . . . . . .17
Update . . . . . . . . . . . . . . . . . . . . . . .133Users 1-3 . . . . . . . . . . . . . . . . . . . . . .19
VVHF - According to quality . . . . . . .59VHF - Alphabetical . . . . . . . . . . . . . .59Voice commands . . . . . . . . . . . . . .135
Address book . . . . . . . . . . . . . .170Bluetooth telephone mode . . . .165Fast access functions . . . . . . . .144General commands . . . . . . . . .142Main menus . . . . . . . . . . . . . . .144Media mode . . . . . . . . . . . . . . .153Navigation . . . . . . . . . . . . . . . .157Navigation in lists . . . . . . . . . .143Radio mode . . . . . . . . . . . . . . .145Status displays . . . . . . . . . . . . .144
Voice control system . . . . . . . . . . .136

187
Index
Voice dialogueEnd . . . . . . . . . . . . . . . . . . . . . .137Examples . . . . . . . . . . . . . . . . .138
Voice entriesAddress Book . . . . . . . . . . . . .108Delete . . . . . . . . . . . . . . . . . . . .126Radio . . . . . . . . . . . . . . . . . . . . .66Read out . . . . . . . . . . . . . . . . . .126
Voice entry signal . . . . . . . . . . . . . .127Voice entry, address book
Create . . . . . . . . . . . . . . . . . . . .108Delete . . . . . . . . . . . . . . . 108, 112Read out . . . . . . . . . . . . . . . . . .112
Voice entry, radioCreate . . . . . . . . . . . . . . . . . . . . .74Delete . . . . . . . . . . . . . . . . . 66, 74Read out . . . . . . . . . . . . . . . 66, 74
Voice mode . . . . . . . . . . . . . . . . . . .135Activate . . . . . . . . . . . . . . . . . .136
Voice output volume . . . . . . . . . . . .125Volume . . . . . . . . . . . . . . . . . . . . . . .20
Acoustic signals . . . . . . . . . . . .130Display . . . . . . . . . . . . . . . . . . .130Increase . . . . . . . . . . . . . . . . . . .18Reduce . . . . . . . . . . . . . . . . . . . .18Set . . . . . . . . . . . . . . . . . . . . . . .18Traffic programme . . . . . . . . . . .69Voice output . . . . . . . . . . . . . .125
WWaveband . . . . . . . . . . . . . . . . . . . . .59

188
Technical dataTechnical data
• Wavebands:FM 87.5 MHz - 108 MHzMW 531 kHz - 1620 kHzKW 5800 kHz - 6250 kHz
• Frequency range:20 Hz - 20 kHz for CD operations30 Hz - 15 kHz for FM50 Hz - 2.5 kHz for MW, KW
• Output:4 x 18 W RMS
• Line cross section:For power supply min. 0.75 mm²
• Loudspeaker impedance:min. 4 Ω
• Line out:4 x analogue Line Out (Ua max 3Vrmsat 10 kΩ)1 x analogue Line Out Mono (Ua max3Vrms at 10 kΩ) for subwoofer
• GAL:In order to utilise GAL, a square wavevoltage with a mass-related amplitudeof +4 V to +12 V must be provided bythe vehicle's electronic speedometer.Volume is increased in 7 incrementsof 2.5dB each.
• Antenna:Impedance 50 Ω
• AUX input:16 KΩ Input resistance, max. inputvoltage 1.7 Vrms
• Telephone mute:Low active level < 2 V
• Supply voltage:12 V
• CD connection:The Becker Silverstone 7860 CDchanger can be connected.
• Playable CDs:Only CDs which comply with DIN EN60908 can be used. The use of 8 cmCDs with an adapter is not permitted.

189
Dear Listener,
In conformance with current EC guidelines, any person may operate this radio receiver.This unit conforms to the current valid European or harmonised national standards. This designationis your guarantee that the unit conforms to the applicable specifications regarding electromagneticcompatibility. This means that interference with other electrical/electronic devices caused by the unit,or interference with this unit caused by other electrical/electronic devices is largely prevented.
The EC type-approval mark (e1) issued by the Federal Office for Transport (KBA) in accordance with European Directive 95/54/EC governing the EMC of motor vehicles authorises installation and operation of the unit in motor vehicles (classes M, N and O).
With regard to the following European standards, the EMC requirements that apply specifically to this unit have been met:
- EN 55013- EN 55020