6 2 identityiq installation guide
DESCRIPTION
sailpointTRANSCRIPT
SailPoint IdentityIQ Version 6.2
Installation Guide

Copyright © 2013 SailPoint Technologies, Inc., All Rights Reserved.
SailPoint Technologies, Inc. makes no warranty of any kind with regard to this manual, including, but not limited to, the implied warranties of merchantability and fitness for a particular purpose. SailPoint Technologies shall not be liable for errors contained herein or direct, indirect, special, incidental or consequential damages in connection with the furnishing, performance, or use of this material.
Restricted Rights Legend. All rights are reserved. No part of this document may be photocopied, reproduced, or translated to another language without the prior written consent of SailPoint Technologies. The information contained in this document is subject to change without notice.
Use, duplication or disclosure by the U.S. Government is subject to restrictions as set forth in subparagraph (c) (1) (ii) of the Rights in Technical Data and Computer Software clause at DFARS 252.227-7013 for DOD agencies, and subparagraphs (c) (1) and (c) (2) of the Commercial Computer Software Restricted Rights clause at FAR 52.227-19 for other agencies. Regulatory/Export Compliance. The export and reexport of this software is controlled for export purposes by the U.S. Government. By accepting this software and/or documentation, licensee agrees to comply with all U.S. and foreign export laws and regulations as they relate to software and related documentation. Licensee will not export or reexport outside the United States software or documentation, whether directly or indirectly, to any Prohibited Party and will not cause, approve or otherwise intentionally facilitate others in so doing. A Prohibited Party includes: a party in a U.S. embargoed country or country the United States has named as a supporter of international terrorism; a party involved in proliferation; a party identified by the U.S. Government as a Denied Party; a party named on the U.S. Government's Entities List; a party prohibited from participation in export or reexport transactions by a U.S. Government General Order; a party listed by the U.S. Government's Office of Foreign Assets Control as ineligible to participate in transactions subject to U.S. jurisdiction; or any party that licensee knows or has reason to know has violated or plans to violate U.S. or foreign export laws or regulations. Licensee shall ensure that each of its software users complies with U.S. and foreign export laws and regulations as they relate to software and related documentation. Copyright and Trademark Notices. Copyright © SailPoint Technologies, Inc. All Rights Reserved. All logos, text, content, including underlying HTML code, designs, and graphics used and/or depicted on these written materials or in this Internet web site are protected under United States and international copyright and trademark laws and treaties, and may not be used or reproduced without the prior express written permission of SailPoint Technologies, Inc.. SAILPOINT, the SAILPOINT logo, SailPoint IdentityIQ, and SailPoint Identity Analyzer are trademarks of SailPoint Technologies, Inc. and may not be used without the prior express written permission of SailPoint Technologies, Inc. All other trademarks shown herein are owned by the respective companies or persons indicated.
Chapter 1 How to Install and Deploy IdentityIQ . . . . . . . . . . . . . . . . . . . . . . . . . . . . . . . . . . 1Supported Platforms . . . . . . . . . . . . . . . . . . . . . . . . . . . . . . . . . . . . . . . . . . . . . . . . . . . . . . . . . . . . . . . . . . . . . .2Special Considerations . . . . . . . . . . . . . . . . . . . . . . . . . . . . . . . . . . . . . . . . . . . . . . . . . . . . . . . . . . . . . . . . . . . . .3
Special Java Considerations . . . . . . . . . . . . . . . . . . . . . . . . . . . . . . . . . . . . . . . . . . . . . . . . . . . . . . . . . . . . .3Special JBoss Considerations . . . . . . . . . . . . . . . . . . . . . . . . . . . . . . . . . . . . . . . . . . . . . . . . . . . . . . . . . . . .4Jasper Font Configuration . . . . . . . . . . . . . . . . . . . . . . . . . . . . . . . . . . . . . . . . . . . . . . . . . . . . . . . . . . . . . . .5
Download and Expand the Installation Files . . . . . . . . . . . . . . . . . . . . . . . . . . . . . . . . . . . . . . . . . . . . . . . . . . . .6Configure the Number of Extended and Searchable Attributes Allowed . . . . . . . . . . . . . . . . . . . . . . . . . . . . . .7Create the IdentityIQ Database and Tables . . . . . . . . . . . . . . . . . . . . . . . . . . . . . . . . . . . . . . . . . . . . . . . . . . . . .9Configure the IdentityIQ Installation . . . . . . . . . . . . . . . . . . . . . . . . . . . . . . . . . . . . . . . . . . . . . . . . . . . . . . . . .10Open IdentityIQ . . . . . . . . . . . . . . . . . . . . . . . . . . . . . . . . . . . . . . . . . . . . . . . . . . . . . . . . . . . . . . . . . . . . . . . . .10Advanced Installation Information . . . . . . . . . . . . . . . . . . . . . . . . . . . . . . . . . . . . . . . . . . . . . . . . . . . . . . . . . .11
Obtaining and Installing the DB2 JDBC Driver . . . . . . . . . . . . . . . . . . . . . . . . . . . . . . . . . . . . . . . . . . . . .11Update the Oracle and SQL Server JDBC Driver . . . . . . . . . . . . . . . . . . . . . . . . . . . . . . . . . . . . . . . . . . .11Install and Register the IQService for Use with Windows . . . . . . . . . . . . . . . . . . . . . . . . . . . . . . . . . . . . .12Configure Integration with Third Party Applications . . . . . . . . . . . . . . . . . . . . . . . . . . . . . . . . . . . . . . . . .13Configure IdentityIQ for Single Sign-on . . . . . . . . . . . . . . . . . . . . . . . . . . . . . . . . . . . . . . . . . . . . . . . . . .13Deployment Instructions for WebSphere . . . . . . . . . . . . . . . . . . . . . . . . . . . . . . . . . . . . . . . . . . . . . . . . . .14Deployment Instructions for WebLogic . . . . . . . . . . . . . . . . . . . . . . . . . . . . . . . . . . . . . . . . . . . . . . . . . . .16
Database Tuning . . . . . . . . . . . . . . . . . . . . . . . . . . . . . . . . . . . . . . . . . . . . . . . . . . . . . . . . . . . . . . . . . . . . . . . .16
Chapter 2 How to Upgrade IdentityIQ . . . . . . . . . . . . . . . . . . . . . . . . . . . . . . . . . . . . . . . . . 17Important Upgrade Considerations . . . . . . . . . . . . . . . . . . . . . . . . . . . . . . . . . . . . . . . . . . . . . . . . . . . . . . . . . .17Upgrading IdentityIQ . . . . . . . . . . . . . . . . . . . . . . . . . . . . . . . . . . . . . . . . . . . . . . . . . . . . . . . . . . . . . . . . . . . . .17
Procedure . . . . . . . . . . . . . . . . . . . . . . . . . . . . . . . . . . . . . . . . . . . . . . . . . . . . . . . . . . . . . . . . . . . . . . . . . .17Post-upgrade Procedures . . . . . . . . . . . . . . . . . . . . . . . . . . . . . . . . . . . . . . . . . . . . . . . . . . . . . . . . . . . . . . . . . .21
Upgrade Data Export Tables . . . . . . . . . . . . . . . . . . . . . . . . . . . . . . . . . . . . . . . . . . . . . . . . . . . . . . . . . . .21

Chapter 1: How to Install and Deploy IdentityIQ
Use the following information to install and deploy SailPoint IdentityIQ on your application server. After IdentityIQ is deployed it must be configured to work within your enterprise. See the SailPoint IdentityIQ Administrator’s Guide to continue with your deployment of IdentityIQ.
During the installation and deployment procedure you must deploy a new Web application in your application server and create a new database and modify its schema in a database server instance. Ensure that you have the required authorization credentials before you begin the installation and deployment process. The IdentityIQ application and the IdentityIQ database can reside on the same server.
The installation and deployment process contains the following parts:• Download and expand the installation files. See "Download and Expand the Installation Files" on page 6.• Configure the number of extended and searchable attributes allowed for your environment. See
"Configure the Number of Extended and Searchable Attributes Allowed" on page 7.• Create the database and tables required for IdentityIQ. See "Create the IdentityIQ Database and Tables"
on page 9.• Configure IdentityIQ to connect to its database. See "Configure the IdentityIQ Installation" on page 10.• Access IdentityIQ to continue with the configuration for your enterprise. See "Open IdentityIQ" on page
10.• Refer to "Advanced Installation Information" on page 11 for additional information on how to deal with
specific application server and database server environments, and for integration requirements for some external systems.
IdentityIQ Installation Guide 1
Supported Platforms
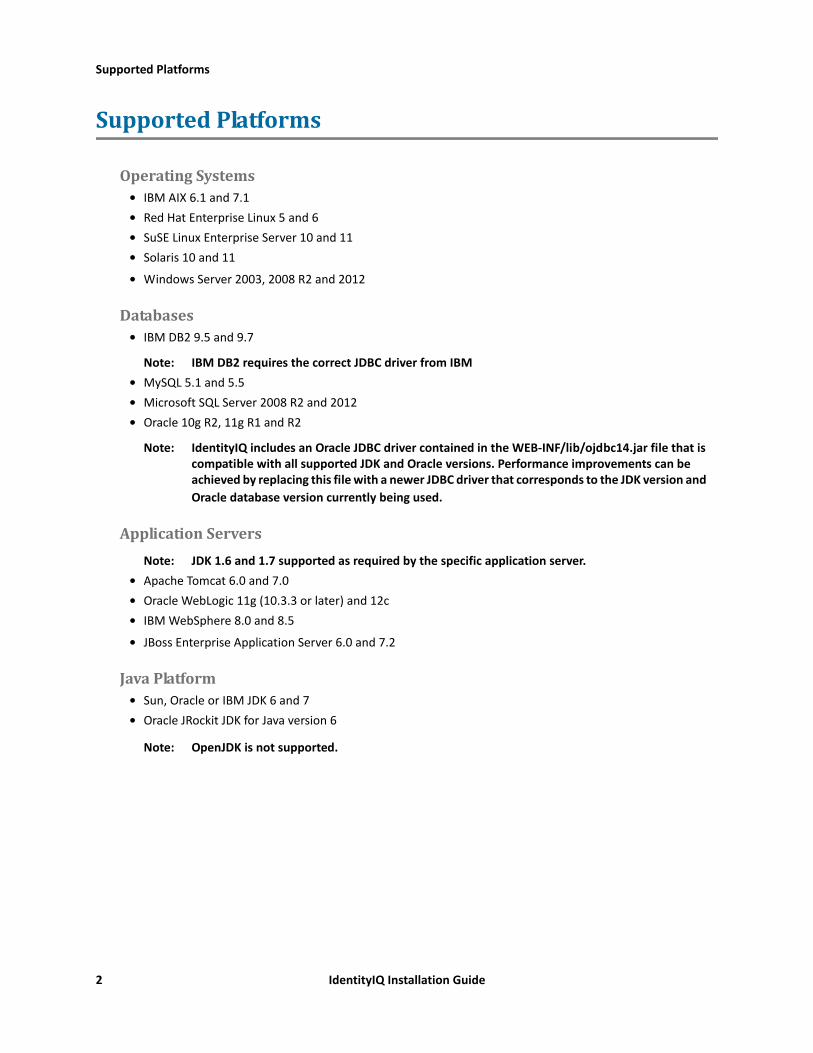
Supported Platforms
Operating Systems• IBM AIX 6.1 and 7.1• Red Hat Enterprise Linux 5 and 6• SuSE Linux Enterprise Server 10 and 11• Solaris 10 and 11
• Windows Server 2003, 2008 R2 and 2012
Databases• IBM DB2 9.5 and 9.7
Note: IBM DB2 requires the correct JDBC driver from IBM• MySQL 5.1 and 5.5• Microsoft SQL Server 2008 R2 and 2012• Oracle 10g R2, 11g R1 and R2
Note: IdentityIQ includes an Oracle JDBC driver contained in the WEB-INF/lib/ojdbc14.jar file that is compatible with all supported JDK and Oracle versions. Performance improvements can be achieved by replacing this file with a newer JDBC driver that corresponds to the JDK version and Oracle database version currently being used.
Application ServersNote: JDK 1.6 and 1.7 supported as required by the specific application server.
• Apache Tomcat 6.0 and 7.0• Oracle WebLogic 11g (10.3.3 or later) and 12c• IBM WebSphere 8.0 and 8.5
• JBoss Enterprise Application Server 6.0 and 7.2
Java Platform• Sun, Oracle or IBM JDK 6 and 7• Oracle JRockit JDK for Java version 6
Note: OpenJDK is not supported.
2 IdentityIQ Installation Guide
Special Considerations
BrowsersNote: If an unsupported browser is used, a notification appears in the lower right corner of the page.
Hovering over the notification reveals a tool tip listing the supported browsers.• Firefox ESR 17 and 24• Google Chrome 30+• Windows Internet Explorer, version, 8, 9, and 10
Note: If you are using Internet Explorer on a server operating system with Enhanced Security Configuration enabled, you must add the IdentityIQ application server host to the Trusted Sites Zone in Internet Explorer using the Security tab of the Internet Options configuration dialog.
• Safari 6
Mobile Support• Safari for iPad (iOS 7)
Languages• English• German• French• Dutch• Spanish
Special Considerations
Special Java Considerations
JVM ArgumentsTo use JDK 6 you must set the sun.lang.ClassLoader.allowArraySyntax system property to true by adding the following to the JVM arguments.
-Dsun.lang.ClassLoader.allowArraySyntax=true
For Apache Tomcat, define a value for the JAVA_OPTS environment variable in bin\catalina.bat or bin/catalina.sh of your Tomcat installation. For BEA WebLogic and IBM WebSphere, refer to the documentation associated with the specific version of the application server for information on how to set JVM arguments using the application server's administrative console or modifying the application server's startup scripts.
IdentityIQ Installation Guide 3

Special Considerations
Special JBoss Considerations
Hibernate RequirementsIdentityIQ requires that hibernate.bytecode.provider=javaassist be set in $JBOSS_HOME\server\default\deploy\ejb3.deployer\META-INF\persistence.properties for JBoss 4.2.x
IdentityIQ uses Hibernate as a part of its persistence layer and requires Hibernate to be configured to use Javaassist as the bytecode provider. The initialization for this setting can only occur once per web application and some services provided by JBoss are set by default to use another bytecode provider which prevents the IdentityIQ configuration from being used. Adding the property will force all uses of Hibernate in the JBoss instance to use the method required by IdentityIQ.
JBoss Version 6JBoss 6 bundles a deployer with it for managing REST. This deployer only permits you to have one rest application. You must rename or remove this deployer before deploying IdentityIQ.
Go to the $JBOSS_HOME\server\default\deployers directory and either remove or rename the resteasy.deployers folder.
JBoss Version 7JBoss 7 also bundles an easy rest deployer similar to JBoss 6, but the process for disabling the deployer is slightly different.
Navigate to the $JBOSS_HOME\standalone\configuration directory and open the standalone.xml file for editing.
Comment out the xml node (line 11 in the default file): <extension module="org.jboss.as.jaxrs"/>.
Comment out the node (line 163 in the default file): <subsystem xmlns="urn:jboss:domain:jaxrs:1.0"/>
UTF-8 and Application Servers
Tomcat
To enable UTF-8 characters in IdentityIQ installations using Tomcat, add the following line to each Connector element in your Tomcat server.xml.
URIEncoding="UTF-8”
The following is an example entry:
<Connector port="8080" protocol="HTTP/1.1" connectionTimeout="20000" redirectPort="8443" URIEncoding="UTF-8" />
JBoss
To enable UTF-8 characters in IdentityIQ installations using JBoss, add the following xml after the <extension/> element to the standalone or domain.xml configuration file
4 IdentityIQ Installation Guide

Special Considerations
<system-properties> <property name="org.apache.catalina.connector.URI_ENCODING" value="UTF-8"/> <property name="org.apache.catalina.connector.USE_BODY_ENCODING_FOR_QUERY_STRING" value="true"/> </system-properties>
Jasper Font Configuration
Using Custom Fonts with JasperReports Font ExtensionsIdentityIQ uses JasperReports to render some reports. The live reports, introduced in version 6.0, do not use JasperReports for rendering. JasperReports uses a specially packaged jar file known as a Font Extension to embed custom fonts in reports, for example, fonts not natively available on the host operating system. Creating a Font Extension involves editing an XML file and creating a jar archive file containing the configuration and font files.
1. Assemble all the font files in a new directory. There may be multiple files depending on all the different styles available to the font. For example, your font may have plain, bold, bold-italic, and italic versions.
2. Create a new XML file called fonts.xml in the same directory with the following structure.
Note: Replace sections between square brackets ”[ ]” with the appropriate information.
<?xml version="1.0" encoding="UTF-8"?>
<!DOCTYPE beans PUBLIC "-//SPRING//DTD BEAN//EN" "http://www.springframework.org/dtd/spring-beans.dtd">
<beans>
<bean id="[unique name of font family e.g. 'myFontFamily']" class="net.sf.jasperreports.engine.fonts.SimpleFontFamily">
<property name="name" value="[font name as referenced in jasper reports]"/>
<property name="normal" value="[file name of normal font]"/>
<property name="bold" value="[file name of bold font]"/>
<property name="italic" value="[file name of italic font]"/>
<property name="boldItalic" value="[file name of bold-italic font]"/>
<property name="pdfEncoding" value="Identity-H"/>
<property name="pdfEmbedded" value="true"/>
</bean>
</beans>
3. Create a new file in the same directory called jasperreports_extension.properties and populate it with the following.
Note: This does not need to be edited, unless you change the name of fonts.xml
net.sf.jasperreports.extension.registry.factory.fonts=net.sf.jasperreports.exten
sions.SpringExtensionsRegistryFactory net.sf.jasperreports.extension.fonts.spring.beans.resource=fonts.xml
IdentityIQ Installation Guide 5
Download and Expand the Installation Files
4. Use the Java jar command to package up the fonts and meta data: jar cvf myfont.jar * This creates a jar file called myfont.jar containing all the fonts in the directory as well as the fonts.xml and jasperreports_extension.properties files.
5. Copy myfont.jar into WEB-INF/lib directory on the IdentityIQ server. The font should now be available to any JasperReport reports.
6. In order for any reports to use this new font, the report must be edited to reference the font. This is accom-plished by modifying the appropriate JRXML object in IdentityIQ. This can be done using the IdentityIQ debug pages or by modifying the .jrxml file in the IdentityIQ installation and re-importing the file to update the object in IdentityIQ. For example, to change the font used in the title style to myFont: <style name="title" isDefault="false" fontName="myFont" fontSize="24" isBold="true" isBlankWhenNull="true" />
Download and Expand the Installation Files
Note: You must have access to both the identityiq_installation_directory and identityiq_home. where: identityiq_installation_directory is the directory in which you download the installation files and identityiq_home is the directory in which you expand the identityiq.war file.
1. Download the IdentityIQ installation files to a temporary installation directory on your application server. For example, C:\IdentityIQ. The installation files are contained in a .zip file available from SailPoint. The IdentityIQ installation files and directories are as follows:
identityiq.war database doc integration
2. Install or deploy the IdentityIQ application in your application server. The IdentityIQ application is packaged in the Java EE standard WAR format in the identityiq.war file. Use the tools provided by your application server for the installation or deployment. When deploying IdentityIQ into an application server as a war file instead of a directory containing the expanded war file, the configuration file WEB-INF/classes/packtag.properties must be modified to
6 IdentityIQ Installation Guide
Configure the Number of Extended and Searchable Attributes Allowed
set resources.checktimestamps=false. The file contains a sample configuration line that must be un-commented and modified to set the value. Note: WebSphere requires additional deployment steps. See "Deployment Instructions for WebSphere" on page 14. Example: This example is using Tomcat to deploy a Web application by unpacking the .war file into an application directory in the webapps directory of the Tomcat installation.
a. Access the webapps directory. cd Tomcat_home\webapps
b. Create an IdentityIQ home directory. mkdir identityiq
c. Access the IdentityIQ home directory. cd identityiq
d. Expand the identityiq.war file to this directory. jar -xvf identityiq_installation_directory\identityiq.war where identityiq_installation_directory is the directory in which you downloaded the installation files.
Note: On UNIX platforms, run the following command to make the IdentityIQ CLI launch script executable: chmod +x WEB-INF/bin/iiq
Configure the Number of Extended and Searchable Attributes Allowed
Note: You do not need to perform this procedure if the default extended and searchable attributes are sufficient for the needs of your enterprise. If you do not need to configure these attributes, continue to "Create the IdentityIQ Database and Tables" on page 9 and use the sample scripts provided.
IdentityIQ is configured by default to enable the following:• Identity — 10 searchable attributes, 5 indexed• Account — 5 searchable attributes, 1 indexed• Certification — 5 searchable attributes, 1 indexed• Role — 4 extended attributes, 1 indexed• Application — 4 extended attributes, 1 indexed• Managed Attributes — 3 extended attributes, 3 indexed
If your enterprise requires more then those configured, you must use the following procedure to add as many additional extended and searchable attributes as needed, up to a maximum of twenty (20). You can also use this procedure to set these attributes to be indexed to enhance search speeds. You should take into consideration, however, that while indexing these attributes will increase search speed, it might reduce processing speed for other IdentityIQ functions.
IdentityIQ Installation Guide 7

Configure the Number of Extended and Searchable Attributes Allowed
If you make changes to the account attributes you must make the same changes to the certification item attributes. This enables searchable attributes from links to be stored with additional entitlements on certifications to enable searching and the display of account status icons.
Note: See the comments at the top of the IdentityExtended.hbm.xml file for database-specific considerations on column sizes.
1. Edit the following files: IdentityExtended.hbm.xml — identity attributes, LinkExtended.hbm.xml — account attributes CertificationItemExtended.hbm.xml — certification attributes ApplicationExtended.hbm.xml — application attributes BundleExtended.hbm.xml — role attributes ManagedAttributeExtended.hbm.xml — managed attributes The files are located in identityiq_home\WEB-INF\classes\sailpoint\object\ where identityiq_home is the directory in which you expanded the identityiq.war file.
a. Open the file with an XML or text editor.b. Scroll down to the section that appears similar to the following:
<property name="extended1" type="string" length="450" index="iiq_identity_extended1_ci"/>
c. Enter as many additional attributes as needed, up to a maximum of twenty. Each line <property name="extended2" type="string" length="450"/> represents one extended or searchable attribute. As you add additional attribute lines, number them sequentially. For example: <property name="extended2" type="string" length="450"/> <property name="extended3" type="string" length="450"/> <property name="extended4" type="string" length="450"/>
d. Optional: Specify attributes that should be indexed. For example in the identity file, add index="iiq_identity_extendedN_ci" to each attribute line that should be indexed. Where N matches the number of the attribute. If case insensitivity is required, use index=”iiq_identity_extendedN_ci”. For example: <property name="extended1" type="string" length="450" index="iiq_identity_extended1_ci"/> <property name="extended2" type="string" length="450" index="iiq_identity_extended2_ci"/> <property name="extended3" type="string" length="450" index="iiq_identity_extended3_ci"/>
e. Save the file.
2. Use the IdentityIQ iiq script to run the schema command to create the new database creation scripts based on your changes to the .hbm.xml files. For example, do the following to run the schema command:
a. Access the proper directory. cd identityiq_home\WEB-INF\bin
8 IdentityIQ Installation Guide

Create the IdentityIQ Database and Tables
b. Run the script and command. iiq schema This creates the scripts you will use to create the IdentityIQ databases.
3. Continue with "Create the IdentityIQ Database and Tables" on page 9.
Create the IdentityIQ Database and Tables
The database DDL scripts for the supported database platforms are located in identityiq_home\WEB-INF\database where identityiq_home is the directory in which you expanded the identityiq.war file. Use these scripts to create the IdentityIQ database and tables.
The database directory contains sample database DDL scripts for the supported database platforms. The scripts that correspond to the default extended and searchable attributes contain the product version number in the filename, for example, create_identityiq_tables-6.0.mysql. If you changed the extended and searchable attribute configuration by modifying the .hbm.xml configuration files and ran the iiq schema command, then the appropriate sample DDL script is in a file without the product version number in the filename, for example, create_identityiq_tables.mysql.
The scripts are designed to create a database instance, create the IdentityIQ tables, create a user with a password for IdentityIQ, and grant the user privileges for accessing the database.
With the exception of the Oracle script, the scripts provided are sufficient as they are. The Oracle script must be modified to specify the DATAFILE location and to uncomment the associated commands that create the database instance. For all database types, it is likely that you will want to change the database user name and password.
The scripts can be modified as required for your environment as long as the table names, column names, and column types are maintained.
Take note of the following information, you will need it when you configure IdentityIQ:
Note: The user/password in the following list can, but do not have to be, the same.
- Host Name
- Database Type
- Database Name
- User ID/Password for a user that can create tables and modify database schema
- User ID/Password for a user that IdentityIQ will use to access the database. This IdentityIQ user must be able to create, modify, and delete objects in the tables that are created.
A database client is used to execute the DDL scripts. Example commands for MySQL would look as follows:
mysql -u user -p Password: password mysql> source create_identityiq_tables.mysql; — Confirmation output from the SQL commands contained in the script is displayed on the screen —
IdentityIQ Installation Guide 9
Configure the IdentityIQ Installation
mysql> show databases; (optional - verification that the database was created) mysql> quit
where user and password are the credentials for a database user that has permissions to create databases, tables, and users.
Configure the IdentityIQ Installation
1. Configure IdentityIQ to point to the database you created. Access the iiq.properties file and update the following information: — Host Name — Database Type — Database Name — User ID — Password The iiq.properties file is located in identityiq_home\WEB-INF\classes, where identityiq_home is the directory in which you expanded the identityiq.war file. The password for the database connection can be clear text or encrypted. It is highly recommended that you use an encrypted password. To create an encrypted password, run the iiq encrypt <password> command from the identityiq_home\WEB-INF\bin directory.
2. Import the initial configuration objects into the IdentityIQ database. Launch the IdentityIQ console by running the iiq console command from the identityiq_home\WEB-INF\bin directory. Use the console command import init.xml to import the configuration objects as shown iiq console > import init.xml
3. Start your application server.
Open IdentityIQ
Open IdentityIQ from your Web browser and continue with the configuration and definition needed for your enterprise.
See the SailPoint IdentityIQ Administration Guide for information on configuring IdentityIQ and modeling roles to work within your enterprise.
Note: If you purchased SailPoint Lifecycle Manager refer to the Lifecycle Manager Acitivation Guide for further instruction on how to activate that product.
1. Launch a Web browser.
10 IdentityIQ Installation Guide
Advanced Installation Information
See “Supported Platforms” on page 2
2. Point the browser to your IdentityIQ installation. Example: If you performed the default Tomcat installation and are accessing IdentityIQ from the same machine on which it was installed, use http://localhost:8080/identityiq.
3. Log on to the IdentityIQ using the default user ID and Password. The default user ID is spadmin and the default password is admin.
You should change the default password as soon as possible. To change the default password for spadmin:
1. Click or mouse over the Define tab and select Identities to display the Identities page.
2. Click admin on the list to display the View Identity page.
3. Click Change Password to display the password information.
4. Change and confirm the password and save your changes.
Advanced Installation Information
Note: Other, supplemental, components such as password interceptor plugins, Connector Gateway instances, and connector agents should be updated to match the version of the IdentityIQ server. See the Direct Connectors Administration and Configuration Guide, delivered with the product, for additional details.
Use the advanced installation information to customize IdentityIQ for your enterprise. Use the advanced installation instructions to do the following:
• Retrieve the DB2 JDBC Driver — See "Obtaining and Installing the DB2 JDBC Driver" on page 11.• Register the IQService for use with Windows — See "Install and Register the IQService for Use with
Windows" on page 12.• Integrate with third party applications for remediation, provisioning and role mining — See "Configure
Integration with Third Party Applications" on page 13.• Configure IdentityIQ to work with a single sign-on service — See "Configure IdentityIQ for Single Sign-on"
on page 13.• Run IdentityIQ on WebSphere — See "Deployment Instructions for WebSphere" on page 14.• Configure WebLogic to work with IdentityIQ — See "Deployment Instructions for WebLogic" on page 16.
Obtaining and Installing the DB2 JDBC Driver
The DB2 JDBC driver implementation is no longer provided in IdentityIQ. To use DB2 as the IdentityIQ repository or for a JDBC application that connects to a DB2 database, the correct implementation jar file should be obtained from the DB2 installation or from the IBM web site.
Update the Oracle and SQL Server JDBC Driver
The Oracle and SQL Server JDBC drivers provided in IdentityIQ are base implementations that work across all supported JDK, database, and operating system environments. To improve performance and maximize compatibility, you should obtain the JDBC driver that is provided with the database installation and replace the one currently in IdentityIQ.
IdentityIQ Installation Guide 11

Advanced Installation Information
Install and Register the IQService for Use with Windows
The IQService is a native Windows service that enables IdentityIQ to participate in a Windows environment and access information only available through Win32 APIs.
After the IQService is installed and running on a Windows machine you can configure tasks in IdentityIQ that use the service such as Windows activity collection, Windows target collection, Active Directory provisioning, and more.
Note: Version 3.5 of Microsoft .NET is required for installation of the IQService executable with most configurations of IdentityIQ. If your configuration requires a different version it is noted in the connector documentation.
Note: The IQService version must match the IdentityIQ server version. If you upgrade one you must upgrade the other.
Install the IQService in a location that is running Windows.
To install and register the IQService, do the following:
1. Create a directory in which to download the service. For example, c:\iqservice.
2. Copy the IQService.zip file from the IdentityIQ installation into the new directory. The IQSer-vice.zip file is located in identityiq_home/WEB-INF/bin/win where identityiq_home is the directory in which you expanded the identityiq.war file.
3. Expand the IQService.zip.
4. Run IQService.exe -i to install a Windows service named IQService.
5. Start the service either from the Windows Services Applet or from the command line by running IQSer-vice.exe -s. Other command line options with this service are: -? | h — This help output -d — run in console mode - i — Install a service -k — stop the service -p — Update the port from which the service will listen for requests from the IdentityIQ server (requires a restart) -r — remove the service -s — Start the service - t — Restart (stop/start) the service -v — Print version information
Note: The IQService will persist configuration settings related to the port, trace file, and trace level in the Windows registry at HKEY_LOCAL_MACHINE\SOFTWARE\SailPoint\IQService. The following keys are used: - port - port on which to listen - tracefile - path to the trace file - tracelevel - 0 (off), 3 (verbose)
Configure Integration with Third Party Applications
SailPoint provides support for integration with third party vendor applications to automate workflow and enable you to leverage the role management, risk assessment, and policy enforcement features of IdentityIQ.
12 IdentityIQ Installation Guide
Advanced Installation Information
Integration focuses on the following points: • Automated remediation — provides automated workflow to remediate inappropriate access and policy
violations using immediate, real-time execution of provisioning or de-provisioning requests.• Role provisioning — enables you to provision user access to data, applications, and systems based on
roles defined within IdentityIQ.• Policy checking for access changes — incorporates compliance and risk management by analyzing new
user requests and role changes against defined policy within IdentityIQ.• Bulk Reprovisioning of modified roles — enables third party applications to receive requests from
IdentityIQ to bulk modify user accounts if roles in IdentityIQ have change.
Integration requires configuration to both IdentityIQ and the applications with which it is integrating. This configuration is highly dependent on the applications and on the environment in which they are running. SailPoint provides some integration examples in the integration folder of the installation package. As well as documentation in the integration and configuration guide delivered with the product.
Configure IdentityIQ for Single Sign-on
IdentityIQ provides rule based SSO authentication support. Create the rules and then specify the rule used to drive authentication from the Login Configuration pages. A rule approach enables you to handle any SSO system that uses the HTTP header to store credentials or other identifying information by writing a new rule.
The SSOAuthenticationRule rule is provided the HttpRequest and a SailPointContext as input and returns an identity for use in the application. The rule is specified in the Login Configuration page.
Configure IdentityIQ for Single Sign-on with SiteMinderAn example SiteMinder rule that illustrates exactly how SiteMinder attributes can be pulled from the header and how the sailpoint.api.Correlator can be used to return a Link/Identity using an identity attribute like a dn can be found in config/examplerules.xml file delivered with your installation package.
For SSO to work with SiteMinder, the sm-authdirname from the SiteMinder header must be mapped to an application that is configured to work with IdentityIQ and aggregation must have been run on that application so that an identity cube exists with a sm-userdn user value.
Once those criteria are met, the rule specified on the Login Configuration page, performs authentication by matching the sm-userdn header variable provided by SiteMinder to an identity cube in IdentityIQ.
The rule performs the authentication by pulling the sm-userdn and sm-authdirname from the SiteMinder header when it receives the HttpRequest and a IIQContext and matching it to an Identity cube.
If the rule does not return an identity indicating that authentication failed, IdentityIQ displays the standard login page for manual authentication.
Deployment Instructions for WebSphere
Note: If you are using WebSphere Application Server version 7.0 before fix pack 13, you need to update web.xml with the following additional parameter in order for the calendar functionality to work. <context-param> <param-name>com.ibm.ws.jsf.disableCommitDuringBuildView </param-name> <param-value>true</param-value> </context-param>
IdentityIQ Installation Guide 13
Advanced Installation Information
Use the following procedure to deploy IdentityIQ on an IBM WebSphere Application Server. When you have completed these steps continue with the deployment of IdentityIQ with "Create the IdentityIQ Database and Tables" on page 9.
The following steps refer to the WebSphere 6.1 interface.
1. Start the WebSphere server.
2. Run the Integrated Solutions Console and login.
3. Click Applications and then select Install New Application.
4. Navigate to the directory in which you extracted the identityiq.war file and provide the context root, for example iiq.
5. Click Next.
6. Enter the Directory to install application. On Windows, this path cannot contain spaces and if it is left blank, and you used the default settings when you installed WebSphere, it defaults to a directory with spaces in the name. Ensure that Distribute Application and Use Binary Configuration are selected and that Create MBeans is not.
7. Click Next until the installation is completed, the default settings do not need to be changed. Make sure that you save your changes before leaving the installation panels.
8. After IdentityIQ is installed, configure it by selecting it from the Enterprise Applications list. The name in the list is as defined in Step 4.
9. Click Class loading and update detection.
10. Ensure that a value is entered in the Polling interval for updated files field and that Classes loaded with application class loader first and Single class loader for application are selected. The polling interval can be zero (0), but there must be a value in the field.
11. Click OK and save your changes.
12. Enable the filter compatibility mode on the application server instance where IdentityIQ is installed. This is required to work around a limitation in WebSphere described in Fix (APAR) PK33090 on the IBM Support web site.
a. From the WebSphere Integrated Solutions Console, click Servers and select Application servers to display the Application servers panel.
b. On the Application servers panel, select the server on which IdentityIQ is installed to display the Application servers Configuration tab.
c. In the Container Settings list, expand Web Container Settings and click Web Container to display the Configuration tab.
d. In the Additional Properties list, click Custom Properties to display the custom properties table.e. Click New to display the General Properties panel.f. Enter the following values:
Name: com.ibm.ws.webcontainer.invokefilterscompatibility Value: true Description: iiq filter Property
g. Click OKh. Click Save
13. Continue with the deployment of IdentityIQ with "Create the IdentityIQ Database and Tables" on page 9.
The following steps refer to the WebSphere 8.5.5 interface.
14 IdentityIQ Installation Guide
Advanced Installation Information
1. Start the WebSphere server.
2. Run the Integrated Solutions Console and login.
3. Click Applications, select New Application, and click New Enterprise Application.
4. Navigate to the directory in which you extracted the identityiq.war file and click Next.
5. Select Fast Path and click Next.
6. Ensure that Distribute Application and Use Binary Configuration are selected and that Create MBeans is not.
7. Click Next until the Map context roots for Web Modules screen is displayed.
8. Set the Context Root to your desired value, for example /iiq.
9. Click Next and then Finish.
10. When the application has completed installation, click Save to save the changes to the master configura-tion.
11. After IdentityIQ is installed, configure it by selecting it from the Applications->Application Types->Web-Sphere Enterprise Applications list. The name in the list is as defined in Step 8.
12. Click Class loading and update detection.
13. Ensure that a value is entered in the Polling interval for updated files field and that Classes loaded with local class loader first (parent last) and Class loader for each WAR file in application are selected. The polling interval can be zero (0), but there must be a value in the field.
14. Click OK and save your changes.
15. Click Application Types->WebSphere Enterprise Applications->identityiq.war.
16. Click JSP and JSF options.
17. Select SunRI1.2 as the JSF implementation.
18. Click OK.
19. Click on Environment->Shared libraries.
20. Click New.
21. Enter JSF 2.1 as the name.
22. Enter ${WAS_INSTALL_ROOT}\JSF2.1\javax.faces-2.1.26.jar as the classpath
23. Verify that the Use an isolated class loader for this shared library box is checked.
24. Click OK.
25. Create a JSF2.1 directory in your WebSphere installation directory (C:\Program Files (x86)\IBM\WebSphere-8.5\AppServer by default)
26. Copy the javax.faces-2.1.26.jar file from INSTALLATION ROOT/pro-files/AppSrv01/installedApps/CELL NAME/identityiq_war.ear/identi-tyiq.war/WEB-INF/lib into the newly created directory.
27. Go back to the identityiq.war application page
28. Click Shared library references near the bottom of the configuration panel in the References section
29. Check the box next to the identityiq_war row under the Application column and click Reference Shared Libraries above the table
30. Select JSF 2.1 from the table of Available libraries and click the right arrow to move it into the Selected table
IdentityIQ Installation Guide 15
Database Tuning
31. Click OK
32. Click OK again
33. Click Save to apply the changes to the master configuration.
34. Start the application from Applications->Application Types->WebSphere enterprise applications.
35. Continue with the deployment of IdentityIQ with "Create the IdentityIQ Database and Tables" on page 9.
Deployment Instructions for WebLogic
When IdentityIQ is deployed in a WebLogic, you must configure the environment before inbound web service requests can be received. Inbound service request are required for IdentityIQ RESETful web services and some of the provisioning providers with whom IdentityIQ integrates.
You must add the following to the security-configuration element in the config.xml file.
<enforce-valid-basic-auth-credentials>false</enforce-valid-basic-auth-credentials>
In a default installation of WebLogic the config.xml can be found in the following directory:
bea_home\user_projects\domains\domain_name\config
Database Tuning
When using MySQL, IdentityIQ can achieve significant performance improvements by using Per-Table Tablespaces. This enables each table and its indexes to be in its own data file.
Note: This setting must be configured prior to creating the IdentityIQ tables using the DDL scripts provided as it only affects behavior during table creation.
Per-Table Tablespaces can be enabled by using the innodb_file_per_table MySQL configuration parameter. This is configured in the [mysqld] section of my.cnf (or other equivalent method for setting MySQL system variables).
For more information, consult the MySQL documentation.
16 IdentityIQ Installation Guide

Important Upgrade Considerations
Chapter 2: How to Upgrade IdentityIQ
Important Upgrade Considerations
Do not perform the upgrade until you have completely read the Release Notes. Additional white papers and articles are available on Compass, SailPoint's online customer and partner community, at https://community.sailpoint.com that can provide additional information to assist with the upgrade procedure.
Note: Refer to “Supported Platforms” on page 2 to ensure that the requirements have not changed since your previous installation or upgrade. Update as needed to ensure that IdentityIQ continues to operate as expected.
Upgrading IdentityIQ
Implementation of IdentityIQ often requires substantial configurations, process changes, customizations, defect mitigations and testing. Upgrades and major releases resolve issues, improve features, and deprecate certain functionality. Review the latest Release Notes and User Guide as well as the implementation procedures to understand the impacts of each component. Also refer to a document titled Best Practices - Deployment, Migration, Upgrade, and Artifact Management.pdf available on Compass, SailPoint's online customer and partner community, at https://community.sailpoint.com/docs/DOC-2264.
The following are two specific and distinct upgrades occurring within this process:• Upgrade Procedure - Upgrading the software in production requires a specific procedure. • Upgrade Configurations - Client implementations of IdentityIQ frequently customize features outside the
configuration options that leverage IdentityIQ APIs and/or coding. These features within the configuration and coding APIs of the software change and improve over time. While most of these version-to-version changes are backwards compatible, any implementation specific scripts or rules that use the API features need to be ported, tested, and validated ahead of the actual upgrade procedure when the installation moves into production.
Procedure
Note: You can only upgrade from the most currently release version of IdentityIQ available, including any patches that have been released for that version.
Use the following information to upgrade SailPoint IdentityIQ to the latest version. After your upgrade is complete refer to the product documentation for information on the latest features and function.
You must stop all processes and shutdown IdentityIQ before performing the upgrade. It is recommended that you schedule the upgrade for a time when the application is not being used heavily.
Note: If IQService is installed, the IQService version must match the IdentityIQ server version. If you upgrade one you must upgrade the other.
IdentityIQ Installation Guide 17

Upgrading IdentityIQ
The upgrade process contains the following parts:• Shutdown IdentityIQ — See, "Shutdown IdentityIQ" on page 18.
Note: It is very important that you perform the database and customization backup before performing the upgrade procedure.
• Backup your existing IdentityIQ databases — See "Backup Your Existing Version of IdentityIQ" on page 18.• Download and expand the installation files — See "Download and Expand the Installation Files" on page
19.• Perform the upgrade to the latest version of IdentityIQ — See "Upgrade to the Latest Version of
IdentityIQ" on page 19.• Reapply any customization — See "Reapply Customization to the Upgraded Installation" on page 20• Access IdentityIQ — See "Access IdentityIQ" on page 21.• Perform the post-upgrade procedures — See "Post-upgrade Procedures" on page 21.
Shutdown IdentityIQYou must stop all running processes and shutdown IdentityIQ before running the upgrade.
Note: Some of the items displayed on the Task Results page are approvals that are generated by workflows and are not running processes. These items are managed by IdentityIQ, should not be terminated, and will display on that page after the upgrade procedure is complete.
Check the Task Results and Report Results pages to ensure that no task-generated processes are running before stopping your application server.
If there are task or reports pending, terminate them within IdentityIQ before shutting down your application server. Processes terminated abnormally might not end gracefully.
To terminate a task or report, right-click on the name and select Terminate.
Backup Your Existing Version of IdentityIQNote: It is very important that you perform the database and customization backup before performing
the upgrade procedure.
Backup your IdentityIQ database and any customization you performed on the current installation. Any customization involving additions or changes to files in the IdentityIQ installation directory is overwritten by the upgrade procedure and will need to be reapplied when it is complete. See "Reapply Customization to the Upgraded Installation" on page 20 for more information.
It is recommended that you create a custom directory within you IdentityIQ installation directory so that changes are not lost during future upgrades of the product. Copy any customized files into this directory so that you can copy and paste them back into the working directories after the upgrade is complete.
Customization also includes the task definitions, reports, rules, and workflows that were included as part of the product and that will be overwritten during the upgrade with the latest version. If you have modified any of these, you will need to re-apply your modifications after the upgrade process.
See your database documentation for information on the proper back up procedure for database you are using.
18 IdentityIQ Installation Guide
Upgrading IdentityIQ
Download and Expand the Installation FilesNote: You must have access to the identityiq_installation_directory and identityiq_home to upgrade
IdentityIQ. where: identityiq_installation_directory is the directory in which you download the installation files and identityiq_home is the directory in which you expand the identityiq.war file.
1. Clear any existing IdentityIQ installation files before downloading the newest version.
2. Download the IdentityIQ installation files to a temporary installation directory on your application server. For example, C:\identityiq. The installation files are contained in a .zip file or on the IdentityIQ disc available from SailPoint The IdentityIQ installation files are as follows:identityiq.war database doc integration
Note: In Step 3, unlike in a patch release, the new version of IdentityIQ cannot be expanded into the same directory as an old version. This would not remove files that no longer exist in the new version and therefore would create conflicts that will cause unexpected failure.
3. Upgrade the IdentityIQ application on your application server. The IdentityIQ upgrade is packaged in the Java EE standard WAR format in the identityiq.war file. Use the tools provided by your application server for the upgrade. Example: This example is using Tomcat to deploy a Web application by unpacking the .war file into an application directory in the webapps directory of the Tomcat installation.
a. Access the webapps directory. cd Tomcat_home/webapps/identityiq
b. Access the IdentityIQ home directory. cd identityiq
c. Expand the identityiq.war file to this directory. jar -xvf identityiq_installation_directory\identityiq.war where identityiq_installation_directory is the directory in which you downloaded the installation files.
Upgrade to the Latest Version of IdentityIQBefore running the upgrade script, import the database specific upgrade file and modify it as required. Modifications are required if the database name used is different than the default.
Note: Verify the database client being used is set up to continue on error to ensure a successful upgrade. If IdentityIQ patches for the previous version were applied, database commands might have already run in the environment. Consult your database client documentation for further information on configuration settings.
Execute the database specific upgrade script named upgrade_identityiq_tables.database_type. These files contain the DDL statements that modify the existing database schema to have the new columns/tables/etc… required for the newer version.
IdentityIQ Installation Guide 19
Upgrading IdentityIQ
You must modify the upgrade script in the same way that the installation script was modified as part of the initial installation. For example, if you are using a different database name or database schema name than the default, you must modify the script to specify the alternate names.
If the extended attributes of the Identity, Account, or CertificationItem were modified during the previous installation, you might need to adjust the upgrade DDL for the spt_identity, spt_link, or spt_certification_item tables.
For example, in MySQL do the following: mysql> source upgrade_identityiq_tables.mysql
If you have installed a patch to the previous version of IdentityIQ, you might receive errors when executing the upgrade DDL because it contains all of the required changes from the base revision and some of the changes might have already been applied when installing a patch.
As of 6.1p3, there are no database changes that would cause an error while running the 6.2 upgrade script.
After the database is upgraded, run the IdentityIQ upgrade application. This example assumes that no custom modifications were made to the original installation.
1. Access the directory in which you extracted the identityiq.war file. cd identityiq_home\WEB-INF\bin
2. Run the script and command. iiq upgrade
3. Optional: Upgrade the IQService if it is deployed:a. Ensure that the service is stopped, either from the Services Applet or from the command line by
running: IQService.exe -kb. Replace the IQService installation files with the contents of IQService.zip that can be found in
the WEB-INF/bin/win directory of the IdentityIQ installation.c. Start the service:
IQService.exe -s
4. Optional: Upgrade the Connector Gateway, if it is deployed.a. Stop the connector gateway.b. Save a copy of the init.xml configuration file located in the Connector Gateway installation
directoryc. Remove the existing contents of the installation directoryd. Extract the ConnectorGateway zip file into the installation directory.e. Move the saved init.xml configuration file into the installation directoryf. Start the Connector Gateway service.
Reapply Customization to the Upgraded InstallationIf you changed the default number of extended and searchable identity, account, or certification item attributes as part of your initial installation, copy your customized IdentityExtended.hbm.xml, LinkExtended.hbm.xml, and CertificationItemExtended.hbm.xml files into the new installation. Important notes about defining extended attributes in IdentityIQ can be found in IdentityExtended.hbm.xml. The notes there apply to all of the product’s extended attributes.
If you make changes to the account attributes you must make the same changes to the certification item attributes. This enables searchable attributes from links to be stored with additional entitlements on certifications to enable searching and the display of account status icons.
The upgrade process modifies many different configuration objects in the system. If you have saved the XML representation of these objects externally for the purposes of change control or ease of deployment, you must
20 IdentityIQ Installation Guide

Post-upgrade Procedures
refresh those objects by exporting them from the system after the upgrade process is complete. Any objects from a previous version of IdentityIQ that are imported into the current version might not have the required changes or enhancements applied. This can cause IdentityIQ to operate abnormally. A list of the objects that are affected is provided in the Release Notes.
Access IdentityIQAccess IdentityIQ from your Web browser and continue working with IdentityIQ.
See the SailPoint IdentityIQ documentation for the latest information.
1. Start the application server (or the IdentityIQ application if supported by the application server).
2. Launch a Web browser. See “Supported Platforms” on page 2
3. Point the browser to your IdentityIQ installation. Example: If you performed the default Tomcat installation and are accessing IdentityIQ from the same machine on which it was installed, use http://localhost:8080/identityiq.
4. Log on to the IdentityIQ using the default user ID and Password. The default user ID is spadmin and the default password is admin.
Post-upgrade Procedures
After you have completed the IdentityIQ upgrade and have the product up and running, perform the following procedures to ensure that all extraneous information is removed from your database tables and that all of the new features are configured to run correctly.
Upgrade Data Export Tables
This procedure is only necessary if you are using the data export feature of IdentityIQ. The Data Export feature enables you to export IdentityIQ data to an external database.
1. Modify the script matching the database on which your data export tables are stored. If necessary, alter the database name in the script. The scripts are named upgrade_data_export_tables.* and are stored in WEB-INF/database/dataExport folder of your IdentityIQ installation directory.
2. Using a database client, execute the modified application script to upgrade the data export DDL.
IdentityIQ Installation Guide 21

Post-upgrade Procedures
22 IdentityIQ Installation Guide