4k multiviewer - tvoneyou must reset the 4k multiviewer to its factory default settings. if your...
TRANSCRIPT
Firmware versions 3.0.0.C CL885 and above MNL-1T-MV-8474 V1.6 July 2016
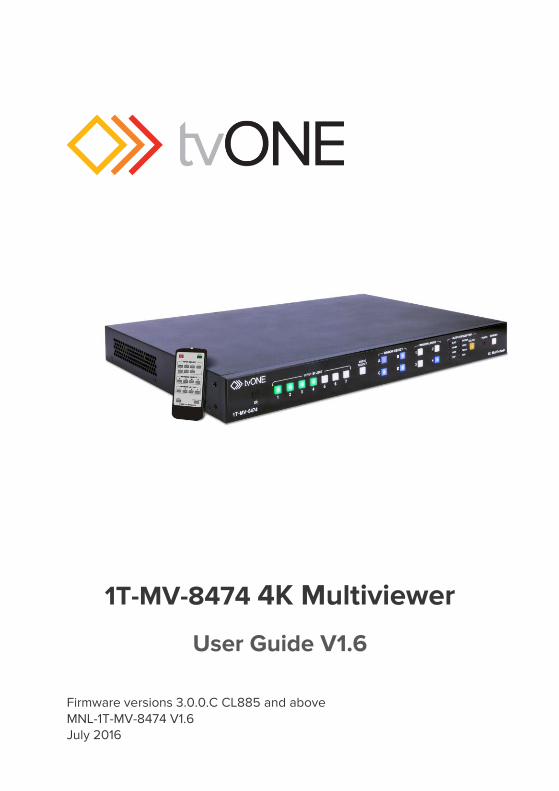
1T-MV-8474 4K Multiviewer
User Guide V1.6


In this guide
Features ....................................................................................................... 1
In the box .................................................................................................... 1
Safety precautions ................................................................................... 2
Quick start .................................................................................................. 3
Front panel ................................................................................................. 5
Rear panel .................................................................................................. 6
IR remote control ..................................................................................... 7
External controls ...................................................................................... 8
The web interface .......................................................................... 8
IP connections ................................................................................. 8
Network settings ............................................................................. 8
RS-232 ............................................................................................... 9
Audio channels ....................................................................................... 10
On-screen display ................................................................................... 11
Enabling and disabling the OSD ............................................... 11
Installing the 4K Multiviewer ............................................................... 12
Wiring Diagram .............................................................................. 12
Operation ................................................................................................. 13
Starting up and shutting down the 4K Multiviewer ............. 13
Window layouts ............................................................................. 13
Configuring your display ............................................................ 16
Example display configurations ................................................ 17
Changing the resolution of your output ................................. 21
Audio settings ............................................................................... 22
Locking the front panel .............................................................. 25
Advanced operation ............................................................................ 26
Saving power with automatic shutdown ............................... 26

Restoring the default factory settings .................................... 26
Changing the baud rate ............................................................. 27
Switching the analog input between RGB and YPbPr....... 27
Turning auto-adjust on and off for VGA sources ................ 28
Firmware......................................................................................... 28
Copying, uploading and downloading EDID ........................ 29
Specifications .......................................................................................... 31
Limited warranty .................................................................................... 37
Regulatory compliance ........................................................................ 38
Liability statement ................................................................................. 39
Contact us ............................................................................................... 40

MNL-1T-MV-8474 V1.6 1
Thanks for buying this 1T-MV-8474 4K Multiviewer from tvONE.
The 4K Multiviewer allows you to display up to four video sources on the same screen, in crisp 4K detail. You can display both digital and analog video from a wide range of devices, and play everything from mono to 7.1 surround-sound audio. Control is quick and simple, whether you’re using the built-in buttons, the remote control, or the fully featured web interface.
Features
Inputs include four HDMI, two DisplayPort and one RGB/YPbPr
HDMI and DisplayPort source input with 4K x 2K @30 Hz
MHL for the four HDMI inputs
HDMI output resolutions, including 4K x 2K @30 Hz and 1080p
Auto-scaler for each source input
Auto-detects EDID
16 multi-window modes
Up to four simultaneous videos
HDCP compliant
Fast switch between input ports
7.1 analog and digital audio
Multi-channel HDMI, DisplayPort audio de-embedding, optical TOSLINK and eight-channel analog outputs
Easy-to-use panel and web interface
Multiple control methods, including an assignable front panel, IR remote control, LAN and RS232 port
LAN includes web interface, Telnet and UDP
1 RU high, 19” wide standard enclosure, rack mountable
In the box
1T-MV-8474 4K Multiviewer
Remote control
AC power cord
2 rack mounting brackets
User guide

2 tvONE
Safety precautions
Read all instructions before attempting to unpack, install or operate this equipment, and before connecting the power supply.
Risk of injury from fire or electric shock
Follow basic safety precautions.
Do not expose this product to rain or moisture.
Do not install this product near water.
Do not spill liquid onto or into this product.
Risk of damage to equipment
Do not push an object of any kind into this product through any openings or empty slots.
Use only the supplied AC power cord. Do not use the power cord if it is damaged.
Do not block any vents or openings in the unit housing that provide ventilation. Allow sufficient space for air to circulate around the unit.

MNL-1T-MV-8474 V1.6 3
Quick start
It’s easy to get started with the 4K Multiviewer, but there’s more help later on, if you need it.
1. Connect your video and audio sources to the input ports, and your display to an output port.
2. Connect the AC power cord, and then connect the plug to an electrical outlet. Switch on.
3. Switch on.
4. Press a button to choose a window layout.

4 tvONE
5. Choose which source you want to appear in which window. Press a button in the WINDOW SELECT area, then press a button in the INPUT SELECT area.
6. Choose where you want your sound to come from. Press the AUDIO button, then press a button in the INPUT SELECT area.

MNL-1T-MV-8474 V1.6 5
Front panel
INPUT SELECT Buttons 1 to 7 correspond with video or audio inputs. The input buttons light up to indicate the status of the video or audio input.
AUDIO SELECT Press to select the audio input required. The currently selected input button lights up, and the others flash. Press an input select button to choose a new audio input.
WINDOW SELECT Buttons A to D represent the four possible windows. When you press a window select button, the associated input button lights up, and the others flash.
WINDOW LAYOUT Buttons 1 to 4 allow you to select pre-programmed window layout modes. The default modes are single window, double window, triple window and quadruple window. You can associate other layouts with these buttons with the web interface.
OUTPUT RESOLUTION
Press the SELECT button to change the resolution. A light indicates the current output.
POWER Indicates when the unit has power.
STANDBY Switches between standby and working mode. The button lights up during standby.

6 tvONE
Rear panel
AC 110-240V Connect the AC power cord provided to an available electrical outlet.
AUDIO CHANNEL 8-channel analog audio output. Connect a 3.5 mm stereo input to the line-in jack of a multimedia system.
OPTICAL Connect the optical output port to the digital audio input port of your amplifier.
HDMI Connect an HDMI cable from this port to an HD (1080p or720p) or 4K display.
INPUTS 1-7 7 2-channel stereo analog audio inputs. Connect a 3.5 mm stereo input from the line-out jack on the audio source to one of these jacks.
HDMI 1-4 Connect up to four sources to these inputs using HDMI cables.
DISPLAYPORT 5/6 Connect up to two sources to these inputs using DisplayPort cables.
RGB/YPbPr Connect a hi-definition source to this input using DB-15 cable or YPbPr-VGA cable.
USB USB port for firmware updates.
LAN Connect to a LAN source with an Ethernet cable to use IP control.
RS232 Connect an RS-232 device to this port with an RS-232 cable.

MNL-1T-MV-8474 V1.6 7
IR remote control
INPUT SELECT
Press buttons 1 to 7 to select the corresponding video input or audio input.
WINDOW SELECT
Buttons A to D represent the four possible windows. When you press a window select button, the associated input button lights up, and the others flash.
WINDOW LAYOUT
Buttons 1 to 4 allow you to select pre-programmed window layout modes. The default modes are single window, double window, triple window and quadruple window. You can associate other layouts with these buttons with the web interface.
AUDIO Press to select the audio input required. The currently selected input button lights up, and the others flash. Press an input select button to choose a new audio input.
MUTE Turn the sound on and off.
RESOLUTION Press to change the resolution. A light in the OUTPUT RESOLUTION area on the front panel of the 4K Multiviewer indicates which resolution is currently selected.

8 tvONE
External controls
The web interface
You can control the 4K Multiviewer from any modern browser with the web interface. You can do any of the tasks that you would otherwise do using the front panel or remote control, plus some more advanced tasks.
Finding out the IP address of your 4K Multiviewer
The 4K Multiviewer automatically uses DHCP to get an IP address when it is connected to a valid network.
You can see the IP address on the on-screen display (OSD). To display the IP address, press any button in the WINDOW LAYOUT area.
If the OSD has been disabled and you need to know the IP address, then you must reset the 4K Multiviewer to its factory default settings.
If your network doesn’t support DHCP, or you connect directly to the 4K Multiviewer, use the factory default IP address 10.0.0.10.
Opening the web interface
To open the web interface, open any browser and enter the IP address for the 4K Multiviewer.
For more information about the OSD, see page 8.
For instructions on resetting the 4K Multiviewer to its factory default settings, see page 26.
IP connections
The 4K Multiviewer supports Telnet, UDP and TCP/IP.
Network settings
On the Network tab of the web interface, you can adjust your network settings.

MNL-1T-MV-8474 V1.6 9
Configuring your network address
You can enable and disable DHCP and change your IP address, Subnet Mask, Gateway and DNS.
Note: If you change your network address, your 4K Multivewer and your computer can end up with different address ranges. You might need to modify the network address of your computer to connect to the 4K Multiviewer.
Configuring sockets
You can choose from TCP Server, TCP Client, TCP Auto, UDP Mode or UDP Multicast.
Choose an option from the Socket drop-down list and select Submit.
Enter a port number and select Submit. The default port number is 23.
RS-232
The RS-232 port
Connect the RS-232 to RXD, TXD and GND only.

10 tvONE
RS-232 Settings
Baud rate 9600
Data bits 8
Parity None
Stop bits 1
Hardware flow control None
For more information about serial command lines, see the separate API document for the 1T-MV-8474 4K Multiviewer.
You can download the API document from the Support Information tab at http://www.tvone.com/4k-multiviewer.
Audio channels There are three methods of audio output:
HDMI output
Optical output (TOSLINK)
Analog output, 8 channels
If the analog input audio format is only 2 channels (Stereo), it uses channels 1 and 2 of the analog outputs. If the input format is 5.1 it uses channels from 1 to 6 to output the audio. If the input format is 7.1 it uses channels from 1 to 8 to output the audio.
Note: Optical output (TOSLINK) only supports stereo.

MNL-1T-MV-8474 V1.6 11
Audio
Format
Channel
1 2 3 4 5 6 7 8
2.0 L R
2.1 L R LFE
5.1 FL FR LFE FC RL RR
7.1 FL FR LFE FC RL RR RLC RRC
On-screen display The on-screen display (OSD) shows video, audio and the IP address of the 4K Multiviewer.
By default, the OSD is set to on. The OSD displays the status and resolution of the source for each window. If nothing is connected, the OSD displays XX not connected. XX is the input port: HDMI 1-4, DISPLAYPORT 5-6 or RGB/YPbPr.
Enabling and disabling the OSD
You can enable or disable the OSD on the Advanced tab of the web interface.
To turn information about audio on or off, choose an option from the Audio OSD drop-down list.
To turn information about video on or off, choose an option from the Video OSD drop-down list.

12 tvONE
Installing the 4K Multiviewer
1. Connect up to four 4K or HD HDMI sources to input ports HDMI 1 to HDMI 4.
2. Connect up to two 4K or HD DisplayPort sources to input ports DISPLAYPORT 5 and DISPLAYPORT 6.
3. Connect one VGA or YPbPr source to input port RGB/YPbPr. 4. Connect output port HDMI to one UHD 4K or HD display. 5. OPTIONAL – you can also connect any of the following inputs and
outputs.
Connect up to seven stereo analog audio sources to audio input ports INPUT 1 to 7.
Connect the 3.5 mm stereo outputs to up to four 2-channel inputs of an audio receiver, or connect the OPTICAL port to the optical input of an audio receiver.
Connect an RS-232 serial controller to the RS-232 port.
Connect a Local Area Network (LAN) to the LAN port. 6. Connect the AC power cord to the 4K Multiviewer, and connect the
plug to an available electrical outlet.
Wiring Diagram

MNL-1T-MV-8474 V1.6 13
Operation
Starting up and shutting down the 4K Multiviewer
The POWER light on the front panel lights up red to indicate the unit has power. If the indicator does not light up, check the power cord is plugged in correctly and that the power switch on the rear panel is turned on.
When the unit is in standby mode, the STANDBY button lights up green. In normal working mode the STANDBY button is not lit.
1. Switch the ON/OFF switch on the rear panel to I (on). 2. To start up or shut down the 4K Multiviewer, choose one of the
following options.
Press the STANDBY button on the front panel
Press the ON/OFF button on the remote control
Use a command from a device connected by Ethernet or RS-232 cable
Use the Advanced tab of the web interface
You can save power by allowing the 4K Multiviewer to shut down automatically when there are no active inputs.
For more information about shutting down automatically, see page 26.
Window layouts
Overview of window layouts
The 4K Multiviewer can display up to four video sources on your HDMI output device. Each source is displayed in a window. Each combination of windows and positions is a window layout.
The 4K Multiviewer offers up to 16 window layouts. On the front panel or the remote control, you can choose from four predefined layouts. You can choose any of the 16 layouts and configure which four layouts are available on the front panel and remote control using the web interface.

14 tvONE
The 16 window layouts
Note: the layouts you see may differ slightly depending on the version of your firmware. The layouts shown here are from firmware versions 3.0.1.1 CL1051 and above.
Choosing a window layout from your default options
On the remote control or the front panel, press one of the four buttons from the WINDOW LAYOUT area.
The screen connected to the HDMI output port shows the window layout, and the button stays lit. In the WINDOW SELECT area of the front panel, buttons light up to show which windows belong to your chosen window layout. In the INPUT SELECT area of the front panel, buttons light up to indicate the currently selected sources.
Default layouts corresponding to buttons 1 to 4 on the front panel and remote control
You can choose any four layouts as your default layouts.

MNL-1T-MV-8474 V1.6 15
Choosing a window layout with the web interface
1. On the General tab, select a window layout.
2. Select Submit.
Choosing your own default window layouts
You can assign any of the 16 window layouts to a button in the WINDOW LAYOUT area on the front panel and remote control. Choose your defaults on the General tab.
1. For each button, choose a window layout from the drop-down list. 2. Select Submit.
Tip: Make a note of which window layout is associated with which button.

16 tvONE
Configuring your display
Use the front panel, remote control or web interface to choose any window layout, and then choose which video source appears in which window. You can show the same source in multiple windows.
Configuring displays
1. To select a window layout, press a button in the WINDOW LAYOUT area.
In the WINDOW SELECT area of the front panel, buttons light up to show which windows belong to your chosen window layout. In the INPUT SELECT area of the front panel, buttons light up to indicate the currently selected sources.
2. To select which source you want to appear in which window, press a button in the WINDOW SELECT area, then press a button in the INPUT SELECT area. Repeat this step for each window of your chosen display.

MNL-1T-MV-8474 V1.6 17
Example display configurations
Key to example configurations

18 tvONE
Example of a single window display
This display shows one input source, in window A. To configure the example below, press A, 5.
Example of a double window display
This display shows two input sources in windows A and B.
Note: firmware versions 3.0.1.1 CL1051 and above include a third window, the background. Window C has no source allocated to it by default, but you can choose one if you want to.
To configure the example below, press:
A, 5
B, 6
Example of a triple window display
This display shows three input sources in windows A, B and C.
To configure the example below, press:
A, 1
B, 2
C, 3
C
C

MNL-1T-MV-8474 V1.6 19
Example of a quadruple window display
This display shows four input sources in windows A, B, C and D.
To configure the example below, press:
A, 1
B, 2
C, 3
D, 7
Configuring window layouts in the web interface
You can configure any of the window layouts on the General tab of the web interface.
1. For each window in your chosen window layout, choose an input from the drop-down list.
2. Select Submit.

20 tvONE
Turning off a window to leave it blank
Note: this feature is only available for firmware version 3.0.1.1 CL1051 or above.
You can turn off a window to leave it blank/black on the Advanced tab of the web interface and on the front panel.
To turn off a window on the front panel:
1. In the WINDOW SELECT area, press and hold button A, B, C or D for five seconds. The window turns black. If the on-screen display is turned on, a label indicates the source has been removed.
2. To turn the window back on, press and hold the same button for five seconds.
Changing the aspect ratio of a window
You can change the aspect ratio of any window on the General tab of the web interface.
1. For each window, choose an aspect ratio from the drop-down list.

MNL-1T-MV-8474 V1.6 21
The options for aspect ratio are:
Normal – use the original aspect ratio from the input source
Full – fill the window
16:9
4.3 2. Select Submit.
Automatically positioning VGA/RGB
You can choose to automatically position VGA/RGB sources. Activate or deactivate auto-positioning on the Advanced tab of the web interface.
Note: Auto-positioning isn’t available for YPbPr.
Changing the resolution of your output
To change the resolution of your output, press the SELECT button in the OUTPUT RESOLUTION area of the front panel repeatedly until the LED for the resolution you want is lit.
You can also change the output resolution on the General tab of the web interface.
Read about which resolutions the 4K Multiviewer supports on page 35.

22 tvONE
Audio settings
Connecting a backup analog audio input
Each digital input can provide video and audio. You can connect an analog audio source to act as a backup for each source. If the digital input has no audio, the 4K Multiviewer automatically switches to the backup audio source.
Connect the backup audio source to the 3.5 mm jack that corresponds to the digital source. For example, to provide backup audio for the source connected to the HDMI 1 port, connect a device to jack 1.
You can also choose to always use the backup analog source.
Choosing to always use an analog audio source
For each input, you can choose to always use the audio from an analog source, or to only use the analog source as a backup.
Configure how the 4K Multiviewer plays audio on the General tab of the web interface.
To always use an analog source for an input, for that input, select External from the drop-down list.
To only use an analog source as a backup for an input, select Auto from the drop-down list.
Note: VGA/RGB/YPbPr does not include an audio signal. If you use the VGA input, connect an analog audio input.

MNL-1T-MV-8474 V1.6 23
Selecting an audio source
1. Press the AUDIO SELECT button. In the INPUT SELECT area, the button for the currently selected audio input lights up and the other buttons flash. If you don’t change the audio source within five seconds, the buttons stop flashing.
2. To change the audio source, in the INPUT SELECT area, press the button for that source. After five seconds the audio changes to the new source.
3. To change the audio source using the web interface, on the General tab, choose an option from the Audio Input drop-down list and select Submit.

24 tvONE
Syncing audio with audio delay
You can delay your audio source to synchronize with your video sources. Choose to delay audio up to 400 ms on the Advanced tab of the web interface.
Setting Delay in milliseconds
0 0
1 40
2 80
3 120
4 160
5 200
6 240
7 280
8 320
9 360
10 400
To delay audio, enter a number from 1-10 in the Audio Delay field and select Submit.
To stop delaying audio, enter 0 in the in the Audio Delay field and select Submit.

MNL-1T-MV-8474 V1.6 25
Locking the front panel
There are two ways to lock the 4K Multiviewer, the admin lock and the complete lock.
When the admin lock is active, the STANDBY and OUTPUT RESOLUTION buttons are locked.
When the complete lock is active, all the buttons are locked.
To activate or deactivate the admin lock
You can activate or deactivate the admin lock on the Advanced tab of the web interface, and you can deactivate the admin lock on the front panel.
To activate the admin lock in the web interface, select the Admin option from the Front Panel Lock drop-down list.
To deactivate the admin lock in the web interface, select the Unlock option.
To deactivate the admin lock on the front panel, in the WINDOW SELECT area, press and hold buttons A and D until the standby button flashes once. If the front panel does not unlock, repeat this step.
To activate or deactivate the complete lock
You can activate or deactivate the complete lock on the Advanced tab of the web interface, or on the front panel.
To activate the complete lock in the web interface, select the Complete option from the Front Panel Lock drop-down list.
To deactivate the complete lock in the web interface, select the Unlock option.
To activate or deactivate the complete lock on the front panel, in the WINDOW SELECT area, press and hold buttons A and D until the standby button flashes once.

26 tvONE
Advanced operation
Saving power with automatic shutdown
On the Advanced tab of the web interface you can tell the 4K Multiviewer to automatically go into standby mode after a set amount of time.
Automatic shutdown only happens when there are no signals from the active sources. When the signals stop, the 4K Multiviewer starts the auto timer and enters standby mode when the time has run out. When the 4K Multiviewer receives a signal, it starts up again.
To enable automatic shutdown, enter a time from 1-60 minutes in the Power Saving field and select Submit.
To disable automatic shutdown, enter 0 in the Power Saving field and select Submit.
Restoring the default factory settings
You can restore the factory settings on the Advanced tab of the web interface, or on the front panel.
To restore the factory settings on the front panel:
1. Press the STANDBY button. The 4K Multiviewer enters standby mode.
2. In the INPUT SELECT area, press and hold button 5. 3. Press the STANDBY button.
The 4K Multiviewer enters active mode. All buttons and lights on the front panel flash to indicate the unit is being set to factory default. The 4K Multiviewer reboots and the OSD shows the window status, IP address and port number.
When you restore the factory default settings, the IP address of the 4K Multiviewer is reset.
Read about how to find the new IP address on page 8.

MNL-1T-MV-8474 V1.6 27
Restoring default network settings
You can restore your default network settings on the Network tab.
Select the Revert network setting to factory default settings check box and select Submit.
Note: This action resets the IP address to the factory default IP address 10.0.0.10. You might not be able to connect to the web interface until the IP address range of your computer and the 4K Multiviewer are in the same range.
Read more about the IP address of the 4K Multiviewer on page 8.
Changing the baud rate
You can choose a baud rate from 9600, 14400, 19200, 28800, 38400, 57600, 115200. We recommend that you use 9600.
Change the baud rate on the Advanced tab of the web interface.
Switching the analog input between RGB and YPbPr
You can switch the VGA input between RGB and YPbPr on the Advanced tab of the web interface.
1. Select either RGB or YPbPr from the Analog setting drop-down list. 2. Select Submit.
3. Reboot the 4K Multiviewer.
For instructions on rebooting the 4K Multiviewer, see page 13.

28 tvONE
Turning auto-adjust on and off for VGA sources
When auto-positioning is active, the OSD displays Auto Adjust in the window assigned to the VGA source.
You can activate or deactivate auto-positioning on the Advanced tab of the web interface.
Firmware
Finding your firmware version
To find out what version of firmware you are using, see the Advanced tab of the web interface.
Updating firmware
You can update the 4K Multiviewer with a USB drive.
Risk of damage to equipment: Do not switch off the 4K Multiviewer until the upgrade process is completed, or the firmware will be corrupted.
Note: the USB port can only support up to 500 mA.
1. Download the latest firmware from www.tvone.com/firmware-updates. Search for 1T-MV8474.
2. Copy the file called MERGE.bin to the root directory of a USB drive. 3. With the 4K Multiviewer switched off, connect the USB drive to the
USB port on the rear of the device. 4. Connect an HDMI display to the HDMI OUTPUT port. 5. Switch on the 4K Multiviewer. 6. When the 4K Multiviewer is in active mode, in the INPUT SELECT
area, press and hold button 1 for more than five seconds. 7. The output screen shows System is upgrading… and all buttons and
lights on the front panel flash. When the update is complete, the output screen shows Upgrading is successful, system will reboot. After a few seconds, the 4K Multiviewer reboots.

MNL-1T-MV-8474 V1.6 29
8. When the 4K Multiviewer has finished rebooting, switch it off and then back on.
It may be necessary to update the web interface as part of the firmware upgrade process. Contact tvONE Technical Support for assistance.
For contact details, see the back page of this guide.
Copying, uploading and downloading EDID
On the EDID tab of the web interface you can copy the Extended Display Identification Data (EDID) from an output device to any input device. You can also download the EDID to your computer, or upload an EDID from your computer.
What is EDID?
EDID is a data structure provided by a digital display to describe its capabilities to a video source, for example, a graphics card or set-top box.
Normally the device displaying the output sends EDID to the device supplying the source. Occasionally, if there is a device between the input and output devices, the information isn’t received correctly and the picture becomes offset or distorted.
Troubleshooting offset or distorted video
If the video in one or more windows is offset or distorted, first try copying the EDID to that input device.
Copying an EDID to an input device
For each affected input, select your output device from the drop-down list, and select Submit.

30 tvONE
Uploading a different EDID
If copying the EDID doesn’t work, try uploading an EDID that you know does work, for example, from a display device that you know works well with that specific input device.
There are seven custom slots available on the 4K Multiviewer for storing EDID files in .bin format. Each slot can contain only one EDID file.
Browse to the EDID file on your computer.
Select a slot from the Select Custom Location drop-down list.
Select Upload.
Downloading and editing an EDID
You can also download an EDID, edit the EDID, and upload it again.
Right-click an option and select Save Target as … to save an output, an input, or an EDID stored in a custom slot on the 4K Multiviewer.
Edit the EDID.
Upload the edited EDID to a new custom slot on the 4K Multiviewer.

MNL-1T-MV-8474 V1.6 31
Specifications
Functionality
Video input formats
HDMI
DVI
DisplayPort
RGBHV
YPrPb
Audio input formats
HDMI and DisplayPort: embedded digital
External analog stereo audio: 20 kΩ impedance
Video output formats
HDMI
Audio output formats
HDMI: embedded digital audio
7.1 surround analog audio: 20 kΩ impedance
TOSLINK: digital optical audio
Format compliance
HDMI v1.4
DVI v1.0
DisplayPort v1.2
HDCP v1.4
Color depth 8-bit
10-bit
12-bit
EDID memory Advanced EDID utilities
Audio bandwidth
20 Hz to 20 kHz
Audio sampling rate
48 kHz
Channels 8CH
Format LPCM
Audio levels Stereo audio: unity / nominal
Stereo audio: 0.5-1.0 VP-P

32 tvONE
Audio delay User-adjustable from 0-400 ms in increments of 40 ms
Inputs
Video 6 digital
1 analog RGB
Audio 6 digital
7 stereo analog
Outputs
Video 1 HDMI/DVI
Audio 1 digital optical, embedded HDMI
4 stereo (analog 7.1)
Input connectors
HDMI/DVI 4 HDMI 19-pin female connectors
DisplayPort 2 20-pin female locking connectors
Analog RGB 1 HD15 (VGA) female connector
Analog Audio 7 stereo 3.5mm female connectors
Power 1 IEC C14 power connector
Output connectors
HDMI/DVI 1 HDMI 19-pin female connector
Digital audio 1 TOSLINK Optical female connector
Analog audio 4 3.5mm female connectors

MNL-1T-MV-8474 V1.6 33
Control
Configuration Web interface
RS-232
Ethernet
IR remote control
front panel buttons
Application Web interface
Buttons 7.5 mm square colored LED backlit
Dimensions
Without feet or rack mounting brackets
(H x W x D)
44 x 439 x 279 mm (1.7 x 17.3 x 11.0 inches)
With feet (H) 51 mm (2.0”)
With rack mounting brackets (W)
483 mm (19.0”)
Weight 3.3 kg (7.3 lb)
Power
AC power 100-240 V AC / 50-60 Hz
Power consumption
15 W maximum
Materials
Front panel 10mm aluminum alloy with black finish
Chassis 1mm pressed steel with matte black finish

34 tvONE
Environmental
Operating temperature
0 °C to 40 °C (32 °F to 104 °F)
Storage temperature
−20 °C to 60 °C (−4 °F to 14 °F)
Operating humidity
20% to 90% non-condensing
Product item number
1T-MV-8474 4K Multiviewer
Accessories
Included 19 Button remote control
AC power cable
User Guide
2x rack mounting brackets
Warranty
Limited warranty 3-year warranty for parts and labor
Regulatory compliance
Main unit FCC
CE
RoHS
Input Resolution
Resolution P/I HDMI DisplayPort VGA
640 x 350 P 85
640 x 400 P 85 85
640 x 480 I 30
640 x 480 P 60/75/85 75/85
720 x 400 P 85
720 x 480 I 60

MNL-1T-MV-8474 V1.6 35
Resolution P/I HDMI DisplayPort VGA
720 x 576 I 25 50
720 x 576 P 50/100
800 x 600 P 60/75/85 60 60
848 x 480 P 60
1024 x 768 P 60/75/85 60/70/75
1152 x 864 P 75
1280 x 720 P 50/60 60 50/60
1280 x 768 P 60/75/85 60/75/80
1280 x 960 P 60/85
1280 x 1024 P 60/75/85 60/75
1366 x 768 P 60
1600 x 900 P 60
1600 x 1024 P 60
1600 x 1200 P 60 60/65/70/75
1680 x 1050 P 60
1792 x 1344 P 60
1856 x 1392 P 60
1920 x 1080 I 25/30 50/60
1920 x 1080 P 24/25/30/ 50/60
60 24/25/30/ 60
1920 x 1200 P 60 60
1920 x 1440 P 60
2048 x 1152 P 60
3840 x 2160 P 24/30 30/60

36 tvONE
HDMI output resolution
AUTO The output resolution is selected automatically based on information read from the display device.
4Kx2K 3840 x 2160 @30 Hz
1080P 1920 x 1080 @ 60 Hz
720P 1280 x 720 @ 60 Hz
WUXGA 1900 x 1200 @ 60 Hz
UXGA 1600 x 1200 @ 60 Hz
WXGA 1280 x 800 @ 60 Hz
XGA 1024 x 768 @ 60 Hz

MNL-1T-MV-8474 V1.6 37
Limited warranty
tvONE warrants the original purchaser that the equipment it manufactures or sells will be free from defects in materials and workmanship for a fixed term from the date of purchase. The warranty term for specific product lines is defined below.
tvONE branded products based on tvONE’s CORIO technology are warranted for a period of five years from the date of purchase. This includes products with the model number prefix of C2, 1T-C2, CX, A2 or S2.
tvONE products, other than those based on tvONE’s CORIO technology mentioned above, are warranted for a period of three years from the date of purchase. This includes products with the model number prefix of 1T, with the exception of 1T-C2.
LCD Monitors are warranted for a period of three years from the date of purchase, with the exception of the LCD panels integrated into the monitors that are supplied by third parties. LCD panels are limited to the term and conditions of the warranty offered by the respective LCD panel manufacturer. Such specific LCD panel warranties are available upon request to tvONE.
Should a product, in tvONE’s opinion, prove defective within this warranty period, tvONE, at its discretion, will repair or replace this product without charge. Any defective parts replaced become the property of tvONE. This warranty does not apply to those products which have been damaged due to accident, unauthorized alterations, improper repair, modifications, inadequate maintenance and care, or use in any manner for which the product was not originally intended.
If repairs are necessary under this warranty policy, the original purchaser must obtain a Return Authorization Number from tvONE and return the product to a location designated by tvONE, freight prepaid. After repairs are complete, the product will be returned, freight prepaid.
LIMITATIONS - All products sold are “as is” and the above Limited Warranty is in lieu of all other warranties for this product, expressed or implied, and is strictly limited to the stated number of years from the date of purchase. tvONE assumes no liability to distributors, resellers or end-users or any third parties for any loss of use, revenue or profit.

38 tvONE
tvONE makes no other representation of warranty as to fitness for the purpose or merchantability or otherwise in respect of any of the products sold. The liability of tvONE with respect to any defective products will be limited to the repair or replacement of such products. In no event shall tvONE be responsible or liable for any damage arising from the use of such defective products whether such damages be direct, indirect, consequential or otherwise, and whether such damages are incurred by the reseller, end-user or any third party.
Regulatory compliance
The 1T-MV-8474 has been tested for compliance with appropriate FCC and CE rules and regulations. The power adaptor/supply has been tested for compliance with appropriate UL and CUL rules, regulations and/or guidelines. This product and power adapter are RoHS compliant.

MNL-1T-MV-8474 V1.6 39
Liability statement
This product is intended for professional use. This product is not intended for use in a medical environment and does not have the required certifications for such use. Similarly, use aboard any aircraft or spacecraft while in flight or as an adjunct to any surface, airborne or marine navigation system or any offshore marine activity, including control of any watercraft, or any use similar to those specifically herein mentioned is prohibited. Use in the aforementioned circumstances would require additional testing and certification.
No warranty is made either expressed or implied including but not limited to any implied warranties of merchantability or fitness for a particular purpose. In no event shall the supplier or manufacturer of this product be liable for errors found within, or be liable for any direct, indirect or consequential damages or loss in connection with the purchase or use of this hardware, software or manual. The sole and exclusive liability to the supplier and manufacturer regardless of the form of action shall not exceed the replacement cost of the materials described herein.
tvONE reserves the right to revise any of its hardware and software products following its policy to modify and/or improve its products where necessary or desirable. This statement does not affect the legal rights of the user in any way.
By using this equipment, you have indicated that you have agreed to the terms listed above. If you do not wish to agree or the above terms are contrary to your conditions of purchase you may return the equipment, unused, to your supplier.
All third party trademarks and copyrights are recognized. The tvONE logo, Magenta logo, CORIO word and the CORIO logo are registered trademarks of tvONE. All other trademarks are the property of their respective holders.
E&OE

40 tvONE
Contact us
www.tvone.com
tvONE NCSA
North, Central and South America
tvONE EMEA
Europe, Middle East, Africa and Asia Pacific
2791 Circleport Drive, Erlanger, KY 41018, USA
Continental Approach, Westwood Industrial Estate, Margate, Kent, CT9 4JG, UK
Tel +1 859-282-7303 Fax +1 859-282-8225
Tel +44 (0)1843 873311 Fax +44 (0)1843 873312
Sales: [email protected] Support: [email protected]
Sales: [email protected] Support: [email protected]
Copyright 2016 tvONE. All rights reserved.
Information in this document is subject to change without notice. The software described in this document is furnished under a license agreement or nondisclosure agreement. The software may be used or copied only in accordance with the terms of those agreements. No part of this publication may be reproduced, stored in a retrieval system, or transmitted in any form or any means electronic or mechanical, including photocopying and recording for any purpose other than the purchaser's personal use without the written permission of tvONE.