4h-911-2 mini 4-h trees - home - purdue extension from mini 4-h trees, ... mini 4-h helper’s page...
TRANSCRIPT

Mini 4-H
Trees
4H-911-2
Protected under
18 USC 707

1
Excerpted from Mini 4-H Trees, Purdue University Cooperative Extension Service.
Written and Compiled by:Roylene Laswell
K-2 Program Coordinator
Purdue University
Richard Chalupa
Extension Educator
Delaware County
Faculty Advisor:Mary Pilat, Ph.D.
4-H Youth
Purdue University
Clerical Support:Wendy Redinbo
4-H Youth
Purdue University
Contact your local Extension office for a list of available projectactivity manuals.
Acknowledgements:We would like to thank the following people for their dedication to positive youth development:
It is the policy of Purdue University Cooperative Extension Service, David C. Petritz, Director, that all persons shall have equal opportunity and access to its programs
and facilities without regard to race, sex, religion, national origin, age or disability. Purdue is an Affirmative Action Employer. This manual may be available in other
formats.
1-888-EXT-INFO
http://www.agcom.purdue.edu/AgCom/Pubs/menu.htm
Copyright (1999) by Purdue Research Foundation, West Lafayette, IN 47907. Unless permission is granted, this material may not be copied, reproduced or coded for
reproduction by any electrical, mechanical or chemical process or combination thereof, now known or later developed.
PRODUCTION TEAM
Specialty Reviewers:Sue Baumgartner, Ed.D.
Williamson County Board of Education
Franklin, Tennessee
Dianna Cooper, M.S
Child Development and Family Studies.
Purdue University
Charles E. Williams, Professor Emeritus
University of Minnesota Extension Service
University of Minnesota
Resources and References:Mini 4-H Forestry Manual, Madison County, Mini 4-H Forestry Discovery Manual, Henry County,
Mini 4-H Forestry Manual, Delaware County
Initial Development Team (1996-1997):A debt of gratitude is owed to the following people for their persistence and foresight in compiling the initial project
activity manuals:
Leanne Burrow, David Caldwell, Natalie Carroll, John Crites, Jonathan Ferris, Jeanette Findley, Brian Gauck,
Dan Kirtley, Anita Krug, Carolyn Miner, RaeAnn O’Neill, Sue Provost, Scott Ripberger, Debra Searcy, and
Susan Trutner.
The Zaner-Bloser font used in this manual was
chosen because it most closely resembles children’s
current writing style

2
Excerpted from Mini 4-H Trees, Purdue University Cooperative Extension Service.
Mini 4-H Helper’s PageWelcome to the Mini 4-H Program! Mini 4-H is designed for youth to explorea variety of project activity areas and to interact with caring adults andother children.
Children receive this project activity manual when enrolling in Mini-4-H. This manual,and the manuals on various other topics, will provide fun, age-appropriate learningactivities throughout their year(s) in Mini 4-H.
As a Mini 4-H adult helper, your job will be to guide and encourage each childthrough the activities. A wide range of activities are provided to allow you tochoose the ones most appropriate for the children you are working with. It is highlysuggested that you do not complete the activities for them. Instead, help them,guide them, work with them, and let them do all that they possibly can. 4-H believesin allowing children to learn by doing. The Mini 4-H project activities are hands onlearning opportunities designed to provide a meaningful educational experiencefor youth.
Additionally, the Mini 4-H program is set up to allow children to display a projectactivity that is based upon information within this manual. Some children may wantto exhibit at the 4-H Fair. The 4-H Fair is an exciting week that allowscommunity youth to showcase their enthusiasm for learning. Children may chooseto display a project activity they did by themselves or one they did with a group.Other children may choose to showcase their work in other ways such asdisplaying it in a special place in their own home.
Mini 4-H is fun! Children will certainly enjoy it. You can have fun too, by guidingand helping as children participate in the program. Encourage and praise thechildren as they have fun learning and sharing with you. If you have any questionsregarding Mini 4-H or other 4-H programs, please feel free to contact your localExtension Office.

3
Excerpted from Mini 4-H Trees, Purdue University Cooperative Extension Service.
Helper’s TipsThe Mini 4-H program can be used with individual children, however the benefitsare maximized when the project activities are used in a group of 2 or morechildren. Children working cooperatively in groups develop positive images ofthemselves and their ideas. Other ways adult helpers can maximize the benefits ofMini 4-H are to:
• Work on a subject interesting to the child by encouraging children to choosethe content area. Look through this manual and choose the projectactivities to work on based on the interests and skill levels of the children.
• Relax and have fun. Some children will want to finish their activities,however some children may not. There is no need to pressure children ofthis age to finish an activity because the real learning takes place whileparticipating in the activity and interacting with others. The finishedproduct should not be the main focus. The knowledge children gain whilethey explore new areas and experiment with new ideas should be theprimary goal.
• Remain flexible and adapt to the changing needs of the children.Restlessness or boredom may indicate a need to stop the activity andcome back to it later.
• Encourage children to talk and work with each other. Children learn bestwhen they are encouraged to share their reactions and observations freely.You may want to ask the children about what they did during an activity,what happened, what was the most difficult, what was the easiest, andwhat they liked the most.
This manual contains activities for children that allow for a wide range ofabilities and provide practice for developing a variety of skills. Many of theprojects have additional things to do listed after the activity in thesection. This section provides ideas to adapt the activity to better match children’sindividual skill levels and also provides additional skill practice.

4
Excerpted from Mini 4-H Trees, Purdue University Cooperative Extension Service.
Mini 4-H’ers PageMini 4-H’ers have lots of fun! There are many activities for you to explore. Youcan try new things. You can share them with your friends and family.
Here are some things to know about 4-H.
The 4-H symbolThe 4-H symbolThe 4-H symbolThe 4-H symbolThe 4-H symbol is a four-leaf clover with an “H” ineach leaf. Clover is a plant that grows in fields,yards, and along roadsides. Most clovers havethree leaves. Sometimes, if you look verycarefully, you may get lucky and find a specialclover with four leaves. A four-leaf clover isused as the symbol for 4-H to let everyoneknow 4-H is a special kind of group.
The 4-H colorsThe 4-H colorsThe 4-H colorsThe 4-H colorsThe 4-H colors are green and white. Thefour-leaf clover is green and the “H” in each leafis white.
A group motto is a saying that tells people what is important to the group.The 4-H mottoThe 4-H mottoThe 4-H mottoThe 4-H mottoThe 4-H motto is “To make the best, better.” When something is better than allof the others, it is the best. Think about a time when you did your best. Maybe youthrew a ball farther than you have ever thrown it before. Now, think about someways you could do better. You may be able to throw farther by practicing for awhile or by watching someone who can throw farther than you to see how theythrow so far. Even if you throw the ball farther than you have ever thrown itbefore, there are still ways that you can do better the next time. 4-H encouragesyou to always try to do better, even if you are doing the best you have ever done.

5
Excerpted from Mini 4-H Trees, Purdue University Cooperative Extension Service.
The 4-H PledgeA pledge is a promise you make to yourself and to the people around you. The4-H pledge is in bold print below. Under each line of the pledge there are wordstelling what the pledge means.
I pledge my Head to clearer thinking,
I promise to use my head to make good choices,
my Heart to greater loyalty,
to use my heart to be a good friend,
my Hands to larger service, and
to use my hands to do helpful things for others,
my Health to better living,
to take care of my body and to show others how to live in a healthy way,
for my club, my community, my country, and my world.
to help my group, my community, my country, and my world be happy andsafe for everyone.

6
Excerpted from Mini 4-H Trees, Purdue University Cooperative Extension Service.
What About Trees?Can you name the tree a leaf came from just from the shape of the leaf? Do youknow how to tell how old a tree is? Have you ever wondered how trees get foodand water? If you would like to learn the answers to these questions and manymore, Mini 4-H Trees is for you!
Trees come in many shapes and sizes. Some trees are tall, some trees are short,some trees have lots of branches, and some trees have only a few branches. Sometrees are shaped like triangles. Other trees have a round or oval shape.Sometimes people change the shape of trees by pruning or cutting the tree’sbranches. Tree branches are pruned to remove dead or deformed branches. Peoplealso use pruning to make a tree grow a certain way. The shapes of trees that havebeen pruned can be very unusual. Pruned trees can be in the shape of a square ormany circles like the pictures below. They can even be in the shape of an animal orperson. When trees or shrubs are cut into different shapes it is called topiary.....Have you ever visited trees with unusual shapes? Have you ever seen pictures oftrees with unusual shapes? What tree shape did you like the best? Why?

7
Excerpted from Mini 4-H Trees, Purdue University Cooperative Extension Service.
Things you need:- Forest Shapes Activity Page - scissors- large sheet of white paper - glue- 8 1/2 X 11” sheets of colored paper - pencil
What you do:1. Cut along the dotted lines on the Forest Shapes
Activity Page. Set these squares aside while youdo the next step.
2. Now, choose a piece of colored paper you wouldlike to use to make one of your trees. Fold thepaper in half like a book.....
3. Cut along the fold to make 2 pieces of paper and foldeach of these pieces in half like a book.
4. Lay one of the squares cut from the Forest ShapesActivity Page on top of the folded piece of coloredpaper. Be sure to lay the shape on the colored paperwith the arrows on the shape pointing to the fold inthe colored paper like in the picture.
5. Staple the papers together where you see this6. Cut out the shape on the solid, black lines. Be careful not to cut on
the fold.7. Open the shape up to show a bigger shape. Repeat with all of the shapes.8. Glue the colored shapes on a piece of paper to create different kinds of
trees in your forest like in the picture below. Now try to make othertrees using different shapes and colors.
Activity 1 - Make Your Own Forest
Fold
Fold

8
Excerpted from Mini 4-H Trees, Purdue University Cooperative Extension Service.
Forest Shapes Activity Page

9
Excerpted from Mini 4-H Trees, Purdue University Cooperative Extension Service.
Activity 2 – Tree PartsThe main parts of a tree are the leaves, branches, trunk, and roots. The leaves areattached to twigs on the branches. The leaves, twigs, and branches together arecalled the crown. The branches are attached to the topof the trunk of the tree. The trunk of the tree is themiddle part of the tree. The roots are attached to thebottom of the trunk and are mostly under the ground.
Things you need:- crayons or markers - stapler- scissors
What you do:1. Color the tree on the Tree Activity Page.2. Cut along the dotted lines on the Tree Parts Activity Page.3. Lay the Tree Parts Activity Page on top of the Tree Activity Page.
Staple where you see this4. Fold back each flap, one at a time, to make a door so you can see the part
of the tree the label is naming.
Things to talk about:Crown, branches, twigs, leaves, trunk, roots, top, bottom, middle, under, over
1. Help children compare their own body parts to the parts of a tree. Comparethe twigs to fingers and toes, the bark to skin, the branches to their arms andlegs, etc.
2. For groups, make a large tree out of paper. Encourage each child to make anapple out of paper. Roll up a small piece of tape on the back of each child’s apple.Blindfold each child in turn and have them “pin the apple on the tree.”
crown
trunk
roots

10
Excerpted from Mini 4-H Trees, Purdue University Cooperative Extension Service.
Tree Parts Activity Page
Crown
Leaves, Branchesand Twigs
Trunk
Roots
Fol
d he
reF
old
here
Fol
d he
reF
old
here

11
Tree Activity Page

12
Excerpted from Mini 4-H Trees, Purdue University Cooperative Extension Service.
Activity 3 – A Tree for Each SeasonEvergreen trees look the same all year long. Their leaves stay green all year andthey do not lose their leaves in the winter like some trees.
Many trees look different in each season of the year. Trees that change witheach season may have light green leaves and sweet smelling flowers on them in thespring. When summer arrives the leaves may turn a darker green and the flowerswill disappear. The leaves on the trees turn bright colors in the fall of the year.When winter comes the leaves from the trees fall on the ground.
Things you need:- 4 empty toilet tissue rolls - 2 white paper plates- popped popcorn - scissors- colored paper scraps - yarn- glue
What you do:1. Cut each paper plate in half.2. Cut two 1” slits in the top of each paper tube across
from each other so the paper plate half will slide into the slits like in thepicture and make a tree. Use one paper plate half for each of the4 trees.
3. Make 1 tree that looks the way trees look in spring by gluing popcorn ontothe paper plate to look like blossoms.
4. Make 1 tree that looks the way trees look in summer by coloring thepaper plate the colors leaves are in the summer.
5. Make 1 tree that looks the way trees look in fall by tearing small piecesof colored paper for the leaves and gluing them on the paper plate.
6. Make 1 tree that looks the way trees look in winter by dipping yarn in glueand putting it on one of the paper plates to look like the bare branches ofsome trees in the winter.
7. Children may want to add roots to each of the trees by gluing yarn to thebottoms of the paper trees.

13
Excerpted from Mini 4-H Trees, Purdue University Cooperative Extension Service.
Activity 4 – RootsThe roots of trees are mostly under the ground. Sometimes you can see treeroots sticking out of the ground around the base of a tree but most of the rootsgrow far down into the soil. Roots help keep the tree from blowing over when thewind blows by holding onto the soil. Roots help keep the soil from eroding by holdingonto the soil. Erosion happens when the soil washes away in the rain or when thesoil blows away in the wind.
Roots also help the tree grow. The roots bring water and food to the tree fromthe soil. Food in the soil is called minerals. Below is an experiment that may help youunderstand how roots work.
Things you need:- 1 celery stalk - red and blue food coloring- 2 glasses half full of water
What you do:1. Cut about 1” off the bottom of the celery stalk.2. Put red food coloring into one of the glasses and blue food coloring into
the other glass.3. Beginning at the bottom of the celery stalk, cut a 4” slit up the middle.4. Set the glasses side by side so they are touching each other. Put the
celery stalk over the 2 glasses so that one leg of the celery stalk is in oneglass and the other leg of the celery stalk is in the other glass. Be surethe legs of the celery stalk are long enough to reach into the water ofthe glasses.
5. Let celery sit in colored water about 1 hour. What has happened tothe celery?
Things to talk about:Roots, why trees need food and water

14
Excerpted from Mini 4-H Trees, Purdue University Cooperative Extension Service.
Activity 5 – Rough Or Smooth?The strong, middle part of a tree that holds up all the branches is called the trunk.The trunks of trees grow just like you do. Each year you grow taller and getheavier. You don’t stop growing until you are an adult. Each year trees grow taller.They also grow bigger around by adding a layer of wood to the outside of theirtrunks.
Trees are covered with bark. The bark protects the tree from insects, diseases,and injury. Some bark is rough and some bark is smooth. Feel the bark of a tree.Does it feel rough or smooth? Does the bark feel the same in all places on thetree? Feel the twigs and the branches. Does the bark on them feel the same asthe bark on the trunk of the tree?
Things you need:- crayons - heavy weight white paper
What you do:1. Choose a tree. Hold the paper against the bark of the tree and rub the
side of a crayon over the paper. The rough places that stick out on thebark will show up darker on the paper than the smooth, lower places onthe bark. The bark’s pattern or texture will be left on the paper.
1. Encourage children to lay under a tree and look up through the branches. Whatkinds of things do they notice? Encourage the children to listen carefully. Whatkinds of sounds do they hear? What kinds of words would they use to describethe sounds they hear? Read a poem in which the author is trying to describe theway a tree looks or sounds.
2. Show children a leaf from a tree. Encourage them to take a walk and try to findthe kind of tree it came from.

15
Excerpted from Mini 4-H Trees, Purdue University Cooperative Extension Service.
Activity 6 – How Old Are Trees?Every year trees add one ring or layer of wood to their trunk.You can find out how old a tree is by counting the rings. Startin the middle with the oldest ring and count all the rings until youget to the outside ring. The number of rings youcounted is the number of years old a tree is.
This tree is 3 years old.
How old is this tree? How old is this tree?
years old. years old.
How old are you? On a piece of paper draw a tree with the same number of ringsin it as your age. (Hint: It is easiest to start with the center ring and add ringsaround it.)

16
Excerpted from Mini 4-H Trees, Purdue University Cooperative Extension Service.
Branches grow from the trunks of trees. Most branches have twigs, leaves, buds,or flowers growing from them.
Leaves grow on different trees in different ways. Some trees have leaves thatgrow straight across the twig from other leaves.
This is called Opposite
and looks like this
Some trees have leaves that grow so they are not straight across the twig fromother leaves.
This is called Alternate
and looks like this
Things you need:- Leaf Activity Page - scissors- Opposite Matching Page - glue- Alternate Matching Page - crayons
What you do:1. Color all the leaves on the Leaf Activity Page.2. Cut along the dotted lines on the Leaf Activity Page. Children more
experienced with scissors may choose to cut out the leaves using the solidblack lines.
3. Glue leaves in the boxes on the Opposite Matching Page and theAlternate Matching Page to match the patterns on each page.
Things to talk about:Opposite, alternate, patterns, matching, same, different
Activity 7 – Branches
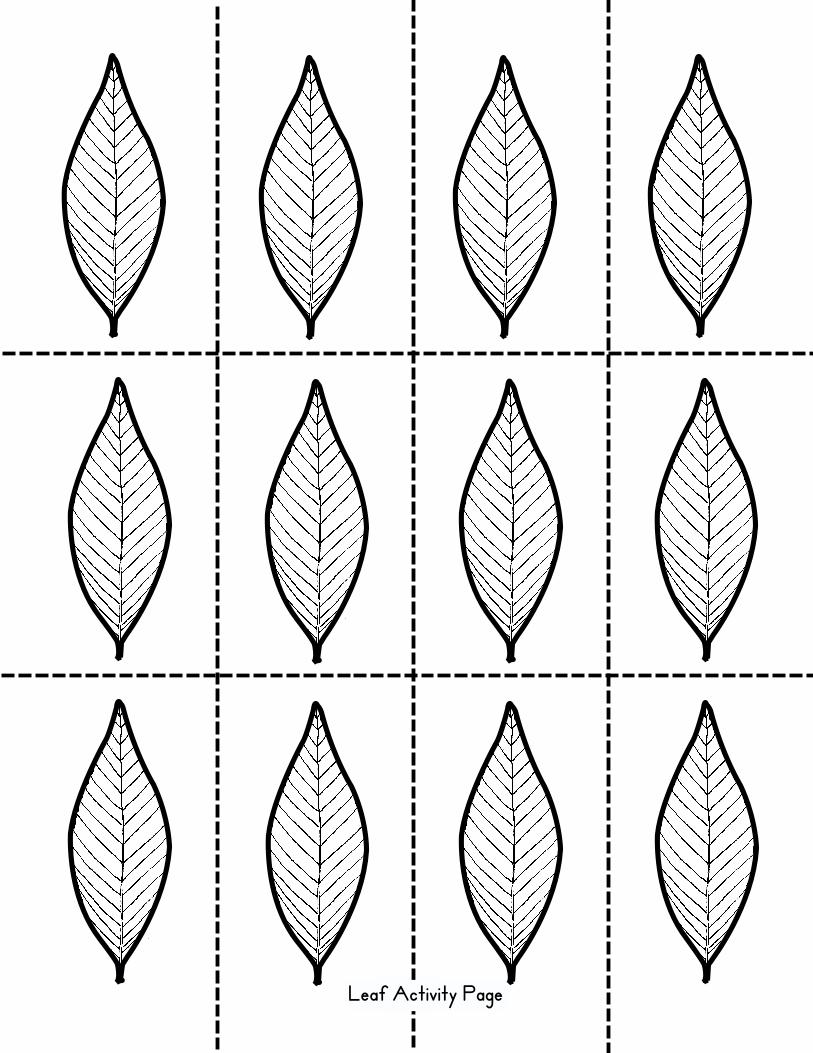
17Leaf Activity Page

18OppositeOppositeOppositeOppositeOpposite Match ThisMatch ThisMatch ThisMatch ThisMatch This
Opposite Matching Page

19
Excerpted from Mini 4-H Trees, Purdue University Cooperative Extension Service.AlternateAlternateAlternateAlternateAlternate
Match ThisMatch ThisMatch ThisMatch ThisMatch This
Alternate Matching Page

20
Excerpted from Mini 4-H Trees, Purdue University Cooperative Extension Service.
Activity 8 – LeavesLeaves are helpful to trees. They use sunshine to make food for the tree to helpit grow. Feel the leaves. Are they smooth or fuzzy? Do they feel more rough onone side than the other? All leaves do the same job even if they don’t all look thesame. The bottom side of leaves have veins or ridges on them. The veins help theleaves to get water so they can grow.
Tree leaves come in many different sizes and shapes. Leaves can be bigger thanyour hand or smaller than your smallest finger. Many leaves have shapes that looklike other things. A leaf can look like a fan, a star, a mitten, or a needle. Otherleaves have shapes all their own.
Leaves can be many different colors. In the summer most leaves are green butsome can be yellow, purple, or other colors. Many leaves change color in the fall.Some colors you might see are red, gold, yellow, orange, and brown.
Trees called evergreens have leaves that stay green all year. Some evergreenleaves are shaped like needles and some have scales on them. Most trees lose alltheir leaves in the fall of the year but evergreen trees keep their leaves even inthe winter .
Things you need:- Leaf Name Activity Page - scissors- 2 Leaf Book Activity Pages - crayons or markers- stapler - glue
What you do:1. Color all leaves on the 2 Leaf Book Activity Pages. Lay these
pages aside.2. Cut the shapes with names of leaves on them from the Leaf Name
Activity Page.3. Glue each shape where it goes on the Leaf Book Activity Pages.4. Cut along dotted lines of both Leaf Book Activity Pages.5. Staple pages together to make a book. Be sure to put the page with the
title on it on the top.

21
Leaf Name Activity Page
WhiteWhiteWhiteWhiteWhiteOakOakOakOakOak
BlackBlackBlackBlackBlackWalnutWalnutWalnutWalnutWalnut
RedbudRedbudRedbudRedbudRedbud
White PineWhite PineWhite PineWhite PineWhite Pine
Sugar MapleSugar MapleSugar MapleSugar MapleSugar Maple
Red CedarRed CedarRed CedarRed CedarRed Cedar
TulipTulipTulipTulipTulip

22
My L
eaf Book
by

23

24
Excerpted from Mini 4-H Trees, Purdue University Cooperative Extension Service.
Activity 9 – Leaf Memory GameThings you need:
- Leaf Memory Activity Page - - - - - scissors- 1 piece of colored construction paper - glue
What you do:1. Glue Leaf Memory Activity Page to the piece of colored construction
paper.2. Next, cut along the dotted lines on the Leaf Memory Activity Page.You
should end up with 12 cards.
To play the game:1. Mix up all the cards and lay them face down in rows.2. Turn over any 2 cards. If the shape of the leaf and the shape of the leaf
shadow match, you keep them and you take another turn. If they don’tmatch, turn both cards back over so the next person can take a turn.
1. Gather several different shaped leaves. Lay the leaves out on top of a piece ofcolored construction paper. Leave the papers in the bright sunshine for severalhours. When the leaves are removed the “sun print” of each leaf will remain.Make a leaf book from the sun prints you made.
.

25
Leaf Memory Activity Page

26
Excerpted from Mini 4-H Trees, Purdue University Cooperative Extension Service.
What to ExhibitThis is a list of project activities that can be shown at the 4-H fair or otherplaces. Pick a project activity you would like to try. You do not have to make themin any order. If you have any questions, please call the Extension Office. There arepeople there who can help you.
• Make a project activity as a group and take it to the fair to show the kindsof things your group has been doing.
• Make a scrapbook of pictures showing your group having fun while makingthe project activities in this manual.
• Draw a picture of the ways your favorite tree looks in each of thefour seasons.
• Make a collage of pictures cut from magazines. Show as many differentkinds of trees as you can find. See if you can find at least one picture of atree with an unusual shape.
• Take a walk in a local park. Collect things that have fallen from trees ontothe ground. Make a tree shaped poster and glue all the things you foundonto the poster. Be sure to match the items with the part of the treewhere they are found.
• Make a leaf rubbings book using 5 leaves you find that you think areinteresting. To make the leaf rubbings, place each leaf on a flat surfacewith the vein side up. Next, place a piece of paper over the leaf and use theside of a crayon to rub color over it. Label each page with the leaf name.
For information on when to take your project to the Fair and where it needs to go,please contact your Extension Office.

27
Excerpted from Mini 4-H Trees, Purdue University Cooperative Extension Service.
More Places to Look
Have Fun!
Autumn Leaves (Scholastic, 1998) by Ken Robbins is a leaf identification bookwith bright, artistic photographs written for children.
Cherry Tree (Boyds Mills, 1996) by Ruskin Bond and Allan Eitzen is a storyabout a young girl watching a tree grow.
Counting on the Woods (DK Ink, 1998) by George Ella Lyon is a counting bookthat uses a walk in the woods as the setting.
Fall Is Not Easy (Zino Pr Childrens’ Books, 1998) by Marty Kelley is a funnystory about a tree’s struggles to change its colors for fall.
Prairie Willow (Stoddart Kids, 1998) by Maxine Trottier, Laura Fernandez, andRick Jacobson is a story about a prairie family planting and watching a willow treegrow.
The Seasons of Arnold’s Apple Tree (Harcourt Brace, Reprint edition, 1988) byGail Gibbons is a story about the seasons of an apple tree.
The Way of the Willow Branch (Gulliver Books, 1996) is about a branch thatfalls from a tree and the many places it goes.
Woods (One Small Square) (McGraw-Hill, 1997) by Donald M. Silver helpschildren answer many questions they may have through simple experimentsand activities.