4-h fibres and fabrics series exploring fibres and … · skill builder 1: tools of the trade...
TRANSCRIPT
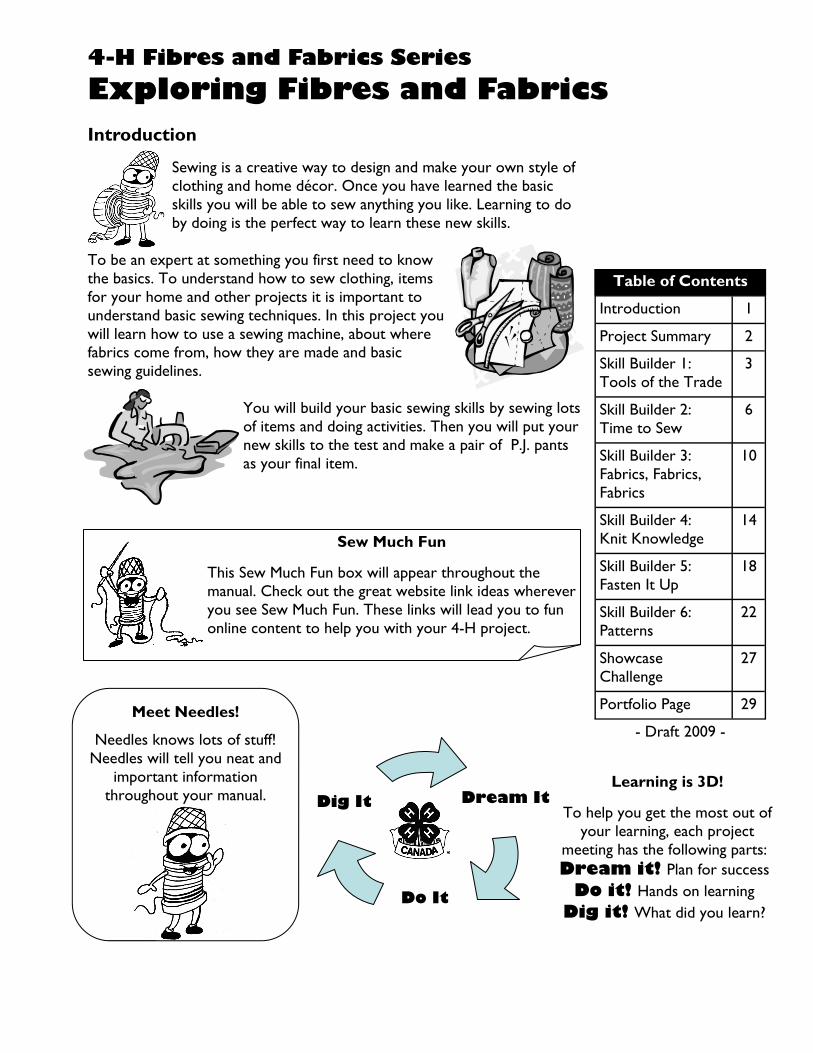
Table of Contents
Introduction 1
Project Summary 2
Skill Builder 1: Tools of the Trade
3
Skill Builder 2: Time to Sew
6
Skill Builder 3: Fabrics, Fabrics, Fabrics
10
Skill Builder 4: Knit Knowledge
14
Skill Builder 5: Fasten It Up
18
Skill Builder 6: Patterns
22
Showcase Challenge
27
Portfolio Page 29
- Draft 2009 -
4-H Fibres and Fabrics Series
Exploring Fibres and Fabrics Introduction
Sewing is a creative way to design and make your own style of clothing and home décor. Once you have learned the basic skills you will be able to sew anything you like. Learning to do by doing is the perfect way to learn these new skills.
To be an expert at something you first need to know the basics. To understand how to sew clothing, items for your home and other projects it is important to understand basic sewing techniques. In this project you will learn how to use a sewing machine, about where fabrics come from, how they are made and basic sewing guidelines.
You will build your basic sewing skills by sewing lots of items and doing activities. Then you will put your new skills to the test and make a pair of P.J. pants as your final item.
Learning is 3D!
To help you get the most out of your learning, each project
meeting has the following parts: Dream it! Plan for success
Do it! Hands on learning Dig it! What did you learn?
Do It
Dig It
Dream It
Sew Much Fun
This Sew Much Fun box will appear throughout the manual. Check out the great website link ideas wherever you see Sew Much Fun. These links will lead you to fun online content to help you with your 4-H project.
Meet Needles!
Needles knows lots of stuff! Needles will tell you neat and
important information throughout your manual.

2
What Skills Will You Learn?
Each section or Skill Builder (or Builder) in this project has activities that will help your project group learn to do by doing while learning new skills and having fun!
To complete this project, you must: Complete the activities in each Builder OR a similar activity that focuses on
the same skills, as you and your leader may plan other activities. Plan and complete the Showcase Challenge. Complete the Portfolio Page. Participate in your club’s Achievement (See the inside back cover for more
information about 4-H Achievements).
Members will be able to... Activities Page
Skill Builder
1
Tools of the Trade Identify basic sewing tools Identify the parts of a sewing machine Stitch with a sewing machine
Whazzit! Make a sewing box Stitch-a-rama! Sew a Bandana Pillow
4 4 4 5
Skill Builder
2
Time to Sew! Thread a machine, backstitch, seam finish
and press seams Optional: Identify a serger and how it works Practice sewing
Optional: Serger sewing - Technology Case Choose one item to sew
8 8
Skill Builder
3
Fabrics, Fabrics, Fabrics! Identify different fibres and fabrics Identify the difference between woven and
non-woven fabrics Understand fabric terms Sew a casing
Word Search Sew one item using woven and
non-woven fabrics Sew one item using a casing
12 13
13
Skill Builder
4
Knit Knowledge Discover how knit fabrics are made Identify career opportunities and community service ideas Sew with knit fabrics
Stretch It! Career Scavenger Hunt Sew one item from t-shirt knit Sew one from double sided
fleece
16 15 17 17
Skill Builder
5
Fasten it up! Understand different types of fasteners Show creativity through fabric choices and
use of embellishment
Repair it! Sew one item using buttons Sew one item using a zipper Sew one using hook and loop
tape
20 21 21 21
Skill Builder
6
Patterns! Use a commercial pattern Demonstrate your new sewing skills Compare the costs of sewing vs. buying a
garment
Field Trip Sewing P.J. Pants Compare it!
23 23 24
When you successfully complete your builders, you will showcase what you have learned.
Showcase &
Portfolio
Explain success in using the skills listed above
Showcase Challenge My Portfolio Page
26 28
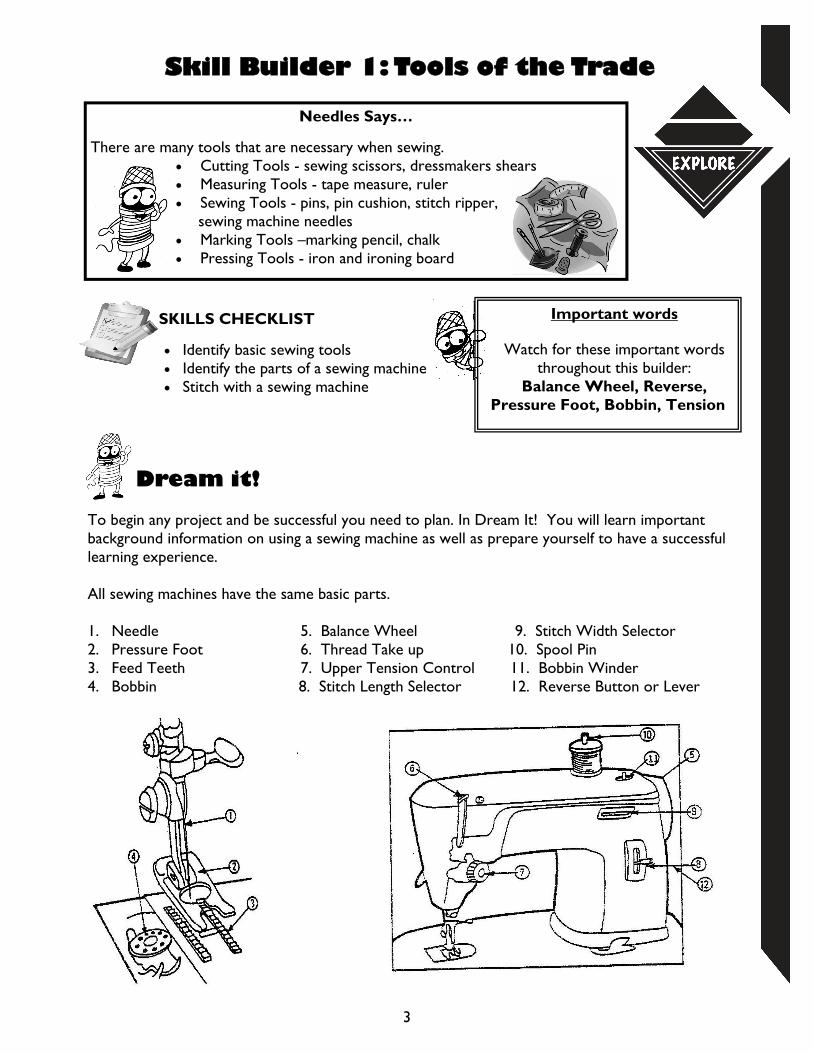
Skill Builder 1: Tools of the Trade
SKILLS CHECKLIST
Identify basic sewing tools Identify the parts of a sewing machine Stitch with a sewing machine
3
Dream it!
To begin any project and be successful you need to plan. In Dream It! You will learn important background information on using a sewing machine as well as prepare yourself to have a successful learning experience. All sewing machines have the same basic parts. 1. Needle 5. Balance Wheel 9. Stitch Width Selector 2. Pressure Foot 6. Thread Take up 10. Spool Pin 3. Feed Teeth 7. Upper Tension Control 11. Bobbin Winder 4. Bobbin 8. Stitch Length Selector 12. Reverse Button or Lever
Needles Says…
There are many tools that are necessary when sewing. Cutting Tools - sewing scissors, dressmakers shears Measuring Tools - tape measure, ruler Sewing Tools - pins, pin cushion, stitch ripper,
sewing machine needles Marking Tools –marking pencil, chalk Pressing Tools - iron and ironing board
Important words Watch for these important words
throughout this builder: Balance Wheel, Reverse,
Pressure Foot, Bobbin, Tension
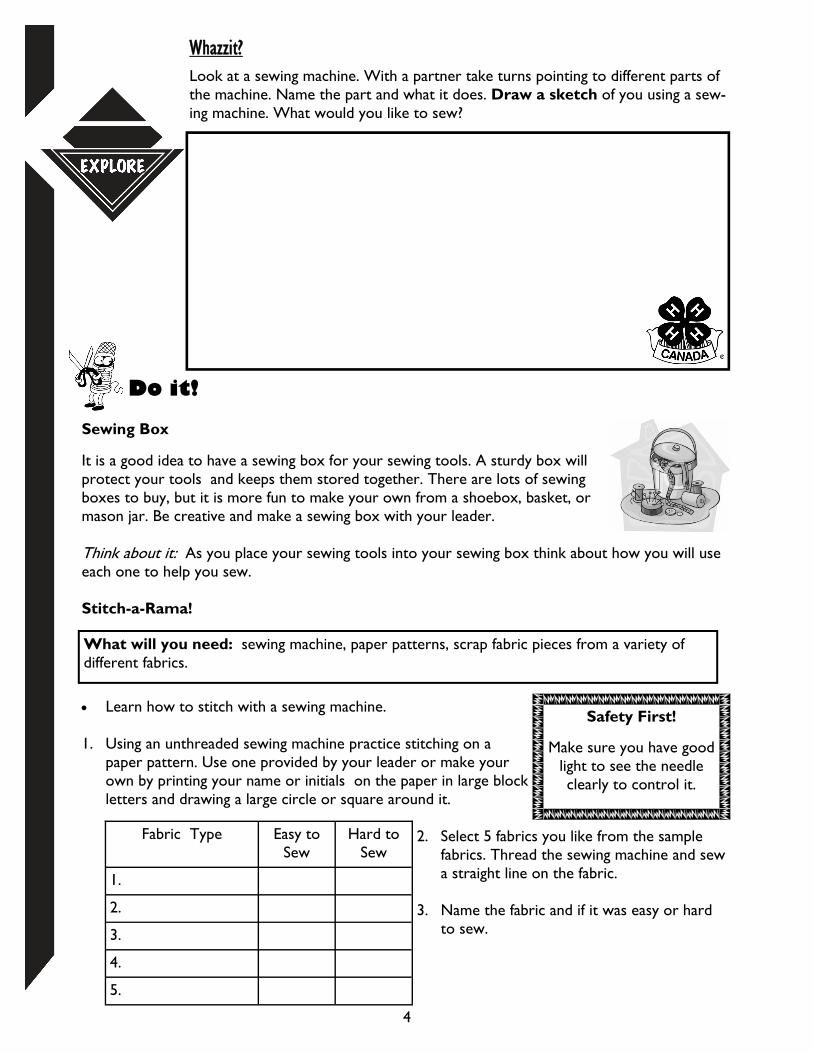
Do it!
Sewing Box
It is a good idea to have a sewing box for your sewing tools. A sturdy box will protect your tools and keeps them stored together. There are lots of sewing boxes to buy, but it is more fun to make your own from a shoebox, basket, or mason jar. Be creative and make a sewing box with your leader. Think about it: As you place your sewing tools into your sewing box think about how you will use each one to help you sew. Stitch-a-Rama!
Learn how to stitch with a sewing machine. 1. Using an unthreaded sewing machine practice stitching on a
paper pattern. Use one provided by your leader or make your own by printing your name or initials on the paper in large block letters and drawing a large circle or square around it.
2. Select 5 fabrics you like from the sample
fabrics. Thread the sewing machine and sew a straight line on the fabric.
3. Name the fabric and if it was easy or hard
to sew.
Safety First!
Make sure you have good light to see the needle clearly to control it.
4
Whazzit?
Look at a sewing machine. With a partner take turns pointing to different parts of the machine. Name the part and what it does. Draw a sketch of you using a sew-ing machine. What would you like to sew?
What will you need: sewing machine, paper patterns, scrap fabric pieces from a variety of different fabrics.
Fabric Type Easy to Sew
Hard to Sew
1.
2.
3.
4.
5.
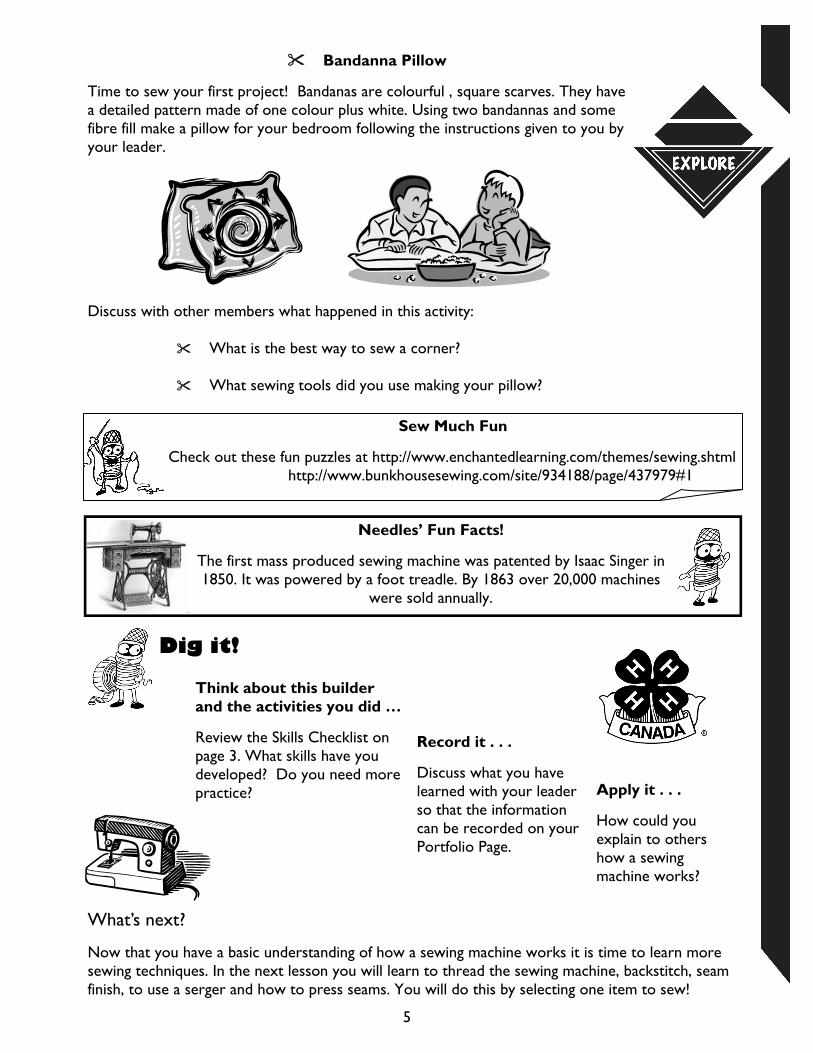
Bandanna Pillow
Time to sew your first project! Bandanas are colourful , square scarves. They have a detailed pattern made of one colour plus white. Using two bandannas and some fibre fill make a pillow for your bedroom following the instructions given to you by your leader.
5
What’s next?
Now that you have a basic understanding of how a sewing machine works it is time to learn more sewing techniques. In the next lesson you will learn to thread the sewing machine, backstitch, seam finish, to use a serger and how to press seams. You will do this by selecting one item to sew!
Think about this builder and the activities you did …
Review the Skills Checklist on page 3. What skills have you developed? Do you need more practice?
Record it . . .
Discuss what you have learned with your leader so that the information can be recorded on your Portfolio Page.
Apply it . . .
How could you explain to others how a sewing machine works?
Discuss with other members what happened in this activity: What is the best way to sew a corner? What sewing tools did you use making your pillow?
Sew Much Fun
Check out these fun puzzles at http://www.enchantedlearning.com/themes/sewing.shtml http://www.bunkhousesewing.com/site/934188/page/437979#1
Needles’ Fun Facts!
The first mass produced sewing machine was patented by Isaac Singer in 1850. It was powered by a foot treadle. By 1863 over 20,000 machines
were sold annually.
Dig it!
6
SKILLS CHECKLIST
Thread a machine, backstitch, seam finish and press seams
Optional: Identify a serger and how it works
Practice sewing
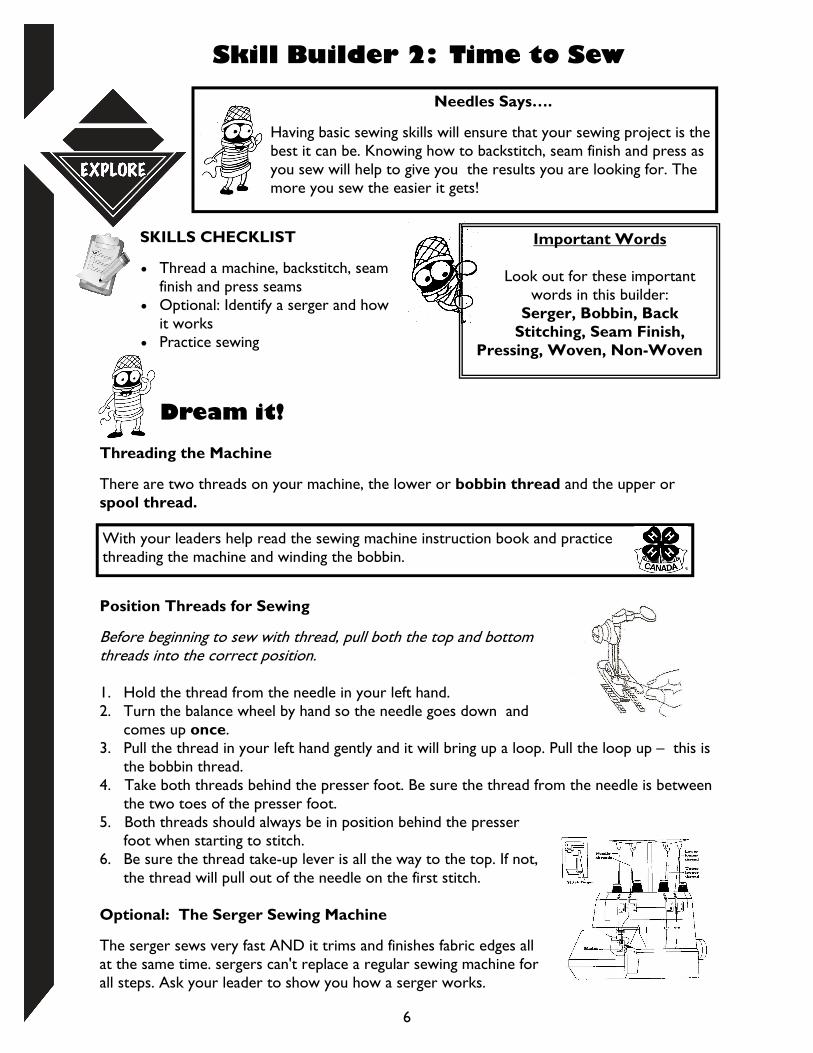
Skill Builder 2: Time to Sew
Dream it!
Threading the Machine
There are two threads on your machine, the lower or bobbin thread and the upper or spool thread.
Position Threads for Sewing
Before beginning to sew with thread, pull both the top and bottom threads into the correct position. 1. Hold the thread from the needle in your left hand. 2. Turn the balance wheel by hand so the needle goes down and
comes up once. 3. Pull the thread in your left hand gently and it will bring up a loop. Pull the loop up – this is
the bobbin thread. 4. Take both threads behind the presser foot. Be sure the thread from the needle is between the two toes of the presser foot. 5. Both threads should always be in position behind the presser
foot when starting to stitch. 6. Be sure the thread take-up lever is all the way to the top. If not,
the thread will pull out of the needle on the first stitch. Optional: The Serger Sewing Machine
The serger sews very fast AND it trims and finishes fabric edges all at the same time. sergers can't replace a regular sewing machine for all steps. Ask your leader to show you how a serger works.
Needles Says….
Having basic sewing skills will ensure that your sewing project is the best it can be. Knowing how to backstitch, seam finish and press as you sew will help to give you the results you are looking for. The more you sew the easier it gets!
With your leaders help read the sewing machine instruction book and practice threading the machine and winding the bobbin.
Important Words
Look out for these important words in this builder:
Serger, Bobbin, Back Stitching, Seam Finish,
Pressing, Woven, Non-Woven
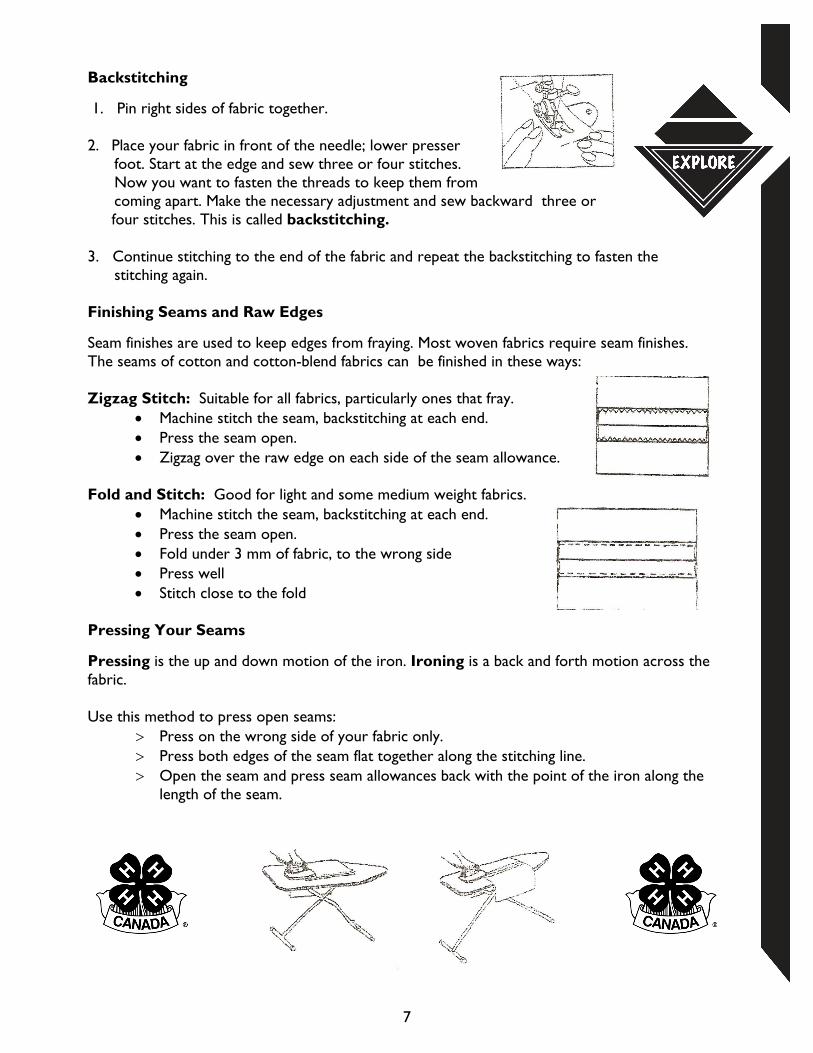
Backstitching
1. Pin right sides of fabric together. 2. Place your fabric in front of the needle; lower presser foot. Start at the edge and sew three or four stitches. Now you want to fasten the threads to keep them from coming apart. Make the necessary adjustment and sew backward three or
four stitches. This is called backstitching. 3. Continue stitching to the end of the fabric and repeat the backstitching to fasten the stitching again. Finishing Seams and Raw Edges
Seam finishes are used to keep edges from fraying. Most woven fabrics require seam finishes. The seams of cotton and cotton-blend fabrics can be finished in these ways: Zigzag Stitch: Suitable for all fabrics, particularly ones that fray.
Machine stitch the seam, backstitching at each end. Press the seam open. Zigzag over the raw edge on each side of the seam allowance.
Fold and Stitch: Good for light and some medium weight fabrics.
Machine stitch the seam, backstitching at each end. Press the seam open. Fold under 3 mm of fabric, to the wrong side Press well Stitch close to the fold
Pressing Your Seams
Pressing is the up and down motion of the iron. Ironing is a back and forth motion across the fabric. Use this method to press open seams:
Press on the wrong side of your fabric only. Press both edges of the seam flat together along the stitching line. Open the seam and press seam allowances back with the point of the iron along the
length of the seam.
7
8
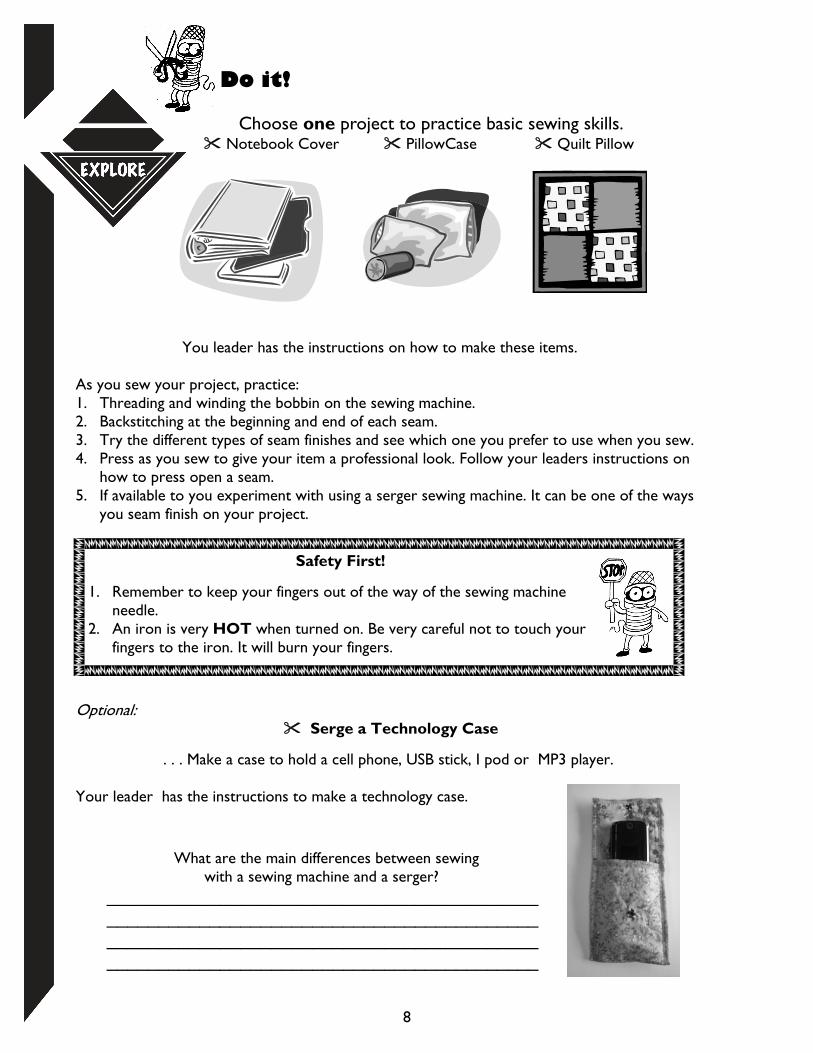
Do it!
Choose one project to practice basic sewing skills. Notebook Cover PillowCase Quilt Pillow
You leader has the instructions on how to make these items. As you sew your project, practice: 1. Threading and winding the bobbin on the sewing machine. 2. Backstitching at the beginning and end of each seam. 3. Try the different types of seam finishes and see which one you prefer to use when you sew. 4. Press as you sew to give your item a professional look. Follow your leaders instructions on
how to press open a seam. 5. If available to you experiment with using a serger sewing machine. It can be one of the ways
you seam finish on your project.
Optional: Serge a Technology Case
. . . Make a case to hold a cell phone, USB stick, I pod or MP3 player. Your leader has the instructions to make a technology case. What are the main differences between sewing with a sewing machine and a serger? __________________________________________ __________________________________________ __________________________________________ __________________________________________
Safety First!
1. Remember to keep your fingers out of the way of the sewing machine needle.
2. An iron is very HOT when turned on. Be very careful not to touch your fingers to the iron. It will burn your fingers.
9
What’s next?
You have learned some basic sewing skills needed to sew any item. Next builder, you will identify different fibres and fabrics and use this knowledge to sew one project using woven and non-woven fabric and one item teaching you to sew a casing. With your leader, discuss which items you will sew at the next meeting. Make a list of supplies to bring to the next meeting .
Think about the builder and the activities you did...
Review the Skills Checklist on page 6. What skills have you developed? Do you need more practice?
Dig It!
How Did it Go? - Answer these questions:
Why is it important to learn the parts of a sewing machine and what they do? Why is it important to press as you sew? How could the skills you learned today help you in the future? Draw a picture of the item you made. If you would make any changes to your item include those ideas in your drawing.
Sew Much Fun
Check out this online sewing manual: http://www.craftandfabriclinks.com/sewingbook/sewbook.htm
Needles’ Fun Facts!
The Costume Museum of Canada is located at 109 Pacific Avenue in Winnipeg, Manitoba. It is home to a collection of 35,000 artifacts spanning 400 years. The collection represents the identity of everyday Canadians,
rural and urban, private and public, through the garments they made, purchased and wore. http://www.costumemuseum.com/collection.html

10
SKILLS CHECKLIST
Identify different fibres and fabrics Know the difference between
woven and non-woven fabrics Understand fabric terms Sew a casing
Skill Builder 3: Fabrics, Fabrics, Fabrics
Important Words
Look out for these important words in this builder: Woven,
Non-Woven, Straight Grain, On-Grain, Natural Fibre,
Synthetic Fibre, Salvage, Casing
Dream it! There are two types of fibres: natural and synthetic (man made).
Many natural fibres come from agriculture: Linen (from Flax), Wool (from animals), Silk (from silk worms), Cotton, Hemp, Bamboo (all from plants). Synthetic fibres are man-made. They include polyester, acetate, acrylic, nylon, spandex, viscose rayon, etc. Blends of natural and synthetic fibres are common and give the best features of both to a fabric. Woven fabrics are made of yarns that weave over and under each other. They do not stretch, but will shrink in the wash. Be sure to wash your fabrics before using them: this is called preshrinking. Denim is an example of a woven fabric.
Non-wovens are fabrics that are made of a mat of fibres. They don't stretch at all, and are useful for special projects. Felt is a non-woven.
Needles Says…
The many different types of fibres and fabrics is what makes sewing so much fun! They make your clothing truly your own design. Agriculture has an important role to play in the making of natural fabrics. Scientists have even invented materials to make man-made fabrics. How cool is that!
Fibre Content Natural Man-made
Fibre Content Natural Man-made
Place a sample of a woven and a non-woven fabric over the above diagrams in your book. What is the fibre content and check if it is it a
natural or man-made fibre.

Woven Fabric Terms
A selvage (or selvedge) is the smooth tightly woven edge of the fabric along the length wise edge. This edge never frays.
The straight grain is a term often used in sewing. It means "with the threads", or following the length wise or crosswise thread. On grain means that the crosswise threads are at right angles or square with the length wise threads. You want your fabric to be on grain. Off grain fabric has crosswise threads that slant instead of being at right angles to the length wise threads. If your fabric is off grain, you will need to straighten it.
Straightening Fabric
Look at the ends of the piece of fabric. If the fabric was torn from the bolt, the torn end is even with the crosswise thread. If it was cut from the bolt, then straighten the fabric by cutting along a thread across the width of the material. Now look at the fabric carefully to see if it needs to have the grain line straightened.
If it is grain perfect, it will fit along the right angle edges of a table. If not, try straightening it this way: for fabric that is just a little off-grain, pull one short corner of the fabric and let someone else pull the other short corner. Pull until it is even with the sides of the table. You are actually pulling those crooked threads straight.
Some fabrics, like polyester / cotton blends seem to be in a permanent position. If you try to pull these fabrics straight, they go right back to their off-grain shape. They cannot be straightened. If you must use the fabric, be sure the lengthwise grain is straight.
Look at a length of woven fabric. Is it on the straight of grain? Practice straightening it.
11
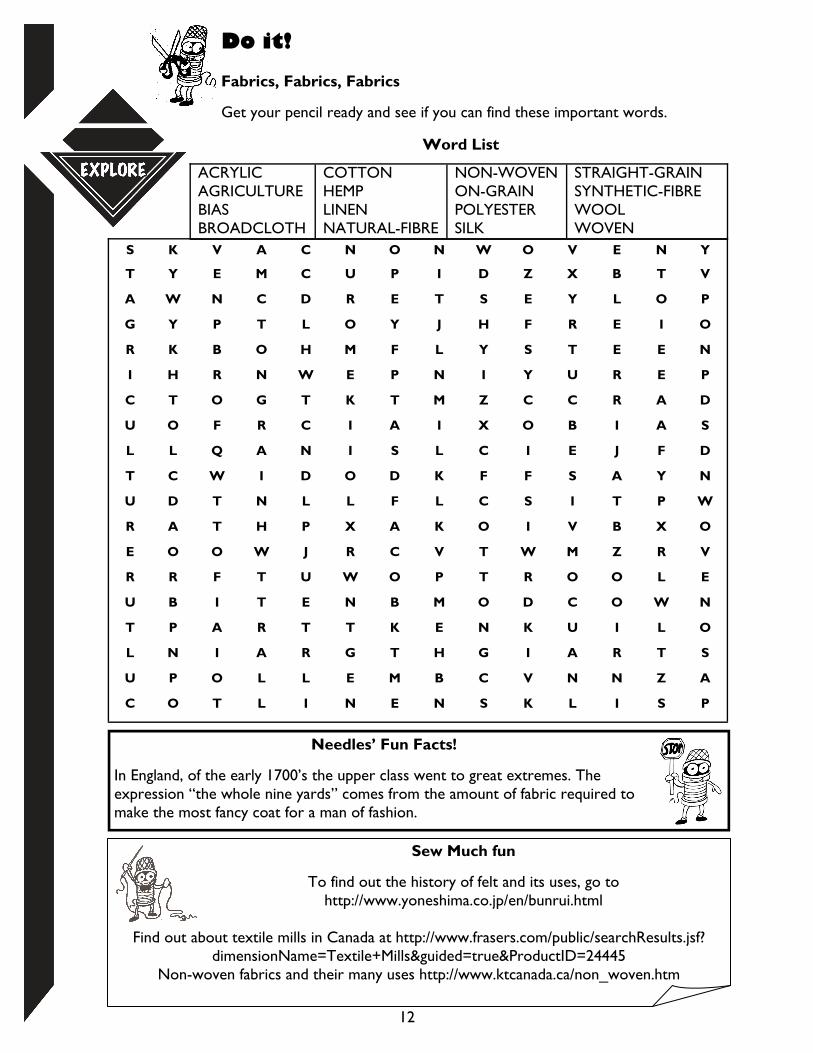
Do it! Fabrics, Fabrics, Fabrics
Get your pencil ready and see if you can find these important words.
Word List
12
K V A C N O
Y E M C U P
S
T
N W O V E N Y
I D Z X B T V
A W N C D R E T S E Y L O P
G Y P T L O Y J H F R E I O
R K B O H M F L Y S T E E N
I H R N W E P N I Y U R E P
C T O G T K T M Z C C R A D
U O F R C I A I X O B I A S
L L Q A N I S L C I E J F D
T C W I D O D K F F S A Y N
U D T N L L F L C S I T P W
R A T H P X A K O I V B X O
E O O W J R C V T W M Z R V
R R F T U W O P T R O O L E
U B I T E N B M O D C O W N
T P A R T T K E N K U I L O
L N I A R G T H G I A R T S
U P O L L E M B C V N N Z A
C O T L I N E N S K L I S P
ACRYLIC AGRICULTURE BIAS BROADCLOTH
COTTON HEMP LINEN NATURAL-FIBRE
NON-WOVEN ON-GRAIN POLYESTER SILK
STRAIGHT-GRAIN SYNTHETIC-FIBRE WOOL WOVEN
Needles’ Fun Facts!
In England, of the early 1700’s the upper class went to great extremes. The expression “the whole nine yards” comes from the amount of fabric required to make the most fancy coat for a man of fashion.
Sew Much fun
To find out the history of felt and its uses, go to http://www.yoneshima.co.jp/en/bunrui.html
Find out about textile mills in Canada at http://www.frasers.com/public/searchResults.jsf?
dimensionName=Textile+Mills&guided=true&ProductID=24445 Non-woven fabrics and their many uses http://www.ktcanada.ca/non_woven.htm
What’s next?
Fabrics are everywhere. They have practical and decorative purposes. You have learned about woven and non-woven fibres and fabrics. The next builder looks at knit fabrics. You will sew one project from t-shirt knit and one from polar fleece. Where do you see knits around your home? Decide with your leader which items you will sew and make a list of supplies to bring to the next meeting.
13
Dig It!
Think about this builder and the activities you did …
Review the Skills Checklist on page 10. What skills have you developed? Do you need more practice?
Record it . . .
Discuss what you have learned with your leader so that the information can be recorded on your Portfolio Page.
Apply it . . .
How could you explain to others how a sewing machine works?
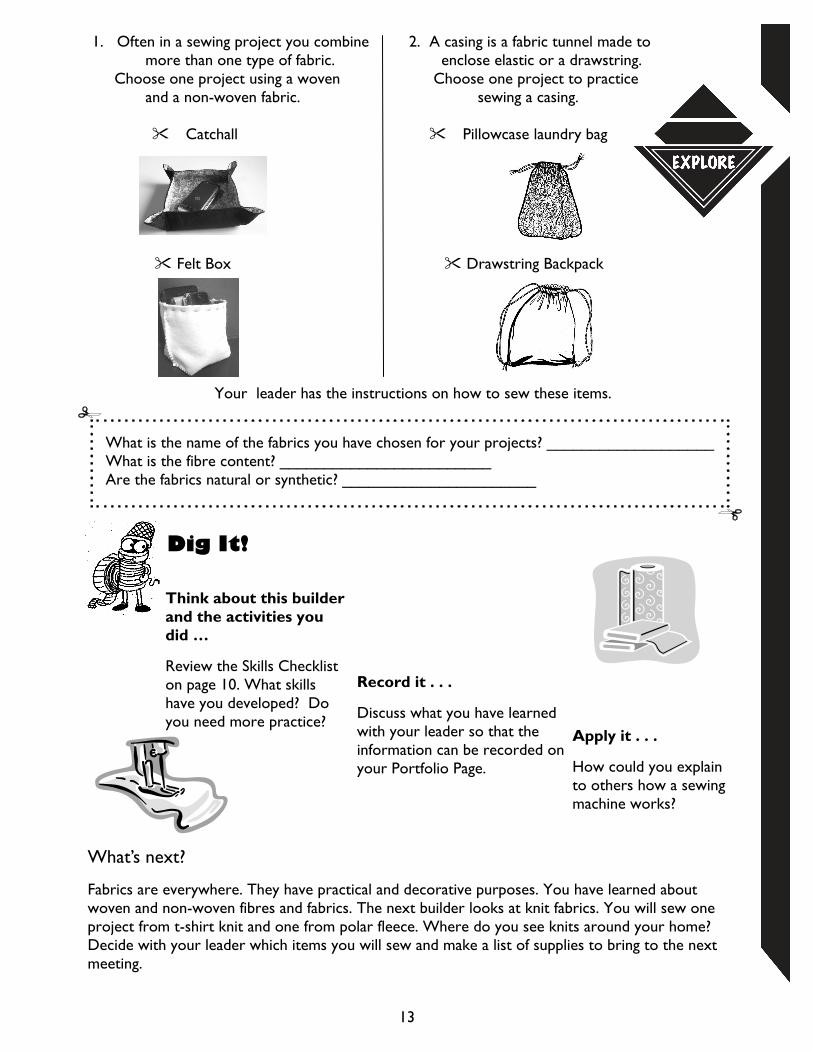
1. Often in a sewing project you combine 2. A casing is a fabric tunnel made to more than one type of fabric. enclose elastic or a drawstring. Choose one project using a woven Choose one project to practice and a non-woven fabric. sewing a casing. Catchall Pillowcase laundry bag Felt Box Drawstring Backpack
Your leader has the instructions on how to sew these items.
What is the name of the fabrics you have chosen for your projects? ___________________ What is the fibre content? ________________________ Are the fabrics natural or synthetic? ______________________

14
SKILLS CHECKLIST
Discover how knit fabrics are made Identify career opportunities and community service ideas Sew with knit fabrics
Skill Builder 4: Knit Knowledge
Important Words
Look out for these important words in this builder:
Single Knit, Double Knit, Rib Knit, Ball Point Needle
Dream it! Types of Knit Fabrics
Single knit fabrics have smooth, flat surfaces with definite right and wrong sides. Single knits appear to be knitted on the right side and purled on the underside. In other words, the right side has vertical ribs and the wrong side forms cross-wise rows. Single knits can be unravelled in the crosswise direction and the edges will roll when stretched. They may run in the lengthwise direction. Napped knits, such as terry or fleece, are examples of specialized single knits.
Fibre Content: ____________________________________________________________ Natural FibresMan-Made Fibres
Fibre Content: ____________________________________________________________ Natural FibresMan-Made Fibres
Needles Says….
Knits are versatile and quite easy and quick to sew. They are more comfortable to wear than woven fabrics because they have built in stretch. Stretching the fabric as you sew is fun and easy to do. Knits allow you to “stretch” your imagination when planning a sewing project!
Rib knits have great elasticity because they are knitted like ribbed cuffs on socks or mitts. The construction is knit one purl one. Rib knits have prominent vertical ribs on both sides and are used around the necks of T-shirts and on sweater cuffs.
Fibre Content: ____________________________________________________________ Natural FibresMan-Made Fibres
Career Scavenger Hunt
There are many career opportunities for young people with a knowledge of textiles and strong sewing skills.
1. By asking others, researching on the internet, or reading a book or magazine, search for a job that uses sewing and clothing skills and knowledge. Answer the questions:
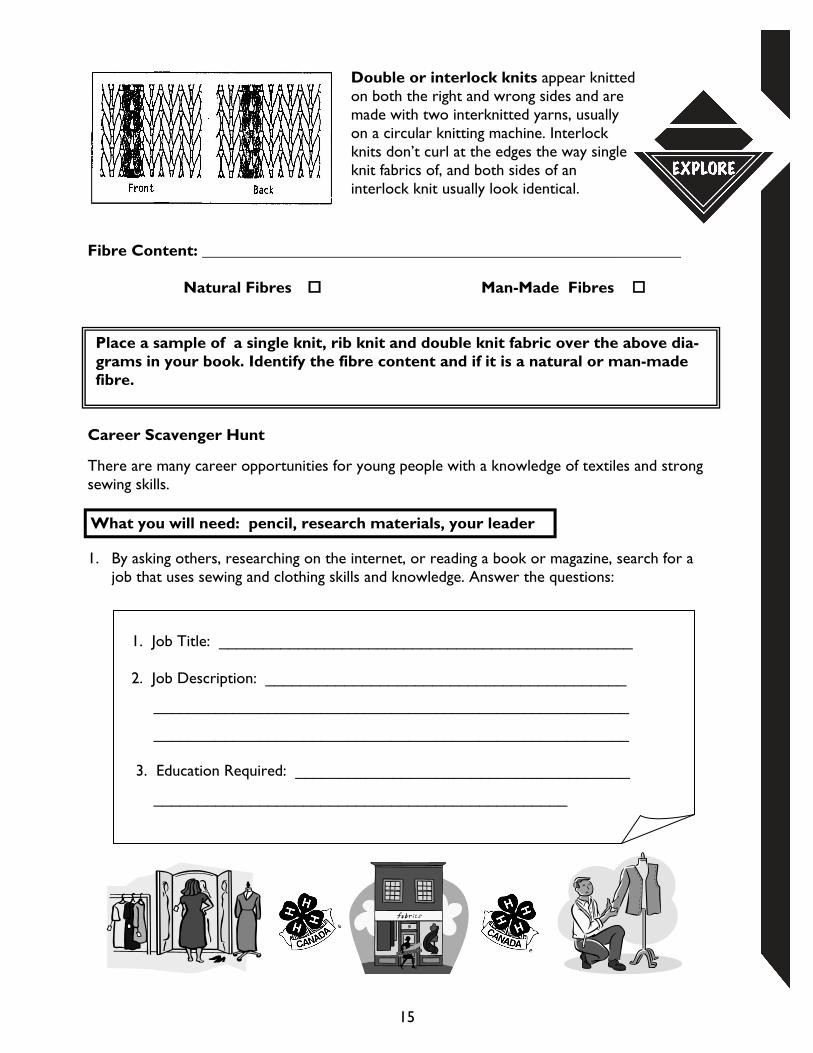
Double or interlock knits appear knitted on both the right and wrong sides and are made with two interknitted yarns, usually on a circular knitting machine. Interlock knits don’t curl at the edges the way single knit fabrics of, and both sides of an interlock knit usually look identical.
Place a sample of a single knit, rib knit and double knit fabric over the above dia-grams in your book. Identify the fibre content and if it is a natural or man-made fibre.
What you will need: pencil, research materials, your leader
1. Job Title: _______________________________________________ 2. Job Description: _________________________________________
______________________________________________________
______________________________________________________ 3. Education Required: ______________________________________
_______________________________________________
15
16
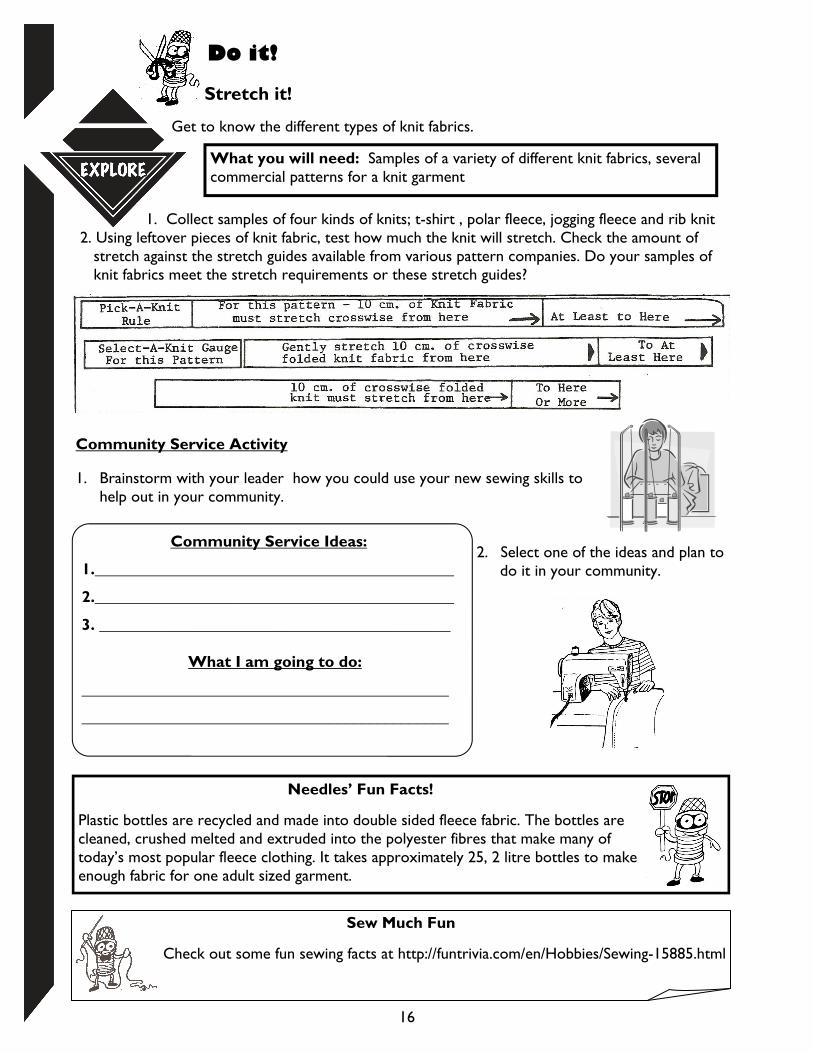
Do it!
Stretch it!
Get to know the different types of knit fabrics. 1. Collect samples of four kinds of knits; t-shirt , polar fleece, jogging fleece and rib knit 2. Using leftover pieces of knit fabric, test how much the knit will stretch. Check the amount of
stretch against the stretch guides available from various pattern companies. Do your samples of knit fabrics meet the stretch requirements or these stretch guides?
Community Service Activity 1. Brainstorm with your leader how you could use your new sewing skills to
help out in your community.
2. Select one of the ideas and plan to
do it in your community.
What you will need: Samples of a variety of different knit fabrics, several commercial patterns for a knit garment
Community Service Ideas:
1._____________________________________________
2._____________________________________________
3. ____________________________________________ What I am going to do:
______________________________________________
______________________________________________
Needles’ Fun Facts!
Plastic bottles are recycled and made into double sided fleece fabric. The bottles are cleaned, crushed melted and extruded into the polyester fibres that make many of today’s most popular fleece clothing. It takes approximately 25, 2 litre bottles to make enough fabric for one adult sized garment.
Sew Much Fun
Check out some fun sewing facts at http://funtrivia.com/en/Hobbies/Sewing-15885.html
17
What’s next?
You have learned about different types of fabrics and where it is best to use them. Now it’s time to focus on fastenings. You will sew a button, put in a zipper and sew hook and loop tape (Velcro). Fastenings are a very important part of learning to sew. Be creative with them when sewing your next items! With your leader talk about the supplies needed for the next meeting. Make a list so you know what to bring to your next meeting.
Dig It!
How Did it Go?
Which was easier to sew, the t-shirt knit or the double knit fleece and how did they compare to sewing with woven fabrics? What type of garments would knits work best for? What type of careers are available for people who have sewing skills? Would you do anything different if you were to make these items again?
Time to Sew!
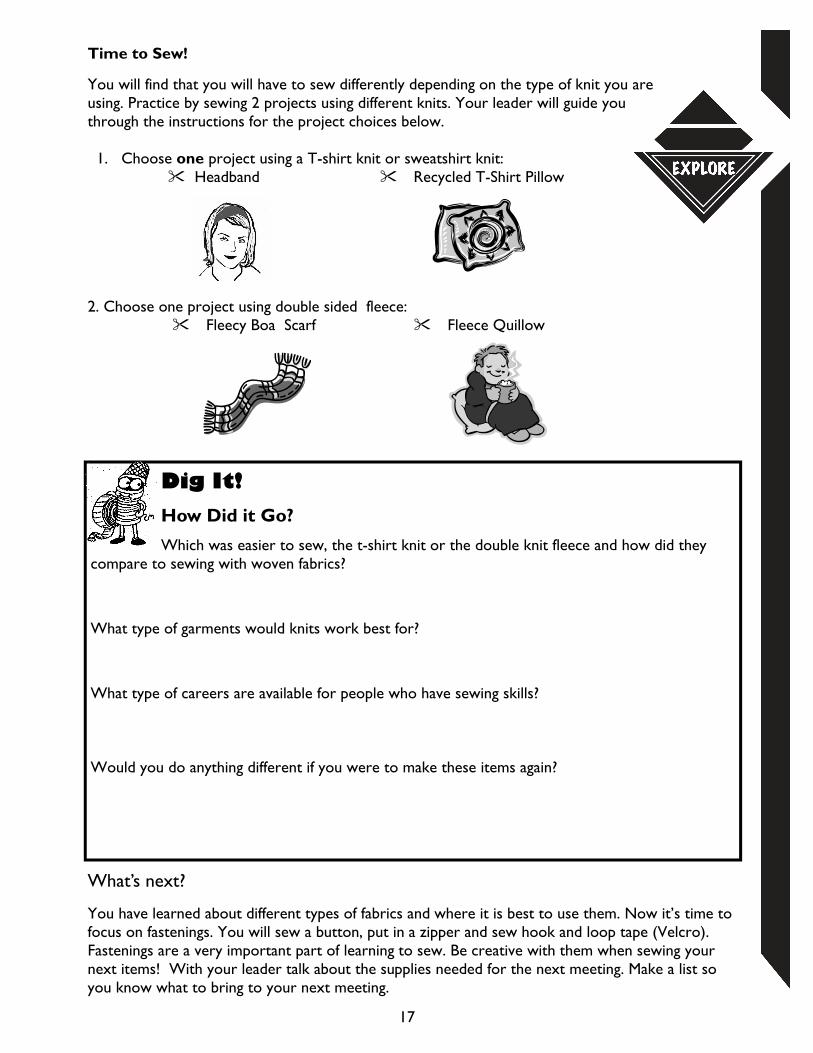
You will find that you will have to sew differently depending on the type of knit you are using. Practice by sewing 2 projects using different knits. Your leader will guide you through the instructions for the project choices below. 1. Choose one project using a T-shirt knit or sweatshirt knit: Headband Recycled T-Shirt Pillow 2. Choose one project using double sided fleece: Fleecy Boa Scarf Fleece Quillow
18
SKILLS CHECKLIST
Understand the different types of fasteners
Show creativity through fabric choices and use of embellishment
Skill Builder 5: Fasten It Up
Important Words
Look out for these important words in this builder:
Fastening, Shank, Zipper Foot
Dream it!
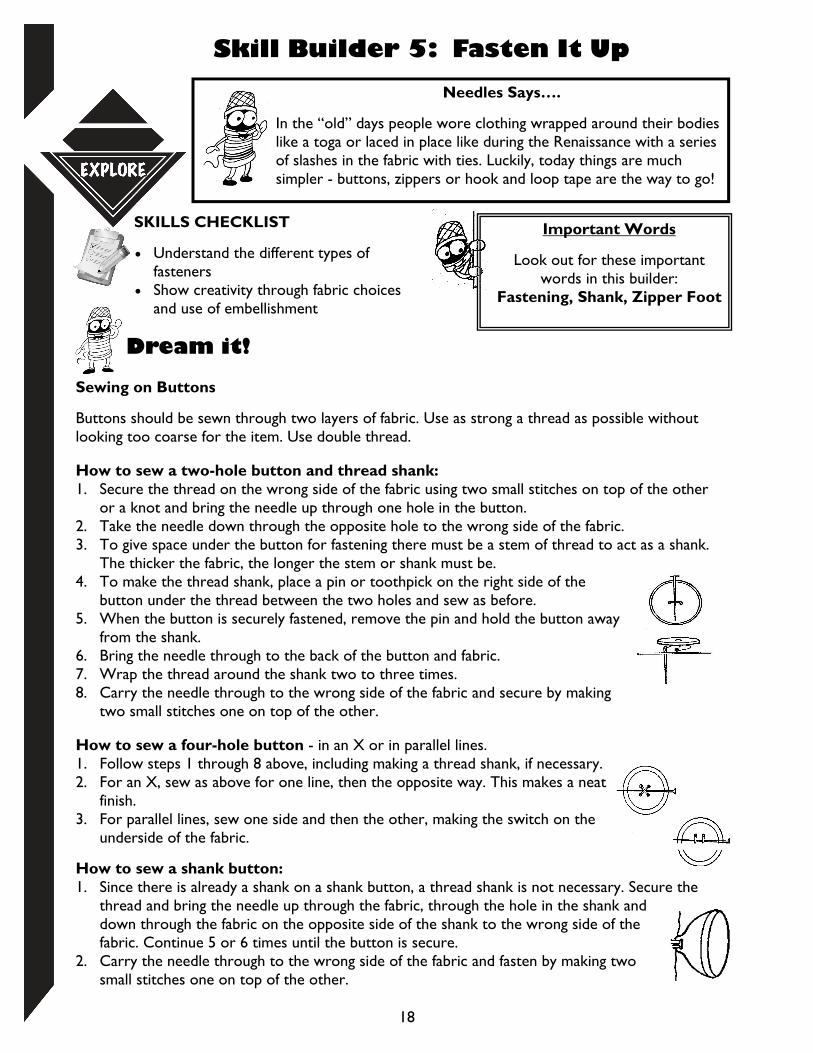
Sewing on Buttons
Buttons should be sewn through two layers of fabric. Use as strong a thread as possible without looking too coarse for the item. Use double thread.
How to sew a two-hole button and thread shank: 1. Secure the thread on the wrong side of the fabric using two small stitches on top of the other
or a knot and bring the needle up through one hole in the button. 2. Take the needle down through the opposite hole to the wrong side of the fabric. 3. To give space under the button for fastening there must be a stem of thread to act as a shank.
The thicker the fabric, the longer the stem or shank must be. 4. To make the thread shank, place a pin or toothpick on the right side of the
button under the thread between the two holes and sew as before. 5. When the button is securely fastened, remove the pin and hold the button away
from the shank. 6. Bring the needle through to the back of the button and fabric. 7. Wrap the thread around the shank two to three times. 8. Carry the needle through to the wrong side of the fabric and secure by making
two small stitches one on top of the other.
How to sew a four-hole button - in an X or in parallel lines. 1. Follow steps 1 through 8 above, including making a thread shank, if necessary. 2. For an X, sew as above for one line, then the opposite way. This makes a neat
finish. 3. For parallel lines, sew one side and then the other, making the switch on the
underside of the fabric.
How to sew a shank button: 1. Since there is already a shank on a shank button, a thread shank is not necessary. Secure the
thread and bring the needle up through the fabric, through the hole in the shank and down through the fabric on the opposite side of the shank to the wrong side of the fabric. Continue 5 or 6 times until the button is secure.
2. Carry the needle through to the wrong side of the fabric and fasten by making two small stitches one on top of the other.
Needles Says….
In the “old” days people wore clothing wrapped around their bodies like a toga or laced in place like during the Renaissance with a series of slashes in the fabric with ties. Luckily, today things are much simpler - buttons, zippers or hook and loop tape are the way to go!
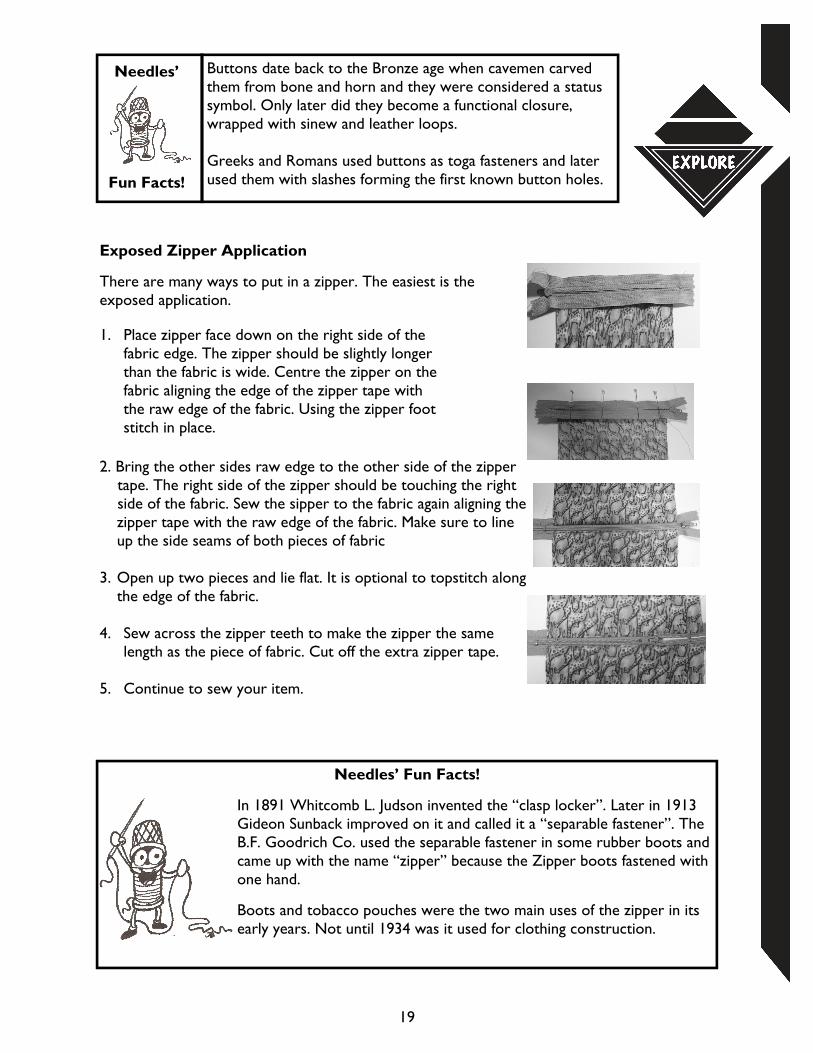
Exposed Zipper Application
There are many ways to put in a zipper. The easiest is the exposed application.
2. Bring the other sides raw edge to the other side of the zipper tape. The right side of the zipper should be touching the right side of the fabric. Sew the sipper to the fabric again aligning the
zipper tape with the raw edge of the fabric. Make sure to line up the side seams of both pieces of fabric
3. Open up two pieces and lie flat. It is optional to topstitch along
the edge of the fabric. 4. Sew across the zipper teeth to make the zipper the same
length as the piece of fabric. Cut off the extra zipper tape. 5. Continue to sew your item.
1. Place zipper face down on the right side of the fabric edge. The zipper should be slightly longer than the fabric is wide. Centre the zipper on the fabric aligning the edge of the zipper tape with the raw edge of the fabric. Using the zipper foot stitch in place.
Needles’ Fun Facts!
In 1891 Whitcomb L. Judson invented the “clasp locker”. Later in 1913 Gideon Sunback improved on it and called it a “separable fastener”. The B.F. Goodrich Co. used the separable fastener in some rubber boots and came up with the name “zipper” because the Zipper boots fastened with one hand.
Boots and tobacco pouches were the two main uses of the zipper in its early years. Not until 1934 was it used for clothing construction.
19
Needles’
Fun Facts!
Buttons date back to the Bronze age when cavemen carved them from bone and horn and they were considered a status symbol. Only later did they become a functional closure, wrapped with sinew and leather loops. Greeks and Romans used buttons as toga fasteners and later used them with slashes forming the first known button holes.
Hook and Loop Tape
Hook and loop tape is a versatile fastener. It is an easy substitute for buttons or snaps. It is composed of two tape strips, one with looped surface (fuzzy) and the other with a hooked surface ( rough). When pressed together the surfaces grip and remain locked until they are pulled apart. When the two sides are pressed together, the hooks catch in the loops and hold the pieces together. When the layers are separated, the strips make a characteristic "ripping" sound.
Hook and loop tape comes in sew-on strips as well as pre-cut disks in a variety of colours. Purchase according to use. To apply follow these instructions. Place each part at least 6 mm from the garment edge. The loop part goes on the over lap ( top) the hook on the under lap (bottom). To attach by machine stitch edge stitch the squares and strips, stitch dots with a triangle.
20
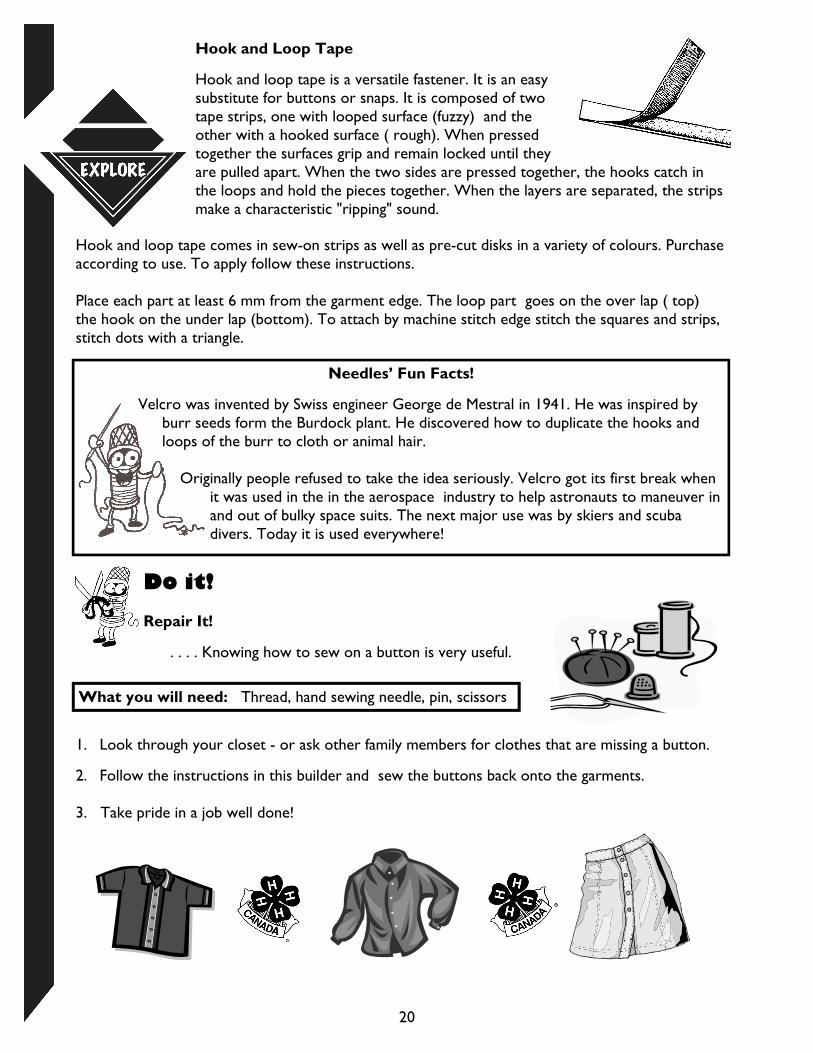
Do it! Repair It!
. . . . Knowing how to sew on a button is very useful.
1. Look through your closet - or ask other family members for clothes that are missing a button.
2. Follow the instructions in this builder and sew the buttons back onto the garments. 3. Take pride in a job well done!
What you will need: Thread, hand sewing needle, pin, scissors
Needles’ Fun Facts!
Velcro was invented by Swiss engineer George de Mestral in 1941. He was inspired by burr seeds form the Burdock plant. He discovered how to duplicate the hooks and loops of the burr to cloth or animal hair.
Originally people refused to take the idea seriously. Velcro got its first break when
it was used in the in the aerospace industry to help astronauts to maneuver in and out of bulky space suits. The next major use was by skiers and scuba divers. Today it is used everywhere!
21
What’s next?
So far you have learned about fibres and fabrics, how to use the sewing machine and basic sewing techniques. You are now ready to sew your first clothing item! Using a commercial pattern you will sew pyjama pants. Think about what the pyjama pants will look like; the type of fabric, pattern, sewing techniques you will use. Make a list of supplies to bring to the next meeting.
Dig It!
Sew Much Fun
Watch a video on how zippers are made at http://www.youtube.com/watch?v=mxX2qoAGZO4
Watch a video on how buttons are made at http://www.youtube.com/watch?v=fpaUkpMu5yY&feature=related
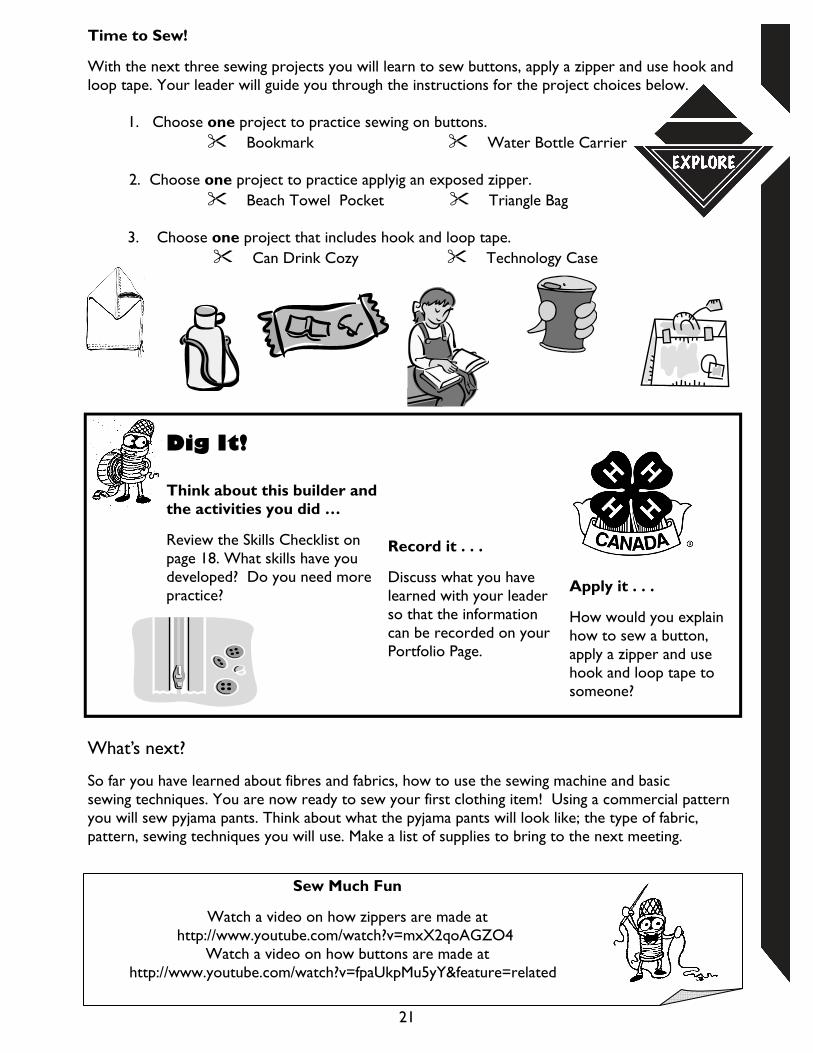
Time to Sew!
With the next three sewing projects you will learn to sew buttons, apply a zipper and use hook and loop tape. Your leader will guide you through the instructions for the project choices below. 1. Choose one project to practice sewing on buttons. Bookmark Water Bottle Carrier 2. Choose one project to practice applyig an exposed zipper. Beach Towel Pocket Triangle Bag 3. Choose one project that includes hook and loop tape.
Can Drink Cozy Technology Case
Think about this builder and the activities you did …
Review the Skills Checklist on page 18. What skills have you developed? Do you need more practice?
Record it . . .
Discuss what you have learned with your leader so that the information can be recorded on your Portfolio Page.
Apply it . . .
How would you explain how to sew a button, apply a zipper and use hook and loop tape to someone?
22
SKILLS CHECKLIST
Use a commercial pattern Demonstrate your new sewing skills Compare the costs of sewing vs.
buying a garment
Skill Builder 6: Patterns
Important Words
Look out for these important words in this builder:
Notions, Layout, Grain Line, Markings, All Sizes
Dream it! What's my size?
Once your pattern design is decided, you'll need to know your size and figure type before a pattern is purchased. For P.J. pants select a pattern size according to the waist and hip measurements. Take your body measurements and fill in the chart below. Take this page when you go shopping.
Needles Says….
Now the fun begins! It is time to put your new sewing skills to work. Everyone likes to relax in cozy pyjama (P.J. ) pants. So get creative and select a pattern you like, some cool fabric and start sewing!
My Body Measurements
Measurements taken: Body point: Where to measure Your measurement Chest Around the fullest part of the chest __________ cm Waist Use string or elastic to locate smallest midriff dimension __________ cm Hips At fullest point of the hips usually 18 cm below waistline for girls or 15 cm below waist- line for boys __________ cm Back waist length From the prominent bone at the base of the back neck to the waistline. __________ cm Height Stand straight, without shoes, against a wall. __________ cm Check the back of the pattern envelope and record:
Size for tops: Size for bottoms: Figure type:
23
What you will need: Tape measure, My Body Measurements chart, money to purchase supplies
What you will need: commercial P. J. pant pattern, fabric, thread, elastic, sewing machine, iron
Do it! Field Trip
1. Take your body measurements chart with you to the store so you can select the
correct size of P.J. pants pattern. 2. Select a fabric and notions required based on the recommendations on the back
of the pattern envelope. 3. Listen to your leader explain what to look for on the outside of the pattern envelope. 4. Keep the receipt for the Garment Cost Sheet activity. 5. While in the store look at the variety of fabrics and identify what they are made of, their
weave and how to care for them. 6. Ask a sales clerk to talk with you about the pros and cons of sewing vs. buying garments.
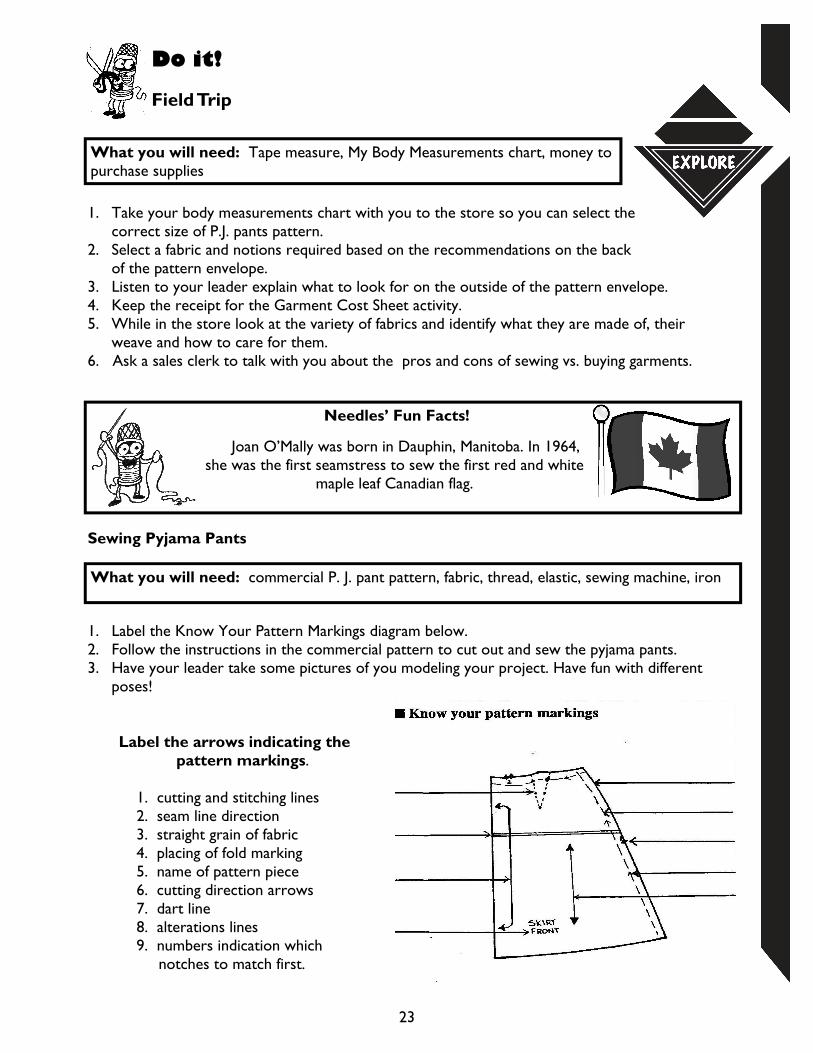
Sewing Pyjama Pants 1. Label the Know Your Pattern Markings diagram below. 2. Follow the instructions in the commercial pattern to cut out and sew the pyjama pants. 3. Have your leader take some pictures of you modeling your project. Have fun with different
poses! Label the arrows indicating the pattern markings. 1. cutting and stitching lines 2. seam line direction 3. straight grain of fabric 4. placing of fold marking 5. name of pattern piece 6. cutting direction arrows 7. dart line 8. alterations lines 9. numbers indication which notches to match first.
Needles’ Fun Facts!
Joan O’Mally was born in Dauphin, Manitoba. In 1964, she was the first seamstress to sew the first red and white
maple leaf Canadian flag.

Garment Cost Sheet Garment Constructed: ___________________________________________ ITEM COST Pattern (company and number) _____________________ _______________ Fabric(s) - (type and amount) _____________________________________________ _______________ _____________________________________________ _______________ Notions—thread, elastic, button etc _____________________________________________ _______________ _____________________________________________ _______________ Other _____________________________________________ _______________ _____________________________________________ _______________ TOTAL COST OF SEWING GARMENT _________________ Cost of Similar Commercially Made Pyjama Pants Store Cost 1. ______________________________________________________________ 2. ______________________________________________________________ 3. ______________________________________________________________ Sewing vs. Buying Pros: ____________________________________________________________ _________________________________________________________________ __________________________________________________________________ Cons:____________________________________________________________ __________________________________________________________________ __________________________________________________________________
Compare It
1. Fill in the Garment Cost Sheet using the receipts from purchasing the supplies for your pyjama pants
2. List the cost of 3 different purchased pyjama pants of similar quality.
3. With your leaders, discuss the pros and cons of sewing vs. buying Pyjama pants. Record below.
What you will need: Garment Cost Sheet, pencil, receipts from your pyjama supplies purchase, prices of pyjama pants (store flyer, catalogue, trip to a store)
24
25
Picture this…(Insert a photo of yourself modeling your pyjama pants.) In this picture I want you to notice: ___________________________________
______________________________________________________________
______________________________________________________________
What’s next?
Next it’s time to think about and plan for the Showcase Challenge. How will you share your new skills? My Portfolio Page is where you can make sure your Exploring Fibre and Fabrics Project Skills Chart is complete.
Dig it! Share your experiences with friends and family
I want to tell you about the field trip: _________________________________
_____________________________________________________________ I want to explain three things to remember when cutting out a pattern: _____________
________________________________________________________________________
________________________________________________________________________
Members Notes
26
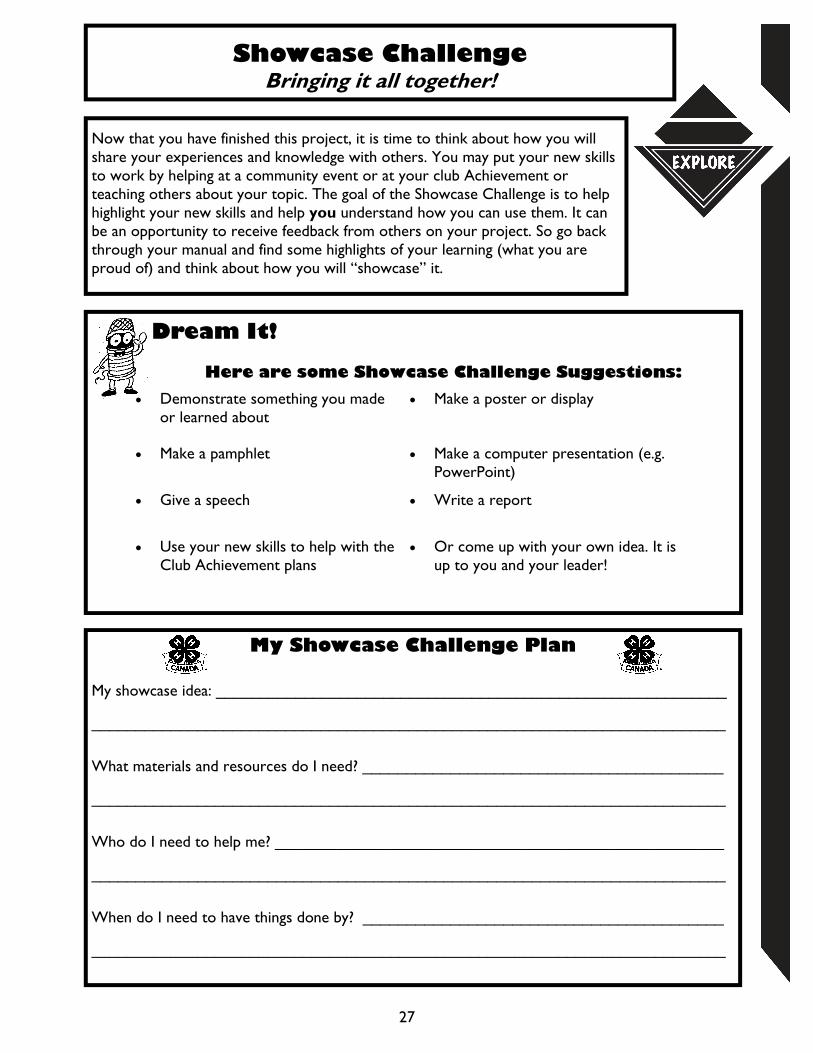
Now that you have finished this project, it is time to think about how you will share your experiences and knowledge with others. You may put your new skills to work by helping at a community event or at your club Achievement or teaching others about your topic. The goal of the Showcase Challenge is to help highlight your new skills and help you understand how you can use them. It can be an opportunity to receive feedback from others on your project. So go back through your manual and find some highlights of your learning (what you are proud of) and think about how you will “showcase” it.
Showcase Challenge Bringing it all together!
Demonstrate something you made or learned about
Make a poster or display
Make a pamphlet Make a computer presentation (e.g. PowerPoint)
Give a speech Write a report
Use your new skills to help with the Club Achievement plans
Or come up with your own idea. It is up to you and your leader!
Dream It!
Here are some Showcase Challenge Suggestions:
My Showcase Challenge Plan My showcase idea: __________________________________________________________
________________________________________________________________________
What materials and resources do I need? _________________________________________
________________________________________________________________________
Who do I need to help me? ___________________________________________________
________________________________________________________________________
When do I need to have things done by? _________________________________________
________________________________________________________________________
27
Dig It! Now that you have showcased your project skills; How did your Showcase Challenge go?
What would you do differently next time?
How will you use your new skills in the future? (in different situations?)
Do It! Insert or attach your finished product or a photo of you sharing your skills in your Showcase Challenge.
28
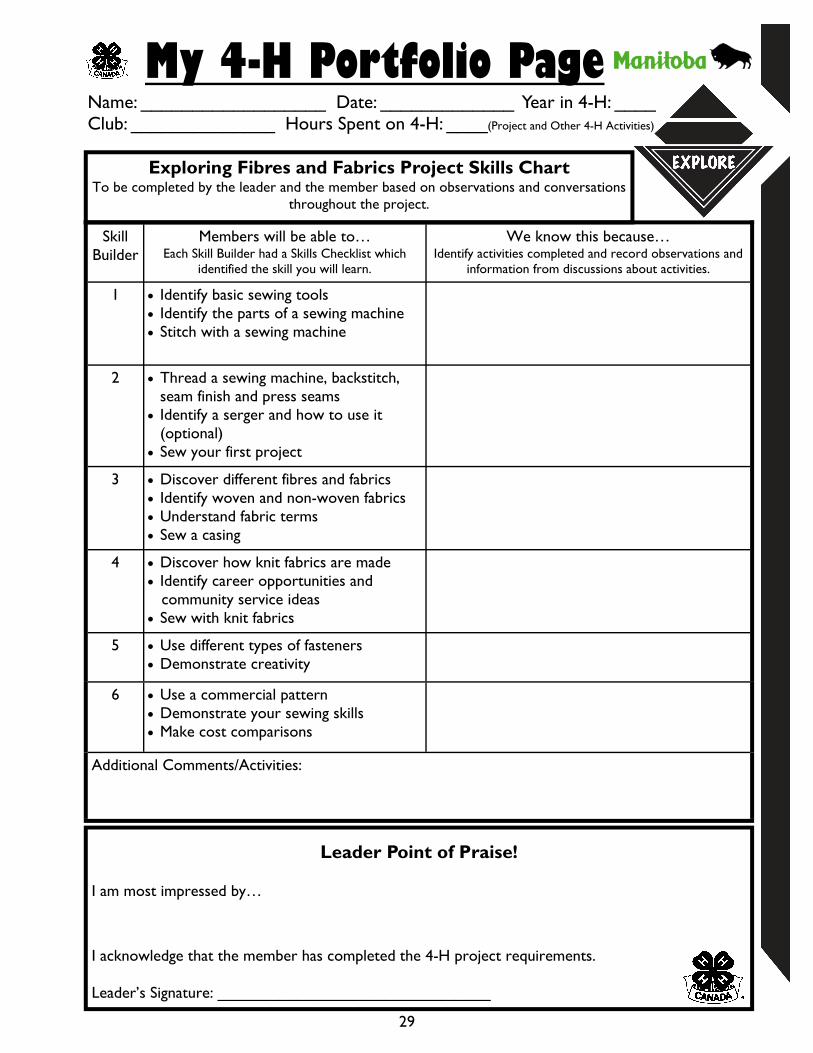
Name: __________________ Date: _____________ Year in 4-H: ____ Club: ______________ Hours Spent on 4-H: ____(Project and Other 4-H Activities)
29
Exploring Fibres and Fabrics Project Skills Chart To be completed by the leader and the member based on observations and conversations
throughout the project.
Skill Builder
Members will be able to… Each Skill Builder had a Skills Checklist which
identified the skill you will learn.
We know this because… Identify activities completed and record observations and
information from discussions about activities.
1 Identify basic sewing tools Identify the parts of a sewing machine Stitch with a sewing machine
2 Thread a sewing machine, backstitch, seam finish and press seams
Identify a serger and how to use it (optional)
Sew your first project
3 Discover different fibres and fabrics Identify woven and non-woven fabrics Understand fabric terms Sew a casing
4 Discover how knit fabrics are made Identify career opportunities and community service ideas Sew with knit fabrics
5
Use different types of fasteners Demonstrate creativity
6 Use a commercial pattern Demonstrate your sewing skills Make cost comparisons
Additional Comments/Activities:
My 4-H Portfolio Page
Leader Point of Praise! I am most impressed by… I acknowledge that the member has completed the 4-H project requirements. Leader’s Signature: _______________________________
30
Member Point of Pride!
What I learned… What I need to improve on… What I want others to notice… Member’s Signature: _______________________________
Above and Beyond! In addition to project skills, 4-H also increases skills in meeting management, communications,
leadership, community involvement through participation in club, area, or provincial 4-H events or activities. List below any activities you participated in this year in 4-H.
(Some examples include Executive Positions Held, Workshops, Communication, Community Service, Rally, Bonspiels, Conferences, Judging, Camps, Trips, Awards, Representation to Area or Provincial Councils, etc)
_____________________________________ _______________________________________
_____________________________________ _______________________________________
_____________________________________ _______________________________________
_____________________________________ _______________________________________
_____________________________________ _______________________________________
_____________________________________ _______________________________________
**Feel Free to add additional pages that include awards, certificates, new clippings, photos or other items that describe your 4-H involvement.
Point of Praise! Another’s perspective on your achievements in 4-H. (community professionals, MAFRI staff, 4-H club head leaders, 4-H Ambassadors, friends of 4-H)
I am most impressed by… I believe that you have learned… In the future I encourage you to… Signature: _______________________________

4-H Achievement
4-H Achievement is… a 4-H club celebration when members have completed their projects. Achievements are planned by the club to give recognition to members and leaders for their accomplishments in their 4-H projects and club activities.
A 4-H Achievement can take many different formats: from choosing a theme, to member project displays, to members using their new skills for the event (entertainment, food, decorating, photographer, etc.), to members presenting their project to the whole group, the options are endless and open to the creativity of the members and leaders in each club! Clubs may also plan their Achievement to promote 4-H to the community or to recognize sponsors and others who have helped the club. Members and leaders - be sure to check your project books for the project completion requirements, so you will be ready for your club’s Achievement celebration!
For more information about 4-H and the many 4-H opportunities available please visit
http://www.gov.mb.ca/agriculture/4-h/
If you have any questions, comments or suggestions for this or other 4-H projects contact:
Manitoba 4-H Projects
Manitoba Agriculture Food and Rural Initiatives 1129 Queens Avenue
Brandon, MB R7A 1L9
Email: [email protected]
Phone: 204-726-6613 Fax: 204-726-6260
This manual is for educational use only and is not intended as professional advice.

4-H Motto
“Learn To Do by Doing” 4-H Pledge
I pledge, My HEAD to clearer thinking, My HEART to greater loyalty, My HANDS to greater service, My HEALTH to better living, For my club, my community, and my country.
What is 4-H?
4-H is an international youth organization involving more than 7 million members in 80 countries around the world. In Canada, 4-H began in 1913 in Roland, Manitoba as a community-based organization dedicated to growth and development of rural youth. Today’s 4-H program reaches both farm and non-farm youth across Canada. The motto of “Learn to Do by Doing” is embodied in the program, as 4-H focuses on skill development as well as personal development of life skills such as communications, leadership and citizenship.
Manitoba 4-H project material is developed by
Manitoba Agriculture, Food and Rural Initiatives (MAFRI)
4-H Quality Equation Principles
Quality People Promote responsibility, respect, trust, honesty, fairness,
sportsmanship, citizenship, teamwork and caring. Quality Experiences
Provide members with personal development and skill development experiences.
Quality Projects Promote and value quality effort. Promote high quality, safe food production within industry standards.