3m scotchbond universal adhesive · apply the adhesive or adhesive mixture to the prepared tooth...
TRANSCRIPT
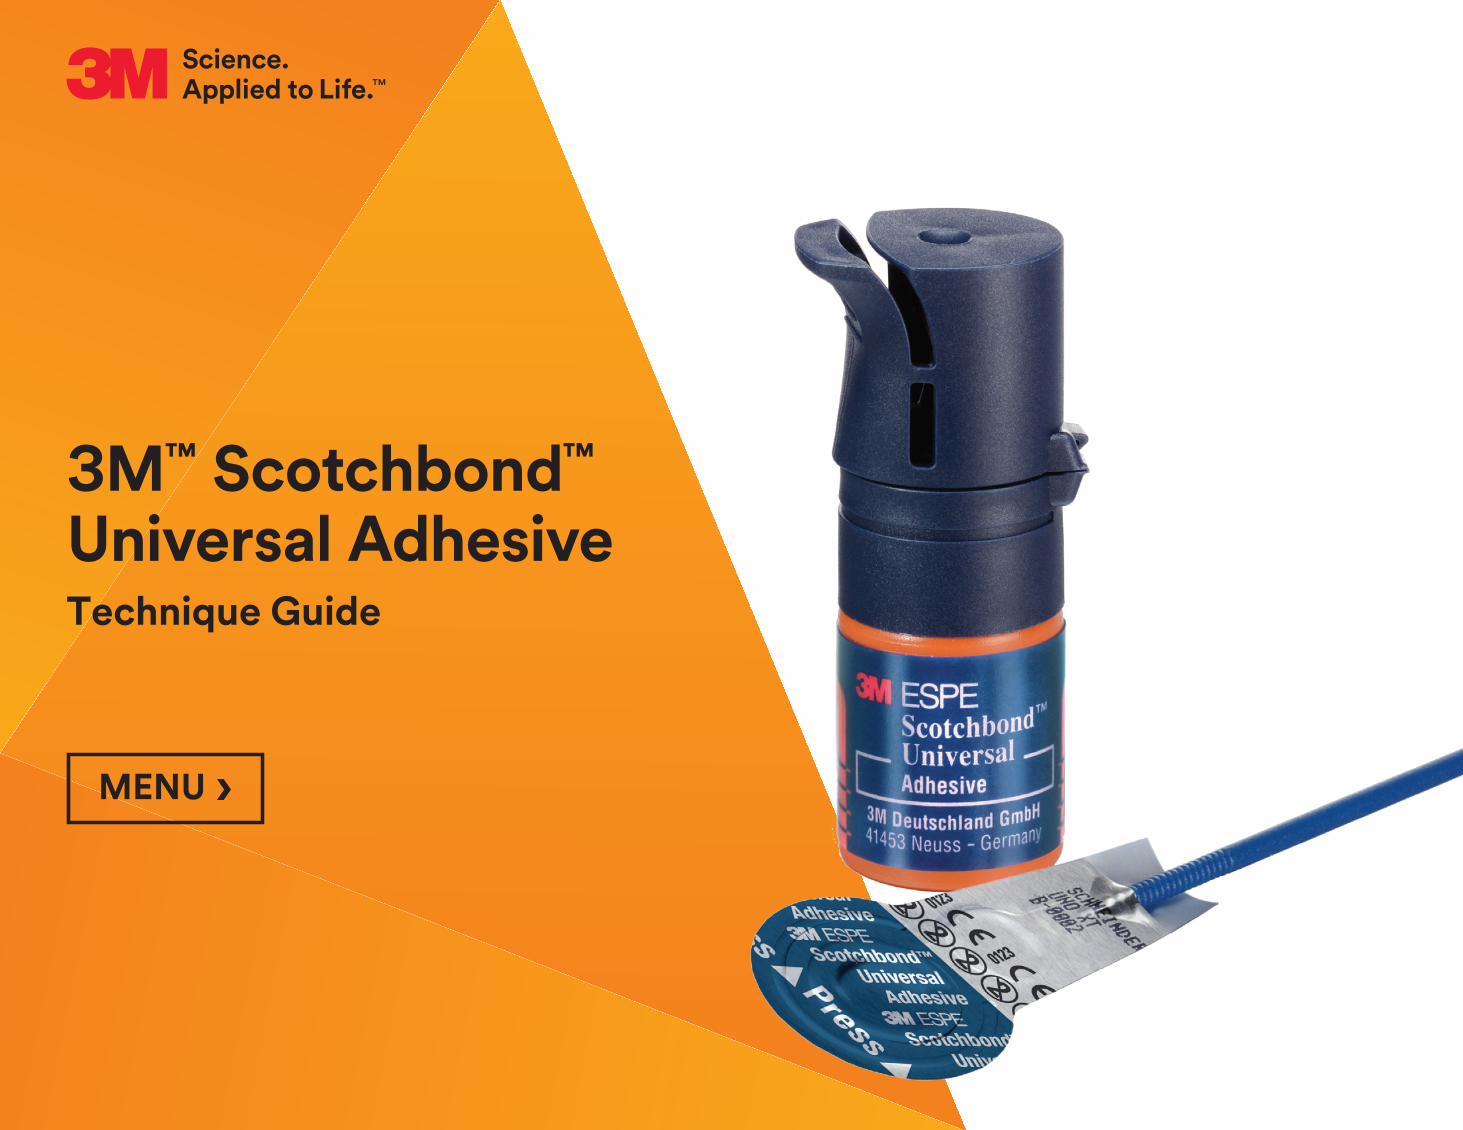
3M™ Scotchbond™ Universal AdhesiveTechnique Guide
MENU ›
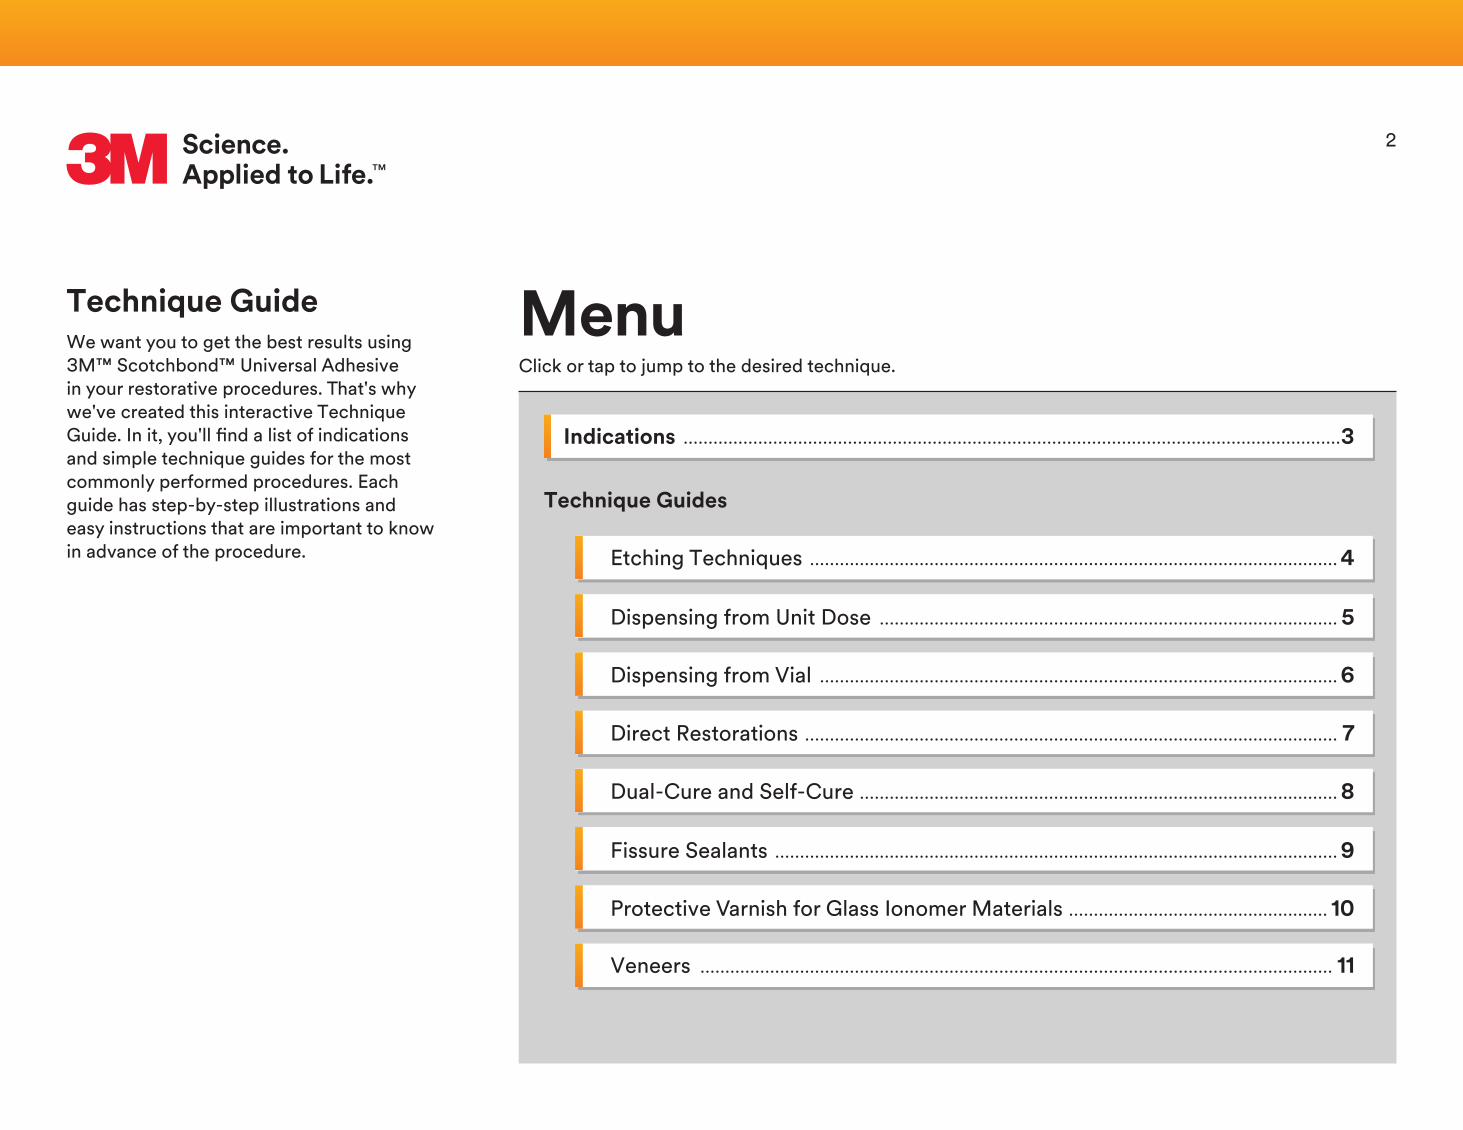
Technique GuideWe want you to get the best results using 3M™ Scotchbond™ Universal Adhesive in your restorative procedures. That's why we've created this interactive Technique Guide. In it, you'll find a list of indications and simple technique guides for the most commonly performed procedures. Each guide has step-by-step illustrations and easy instructions that are important to know in advance of the procedure.
MenuClick or tap to jump to the desired technique.
2
Indications ....................................................................................................................................3
Direct Restorations ........................................................................................................... 7
Dual-Cure and Self-Cure ................................................................................................ 8
Dispensing from Unit Dose ............................................................................................ 5
Dispensing from Vial ........................................................................................................ 6
Veneers ............................................................................................................................... 11
Etching Techniques .......................................................................................................... 4
Fissure Sealants ................................................................................................................. 9
Protective Varnish for Glass Ionomer Materials .................................................... 10
Technique Guides

*See Instructions for Use for a full list of indications.
MENU
Indications*
• Bonding light-cured composite or compomer for all classes of direct restorations
• Bonding of dual-cure cements and core build-up materials
• Bonding of self-cure composites
• Root surface desensitization
• Sealing of dentin prior to amalgam restorations
• Protective varnish for glass ionomer restorative materials
• Repair of composite or compomer restorations
• Bonding sealants
• Bonding veneers in combination with 3M™ RelyX™ Veneer Cement
3
MENU
*Please refer to the Instructions for Use for more information.
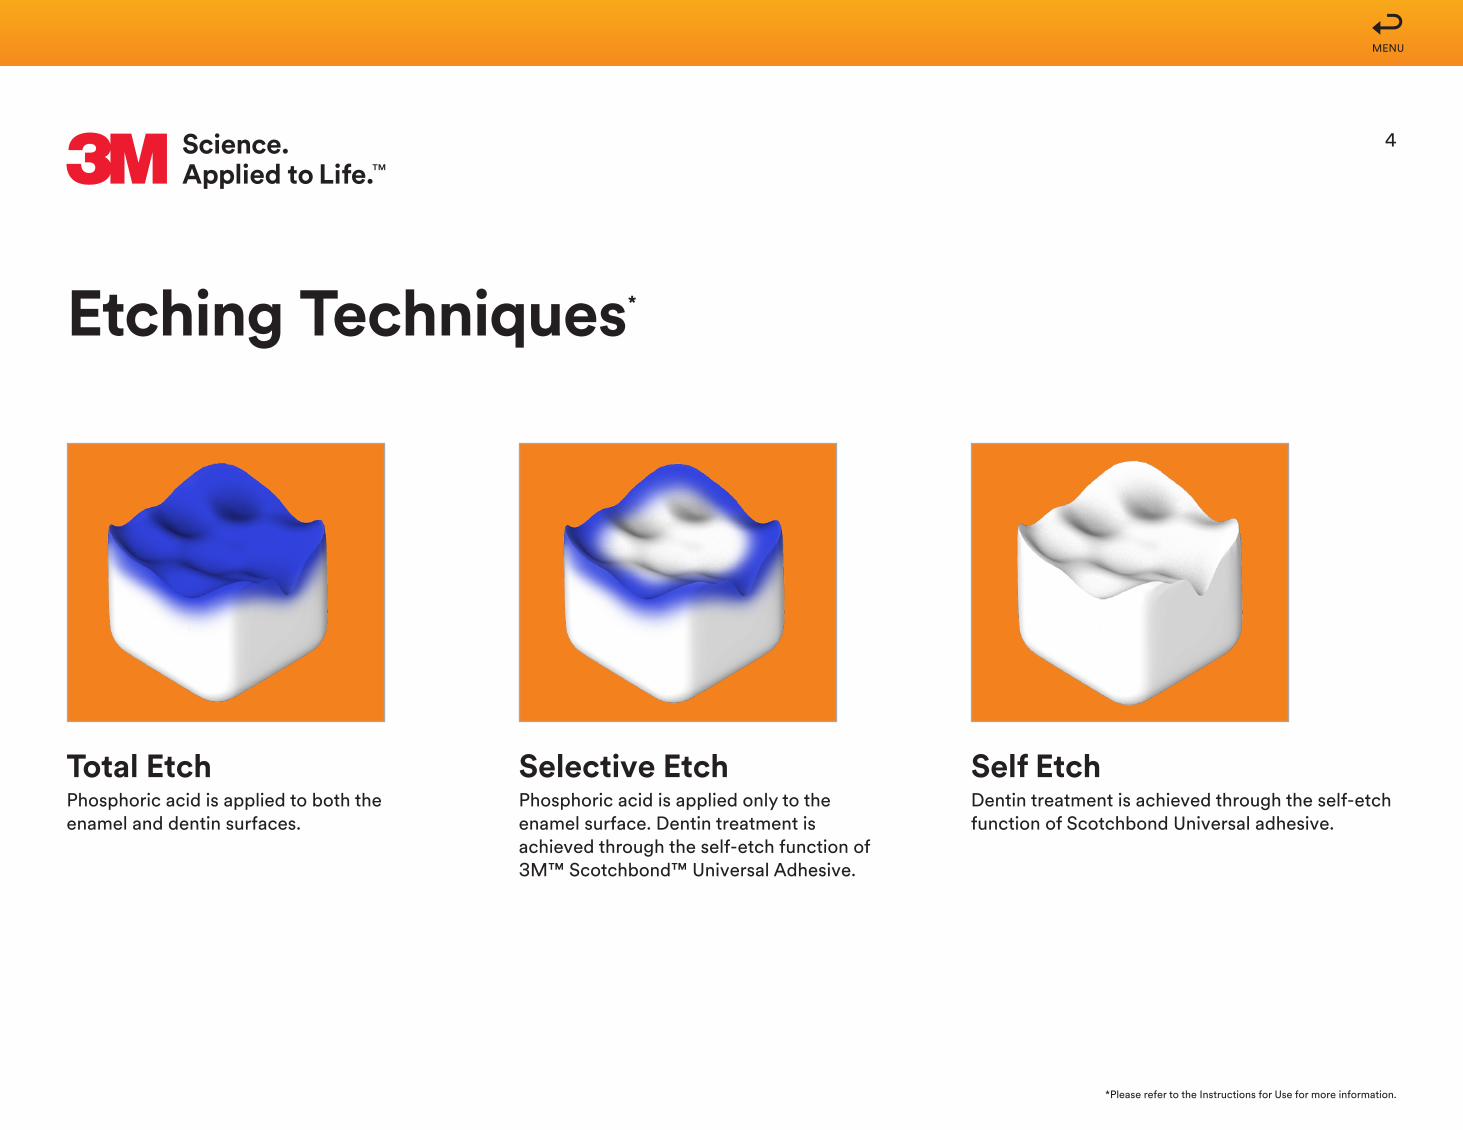
Etching Techniques*
Total EtchPhosphoric acid is applied to both the enamel and dentin surfaces.
Selective EtchPhosphoric acid is applied only to the enamel surface. Dentin treatment is achieved through the self-etch function of 3M™ Scotchbond™ Universal Adhesive.
Self EtchDentin treatment is achieved through the self-etch function of Scotchbond Universal adhesive.
4
MENU
*Please refer to the Instructions for Use for more information.
Dispensing from Unit Dose*
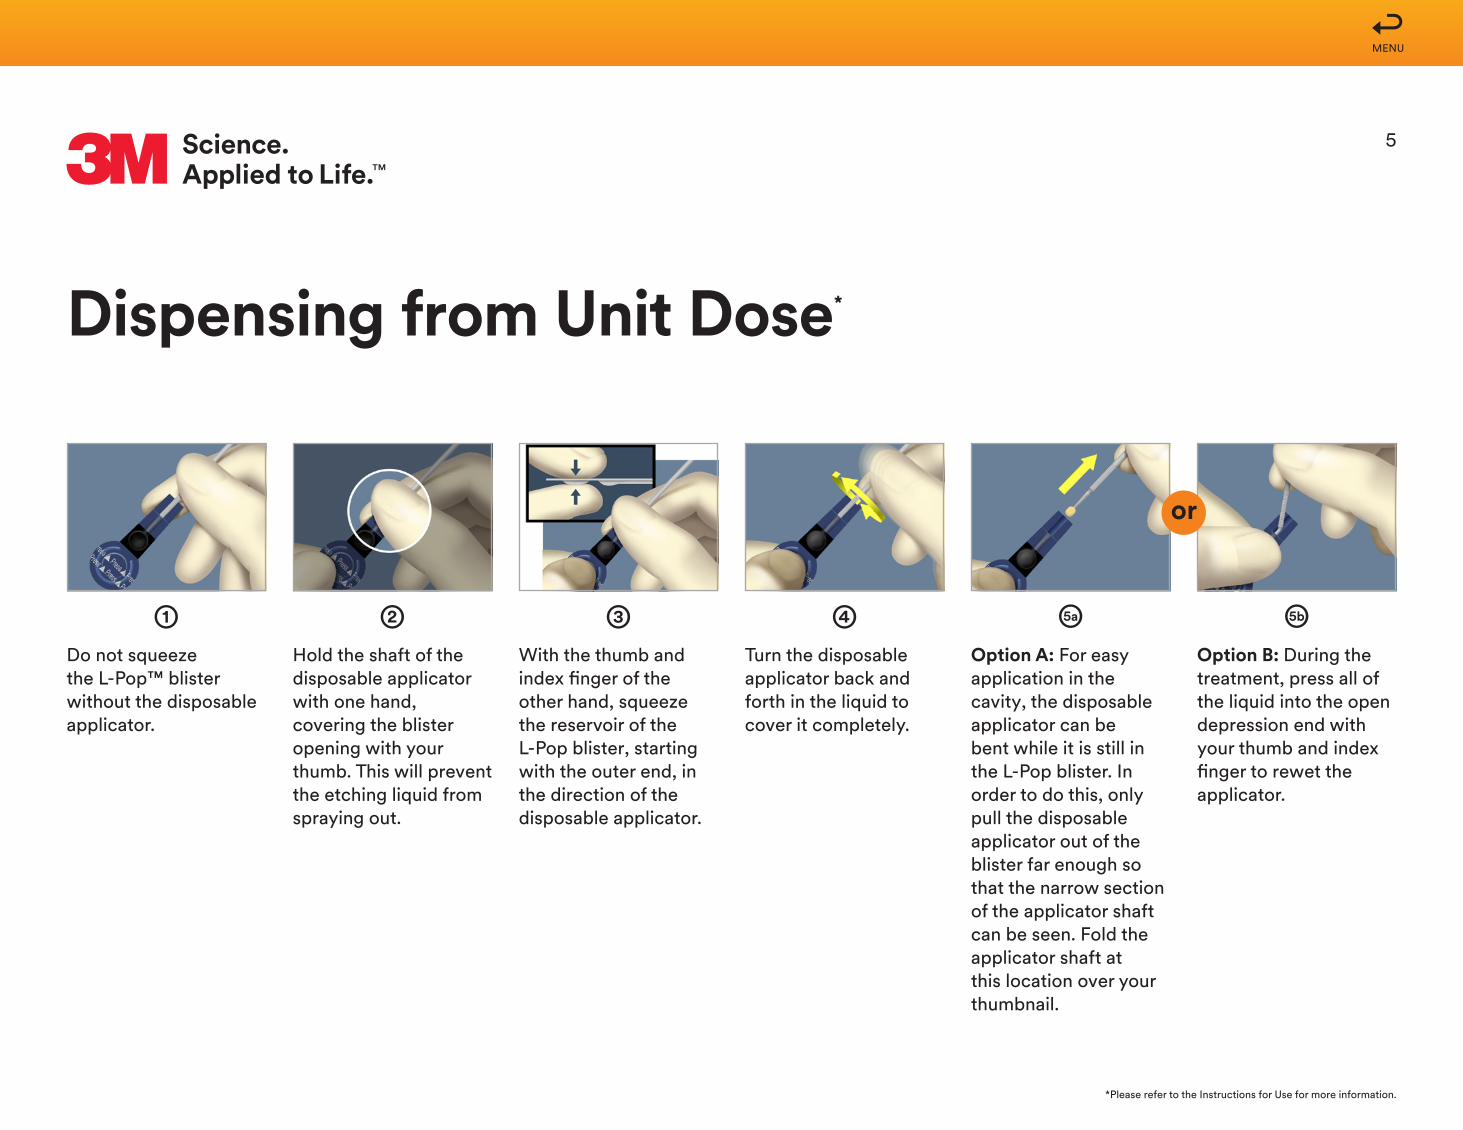
➀ ➁ ➂ ➃Do not squeeze the L-Pop™ blister without the disposable applicator.
Turn the disposable applicator back and forth in the liquid to cover it completely.
Hold the shaft of the disposable applicator with one hand, covering the blister opening with your thumb. This will prevent the etching liquid from spraying out.
Option A: For easy application in the cavity, the disposable applicator can be bent while it is still in the L-Pop blister. In order to do this, only pull the disposable applicator out of the blister far enough so that the narrow section of the applicator shaft can be seen. Fold the applicator shaft at this location over your thumbnail.
With the thumb and index finger of the other hand, squeeze the reservoir of the L-Pop blister, starting with the outer end, in the direction of the disposable applicator.
Option B: During the treatment, press all of the liquid into the open depression end with your thumb and index finger to rewet the applicator.
5a 5b
or
5
MENU
*Please refer to the Instructions for Use for more information.
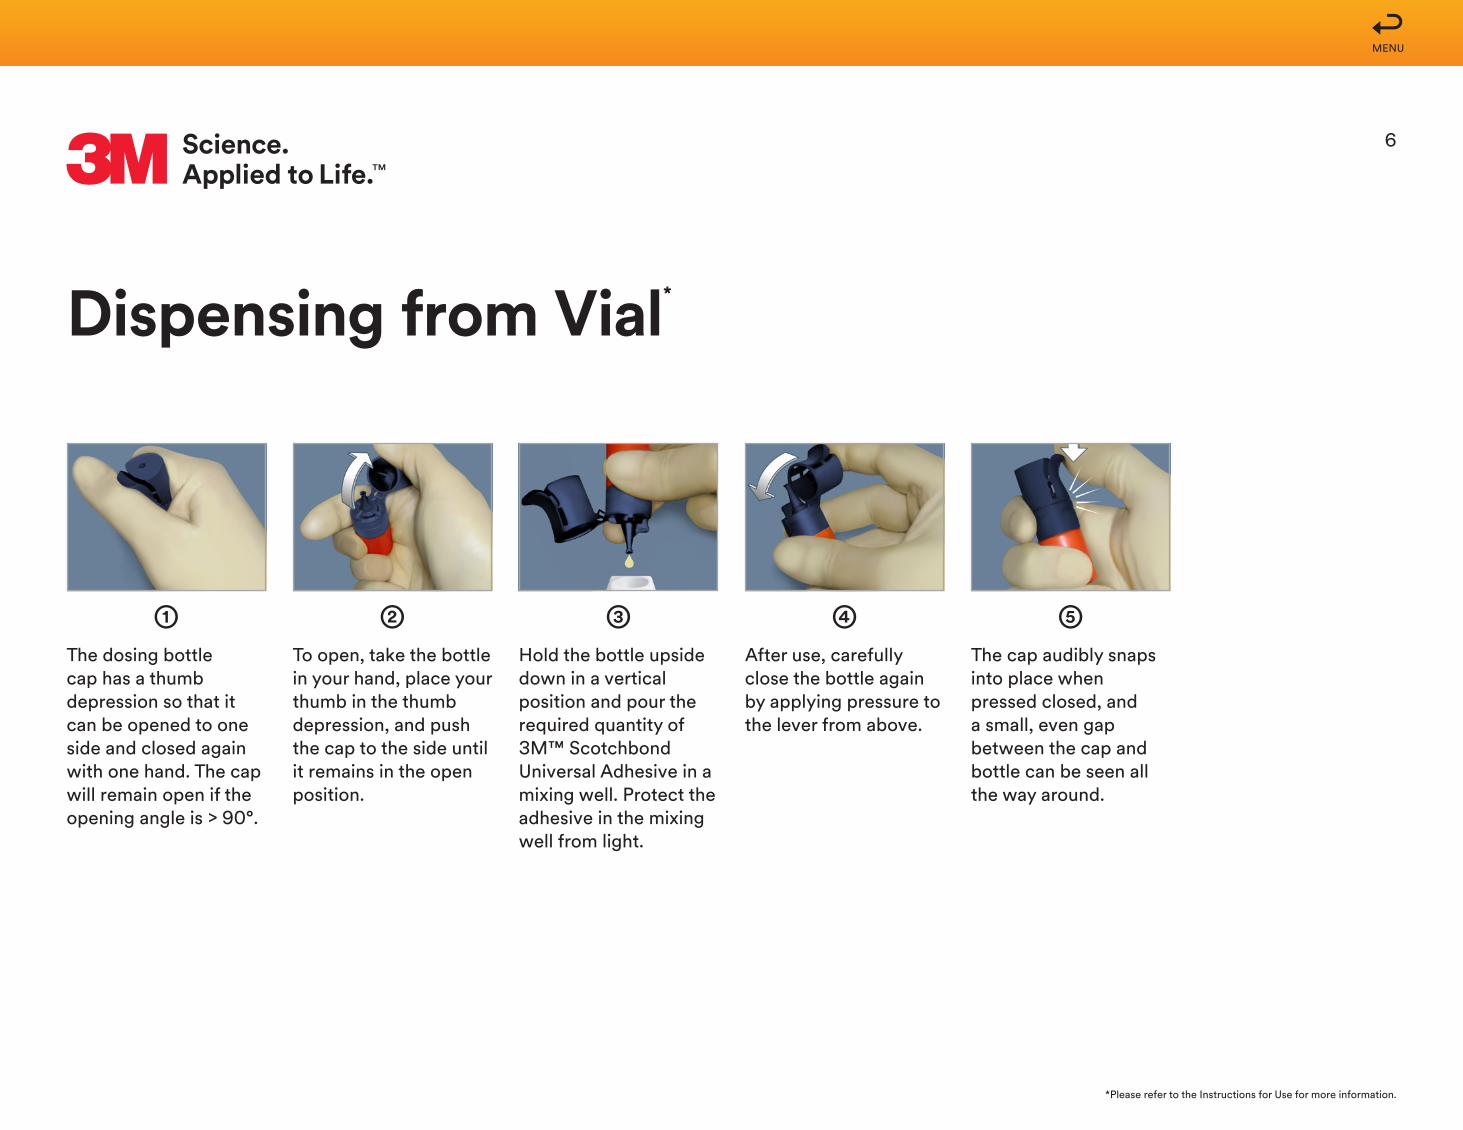
Dispensing from Vial*
➀ ➄➁ ➂ ➃The dosing bottle cap has a thumb depression so that it can be opened to one side and closed again with one hand. The cap will remain open if the opening angle is > 90°.
After use, carefully close the bottle again by applying pressure to the lever from above.
To open, take the bottle in your hand, place your thumb in the thumb depression, and push the cap to the side until it remains in the open position.
The cap audibly snaps into place when pressed closed, and a small, even gap between the cap and bottle can be seen all the way around.
Hold the bottle upside down in a vertical position and pour the required quantity of 3M™ Scotchbond Universal Adhesive in a mixing well. Protect the adhesive in the mixing well from light.
6

MENU
*Please refer to the Instructions for Use for more information.
Direct Restorations*
➀ ➁ ➂Following the selective enamel etch or total etch of the enamel and dentin, apply the adhesive to the prepared tooth and rub it in for 20 seconds.
Gently air dry the adhesive for approximately 5 seconds to evaporate the solvent.
Light cure for 10 seconds.
7

MENU
*Please refer to the Instructions for Use for more information.
Dual-Cure and Self-Cure*
➀ ➁ ➂ Place one drop each of 3M™ Scotchbond™ Universal Adhesive and dual cure activator* in a mixing well and mix for 5 seconds.
Light cure for 10 seconds. (Optional step with 3M™ RelyX™ Ultimate Cement.)
Apply the adhesive or adhesive mixture to the prepared tooth and rub it in for 20 seconds.
Gently air dry the adhesive for approximately 5 seconds to evaporate the solvent.
➃
Bonding of Dual-Cure Cements and Core Build-up Materials
➄ ➅Apply the adhesive or adhesive mixture to the restoration for 20 seconds.
Air dry for 5 seconds. Do not light cure! Proceed with cementing the restoration according to manufacturer’s instructions.
Bonding of Self-Cure CompositesComplete steps 1–4 prior to application of the self-cure composite.
* The 3M™ Scotchbond™ Universal Dual Cure Activator is not required when using RelyX Ultimate Cement. When using RelyX Ultimate Cement, please proceed to Step 2.
8
MENU
*Please refer to the Instructions for Use for more information.
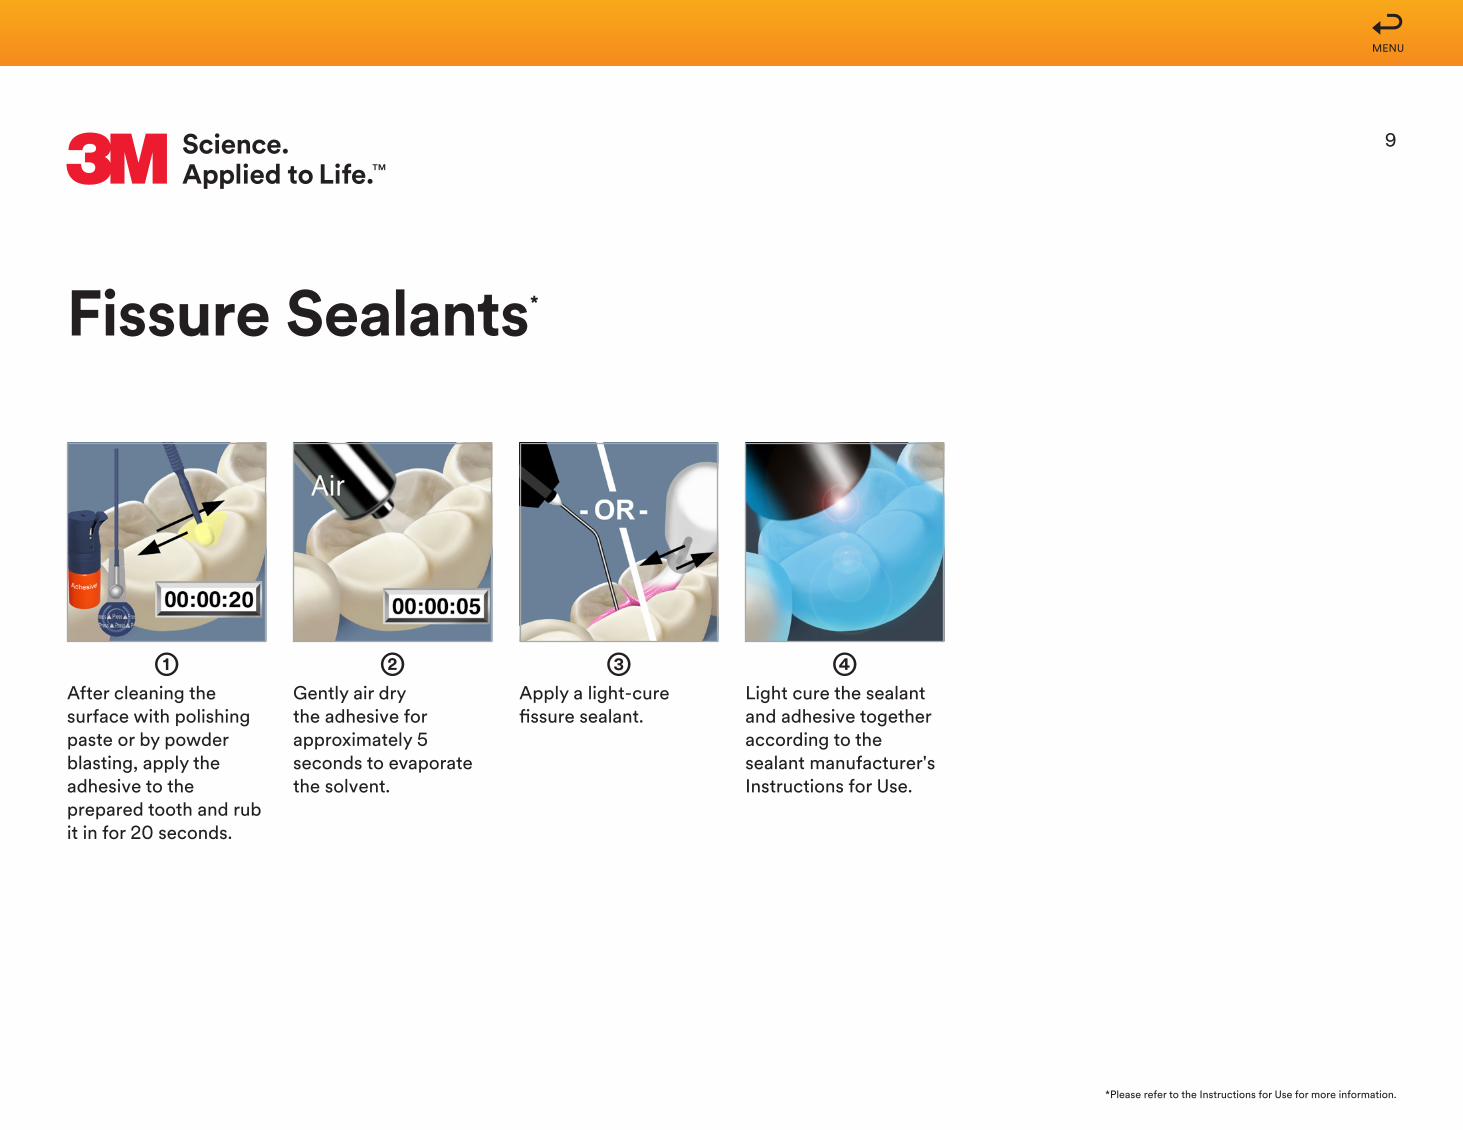
After cleaning the surface with polishing paste or by powder blasting, apply the adhesive to the prepared tooth and rub it in for 20 seconds.
Gently air dry the adhesive for approximately 5 seconds to evaporate the solvent.
Apply a light-cure fissure sealant.
Light cure the sealant and adhesive together according to the sealant manufacturer's Instructions for Use.
Fissure Sealants*
➀ ➁ ➂ ➃
9

MENU
*Please refer to the Instructions for Use for more information.
Light cure for 10 seconds.
After the glass ionomer has been finished, apply the adhesive to the restoration surface and rub it in for 20 seconds.
If needed, adjust the occlusion and reapply adhesive to the ground places to protect the filling from drying out.
Gently air dry the adhesive for approximately 5 seconds to evaporate the solvent.
Use a damp cloth or cotton pellet to remove the oxygen inhibition layer.
➀ ➁ ➂ ➄
Protective Varnish for Glass Ionomer Materials*
➃
10

MENU
*Please refer to the Instructions for Use for more information.
Cement the veneer with 3M™ RelyX™ Veneer Cement or 3M™ RelyX™ Ultimate Cement according to the pertinent Instructions for Use.
Apply a commonly used phosphoric acid etching gel (about 35%), e.g., 3M™ Scotchbond™ Universal Etchant, to the enamel and dentin for 15 seconds.
Rinse thoroughly with water for 10 seconds.
Dry with cotton pellets. Apply 3M™ Scotchbond™ Universal Adhesive immediately to the entire surface of the enamel and dentin and rub it in for 20 seconds.
Gently air dry the adhesive for approximately 5 seconds to evaporate the solvent.
Do not light cure!
Veneers*
Light cure the gingival edges first for 30 seconds, followed by light curing the middle and incisal edges each for 30 seconds.
Seat the veneer in place using gentle pressure. Spot cure the veneer into place on the facial surface away from the margins using a small-diameter light guide for 20 seconds to secure it in place. Remove the excess cement from the margins using a blunt instrument or dry brush.
10 11 12
Apply Scotchbond Universal adhesive to the hydrofluoric acid etched veneer surface.
Gently air dry the adhesive for approximately 5 seconds to evaporate the solvent.
Do not light cure!➆ ➇ ➈
➀ ➄➁ ➅➂ ➃
11

MENU
3M, ESPE, L-Pop, RelyX and Scotchbond are all trademarks of 3M or 3M Deutschland GmbH. Used under license in Canada. © 3M 2017. All rights reserved.
3M Oral Care2510 Conway AvenueSt. Paul, MN 55144-1000 USA
Phone 1-800-634-2249Web 3M.com/dental
www.3M.com/Scotchbond
3M Canada Post Office Box 5757London, Ontario N6A 4T1 Canada
Phone 1-888-363-3685