3dtotal siggraph free mag
DESCRIPTION
documento 3dtotal- Siggraph- Computação Gráfica.TRANSCRIPT

T H E F I R S T O F I T S K I N D P R I N T E D E D I T I O N E X C L U S I V E T O S I G G R A P H 2 0 1 4
# 0 1
MALEF ICENT R E N D E R I N GDigital Domain reveals the hair and skin advances in V-Ray for Maya used in 2014's Disney blockbuster hit
INSIDE:Studio profile: Scanline VFX
Getting started in V-Ray 3.0Master ZBrush for better characters
Perfecting real-time charactersKevin Margo on the future of filmmaking
Federico Scarbini's 3D sketchbook Buck discusses the art of collaboration
ASILE talks photography and 3D24 pro time-saving tips and tricks
Exclusive discounts + more!


Attending SIGGRAPH is like 'coming home' for the CG creative.Whether you're a SIGGRAPH veteran or new to the scene, the community that descends upon the conference and exhibition host town each year
never fails to provide a huge welcome and lashings of enthusiasm for those that travel the globe to join the fun. A gathering of top creative talents and
technical masters amidst a host of groundbreaking technologies and exciting glimpses at the future makes SIGGRAPH the place to be for those working
in computer graphics. We are therefore thrilled to bring you this very special magazine exclusively for SIGGRAPH 2014 attendees! Join us as we celebrate a year of triumphs with helpings of inspiration, pro tips, software tricks and exclusive interviews for you to devour during your stay (and on the plane
home). Enjoy the mag, and have a great SIGGRAPH!
This magazine is brought to you in association with Chaos Group, the makers of V-Ray. www.chaosgroup.com
L Y N E T T E C L E E – E D I T O R – 3 D T O T A L . C O M
3dtotal.com Ltd.29 Foregate Street, WorcesterWR1 1DSTel: +441905 29764www.3dtotal.comwww.3dtotalpublishing.com
facebook.com/3dtotaltwitter.com/3dtotalyoutube.com/3dtotalpublishing
Magazine teamEditor: Lynette CleeEmail [email protected] +441905 29764Writers: Lynette Clee, Paul Hellard, Henry WinchesterDesigners: Imogen Williams,Aryan Pishneshin, Matthew LewisProofreader: Melanie Smith
AdvertisingTo advertise in future editions of 3dtotal magazine or on the 3dtotal website, contact George Lucas for a media kit.Advertising Manager:George LucasEmail [email protected] +7766 557 515
Circulation5,000 copies exclusive to SIGGRAPH 2014
3dtotal.com Ltd. Founderand Director:Tom GreenwayEmail [email protected] +441905 29764
Printing and distributionPrinted by Taylor Brothers Bristol Limited, 13-25 Wilder Street, Bristol,BS2 8PY, United Kingdom.Call: +44117 9245 452
Distributed in Vancouver, Canada, by SIGGRAPH 2014, 3dtotal.com Ltd., and the Chaos Group.
Disclaimer: All text and layout is the copyright of 3dtotal.com Ltd., 2014. Images are copyright the featured artists/studios or their clients, unless otherwise stated. All images are used with permissions and credited accordingly. In the event of any copyright queries, please contact the Editor at [email protected] or call +441905 29764. No part of this magazine may be reproduced without prior written permission from 3dtotal.com Ltd. Every effort has been made to ensure all featured information was correct at the time of printing. In the event of any errors, please contact the Editor. Any other queries regarding this magazine may be directed to the Editor.
We hope to see you around! Drop by booth #1151 to say 'Hi!' to the
3dtotal team!
C O N T E N T S04/GALLERY Stunning images from far and wide to inspire and delight
10/THE NEED FOR SPEED24 top tips from the biggest names in the 3D and VFX world
16/DIGITAL DOMAIN: MALEFICENT RENDERINGDiscover how CG hair and skin was perfected in the Disney hit
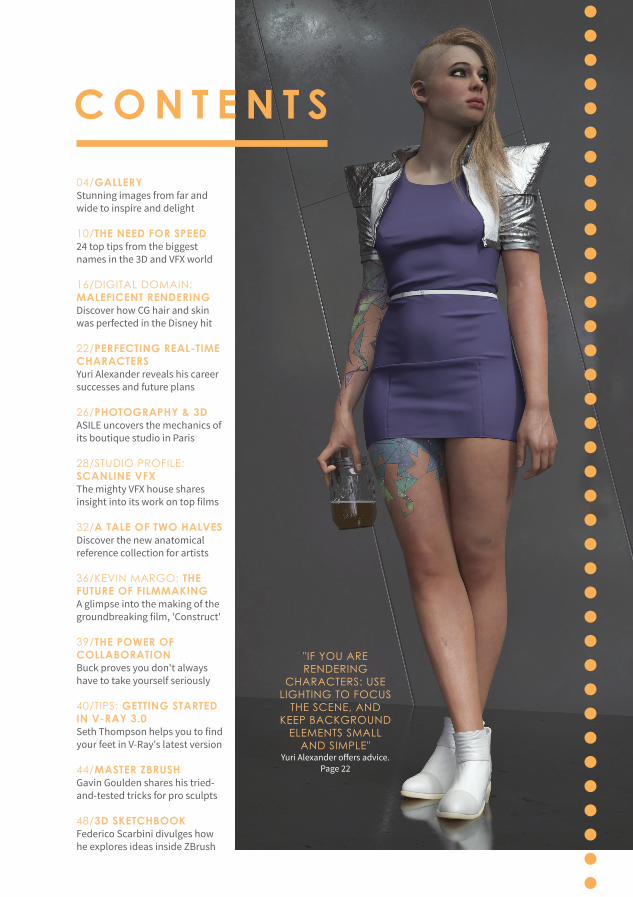
22/PERFECTING REAL-TIME CHARACTERSYuri Alexander reveals his career successes and future plans
26/PHOTOGRAPHY & 3DASILE uncovers the mechanics of its boutique studio in Paris 28/STUDIO PROFILE: SCANLINE VFXThe mighty VFX house shares insight into its work on top films
32/A TALE OF TWO HALVESDiscover the new anatomical reference collection for artists
36/KEVIN MARGO: THE FUTURE OF FILMMAKINGA glimpse into the making of the groundbreaking film, 'Construct'
39/THE POWER OF COLLABORATIONBuck proves you don't always have to take yourself seriously
40/TIPS: GETTING STARTED IN V-RAY 3.0Seth Thompson helps you to find your feet in V-Ray's latest version
44/MASTER ZBRUSHGavin Goulden shares his tried-and-tested tricks for pro sculpts
48/3D SKETCHBOOKFederico Scarbini divulges how he explores ideas inside ZBrush
"IF YOU ARE RENDERING
CHARACTERS: USE LIGHTING TO FOCUS
THE SCENE, AND KEEP BACKGROUND
ELEMENTS SMALL AND SIMPLE"
Yuri Alexander offers advice. Page 22
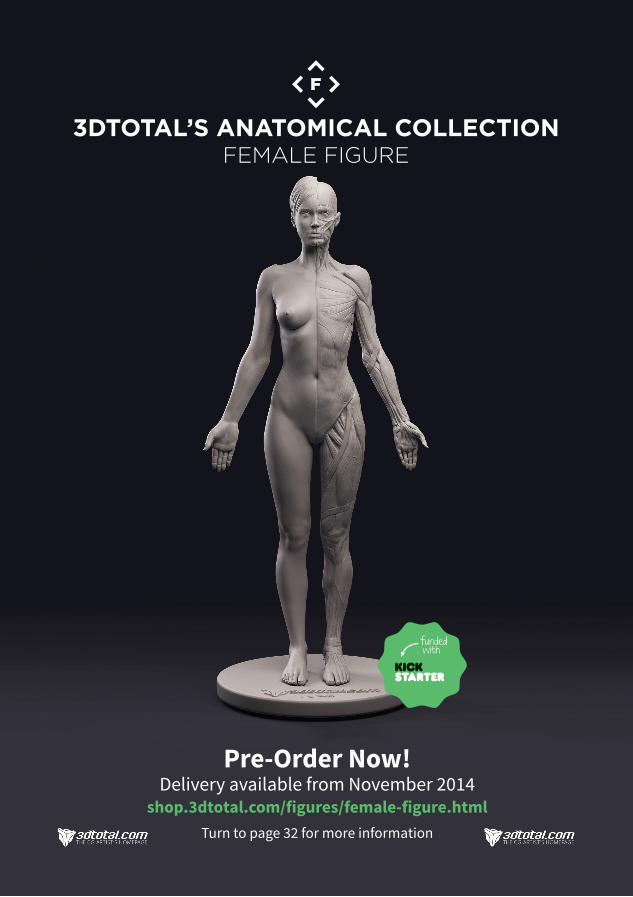
3DTOTAL’S ANATOMICAL COLLECTIONFEMALE FIGURE
Pre-Order Now! Delivery available from November 2014
shop.3dtotal.com/figures/female-figure.htmlTurn to page 32 for more information

4 5
Gallery A Little Farther to the Rightby Juan Siquier
www.juansiquier.com3ds Max, V-Ray, Photoshop
© Juan Siquier

6 7
Intergalactic Music Pilotby Oleg Memukhin
http://monkibase.artstation.comBlender, ZBrush, V-Ray
Alice in Wonderlandby Yuo Tengara
www.yuotengara.comMaya, Mudbox, ZBrush, V-Ray,
NUKE, Photoshop
© Oleg Memukhin © Yuo Tengara. Original concept by Júlia Sardà

The Rain Umbrellasby Αris Michailidishttp://bit.ly/ArisMichailidis3ds Max, OnyxTree, Merêces Olive Trees, V-Ray, After Effects © Αris Michailidis (Nox-3D)

9

10 11
©David Luong
12
3
69
GET THE MOST FROM YOUR SOFTWARE
FEELING SUPPORTEDI mainly use 3ds Max and V-Ray, personally. At Blur Studio, I find V-Ray to be an excellent renderer – it's fast, good-looking and always evolving. The V-Ray team also offers great support and they are there if you ever encounter bugs or issues with renders. After years of experience with this software, I feel extremely confident that I can create anything a client could dream of, without the stress of unstable or slow renders. Simon Blanc
↑ Simon is a Junior Supervisor and Lead Scene
Assembler at Blur Studio. ©Simon Blanc
STICK TO WHAT YOU KNOWThe base of my work is supported by four software packages: ZBrush, 3ds Max, V-Ray and Photoshop. All these tools have been around for a long time, improved with each new release and have been battle-tested, so they are highly reliable. In the heat of the battle I wouldn't throw in any untested software. That would be asking for trouble! Jose Alves da Silva
↑ Jose is a full-time Freelance 3D Character
Artist. He says it's best to experiment with
new software when you don't have anything
important going on. ©Jose Alves da Silva
BACK TO BASICSI really like software that's intuitive and doesn't take a whole army of technical support to get it going. I primarily use Photoshop for digital matte painting, After Effects for motion graphics work, The Foundry's NUKEX for compositing, and CINEMA 4D for 3D modelling and animation. All of these combine to work well with each other – they're fast but very powerful industry standard pieces of software. David Luong
↑ David is Senior Cinematic Artist II at Blizzard
Entertainment. Ivory Castle is one of his
personal images. ©David Luong
THE PERFECT TOOLSETI use 3ds Max in combo with ZBrush for the obvious need for more detailed products whenever it is organic or hard-surface – you can count on it. ZBrush is also the best of tools when it comes to retopology, optimization, and UV-remapping when you are not the technical type – like myself! Then of course I use Photoshop, as it is the ultimate 2D software. And for editing or effects, I stick with After Effects. Pascal Blanché
↑ Pascal is the Senior Art Director at Ubisoft
Montreal. ©Pascal Blanché
THE MAYA PROPHECYAt Weta Digital, we work a lot with likeness. I do pretty much everything in Maya, including most of the sculpting. I recently joined the facial team so I get to sculpt facial shapes all day and for that we have a really solid pipeline and tools that allow me to keep everything inside Maya. Marco Menco
↑ Marco Menco is a 3D Modeler at Weta
Digital. At work he keeps everything in
Maya, although he uses ZBrush for freelance
work and personal projects. This is one of his
personal character studies. ©Marco Menco
4
Alessandro Baldasseroni
www.eklettica.com
Christophe Dessewww.xtrm3d.com
Tor Frickwww.torfrick.com
Ian Joynerwww.ianjoyner.com
David Luongwww.davidluong.net
Marco Mencowww.marcomenco.com
Simon Blancwww.simonblanc.
com
Pascal Blanchéhttp://pascalblanche.
artstation.com
Toni Bratincevicwww.interstation3d.
com
Vitaly Bulgarovwww.bulgarov.com
Jose Alves da Silvawww.artofjose.com
Marek Denkowww.marekdenko.net
THE 2D ADVANTAGE
5 I love to "sculpt" the silhouette of DynaMesh concepts using Photoshop. I do a rough sculpt
in ZBrush with DynaMesh then take a snapshot into Photoshop to warp it and paint over, focusing on negative spaces and volumes zig-zagging across the screen. I can then use the painting as a guide to ensure break-up of the figure. Marco Menco
↑ An unusual use for Photoshop gives
better results for Marco Menco's
characters. ©Marco Menco
1 2 3
THE NEED FOR SPEED24 ultimate time-saving tips and tricks for 3D and VFX artists The world of 3D and visual effects has never been more intense, with constant deadlines and demanding clients mingling to produce a pressure cooker of emotional and tired workers. However, there are shortcuts and ways to make your life a lot easier. We've spoken to some of the world's most respected CG artists about how they manage their workloads and make the most of their software while keeping a general aura of calmness and tranquility. Words by Henry Winchester
6

12 13
EASY ACCESS
8 I love shortcuts and hotkeys! The best thing to do is set up a custom user interface in your
program so that everything you want is where you need it and easy to grab. Ian Joyner
↑ Ian Joyner is a Character Artist at Legacy
FX in Los Angeles. This particular image
was created especially for one of Ian's
class demos at the Concept Design
Academy in Pasadena. He's also taught
for Gnomon School of Visual Effects.
©Ian Joyner
LEARN IT LIKE WETAAt Weta Digital we have special meetings and lots of tutorials in the internal Wiki. So that helps for both studio work (mostly) and freelance, too. Otherwise I'm an avid internet user and I can find most of my answers there. When I was back in Vancouver it was easier to access events open to the public, so that was great for getting new information relative to the industry and the tools. Marco Menco
↑ We'd really love to see Weta's internal Wiki!
©Marco Menco
MOVE ON TO BETTER THINGS BE PREPARED FOR ANYTHING
LEARNING NEW SKILLSThere's a lot of sharing between co-workers in the studio – that's how I learn new skills! But we can feel overwhelmed by the amount of new software out there and new methodologies. I try to catch up when possible, following tutorials on the internet, mostly on ZBrushCentral, YouTube as well as anywhere else that tends to come recommended by my peers. Alessandro Baldasseroni
Alessandro is a Lead Character Artist at Blur
Studio in California.
SET REALISTIC GOALSWhen I start my day, I will make a mental list of the tasks I have to complete – and won't consider that my working day has finished until all of those tasks are completed. That way, if there are any problems, the 'damage' stays within that day and doesn't affect the schedule. For this to be effective you have to set realistic goals for each day, otherwise you will be crunching every day. Jose Alves da Silva
↑ Minimize daily damage. ©Jose Alves da Silva
THE LA EFFECTI take classes online and in person. Living in Los Angeles means that I am able to learn one-on-one from some really amazing artists, so I try and do a few classes a year. I mostly like to take courses on traditional arts though, as I find that these can be the most useful and long-lasting in terms of building up skills. Ian Joyner
↑ Dement is another of Ian's exciting images
created for a class demo at the Concept
Design Academy in Pasadena, California.
©Ian Joyner
BE A DREAMERFollow your dreams! I say this to a lot of people who are in a funk and aren't satisfied with where they are now, or what they are doing. Sometimes you just have to do what you want to do, and not what others want. It's how I got to where I am today. David Luong
↑ Skyward Life is another of David's dreamy
landscapes. David has also worked on a host
of videogames in his career, including Heroes
of the Storm and Diablo III: Reaper of Souls.
©David Luong
BASH THOSE KITSI've been doing the equivalent of kitbashing in CG for a long time now, and more and more tools tend to help me continue that way. What is interesting with kitbashing is that, like custom brushes in Photoshop, it leaves a certain amount of space for improvization and unexpected results. Pascal Blanché
↑ Pascal enjoys 'kitbashing' to create new and
interesting objects and characters. This is
just one of his exceptional personal projects,
Nomad. ©Pascal Blanché
THE BIG PICTUREDon't lose sight of the bigger picture. It's often easy as an artist to get very attached to a small part of the whole, and then lose track of what's important when you are on a strict deadline. What really helps me is to take a step back and try to see the bigger picture, and then re-prioritize what I have do – often it's not what you want to do, but it helps to get there faster. Tor Frick
↑ Tor Frick is an Art Director at Machine Games
and has worked on Far Cry 3. ©Tor Frick
BECOME A MASTERI grew up on 3ds Max, V-Ray, Photoshop, and then later on Fusion. For the line of work that I'm doing I'm quite satisfied with these apps right now. As I've sort of mastered the tools I'm using for the work I do, I'm more focused into ideas and inspirations than tools skills. But I always keep my eyes open for new stuff. Marek Denko
↑ Marek Denko is the Founder of NoEmotion
and a master of 3D photorealism. His
astonishing images exhibit his sharp eye for
contrast and composition. ©Marek Denko
14
THE DEADLY COMBOI tried several combinations of rendering software and hair generation plug-ins and tools before I found the deadly combo! Hair Farm is a plug-in for 3ds Max that does a terrific job at creating hair, in which the hair strands are generated within mesh volumes. With the latest version of V-Ray supporting Hair Farm, I can now render hair that handles GI, area lights, reflections and so on, with manageable render times. Jose Alves da Silva
↑ Hair Farm and V-Ray win. ©Jose Alves da Silva
UVS AND TERRAINThere are a few apps in my workflow that I can't live without. UV Layout (www.uvlayout.com) is simple and very logical to use, it has great unwrap algorithms for organic surfaces and its layout tools are great. World Machine (www.world-machine.com) is another tool I use for terrain generation. It uses a node-based approach and produces some amazing results. Toni Bratincevic
↑ Toni is a Senior Environment Modeler at
Blizzard Entertainment. He stays on top of
his UVs with UV Layout. ©Toni Bratincevic
97
"WE CAN FEEL
OVERWHELMED BY THE AMOUNT
OF NEW SOFTWARE OUT THERE"
10 1611 12 18
YOU ARE NOT A SURGEONI am an art director. I am not a surgeon working on a dying patient – now that
would be a high-pressure situation! Keep your cool; there is no life or death risk here, just a matter of priorities. It is like eating an elephant – you do it one chunk at a time! Pascal Blanché
↑ Pascal has invested plenty of time
learning the rules so he knows how and
when to break them. ©Pascal Blanché
13 15
14
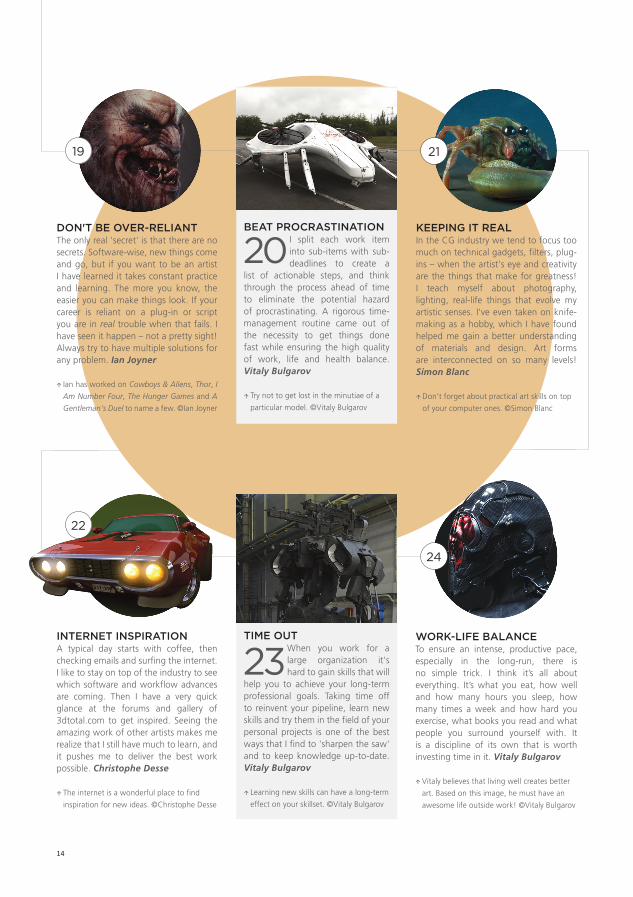
TIME OUTWhen you work for a large organization it's hard to gain skills that will
help you to achieve your long-term professional goals. Taking time off to reinvent your pipeline, learn new skills and try them in the field of your personal projects is one of the best ways that I find to 'sharpen the saw' and to keep knowledge up-to-date. Vitaly Bulgarov
↑ Learning new skills can have a long-term
effect on your skillset. ©Vitaly Bulgarov
BEAT PROCRASTINATIONI split each work item into sub-items with sub-deadlines to create a
list of actionable steps, and think through the process ahead of time to eliminate the potential hazard of procrastinating. A rigorous time-management routine came out of the necessity to get things done fast while ensuring the high quality of work, life and health balance. Vitaly Bulgarov
↑ Try not to get lost in the minutiae of a
particular model. ©Vitaly Bulgarov
WORK-LIFE BALANCETo ensure an intense, productive pace, especially in the long-run, there is no simple trick. I think it’s all about everything. It’s what you eat, how well and how many hours you sleep, how many times a week and how hard you exercise, what books you read and what people you surround yourself with. It is a discipline of its own that is worth investing time in it. Vitaly Bulgarov
↑ Vitaly believes that living well creates better
art. Based on this image, he must have an
awesome life outside work! ©Vitaly Bulgarov
INTERNET INSPIRATIONA typical day starts with coffee, then checking emails and surfing the internet. I like to stay on top of the industry to see which software and workflow advances are coming. Then I have a very quick glance at the forums and gallery of 3dtotal.com to get inspired. Seeing the amazing work of other artists makes me realize that I still have much to learn, and it pushes me to deliver the best work possible. Christophe Desse
↑ The internet is a wonderful place to find
inspiration for new ideas. ©Christophe Desse
DON'T BE OVER-RELIANTThe only real 'secret' is that there are no secrets. Software-wise, new things come and go, but if you want to be an artist I have learned it takes constant practice and learning. The more you know, the easier you can make things look. If your career is reliant on a plug-in or script you are in real trouble when that fails. I have seen it happen – not a pretty sight! Always try to have multiple solutions for any problem. Ian Joyner
↑ Ian has worked on Cowboys & Aliens, Thor, I
Am Number Four, The Hunger Games and A
Gentleman's Duel to name a few. ©Ian Joyner
KEEPING IT REALIn the CG industry we tend to focus too much on technical gadgets, filters, plug-ins – when the artist's eye and creativity are the things that make for greatness! I teach myself about photography, lighting, real-life things that evolve my artistic senses. I've even taken on knife-making as a hobby, which I have found helped me gain a better understanding of materials and design. Art forms are interconnected on so many levels! Simon Blanc
↑ Don't forget about practical art skills on top
of your computer ones. ©Simon Blanc
19 21
22
24

15
Essential titles for your bookshelf
High-quality books for every digital artist. 3dtotal.com/books
Looking for some inspiration? Or want to find out more about specific software? Look no further than 3dtotal.com/books
WORLDWIDE SHIPPING

Industry journalist Paul Hellard investigates the hair and skin advances within V-Ray seen in Digital Domain’s work on 2014's blockbuster hit movie, Maleficent
W O R D S B Y P A U L H E L L A R D
R E N D E R I N G
▶ Thistlewit is one of three lead pixies with plenty of screen time in Maleficent. Her long, curly, blonde hair was a particular nightmare when it came to rendering...
Disney’s Maleficent explores the untold version of the iconic villain from the fairy tale, Sleeping Beauty. Maleficent (Angelina Jolie), a fairy of the most evil temperament, is driven by a fierce desire to protect the moors over which she presides. The challenge for Digital Domain, however, was to marry photorealistic characters with high-resolution, actor-specific mo-cap reference, involving deep R&D to craft the most impressive render passes seen in a Disney movie.
C O M P L E X F A C E S“There was a lot of look-development and experimentation in the work that Digital Domain did on Maleficent with V-Ray,” says Chaos Group’s Creative Director, Christopher Nichols. “The first thing we had to do was to set up a ‘proof of concept’. We had facial scans of the actors and they were morphed and changed slightly to make them look more like pixies. What was always debated was: would the fact they were being made to look smaller make their faces look even more shiny, sub-surfaced – looking more like a baby's skin. The truth was when we did that to them, they didn’t look like themselves anymore. We
had to scale it back to keep as much of the character in there as possible, with that 'perfect skin' look. It was a tremendous aesthetic experiment which went back and forth a lot, and we found that 'sweet spot' after all.”
The pixies in Maleficent required a far more complex facial range and considerably more attention than had ever previously been attempted. Digital Domain has been using Chaos Group’s V-Ray for years to render the many characters in their productions. V-Ray was used across the board in Maleficent, as well. In fact, Chaos Group also helped Digital Domain in the development of the characters by working on the sub surface shader. “Digital Domain was able to get early access to many of the character-centric features we had been developing,” Nichols adds, “such as skin and hair, which allowed us to test and refine them in the real world, and are now part of V-Ray 3.0.”
Thistlewit is the one of the three lead pixies with a lot of screen time. She had a lot of long, curly, blonde hair. “That’s kind of like the nightmare situation for hair
CHRISTOPHER NICHOLSCREATIVE DIRECTOR
Chaos Groupwww.chaosgroup.com
DARREN HENDLERDIGITAL FX SUPERVISOR
Digital Domainwww.digitaldomain.com
JONATHAN LITTCG SUPERVISORDigital Domain
www.digitaldomain.comAll images ©Disney 2014
M A L E F I C E N T

18 19
rendering,” says Nichols. “We pretty much had to do full-on multi-bounce GI passes to go through all that hair, to make it look as luscious as it does. This rendering took some time, especially during those big close-up shots of the character. That’s when we really started to use more of the new V-Ray settings. Chaos Group sent one of their key developers to work at Digital Domain for several weeks to help on some of those optimizations of the skin and the hair.”
P I X I E H A I RDigital Domain has been one of the big testers of the hair technology with Chaos Group’s V-Ray for years. They’ve been working and growing hair together for a long time. “We build the hair in our custom software, Samson. Being a physically based ray tracer, you can’t just make cheats
when you render hair in V-Ray,” explains CG Supervisor Jonathan Litt. “There are no deep shadows or anything like that. It has to ray trace through the hair, which is quite an intensive exercise. Chaos Group upgraded its hair technology mid-to-late last year and it is now part of V-Ray 3.0, but they back-ported it into the build we were using on Maleficent and the render times were significantly faster – up to twice as fast.”
The designers had to create photoreal fairy versions of the actors, stylized and doll-like, and still recognizable as their actors. But there was more: there were to be digital versions of the actors as themselves as well, but no one cinema-goer will ever see them. “These characters would be rigged and made to be perfect,” says Darren Hendler,
Digital Effects Supervisor at Digital Domain. “They would be indistinguishable from the real footage of the actor doing their lines.”
“In fact,” explains Hendler, “we built the active facial rig of the actors so detailed that it performs and matches our actors exactly. We weren’t going to use them in the movie, but these formed the basis for our characters’ faces. We then transferred that data to the pixie design.”
Making photorealistic studies of the three actors playing the pixies turned out to be a key timesaver in the Maleficent production, because the pixie designs were changing quite frequently – and drastically – all the way through the creative stages.
F O R E S T C L O T H E SWrapping the pixies in a bush of natural fibers...
Digital Domain had done so much work on clothing and cloth-sim, jackets and all sorts of things, and now the wardrobe was being made out of all different plant materials. There is an immense range of twigs and plants, all sewn and stitched together. “All these elements required that SSS
look, and of course, there was a ton of them,” Nichols says.
Litt adds that this became one of the most challenging areas of the characters. “The design and artwork looked amazing, but it didn’t give us complete guidance on how the real-world, 3D, stitched-together costume was going to appear and move,” he says. “Rigging leaves and twigs and showing how they
wrap around the character was a big challenge. We went around stitching branches, twigs and flowers to our own clothes and watched as we walked around. This really was CG-animated-style-meets-photorealistic- style in play.”
“WE BUILT THE ACTIVE FACIAL RIG OF THE ACTORS SO DETAILED THAT IT PERFORMS AND MATCHES OUR ACTORS EXACTLY”
M A L E F I C E N T R E N D E R I N G
All images ©Disney 2014
▶ Thistlewit had a complex collection of dandelions she carried with her that were also rendered through the Hair system

21
"The character changed all the time,” Hendler explains. “We would have a fully working new facial rig in the space of a day.” Every time a new pixie design came in, they could transfer the skin rendering, shaders, facial expressions, everything, straight onto the new character design. Digital Domain used their proprietary facial transfer toolkit, which took into account the many differences in cheekbones, skin and even the blood flowing underneath, in order to accentuate expressions of anger, fear and delight from the character. They rebuilt each of the 3,000 or so face shapes individually, as the actor would naturally appear, then converted these from their natural look on the actor's face to the more CG ‘pixified’ version of the character. “It didn’t ever have that much affect on the character animation,” Hendler explains. “For example, if the animation was put into another design, it would
make exactly the same smile, but would just be a little bit different. It would be the kind of smile the different character would make, while being driven by exactly the same actor.”
When working so closely with Chaos Group on their shaders, Digital Domain could ask for any kind of modification to V-Ray, but this went deeper, and was more technical. “We devised a new lighting model for skin and then tore down those components to their base levels,” Litt explains. “In V-Ray you can create a BRDF shader, and usually the regular shaders in Maya use these in combinations. A big component of a skin shader is specular reflection. Normally these are run by default with the Blinn or Phong-based mathematical models of how specular reflections are distributed. In the default setup, by folding those BRDF models together inside V-Ray, we could change
M A L E F I C E N T R E N D E R I N G
“AS WELL AS MOVING WITH THE WING, EACH FEATHER WOULD BE INFLUENCED BY THE CROSS WIND AND TURBULENCE”
L I G H T A S A F E A T H E R Some of the most amazing structures in the movie, and perhaps the least talked about, are Maleficent’s wings...
“There really was no place to hide with these wings,” says Hendler. “Framed extremely close, each feather was individually modeled and rigged. The wings were featured as almost a separate character in the movie and were required to conform into almost any shape whilst never appearing to have any of the thousands of feathers intersect.”
The production designers wanted them to be physically correct while on Maleficent’s back. After meetings, director Rob Stromberg would take a frame away and paint how he wanted the wings to look and the silhouette he wanted them to fit. There would have been a thousand feathers sitting on this wing, which is completely realistically rigged as well.
The rigging crew did an amazing job to create rigs which held up under most moves, but could be brought back, tweaked and set to go once again very quickly to simulate and move around without colliding with one another. “We went through the process of modeling each individual feather on the wing,” states Hendler. “As well as moving with the wing, each feather would be influenced by the cross wind and turbulence, which added an extra dimension to the reality."
and activate the Cook-Torrance model to run our skin shaders, which is bundled with V-Ray. This isn’t normally exposed at the Maya level but you are actually able to dig right down and modify the shaders to run at this advanced level pretty easily with V-Ray.”
In fact, the Digital Domain team was able to not just modify, but to write completely new shaders to plug into V-Ray and create some impressive cloth shaders for Maleficent’s dress; the feathers of the wings were devised by writing a new custom shader in V-Ray. Litt is quick to admit this isn’t a rookie task: “Writing a BRDF shader is a pretty deep mathematical journey though,” he says. “When writing a physical shader it isn’t just a matter of throwing together a dot product or two.”«
All images ©Disney 2014

22 23
3dtotal: What kinds of projects do you focus your skills on and can you reveal some of your clients?Yuri Alexander: As a freelancer, I try to take most of my work with small studios or indie developers. I enjoy having more creative and design leeway over the characters I create, and I also find smaller team dynamics more interesting. I have several favorite clients: one is for a scripted fiction show which is using real-time engines and tools instead of traditional rendering to speed up workflow. I'm also working on a number of characters for a game about gang violence on the south side of Chicago, which is called "We Are Chicago", for the studio Culture Shock Games.
3dt: What are the challenges of working in real-time art? YA: The technical restrictions of real-time are fun to work with; they encourage a more technical type of creativity that I enjoy. As the engines develop – especially the new generation of physically based engines – most people have had to retool their workflow, but it is all for the better!
3dt: You've written several free tutorials for the community (www.yurialexander.com/tutorials), covering ZBrush and V-Ray. Why are these tools essential?YA: I see them both as more flexible tools than maybe their similar peers, and
I think that the ZBrush and V-Ray combination is powerful! ZBrush has the perfect tools for modeling just about anything, including those for adding massive amounts of detail. V-Ray makes setting up shaders, lighting and render configurations easy, and lets you test different methods and ideas easily, while allowing you to take advantage of that additional ZBrush detail. Moving and iteration between the two feels very natural!
3dt: Can you briefly explain some of the advantages of rendering your sculpts from ZBrush in V-Ray for Maya? How does it push your work to the next level?YA: Well, V-Ray and ZBrush work well together in a pipeline. Beyond being a creative tool, ZBrush has quick-and-easy methods for translating your work into a render-able scene. On the other side, V-Ray makes utilizing the meshes and maps fast and easy. V-Ray also makes dialing in the quality of render you are targeting easy, so you can improve quality in specific areas without having to increase quality globally, which keeps iteration times down.
3dt: Can you share with us some of your top tips for creating an awesome portfolio and marketing your work to the masses?YA: If you are rendering characters: use lighting to focus the scene, and keep background elements small and simple. Put your best work up front, and leave out anything mediocre!
3dt: What are your plans for the future – are there any clients or studios you would like to work for next? Can you tell us who and why?YA: I'd like to continue working for smaller studios, and focus more of my effort into character design. I've been grateful for finding creative opportunities in freelance so far, and I will continue to pursue projects that give me this freedom.
3dt: Finally, if we were to redo this interview in one year's time, what do you hope to have achieved by that milestone in the future?YA: Hopefully I will still be working to push my artistic skills, and keeping up with the advancements in V-Ray to get the best renders out of my models.
Images:
1. Shadows, 2013. This striking image is an unused
mock concept created for a videogame project.
Modeled in ZBrush and rendered using V-Ray 2.0 for
Maya. ©Yuri Alexander
2. Mechanical Arm Concept. Crafting a mech limb is
all in a day's work for Yuri! It's important to think about
how arms bend and how the forearm would shorten in a
design like this. Image courtesy of Patrick O'Mara
3. Anatomy Study Sculpt. Understanding the
fundamentals of human anatomy is an essential skill
for anyone looking to make it in character design and
modeling. ©Yuri Alexander
4. Planetdrop Character. This is one of Yuri's
current freelance projects, showcasing his incredible
attention to detail to not only the human form, but also
convincing clothing. Image courtesy of Patrick O'Mara
Background image: Anatomy Study. Presenting a
simple anatomy study in a realistic environment with
convincing lighting such as this helps to bring the
model to life. ©Yuri Alexander
Freelance 3D artist
Yuri Alexander discusses the tools
that help him craft stunning characters for real-time
projects and 3D illustrations.
Yuri Alexander is a talented 3D artist working in the Seattle/Redmond area of Washington, USA. With
major studios opening up in Redmond and the Amazon offices setting up downtown, plus a healthy number of small
and indie studios in the vicinity, it offers a fantastic base for a full-time freelancer such as Yuri, who specializes in real-time characters
for videogames and 3D illustrations.
We talk to Yuri to find out a little more about his experiences in the industry and how his tools keep him at the top of his game.
Yuri Alexander | www.yurialexander.com
Sci-fi girl…Turn the page to see our centerfold image, rendered in Maya with V-Ray 2.0. We can't wait to see what Yuri's characters will look like with V-Ray 3.0's new skin and hair capabilities! Stay tuned to Yuri's website for future updates: www.yurialexander.com
1
2 3
4
PERFECTING
REAL-TIME CHARACTERS
"The ZBrush and V-Ray combination is powerful… Moving and iteration between the two feels very natural!"

24 25 Yuri
Alex
ande
r | w
ww
.yur
iale
xand
er.c
om
26
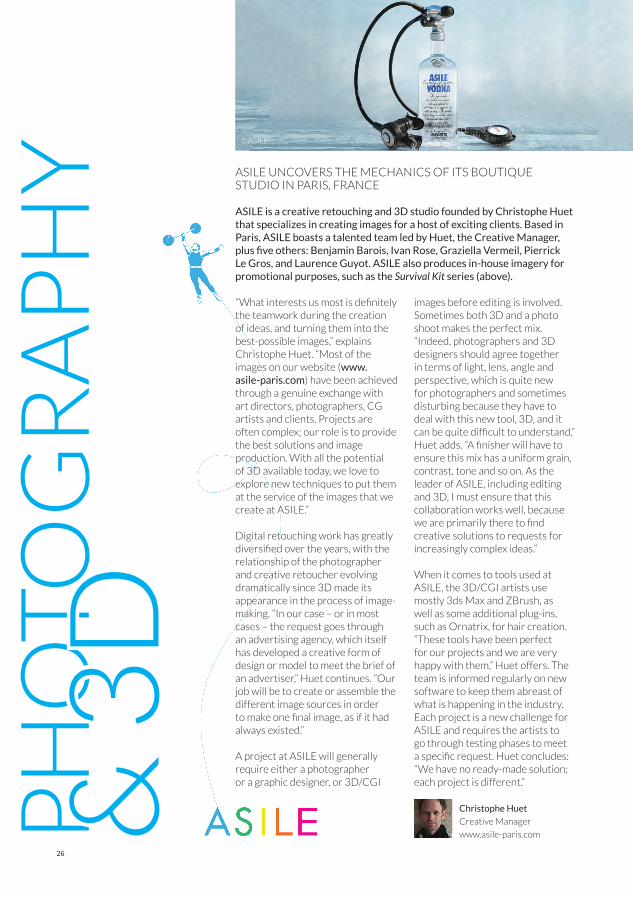
images before editing is involved. Sometimes both 3D and a photo shoot makes the perfect mix. “Indeed, photographers and 3D designers should agree together in terms of light, lens, angle and perspective, which is quite new for photographers and sometimes disturbing because they have to deal with this new tool, 3D, and it can be quite difficult to understand,” Huet adds. “A finisher will have to ensure this mix has a uniform grain, contrast, tone and so on. As the leader of ASILE, including editing and 3D, I must ensure that this collaboration works well, because we are primarily there to find creative solutions to requests for increasingly complex ideas.”
When it comes to tools used at ASILE, the 3D/CGI artists use mostly 3ds Max and ZBrush, as well as some additional plug-ins, such as Ornatrix, for hair creation. “These tools have been perfect for our projects and we are very happy with them,” Huet offers. The team is informed regularly on new software to keep them abreast of what is happening in the industry. Each project is a new challenge for ASILE and requires the artists to go through testing phases to meet a specific request. Huet concludes: “We have no ready-made solution; each project is different.”
ASILE is a creative retouching and 3D studio founded by Christophe Huet that specializes in creating images for a host of exciting clients. Based in Paris, ASILE boasts a talented team led by Huet, the Creative Manager, plus five others: Benjamin Barois, Ivan Rose, Graziella Vermeil, Pierrick Le Gros, and Laurence Guyot. ASILE also produces in-house imagery for promotional purposes, such as the Survival Kit series (above).
“What interests us most is definitely the teamwork during the creation of ideas, and turning them into the best-possible images,” explains Christophe Huet. “Most of the images on our website (www.asile-paris.com) have been achieved through a genuine exchange with art directors, photographers, CG artists and clients. Projects are often complex; our role is to provide the best solutions and image production. With all the potential of 3D available today, we love to explore new techniques to put them at the service of the images that we create at ASILE.”
Digital retouching work has greatly diversified over the years, with the relationship of the photographer and creative retoucher evolving dramatically since 3D made its appearance in the process of image-making. “In our case – or in most cases – the request goes through an advertising agency, which itself has developed a creative form of design or model to meet the brief of an advertiser,” Huet continues. “Our job will be to create or assemble the different image sources in order to make one final image, as if it had always existed.”
A project at ASILE will generally require either a photographer or a graphic designer, or 3D/CGI
Christophe Huet
Creative Manager
www.asile-paris.com
ASILE UNCOVERS THE MECHANICS OF ITS BOUTIQUE STUDIO IN PARIS, FRANCE
PH
OTO
GR
AP
HY
&
3D
©ASILE
©ASILE

Model stylized toons in 3ds Max andLearn to paint futuristic cityscapesMaster concept art for videogamesCreate characters in MudboxDigitally paint futuristic soldiersLearn to paint steampunk environmentsBeginner's guide to rigging in MayaDigitally paint medieval fantasy scenesLearn to model characters like Cedric SeautPaint dynamic characters in PhotoshopPhotoshop for 3D techniquesBeginner's guide to digital painting
Paint the un-deadLearn to create 3D fantasy scenesMaster custom brushes Create 3D environments using SketchUpPractice lighting outdoor environmentsLearn Mike Jensen's sculpting techniquesSculpt weird and wonderful 'manimal' conceptsCreate credible game charactersDiscover texturing techniquesMaster vehicle paintingDigitally paint hair and facesEmbrace creature concept designPaint the elements in PhotoshopLearn to paint armor
Discover speed painting Matte-painting techniques revealedSpeed sculpting: improve your ZBrush workflowLearn to create a Gothic church interior Master ZBrush character creationSwordmaster: create a 3D male characterJoan of Arc: create a 3D female characterBeginner's guide to ZBrushCreate a 3D tuc-tuc vehicleMaster 3D environment lightingFrom concept to render: realize a full CG sceneLearn to model a Bugatti Veyron
Learn to sculpt like the mastersDigitally paint fantasy landscapes
Art fundamentals revealedLearn to paint pinups with Serge Birault
Master matte painting with Piotrek SwigutDiscover the art of cartoon critters
Learn to paint characters' personalitiesMaster Vue for environments
Design characters for films and gamesMaster fairytale illustrations
Discover how to blend 3D and photographyMaster topology for better models
Learn to paint creatures in Painter
Sculpt armored beasts in ZBrush
Discover tips and tricks for pro
animationsLearn the art of painting manga
charactersMaster 3D character
productionDiscover 3D particles
and dynamics Learn to design
droids for 3DBuild droids in 3DDesign and create quadruped beasts
Learn how to create characters in 3ds
MaxMaster cartoon
creation in Photoshop
Design weapons for videogames
Learn how to animate characters
Discover how to perfect realistic shadersLearn to create custom brushes for characters
Master hard-surface modeling in MayaCreate a videogame environment in UDK
Improve your portrait painting in PhotoshopMaster vehicle design
Learn to paint creatures from folkloreDiscover how to paint myths and legends
From concept to render: create a 3D spaceshipCreate low-poly characters for games
Learn to model human anatomyMaster comic book illustration
Create mighty monsters in ZBrushDiscover Photoshop post effects
Whatever you want to create – 3dtotal has got you covered...
Professional trainingat affordable prices
2 eBooks - save 10% 3 eBooks - save 15%4 eBooks - save 20%
5 eBooks - save 25% 6+ eBooks - save 30%
SAVE UP TO 30%
For bundle buys only
3dtotal eBooks
3dtotal.com/ebooks
28 29
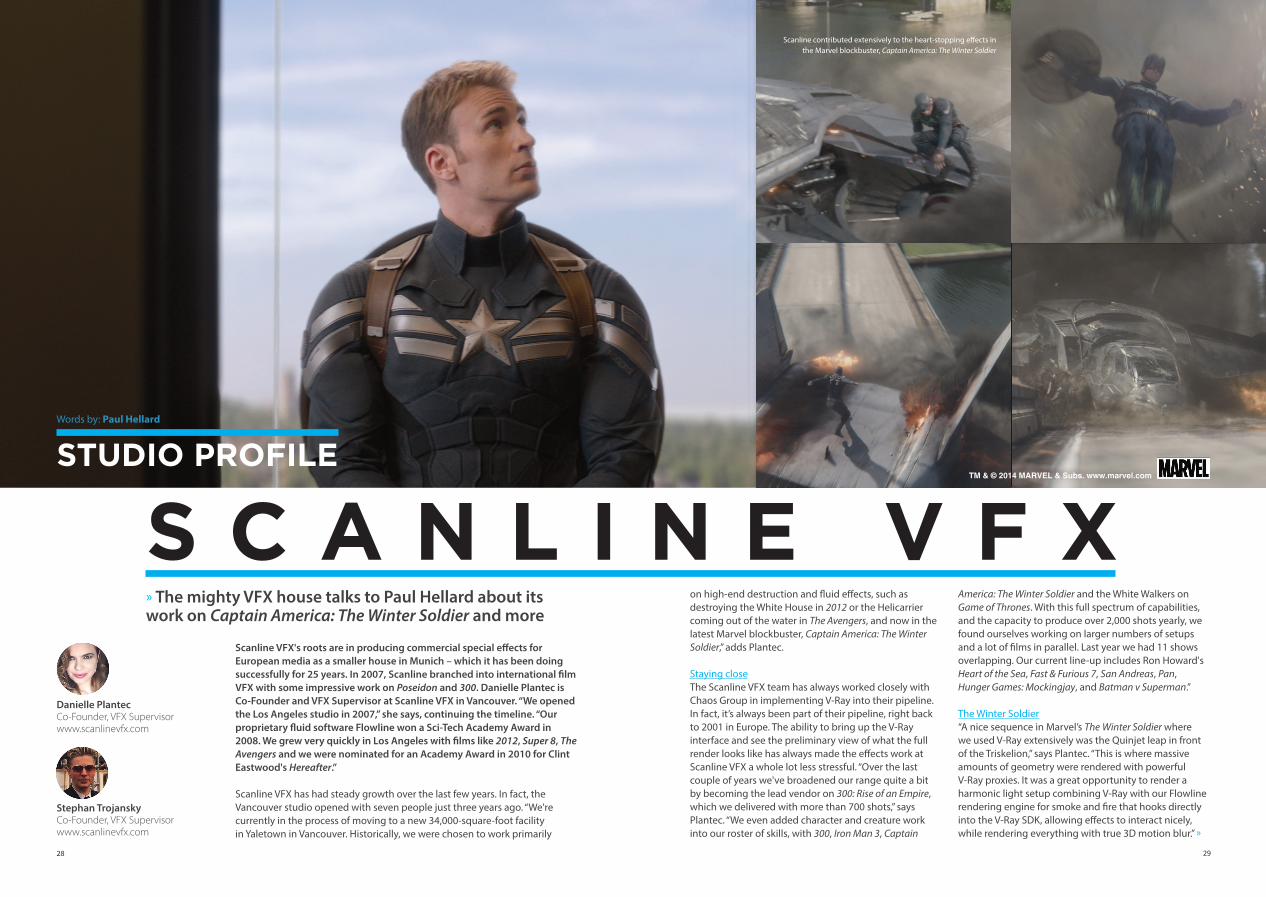
S C A N L I N E V F XSTUDIO PROFILE
» The mighty VFX house talks to Paul Hellard about its work on Captain America: The Winter Soldier and more
Scanline VFX's roots are in producing commercial special effects for European media as a smaller house in Munich – which it has been doing successfully for 25 years. In 2007, Scanline branched into international film VFX with some impressive work on Poseidon and 300. Danielle Plantec is Co-Founder and VFX Supervisor at Scanline VFX in Vancouver. “We opened the Los Angeles studio in 2007,” she says, continuing the timeline. “Our proprietary fluid software Flowline won a Sci-Tech Academy Award in 2008. We grew very quickly in Los Angeles with films like 2012, Super 8, The Avengers and we were nominated for an Academy Award in 2010 for Clint Eastwood's Hereafter.”
Scanline VFX has had steady growth over the last few years. In fact, the Vancouver studio opened with seven people just three years ago. “We're currently in the process of moving to a new 34,000-square-foot facility in Yaletown in Vancouver. Historically, we were chosen to work primarily
on high-end destruction and fluid effects, such as destroying the White House in 2012 or the Helicarrier coming out of the water in The Avengers, and now in the latest Marvel blockbuster, Captain America: The Winter Soldier,” adds Plantec.
Staying closeThe Scanline VFX team has always worked closely with Chaos Group in implementing V-Ray into their pipeline. In fact, it’s always been part of their pipeline, right back to 2001 in Europe. The ability to bring up the V-Ray interface and see the preliminary view of what the full render looks like has always made the effects work at Scanline VFX a whole lot less stressful. “Over the last couple of years we've broadened our range quite a bit by becoming the lead vendor on 300: Rise of an Empire, which we delivered with more than 700 shots,” says Plantec. “We even added character and creature work into our roster of skills, with 300, Iron Man 3, Captain
America: The Winter Soldier and the White Walkers on Game of Thrones. With this full spectrum of capabilities, and the capacity to produce over 2,000 shots yearly, we found ourselves working on larger numbers of setups and a lot of films in parallel. Last year we had 11 shows overlapping. Our current line-up includes Ron Howard's Heart of the Sea, Fast & Furious 7, San Andreas, Pan, Hunger Games: Mockingjay, and Batman v Superman.”
The Winter Soldier“A nice sequence in Marvel’s The Winter Soldier where we used V-Ray extensively was the Quinjet leap in front of the Triskelion,” says Plantec. “This is where massive amounts of geometry were rendered with powerful V-Ray proxies. It was a great opportunity to render a harmonic light setup combining V-Ray with our Flowline rendering engine for smoke and fire that hooks directly into the V-Ray SDK, allowing effects to interact nicely, while rendering everything with true 3D motion blur.” »
Danielle PlantecCo-Founder, VFX Supervisorwww.scanlinevfx.com
Stephan TrojanskyCo-Founder, VFX Supervisorwww.scanlinevfx.com
Words by: Paul Hellard
Scanline contributed extensively to the heart-stopping effects in the Marvel blockbuster, Captain America: The Winter Soldier
TM & © 2014 MARVEL & Subs. www.marvel.com

30 31
A lot of the work at Scanline VFX is with integrated cooperation with V-Ray plugged into the Flowline SDK. Scanline Co-Founder Stephan Trojansky also spoke to us about how Flowline and V-Ray work so closely together. “We just use the API to define another primitive in V-Ray that connects to the Flowline render engine,” Trojansky explains. “This lets us integrate Flowline with V-Ray reflections, refractions, dome-lighting and global illumination, sub-surface scattering – and all the other V-Ray ray-tracing features.” The integrated versions of V-Ray for use within 3ds Max and Maya are also very convenient for Scanline because it all lives in the same space with the same memory access. “We just recently finished our first show with pure Maya rendering, which was Game of Thrones, and this pipeline allows us to take the best of both worlds, with the V-Ray abilities inbuilt,” says Trojansky.
Scanline VFX has just upgraded its complete facility and render farm to V-Ray 3.0. Among the overall speed improvements is the new Progressive Renderer in particular, which allows you to define image quality by time allocated – this is great to keep any test renders at a predictable speed. The Chaos Group keeps a tight relationship with Scanline VFX on the R&D side, communicating weekly with their developers. They also visit the facilities once or twice a year to get a first-hand impression of what the biggest needs for the future are. “I've known Vlado [Koylazov] for almost 13 years,” adds Plantec, “when we implemented the first implicit surface renderer into V-Ray 1.0. Ever since then a great relationship has evolved over the years.”
The rise of an empire“300: Rise of an Empire was the most fun I've had on a show in 18 years,” says Plantec. “Not only was subject matter over-the-top and fantastic, but our internal team was a lot of fun to work with, too. The client was incredibly supportive and gave us creative freedom. There was such a broad range of cool material to work with from a 4,000-frame shot with a fully CG horse, water, fire digital doubles, proto-samurai and crazy retiming of sequences, to beautiful underwater creatures, fantastic
blood shots and full digital battles that took place entirely on water!”
Scanline VFX primarily works with off-the-shelf software, but continues to invest heavily in Flowline. There is also a range of pipeline tools to seam it all together and improve workflows. Working the Autodesk workhorse suite of 3ds Max and Maya, Scanline VFX takes advantage of the interoperability within V-Ray to allow them to light and render on the fly. They also extensively use Flowline for the depiction of fluids and all manner of smoke and flames, as well as The Foundry’s MARI for texturing the many vehicles that pass their way through the pipeline, especially on the The Winter Soldier and other Marvel productions they have been involved in. Massive Software also has a big place in their crowd workflow, with some brilliant new updates in version 6.0. thinkingParticles from cebas has a solid place in there as well.
CommunitySome VFX companies have such a large community that too many artists feel swamped and lost in the crowd. Despite Scanline's expansion, the culture survives through these days with solid social interaction and staff involvement. While Scanline VFX has become a lot bigger, they're
[ ]“300: Rise of an Empire was the most fun I've had
on a show in 18 years”
Scanline at SIGGRAPHBryan Grill, VFX Supervisor at Scanline VFX, teams up with Overall VFX Supervisor Dan DeLeeuw from Marvel, Russell Earl, VFX Supervisor at ILM, and Edson Williams, VFX Supervisor from Lola VFX to show the SIGGRAPH 2014 Production Session audience how they created some of the heart-stopping effects in the Marvel blockbuster Captain America: The Winter Soldier. Scanline VFX also plans to present some of its latest work in the Exhibits Fast Forward session, set for Monday 11 August.
still not a corporation, so it is a lot easier for them to arrange fun things for their hard-working crew and to maintain that smaller company feel. “We arrange a lot of parties, screenings, events and cool swag for the team,” says Plantec. “Our wrap parties and SIGGRAPH parties always have something fun to offer.”
There’s even been a weekend in Vegas at the Venetian for the Scanline crew. Sometimes they have acrobats and fire dancers,
or sunset boat rides. “In fact, the team is very involved with building and maintaining the culture so the crew feel valued and they know we appreciate them.” Artists will also join in the organizing and will arrange trips to festivals and concerts for their department. Sometimes even skiing, paintballing, go-karting, kayaking, river rafting, zip lining and karaoke. “We have a fantastic soccer team and an ultimate team... all arranged by the artists themselves,” Plantec adds. ■
Scanline opened its Los Angeles studio in 2007, winning a Sci-Tech Academy Award in 2008. The company then grew quickly in LA with films like 2012, Super 8 and The Avengers
The Vancouver Scanline studio opened with just seven people three years ago. The team is now in the process of moving to a new 34,000-square-foot facility in Yaletown
Scanline delivered more than 700 shots on 300: Rise of An Empire, making it the lead vendor on the blockbuster and widening the studio's range even further
300: Rise of an Empire. Images © 2014 Warner Bros. Pictures

T W O H A L V E S3dtotal kickstarts a new anatomical collection for artists with a
male and female pair of 11-inch statues
In March 2013, 3dtotal caused a stir in the digital art community when it launched a Kickstarter project to bring a new, affordable anatomical male reference figure to the market. Within 24 hours, the project was fully funded, and by the finish line it received £24,662 in pledges – a whopping 1,644 percent of the original funding goal.
One year later saw the announcement of a partner in crime: a female anatomical reference figure produced to the same standards as the original male, and also to scale. Five-percent shorter than the male makes her 265mm tall, minus the base (the male is 297mm, minus the base). Cast in the same neutral gray resin, the models make fantastic desktop companions.
The back-storyLaunched on 7 March 2013, the project was expected to make around £1,500 – enough to create an initial run of statues. The ultimate goal was to create a great anatomical reference for an affordable price, without compromising too much on quality. The aim has always been to give every artist the chance to develop their anatomy skills without having to pay a fortune for the privilege of such a tool.
The base model was originally sculpted by Federico Scarbini (www.federicoscarbini.com) and the anatomy was refined by Dan Crossland (www.dancrossland.co.uk) – both classically trained professional character modelers. The model was intended to be cast in gray resin to make the variation in the surfaces and directional flow of the muscles easy to see and understand. One half of the figure shows full skin, while the other is a clear and detailed dissection revealing muscle structure.
When the project funded in April 2013, that was only the start of the fun for the 3dtotal team. The statues then had to be made...
THE SPECS
Male FemaleCast in neutral gray resin Cast in neutral gray resin
28cm tall (11 inches) 26.5cm tall
Weight approx. 340 grams Weight approx. 240 grams
Half full skin/half muscle flow Half full skin/half muscle flow
Sculpted by Federico Scarbini and Dan Crossland
Sculpted by Dan Crossland
RRP: £60 (approx. $99 US/€74 EUR) RRP: £60 (approx. $99 US/€74 EUR)
A T A L E O FMaking a debut
The team managed to have three pre-order statues made ahead and fast-tracked to Anaheim, Los Angeles, just in time for SIGGRAPH 2013. There it was debuted on the Pixologic booth as part of a giveaway. Each day, attendees could sign up for their chance to take home one of the three statues. It had an overwhelming response and many people asking where they could buy it from. Now so popular they are currently out of stock, the models are on pre-order in the 3dtotal web shop priced at £60 (approx. $99 US), with delivery available from November 2014.
Photography by Thomas Roussel
32 33

Jumping in at the deep endWith the Kickstarter funds in the bank, it was time to begin the task of perfecting the figure with the casting company in the United States and ZBrush sculptor, Dan Crossland. The relentless back and forth between the 3dtotal team, backers (to let them know what was happening) and Dan involved a process of emails, phone calls, and having prototype 3D prints made and sent to Dan's home so he could preview his model in real-world 3D. With such an overwhelming response from backers, the team wanted to make sure the extra funds went towards improvements for a better quality statue for everyone. If you compare the model in the initial Kickstarter video to the final result, you can see just how much time, effort and resources were invested to take the model to the next level (visithttp://kck.st/13H3Mlj).
When the model was as desired, it was sent to the 3D printers in China, Ownage (www.ownage.com), to create the highest resolution print possible with the technology. The final model was then approved and sent to the US casting company to create the molds. Since a mold will only take a small number of casts, a lot of molds had to be made to fulfil the backer rewards. But it wasn't all plain sailing from there. As 3dtotal's first project of this ilk, there were many problems to overcome, including dealing with seams, getting the best shade of gray for artistic purposes, ensuring the resin wasn't too shiny – not to mention how to get 400 models from the US to the UK! The entire experience was an extremely valuable one, from start to finish, allowing the team to get a great pipeline in place for the next project…
A new addition Following on from the success of the male statue on Kickstarter, work began on a second model to join the collection. The female anatomical reference figure is the second model to grace artists' desks and workspaces around the world, giving everyone a chance to develop their anatomy skills without a hefty price tag. Whether artists use pencil and paper, paintbrushes, clay or digital art software, the models are designed to be invaluable for those wanting to understand the form and structure of human anatomy.
The second project was launched on Kickstarter in April 2014 and funded in May, reaching a staggering 4,963 percent of its original funding goal, with 742 backers jumping on board. The statues are in production and in the process of being delivered to backers. Once backers have received their rewards, the female statue will go on sale in the 3dtotal shop. Stay tuned to www.3dtotal.com for updates.
What's next for the collection?3dtotal is working with a gathering of talented artists around the world on a bunch of yet-to-be-announced projects that will add to the collection during 2015 and 2016. See sneak peeks on booth #1151 and sign up to the twice-monthly 3dtotal newsletter to be among the first in the know: www.3dtotal.com/newsletter.
What the customers think..."The detail is extraordinary for the low price point and the build quality is superb. I've recommended this to a few artist friends already and will continue to do so. It's so much easier to understand form and muscle structure when you can physically hold something."
"Knowing how expensive most anatomy reference models are, I'm very pleased 3dtotal went through the effort to bring this educational resource at such a democratic price-point."
Male and female anatomy figures available on
Pre-Order Now!
Delivery available from November 2014
Kickstarting ideasKickstarter has been a great tool for 3dtotal over the last few years. The team successfully published the strategic card game Prime Wars, which featured over 50 top artists (http://kck.st/N8tg2e), and the more elaborate and challenging board game 404: Law Not Found, which successfully reached its £10,000 funding goal in just a few days (http://kck.st/19AOgHD). Not to mention an epic collection of personal work by master artist Loïc Zimmermann, a VFX Concept Artist on Thor, Iron Man 3 and True Grit (http://kck.st/1hCp71Q), and the overwhelmingly popular Sketch Workshop project for traditional artists (http://kck.st/1f8FyGB).
Stay up-to-date with 3dtotal to avoid missing out on the team's exciting future projects by signing up to the twice-monthly email newsletter right here:www.3dtotal.com/newsletter. You can also follow 3dtotal on Facebook (www.facebook.com/3dtotal) and Twitter (http://twitter.com/3dtotal).
shop.3dtotal.com/figures/anatomy-figure.html
34 35

T H E A R T O F
F I L M M A K I N GI N D I EBlur Studio's Kevin Margo offers a glimpse into the making of his groundbreaking short movie, 'Construct', and looks towards what's next...
Kevin Margo is a visual effects and CG supervisor at Blur Studio in Culver City, California. Now 11 years into Blur and the director of his own groundbreaking short movie, 'Construct', Kevin talks to 3dtotal about the future of independent filmmaking.
Can you tell us how you've seen the CG and VFX industry evolve?From a financial and business model perspective I can't say it's been the healthiest of evolutions. From the technical side it's exciting to see how much CG and visual effects are being tapped to produce tent-pole films. It's great to see that it's working its way and ingraining itself more firmly into the broader production process, which kind of leads up to the 'Construct' stuff that I'm trying to do. Just on a technical level, in the 11 years since I've been at Blur... When I started there Brazil was the renderer of choice; it was pretty attractive at the time, but it didn't do indirect illumination or glossy reflections, so there were a lot of limitations. We've made two renderer changes since I've been there: we went from Brazil to
Kevin MargoDirector and VFX/CG Supervisor, Blur Studiowww.kevinmargo.com Credits:'Construct' – Director/VFX Supervisor'Grounded' – Director/VFX SupervisorBatman Arkham Knight trailer – CG SupervisorThor: The Dark World prologue sequence – VFX/CG SupervisorBatman Arkham City trailer – CG SupervisorHalo 4: Scanned launch trailer – VFX/CG Supervisor
Read the full
interview at http://bit.ly/kevinmargo
mental ray, and now we're... stumbling into limitations with its implementation into 3ds Max. That eventually led us to V-Ray as where we're at now, and getting the benefits of all these great features and the benefits of a deep collaboration with the Chaos Group guys to be able to drive the development of their own software. That's been really exciting.
Tell us about your teaser for the short movie, 'Construct'. What's the story?'Construct' is essentially a one-minute extraction from an eight-minute short film that I'm still working on. The world of Construct is a near-future society where AI and robotics have developed to a point where you're seeing androids insert themselves, or try to assimilate into broader society, and there are political and social tensions because of that.
It's not using live action – but I'm trying to replicate it as closely as possible. Chaos Group and I are developing V-Ray RT for MotionBuilder. I had done a live-action short film three or four years ago, but at the same »
PROGRESSIVE RENDERINGV-Ray RT is progressive, so it'll throw one or
two samples into a pixel and it'll look noisy.
But if you freeze the scene state and let V-Ray
operate for a few more seconds, by that time
it's had enough time to catch up, and it's
thrown in another 50 or 100 samples into each
pixel. Two or three seconds later you're staring
at something that's buttery, creamy smooth, GI-
lit and photorealistic – which is super exciting!
36

» time at Blur I was doing all this CG-only stuff, and I've been trying to find a way to merge the two processes as closely as possible and bring the two together... to create a new, really cool, efficient workflow for producing virtual content.
Basically, we took and we ported into MotionBuilder, so we had our performers moving around inside the motion-capture volume, and then we had a camera operator also filming the scene. And when I say "camera operator", it was really just a monitor on sticks with a few input commands – it wasn't a live-action screen, it was a tracked viewing device that, when pumped through MotionBuilder, MotionBuilder had the robot characters with V-Ray lighting and shading in it. We were ray-tracing or path-building on top of this MotionBuilder scene in real time through the camera that we were capturing in the volume at the same time.
The result is that inside the volume, the camera operator can see through his monitor viewport a real-time path-traced representation of the performers in front of him, as robots in the scene, in the set in 'Construct', the short film. That's the really exciting thing we're doing: bringing all these real-world lighting and shading, physically based rendering algorithms into the motion-capture volume, and enabling all of that to happen in real time.
Once you do that it's really exciting because now you can start replicating real-world camera concepts, like depth of field, target distance, f-stops, shutter speed, white balance. And lighting, too... You can block-out scenes, you can figure out camera angles, you can work out where your characters are going to go, and then you can think about: What do I want out of this shot? What f-stop do I want? How do I want to frame this shot? How do I want to use the lighting, and a lighting toolkit through V-Ray, to light this shot in a naturalistic manner?
The end result is a real-time image that's a little noisy due to the technology limitations right now – you're only able to shoot a sample or two into a pixel per frame, so it's a little grainy, but the idea that we're using the same rendering algorithms in real-time that has production scalability to a final delivery production frame is super exciting.•
THE FUTURE OF FILMMAKINGIt's definitely exciting. The thing that I'm really
excited and hopeful about is that when this
process matures a little more, it becomes what
the DSLRs did for independent filmmaking in
the last decade. That technology got to the
point where it was enabling an individual or
a small team of guys to create content very
quickly that could grab people's attention and
hold its own and compete against more costly
looking productions. I'm hoping that when
this stuff starts to mature a little bit more... I'm
hoping it's going to empower visual effects
artists to tell their own stories.•
Stay tuned! Kevin wants the short finished by
late fall/early winter. "In the late summer and
fall… the minutes will start rolling in!" he says.
See V-Ray RT in action
in the making of 'Construct' video:
http://vimeo.com/91330144
38

39
THE POWER OFCOLLABORATION
Buck is a design-driven production company comprised of a collective of directors, producers, digital artists, graphic designers, illustrators and animators, who all equally believe in "the power of collaboration". Henry Winchester talks to the team to find out more.
Orion Tait Executive Creative Director/Principal
Ryan O’Phelan CG Supervisor
Is the playful nature that's present in your work something that came about consciously?Ryan O’Phelan: Buck has a playful atmosphere in general, and the work that we do tends to attract artists with a playful style. Over time, there is a feedback loop that naturally aligns our artists' strengths and our clients' needs.
Orion Tait: I agree. We operate as a relatively flat, collaborative collective of individual artists and filmmakers, so it’s always interesting to me to hear how others perceive the through-line in our body of work. I agree with Ryan that our collective 'style', if you want to call it that, such as the playfulness you perceive, has happened naturally over time, across all the little decisions we make – from what projects to take on to what we put on our website, to how we communicate during production. We take our work pretty seriously, but not ourselves!
How much back and forth is there between you and the client?OT: Ours is a very collaborative process, both with the client and internally with our own teams.The amount of back and forth varies from project to project, but in most cases we’re sharing weekly progress with the client for every milestone in the production pipeline.
What software do you use, and what advantage do you think your tools give you over your closest competitors?ROP: We do cell animation, pure CG, live-action, stop-motion, and some puppetry as well, and most of these categories require different suites of tools as well as different workflows. In the CG arena, we have chosen Maya as our workhorse, simply because of its range of features and its ubiquity in the industry. Success comes not only from software feature sets, but the ease with which you can hire artists, and the dependability that working with a widely tested and feature-rich solution gives you. We have built a pipeline around Maya and V-Ray at Buck, and it serves us well.
At the same time, while we have a dependable CG pipeline, we are constantly evaluating other software like CINEMA 4D, MODO, and Houdini. It would be a mistake for studios in our industry to ignore the opportunities offered by other packages. You have to make them all work together to find the advantages.
www.buck.tv
▲ Pitching projects to clients is an art form in its own right. Luckily for Buck, the team often also gets the fortune of choosing which jobs they want to work on! This impressive array of client work speaks for itself.Images courtesy of Buck

40 41
V-Ray is one of the fastest, most powerful, and stable ray tracers on the market today. With the new addition of the Progressive Rendering engine and many other innovative features of V-Ray 3.0, users are able to visualize, create, and render images and movies of the highest quality, faster than ever.
Seth ThompsonCinematic Environment & Set SupervisorBlizzard Entertainment
Getting started with V-Ray
software Tips
Basic
Advanced
Expert00Adaptive render area only completed this section in 20 mins
Light cache preview
V-Ray 2.0 – Adaptive mode 20-minute render result at 2k
V-Ray 3.0 – Progressive mode 20-min render result at 2k
Computer spec: Intel Core i7 CPU 930 @2.80 GHz • 24.0 GB RAM • NVIDIA
GeForce GTX 465 graphics card
Use the new Render Mask feature to quickly render a selected object
01: Embrace the interfaceNew and current users of V-Ray will be pleased with 3.0's updates to the user interface (UI), which now offers the choice of Basic, Advanced and Expert modes, allowing users of varying experience levels to simplify the UI based on their needs. In Basic mode, the most essential options are exposed, allowing new users to start creating and rendering in V-Ray with ease. For experienced users, the Advanced and Expert modes allow full access to all the features they are accustomed to from the previous versions of V-Ray.
02: Top toolsOne of the V-Ray tools I have always enjoyed using is the VRayDisplacementMod modifier in combination with 2D black-and-white maps, or 3D-sculpted maps. With this modifier you can quickly generate, render and edit displacement values. In the image of the vine on top of the fish sculpture (right) you can see the differing displacement results between using a tree bark map and a black-and-white checker map on the vine. Plus, with the new 3.0 Render Matte
feature combined with the V-Ray Frame buffer A to B comparison option, artists can quickly render selected objects, and then compare render results without having to process an entire scene’s data – saving lots of time!
TOP LEFT: This is one of Seth’s personal works,
in which he leveraged V-Ray’s ray-tracing
power to effortlessly render tens of millions
of polygons
00: The Progressive Rendering mode for
V-Ray 3.0 has massive speed improvements
over version 2.0
01: There are different levels of options
available depending on the user modes, such
as here in the V-Ray GI tab in the Render
Setup window
02: The VRayDisplacementMod, the V-Ray
Render history, and the new Render Mask
options are great tools that can speed up
your workflow
01 02Use the VRayDisplacementMod (Modifier) in combination with black-and-white 2D maps to displace geometry. Simply drag a desired map into the Texmap slot, and adjust Amount for displacement strength
Set Texmap min to -.5 and Texmap max to .5 value. This tells V-Ray to displace white values positively and black values negatively with the pure gray (R 128, G 128, B 128) color value as neutral with no displacement
Use the V-Ray Render history to compare versions of renders to see what you like best
A B
A
B
1
2
Be sure you have enough topology to subdivide displacement with a TurboSmooth modifier
11,000,000+ Polygons
42
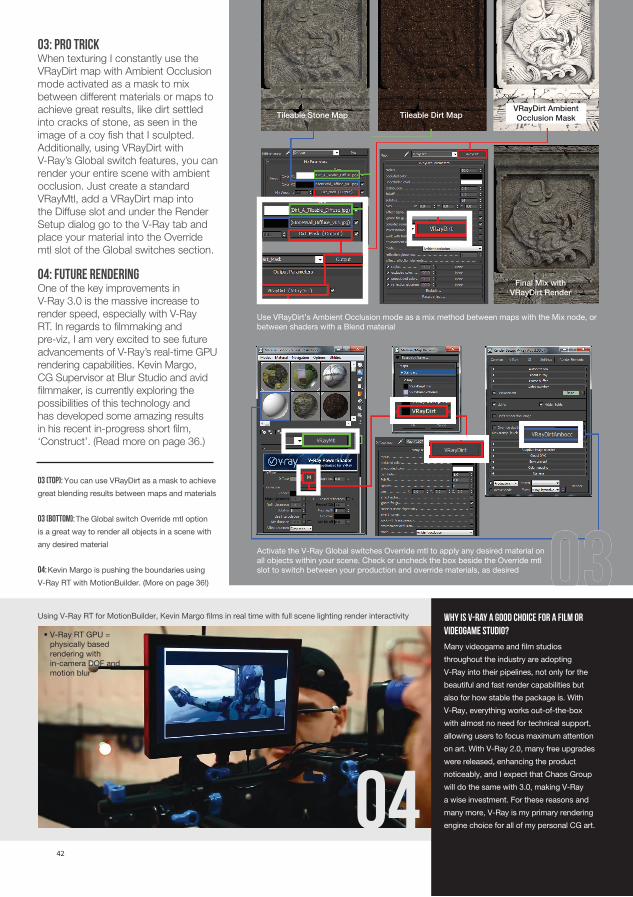
03: Pro trickWhen texturing I constantly use the VRayDirt map with Ambient Occlusion mode activated as a mask to mix between different materials or maps to achieve great results, like dirt settled into cracks of stone, as seen in the image of a coy fish that I sculpted. Additionally, using VRayDirt with V-Ray’s Global switch features, you can render your entire scene with ambient occlusion. Just create a standard VRayMtl, add a VRayDirt map into the Diffuse slot and under the Render Setup dialog go to the V-Ray tab and place your material into the Override mtl slot of the Global switches section.
04: Future renderingOne of the key improvements in V-Ray 3.0 is the massive increase to render speed, especially with V-Ray RT. In regards to filmmaking and pre-viz, I am very excited to see future advancements of V-Ray’s real-time GPU rendering capabilities. Kevin Margo, CG Supervisor at Blur Studio and avid filmmaker, is currently exploring the possibilities of this technology and has developed some amazing results in his recent in-progress short film, ‘Construct’. (Read more on page 36.)
03 (top): You can use VRayDirt as a mask to achieve
great blending results between maps and materials
03 (bottom): The Global switch Override mtl option
is a great way to render all objects in a scene with
any desired material
04: Kevin Margo is pushing the boundaries using
V-Ray RT with MotionBuilder. (More on page 36!)
Final Mix with VRayDirt Render
Tileable Stone Map Tileable Dirt Map
Use VRayDirt’s Ambient Occlusion mode as a mix method between maps with the Mix node, orbetween shaders with a Blend material
Activate the V-Ray Global switches Override mtl to apply any desired material on all objects within your scene. Check or uncheck the box beside the Override mtl slot to switch between your production and override materials, as desired 0303
Using V-Ray RT for MotionBuilder, Kevin Margo films in real time with full scene lighting render interactivity
• V-Ray RT GPU = physically based rendering with in-camera DOF and motion blur
Why is V-Ray a good choice for a film or videogame studio?
Many videogame and film studios
throughout the industry are adopting
V-Ray into their pipelines, not only for the
beautiful and fast render capabilities but
also for how stable the package is. With
V-Ray, everything works out-of-the-box
with almost no need for technical support,
allowing users to focus maximum attention
on art. With V-Ray 2.0, many free upgrades
were released, enhancing the product
noticeably, and I expect that Chaos Group
will do the same with 3.0, making V-Ray
a wise investment. For these reasons and
many more, V-Ray is my primary rendering
engine choice for all of my personal CG art.
VRayDirt Ambient Occlusion Mask
04
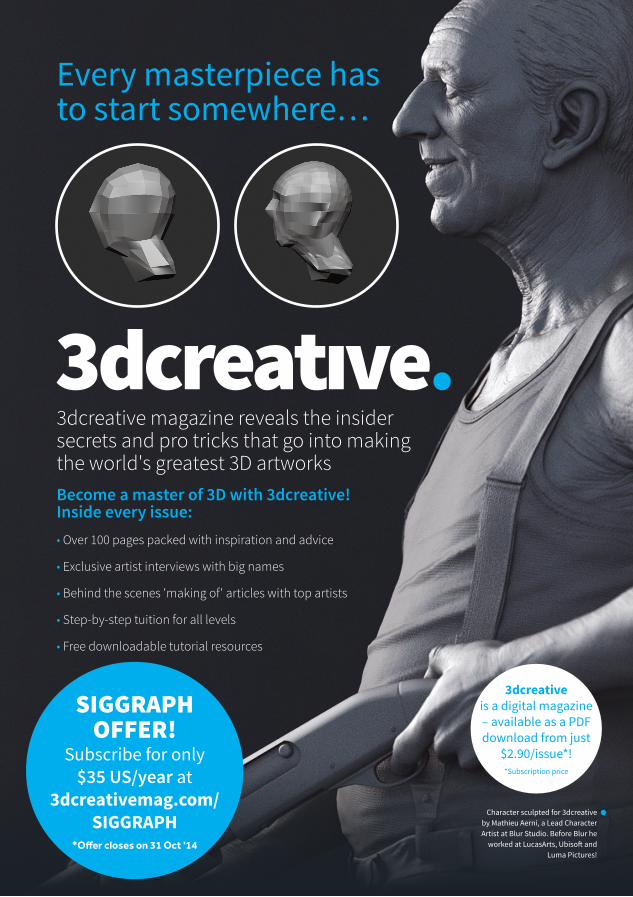
Every masterpiece has to start somewhere…
Character sculpted for 3dcreative by Mathieu Aerni, a Lead Character Artist at Blur Studio. Before Blur he
worked at LucasArts, Ubisoft and Luma Pictures!
3dcreative magazine reveals the insider secrets and pro tricks that go into making the world's greatest 3D artworksBecome a master of 3D with 3dcreative! Inside every issue:• Over 100 pages packed with inspiration and advice
• Exclusive artist interviews with big names
• Behind the scenes 'making of' articles with top artists
• Step-by-step tuition for all levels
• Free downloadable tutorial resources
3dcreative is a digital magazine – available as a PDF download from just
$2.90/issue*! *Subscription price
SIGGRAPHOFFER!
Subscribe for only $35 US/year at
3dcreativemag.com/SIGGRAPH
*Offer closes on 31 Oct '14

Master ZBrushInsomniac Games' Lead Character ArtistGavin Goulden divulges his tried-and-tested tricks for better sculpts
Gavin Goulden is the Lead Character Artist for Insomniac Games working on the upcoming Xbox One title, Sunset Overdrive. Prior to this, he was the Lead Character Artist for Irrational Games, working on BioShock Infinite and the Burial at Sea DLC series. Having been crafting characters for triple-A games for years, such as BioShock's charismatic Elizabeth, Gavin shares his professional advice for better character sculpts in ZBrush across three bite-sized tutorials.
Using masks for fine detailsDiscover how to create fine detail in a face, including pores, wrinkles, and blemishes, using a mask created from a texture inside ZBrush
When sculpting faces and skin, placement of details is very important, and that extra level of polish can really make your sculpture sing – but it can be tedious and time-consuming. To help speed things up, and keep the details accurate, I like to use a mask based off of a grayscale texture that marks the peaks and valleys of the surface and allows you to push them in or out using Deformation > Inflate. This technique helps lay down a nice base layer of detail that is far more interesting than just surface
Pro tip: Pushing details furtherUsing this technique means that your model is being changed globally – meaning all exposed areas have the same treatment, which isn't necessarily true in the real world. You can continue to mask out areas and, with your favorite brush, push out details further!
noise and allows you to build from that using normal sculpting methods.
To begin, you will need an unwrapped model and a grayscale texture where white represents high points of information and black represents low points of information. In this example, you can begin with a desaturated texture and manually paint extra details that would be lost. Once you're happy with the larger and medium forms of your sculpture, import the grayscale texture into the Alpha slot within your brush in ZBrush. Navigate to Masking > Mask by Alpha and click Mask by Alpha. This will cause black areas in your texture to mask off areas of your sculpt (by default leaving them deactivated) – if you cannot see your mask applied to your sculpt, simply enable View Mask. Once your mask is applied, you can navigate to Deformation > Inflate and decrease or increase the intensity. You can easily see your geometry being displaced based on the texture you applied to your model.
1
Gavin GouldenLead Character ArtistInsomniac Gameswww.gavimage.com@GavinGoulden
▲ Adding a final pass of surface detail to your model can make a world of difference – but overdo it, or add unnatural details, and the effect is ruined!
You can see the different steps taken to
mask out details and the effect that adding this
information to your sculpt has – and it only takes a
few minutes!
Continue pushing details out in your sculpt by masking off areas more and running a Standard brush over the exposed areas
▶
▶
44 45

Creating facial hair with the FiberMesh toolGain a basic understanding of the FiberMesh tool in ZBrush and see the potential that FiberMesh can have in your projects
Almost every character artist has struggled with hair in one way or another. Either rendering difficulties in games, technical limitations, or just feeling like it's plain tedious work. ZBrush's FiberMesh feature gives artists a quick and easy way to place hair on their characters without the need to manage planes, sculpting out wigs, and hand-crafting splines. Similar to spline-based hair plug-ins in your favorite 3D program, FiberMesh is a great solution for quick hair and fur. In this tutorial I will give you a quick look at how FiberMesh works and, hopefully, give you ideas for what you can do with your next character creation.
First, mask out the area on your character that you would like to grow hair from. In this case, I will be creating a beard, but you can apply the same ideas to any part of your model. Once your mask has been created, navigate to the FiberMesh panel within ZBrush and click on LightBox > Fibers. This will bring up a panel that will let you select from a series of presets that are available by default with ZBrush. After clicking on one of these presets, you should see it automatically applied to your model.
Painting skin textures with Color SprayA quick overview on how to paint skin textures in ZBrush using the Color Spray tool will add a little life to your character sculpts
An important part of character creation is having believable skin that renders properly in both high-end and real-time scenarios. With current generation workflows evolving, my process has changed from painting a two-dimensional texture to painting textures right onto my high-resolution mesh. This allows me to bake everything out together, and make iterations right at the source rather
2 3
▲ FiberMesh is a quick and easy solution for hair geometry, that can be altered and rendered after its creation
▲ Polypaint is a great tool for laying down base textures as well as creating fully detailed color maps for your characters
▲ Mark major areas in your character by defining landmarks using broad strokes with the Polypaint tool
▲ Mask out the areas you wish to apply hair to on your model. Growing hair is as easy as finding a preset in ZBrush
▲ Once your hair SubTool has been created, you can keep manipulating your hair/fur with ZBrush's Groom tools and regular brushes
Pro tip: Using the Groom tools in ZBrushAfter you have accepted your FiberMesh settings, a SubTool will be created with geometry that just makes up those hairs you have created. You can keep adjusting your model with regular ZBrush brushes, but also have access to the Groom brushes which will allow you to twist, lengthen, and crop your hair strands.
Pro tip: Adding detail to your skin textureOnce you've defined your base colors, change your brushstroke to Color Spray; this will cause the colors that you apply to be varied – similar to changing the spread in the Shape Dynamics brush panel in Photoshop. The colors applied will alternate between the primary and secondary colors chosen in your tool; so, if you have black and white, the result will be a mix of black and white dots. At this stage, you're pushing the color variation within your skin but still want to keep the differences subtle, so keep your color selections within the same range. I work in phases, going over the model with bigger strokes that help break up the surface, and then refine as I go.
than manipulating a baked-down asset. Most people are familiar with the Polypaint feature within ZBrush, but may not be familiar with how powerful it can be – so with this short guide I hope to shed some light on that feature and what it could possibly bring to your future projects.
To begin, select a color that is relevant to your character's skin tone and fill your model. Then begin marking major landmarks with shades of blue and red. Any tool will do, but I just use Standard with only RGB activated at 100%. Generally, where blood would be closer to the surface it will have a stronger red or pink color; fattier areas – and locations that have stubble – will be slightly blue and green. The key here is subtlety: a small variation can go a long way! Right now, you are working with broad strokes to mark bigger locations. Even at this stage, you could easily bake out a texture to then push further in Photoshop – using the baked-down texture as a starting point or guide.
◀ Use Color Spray and work in passes to bring more detail and life to your character's skin texture
GoZ!At the push of a button you can transfer your mesh to an application of your choice and it will instantly set up all the appropriate shading networks for you. GoZ also supports the transfer of multiple Tools and/or SubTools between ZBrush and its target applications to save you hassle and allow you more time to focus on what you love: creating art! GoZ-enabled applications currently include Maya, 3ds Max, MODO, CINEMA 4D, LightWave 3D, Poser, DAZ Studio, Carrara, Photoshop and more!
46 47

48
Talented MPC London Modeler and Texture Artist, Federico Scarbini, shares the secrets of his highly imaginative 3D sketchbook
"Starting a new 'hero' personal project can sometimes take up months of your free time. Which is why having a sketchbook is a great idea: it's a place where you can explore concepts freely without any time limitations, and have fun at the same time!
"No one needs to see what you come up with (unless you want them to), and in the worst case scenario you spend an hour of your life producing something you don't like (but still end up practicing anyway). Not all sculpts are worth showing – this is completely normal. In my case, I'd say that 40 percent are interesting, 20 percent are nice, and a very few catch my attention. But as I'm not spending a lot of time producing them, it's still worth it to give me the chance to produce those very few that may later become a hero project!
"Some sketches start as simple traditional drawings with pencil and paper – sometimes I need this step to explore ideas before jumping into ZBrush because it's quicker to change things with fast lines than sculpting in 3D. Other times I start directly in ZBrush, usually when I already have a clear idea or feel confident about where I want to go. ZBrush has very powerful tools for quick sketching and for creating new geometry on the fly. Once in ZBrush, I usually start from a DynaMesh or a ZSphere armature. The brushes I use the most are Move, Clay Tubes, Clay Buildup, Standard and DamStandard. I tend to not subdivide my mesh unless I really need to step up with the resolution to define finer details.
"To me, the ultimate goal of sketching is to express an idea that could be about a character or an environment – or anything, really. When you reach the point where what you produced could be a starting point for a discussion with clients, colleagues or friends, then your sketch has served the purpose!"
Federico ScarbiniModeler and Texture Artist, MPC Londonwww.federicoscarbini.comFederico Scarbini is employed as a Modeler and Texture Artist at MPC in London, where he is responsible for delivering assets for feature films, ranging from digital doubles and creatures to vehicles and environments
"ZBrush has very powerful
tools for quick sketching and for creating new geometry
on the fly"
◀ Untitled. This sketch was inspired by macro references of flowers and diagrams of mathematical formulae found in nature
◀ Untitled. Vaguely reminiscent of Hellraiser's Cenobites, this character appears menacing due to its lack of eye contact and scary, sharp teeth
Cyclops. This is the first in a series of cyclops studies – this one has one large eye with nostrils shifted to the side. He's intended to be the smart one of the bunch! ▶
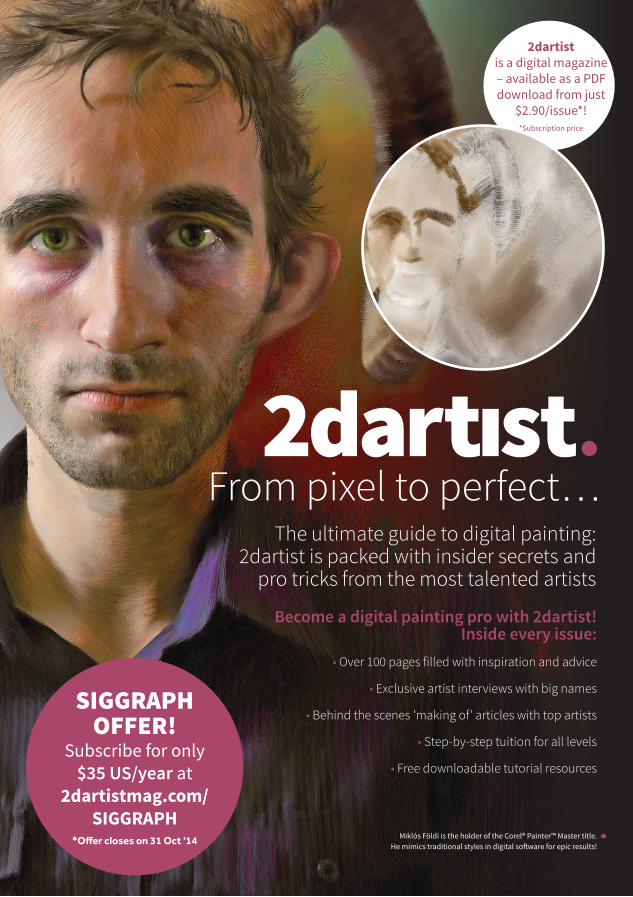
From pixel to perfect…The ultimate guide to digital painting:
2dartist is packed with insider secrets and pro tricks from the most talented artists
Become a digital painting pro with 2dartist! Inside every issue:
• Over 100 pages filled with inspiration and advice
• Exclusive artist interviews with big names
• Behind the scenes 'making of' articles with top artists
• Step-by-step tuition for all levels
• Free downloadable tutorial resources
Miklós Földi is the holder of the Corel® Painter™ Master title. He mimics traditional styles in digital software for epic results!
2dartist is a digital magazine – available as a PDF download from just
$2.90/issue*! *Subscription price
SIGGRAPHOFFER!
Subscribe for only $35 US/year at
2dartistmag.com/SIGGRAPH
*Offer closes on 31 Oct '14

F E A T U R I N GYURI ALEXANDER
JOSE ALVES DA SILVAALESSANDRO BALDASSERONI
SIMON BLANCPASCAL BLANCHÉ
TONI BRATINCEVICVITALY BULGAROVDAN CROSSLAND
MAREK DENKOCHRISTOPHE DESSE
TOR FRICKGAVIN GOULDENDARREN HENDLERCHRISTOPHE HUET
IAN JOYNERJONATHAN LITTDAVID LUONGKEVIN MARGO
OLEG MEMUKHINMARCO MENCOARIS MICHAILIDIS
CHRISTOPHER NICHOLSRYAN O’PHELAN
DANIELLE PLANTECFEDERICO SCARBINI
JUAN SIQUIERORION TAIT
YUO TENGARASETH THOMPSON
STEPHAN TROJANSKY
WWW.3DTOTAL.COMBOOTH #1151Cover artwork: Maleficent, © Disney 2014