2.4ghz radio control model boat -...
TRANSCRIPT
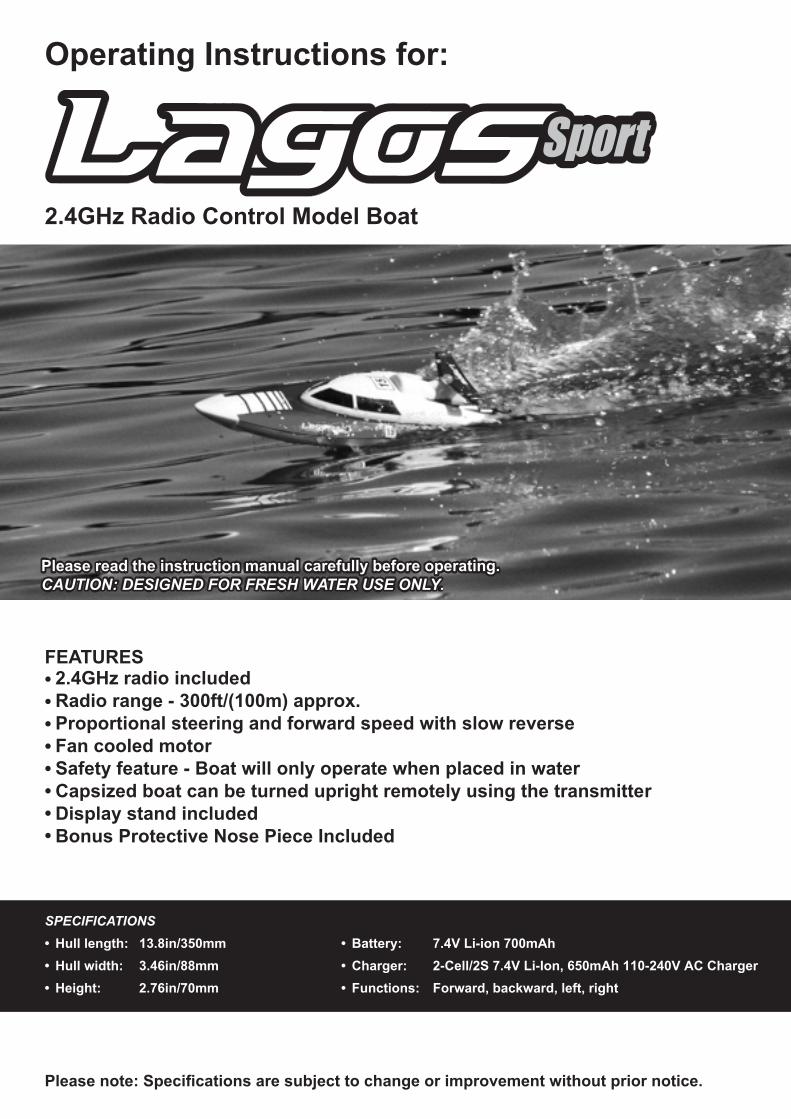
Operating Instructions for:
2.4GHz Radio Control Model Boat
FEATURES• 2.4GHz radio included• Radio range - 300ft/(100m) approx.• Proportional steering and forward speed with slow reverse• •
Fan cooled motor
• Safety feature - Boat will only operate when placed in water
• Capsized boat can be turned upright remotely using the transmitter
• Display stand includedBonus Protective Nose Piece Included
SPECIFICATIONS• Hull length: 13.8in/350mm• Hull width: 3.46in/88mm• Height: 2.76in/70mm
• Battery: 7.4V Li-ion 700mAh• Charger: 2-Cell/2S 7.4V Li-Ion, 650mAh 110-240V AC Charger• Functions: Forward, backward, left, right
Please read the instruction manual carefully before operating.CAUTION: DESIGNED FOR FRESH WATER USE ONLY.Please read the instruction manual carefully before operating.CAUTION: DESIGNED FOR FRESH WATER USE ONLY.
Atomic Flash Instructions2
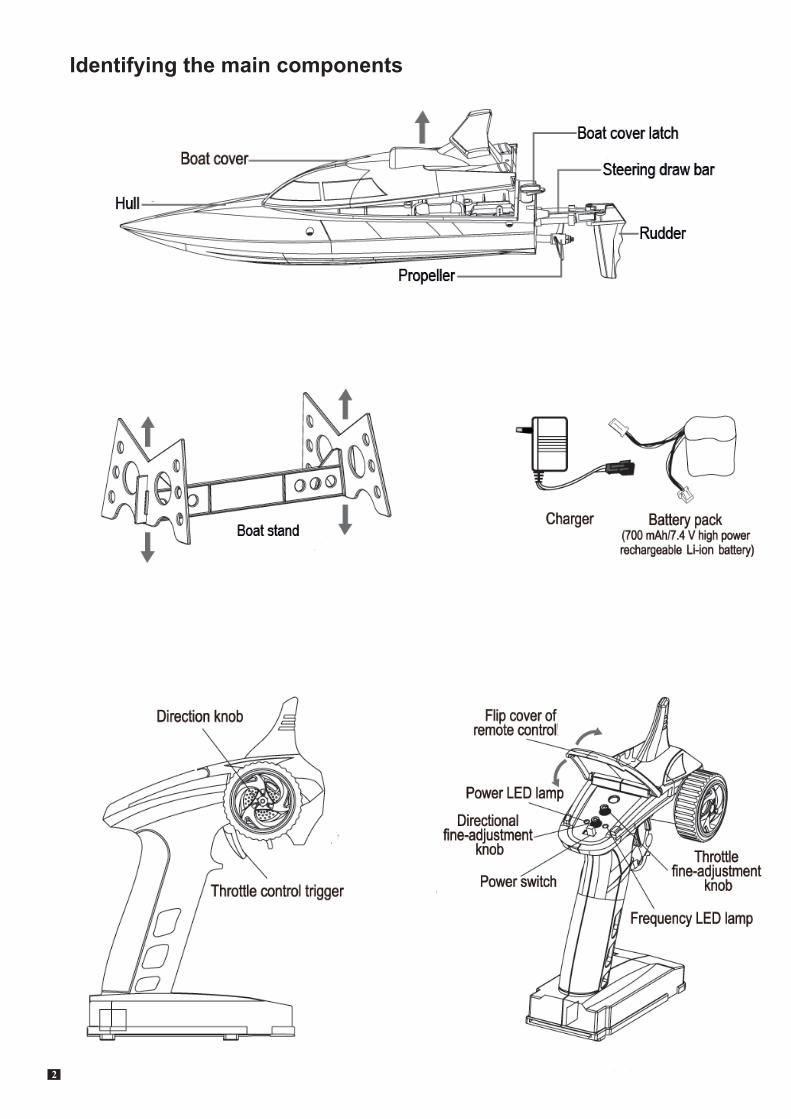
Identifying the main components

www.modelengines.com.au 3
120V
AC
Installing batteries in transmitter
Charging boat battery
Remove retaining screw and slide open the battery cover on base of the transmitter.Insert six (included) 1.5V AA alkaline batteries into the base of the tranmitter.
Safety Warning: Ensure correct polarity, “+” and “-”, when inserting batteries.
Replace battery cover and retaining screw.
1. Remove battery from the boat.2. Connect the boat battery to the charger.3. Plug the charger into a 120V power socket and
turn on the power.4. Charge time is approxiamately 1 hour.5. Do not leave battery unattended.6. When the charge time is complete, the surface of
the battery may be warm.7. Turn off the power, remove the charger from the
socket and disconnect the battery.8. During charging, if the battery becomes too hot
to hold, disconnect from the power and charger immediately.
Precautions for batteries in transmitter1. AA alkaline batteries are recommended.2. Rechargeable batteries may be used.3. Non-rechargeable batteries cannot be recharged.4. Do not short circuit or dismantle alkaline or
rechargeable batteries and do not place used batteries into a fire.
5. Charge rechargeable batteries only with Adult supervision.
6. Take rechargeable batteries out of the boat and transmitter to recharge.
7. Ensure correct polarity when replacing batteries.8. Do not mix battery types or brands and do not
mix old and new batteries.9. The boat may be cleaned in fresh water. You must
remove the battery before cleaning.10. Discharged batteries must not be left in the boat
or the transmitter.11. If you are not using the boat, remove the battery.12. Regularly check the condition of the wiring,
plugs, hull and other components incase of damage. If damage is found, do not use until repaired.
Atomic Flash Instructions4
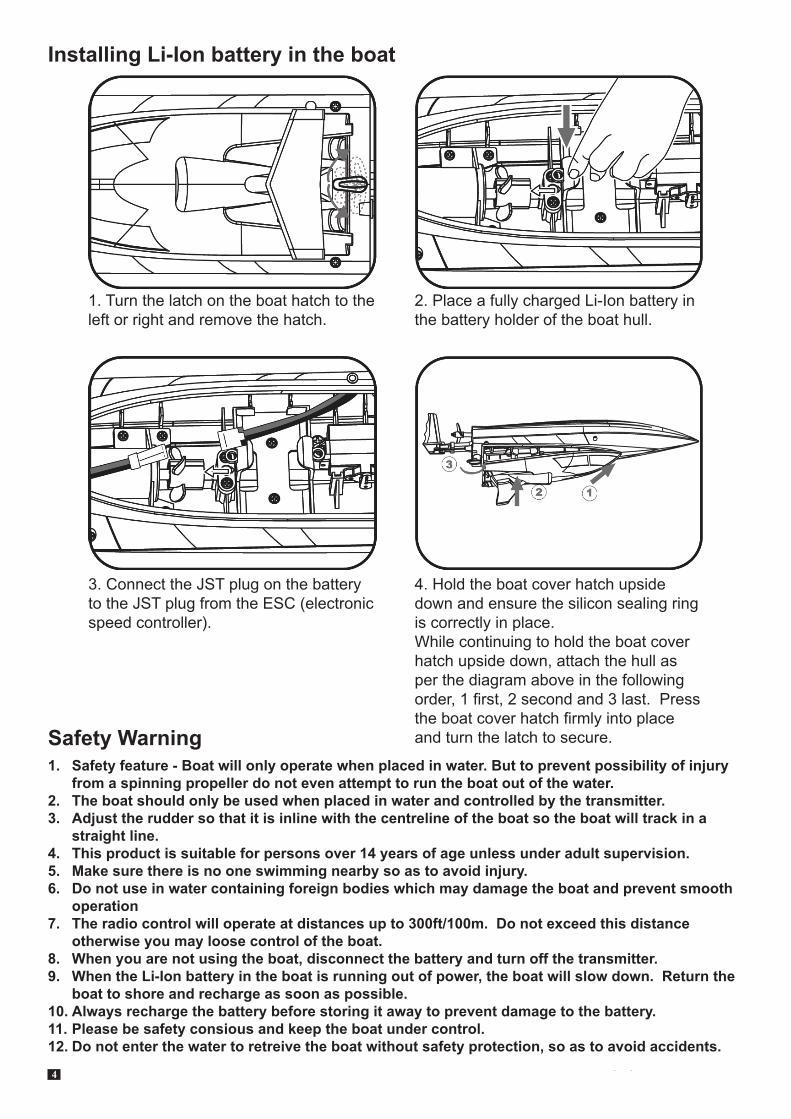
Installing Li-Ion battery in the boat
Safety Warning
1. Turn the latch on the boat hatch to the left or right and remove the hatch.
2. Place a fully charged Li-Ion battery in the battery holder of the boat hull.
3. Connect the JST plug on the battery to the JST plug from the ESC (electronic speed controller).
4. Hold the boat cover hatch upside down and ensure the silicon sealing ring is correctly in place.While continuing to hold the boat cover hatch upside down, attach the hull as per the diagram above in the following order, 1 first, 2 second and 3 last. Press the boat cover hatch firmly into place and turn the latch to secure.
1. Safety feature - Boat will only operate when placed in water. But to prevent possibility of injury from a spinning propeller do not even attempt to run the boat out of the water.
2. The boat should only be used when placed in water and controlled by the transmitter. 3. Adjust the rudder so that it is inline with the centreline of the boat so the boat will track in a
straight line.4. This product is suitable for persons over 14 years of age unless under adult supervision.5. Make sure there is no one swimming nearby so as to avoid injury.6. Do not use in water containing foreign bodies which may damage the boat and prevent smooth
operation7. The radio control will operate at distances up to 300ft/100m. Do not exceed this distance
otherwise you may loose control of the boat.8. When you are not using the boat, disconnect the battery and turn off the transmitter.9. When the Li-Ion battery in the boat is running out of power, the boat will slow down. Return the
boat to shore and recharge as soon as possible. 10. Always recharge the battery before storing it away to prevent damage to the battery.11. Please be safety consious and keep the boat under control.12. Do not enter the water to retreive the boat without safety protection, so as to avoid accidents.
www.modelengines.com.au 5
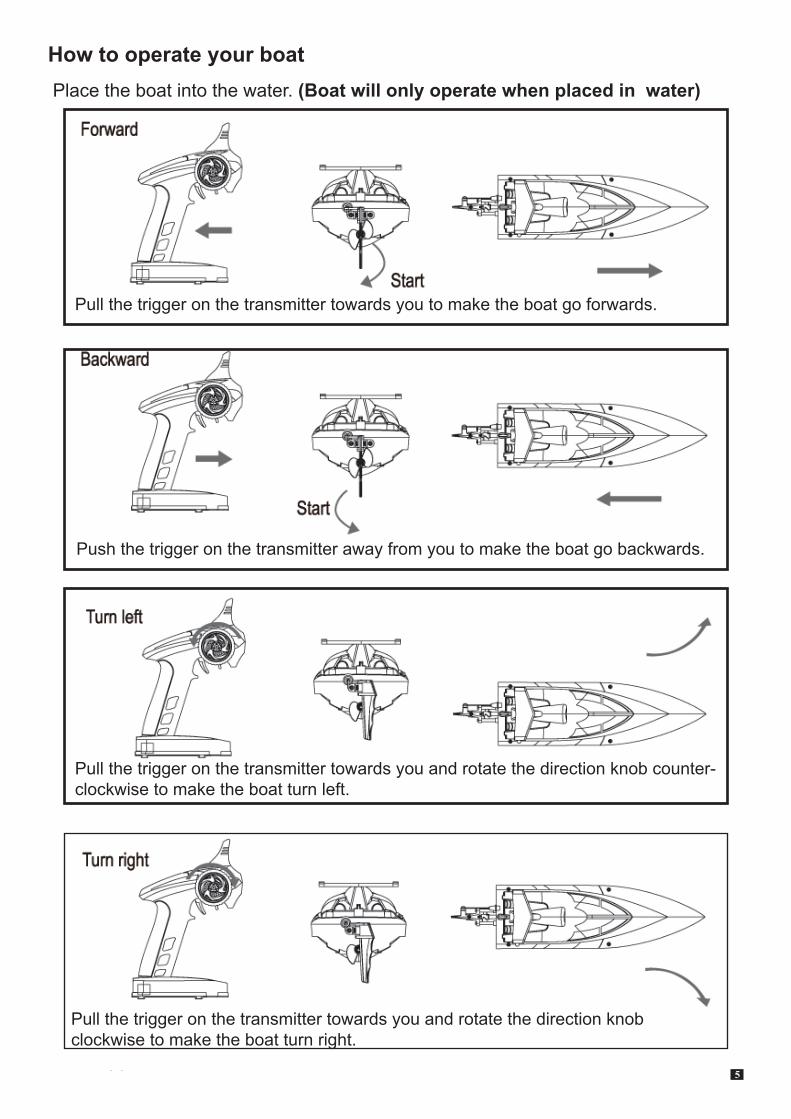
How to operate your boat
Pull the trigger on the transmitter towards you and rotate the direction knob counter-clockwise to make the boat turn left.
Place the boat into the water. (Boat will only operate when placed in water)
Push the trigger on the transmitter away from you to make the boat go backwards.
Pull the trigger on the transmitter towards you and rotate the direction knob clockwise to make the boat turn right.
Pull the trigger on the transmitter towards you to make the boat go forwards.
Atomic Flash Instructions6
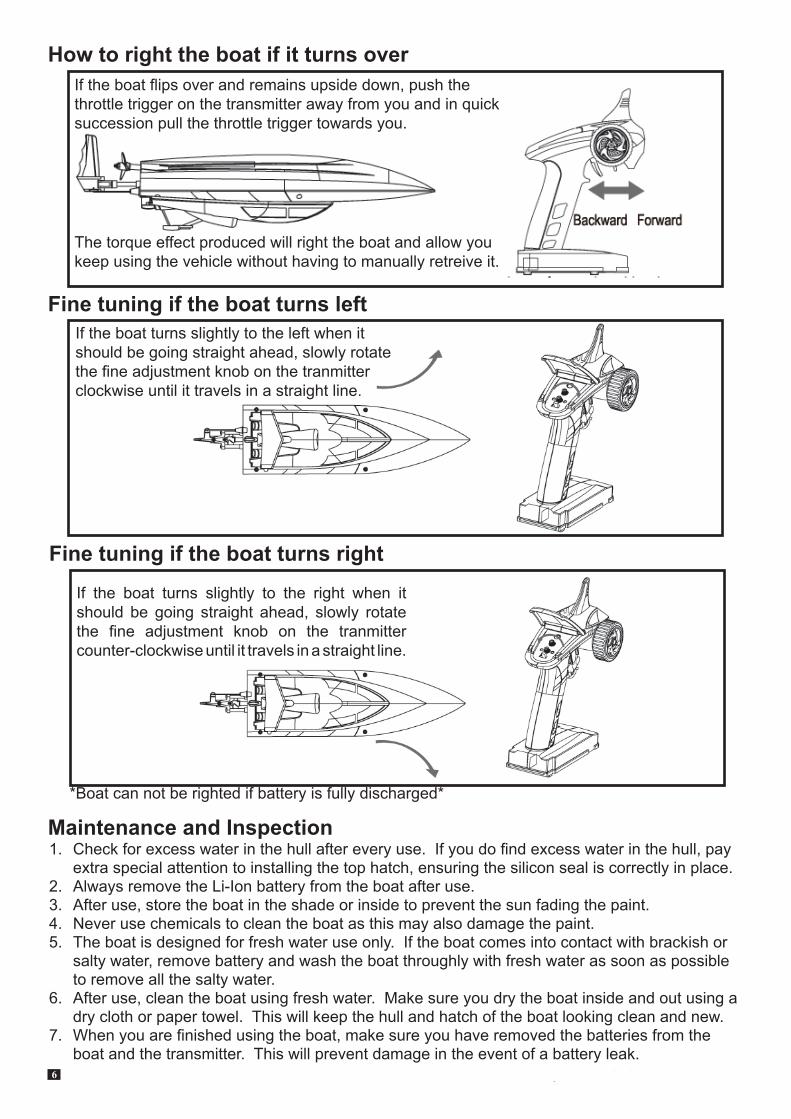
How to right the boat if it turns over
Fine tuning if the boat turns left
Fine tuning if the boat turns right
Maintenance and Inspection1. Check for excess water in the hull after every use. If you do find excess water in the hull, pay
extra special attention to installing the top hatch, ensuring the silicon seal is correctly in place.2. Always remove the Li-Ion battery from the boat after use.3. After use, store the boat in the shade or inside to prevent the sun fading the paint.4. Never use chemicals to clean the boat as this may also damage the paint.5. The boat is designed for fresh water use only. If the boat comes into contact with brackish or
salty water, remove battery and wash the boat throughly with fresh water as soon as possible to remove all the salty water.
6. After use, clean the boat using fresh water. Make sure you dry the boat inside and out using a dry cloth or paper towel. This will keep the hull and hatch of the boat looking clean and new.
7. When you are finished using the boat, make sure you have removed the batteries from the boat and the transmitter. This will prevent damage in the event of a battery leak.
If the boat turns slightly to the left when it should be going straight ahead, slowly rotate the fine adjustment knob on the tranmitter clockwise until it travels in a straight line.
The torque effect produced will right the boat and allow you keep using the vehicle without having to manually retreive it.
If the boat turns slightly to the right when it should be going straight ahead, slowly rotate the fine adjustment knob on the tranmitter counter-clockwise until it travels in a straight line.
If the boat flips over and remains upside down, push the throttle trigger on the transmitter away from you and in quick succession pull the throttle trigger towards you.
*Boat can not be righted if battery is fully discharged*
www.modelengines.com.au 7
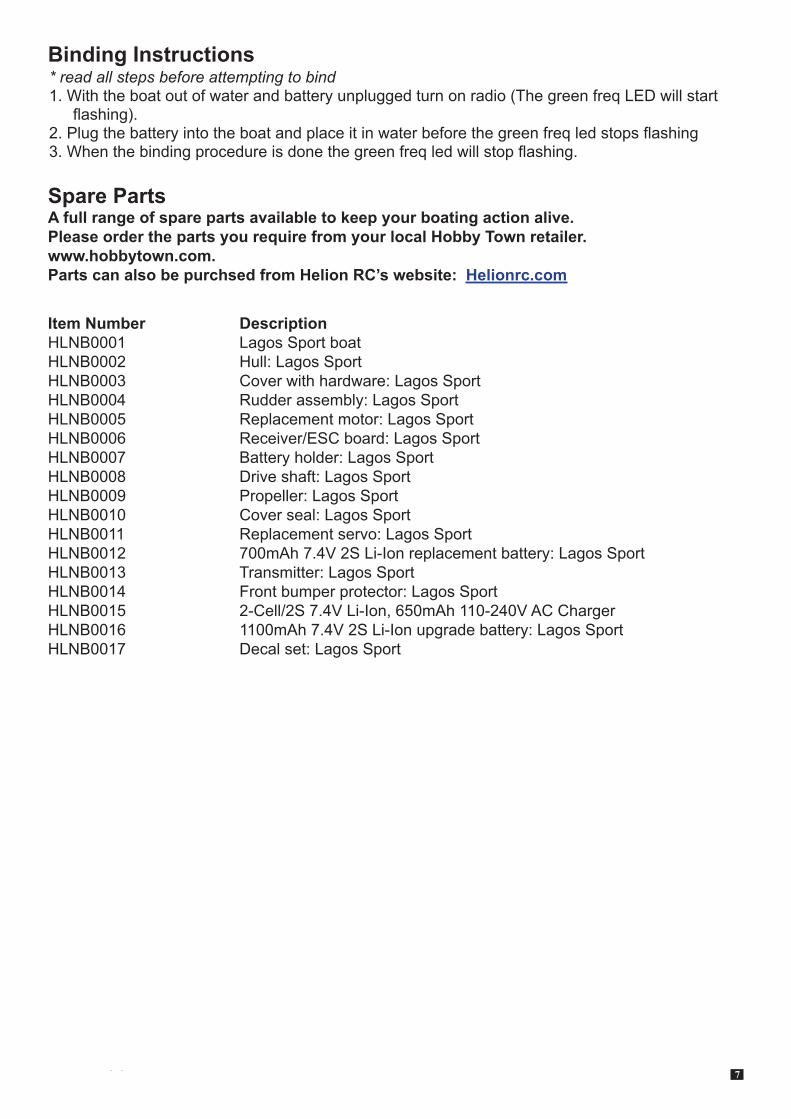
Spare PartsA full range of spare parts available to keep your boating action alive.Please order the parts you require from your local Hobby Town retailer. www.hobbytown.com.Parts can also be purchsed from Helion RC’s website: Helionrc.com
Item Number Description HLNB0001 Lagos Sport boat HLNB0002 Hull: Lagos Sport HLNB0003 Cover with hardware: Lagos Sport HLNB0004 Rudder assembly: Lagos Sport HLNB0005 Replacement motor: Lagos Sport HLNB0006 Receiver/ESC board: Lagos Sport HLNB0007 Battery holder: Lagos Sport HLNB0008 Drive shaft: Lagos Sport HLNB0009 Propeller: Lagos Sport HLNB0010 Cover seal: Lagos Sport HLNB0011 Replacement servo: Lagos Sport HLNB0012 700mAh 7.4V 2S Li-Ion replacement battery: Lagos Sport HLNB0013 Transmitter: Lagos Sport HLNB0014 Front bumper protector: Lagos Sport HLNB0015 2-Cell/2S 7.4V Li-Ion, 650mAh 110-240V AC Charger HLNB0016 1100mAh 7.4V 2S Li-Ion upgrade battery: Lagos Sport HLNB0017 Decal set: Lagos Sport
Binding Instructions * read all steps before attempting to bind1. With the boat out of water and battery unplugged turn on radio (The green freq LED will start
flashing).2. Plug the battery into the boat and place it in water before the green freq led stops flashing3. When the binding procedure is done the green freq led will stop flashing.

Atomic Flash Instructions8
Notes____________________________________________________________________________________________________________________________________________________________________________________________________________________________________________________________________________________________________________________________________________________________ _______________________________________________________________________________________ _______________________________________________________________________________________ _______________________________________________________________________________________ _______________________________________________________________________________________ _______________________________________________________________________________________ _______________________________________________________________________________________ _______________________________________________________________________________________ _______________________________________________________________________________________ _______________________________________________________________________________________ _______________________________________________________________________________________ _______________________________________________________________________________________ _______________________________________________________________________________________ _______________________________________________________________________________________ _______________________________________________________________________________________ _______________________________________________________________________________________ _______________________________________________________________________________________ _______________________________________________________________________________________ _______________________________________________________________________________________ _______________________________________________________________________________________ _______________________________________________________________________________________ _______________________________________________________________________________________ _______________________________________________________________________________________ _______________________________________________________________________________________ _______________________________________________________________________________________ _______________________________________________________________________________________ _______________________________________________________________________________________ _______________________________________________________________________________________ _______________________________________________________________________________________ _______________________________________________________________________________________ _______________________________________________________________________________________ _______________________________________________________________________________________ _______________________________________________________________________________________ _______________________________________________________________________________________ _______________________________________________________________________________________ _______________________________________________________________________________________ _______________________________________________________________________________________ _______________________________________________________________________________________ _______________________________________________________________________________________ _______________________________________________________________________________________ _______________________________________________________________________________________ _______________________________________________________________________________________ _______________________________________________________________________________________ _______________________________________________________________________________________ _______________________________________________________________________________________ _______________________________________________________________________________________ _______________________________________________________________________________________ _______________________________________________________________________________________
www.modelengines.com.au 9
90 Day Limited WarrantyGeneral Disclaimer: This item is to be free of manufacture defects at ti me of purchase. This warranty does not cover breakage due to abuse, improper break-in, improper setup, or improper operati on. We at Helion have made every eff ort in component design, material selecti on and assembly to make our products as durable as possible. Helion products are covered under warranty only against manufacturer’s defect in materials, workmanship or assembly when it is new (before being used).
If you believe a defect in materials, workmanship or assembly was not ap-parent when the product was new and only became evident aft er the prod-uct was used, then please contact your local HobbyTown USA® to apply for warranty service. You must provide your original sales receipt verifying the proof-of purchase and date thereof.
Provided warranty conditi ons have been met, the components that are found to be defecti ve, incorrectly made, or incorrectly assembled within the warranty coverage ti me period may be repaired or replaced under the sole discreti on of HobbyTown USA®. In the event that your product needs a re-pair or a replacement part that is not covered by this warranty, your local HobbyTown USA® dealer can assist you with obtaining the genuine replace-ment parts and/or accessories to service your Helion product.
If you purchased your Helion product from a HobbyTown USA® internet site not affi liated with a local store, please consult that site for its service policies.
Exclusively Available at HobbyTown USA®
000046-001 (REV B)