2013 rules flipbook v1 - decision...
TRANSCRIPT

RAF: Lion2013 Rules Flipbook v1.0
This guide is an update of the excellent Flipbook prepared by “Alan_De_Smet” and “rockhpi” on BoardGameGeek.com (RAF: Lion Rules Flipbook v1.4-ads4). I have updated their original document to incorporate changes made to the rules in the 2013 Decision Games reprint of RAF: The Battle of Britain 1940.
This guide is not meant to replace the rules. However, if you print out these pages you can go through eachstep, one page at a time and never have to refer to other sections of the manual. All the rules for each step are in one place, as well as many of the charts and some visual aids. For the full rules and examples refer to your RAF rulebook.
This flipbook is designed to be printed double sided with “long-edge binding.” Single sided will work fine; you might want to flip the two copies of the CRT over so they will be visible simultaneously with Raid Steps 10 and 13.
ADVANCED: Advanced rules are marked like this. ◦ OPTIONAL: Optional rules are marked like this.
Version History
V1.0 – August 12, 2015: Updated RAF: Lion Rules Flipbook v1.4-ads4 to include clarifications and rules updates from 2013
This flipbook is originally the work of “rockhpi” on BoardGameGeek.com ([email protected]). It has been modified by Alan De Smet(“Alan_De_Smet” on BoardGameGeek.com) with the generous permission of rockhpi. It has been further modified by “bpierce72” onBoardGameGeek.com with the generous permission of “Alan_De_Smet”. To report any errors or omissions, contact “bpierce72” onBoardGameGeek.com or at [email protected]. This is the original work of rockhpi , Alan De Smet, and bpierce72, based on
material under copyright and is published with the kind permission of Christopher Cummins of Decision Games.

Setting Up For Play
Setting Up For Play• Select a scenario:
Scenario Approx. Duration Period CoveredPrelude to Eagle Day about 1 hour August 11th only (1 raid day)The Hardest Days about 3 hours August 11th – about August 18th (4 raid days)The Thin Blue Line about 5 hours August 27th – about September 11th The Battle of Britain about 12 hours August 11th – about September 22nd
• Remove Target Cards 35-60, shuffle Target Cards The Thin Blue Line: Instead remove cards 45-60.
• Remove Force Cards 87-90, shuffle Force Cards• Remove Raid Event Cards 129-134, shuffle Raid Event Cards• Shuffle Day Cards
The Thin Blue Line: Remove cards 135, 136, and 138. Place 149 next to the deck as if just drawn toindicate that the event “LF3 to LF2” is in effect.
• Place British squadrons (not reinforcements, aces, or Blenheims) in their sectors [27 counters] The Thin Blue Line exceptions:
• Add these replacement squadrons in their sectors, full• Hurricanes: 249/4/10, RCAF/3/11, 310/2/12. Spitfires: 602/1/11, 616/2/11, 603/6/11
• Flip five squadrons in sectors on the map to their reduced sides. You choose, but three must bein Group 11, and no more than one squadron per sector.
▫ Night Raid (OPTIONAL): Add the 5 Blenheim squadrons to their sectors• Place all Gruppen (not reinforcements) on their airbases. [77 counters]
The Thin Blue Line exceptions:• Place reinforcement Gruppe IV/JG51/2 at its airbase and Remove all Ju 87 Gruppen from play.
• Place priority markers: All other scenarios:
Marker PriorityAirfields MediumCities LowIndustry LowPorts HighRadar High
The Thin Blue Line:Marker Priority
Airfields HighCities MediumIndustry MediumPorts LowRadar Low
• Place Time Marker on 0600.• Place Detection Marker anywhere on the detection track. • Place Day marker on August 11th
The Thin Blue Line: Place Day marker on August 27th, flipped to the “LF3 to LF2” side.• VP marker on 0, British side up. ADVANCED: Place the two Ace Squadron Markers in the Ace Squadron Box.• Set up replacement markers
Prelude to Eagle Day: Do not set any replacement markers. The Hardest Days or The Battle of Britain:
• German Level Bomber: 9• German Fighter: 11• Hurricane: 9• Spitfire: 7◦ Blenheim: 1 (OPTIONAL)
• Experienced Pilot: 7
The Thin Blue Line:• German Level Bomber: 5• German Fighter: 4• Hurricane: 12• Spitfire: 8◦ Blenheim: 1 (OPTIONAL)
• Experienced Pilot: 2• Luftwaffe Depletion marker on the 0 box.• Thin Blue Line or Battle of Britain: Place reinforcement Gruppen on their spaces on the calendar. Put
Sealion Preparation on 9/11.
RAF: Lion Rules Flipbook 2 Setting Up For Play
Daily Preparation
Repair• Skip of first day of scenario• Remove all Light Damage markers from the map. • Attempt to repair each Heavy Damage Token:
Roll a die and compare it to the Repair Chance on the current Day Card:< Repair Chance: Remove Damage Marker.= Repair Chance: Flip to Light Damage side.> Repair Chance: No effect.
Time of Day• Draw the top Event Card. If the Time Advance value is:
0 - Time Marker = 06001 - Time Marker = 08002 - Time Marker = 1000
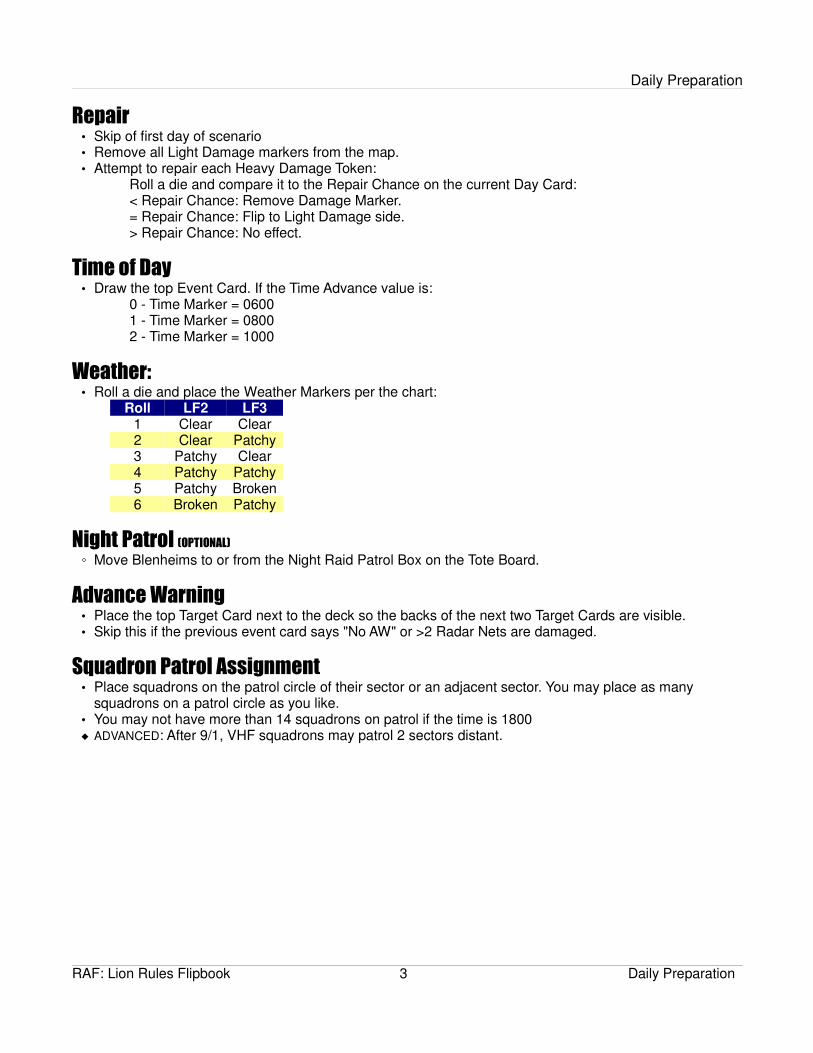
Weather:• Roll a die and place the Weather Markers per the chart:
Roll LF2 LF31 Clear Clear2 Clear Patchy3 Patchy Clear4 Patchy Patchy5 Patchy Broken6 Broken Patchy
Night Patrol (OPTIONAL)
◦ Move Blenheims to or from the Night Raid Patrol Box on the Tote Board.
Advance Warning• Place the top Target Card next to the deck so the backs of the next two Target Cards are visible.• Skip this if the previous event card says "No AW" or >2 Radar Nets are damaged.
Squadron Patrol Assignment• Place squadrons on the patrol circle of their sector or an adjacent sector. You may place as many
squadrons on a patrol circle as you like. • You may not have more than 14 squadrons on patrol if the time is 1800 ADVANCED: After 9/1, VHF squadrons may patrol 2 sectors distant.
RAF: Lion Rules Flipbook 3 Daily Preparation

Raid Steps 1-2
Raid Step 1: Raid Target Determination• Reveal the Target Card pulled during Advance Warning (if none,
reveal top card).• Check the Target Type and Strategic Value on the Raid Priority
Table and roll to determine whether it's a Major or Minor Raid.• If the result is no raid, repeat this step until a raid occurs.• If the Luftflotte listed has < 2 full fighter gruppen or <2 full bomber
gruppen, the raid must be minor (treat major as minor). If the targetis beyond 109 range, at least two full Me110 units must beavailable for a major raid to occur.
ADVANCED: Middle Wallop is in Me109 range.
Raid Step 2: British Detection• Roll the die. Add:
+2 for each undamaged radar net listed on the Target Card +OCV value per the weather: Clear/Patchy/Broken +3 for a Major Raid and Luftwaffe Depletion Level 0 or 1 +1 for a Major Raid and Luftwaffe Depletion Level 2 +1 for a Follow-Up Raid ADVANCED: −2 if Target is a Forward Airfield If the fighter group HQ is damaged (Group 10 = Box; Group 11
= Uxbridge), the detection die roll for raids against a target inthat fighter group is halved (rounded up).
If Stanmore HQ is damaged, the entire detection modifier is halved. If Stanmore HQ AND a Group HQ are damaged at the same time, no detection modifier.
• Move the Detection Marker to the resulting value on the Detection Track.
RAF: Lion Rules Flipbook 4 Raid Steps 1-2

Raid Steps 3-4
Raid Step 3: Commit Squadrons (Poor Intelligence)• Skip this step unless your Intelligence level is Poor.• You may commit squadrons from sectors listed on the Target Card.
Use only sectors in the yellow box.
WarningLevel
PatrollingSector
Enroute
Available inSector
EnroutePatrollingIn Range
Availablein Range
None/Late Yes No No NoSufficient Yes Yes No NoEarly Yes Yes Yes NoVery Early Yes Yes Yes Yes
• Move any or all eligible squadrons into the Hunt Box (retain facing).• If you choose not to respond to a Raid that includes at least 1 bomber gruppen, lose 1 VP. ADVANCED: (if Warning = Late or Sufficient) May declare Delayed Reaction - increase the Warning Level
by 1 step. Put the Delayed Reaction Marker in the Raid Display. All CP gruppen go to the Hunt Box.
Raid Step 4: Raid Size Determination• Draw a Force Card to determine the number of Gruppen in the Raid. Use the left
side only.• If the Raid Size is No Raid, move any committed squadrons to the In Flight box
(retain facing). The raid does not occur. Return to Raid Step 1: Raid TargetDetermination (p4). Do not advance time.
RAF: Lion Rules Flipbook 5 Raid Steps 3-4

Raid Steps 5-6
Raid Step 5: Commit Squadrons (Limited Intelligence)• Skip this step unless your Intelligence level is Limited.• You may commit squadrons from sectors listed on the Target Card.
Use only sectors in the yellow box.
WarningLevel
PatrollingSector
Enroute
Available inSector
EnroutePatrollingIn Range
Availablein Range
None/Late Yes No No NoSufficient Yes Yes No NoEarly Yes Yes Yes NoVery Early Yes Yes Yes Yes
Move any or all eligible squadrons into the Hunt Box (retain facing).• If you choose not to respond to a Raid that includes at least 1 bomber gruppen, lose 1 VP. ADVANCED: (if Warning = Late or Sufficient) May declare Delayed Reaction - increase the Warning Level
by 1 step. Put the Delayed Reaction Marker in the Raid Display. All CP gruppen go to the Hunt Box.
Raid Step 6: Raid Deployment• Draw another Force Card to determine the types of Gruppen in the raid.• Select gruppen from the Luftflotte on the
Target Card per the 2nd Force card, from 1to (Raid Size).
• Reduced gruppen may not be selected.• If no gruppen of the selected type are
available, substitute the other fighters forfighters, or bombers for bombers (Ju88,then Do17, then He111, then Ju87). If nosubstitutes are available, select none anddo not select for entries further down the list.
• Elite Me110s must be selected before other Me110s if they are available ADVANCED: If forward airfield target is Middle Wallop (Card #37) it is considered
in range of Me109s.• If the target card is beyond 109 range, substitute 110s in the raid. Me109s on
channel patrol may still be used.• If the 2nd Force Card says "+2 Me 109 Sweep", and a minor raid is underway,
add 2 to the Raid Size and take that many 109s instead of the listed gruppentype. Do not substitute 110s.
• If no gruppen can be selected, the raid is a false raid. Move any committedsquadrons to the Inflight box, advance the clock two spaces, and go to Clock Update (p13) with the two space time advance counting as the clock update.
• Place Bomber gruppen in the Bomber Box• Place Me109s in the Hunt Box, with the following exceptions:
“e” go to the Close Escort Box “cp” go to the Channel Patrol Box If the Detection Result is No Warning, “cp” go to the Close Escort Box
• Place Me110s in the Close Escort Box (even if substituting) unless no bombers, then place in Bomber Box.
RAF: Lion Rules Flipbook 6 Raid Steps 5-6

Raid Steps 7-9
Raid Step 7: Commit Squadrons (Accurate Intelligence)• Skip this step unless your Intelligence level is Accurate.• You may commit squadrons from sectors listed on the Target Card.
Use only sectors in the yellow box.
WarningLevel
PatrollingSector
Enroute
Available inSector
EnroutePatrollingIn Range
Availablein Range
None/Late Yes No No NoSufficient Yes Yes No NoEarly Yes Yes Yes NoVery Early Yes Yes Yes Yes
• Move any or all eligible squadrons into the Hunt Box (retain facing).• If you choose not to respond to a Raid that includes at least 1 bomber gruppen, lose 1 VP. ADVANCED: (if Warning = Late or Sufficient) May declare Delayed Reaction - increase the Warning Level
by 1 step. Put the Delayed Reaction Marker in the Raid Display. All CP gruppen go to the Hunt Box.
Raid Step 8: Hunter Interception ADVANCED: If there are 5+ squadrons in the hunt box AND squadrons outnumber fighter gruppen by
more than 2:1, you must move any excess squadrons to the bomber box until this condition is no longer met. Select evenly by squadron letter when possible.
• If no gruppen are in the Hunt Box, all full squadrons move to the Bomber Box or Inflight Box, your choice.Reduced squadrons or Blenheims MUST go to the Bomber Box.
• If gruppen < squadrons in the Hunt Box, FULL excess squadrons may move to the Bomber Box. Reduced squadrons or Blenheims may not move to the Bomber Box.
• If gruppen ≥ squadrons, all squadrons are intercepted and stay in the Hunt Box.• If there are no squadrons in the Hunt Box, all gruppen in the Hunt Box move to the Inflight Box. All
gruppen in close combat move to the Bomber Box. Skip Raid Steps 10, 12, and 13. ADVANCED: If gruppen ≥ squadrons in Hunt Box, at least 2 fighter squadrons are in Hunt Box and at least
1 gruppe are in the Bomber Box, you can declare Fend & Evade: Select 2 full fighter squadrons, flip one to reduced and move it to the Bomber Box. 1 or 2 full pairs may Fend & Evade. Can keep choosing groups of two, but only up to two groups. Ace squadrons do not flip to reduced and a non Ace squadron in a pair with the Ace squadron also
does not flip.
Raid Step 9: Raid Approach Event• Draw an Event Card and carry out the “A:” or “L:” Approach Event.
See the rulebook for expanded rules on a given Event. ADVANCED: VHF squadrons are not susceptible to Radio Confusion
RAF: Lion Rules Flipbook 7 Raid Steps 7-9

Raid Step 10: Hunter Attack
Raid Step 10: Hunter Attack• If there are no gruppen in the Hunt Box, move any squadrons in the Hunt Box to the Bomb Box and
move to the next step.• Add the Combat Ratings of all squadrons and gruppen in the Hunt Box.• Count the number of gruppen ONLY in the combat and find that column at the top of the
Combat Results Table.• Go down that column until you find the total Combat Rating value.• If there is a German Altitude Advantage from the Raid Approach Event, go up one extra row.• If there is a British Altitude Advantage from the Raid Approach Event, go down one extra row. ADVANCED: If an Ace squadron is involved, go down one extra row (only 1 row even if 2 Aces involved).• Roll one die - use the results on the right for all squadrons and gruppen.• Apply damage based on each unit's nationality and whether it is an A, B, or C.
Unit - Disrupt Abort Light Loss Heavy LossFull Gruppe
To CloseEscort†
To Inflight To InflightReduced
To Light Loss(+1VP)
To Heavy Loss(+2VP)
Reduced Gruppe
To Inflight To Inflight To Light LossFull
(+1VP)
To Light LossFull
(+1VP)
To Heavy LossFull
(+2VP)Full Squadron
To BombBox orInflight*
To BombBox
Reduced orInflight Full*
To InflightReduced
To Light Loss(−1VP)
To Heavy Loss(−2VP)
Reduced Squadron
To BombBox
Reduced†
To InflightReduced
To Light LossFull
(−1VP)
To Light LossFull
(−1VP)
To Heavy LossFull
(−2VP)* If no Gruppen are in the Bomb Box, move to Inflight. Otherwise choose.† If no Gruppen are in the Bomb Box, move to Inflight.
ADVANCED: If the attack was resolved in row A-G of the CRT, and the total VP result from the Hunter Attack is +2 or better, and at least one fighter squadron got a No Effect result, you receive an Ace Squadron.
Swap the Squadron Marker of a squadron the received a No Effect result with the Ace Marker for that fighter type. If the Ace Marker is in use, receive no Ace Squadron. You can receive no more than 1 Ace Squadron per combat. The old Squadron Marker is place in the Ace Squadron box.
ADVANCED: If an Ace Squadron received Light or Heavy Loss, swap the Ace and Squadron Markers. It is no longer an Ace Squadron.
RAF: Lion Rules Flipbook 8 Raid Step 10: Hunter Attack

Combat Results Table
Number of Gruppen in Combat0 Dep - 1 - 2 - 3 4 5 6 7 8+ Combat ResultsDep 1 - 1 - 2 3 4 5 6 7,8 9 10+ German British
Dep 2 1 - 2 3 4 5 6 7,8 9 10+ Roll A B C A B C
A−1 or
less
0 or
less
1 or
less
1 or
less
2 or
less
3 or
less
4 or
less
5 or
less
7 or
less
10 or
less
14 or
less
1 D - - H L H2 - D - A H H3 - D D H H A4 - A - H L L5 D - A L H L6 A - D L A H
B 0 1 2 2,3 3,4 4,5 5-7 6-8 8-10 11-14 15-18
1 - A - H L D2 D - D A D H3 - D A D H A4 A - D L A L5 A A - L L A6 D D A A A L
C 1 2 3,4 4,5 5,6 6,7 8-10 9-12 11-14 15-18 19-23
1 D A - A H A2 D D A D A H3 A D D H D D4 - - L A A L5 - L - D L A6 L - D L D D
D 2 3 5 6,7 7-9 8-10 11-14 13-16 15-19 19-23 24-29
1 A - D L D A2 A A - A L D3 D D A D A L4 - L A L A -5 D D L - L A6 L A D A - L
E 3 4 6,7 8,9 10-12 11-14 15-18 17-21 20-26 24-30 30-36
1 A - A L D A2 - L D A L D3 D A A - A L4 L A - D D L5 A A A L - D6 A D L D L -
F 4 5,6 8,9 10-12 13-16 15-18 19-23 22-27 27-35 31-39 37-45
1 L D - L A D2 - L A D D L3 A - L - L A4 D L A D D A5 L A D A A -6 A A L A - D
G 5 7,8 10,11 13-15 17-20 19-24 24-29 28-35 36-44 40-51 46-58
1 D A L L D D2 D H A - L D3 A D H D - L4 L L D A D -5 L D L D - A6 H L D - A -
H 6 9,10 12-14 16-19 21-24 25-30 30-37 36-45 45-54 52-64 59-75
1 D H A A - D2 L D H D A -3 H L D - D A4 A L H - D D5 H A L D - D6 L H L D D -
I 7+ 11+ 15+ 20+ 25+ 31+ 38++ 46+ 55+ 65+ 76+
1 L A H A - -2 A H H - A -3 H H A - - A4 H L H - D -5 H H L D - -6 H H H - - D
-: No effect D: Disrupted A: Abort L: Light Loss H: Heavy Loss
RAF: Lion Rules Flipbook 9 Combat Results Table
Raid Step 11-13
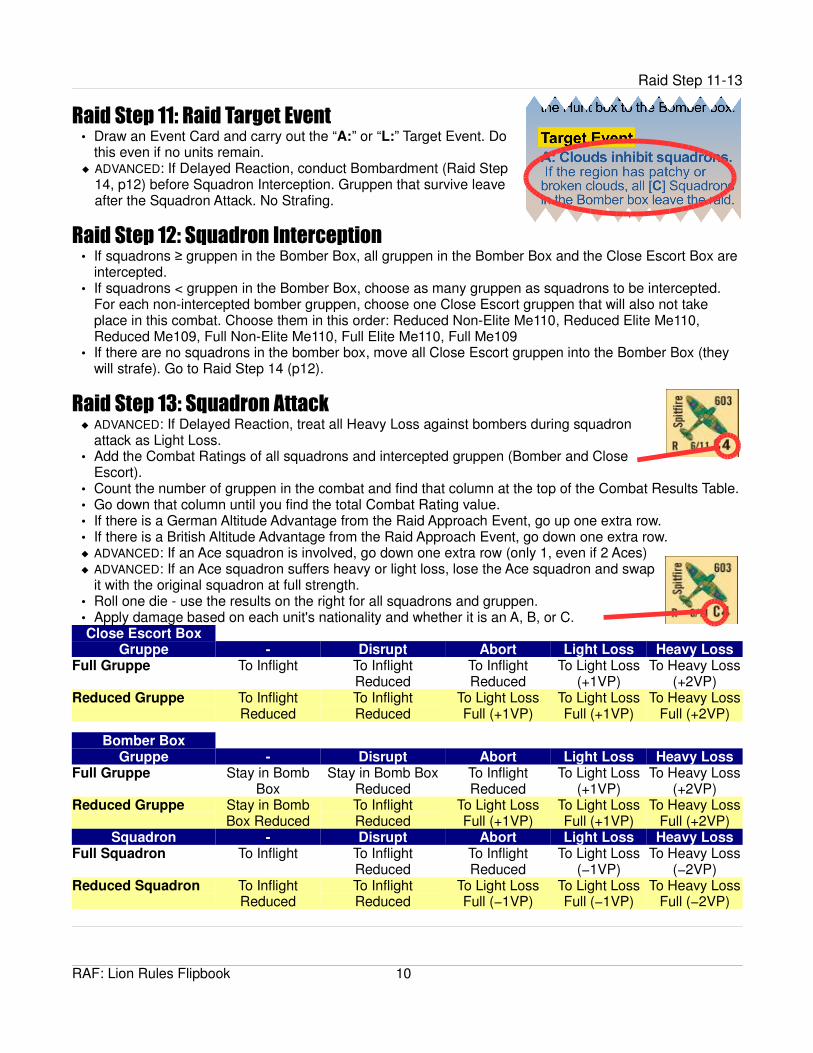
Raid Step 11: Raid Target Event• Draw an Event Card and carry out the “A:” or “L:” Target Event. Do
this even if no units remain. ADVANCED: If Delayed Reaction, conduct Bombardment (Raid Step
14, p12) before Squadron Interception. Gruppen that survive leaveafter the Squadron Attack. No Strafing.
Raid Step 12: Squadron Interception• If squadrons ≥ gruppen in the Bomber Box, all gruppen in the Bomber Box and the Close Escort Box are
intercepted.• If squadrons < gruppen in the Bomber Box, choose as many gruppen as squadrons to be intercepted.
For each non-intercepted bomber gruppen, choose one Close Escort gruppen that will also not take place in this combat. Choose them in this order: Reduced Non-Elite Me110, Reduced Elite Me110, Reduced Me109, Full Non-Elite Me110, Full Elite Me110, Full Me109
• If there are no squadrons in the bomber box, move all Close Escort gruppen into the Bomber Box (they will strafe). Go to Raid Step 14 (p12).
Raid Step 13: Squadron Attack ADVANCED: If Delayed Reaction, treat all Heavy Loss against bombers during squadron
attack as Light Loss.• Add the Combat Ratings of all squadrons and intercepted gruppen (Bomber and Close
Escort).• Count the number of gruppen in the combat and find that column at the top of the Combat Results Table.• Go down that column until you find the total Combat Rating value.• If there is a German Altitude Advantage from the Raid Approach Event, go up one extra row.• If there is a British Altitude Advantage from the Raid Approach Event, go down one extra row. ADVANCED: If an Ace squadron is involved, go down one extra row (only 1, even if 2 Aces) ADVANCED: If an Ace squadron suffers heavy or light loss, lose the Ace squadron and swap
it with the original squadron at full strength.• Roll one die - use the results on the right for all squadrons and gruppen.• Apply damage based on each unit's nationality and whether it is an A, B, or C.Close Escort Box
Gruppe - Disrupt Abort Light Loss Heavy LossFull Gruppe To Inflight To Inflight
ReducedTo InflightReduced
To Light Loss(+1VP)
To Heavy Loss(+2VP)
Reduced Gruppe To InflightReduced
To InflightReduced
To Light LossFull (+1VP)
To Light LossFull (+1VP)
To Heavy LossFull (+2VP)
Bomber BoxGruppe - Disrupt Abort Light Loss Heavy Loss
Full Gruppe Stay in BombBox
Stay in Bomb BoxReduced
To InflightReduced
To Light Loss(+1VP)
To Heavy Loss(+2VP)
Reduced Gruppe Stay in BombBox Reduced
To InflightReduced
To Light LossFull (+1VP)
To Light LossFull (+1VP)
To Heavy LossFull (+2VP)
Squadron - Disrupt Abort Light Loss Heavy LossFull Squadron To Inflight To Inflight
ReducedTo InflightReduced
To Light Loss(−1VP)
To Heavy Loss(−2VP)
Reduced Squadron To InflightReduced
To InflightReduced
To Light LossFull (−1VP)
To Light LossFull (−1VP)
To Heavy LossFull (−2VP)
RAF: Lion Rules Flipbook 10

Combat Results Table
Number of Gruppen in Combat0 Dep - 1 - 2 - 3 4 5 6 7 8+ Combat ResultsDep 1 - 1 - 2 3 4 5 6 7,8 9 10+ German British
Dep 2 1 - 2 3 4 5 6 7,8 9 10+ Roll A B C A B C
A−1 or
less
0 or
less
1 or
less
1 or
less
2 or
less
3 or
less
4 or
less
5 or
less
7 or
less
10 or
less
14 or
less
1 D - - H L H2 - D - A H H3 - D D H H A4 - A - H L L5 D - A L H L6 A - D L A H
B 0 1 2 2,3 3,4 4,5 5-7 6-8 8-10 11-14 15-18
1 - A - H L D2 D - D A D H3 - D A D H A4 A - D L A L5 A A - L L A6 D D A A A L
C 1 2 3,4 4,5 5,6 6,7 8-10 9-12 11-14 15-18 19-23
1 D A - A H A2 D D A D A H3 A D D H D D4 - - L A A L5 - L - D L A6 L - D L D D
D 2 3 5 6,7 7-9 8-10 11-14 13-16 15-19 19-23 24-29
1 A - D L D A2 A A - A L D3 D D A D A L4 - L A L A -5 D D L - L A6 L A D A - L
E 3 4 6,7 8,9 10-12 11-14 15-18 17-21 20-26 24-30 30-36
1 A - A L D A2 - L D A L D3 D A A - A L4 L A - D D L5 A A A L - D6 A D L D L -
F 4 5,6 8,9 10-12 13-16 15-18 19-23 22-27 27-35 31-39 37-45
1 L D - L A D2 - L A D D L3 A - L - L A4 D L A D D A5 L A D A A -6 A A L A - D
G 5 7,8 10,11 13-15 17-20 19-24 24-29 28-35 36-44 40-51 46-58
1 D A L L D D2 D H A - L D3 A D H D - L4 L L D A D -5 L D L D - A6 H L D - A -
H 6 9,10 12-14 16-19 21-24 25-30 30-37 36-45 45-54 52-64 59-75
1 D H A A - D2 L D H D A -3 H L D - D A4 A L H - D D5 H A L D - D6 L H L D D -
I 7+ 11+ 15+ 20+ 25+ 31+ 38++ 46+ 55+ 65+ 76+
1 L A H A - -2 A H H - A -3 H H A - - A4 H L H - D -5 H H L D - -6 H H H - - D
-: No effect D: Disrupted A: Abort L: Light Loss H: Heavy Loss
RAF: Lion Rules Flipbook 11 Combat Results Table

Raid Step 14: Bombardment
Raid Step 14: Bombardment• Skip this step if it was already performed prior to Raid Step 13: Squadron Attack because
of a Delayed Reaction or if there are no gruppen in the Bomber Box.• Add up the total Bombing Strength of all units in the Bomber Box. • When attacking radar, city, headquarters, or military bases, Me110s halve their strength
and 109s do not attack at all.• Roll a die and find the damage based on the total Bombing Strength:
If no squadrons were in the Bomber Box at any point, shift 2 columns right. If all Bombers are Ju87s and the target is not Radar, shift 2 columns right. If Patchy Clouds, shift 1 column left. If Broken Clouds, shift 2 columns left. Overall, never shift more than 3 columns left/right in total from Total Bombing Strength.
Total Bombing StrengthRoll 1 2 3 4-5 6-7 8-9 10-11 12-14 15-17 18-20 21-24 25+
1 - - - - - - - 1 1 1 2 22 - - - - - 1 1 1 2 2 2 23 - - - 1 1 1 1 2 2 2 2 H4 - - 1 1 1 2 2 2 2 H H H5 - 1 1 2 2 2 H H H H H H6 1 2 2 2 H H H H H H H H
Subtract VPs per the result (H = 3VPs), double if Target Card says “Vpx2”. If the Target Event specifies that the target is non-essential, reduce VP loss by 1.
• Assess Damage EffectsCities/Military Bases/Ports. No effect beyond loss of victory points.Airfields
1 or 2 damage: 1 or 2 damage.H: roll a die. On a result < 3 then the damage = 3. Otherwise, the damage = result.
Move # of squadrons = damage from the airfield's sector to Landing Box. If there aren't enough squadrons on map, take them from sector's Rearm Box. Squadrons on patrol/in flight can't be taken.
Lose 1 replacement point for every squadron in the bombed sector's Landing and Light Loss Boxes up to the damage number. If there aren't enough squadrons, the rest of the points are ignored.
• Assign losses to planes in the Landing Box first. Hurricanes then Spitfires then Blenheims. ADVANCED: Forward Airfields: Treat H as 2 points for VP and Damage for Primary Target only.
Control Room. If damage is H and second roll is 6, place a Light Damage Marker on the airfield. No additional squadrons in this sector can be placed on patrol until the damage is fixed. Squadrons in this sector can only respond to Raids in this sector.
Industry1 or 2 damage: 1 or 2 damage.H: roll a die. On a result < 3 then the damage = 3. Otherwise, the damage = result.
Aircraft with the most Replacement Points loses points = damage. If Hurricane/Spitfire are tied, assign all to Spitfires. If there are not enough Replacement Points, take them from other aircraft types. If they are all at 0, then the remainder can be ignored.
Headquarters*1 or 2 damage: place a Light Damage Marker on the HQ.H: place a Heavy Damage Marker on the HQ.
Radar *1 or 2 damage: place a Light Damage Marker on the station.H: Place a Heavy Damage Marker on the station.
If radar nets are damaged in 2 or more regions (LF2 East, LF2 South, or LF3), the radar system is crippled. Place the Radar System Crippled card on the Target Deck.
* If Radar or Headquarters already has Light or Heavy Damage and receives additional bombing damage: 1 Damage = Lose 1 VP 2 Damage/Heavy Damage = Lose 2/3 VPS. If it has Light Damage Marker, flip to Heavy Damage.
RAF: Lion Rules Flipbook 12 Raid Step 14: Bombardment

Raid Step 15-16
Raid Step 15: German Recovery ADVANCED: If there are 3 or more Ju87 gruppen in the Light or Heavy Loss Box, remove all Ju87s from
the game permanently.• All gruppen in the Bomber, Close Escort, and Channel Patrol Boxes go to the Inflight Box.
For gruppen in the Inflight Box ONLY:• Move all Bomber gruppen to their bases, reduced side up.• Move Full Fighter gruppen to the clock, three spaces ahead of current time.• Move Reduced Fighter gruppen four clock spaces ahead (flip to full).• If a Fighter gruppe would be placed past 1800, instead move it to its base reduced side up.
Raid Step 16: Clock Update• Advance the Clock 0, 1, or 2 spaces per the last Event Card.
For 0: Go to Raid Step 1 (p4), conduct a new Raid.• If Time Advance says Follow-Up, go to Raid Step 2 (p4),
conduct a Follow-Up Raid of the same type, minor or major.For 1 or 2: Go to Airfield Operations (p14).For End of Day: Go to Calendar Update Phase (p15).
RAF: Lion Rules Flipbook 13 Raid Step 15-16

Airfield Operations
Airfield Operations Step 1: German Fighter Turnaround• All gruppen on the current or previous clock spaces go to their bases, full.
Airfield Operations Step 2: Squadron TurnaroundTime Advance: 1
• Squadrons in Re-Arm Boxes move back to their sectors.• Squadrons in Landing Boxes go to their sector's Re-Arm Box.• Patrolling Squadrons go to their sector's Re-Arm Box.• Full Squadrons in the Inflight Box go to their sector's Re-Arm Box.• Reduced Squadrons in the Inflight Box go to their sector's Landing Box, full.
Time Advance: 2• Squadrons in Re-Arm or Landing Boxes move back to their sectors.• Patrolling Squadrons move back to their sectors.• Full Squadrons in the Inflight Box go to their sector.• Reduced Squadrons in the Inflight Box go to their sector's Re-Arm Box, full.
Airfield Operations Step 3: Advance Warning• Skip this step if 2 or more radars are damaged or if the last Target Event says 'No AW'.• Draw a Target Card and place it facedown next to the deck.
Airfield Operations Step 4: Squadron Patrol Assignment• Place squadrons on the patrol circle of their sector or an adjacent sector. You may place as many
squadrons on a patrol circle as you like. • You may not have more than 14 squadrons on patrol if the time is 1800
Airfield Operations Step 5: Return to Raid Step 1 (p4)
RAF: Lion Rules Flipbook 14 Airfield Operations

Calendar Update steps 1-3
Calendar Update Step 1: Squadron and Gruppen Reset• Move all inflight squadrons to their assigned sectors, full.• Move all patrolling, Re-Arming, and Landing squadrons to their sectors, retaining their facing. • Move all gruppen from the Inflight Box and the clock to their bases, full.• Flip reduced gruppen in their bases face up (full).
Calendar Update Step 2: Resolve Night Raids (OPTIONAL)◦ Move He111 gruppen to each LF's Night Raid Box per the Night Raid Commitment table.◦ If more gruppen are on the Night Raid Box than are required, move excess to their air bases.◦ If not enough He111s are available, substitute Ju88s or Do17s ONLY.◦ Check the Night Raid Interception Table to determine the chance of interception.◦ Roll a die to determine the number of gruppen intercepted-move selected squadrons and gruppen to the
Bomber Box.◦ If Blenheim 600/6/11 squadron is used, you may choose to subtract 1 from the die roll. They must
intercept.◦ Conduct a normal combat in the Bomber Box. No Effect results return gruppen to the Night Raid Box
(full) and Abort/Disrupt returns the gruppen to their airbase (full).◦ Roll on the Night Raid Bombing Table to determine VP loss.◦ Results with a * move 1 gruppe to the Light Loss Box and give you +1VP.◦ Bombers remain in the Night Box after bombing.
Calendar Update Step 3: Day Advance• Draw a Day Card to determine how many days pass before the next raid day.
Advanced: If 2 or more radar stations have Heavy Damage, VP is between −20 and −34, 7 or more squadrons in sectors are reduced, or Sealion preparations are underway:
Draw the next two Day Cards and use the one that has the fewest days elapsed. If the days elapsed are identical, use the 1st card drawn.
Shuffle the unused card into the deck-do not shuffle the discard pile. You can't have two 1-day cards in a row-draw again if a second 1-day card comes up. Ignore this if
any of the conditions listed in the above Advanced rules are met. You can't have two 5 or 6-day cards in a row-draw again if a second 5 or 6-day card comes up.
• Move the Calendar Marker ahead the number of days on the Day card. +1VP per day.If you reach or pass Sept. 8, implement the stabilization scheme: For every reinforcement squadron not yet taken, move the Experienced Pilot Marker two spaces up the track.
• Each day you are past Sept. 10, check for Sealion preparations: Compare the current VPs to the start value (right) and the cancel value (left).
If VP ≥ the cancel value on the first check, the game ends in a British Decisive Victory. If VP ≥ the cancel value after the first check, the game ends in a British Operational Victory. If the VP is between the two values, move the Sealion Marker 1 day past the current day. If the Sealion Marker is delayed past Sept. 22, the game ends in a draw.
• If VP < start value, flip the Sealion Marker to D-Day at +10 days on the calendar. −5VP. Move the Luftwaffe 8 spaces down the Depletion Track. Target Priorities are: High: Airfields and Ports, Medium: Radar, Low: Cities and Industry. Priorities never change after.
If the Calendar Marker is moved into or past the Sealion D-Day space, the game ends:• If VP ≤ the start value the Germans invade, a British Decisive Defeat.• If VP is between the start and cancel values, a British Operational Defeat.• If VP ≥ the cancel value, a Tactical British Victory.
• If the VP is ever worse than −34, the game ends in a British Decisive Defeat.• If the VP is better than +34, the game ends in a British Decisive Victory.
RAF: Lion Rules Flipbook 15 Calendar Update steps 1-3

Calendar Update steps 4-9
Calendar Update Step 4: Day Event• Carry out the event on the Day Card. • If a “T” is on the appropriate space of the chart, the German Terror Strategy is in effect. Add target cards
45-60 to the deck and shuffle.
Calendar Update Step 5: Update Replacement Points• Move the Replacement Markers up the Track per the Day Card.• Move the Experienced Pilot marker up the Track per the Day Card, based on Vps.• On the first raid day on or after September 8th, remove all unused reinforcement squadrons from play,
gaining 2 Experienced Pilot Points for each squadron so removed.
Calendar Update Step 6: Light Loss Replacement• For each squadron in the Light Loss Box
Spend 1 matching Replacement Point to move the unit to its sector, full. If no matching ReplacementPoints are available, leave the unit in the Light Loss Box.
Spend 1 Experienced Pilot point. If no Experienced Pilot Point is available, flip the squadron to reduced (Green Pilots)
• For each non-Ju87 gruppe in the Light Loss Box Spend 1 matching Replacement Point to move the unit to its airbase, full. Ju87s never leave the
Loss Boxes. If no Replacement Point is available, move the gruppe but move the Luftwaffe Depletion marker one
space up the Depletion Track. Do not move the gruppe if the Luftwaffe Depletion is at Level 2.
Calendar Update Step 7: Heavy Loss Replacement• For each squadron in the Heavy Loss Box, spend 1 matching Replacement Point to move the unit to the
Light Loss Box. If no matching Replacement Points are available, leave the unit in the Heavy Loss Box.• For each non-Ju87 gruppe in the Heavy Loss Box
Spend 1 matching Replacement Point to move the unit to the Light Loss Box. Ju87s never leave theLoss Boxes.
If no Replacement Point is available, move the gruppe to the Light Loss Box but move the Luftwaffe Depletion marker one space up the Depletion Track. Do not move the gruppe if the Luftwaffe Depletion is at Level 2.
Calendar Update Step 8: Reinforcements• If the Calendar Marker reaches Reinforcement gruppen, place those gruppen at their base, full.• You may spend VPs for one or two squadrons to be placed full in their assigned sector.
Aug. 11- Aug. 16: each squadron costs 4VPs Aug. 17- Aug. 26: Each squadron costs 3VPs Aug. 27- Sept. 7: Each squadron costs 2VPs Sept. 8 and on: No reinforcement squadrons are available.
Calendar Update Step 9: Shuffle Decks• For all cards except the Day cards, shuffle if its discard pile is bigger than the deck.• In Battle of Britain, add cards 35-44 to the Target Deck at the end of the fourth Raid Day.
Return to Daily Preparation (p3)
RAF: Lion Rules Flipbook 16 Calendar Update steps 4-9

Victory Assessment
Victory Assessment• If the VP is ever worse than −34, the game ends in a British Decisive Defeat.• If the VP is better than +34, the game ends in a British Decisive Victory.
Prelude to Eagle DayStop before beginning Calendar Update Step 1: Squadron and Gruppen Reset.
VPs Result−35 to −16 British Decisive Defeat−15 to −6 British Tactical Defeat
−5 to −1 Draw0 to 9 British Tactical Victory10+ British Decisive Victory
The Hardest DaysStop before beginning Calendar Update Step 1: Squadron and Gruppen Reset at the end of the fourth Raid Day.
VPs Result−34 to −26 British Decisive Defeat−25 to −11 British Operational Defeat−10 to −1 Draw
0 to 14 British Operational Victory15 to 34 British Decisive Victory
The Thin Blue LineStop the first time you check for Operation Sealion preparations with 16.1. This check occurs after you gain VPs for the day advance, but before receiving and expending replacement points.
Sealion result ResultPreparations begin British Decisive DefeatDelayed, Luftwaffe Depletion level 0 or 1 British Operational DefeatDelayed, Luftwaffe Depletion level 2 British Operational VictoryCanceled British Decisive Victory
The Battle of BritainStop if the VP total is greater than or equal to the cancel value when you check for Sealion preparations, the game ends in a British Victory.
VP ≥ cancel value Resultfirst Sealion preparations check British Decisive Victorylater Sealion preparations checks British Operational Victor
Stop when the Day marker moves into or past the Sealion D-Day space. Compare the Victory Points to the start and cancel values in the Sealion D-Day space.
VPs ResultVP ≤ start value British Decisive Defeat, the Germans invadeVP between start and cancel values British Operational DefeatVP ≥ cancel value Tactical British Victory.
RAF: Lion Rules Flipbook 17 Victory Assessment