148. portable ladder standards (1)except as otherwise permitted by this part, portable ladder...
TRANSCRIPT

Ladder Safety Training

Ladder Safety Training – Why?

148. Portable ladder standards
(1) Except as otherwise permitted by this Part, portable ladder design, construction and use shall meet the requirements of
(a) CSA Standard CAN3-Z11 "Portable Ladders"; (b) ANSI Standard A14.1-1990 "Safety Requirements for Portable Wood Ladders"; (c) ANSI Standard A14.2-1990 "Safety Requirements for Portable Metal Ladders"; or (d) other standard acceptable to the minister.
(2) A manufactured portable ladder shall be (a) marked for grade and use; and (b) used in accordance with the manufacturer's instructions.
NL Legislation

154. Restrictions on use 1) Except as otherwise permitted by a manufacturer, a worker shall not work
from either the top 2 rungs of a portable single or extension ladder or the top 2 steps of a stepladder.
2) A ladder shall not be used as a scaffold component or as a horizontal walkway, ramp or work platform support except where the ladder is part of a pre-manufactured or engineered system.
3) A worker shall maintain 3 points of contact when using a ladder. 4) A worker may only work from a portable ladder without fall protection
where (a) the work is a light duty task of short duration at each location; (b) the worker's centre of gravity is maintained between the ladder side rails; and (c) the ladder is not positioned near an edge or floor opening that
would significantly increase the potential fall distance.
NL Legislation

Ladders

Before the JOB consider the following:Is a STEPLADDER right for the job?Task
Plan ahead for the tasks you will be doingWill you need to
Move around while on ladderCarry items with youWork for more than 30 mins
UserIs the user fit enough to work at heights.Are they comfortable working at heights.
Choosing a Ladder

Is the Ladder strong enough?
Maximum Static Vertical loadWeight of user & additional weight carried
Duty RatingFrequency and general condition
Choosing a Ladder

A ladder's duty rating tells you its maximum weight capacity. There are four categories of duty ratings: Type IAThese ladders have a duty rating of 300 pounds. Type IA ladders are recommended for extra-heavy-duty industrial use.Type IThese ladders have a duty rating of 250 pounds. Type I ladders are manufactured for heavy-duty use.Type IIThese ladders have a duty rating of 225 pounds. Type II ladders are approved for medium-duty use.Type IIIThese ladders have a duty rating of 200 pounds. Type III ladders are rated for light-duty use.
Duty Rating

Type Advantages Disadvantages
Wooden* Does not conduct electricity when dry* Natural insulator against cold/ heat
* Heavy* Can dry and split* Can fail suddenly
Aluminium* Light* Strong* Robust* Low maintenance
* Conducts electricity* Conducts heat and cold
Fiberglass* Does not conduct electricity* Can withstand cold and heat
* Heavy* Chip or crack under impact* Can crack or fail under heavy load
Types of Ladders

Parts of a Step Ladder

1) User Inspections- Stiles - Locking devices - Platform - Steps or Treads- Non-slip feet - ID tag – readable?
2) People and Place safety- Not for work more than 30 minutes in duration - Not for work requiring more than 10kg weight to be lifted- Footwear – CSA safety- Clothing - proper fitting clothing- Check area – overhead, other people, firm base, doors , safe “drop zone”
Set Up and Use of Step Ladder

3) Ladder set up- Is it fully opened and locked into correct position- Is it on firm and level base- Is it positioned with steps facing work- Multi design ladders must be set up properly for work being
preformed
4) User guidelines- Secure grip at all times- 3 point contact when climbing- Ensure all items are secure on ladder- Do not use top platform as work step- MOVE LADDER FOR WORK AND DO NOT OVER REACH
Set Up and Use of Step Ladder

NL Regs section 153 Extension Ladder Length. A ladder shall be of sufficient length to project approximately one metre above the level of the upper landing to which it provides access, except where there is limited clearance and the ladder is adequately secured.
Parts of an Extension Ladder

Setting Up An Extension Ladder

What should you do to safely secure extension ladders?
• Place ladders on a firm, level surface and ensure the footing is secure.
• Erect extension ladders so that the upper section rests on (e.g., in front of) the bottom section. This means the bottom section "faces" a wall or other supporting surface (see figures below).
• Place the ladder feet so that the horizontal distance between the feet and the top support is 1/4 of the working length of the ladder. The ladder will be leaning at a 75 degree angle from the ground.
• Raise and lower ladders from the ground. Ensure that locking ladder hooks are secure before climbing.
Setting Up An Extension Ladder

• Erect ladders so that a minimum of 1 m (3 ft) extends above a landing platform. Tie the top at support points.
• Brace or tie off the ladder near the base. If there is no structure to tie off to, use a stake in the ground.
• Leave all tie-off devices in place until they must be removed before taking the ladder down.
• Maintain the minimum overlap of sections as shown on a ladder label. Refer to safety regulations.
Note: When working 3 metres (10 feet) or more above ground, wear a safety belt or harness with the lanyard tied appropriately
to the structure.
Setting Up An Extension Ladder

What should you avoid when using extension ladders?
• Do not use ladders near electrical wire.• Do not set up or take a ladder down when
it is extended. • Do not overextend. Maintain minimum overlap
of sections. • Do not climb higher than the fourth rung from the
top of a ladder. • Do not use ladders on ice, snow or other slippery surfaces
without securing ladders' feet. • Do not extend top section of a ladder from above or by
"bouncing" on a ladder.• Do not leave ladders unattended.
Setting Up An Extension Ladder

What should you do to avoid overexertion while setting up an extension ladder?
When setting up an extension ladder, use the following method to avoid straining muscles or losing control of a ladder. With ladders weighing more than 25 kg (55 lb), or where conditions complicate the task, have two persons set up a ladder, step by step, as follows: Lay a ladder on the ground close to intended location. Brace ladder base using helpers' feet. Grasp the top rung with both hands, raise the top end over your head and walk toward the base of a ladder. Grasp the centre of the rungs to maintain stability. Move the erect ladder to the desired location. Lean itforward against the resting point.
Setting Up An Extension Ladder
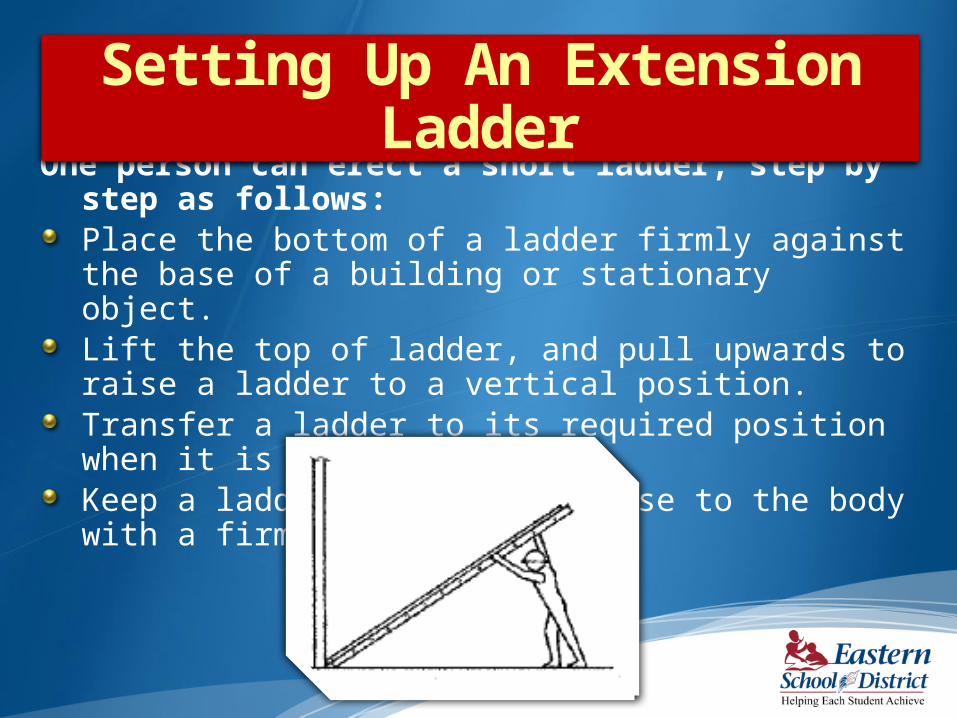
One person can erect a short ladder, step by step as follows: Place the bottom of a ladder firmly against the base of a building or stationary object. Lift the top of ladder, and pull upwards to raise a ladder to a vertical position. Transfer a ladder to its required position when it is erect. Keep a ladder upright and close to the body with a firm grip.
Setting Up An Extension Ladder

Setting Up An Extension Ladder

Scaffolding

Scaffold erection and dismantling must be done by, or supervised by, qualified workers.
The vertical supports of scaffolds must be Placed on a firm base or sill Capable of withstanding superimposed weight from the scaffold and anything placed on the scaffold
Do not use pallets, boxes, concrete blocks, bricks, or other unstable materials to support scaffolds.
All scaffolds must be erected plumb and level, and be designed for the intended use.
Scaffold Legislation

Scaffolds must be secured to the building structure approximately 4.6 m (15 ft.) vertically but not to exceed 6.1 m (20 ft.) vertically and 6.4 m (21 ft.) horizontally. NOTE: Narrow scaffolds must be secured to the structure when the platform height exceeds three times the smallest base dimension.
Bracing requirements for prefabricated scaffolds must be installed according to the manufacturer’s instructions. Bracing for job-built scaffolding must meet standards acceptable to OHS.
All scaffolds must be inspected before use by those who will use them, regardless of who erected them. No damaged or weakened scaffold may be used until it has been effectively repaired.
Scaffold Legislation

Aerial Lift Suspended “Pump Jack”
Types of Scaffolds

Supported“Framed or Fabricated”
Types of Scaffolds

Falls from scaffolds are one of the leading causes of injuries to construction workers .
All scaffolds 3 m (10 ft.) or more above grade must have standard guardrails on their open side.
A standard guard consists of:A top rail approximately 1.1 m (42 in.) above the platformAn intermediate rail centred at approximately the midpoint of the space between the underside of the top rail and the upper edge of the platformVertical guardrail supports spaced not more than 3 m (10 ft.) apart for wooden scaffoldingStandard guardrails must be designed to withstand a static load of 550 N (125 lb.) applied laterally at any point of the top rail.
Guardrails

1.1 m(42") Top rail
2" x 4" or 2" x 6“
Intermediate rail 2" x 4"
Maximum 3 m (10 ft.) between supports
Guardrails

Manufactured scaffold planks are available in various lengths and duty ranges. These planks must be installed and used according to the manufacturer’s and/or supplier’s specifications. Securing devices for aluminum/plywood platforms
Examples of the various types of manufactured plank and securing devices for aluminum/plywood platforms
Manufactured Scaffold Planks

General requirementsWood scaffolding must be built using No. 2 or better lumber. To eliminate split, warped, or otherwise defective lumber, scaffold materials should be hand-selected.
Progressively brace the scaffold as it is erected.
Make sure there is firm contact between bearer blocks, bearers, wall scabs, and ledgers to provide maximum strength at connecting points.
The number and size of nails and nailing patterns at connections should be consistent with good practice. As a guide, nails should protrude at least two-thirds of the thickness into the adjoining piece of lumber.
Wood Scaffold Erection Guidelines

When holding power is critical, or when the scaffold will be used for an extended length of time, dip galvanized or spiral nails should be used. When scaffold components are intended to be dismantled and reused, double-headed nails may be used.
Caution: Do not use the same nail holes on reassembly.
Do not exceed the maximum allowable dimensions for bearers and upright spacing.
Do not overload the scaffold.
The spacing of vertical supports (uprights) and bearers must not exceed 3 m (10 ft.).
Wood Scaffold Erection Guidelines

2" x 4" or 2" x 6” Top rail
2" x 4“ Intermediate rail
2” x 10” Platform
2" x 4" or 1" x 6“ Ledger
1" x 6" or 2" x 4" Brace
Mudsill
Maximum 3m (10ft) between supports)
Note: For sake of drawing clarity, toeboards are not shown.
Wood Scaffold Erection Guidelines

All scaffold planks must be inspected and tested before use.
Lumber or manufactured scaffold planks used for a work platform must consist of at least two planks placed side by side to provide a work surface with a nominal width of 50 cm (20 in.), or nominal width of 30 cm (12 in.) for ladder-jack platforms.
Scaffold planks should completely cover the area between front and rear vertical supports or the rear guardrail.
Scaffold planks must be secured against any movement in any direction (including uplift).
Scaffold Planks

Sawn wood planks must be hand-selected and in the following grades and sizes:
Using the specifications above, the maximum span is:3 m (10 ft.) for light-duty scaffolds2.1 m (7 ft.) for heavy-duty scaffolds
Minimum width
mm inchesSelect Structural — Scaffold Planks 38 x 235 2 x 10 nominal
Select Structural — Joists & Planks 48 x 251 2 x 10 nominal
No. 2 and Better — Joists & Planks* 38 x 235 2 x 10 rough sawn
No. 2 and Better — Joists & Planks 38 x 235 2 x 10 dressed/nominal
* Important: These planks must be doubled, one on top of the other.
Scaffold (lumber) Planks

Lumber used for planks must be graded and marked to the National Lumber Grades Authority (NLGA) Standard Grading Rules for Canadian Lumber.
Scaffold planks must extend a minimum of 150 mm (6 in.) and a maximum of 300 mm (12 in.) beyond their supports.
Scaffold planks must be held in place if there is a danger of the planks slipping off their supports.
Scaffold Planks

Manufacturer’s specifications must be followed for testing laminated wood scaffold planks. The following is an acceptable method for testing sawn wood scaffold planks:
Place test scaffold plank on two blocks. The block size and test span must be selected from the following table:
Test Span Span Block Size
2.1 m (7 ft.) 60 mm (23⁄8 in.)
3 m (10 ft.) 92 mm (35⁄8 in.)
Testing Procedure for Scaffold Planks

Have two workers who together weigh at least 148 kg (325 lb.) stand on the centre of the supported plank. Do not jump up and down on the plank.
Reject the plank if any of the following events occur: The plank bends enough to contact the groundCracking sounds are heard (indicating fibre overstressing)After removal of the test load, the plank fails to return to its original position (i.e., it remains bent)
Scaffold planks passing this test should be identified by stencilling or end painting. It is also advisable to have the ends of the planks encased in metal sleeves or jackets for damage protection and additional identification.
Testing Procedure for Scaffold Planks

To prevent damage, scaffold planks must be handled carefully, used correctly, and stored properly.
Scaffold planks must never be overloaded, used as sills, or subjected to any condition that could affect the integrity of the plank as a working platform.
Testing Procedure for Scaffold Planks

Single-pole wood scaffold for light duty
The spacing of vertical supports and bearers of a single-pole wood scaffold for light duty must not exceed 3 m (10 ft.).
On single-pole scaffolds, the inner ends of bearers must be supported by bearer blocks securely fastened to wall scabs
Metal bearer bar
2" x 4"Upright
2" x 6" Bearer
2" x 4"Bearerblock
Minimum610 mm(2 ft.)overlap
2" x 6"Wall scab
Bearer Connections at Wall

Pump jack scaffolds must be erected, operated, and maintained in accordance with the manufacturer’s instructions.
A copy of the manufacturer’s instructions must be readily available on site for reference by workers.
No more than two workers are permitted on a pump jack scaffold at one time. The maximum allowable safe working load is 227 kilograms (500 pounds).
Each pump jack bracket must have two positive gripping mechanisms to prevent failure or slippage.
Pump Jack Scaffolding Requirements

Pump Jack Scaffolding RequirementsWood poles shall
Not be spaced more than 2.3 metres (seven feet) apart
Be secured to the work wall by rigid triangular bracing at the top, bottom, and other points such that the maximum distance between braces is three metres (10 feet)
Not exceed nine metres (30 feet) in height
Require mending plates installed at all splices, when two by fours are spliced to make a pole
Have the seam parallel to the bracket when constructed of two continuous lengths joined together

Metal poles shall :Be secured as specified by the manufacturer’s instructions
Have a minimum of one brace up to 7.3 metres (24 feet), and above that height the bracing shall not exceed a maximum span of 4.9 metres (16 feet) from top to bottom
Not exceed 15.2 metres (50 feet) in height unless certified by an engineer
Poles must be placed on mud-sills or other adequate firm foundation.
Pump Jack Scaffolding Requirements

The work platform must be
Secured to the pump jack brackets
A minimum width of 30 centimetres (12 inches)
A bench platform, incorporated in the scaffold at an approximate height of 107 cm (42 in.), is acceptable in lieu of a top rail.
Pump Jack Scaffolding Requirements

What Do You Know?

Here are the safety violations they spotted:
The access ladder is too short (it must be long enough to project approximately 1 m (3 ft.) above the upper landing to which it provides access).The scaffold has a lockout tag placed on it, indicating the scaffold is unfinished and should not be used.There is a bucket near the edge. If excess material could fall off the scaffold, a toe board should be used.The worker doesn’t have safe access to the scaffold, and would have to climb through the guardrails to access the upper platform.
What Do You Know?

The worker doesn’t have safe access to the lower level of the scaffold, and would have to crawl through the brace to reach it.There is a dangerous gap in the middle of the upper level platform — a slip/trip hazard.The lower level platform is unfinished. The worker needs a guardrail to use it.The cross brace is missing from the back of the scaffold (it must be erected according to the manufacturer’s instructions).The mid-rail is missing on the upper platform, a key component of a guardrail system.
What Do You Know? (cont.)

Firm FoundationTo ensure stability, scaffold must be placed on Base plates
Mud Sills
Or other adequate firm foundation
Capacity. Scaffolds must be capable of supporting their own weight and at least 4 times their maximumintended load
Setting Up Supported Scaffold

Bracing. Frames must be connected by cross, horizontal or diagonal braces, alone or in combination, which secure vertical members together laterally.
Setting Up Supported Scaffold

Fall ProtectionConsists of either “fall arrest” – harness and lifeline, or “fall prevention” – guardrails
Must be in place when worker is at height greater than 3.05 m (10ft) or more at workers feet level
All employees working at this level must wear fall arrest equipment
Fall arrest:Can not be tied off to standpipes, electrical conduit, vents or the like
Setting Up Supported Scaffold

Setting Up Supported ScaffoldGuardrails
Must be on all platforms over 4ft from ground or previous level of scaffold
Must have vertical supports no more than 8ft apart
Must not be no more than 1.07 m ( 3.51ft) from floor with a rail in between the two.
Maybe be replaced by cross braces as long as intersection of brace is between 50.8-76.2 (20-30inches) for mid guardrail and 96.5-122cm (38-48) inches for toprail.

Working GapThere can be no more than 14 inches between the scaffold and the structure worked on.
Falling Object Protection
All persons working around scaffolding must be protected against falling objects/debris by hard hat, toeboards, screens or netting.
Setting Up Supported Scaffold

Questions?