10 tips for creating tack sharp photos - focus...
TRANSCRIPT

10 Tips For Creating Tack Sharp Photos
A photographer’s guide to sharper images
Focus Pyramid
1st Edition

.................................................................................Introduction 3......................................................................................................Getting Started 3
.................................................................................Method #10 4...........................................................................................Cut Back On The Joe 4
...................................................................................Method #9 5........................................................................................................Lock It Down 5
...................................................................................Method #8 6........................................................................................How fast is fast enough? 6
...................................................................................Method #7 7..................................................................................Put your Aperture on a diet 7
...................................................................................Method #6 8............................................................................................Turn up the volume!! 8
...................................................................................Method #5 9...........................................................................................................Lens Candy 9
.................................................................................Method #4 10...................................................................................Turn off lens stabilization 10
.................................................................................Method #3 11............................................................................All glass is NOT created equal 11
.................................................................................Method #2 12..................................................................................The Diopter is your friend 12
.................................................................................Method #1 13............................................Auto Focus Lens Calibration - Piéce de Résistance 13
IntroductionOk folks... Let me start out by telling you what
you will NOT learn from this eBook. You will not
learn Masking, Unsharpening, Layering or any other
Adobe Photoshop technique to help fool the viewer
into thinking your image is sharper than it really is.
What you WILL learn is how to get razor sharp
images in the camera at the time of capture. This will
not only free up your time to take more pictures,
spend more time enjoying the ones you have already
taken, but inevitably be more profitable if you’re a
pro.
GETTING STARTED
Some of the Top 10 Methods To Make Razor Sharp Photos may simply only be review
for most photographers while others, a bit more obscure, will be worth learning and putting into
practice immediately. In a Letterman-esque manner I’ll go through my top 10 picks!
The goal:
• Introduce to you techniques which will ultimately help you to create
sharper images with little to no additional effort
• Highlight products that will not only help you to create sharper images,
but provide you peace of mind when fast focusing is critical.

Method #10CUT BACK ON THE JOE
In many cases, blurry photos are a direct result from a shaky hand. Try
laying off the caffeine, but if that’s simply not a realistic option, as in my
case, and a tripod is not available, you can start out by trying these simple
techniques:
• Hold your camera with both hands
• Widen your stance
• Bring the camera closure to your body
• Keep elbows tucked in
• Brace yourself against a wall or other solid object
• Don’t “PRESS” your shutter release, glide over it softly (be gentle)
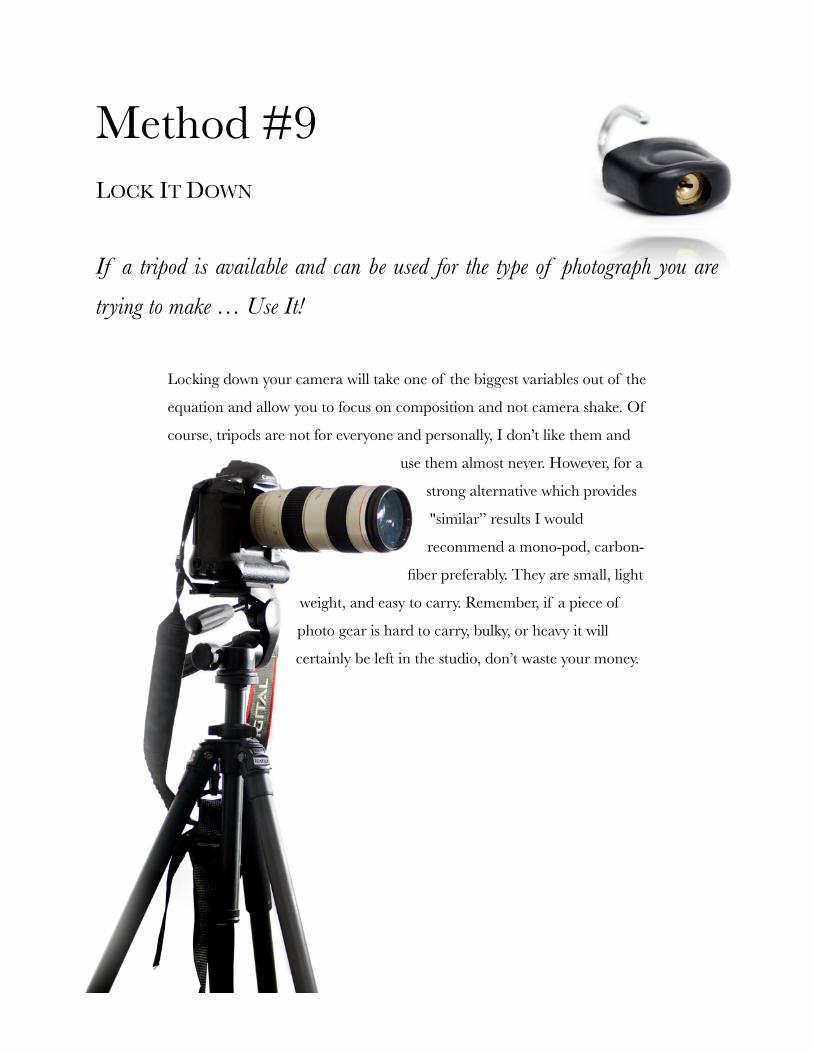
Method #9LOCK IT DOWN
If a tripod is available and can be used for the type of photograph you are
trying to make … Use It!
Locking down your camera will take one of the biggest variables out of the
equation and allow you to focus on composition and not camera shake. Of
course, tripods are not for everyone and personally, I don’t like them and
use them almost never. However, for a
strong alternative which provides
"similar” results I would
recommend a mono-pod, carbon-
fiber preferably. They are small, light
weight, and easy to carry. Remember, if a piece of
photo gear is hard to carry, bulky, or heavy it will
certainly be left in the studio, don’t waste your money.

Method #8HOW FAST IS FAST ENOUGH?
We all know to freeze action we must use a fast shutter speed or strap on a
flash. If a flash is not available try this simple rule of thumb when shooting
handheld. Pick a shutter speed that is equal or greater than your focal length.
Ok.. so what does that mean?
Here are a couple of examples:
• At 25mm set your shutter speed to 1/25th or faster
• At 50mm set your shutter speed to 1/50th or faster
• At 100mm set your shutter speed to 1/100th or faster
• At 200mm set your shutter speed to 1/200th or faster
If your camera can not shoot at these speeds, simply choose the next higher.

Method #7PUT YOUR APERTURE ON A DIET
Is your camera’s aperture too fat?
We are told that “professional” images have
beautiful bokeh (background blur) and to produce
this we must shoot using the largest aperture that
our lens allows. While partially true, the fact is the
wider (larger) our aperture is, the softer the over all
image inevitably becomes. There are exceptions to
this, but I’ll have to expound upon these in a
future text. For now, simply stop down your
aperture “lean it up” a bit. If you were to shoot
with a lens that allow for f2.8 try to use either f3.2,
f3.5 or even f4.0 as an alternative and notice
sharper images immediately.

Method #6TURN UP THE VOLUME!!
What??? What did you say? I can’t hear ya, sonny!
NOISE plays an important role in image’s sharpness. Quiet, zen-like, images will generally be
sharper than noisy more manic, photos! The cause of noise, in a nut shell, is ISO, the dark horse
i n t o d a y ’ s c a m e r a
manufacture image quality
race, and by far more
important than megapixels
and alike. ISO controls the
sensitivity of your sensor. We
are lead to believe that setting
our camera’s ISO to it’s
lowest possible setting i.e..
100, 160, etc. will provide the
sharpest images! WRONG!
Each manufacture and for that matter each camera body has an optimum ISO which may not be
its lowest possible setting. For example, our studio Canon 7D’s creates sharper / less noisy images
when set to ISO 160 over the lower ISO 100 while our Canon 5D MarkII enjoys the lower
setting. Research your camera body’s “native” ISO sweet spot and setup your camera
accordingly.

Method #5LENS CANDY
Where is your lenses sweet spot?
Each and every lens in your kit has what we call a sweet spot, a f-stop that produces the
sharpest possible image. When light is not an issue as in shooting outdoors during
the day, using a strobe or shooting at long exposure times while using a
tripod, simply setting your lens f-stop to it’s sweet spot
will go a long way to creating a sharper image! So
okay... Joseph but I don’t know where my lens’
sweet spot is, you ask! :) Simply, photograph
the sharp text of a magazine at a wide open
setting say f2.8 then at it’s maximum setting
say f32 and finally take two more shots in
between the two. Example: f2.8, f8.0, f16,
f32 As you get closer to your lenses “sweet
spot” you can simply refine the f-stop to
obtain the lens’ absolute sharpest spot.
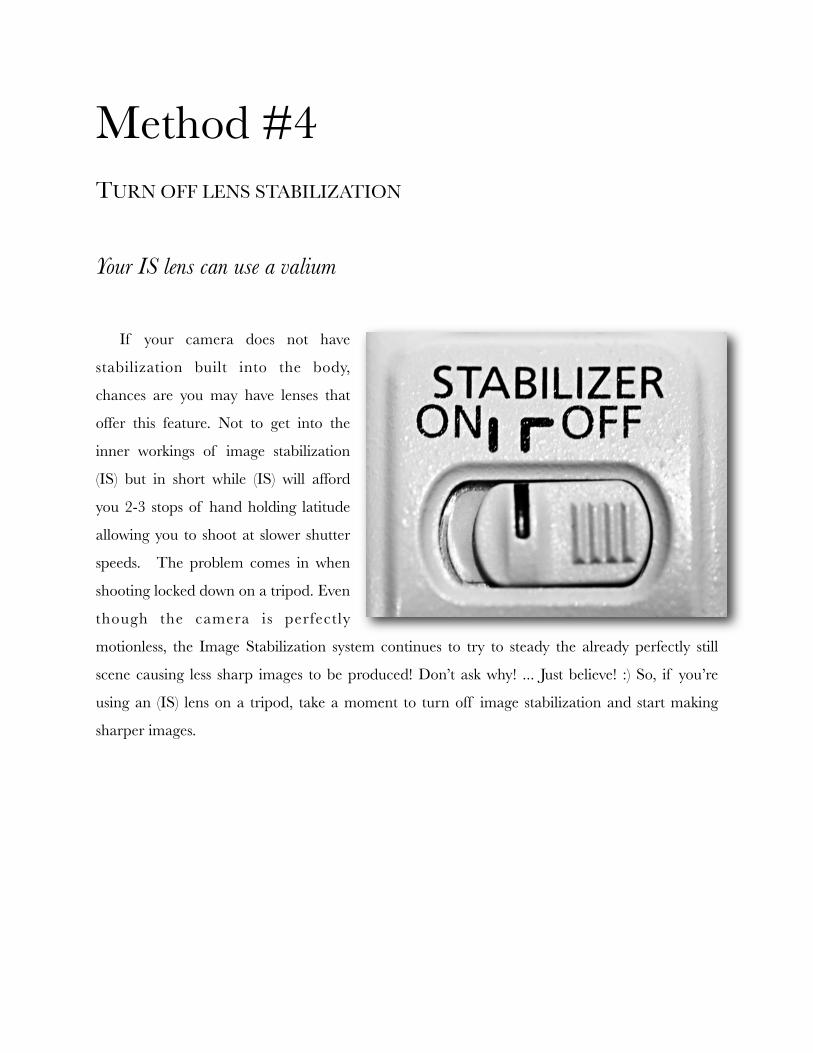
Method #4TURN OFF LENS STABILIZATION
Your IS lens can use a valium
If your camera does not have
stabilization built into the body,
chances are you may have lenses that
offer this feature. Not to get into the
inner workings of image stabilization
(IS) but in short while (IS) will afford
you 2-3 stops of hand holding latitude
allowing you to shoot at slower shutter
speeds. The problem comes in when
shooting locked down on a tripod. Even
though the camera is perfectly
motionless, the Image Stabilization system continues to try to steady the already perfectly still
scene causing less sharp images to be produced! Don’t ask why! ... Just believe! :) So, if you’re
using an (IS) lens on a tripod, take a moment to turn off image stabilization and start making
sharper images.

Method #3ALL GLASS IS NOT CREATED EQUAL
Plastic, glass, or something in-between
We, DSLR users, both amateur and pro, absolutely love our high-end glass and rightfully so.
The difference between the image sharpness of a Canon 50mm f1.8 Plastic Lens and a Canon
50mm f1.4 lens or a 28-135mm zoom and a Canon 24-105mm is quickly made painfully
apparent during the most basic pixel peeping. Camera manufactures produce spanking NEW
“must have” camera bodies nearly every year while lenses remain the same for many times
longer. If you have a limited budget. I
recommend purchasing a “cheaper”
camera body that will do what you
need it to do and spring for the
more expensive higher quality
lens which may very well last
you a lifetime. More times
than not, high quality glass
w i l l p ro d u c e s h a r p e r
photographs.
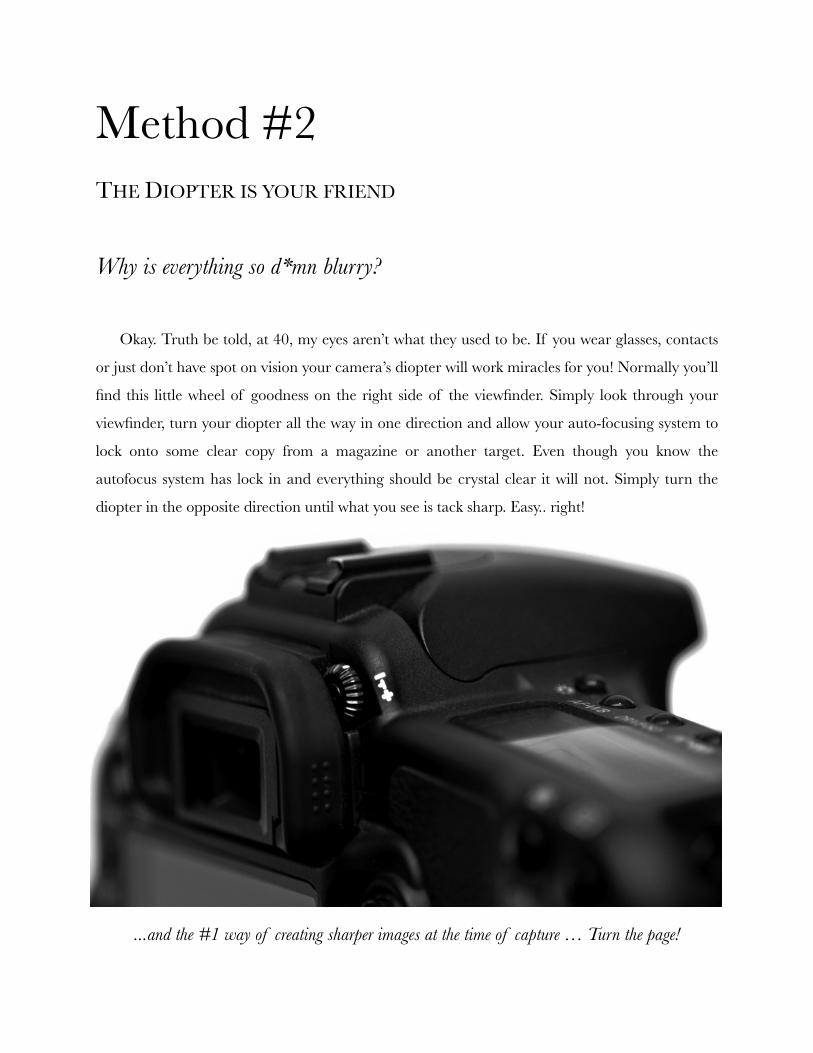
Method #2THE DIOPTER IS YOUR FRIEND
Why is everything so d*mn blurry?
Okay. Truth be told, at 40, my eyes aren’t what they used to be. If you wear glasses, contacts
or just don’t have spot on vision your camera’s diopter will work miracles for you! Normally you’ll
find this little wheel of goodness on the right side of the viewfinder. Simply look through your
viewfinder, turn your diopter all the way in one direction and allow your auto-focusing system to
lock onto some clear copy from a magazine or another target. Even though you know the
autofocus system has lock in and everything should be crystal clear it will not. Simply turn the
diopter in the opposite direction until what you see is tack sharp. Easy.. right!
...and the #1 way of creating sharper images at the time of capture … Turn the page!

Method #1AUTO FOCUS LENS CALIBRATION - PIÉCE DE RÉSISTANCE
That’s not where I was focusing
The easiest and most consistent way of getting sharper images, bar none, is by calibrating
your lenses. We all greatly rely on our Auto Focusing System to simply Get It Right! But … More
often than not this system produces either Front Focus or Back Focus right from the factory.
Have you ever shot a portrait and
specifically focused on the persons eyes
only to find either the tips of their nose
or possibility ears were perfectly in
focus while their eyes were soft? This is
a classic description of a Front or Back
focusing problem.
Interestingly, from lens copy to lens
copy the actual focus spot varies. For years there was absolutely no way to correct for this
problem besides sending the lens back to the manufacture for calibration which was not only very
costly but many times still did not solve the problem when using the lens on various camera
bodies.
Finally there’s a solution! Most major camera manufactures, knowing this was a problem,
have introduced “Auto Focus Micro Adjustment Calibration Custom Settings”.
With the advent of custom in-body lens calibration, a few products hit the market which
would help photographers calibrate their lenses. These tools show the exact spot where your auto
focus system “thinks” it should be focusing on which in turn gives you the ability to either
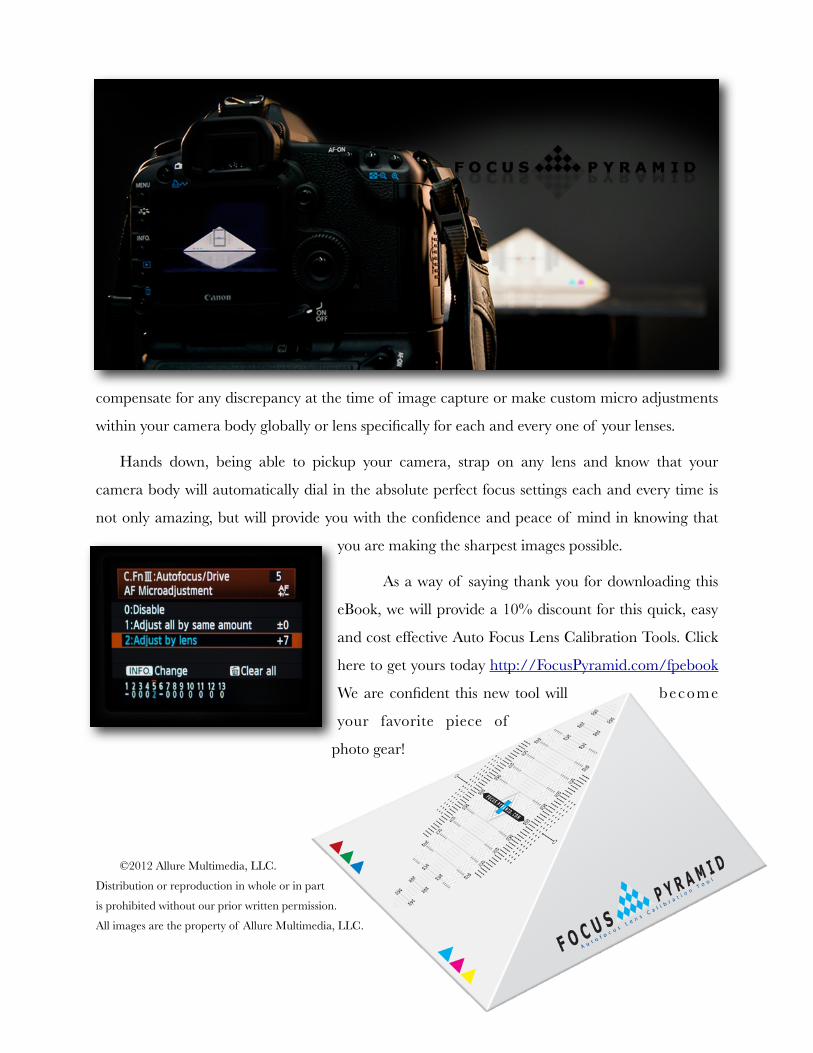
compensate for any discrepancy at the time of image capture or make custom micro adjustments
within your camera body globally or lens specifically for each and every one of your lenses.
Hands down, being able to pickup your camera, strap on any lens and know that your
camera body will automatically dial in the absolute perfect focus settings each and every time is
not only amazing, but will provide you with the confidence and peace of mind in knowing that
you are making the sharpest images possible.
As a way of saying thank you for downloading this
eBook, we will provide a 10% discount for this quick, easy
and cost effective Auto Focus Lens Calibration Tools. Click
here to get yours today http://FocusPyramid.com/fpebook
We are confident this new tool will become
your favorite piece of
photo gear!
©2012 Allure Multimedia, LLC.
Distribution or reproduction in whole or in part
is prohibited without our prior written permission.
All images are the property of Allure Multimedia, LLC.