1 lean construction education program: project team course
TRANSCRIPT

1
Lean Construction Education Program: Project Team Course

2
Welcome
• Your instructor• Orientation• Participant introductions
– Your name, company, and position– What is your Lean Construction experience?
• What is Lean Construction?• Goal of Today’s class

3
AGC’s Lean Construction Education Program Overview
• A series of courses that progressively cover a range of topics in Lean Construction including:– Variation and pull in production– Lean workstructuring, supply chains, and assembly– Production management– Management by values– Problem-solving principles and tools
• For more information, including information on credentialing, visit www.agc.org/LCEP.

4
Time Session Topic/Activity
120 minutes 1 Workflow
120 minutes 2 Planning and Evaluating the Plan
Course Schedule

5
Session 1

6
Time Session Topic/Activity
1 Workflow
60 minutes - Variation in Production Systems
60 minutes - Pull in Production
Today’s Course Schedule
7
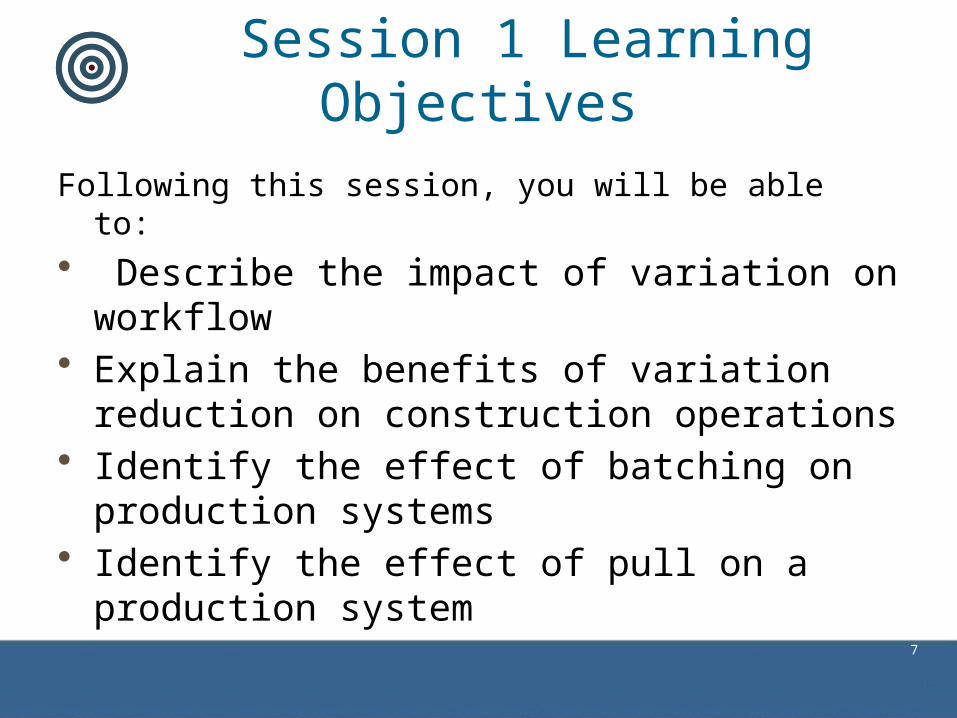
Session 1 Learning Objectives
Following this session, you will be able to:
• Describe the impact of variation on workflow• Explain the benefits of variation reduction on
construction operations• Identify the effect of batching on production
systems• Identify the effect of pull on a production system
8
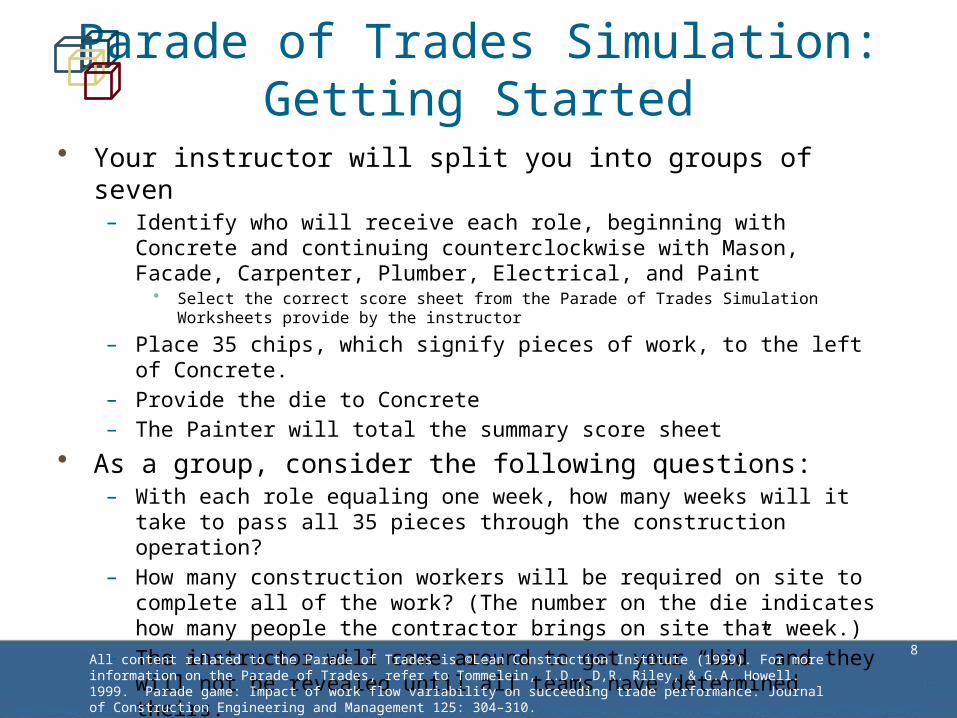
Parade of Trades Simulation:Getting Started
• Your instructor will split you into groups of seven– Identify who will receive each role, beginning with Concrete and continuing
counterclockwise with Mason, Facade, Carpenter, Plumber, Electrical, and Paint • Select the correct score sheet from the Parade of Trades Simulation Worksheets provide by the
instructor
– Place 35 chips, which signify pieces of work, to the left of Concrete.– Provide the die to Concrete– The Painter will total the summary score sheet
• As a group, consider the following questions:– With each role equaling one week, how many weeks will it take to pass all 35
pieces through the construction operation?– How many construction workers will be required on site to complete all of the
work? (The number on the die indicates how many people the contractor brings on site that week.)
– The instructor will come around to get your “bid” and they will not be revealed until all teams have determined theirs.
All content related to the Parade of Trades is ©Lean Construction Institute (1999). For more information on the Parade of Trades, refer to Tommelein, I.D., D,R. Riley, & G.A. Howell. 1999. Parade game: Impact of work flow variability on succeeding trade performance. Journal of Construction Engineering and Management 125: 304–310.

9
Die
Concrete
Car
pent
er
Mason
Faca
deElectrical
Paint
er
Plumber
Chips & Group Score Sheet
35
Die
Parade of Trades Simulation Setup

10
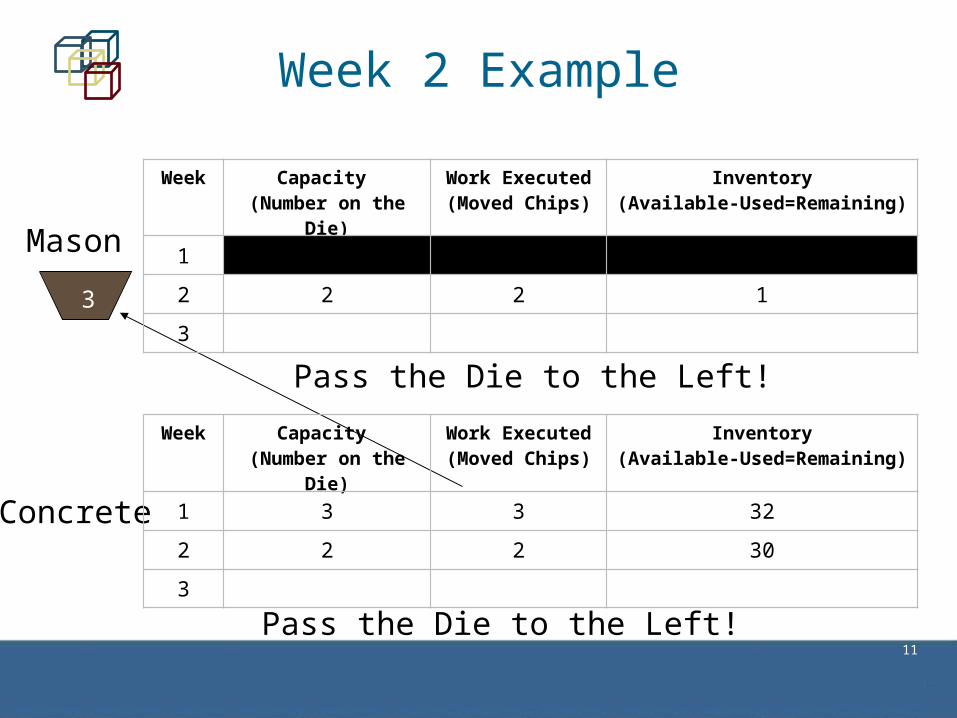
Week 1 Example
• After rolling, note your totals and pass the die to the left (clockwise) and chips to the right (counterclockwise)
• Moving one chip through one station requires one “crew” work unit.
• A die has an average production of 3.5 units per roll (week)
Week Capacity (Number on the Die)
Work Executed(Moved Chips)
Inventory(Available-Used=Remaining)
1 3 3 32
2
3
Concrete
11
Week 2 Example
Mason
Concrete
3
Pass the Die to the Left!
Pass the Die to the Left!
Week Capacity (Number on the Die)
Work Executed(Moved Chips)
Inventory(Available-Used=Remaining)
1 3 3 32
2 2 2 30
3
Week Capacity (Number on the Die)
Work Executed(Moved Chips)
Inventory(Available-Used=Remaining)
1
2 2 2 1
3
12
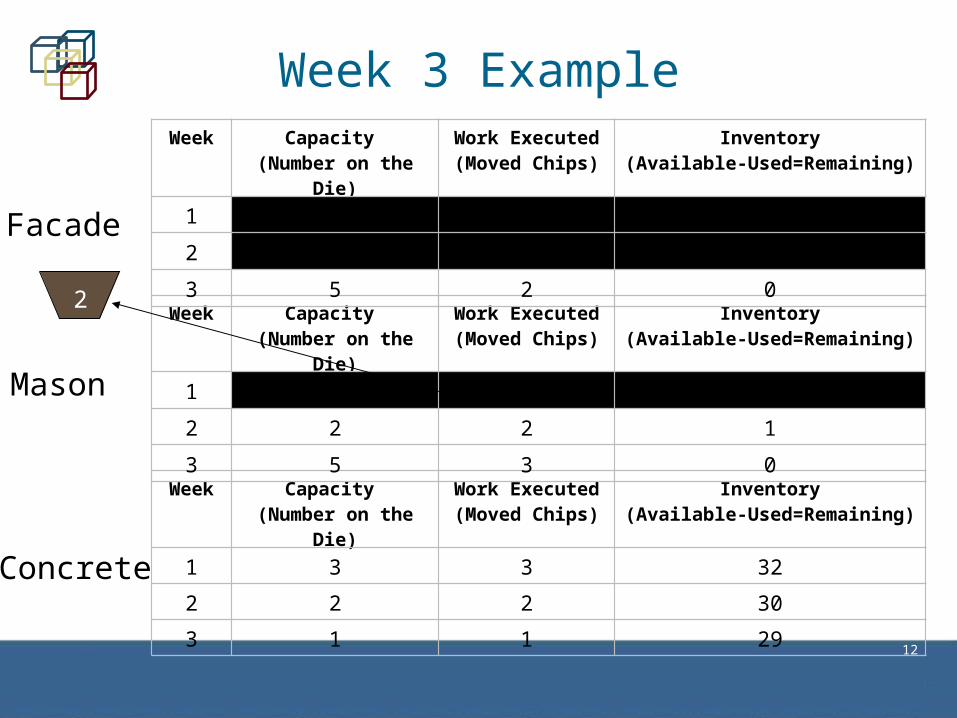
Facade
Week Capacity (Number on the Die)
Work Executed(Moved Chips)
Inventory(Available-Used=Remaining)
1 3 3 32
2 2 2 30
3 1 1 29
Concrete
Mason
Week Capacity (Number on the Die)
Work Executed(Moved Chips)
Inventory(Available-Used=Remaining)
1
2 2 2 1
3 5 3 0
Week Capacity (Number on the Die)
Work Executed(Moved Chips)
Inventory(Available-Used=Remaining)
1
2 2 2 30
3 5 2 0
Week 3 Example
2

13
When Work Is Complete…
• Using your score summary sheet the painter should:– Record the week each trade finishes– Add and record the available capacity for all trades. – Add and record the total remaining inventory for all
trades except Concrete. • Note the highest amount of inventory in any week for each
trade.
14
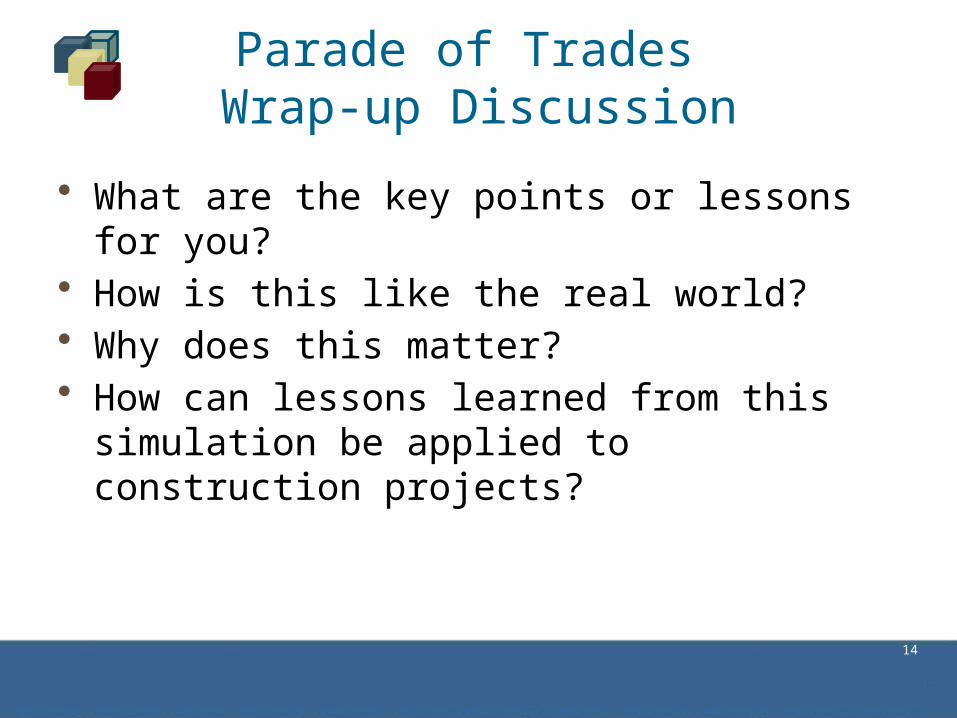
Parade of Trades Wrap-up Discussion
• What are the key points or lessons for you?• How is this like the real world?• Why does this matter?• How can lessons learned from this simulation be
applied to construction projects?

15
Results Example
0
5
10
15
20
25
30
35
40
1 2 3 4 5 61.2.2.5.5.6 1.2.3.4.5.6 2.2.3.4.5.5 2.3.3.4.4.5 3.3.3.4.4.41.1.1.6.6.6
# W
eeks
to
Com
plet
e
Average Loss 115.8 97.6 75.3 51.2 37 17.3
16
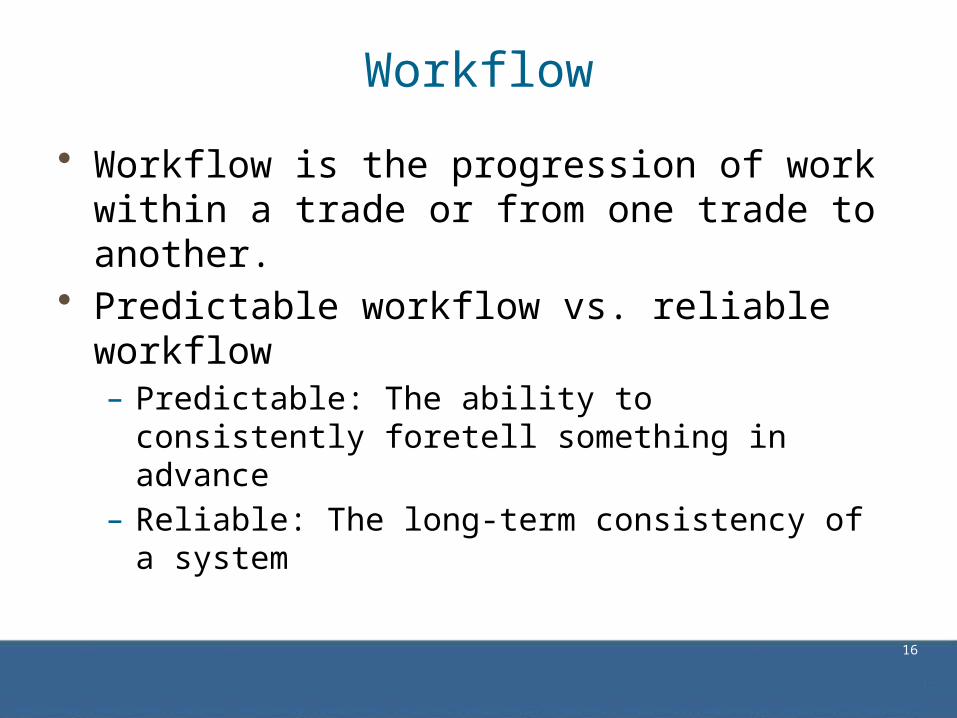
Workflow
• Workflow is the progression of work within a trade or from one trade to another.
• Predictable workflow vs. reliable workflow– Predictable: The ability to consistently foretell
something in advance– Reliable: The long-term consistency of a system

17
Variation
• Variation is caused by fluctuations in the process and results from pre-determined standards.– It arises when people do whatever they can to get
results.– It results in interrupted workflow - workers waiting for
work and work waiting for workers.
InconsistentProcess
InconsistentResults

18
Types of Variation
• Variation refers to random or non-random differences in a production process.
• Deming identified two types of variation5
– Common cause variation: Random, a property of the process or procedure
– Special cause variation: Non-random, caused by external influences to the defined process
• Variation of either kind in production systems is bad.– Special cause variation must be addressed before
common cause variation
19
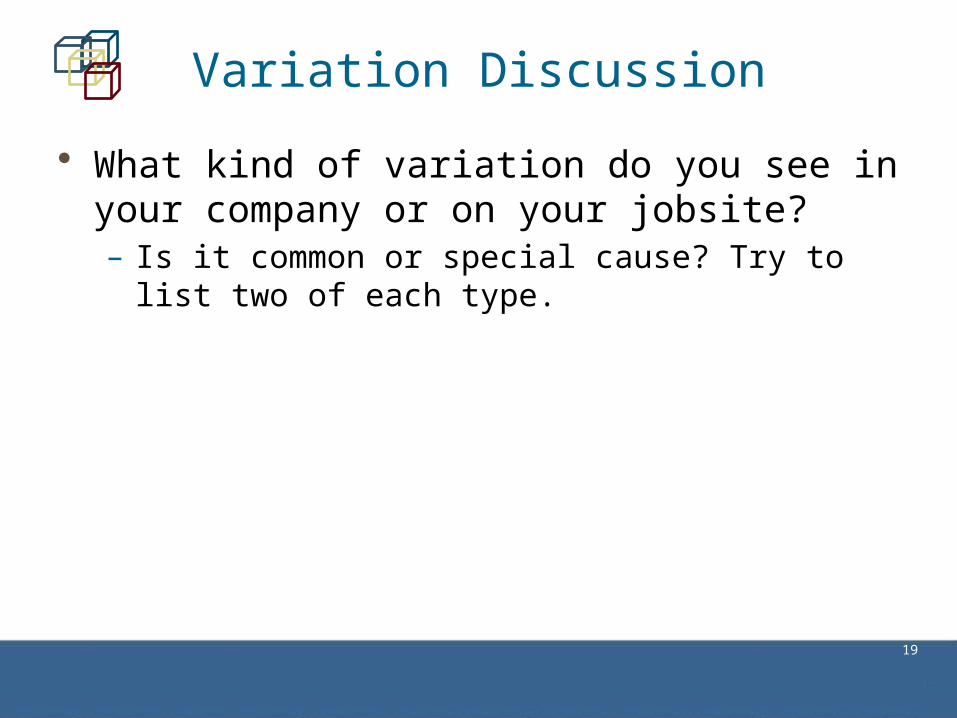
Variation Discussion
• What kind of variation do you see in your company or on your jobsite?– Is it common or special cause? Try to list two of each
type.

20
Variation, Lead Time,and Capacity Utilization
Wai
t T
ime
100%Capacity Utilization
A
Wai
t T
ime
21
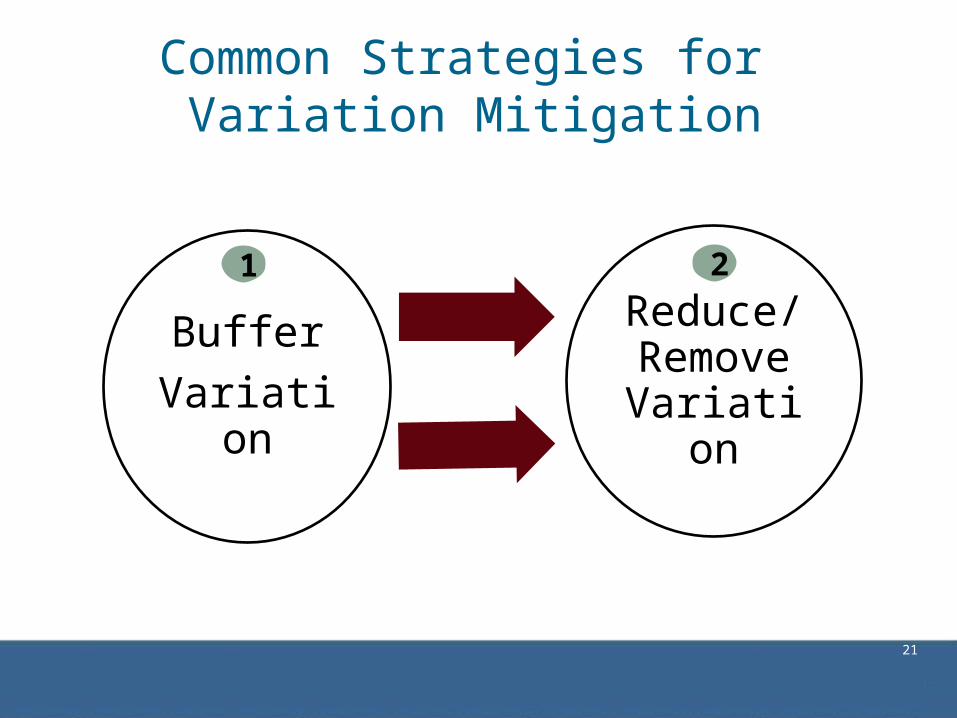
Common Strategies for Variation Mitigation
Buffer
Variation
Reduce/Remove Variation
1 2

22
Light Fixture Assembly Simulation: Getting Started1
• Your instructor will split you into groups of six. – Within your group identify an individual for each role:
• Timekeeper• Facilitator• Apprentice — Assembly • Journeyworker — Installation• Journeyworker — Wire and Clip• Journeyworker — Lamp and Finish
– Each person should carefully review his/her role’s worksheet, found in the Reference Section
1Abdelhamid, Tariq. “Michigan State University, Center for Construction Project Performance Assessment and Improvement.” www.c2p2ai.msu.edu (2008-2010)

23
How You Play• Roles
– Timekeeper: Times the overall simulations, cueing the facilitator– Facilitator: Introduces new fixtures into the process, providing them to the
apprentice– Apprentice: Completes the assembly and passes the batch– Installation journeyworker: Completes the installation and passes the batch– Wire and Clip journeyworker: Completes the wire-and-clip operation and
passes the batch– Lamp and Finish journeyworker: Completes the lamp-and-finish operation,
completing the batch
• You will be running three, five-minute simulations that will have batches of:– Eight light fixtures– Four light fixtures– One light fixture
• Your instructor will tell you when to start each simulation
24
How to Play(Continued)
• The apprentice takes one piece of paper at a time, writes the batch number on it, and makes the designated marks.– When the number designated for the batch size is met, paper clip them
together and put them in the queue for the next role– From time to time the facilitator will provide the apprentice with a different
color of paper to use in their batch. This does not change any processes.
• The first journeyworker takes the batch, unclips it, and makes their designated marks– When the number designated for the batch is met, paper clip them together
and put them in the queue for the next role
• This process continues through all roles, with each role beginning work on the next batch (if available) when they have finished the previous
• When time runs out for each simulation you will mark your results on your worksheet, calculate your cash flow, and report your results.

25
Rules to Keep in Mind
• If a fixture is damaged during any phase of the production sequence (i.e. is mismarked), you must fix it before you pass it on to the next unit
• We will evaluate each individual’s performance based on output. No specific quality measures exist; each team member needs to use his or her own discretion for any quality decisions
• While performing the pull instance of the simulation, you can begin working on the product only when the queue to the right is empty
• To calculate WIP, if you have started on a batch, the entire batch must be calculated as WIP

26
Predict Your Performance
• Before beginning each simulation consider as a group:– How many fixtures will your team produce in each
simulation?– How long will it take for the first batch of light fixtures to be
completed?– How much WIP will be generated (subassemblies left on
the table)?– How many specially ordered fixtures will you complete?
• Note your predictions on your worksheet. The instructor will also come around to get your predictions and they will not be revealed until all groups have determined theirs.

27
Light Fixture Assembly Discussion
• How did your actual results vary from your predictions?
• What are the key points or lessons for you?• How is this like the real world?• Why does this matter?• Suggest ways to use what you learned from this
simulation on projects.

28
Important Concepts and Definitions
• Work in progress (WIP):– The amount of work in the production process at a
given time.
• Throughput:– The amount of finished material/product coming out of
the production process in a given amount of time – The real measure of speed in the system
• Cycle time:– The time it takes to complete one finished unit of a
process
29
Types of Production Systems
• Either based on product mix or process pattern• The two types are:
– Batch-and-queue– Continuous-flow

30
Batch-and-Queue
• Each production stage creates or completes more than one piece of an item– A “batch” of units is created– That end up in a “queue” – Where they wait until the downstream function needs them
• Commonly used in construction to create buffers• Some examples are:
– Assembling light fixtures in batches to create a stockpile to feed installation
– Excavating all foundation pads, then sequentially installing rebar

31
Hidden Inefficiencies in Batch-and-Queue Systems
• Batch-and-queue systems help cope with variation, but they hide inefficiency through more:– Unfinished items in stages of production at any time– Cost due to more materials– Space– Labor– Transportation– Storage– Security

32
Batch-and-Queue Systems Discussion
• What batches have you encountered in construction?
• What has been your experience with batching on your projects?
33
Continuous-Flow
• A unit undergoes each stage of production sequentially; no batching of units occurs. This yields:– A reliable workflow– Lower costs due a reduced need for:
• Material, space, labor, transportation, storage, and security
– Quick identification of quality issues
• Also called single-piece flow or just in time/justified for time.
• Production with customer demands; only what is needed, when it is needed, in the quantity needed.
• Complete continuous-flow is only an ideal because of variation.

34
Continuous-Flow System Examples
• Some examples are:– Installing, wiring and clipping, and finishing
light fixtures one by one.– Hanging doors and completing the hardware
installation at the same time.
35
Push vs. Pull
• Batch-and-queue production systems are referred to as push systems
• Continuous-flow production systems are referred to as pull systems

36
Push Production Systems
• In a push production system:– Work is released based on a preset schedule
• The schedule is based on projected demand• The schedule is the only control for production
– Work in progress is considered to be unavoidable and can create a buffer
– Optimization only occurs locally, with no consideration for the whole
– There may be excess inventory in the system

37
Push System Examples
• Some examples of push in construction are: – Delivery of material regardless of space
constraints on site– Installing drywall based on a master schedule but
with limited or no coordination with mechanical, electrical, and plumbing (MEP) trades.

38
Pull Production Systems
• In pull production:– Work is released based on downstream demand.– The system controls the work in progress levels – The system monitors throughput– There is a reliable workflow in the process– A pull system is necessary, but not sufficient to realize
continuous-flow
39
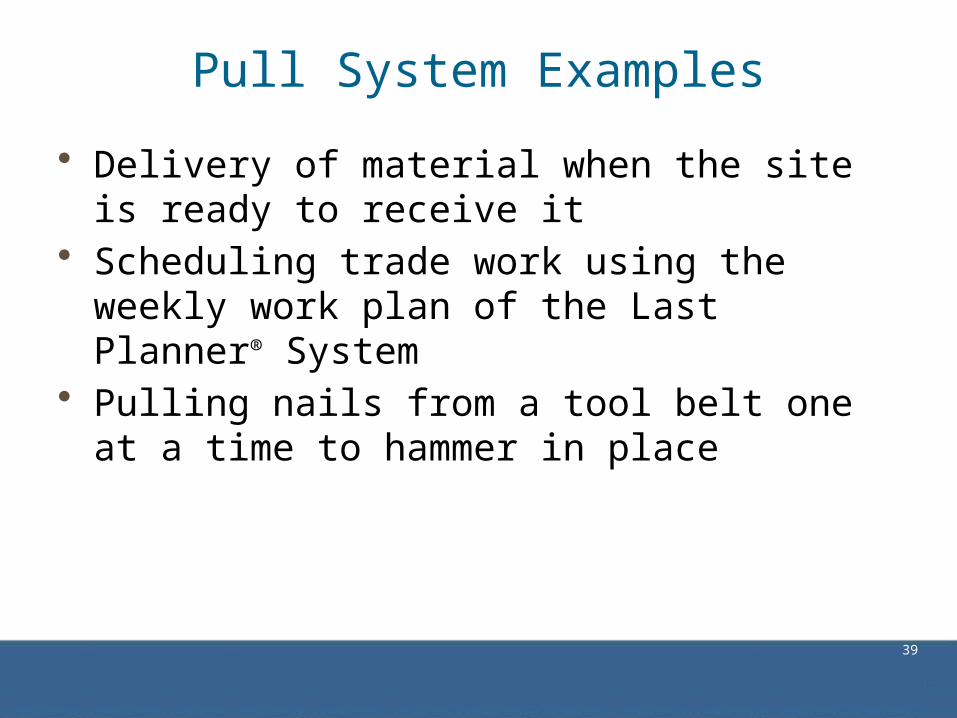
Pull System Examples
• Delivery of material when the site is ready to receive it
• Scheduling trade work using the weekly work plan of the Last Planner® System
• Pulling nails from a tool belt one at a time to hammer in place

40
Pull Strategies in ConstructionExample 1: Using a Supermarket
• Using a warehouse or stockyard (called a supermarket) in a strategic location in the supply chain to store materials and subassemblies– Allows the pull of materials onsite– Facilitates just in time deliveries to the site– Helps mediate price fluctuations that can work against
just in time delivery– Can be a designated area of the building

41
Pull Strategies in Lean ConstructionExample 2: Shared Work as a Trigger
• Coordination of trade work (downstream and upstream) using shared work as trigger– Base of studs is color
coded to indicate wall
utilities needs– Work proceeds if
there is a color code
42
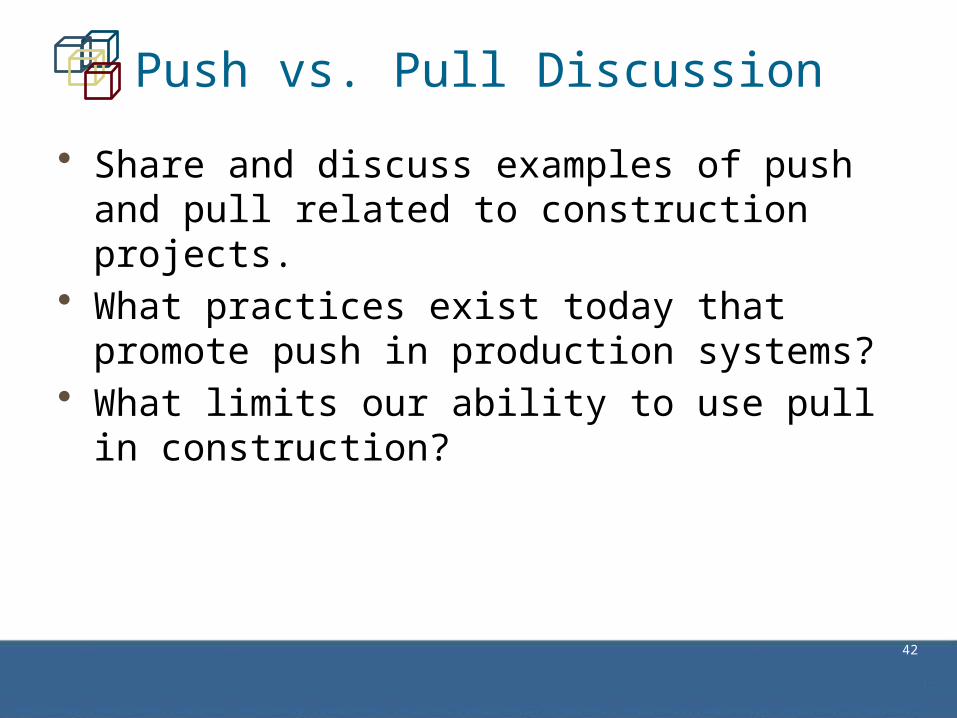
Push vs. Pull Discussion
• Share and discuss examples of push and pull related to construction projects.
• What practices exist today that promote push in production systems?
• What limits our ability to use pull in construction?

43
Session Summary
• Workflow is the progression of work within a trade or from one trade to another
• To improve the total system performance, we must improve the throughput of the system, not just improve individual pieces
• Reducing workflow variation:– Makes project outcomes more predictable– Simplifies coordination between trades– Reveals new opportunities for improvement

44
Session Summary
• In a batch-and-queue system each production stage creates more than one piece at a time, creating a queue.
• Batch-and-queue systems are a form of push systems. – In a push system everything is “pushed” through at a
predetermined schedule.• In continuous-flow systems each stage of production is
done sequentially.• Continuous-flow systems are a form of pull systems.
– In a pull system work releases based on downstream demand.
45
Session 2

46
Time Session Topic/Activity
2 Pull in Production
5 minutes-
Session 2 Introduction, Schedule and Learning Objectives
15 minutes - Push and Pull Planning Defined
55 minutes Pull Planning Simulation
30 minutes - The Last Planner System
10 minutes - Communicating the Plan
5 minutes - Course Summary
Today’s Course Schedule

47
Session 2 Learning Objectives
Following this session, you will be able to:
• Describe the basic characteristics of the push planning approach
• Describe the pull planning process• Distinguish pull planning from push planning

48
Q What We’ve Learned So Far
• The goal of Lean Construction is to eliminate: – Workers waiting for work– Work waiting for workers
• The way to do this is to: – Reduce variation– Eliminate waste– Improve workflow reliability

49
Push Planning Defined
• The traditional planning system is a push system.
– In this system work is pushed into production:
• Based on predetermined completion dates
• Regardless of whether workers are ready to start work
– It is an assumption-based vision of how the work will take place
– It confuses planning with prediction, leading to local optimization

50
Push Planning Discussion
• Share and discuss your company’s push planning practices: – When is planning typically done for projects?– Who is involved?– What format does your company use to
communicate the plan?– Is the plan typically followed?– How are updates typically managed?
51
Pull Planning Defined
• Pull planning depends on an understanding of the levels of readiness of downstream activities.
• Work is scheduled for when it can be properly performed, not based on predetermined dates, by those who will execute the work.
• Pull planning is used heavily in creating phase schedules in the LPS.
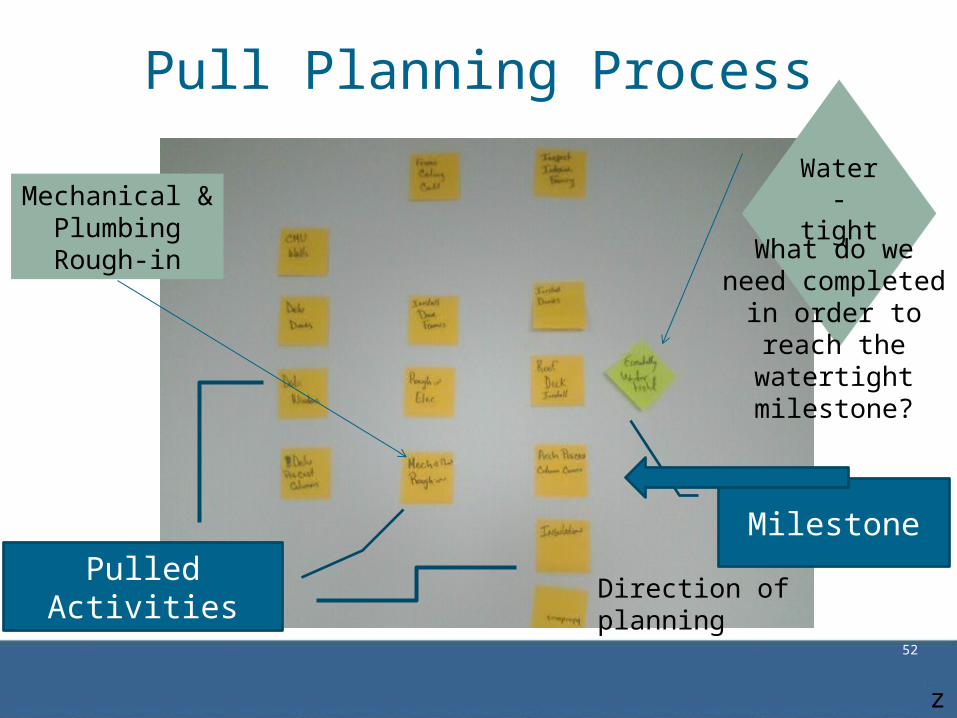
• In pull planning you start from a milestone and work your way backward
52
Pull Planning Process
Milestone
Pulled Activities Direction ofplanning
Mechanical & PlumbingRough-in
Water- tight
What do we need completed
in order to reach the watertight
milestone?
z
53
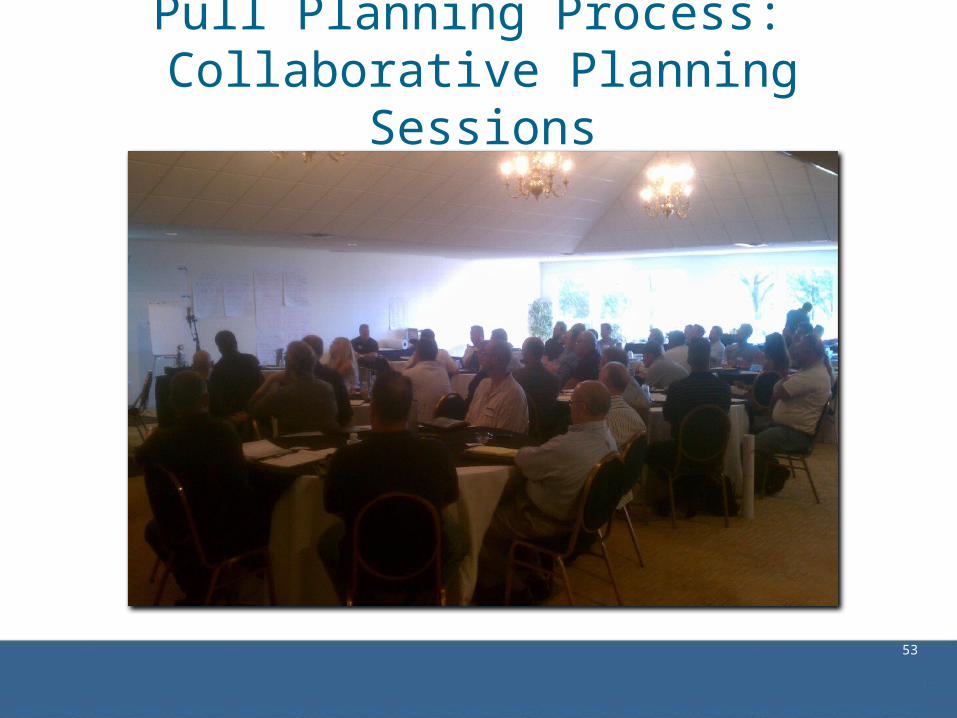
Pull Planning Process: Collaborative Planning Sessions
54
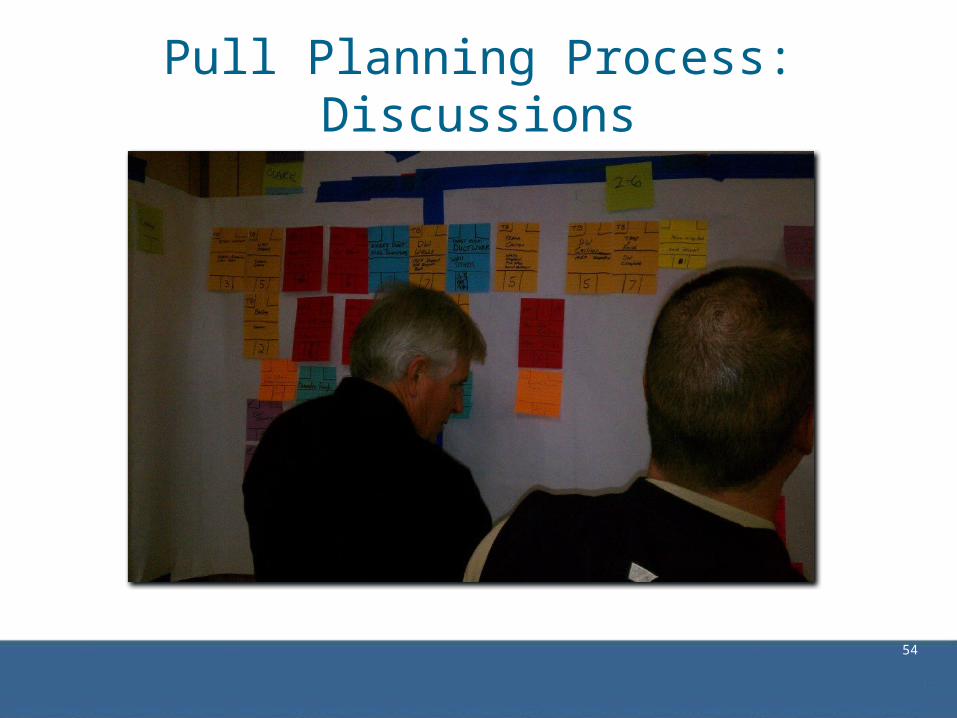
Pull Planning Process: Discussions

55
Pull Planning Simulation2:Before You Begin
• We will plan, and then build, a structure using a pull planning process.
• Your facilitator will divide you into groups of four– Each person will be assigned:
• Blocks of a specific color• An “I Get/I Give” card, matching your assigned block color
– Each group gets a site plan and milestone note• The site plan is used to indicate which side of the building is
the front• The milestone note is used to indicate the end of the building
process where the building is complete.
• Clear off your tables to have room for building
2DPR Pull Planning Game, ©DPR Construction, www.dprstore.com, Item 2431
56
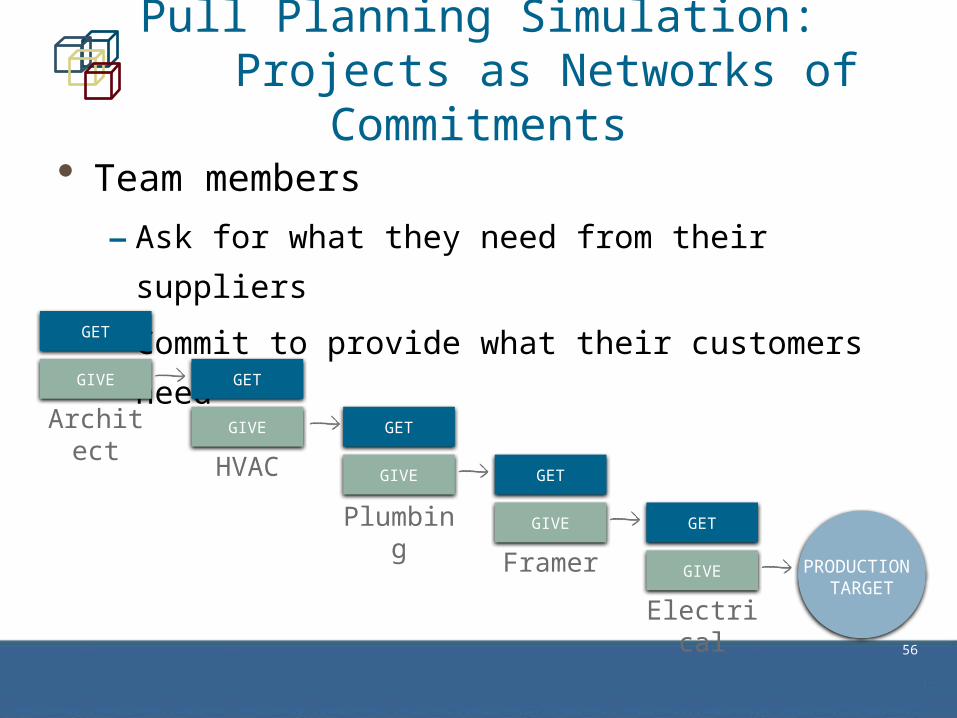
Pull Planning Simulation: Projects as Networks of Commitments
• Team members
– Ask for what they need from their suppliers
– Commit to provide what their customers need
Architect
HVAC
Plumbing
Framer
Electrical
PRODUCTION TARGET
GET
GIVE GET
GIVE GET
GIVE GET
GIVE GET
GIVE

57
Pull Planning Simulation:“I Get/I Give” Card
• “I get” = what you need to begin
• “I give” = what you will give to the next person
• Each card can only have one “give”
• You may need more than one “give” to achieve your “get”
– A “get” can be a constraint of the “TIMMESS” type
• Time, information, material, manpower, equipment, safety, and space
58
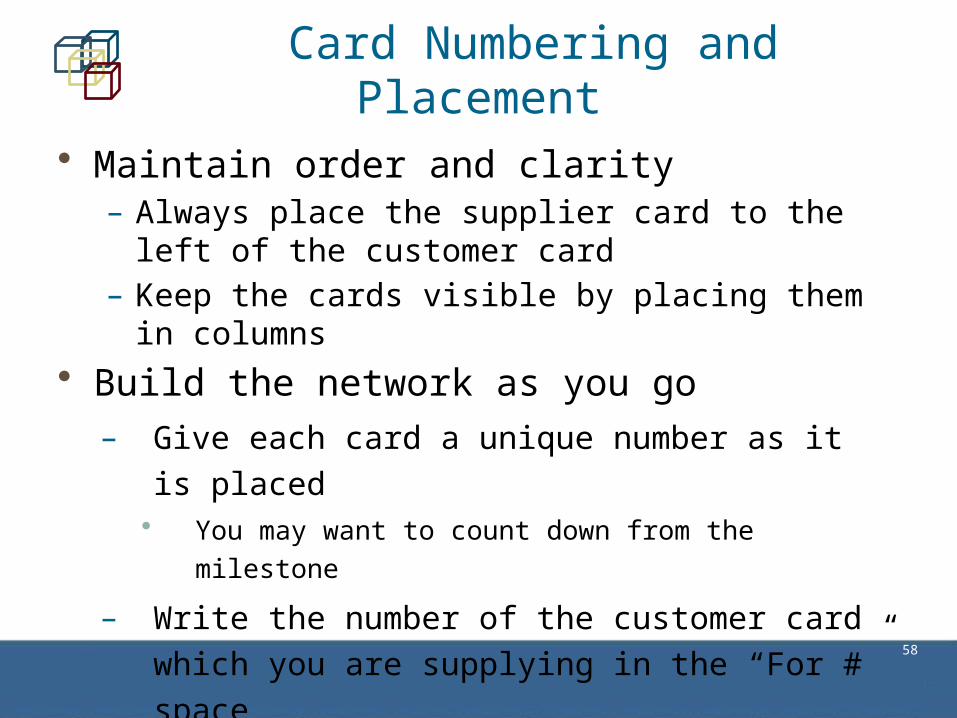
Card Numbering and Placement
• Maintain order and clarity– Always place the supplier card to the left of the
customer card– Keep the cards visible by placing them in columns
• Build the network as you go– Give each card a unique number as it is placed
• You may want to count down from the milestone
– Write the number of the customer card which you
are supplying in the “For #” space

59
Pull Planning Simulation:Example “I Get/I Give” Card
60
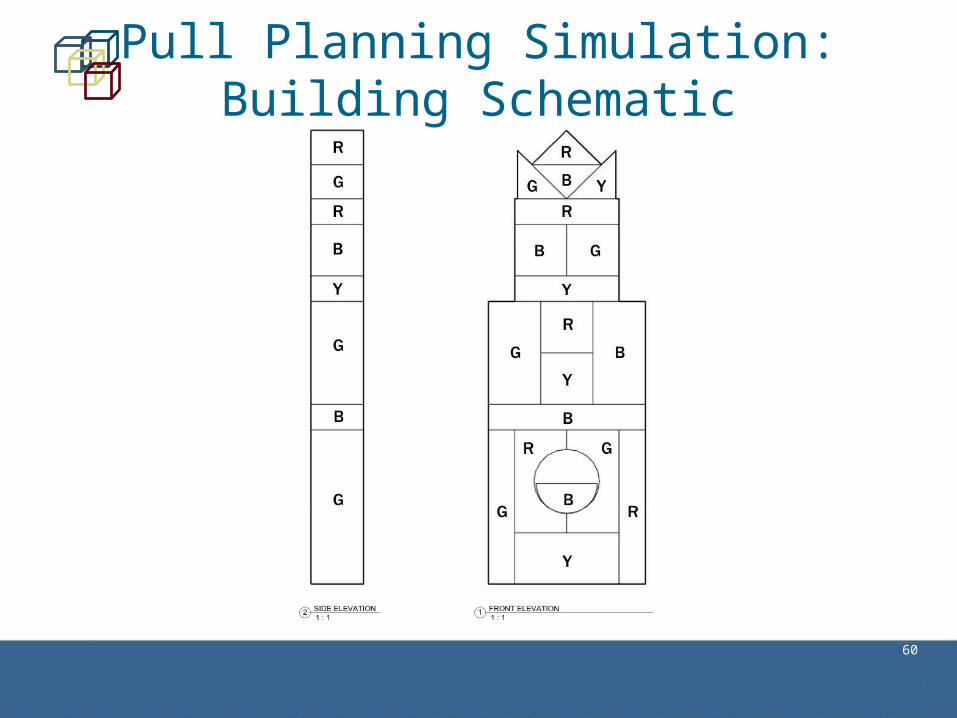
Pull Planning Simulation: Building Schematic

61
Pull Planning Simulation: The Building

62
Blocks for the Simulation

63
Pull Planning Simulation: The Customer Invitation Method
1. The customer invites their supplier(s) to place
a card representing delivery of what they need
when they need it
2. The customer signs off when they have
everything they need to deliver their work
3. Each supplier becomes the customer and does
the same thing

64
Pull Planning Simulation: Pre-Planning Discussion
• Who should go first?• What is the best sequence — building
from the inside or outside?• Where and how should the pieces be
placed? Quality?• What if a piece is delivered late? What can
you do?

65
Pull Planning Simulation:Planning
• The red contractor lays the last block on the structure so he/she completes the first “I Get/I Give” card, placing it on the far right of the table.
• The red contractor invites the next contractors to fill out their cards.– They place their cards to the left of the red
contractor’s, and the process continues.– Each contractor must be invited by the previous
• The plan is complete when all the blocks are accounted for.
• Do not begin the building process

66
Pull Planning Simulation: Building
• The facilitator will signal groups to begin.• Build using the “I get/I give” cards you created
during the planning process, ending at the milestone sticky note.
• Use the site plan to orient your building• You can only touch your blocks• You must build only from your plan. You cannot
look at the pictures of the building
67
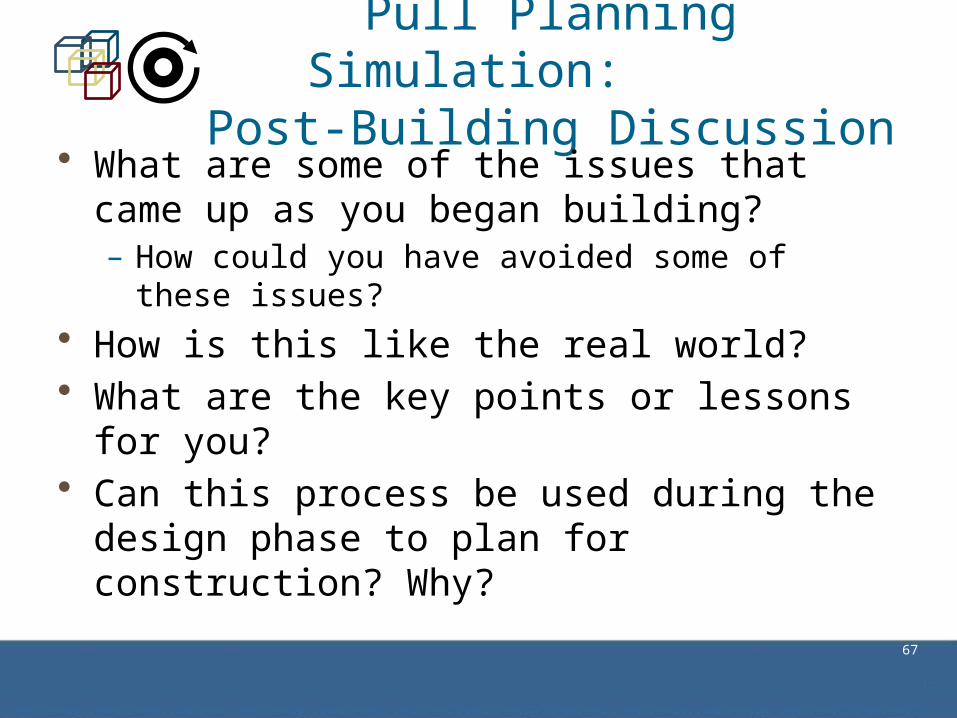
Pull Planning Simulation: Post-Building Discussion
• What are some of the issues that came up as you began building? – How could you have avoided some of these issues?
• How is this like the real world? • What are the key points or lessons for you?• Can this process be used during the design
phase to plan for construction? Why?
68
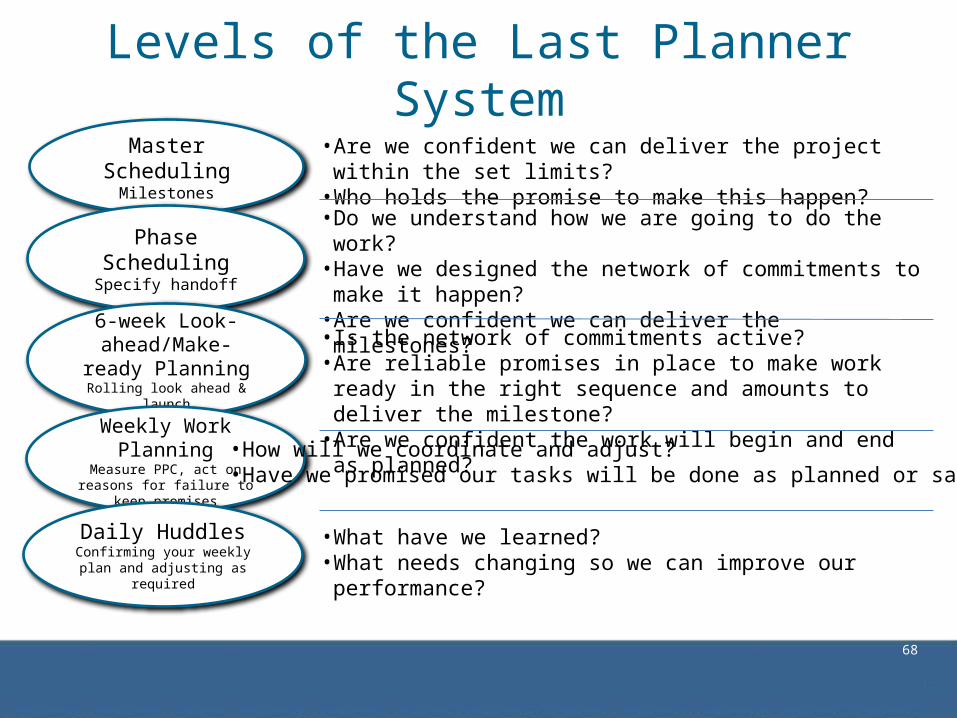
Levels of the Last Planner SystemMaster
SchedulingMilestones
Phase SchedulingSpecify handoff
6-week Look-ahead/Make-ready
PlanningRolling look ahead & launch
Weekly Work Planning
Measure PPC, act on reasons for failure to keep promises
Daily HuddlesConfirming your weekly plan
and adjusting as required
• Are we confident we can deliver the project within the set limits?• Who holds the promise to make this happen?
• Do we understand how we are going to do the work?• Have we designed the network of commitments to make it
happen?• Are we confident we can deliver the milestones?
• Is the network of commitments active?• Are reliable promises in place to make work ready in the right
sequence and amounts to deliver the milestone?• Are we confident the work will begin and end as planned?
• How will we coordinate and adjust?• Have we promised our tasks will be done as planned or said no?
• What have we learned?• What needs changing so we can improve our performance?

69
Master Schedules
Figure 2.2
Activity Jan. Feb. March April May June July Aug. Sept. Oct. Nov. Dec.
Site Utilities x x x x x x
Excavation x x x x x x
Foundations x x x x x x x
Structural Steel x x x x x x
Exterior Framing x x x x x x x x
Roof x x x x x x
Doors & Windows x x x x x
MEP Overhead Rough-in x x x x x x x x x x x x
Interior Framing x x x x x x x
Drywall x x x x x x x x
Paint x x x x x x x x x x
Celings x x x x x x x
MEP Trim out x x x x x x x
Flooring x x x x x x
Casework x x x x x x x x
Punchlist x x x
Substantial Completion x
70
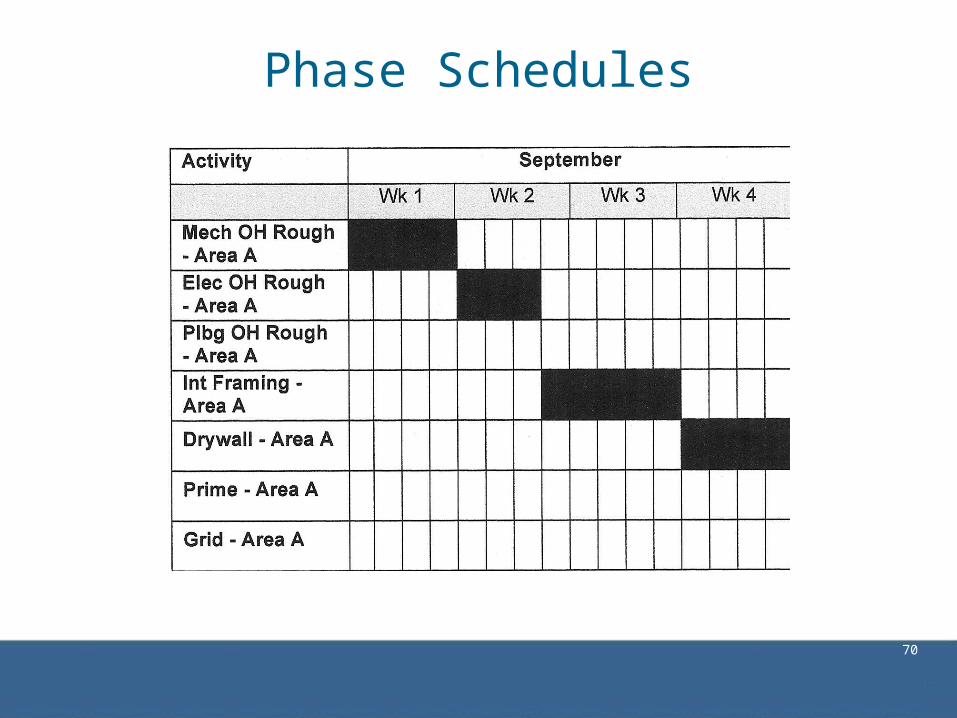
Phase Schedules

71
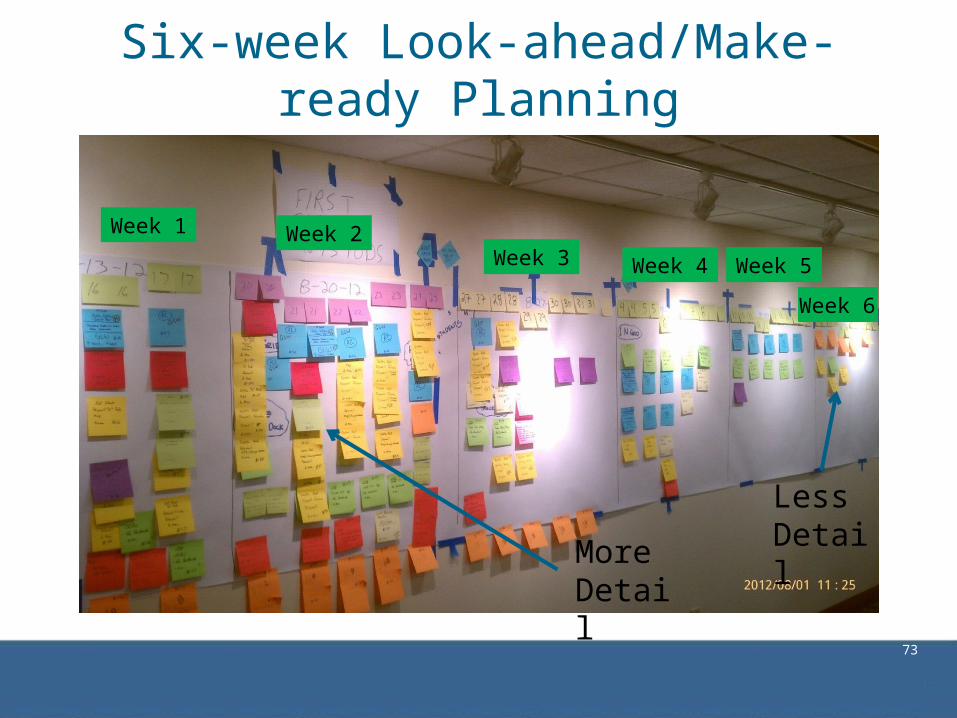
Six-week Look-ahead/Make-ready Planning

72
Six-week Look-ahead/Make-ready Planning
73
Six-week Look-ahead/Make-ready Planning
Week 1 Week 2Week 3
MoreDetail
Less Detail
Week 4 Week 5
Week 6
74
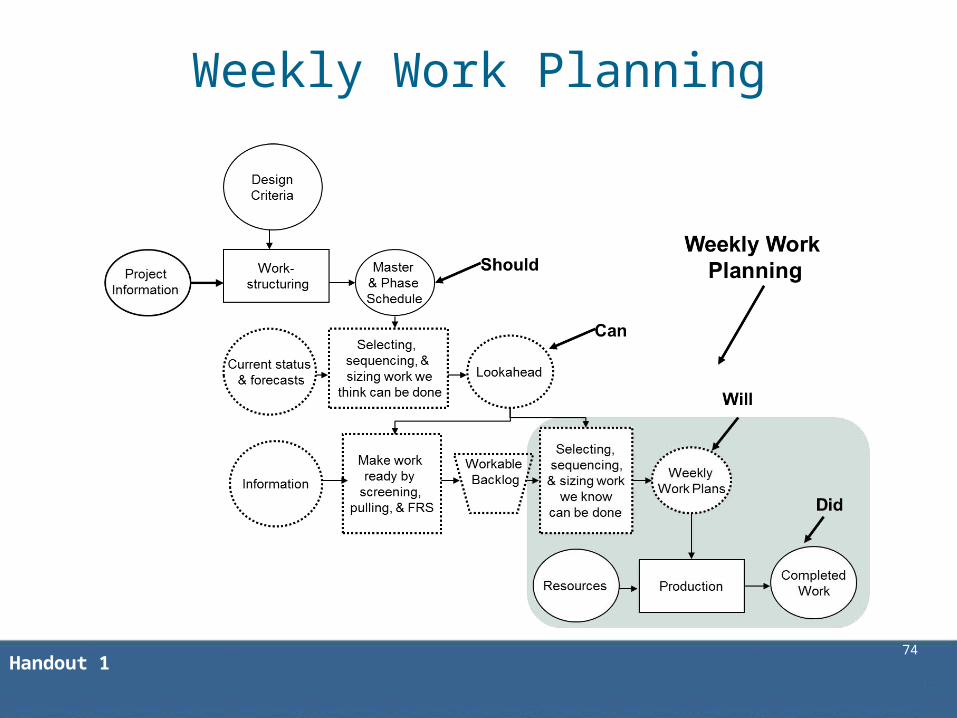
Weekly Work Planning
Handout 1

75
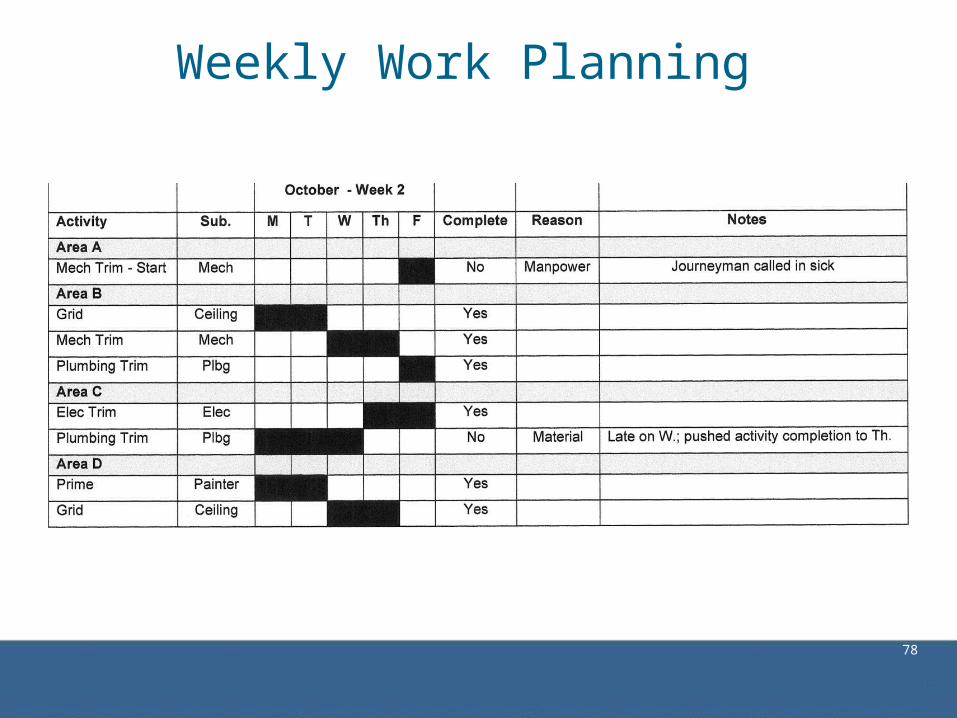
Weekly Work Planning

76
Weekly Work Planning

77
Weekly Work Planning
78
Weekly Work Planning

79
Weekly Planning Cycle
80
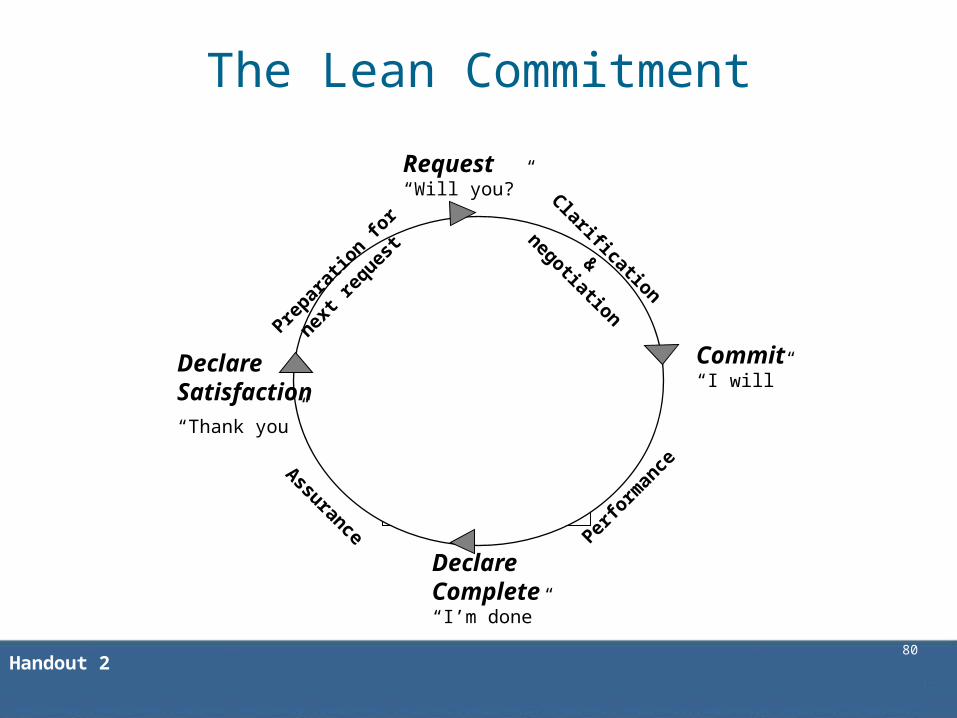
Conditions of Satisfaction
&Date of
Completion
Request“Will you?”
Prepar
atio
n for
next r
eques
t
Clarification&
negotiation
Perfo
rman
ce
Declare Complete“I’m done”
Commit“I will”
Assurance
DeclareSatisfaction“Thank you”
The Lean Commitment
Handout 2

81
The Lean Commitment
• Elements of commitment:– Definition – Assignments must be specific– Soundness – Design and prerequisite work are complete; materials
are on hand– Safety – Promise to work safe and maintain a safe jobsite– Sequence – Constructability has been reviewed to determine this
task is necessary at this point– Size – Planned task is achievable in time allotted by the crew in
place– Learning – Tracking of complete/incomplete assignments
Handout 3

82
Percent Plan Complete
PPC = Total Weekly Promised Assignments
Completed Weekly Assignments

83
Percent Plan Complete

84
Percent Plan Complete

85
Reasons Analysis for PPC

86
Reasons Analysis for PPC

87
Reasons Analysis for PPC

88
Daily Huddles

89
LPS Summary
Lays out all milestones.
Establishes handoffs between milestones.
Takes handoffs, expands them and makes constraints visible.
Details the work to be done.
Confirms that daily commitments will be done.
Master SchedulingMilestones
Phase SchedulingSpecify handoff
6-week Look-ahead/Make-
ready PlanningRolling look ahead &
launch
Weekly Work PlanningMeasure PPC, act on reasons for failure to keep promises
Daily HuddlesConfirming your weekly plan
and adjusting as required
Handout 4

90
Communicating the Plan

91
Session 2 Summary
• Many different ways to show the schedules – sticky notes, spreadsheets, etc.;
• Collaborative process and dialogue among subcontractors is key;
• GC no longer dictates the schedule.
92
Session 2 Summary• Push plans:
– Are typically produced by a single entity with little to no involvement of those executing the work
– Result in a plan full of assumptions about means and methods that usually is not reflective of what really will take place
• Pull plans:– Are produced by those who will execute the work
• The executors will engage in production system design by virtue of being present and the clear need for coordination.
– Are developed by working backward from a target completion date, with tasks defined and sequenced so that their completion releases work to begin on a subsequent task