00 ncc cover page - a.g it solutionagitsolution.com/cbse/ebooks/12th class/national cadet...
TRANSCRIPT

41
UNIT-3
Knowledge Understanding Application Skills Evaluation
Elementary
knowledge
about rifles
and shooting.
The students will
understand the different
positions in which the
rifle can be operated;
how firing is done; how
the trigger is operated;
hoe to handle the recoil.
The students will
become alert and
careful as handling
weapons will in still in
them a sense of
responsibility for their
own and others safety.
Activities, work
sheets and
assignments,
mock exercises
Learning to shoot has been man‟s basic instinct from the early ages. Early men went out
into the jungle with bows, arrows and weapons for hunting and also used them to
protect themselves from dangerous animals and enemies. As times progressed, more
weapons evolved to include, sophisticated blade equipment and, still later, cannons,
rifles, machine-guns, tanks, battleships, war planes, rockets – and eventually nuclear
weapons have made their way into the modern defence technology.
Advancement of Weapons
Weapons have always played a crucial role in the society, moulding and changing the
course of history. They have destroyed civilizations and created new ones. Apart from
their employment in warfare and other combat situations, they are also used for the
maintenance of law and order and for border security.
42
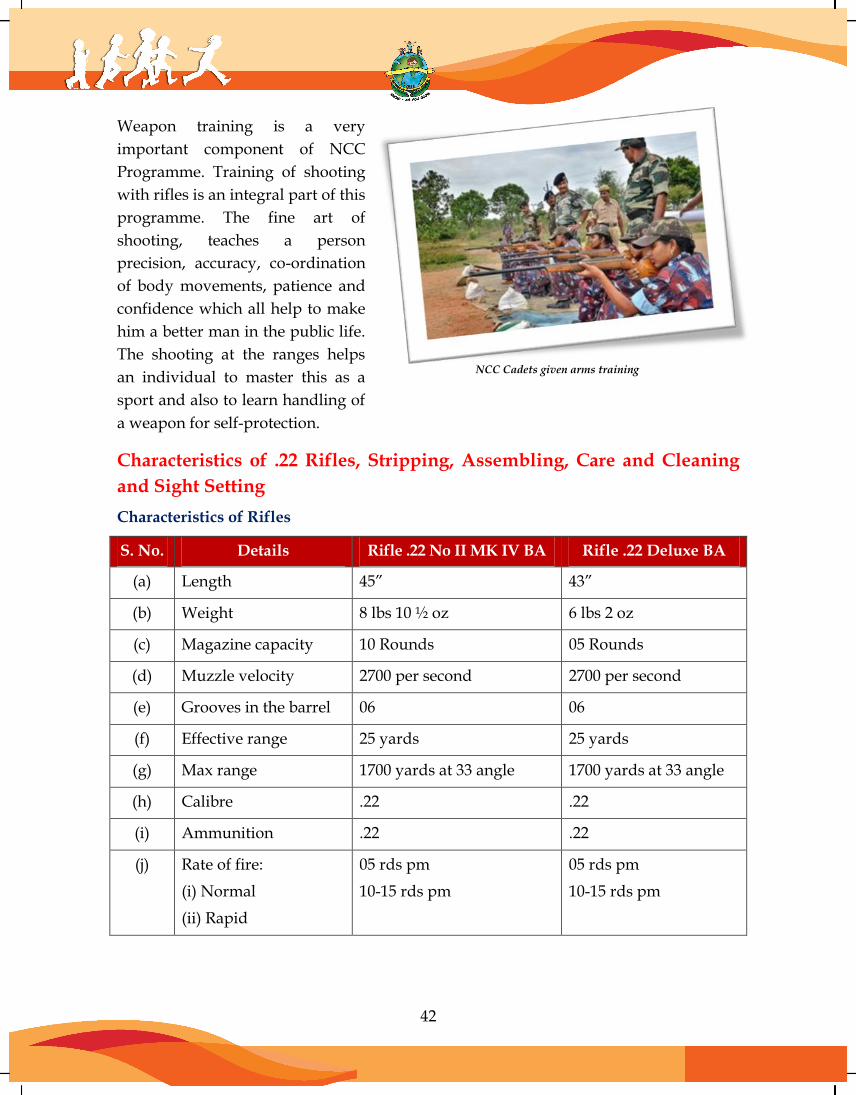
Weapon training is a very
important component of NCC
Programme. Training of shooting
with rifles is an integral part of this
programme. The fine art of
shooting, teaches a person
precision, accuracy, co-ordination
of body movements, patience and
confidence which all help to make
him a better man in the public life.
The shooting at the ranges helps
an individual to master this as a
sport and also to learn handling of
a weapon for self-protection.
Characteristics of .22 Rifles, Stripping, Assembling, Care and Cleaning
and Sight Setting
Characteristics of Rifles
S. No. Details Rifle .22 No II MK IV BA Rifle .22 Deluxe BA
(a) Length 45” 43”
(b) Weight 8 lbs 10 ½ oz 6 lbs 2 oz
(c) Magazine capacity 10 Rounds 05 Rounds
(d) Muzzle velocity 2700 per second 2700 per second
(e) Grooves in the barrel 06 06
(f) Effective range 25 yards 25 yards
(g) Max range 1700 yards at 33 angle 1700 yards at 33 angle
(h) Calibre .22 .22
(i) Ammunition .22 .22
(j) Rate of fire:
(i) Normal
(ii) Rapid
05 rds pm
10-15 rds pm
05 rds pm
10-15 rds pm
NCC Cadets given arms training
43
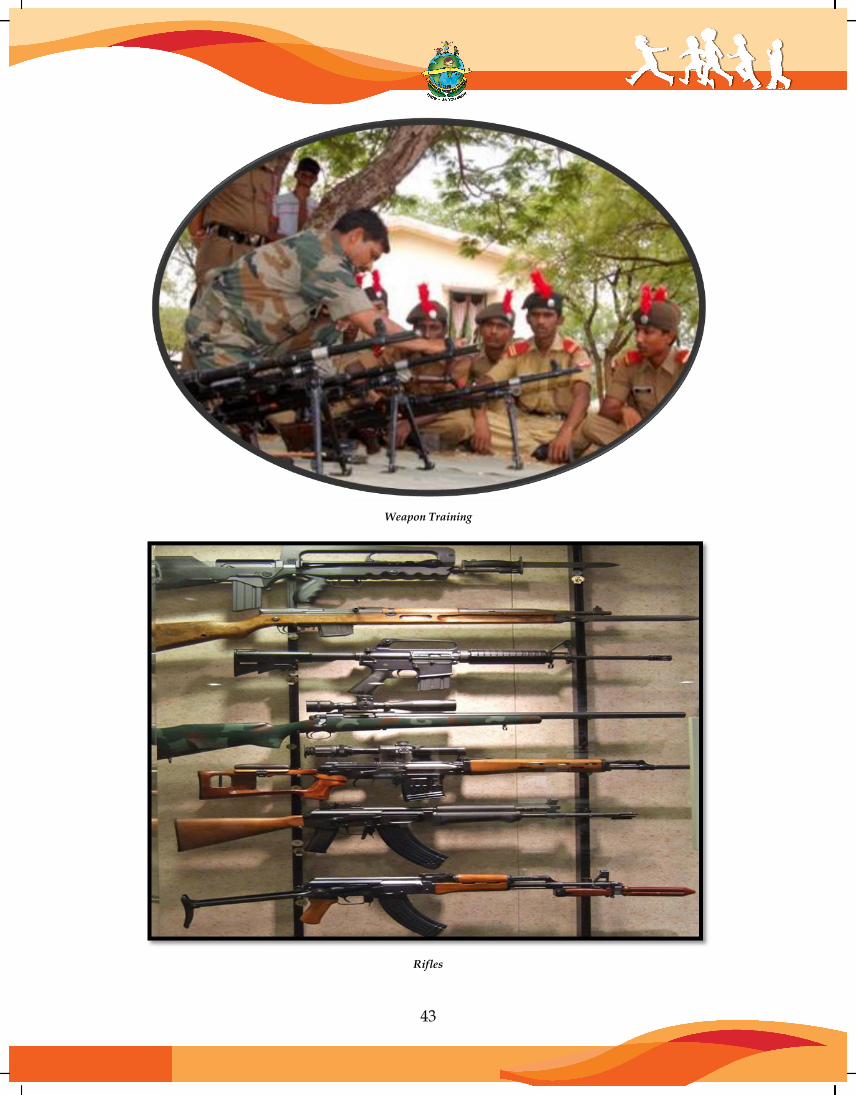
Weapon Training
Rifles

44
Fig- 1: Rifle .22 No 2 MK IV
Fig–2: Rifle .22 Deluxe
Safety Precautions
a) Pushing forward the safety catch, raising and drawing back the bolt knob and
then, examining the chamber and the magazine. When satisfied that both are clear,
push the bolt knob forward and then down, press the trigger and apply the safety
catch.
b) Inspecting the drill cartridges and ensuring that there is no live ammunition.
Stripping: Before stripping, a check should be carried out as to whether the number on
the left side of the body corresponds with the number on the back side of the lever of
the bolt (fig 1). The removal is done in the following sequence:-
a) Removal of the bolt by raising the leaf back sight and pushing forward the safety
catch. The left hand is kept under the magazine with the middle finger on the
restraining catch. The bolt is withdrawn to the rear, the bolt head upwards turned
and the back sight folded back.
b) The magazine catch is pressed upwards and the magazine is taken out.

45
Assembling: The assembling of the rifle is always in the reverse order. The magazine is
checked to ensure that the magazine number is the same as that of the rifle. The
magazine is inserted at its place and pressed. The cadet should ensure that the
magazine is fixed in its place.
While assembling the bolt of the Deluxe .22 rifle, the following have to be borne in
mind:
a) The bolt head should be fully tight.
b) The bolt head and guide rib as well as cocking piece and steel lug should be in a line.
c) The number of the bolt should tally with that of the rifle.
d) The safety catch should be applied.
The bolt is inserted by holding the bolt lever with the right hand and rifle with the left.
The bolt is pushed forward until it touches in the charger guide and the bolt head is to
be turned towards right till the click sound is heard. Now the trigger is pushed forward
and pressed and the safety catch is applied.
Sight Setting: The sight is set by pressing the thumb spring (Range increasing towards
the muzzle side- the thumb spring is adjusted accordingly).
Care and Cleaning: The efficiency of the rifle depends on two factors. The care given to
the rifle and the skill of the firer. The rifle is designed to stand up to active service
conditions but performance will be considerably affected if it is subjected to unduly
harsh conditions. The rifle is stripped, the butt trap is opened and the pull through and
the oil bottle is removed for cleaning. The pull-through has three loops, first one is for
the gauze, the centre for cleaning the barrel with flannelette and the end one for oiling
the barrel and for use of the armourer.
Loading, Cocking and Unloading
In action, the soldiers‟ life depends as much upon the rapid loading of rifle as upon the
accuracy of shooting. This underlines the importance of swiftness in bolt manipulation.
The bolt ought to be properly lubricated.
Ammunition and Charger: No charger is provided for the deluxe rifle. The ammunition
is loaded one by one in the magazine. It is to be ensured that the ammunition is clean
before firing.

46
Correctly Filled Charger Loading an Unloading
Loading must be carried out on orders and no action is taken without proper orders. It
must be carried out clearly and in a set sequence. Fumbling and lack of determination
leads to jamming and delay.
Loading and Unloading in the Lying Position:
The following drill is carried out:-
a) Lying down, a long pace forward is taken with the left foot and at the same time,
the rifle is passed into left hand, grasping it at the point of balance. The right hand
is placed on to the ground in line with the left foot. During this movement, the rifle
is pushed forward and lowered to the ground. The left arm is extended to the
front. The legs to be well apart. Now the rifle can be loaded.
b) The rifle can be unloaded without further orders. The right hand is placed on the
ground below the right shoulder. The left hand is drawn up. Stand up as quickly
as possible.
Lying Position and Hold
The lying position is the most comfortable position from which to fire. The three basic
essentials of good shooting are:-
a) The position must be comfortable and hold so firm that the rifles gains a rock like
steadiness.
b) The firer must aim correctly.
c) The trigger be pressed in such a way that aim is not disturbed.

47
Position and Hold:
To get a stable position, the firer should get a feeling of being rooted to the ground with:
a) Legs are opened wide apart and body slanting to the left from the line of the
target.
b) The formation of the two triangles:
i) A horizontal triangle is formed by the three points where the chest leaves the
ground, the left elbow and the right elbow. (Fig 1)
Fig-1
ii) The vertical triangle as viewed from the front of firer, two of its sides are
formed by the forearms, the base being the ground between elbows. In
addition as a quick check, the shoulders should be level (Fig-2)
Fig-2

48
The Right Hand: Bedded in as per the build of the firer, a firm grip providing
steadiness, and the shoulder bent well forward to allow the forefinger between the first
and second points to be actually on the trigger. The right hand must pull back the rifle
very firmly in the shoulder, and lock it there. The forefinger must take the first pressure
on the trigger, whenever the butt is brought into the shoulder.
The Left Hand: The left hand acts as the support to the forward part of the rifle, thereby
helping to steady the rifle against the shoulder. The rifle should be held as far forward
as possible, well clear of the magazine. No attempt is made to force the left wrist under
the rifle. The large pod of the muscle at the base of the left thumb protrudes and
automatically be pressing against the left side of the rifle and that is balanced by a
similar pressure by the left forefinger on the other side of the rifle. The left hand never
pulls the rifle into the shoulder.
Fig-3
The Shoulder: The butt plate is bedded into the shoulder. Improper bedding in will
result in a sore shoulder and possible flinching. The butt plate should meet the shoulder
on the interior pad of the shoulder muscle joint and not in the „hollow‟ of it.
Position of the Head: The weight of the head should press the chin downwards and to
the right against the butt. The head should be at such a distance that neither the cocking
piece nor the finger, knocks the face during firing.
Breathing: To aim correctly, hold the breath while pressing the trigger.
Aiming I - Range and Targets
Accuracy of the aim is essential for the successful shot. This is by far the most difficult
operation, as the eye has certain limitations and there are influences affecting what it

49
does. Nevertheless, good shooting can only be obtained with consistency of aim.
Normally, 25 yards range is used for the Deluxe .22 rifle.
Aiming
The laws of aiming are:
(a) Focusing on the target so that a clear picture is formed on the retina of the eye and
getting true centre of the target. Then with the eye, focus to the foresight.
(b) Holding the rifle properly and keeping it upright.
(c) Close the left eye and focus the foresight.
(d) See the foresight through the black sight „U‟. The foresight is seen right in the
centre of the U. The tip of the foresight must be aligned in the centre and in level
with the shoulder of the U.
Fig-1: Correct Aim
Elevation is given to counter the force of gravity, while the bullet is in flight. The
elevation depends upon the range of the target. This elevation is given automatically by
adjusting the back sight.
Targets:
The following targets are generally used by female cadets:
(a) For application firing 1‟ x 1‟ target is used. The aim is to be taken at the bull, which
is the black, centre-most circle.
b) For grouping, 1‟ x 1‟ target with a white patch in the centre of the bull is used.
(c) For rapid firing, 6 inches figure target is used. The aim is taken at the centre of the
figure.

50
Fig–2 Fig–3
Trigger Control and Firing a Shot
Trigger Control: The third intention for accurate shooting is the trigger operation
without disturbing the aim. To achieve this, perfect co-ordination between eye, brain
and operation of the forefinger on the trigger is required. To develop this co-ordination,
the following exercises have been designated:
Trigger Operation Exercise No.1
Object: To practice independent action of the index finger.
Method: With the exception of the index finger, the right hand grips the left wrist as
firmly as possible until the white is visible under the nail tips. The right index finger
then press slightly on the wrist, on which action there must not be any increase in
pressure from any part of the hand. Avoid wearing a wrist watch during the exercise.
Trigger Operation Exercise No. 2
Object: To practice further muscular control of the hand.
Method: For this, the right knee is held clinched with the right hand, less the index
finger, held away in a hooked position as through round trigger. The index finger is
made to move through an arc as if pressing the trigger. The only movement should be
forming of the middle joint of the index finger to its tip.
Trigger Operation Exercise No. 3
Object: To develop co-ordination between the right eye, brain and right hand index finger and
practice muscular control of the hand.

51
Method: For this the lying position is assumed and the rifle is cocked. The left hand
leaves the rifle and supports the head. The left eye is closed. (If the firer cannot close her
left eye, she blankets it out with the left hand). The right eye takes a line of vision, eye-
foresight-any object on the ground in front of the line of vision when the brain impulse
'on aim' is transmitted by the eye, the index finger instantaneously presses the trigger.
Trigger Operation Exercise No. 4
Object: To introduce an element of `holding’ and the co-ordination between right eye, brain and
right index finger.
Method: The exercise is the same as No 2 with slight differences. Hold the rifle with
both the hands and take the aim at the target. Now the important thing is restraining
the breathing. (This has been already dealt with under `Holding‟). During this exercise,
there should not be any round in the chamber.
Trigger Operation Exercise No. 5
Object: To introduce an element of ‘holding’ and the co-ordination between right eye , brain and
right hand index finger.
Method: As for exercise 3, with the important addition of right hand holding, rifle is
held steadily and no quiver is allowed. (When the firer attempts this exercise he must
bring in the important item of restraining the breathing. This has already been dealt
with under „holding‟). During its performance, no discernible movement of the rifle
whatsoever is to take place. Magazines must be removed to practice this exercise. When
the firer performs this exercise by getting two or three totally correct performances
quickly, he/she is a potential „marksman‟.
Firing a Shot:
Determination: Accurate shooting is never achieved without concentration. Each time
a shot is fired the firer must be fully determined that it is going to be the perfect one.
Turning the Shot: From the time correct holding is achieved, not more than five
seconds should be taken to fire a shot. Dwelling on the aim causes the eye and muscles
to tire and results in bad shooting.
Action on Range Being Ordered: When the „range‟ is given, the firer adjusts his/her
sights and await for indication of the target.
Sequence of Firing a Shot:
Aiming Position: On coming into the aim, the firer must take the first pressure.

52
Breathing: Just before taking aim,
breathing must be gently restrained. It is
important to coordinate so that, when the
foresight comes to the point of aim, the
breath is partially exhaled.
Firing: Immediately on „correct aim‟, the
second pressure is to be taken and shot
fired. For a second or two after firing,
there should be no relaxation of the hold
or movement of trigger finger or head.
Follow Through The hold and aim must
be maintained until the bullet has left the
barrel. Better still, fire should allow
through until the bullet has reached the target.
Declaration: The firer declares, if the aim at the time of firing is not correct e.g. left,
right, high or low. A correct shot should not be declared.
Re-loading in the Shoulder: Immediately after follow through or declaration, reloading
at the shoulder is carried out.
Re-alignment: Having reloaded, the firer should realign his sights approximately on
the target.
Limber-Up: Before firing any practice, it is advisable to carry out trigger operation
exercise No 5 and sequence of action for firing a shot. This is termed as „limber-up‟
and its aim is to assist in coordination and tuning up of muscles, eye and brain.
Range Procedure and Safety Precautions
Use of Red Flags: No firing should take place until all the red flags are hoisted and
look-out men posted as per the range standing orders. One flag will always be on the
top of the butt. Flags are a warning that the range is in use. A red flag displayed on the
rifle butt indicates that no firing should take place.
Suspension of Firing: If firing is suspected during the practice, owing to some
unforeseen event, weapons are placed on the ground and the firer stands clear.
Inspection of Weapons: The officer in charge of the firing point is responsible for
ensuring that all weapons are cleared and inspected before leaving the firing point. A
further inspection will be carried out at the conclusion of firing.
Firing a Shot

53
During inspection, loading, and unloading, all the rifles must point towards the target.
On the command „ Nirikshan ke lie Janch Shastra’ (Examine Arms) rifles are held parallel
to the ground and pointed in the direction of the target.
No one will go to the targets until all weapons have been unloaded, inspected and
permission to go has been given by the officer in charge. Only the target papers are
brought back to check the results.
Only firers, coaches, the Firing Point Officer and his/her assistants are allowed on the
firing point. Waiting details must be at least 10 yards from the firing point or in the
shelter provided.
The following is the normal procedure on the firing points:-
(a) The party to fire is brought within about 100 yards of the firing point.
(b) The practices to be fired are explained.
(c) Firers are detailed to targets.
(d) The coaches, ammunition party and look out men take up their positions.
(e) Only the first two details form up behind their targets.
(f) On the order of „Age Barh’ (detail advance) the first detail will take position on the
firing point.
(g) On the lowering of the red flag at the butt, the officer supervising the firing point
may order his red flag to be taken down and give the order of „Detail Advance‟.
The coaches check their positions and correct them if needed, and give the word of
command „Limber up‟.
On this, the firers must align rifles. The officer gives the order to load and carry on.
(h) The firing starts only after getting orders from officer-in-charge of firing.
(j) On completion of fire, the firers must raise their right hand up, keeping the elbow
on the ground.
(k) Officer-in-charge gives the word of command ‘Khali Kar’ (before this he must
ensure that all have finished). On this, the firers take their rifles onto their
shoulders and move the bolt twice, press the trigger and stand up.
(l) The Officer-in-Ccharge gives the command ‘Detail Report’. On this the firers would
report „Number ek rifle theek, do theek, teen theek and number char rifle theek’. The report
will be from left to right. (Normally four targets are used on the miniature range).

54
(m) The first and last firer will say „Number ek rifle theek’ and the rest will say „Do theek,
teen theek’ and so on.
(n) The details are changed by word of command and the new detail which has been
waiting comes up while another detail forms up behind.
(o) Before the firers leave the range they have a further weapon inspection. Each firer
is asked whether he/she has any live ammunition. It is to n ensure that they have
no live ammunition.
Miniature Ranges: Only .22 ammunition is used on miniature ranges. Scoring is similar
to that as laid down for the classification of ranges.
Aiming II - Alteration of Sight
Necessity: If during firing it is found that the elevation of the barrel is not correct i.e
when the rifle is fired correctly with correct aim, the shot goes high or low instead of
hitting the point of aim, it is necessary, provided the time allows, to read just the setting
of the back sight.
Mean Point of Impact (MPI): The central point of area covered by the group of rounds
fired with consistent aim and held at the same aiming mark is called MPI.
Elevation: The amount of alteration necessary is given in the following table, which
shows the change of MPI when the sight is changed by 100 yards:
Range Target Rise or drop of MPI on target
200 yards 6 inches
300 yards 12 inches
400 yards 18 inches
500 yards 24 inches
An alteration of 50 yards in the sight brings half the effect shown above. 200 yards
doubles it on the target.
Figure Target: If, while firing at figure targets, the shots are observed to miss, either
high or low, the firer should raise or lower his/her sights by one hundred yards, re-aim
and fire. If the shot is observed to miss the target, the sight should be altered by a
further 100 yards.

55
Theory of Group and Snap Shooting
The Group and its MPI: In approaching
a method for firing, the first essential to
understand is that, when firing a series
of shots with a supposedly constant aim
and under the same conditions, they will
not all hit the same spot, however
perfect the weapon and its ammunition.
A pattern is always formed. The
divergence of shots in due to a variety of
reasons.
For the purpose of training the group
indicate five consecutive well-fired
shots, fired with consistent aim at the
same aiming mark. The central point of impact is the Mean Point of Impact (MPI) of the
group.
Grouping Capacity: The diameter of a circle containing all five shots, fired by a firer to
the best of his ability, is known as his grouping capacity.
For the purpose of coaching and scoring, firers are classified into certain grouping
capacities and measured at a range of 100 yards. These capacities are represented by the
diameter of the circles e.g., 2 inches, 4 inches and so on.
A firer‟s grouping capacity, while remaining fairly constant at any given range, varies
in proportion to the range at which firing is taking place. Thus once a firer‟s grouping
capacity at 100 yards/ 25 yards has been ascertained, his capacity at any other range can
be calculated by simple arithmetic. Hence should the group be centrally placed the
scores expected on target can also be predicted.
Declaration: It must be appreciated that a group is representative of a firer‟s capacity,
only when a correct aim has been taken for every shot. Should a firer accidentally fire
when aim is not correct, he must note very carefully where the sights were pointing at
the moment of firing and declare the fact. If on checking it is found that a bullet has
gone astray and not at the place declared by the firer, it should be ignored for judging
his grouping capacity. For instance if a firer was making a 4 inches group and because
of one stray bullet he makes a 12 inches group, his grouping capacity will be considered
as 4 inches.

56
Application of the Grouping: Grouping is of immense value to the firer and to his
coach and does in fact form the basis of application practices in which the centre of the
firer‟s group is applied to the centre of the target to note very carefully the group of the
MPI, making alterations to sighting or to the point of aim where necessary. In the early
stages a coach helps the firer for this purpose.
For example; If the position of the first shot is reasonably good and no error is declared,
the second shot should be fired with the same aim. If the second shot is within the
grouping capacity of the firer the probable MPI is the middle of the two shots. If MPI is
too far out it should be adjusted for elevation and deflection; the correction should not
be made boldly but with caution. The third shot gives the clear picture. If this MPI is
again not central, a further cautious change should be made. After the forth shot, the
MPI position should be known and the fifth shot should be a good one fired with the
correctly ascertained elevation and deflection.
Improving Capacity: Once the grouping capacity of the firer is assessed, it will be his
duty not only to maintain this capacity, but to improve on it eradicating any faults he
has had in the early shoots.
Miniature Range Snap Shooting: After grouping and application fire, the snap
shooting should be fired. This is to defeat the time factor. Initially it is done on
miniature range to make the firer realize that the exposure of target is enough to get a
deliberate round fired and he/she must be perfectly calm and collected throughout. In
fact before he/she is made to fire he/she should be given enough practice:
(a) Concentration
(b) Speeding up co-ordination between eye and hand.
(c) Practising in dominating impulse.
The stages of practice is:
(a) Stage-1: Automatic Alignment: The aiming mark is given at the instructors eye
when the squad is lying in semi-circle with instructor in the centre. The alignment
is checked with the help of aiming disc when the individual on the command `up‟
aims at the eye of the instructor.
(b) Stage-2: Automatic Alignment with Correct Hold and Trigger Operation: On
the command „up‟ the firer brings up the rifle, aims, holds the rifle correctly and
takes the shot. The firer reloads when the rounds would have left the barrel for
certain (It is best to emphasise this by a distinct pause), comes down and declares

57
his/her shot, if incorrect, to the instructor. There is no time limit initially, only
„accuracy before speed‟ is insisted. Later in this stage, indication with a finger is
given and thus raising of the finger is the signal for the firer to fire his round. Sight
impulse thus replaces sound impulse.
(c) Stage 3, 4 and 5: Practice firing is done at figure targets 11, 12 and snap shooting at
ranges 100, 200 and 300 yards.
(d) Stage 6: For firing on a miniature range, representative figure targets are used and
the time progressively reduced from 7 to 4 seconds. The size of the targets is also
reduced. Not more than two practices should be fired in a day. Here again
accuracy before speed will be insisted upon. Good holding is essential.
(e) In stage 7: The practice is given at range sighting at figure 11 and 12 targets and in
stage 8, the range snap shooting practice is carried out.
Continuous Snap Shooting: It is to take on the targets as they appear. The time comes
in battle when the rifleman is confronted with a number of enemies within killing
range. The task is to account for as many as possible, before they escape to cover or
alternatively get to close quarters. The guiding principle is, always „shoot to kill‟. In this
case, having killed one enemy, the firer must at once engage another, firing
continuously and methodically as long as the target remains.

58
The Points to be Observed
(a) Accuracy is not sacrificed for speed.
(b) There is no verbal declaration of aim, since this would cause distraction.
(c) The butt remains in the shoulder in order to save time in re-aiming.
(d) Perfect bolt manipulation is ensured so that no time is wasted in reloading.
(e) Firing continues until such time as the command „stop‟ is given, or no further fire
is required.
Short Range Firing (.22 Rifle)
Practice
No
Practice Target Range Round Instructions Scoring
1. Deliberate 1Ft 25
yards
1 (a) Position lying
supported
(b) One practice
of 5 rounds
Bull and Inner-3
points
Magpie-2 points
Outer-1 points
HPS - 15 Points
Long/Short Range 7.62mm Rifle Course (Firing by Cadets of Sd/Sw Ncc)
Practice
No
Practice Target Range Round Instructions Scoring
1. Deliberate 4‟x 4‟/
1‟x 1‟
100/25
yards
5 (a) Position lying
supported
(b) Position lying
unsupported
Bull and Inner-3
points
Magpie-2 points
Outer-1 points
HPS-15 points
Bull and Inner-3
points
Magpie-2 points
Outer-1 points
HPS-15 points
Note: Out of 12 rounds authorized per cadet, 2 rounds are pooled for zeroing and re-
classification of failures.

59
Characterstics: 7.62 mm SLR
1. Calibre – 7.62 mm.
2. Length
a) With short butt – 1126.50 mm (44.35 in).
b) With normal butt – 1139.20 mm (44.85 in).
c) With long butt – 1151.90 mm (45.35 in).
d) Length of rifle with bayonet – 1397.00 mm (55 in).
3. Weight
a) Rifle only – 4.4 kg.
b) Rifle with full mag – 5.1 kg.
c) Rifle with full magazines and bayonet – 5.392 kg.
d) Bayonet – 0.283 kg.
e) Empty Magazine – 0.255 kg.
f) Full magazine – 0.709 kg.
4. Rate of Fire
a) Normal – 5 rds per min.
b) Rapid – 20 rds per min.
c) Faster than rapid – 60 rds per min.
5. Range
a) Effective range – 275 m (300 yds).
b) Sight range – 200 yds to 600 yds.
6. Sight Radius – 533.40 mm (21.77 in).
7. No of Grooves – 06 (Six).
8. Pitch – 1 turn in 304.8 mm (12 in).
9. Twist of rifling – Right hand.
Amn (Cart SA Ball 7.62mm)
10. (a) Calibre – 7.62 mm.

60
(b) Weight of cart – 23.07gm ± 0.65 gm
(c) Length of cart – 71.16mm ± .76mm
(2.80-0.03 in)
(d) Weight of bullet – 9.33 ± 0.13 gm
(144 ± 2 gm).
(e) Powder charge – NC Powder.
(f) Muzzle velocity – 815m/2700 ft ± 30 ft/S
(at 27.43m (90 ft) from muzzle)
(g) Weight of cart case – 10.89 gm.
(h) Weight of propellant charge – 2.85 gm.
11. System of operation – Gas operation.
12. Magazine capacity – 20 rds.
Characteristics: 5.56mm INSAS Rif
1. Calibre – 5.56 mm.
2. Length of rifle without bayonet – 960 mm.
3. Length of rifle with bayonet – 1110 mm.
4. Length of barrel – 464 mm.
5. Weight
a) Fixed butt with empty magazine – 3.6 kg.
b) Fixed butt with loaded magazine – 3.69 kg.
(c) Empty magazine – 340gm.
d) Full magazine – 305 gm.
e) Bayonet – 400 mtr.
6. Effective Range – 90 gms.
7. Sight Radius – 470 mm.
8. Muzzle velocity – 900 m/s.
9. Principle of operation – Gas Op.

61
10. Penetration – 3 mm at 700 m.
11. Mode of fire – Single shot and three round
burst (TRB).
12. Rate of Fire
a) Normal – 60 rds/min.
b) TRB – 90 rds/min.
(c) Intense – 150 rds /min.
(d) Cyclic – 600 to 650 rds/min.
13. Types of Ammunition
a) Ball Rd.
b) Tracer Rd.
c) Blank Rd.
d) HD Cart.
SUMMARY
Learning to shoot has been the man’s basic instinct from the early ages. Then men went out
into jungle with bows, arrows and weapons for hunting.
Weapon training is a very important component of the NCC Programme. Training of
shooting with rifles is an integral part of this programme.
Shooting, teaches a person precision, accuracy, co-ordination of body movements, patience
and confidence which all help to make him a better man in the public life.
The shooting at the ranges helps an individual to master this as a sport and also to learn
handling of a weapon for self-protection.
Rifle .22 No MK-II, MK IV and Deluxe BA have different characteristics in terms of
weight, length, magazine capacity, velocity, range, calibre, ammunition and rate of fire.
Precautions should be strictly followed when stripping, assembling, sight setting of the
rifle is carried out.
The efficiency of the rifle depends upon its care in terms of cleaning and the skill of the
firer.
In action the soldiers’ life may depend as much the rapid loading of rifle as the accuracy of
shooting.

62
Lying is the most comfortable position from which to fire. The three basic essentials of good
shooting are:-(a) Position must be comfortable and hold so firm that the rifle gains a rock
like steadiness. (b) The firer must aim correctly. (c) The trigger be pressed in such a way
that the aim is not disturbed.
Accuracy of the aim is essential for a successful shot. This is by far the most difficult
operation, as the eye has certain limitations and there are influences affecting what it does.
Nevertheless, good shooting can only be achieved with consistency of aim.
The third essential criteria for accurate shooting is trigger operation without disturbing the
aim. To achieve this, perfect co-ordination between the eye, brain and operation of the
forefinger on the trigger, is required.
The Group and its MPI: For the purpose of training, the group implies five consecutive
well-fired shots, fired with consistent aim at the same aiming mark. The central point of
impact is the Mean Point of Impact (MPI) of the group.
Grouping Capacity: The diameter of a circle containing all five shots, fired by a firer to
the best of his/her ability, is known as his / her grouping capacity.
Miniature Range Snap Shooting: After grouping and application fire has been done, the
snap shooting should be fired. This is to defeat the time factor. Initially it should be done on
miniature range to make the firer realize that the exposure of target is enough to get a
deliberate round fired and he/she must be perfectly calm and collected throughout. In fact
before he/she is made to fire she should be given enough practice in the following:
(a) Concentraration.
(b) Speeding up co-ordination between the eye and hand.
(c) Practicing in dominating impulse.
The practice is given in the following stages:
(a) Stage-1: Automatic Alignment
(b) Stage-2: Automatic Alignment with Correct Hold and Trigger Operation
(c) Stage 3,4 and 5: Practice firing is done at figure targets 11, 12 and snap shooting at
ranges 100, 200 and 300 yards.
Stage-6: For firing on miniature range representative figure targets are used and the
time progressively reduced from 7 to 4 seconds. The size of the targets is also reduced.
Not more than two practices should be fired in a day. Here again accuracy before
speed will be insisted upon. Good holding is essential.
In stage 7: The practice is given at range sighting at figure 11 and 12 targets and in
stage 8, the range snap shooting practice is done.

63
CROSSWORD PUZZLE – 3
Solve the crossword with the given clues:
1.R
2.C
3.S 4.M 7.S
6
5.T
8.G E
9.L R
Across:
2. The process of raising the cock of (a gun) in order to make it ready for firing
4. Central Point of Impact is also known as
5. Synonym route, flight path, course
8. The pull through has three loops, first one is for the __________
9. The term used for: Before firing any practice, it is advisable to carry out trigger
operation exercise No 5 and sequence of action for firing a shot.

64
Down:
1. Hand used for twist of Rifling (left hand or right hand)
3. The act of firing a shot
4. Point (.) 22 ammunition is used in this range
6. To aim correctly, hold the breath while pressing the _________
7. The adjustment of a gunsight for elevation and windage on a particular range
under favorable light conditions
Comprehension Questions
Q1. Answer the following in about 15 words:
i) Define Trajectory and First Catch.
ii) When will the rifle will be halfcocked?
Q.2. Answer the following in about 50 words:
i) What are the basic essentials of a good firer?
ii) What are the various positions to be taken while firing?
iii) Name any 10 parts common to all weapons?
iv) What are the main points to be observed during continuous snap shooting?
v) Which targets are generally used by female cadets for shooting?
Q.3. Answer the following in about 75 words
i) Describe the sequences of stripping and assembling of LMG?
ii) What is a 'Group'? What are the methods of finding the MPI?
iii) Why is weapon training a very important component of the NCC programme?
iv) What should the firer do to get a stable position while shooting?
v) What are the laws of aiming?
Q.4. Answer the following in about 150 words
i) What parts of a rifle are stripped and cleaned?
ii) Explain the range procedures and safety precautions under the following
heads:
a) Use of red flag
b) Suspension of firing

65
c) Inspection of weapons
ii) What drill must be carried out for loading and unloading of a rifle, in the
lying position?
Q.5. Answer the following in about 250 words
i) Explain the sequence of firing a shot.
ii) Explain „alteration of sight‟ under the following heads
a) Necessity
b) Mean point of impact (MPI)
c) Figure target
Let’s Discuss
Q.6. HOTS (Higher Order Thinking Skills)
“Weapons have always played a crucial role in the society, moulding and
changing the course of history”. Elaborate.