probonomanager.zendesk.com · web viewa few pages of note would be firm pro bono timekeepers, firm...
TRANSCRIPT
USING A GRID This guide is used to give specific instruction on using a grid within the platform. The Kendo UI grid is a powerful widget which allows you to visualize and edit data via its table representation. It provides a variety of options about how to present and perform operations over the underlying data, such as paging, sorting, filtering, grouping, editing, etc.
You can gain access to a grid by selecting a number of different pages. A few pages of note would be Firm Pro Bono Timekeepers, Firm Pro Bono Matters, or Firm Pro Bono Opportunities.
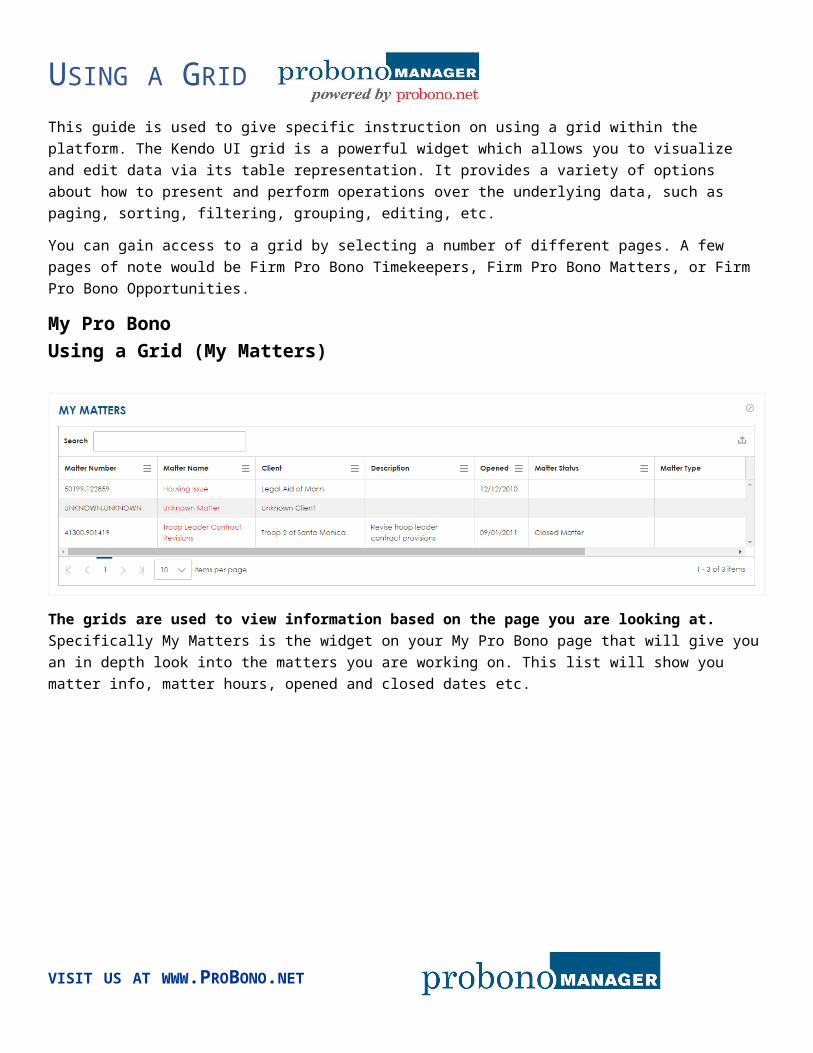
My Pro BonoUsing a Grid (My Matters)
The grids are used to view information based on the page you are looking at. Specifically My Matters is the widget on your My Pro Bono page that will give you an in depth look into the matters you are working on. This list will show you matter info, matter hours, opened and closed dates etc.
VISIT US AT WWW.PROBONO.NET

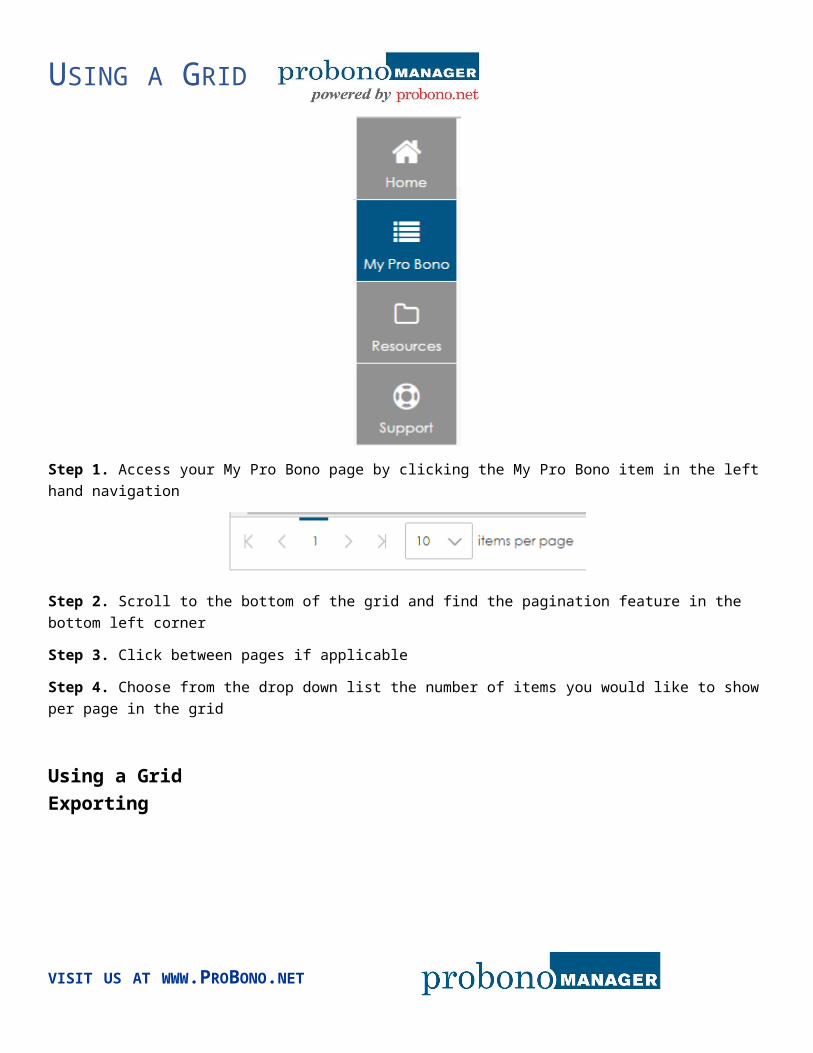
USING A GRID Step 1. Access your My Pro Bono page by clicking the My Pro Bono item in the left hand navigation
Step 2. View the information listed inside the My Matters grid
Using a GridSearch
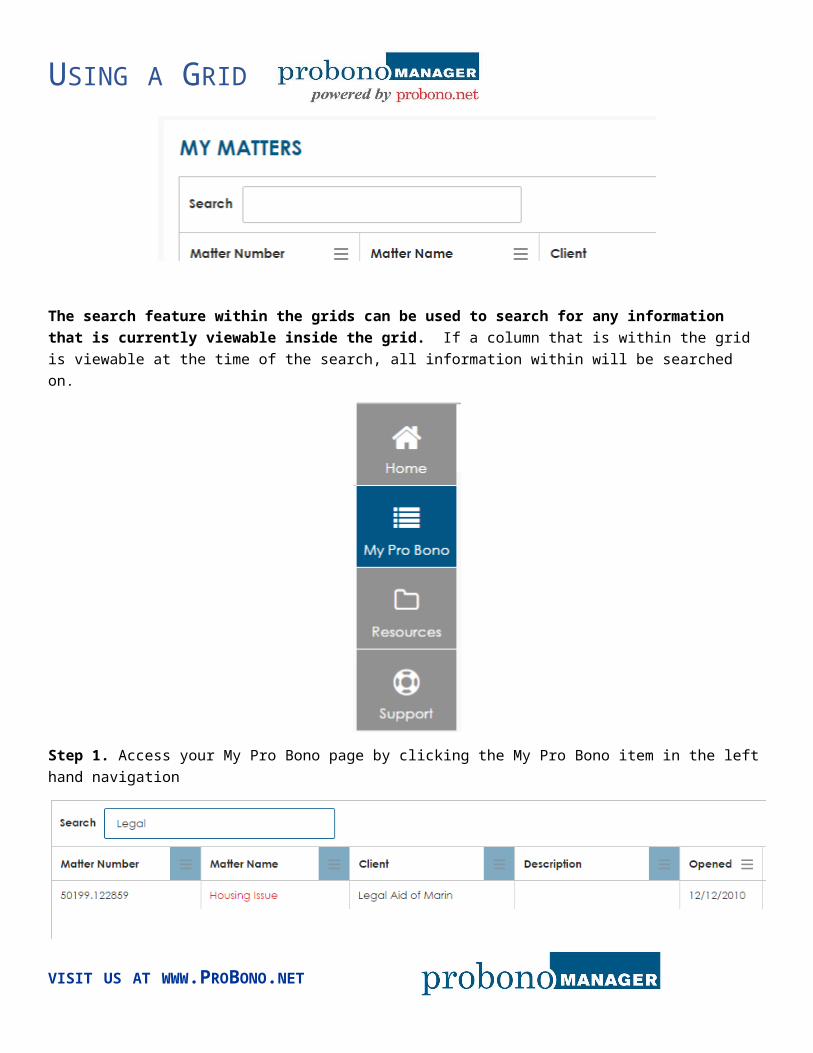
The search feature within the grids can be used to search for any information that is currently viewable inside the grid. If a column that is within the grid is viewable at the time of the search, all information within will be searched on.
VISIT US AT WWW.PROBONO.NET
USING A GRID
Step 1. Access your My Pro Bono page by clicking the My Pro Bono item in the left hand navigation
Step 2. Locate the search function within the grid. Search for the information you are looking for. In this example we searched for anything containing the word “Legal”
Step 3. Notice that after you hit enter and complete a search. Some of the columns hamburger icon will be highlighted. This mean that those columns were filtered using the search you used above.
Using a GridFiltering
VISIT US AT WWW.PROBONO.NET

USING A GRID
Filtering is used to dig deeper into the data sets you are using. The data can be filtered in a couple of different ways. You will see that certain columns have different types of filters then others. Date columns are filtered using date ranges, whereas tag columns are filtered using a multiple selection drop down check box, lastly normal columns can be filtered using parameters in a drop down list that will be explained below.
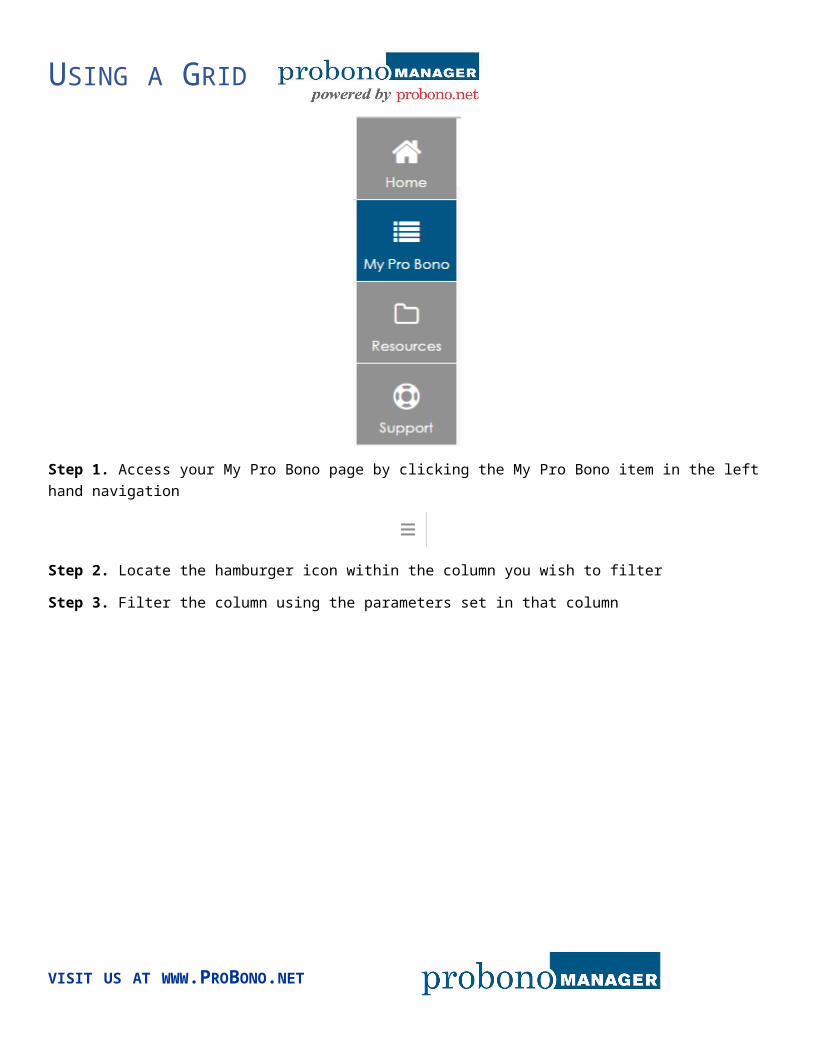
Step 1. Access your My Pro Bono page by clicking the My Pro Bono item in the left hand navigation
Step 2. Locate the hamburger icon within the column you wish to filter
Step 3. Filter the column using the parameters set in that column
VISIT US AT WWW.PROBONO.NET
USING A GRID
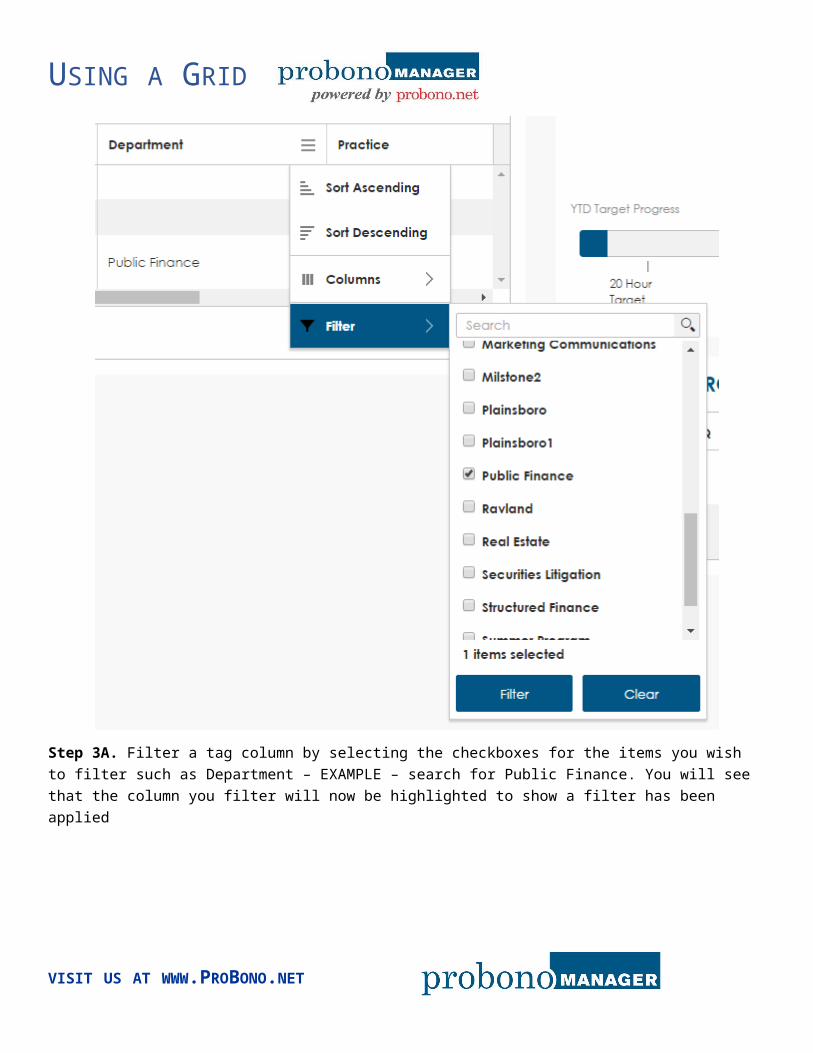
Step 3A. Filter a tag column by selecting the checkboxes for the items you wish to filter such as Department – EXAMPLE – search for Public Finance. You will see that the column you filter will now be highlighted to show a filter has been applied
VISIT US AT WWW.PROBONO.NET
USING A GRID
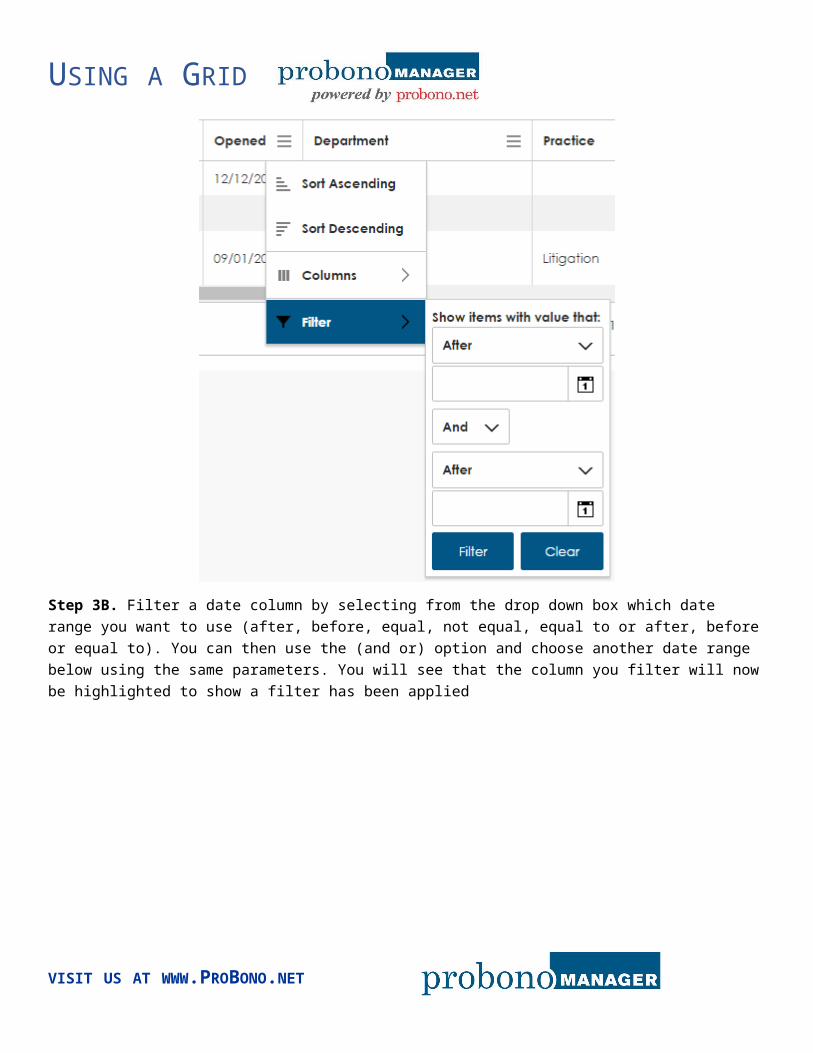
Step 3B. Filter a date column by selecting from the drop down box which date range you want to use (after, before, equal, not equal, equal to or after, before or equal to). You can then use the (and or) option and choose another date range below using the same parameters. You will see that the column you filter will now be highlighted to show a filter has been applied
VISIT US AT WWW.PROBONO.NET
USING A GRID
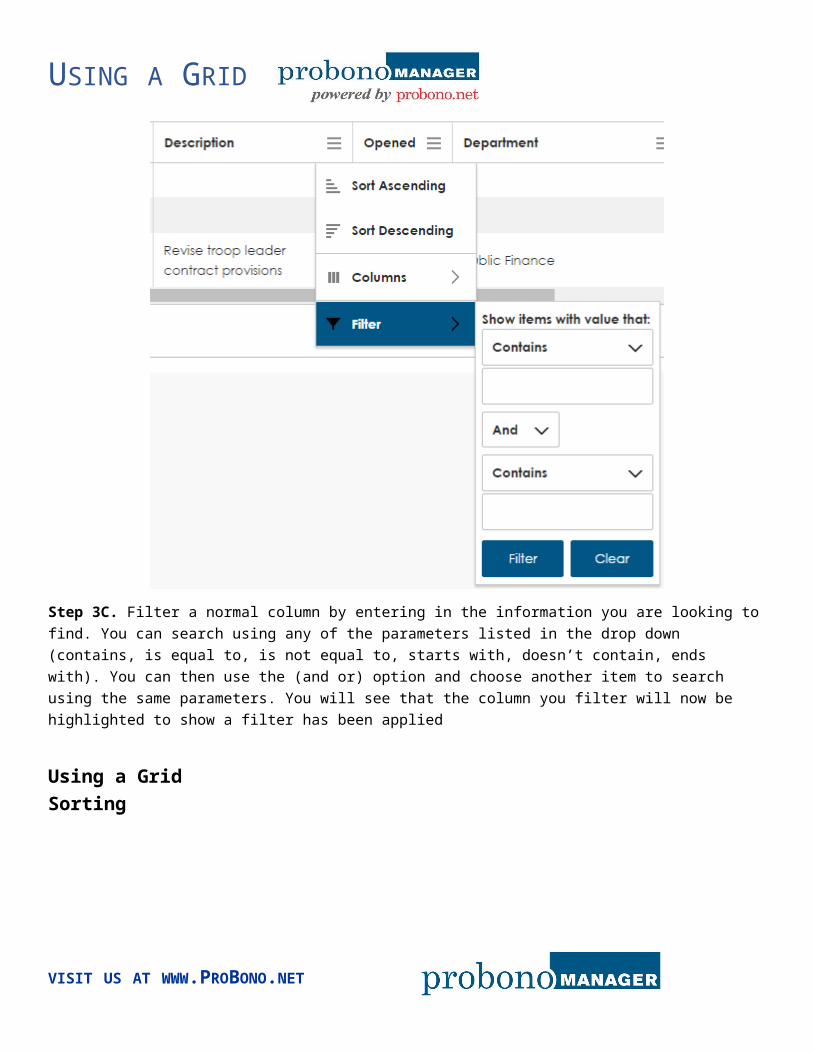
Step 3C. Filter a normal column by entering in the information you are looking to find. You can search using any of the parameters listed in the drop down (contains, is equal to, is not equal to, starts with, doesn’t contain, ends with). You can then use the (and or) option and choose another item to search using the same parameters. You will see that the column you filter will now be highlighted to show a filter has been applied
Using a GridSorting
VISIT US AT WWW.PROBONO.NET
USING A GRID
All columns can easily be sorted by either Ascending Order, or Descending Order. This can be used to easily sort name alphabetically, or numbers from highest to lowest or vice versa.
Step 1. Access your My Pro Bono page by clicking the My Pro Bono item in the left hand navigation
Step 2. Click the hamburger icon within the column you wish to sort
VISIT US AT WWW.PROBONO.NET

USING A GRID
Step 3. Click Sort Ascending or Sort Descending. Ascending will give you results showing A-Z or 1-9, Descending will show you Z-A and 9-1 (NOTE: When a column is sorted there will be a small carrot icon on the column to indicated sorting)
Step 4. As a note you can also achieve this by just clicking on the column header. Clicking it once will show ascending, clicking it twice will show descending
Using a GridAdding/Removing Columns
Within every grid you have the ability to add and remove columns. Each grid has a specific set of columns associated to it. However not every column is built into the default view or a canned list. So if you wish to look at specific columns you can add and remove columns from the drop down check box list.
VISIT US AT WWW.PROBONO.NET

USING A GRID
Step 1. Access your My Pro Bono page by clicking the My Pro Bono item in the left hand navigation
Step 2. Click on the hamburger icon of any column within the grid
VISIT US AT WWW.PROBONO.NET

USING A GRID
Step 3. Choose the Columns drop down – this will open up an additional pop out window. Within this window is the full list of columns that is associated to the grid you are working in
VISIT US AT WWW.PROBONO.NET
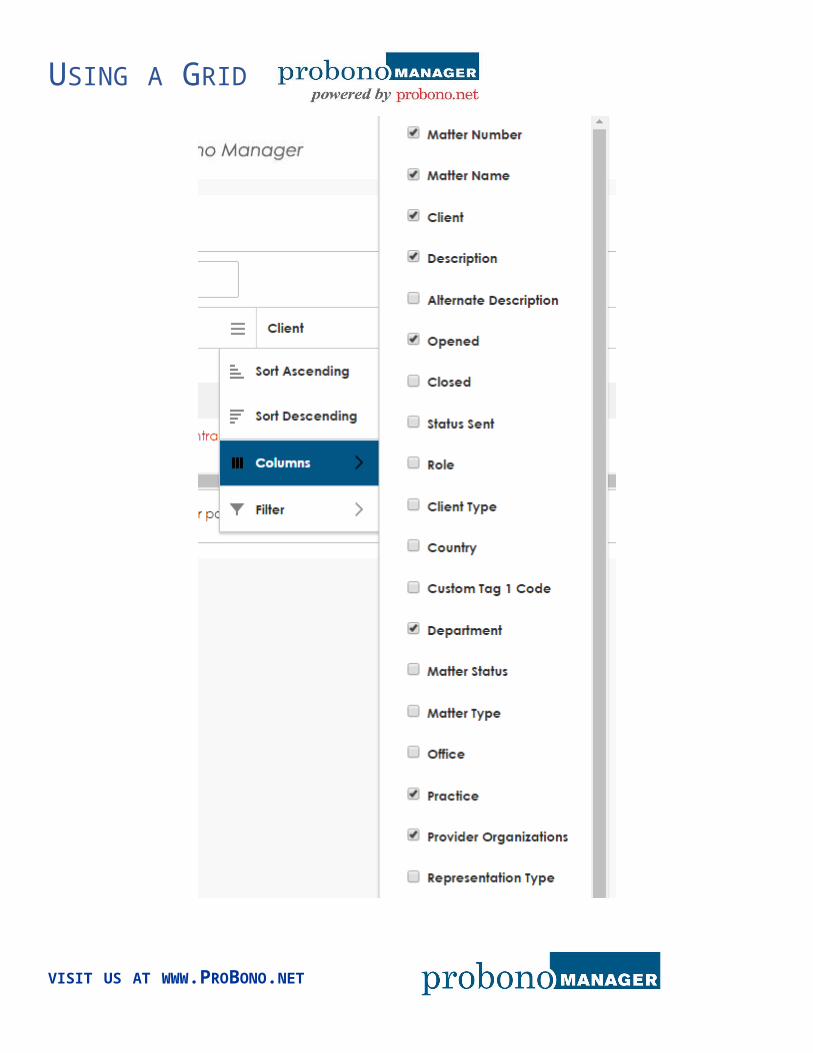
USING A GRID Step 4. Select the columns you wish to add or remove (NOTE: all of the columns that are already showing will be checked)
Using a GridPagination
Within each grid you will have the ability to use the pagination feature. This feature allows you to navigate pages of the grid depending on how many items are showing. You also have the ability to change how many items are shown per page. So if you wish to look at a larger list you can up the number of items. If you wish to look at a smaller list you can shrink it down to easily see all of your information.
Step 1. Access your My Pro Bono page by clicking the My Pro Bono item in the left hand navigation
VISIT US AT WWW.PROBONO.NET

USING A GRID
Step 2. Scroll to the bottom of the grid and find the pagination feature in the bottom left corner
Step 3. Click between pages if applicable
Step 4. Choose from the drop down list the number of items you would like to show per page in the grid
Using a GridExporting
Within each grid you will have the ability to export the information you are viewing. This feature allows you to export all of the data you are currently viewing. The exports come out in CSV with all of the filters built in. The export only exports the columns that are CURRENTLY showing.
VISIT US AT WWW.PROBONO.NET
USING A GRID
Step 1. Access your My Pro Bono page by clicking the My Pro Bono item in the left hand navigation
Step 2. Click the export button on the right hand side of the grid
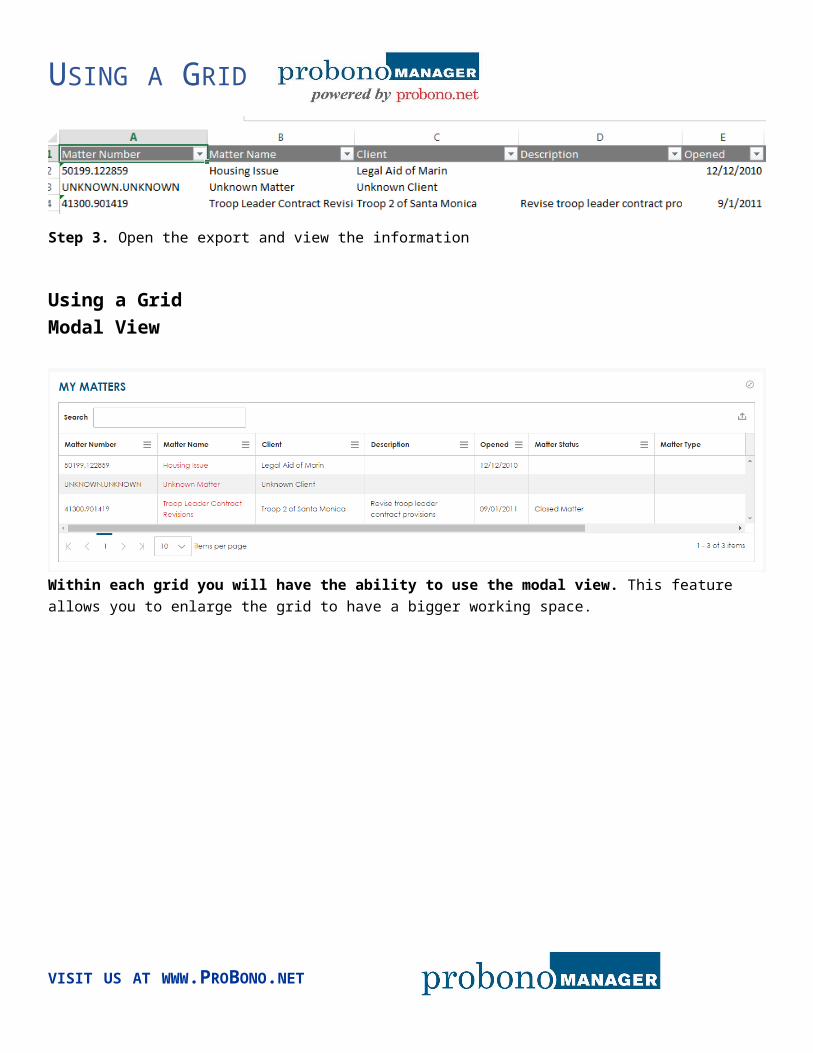
Step 3. Open the export and view the information
Using a GridModal View
VISIT US AT WWW.PROBONO.NET

USING A GRID
Within each grid you will have the ability to use the modal view. This feature allows you to enlarge the grid to have a bigger working space.
Step 1. Access your My Pro Bono page by clicking the My Pro Bono item in the left hand navigation
Step 2. Click the modal button to enlarge the grid
Step 3. View the enlarged grid and bigger working space
Step 4. You can also get out of the modal view by click the same modal button
Using a Grid
VISIT US AT WWW.PROBONO.NET
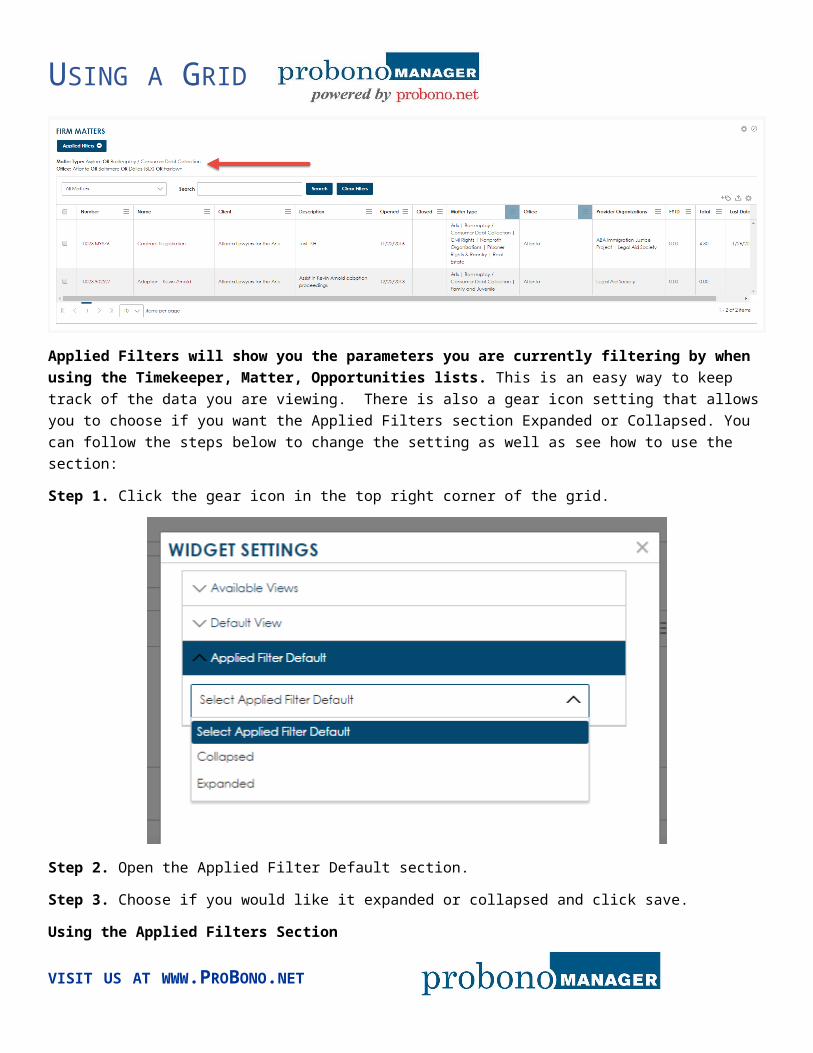
USING A GRID Applied Filters
Applied Filters will show you the parameters you are currently filtering by when using the Timekeeper, Matter, Opportunities lists. This is an easy way to keep track of the data you are viewing. There is also a gear icon setting that allows you to choose if you want the Applied Filters section Expanded or Collapsed. You can follow the steps below to change the setting as well as see how to use the section:
Step 1. Click the gear icon in the top right corner of the grid.
Step 2. Open the Applied Filter Default section.
Step 3. Choose if you would like it expanded or collapsed and click save.
Using the Applied Filters Section
Step 1. Choose the list you wish to view.
VISIT US AT WWW.PROBONO.NET

USING A GRID
Step 2. Filter the columns you would like filtered. Example: Filter Matter Type by Asylum and Arts, Filter Office by San Francisco and Silicon Valley.
Step 3. View the Applied Filters section to see what you have filtered currently. Expanded and collapse the section to see the functionality.
VISIT US AT WWW.PROBONO.NET
USING A GRID
VISIT US AT WWW.PROBONO.NET