© 2009 cengage learning. all rights reserved. chapter 6: advanced flour technology
TRANSCRIPT
© 2009 Cengage Learning. All Rights Reserved.
Chapter 6:
Advanced Flour Technology

© 2009 Cengage Learning. All Rights Reserved.
CHAPTER
6
Introduction• Flour is an ingredient with many properties to
consider and the baker has several resources:
– Flour Specification Sheets
– Baking Tests
– Dough conditioners to compensate for flour deficiencies or to aid on the baking process
© 2009 Cengage Learning. All Rights Reserved.
CHAPTER
6
How to Read a Flour Specification Sheet
• Commonly called Product Specifications (spec.) sheet
• Sort of “Identity form” of the flour
• Supplied by the miller
• Describes all the technical characteristics of the flour
• Help the baker to anticipate the baking performance of the flour
© 2009 Cengage Learning. All Rights Reserved.
CHAPTER
6
How to Read a Flour Specification Sheet
• Information on a Spec sheet:
– Name and address of the mill
– Brand identity of the flour
– Product description
– Ingredients declaration
– Analytical specifications
– Scientific test value
– Additional information

© 2009 Cengage Learning. All Rights Reserved.
CHAPTER
6
How to Read a Flour Specification Sheet
• General Information
– Name and address of the mill
– Brand identity of the flour
– Name of lab and person who tested flour
• Product description
– Describes origin and type of wheat used
– Guarantees product was processes in compliance with US Federal Food, Drug and Cosmetic Act

© 2009 Cengage Learning. All Rights Reserved.
CHAPTER
6
How to Read a Flour Specification Sheet:
Ingredient Declaration and Enrichment
• Ingredient Declaration:
– List of ingredients in flour besides wheat flour
– Ingredients are added for nutrition and baking performance
• Enrichment
– Used to increase nutritional value of flour
– What is taken out during milling is put back in
– No noticeable affect on baking process
© 2009 Cengage Learning. All Rights Reserved.
CHAPTER
6
How to Read a Flour Specification Sheet:
Ingredient Declaration
• Potassium Bromate
– Dough oxidizer
– Reinforced strength of the dough in later stages of baking process
– Affect on products:
• Larger product volume
• Larger cuts opening
– Banned in some states/countries due to carcinogenic properties

© 2009 Cengage Learning. All Rights Reserved.
CHAPTER
6
How to Read a Flour Specification Sheet:
Ingredient Declaration
• Ascorbic Acid
• Dough Oxidizer
• A synthesized Vitamin C product
• Reacts early in baking process
• “Green” option for use of dough oxidizer

© 2009 Cengage Learning. All Rights Reserved.
CHAPTER
6
How to Read a Flour Specification Sheet:
Ingredient Declaration
• Benzyl Peroxide
• Bleaching Agent
– Whitens cartenoid pigments of wheat
• Results:
– Whiter crumb color
– Reduced flavor

© 2009 Cengage Learning. All Rights Reserved.
CHAPTER
6
How to Read a Flour Specification Sheet:
Ingredient Declaration
• Azodicarbonamide (ADA)
• Bleaching Agent, Oxidizer (with Maturing properties)
• Improves baking performance of very fresh flour

© 2009 Cengage Learning. All Rights Reserved.
CHAPTER
6
How to Read a Flour Specification Sheet:
Ingredient Declaration
• Malt
• Used to adjust enzyme content in flour
• Comes from malted barlet flour
• Diastatic vs. non-diastatic

© 2009 Cengage Learning. All Rights Reserved.
CHAPTER
6
How to Read a Flour Specification Sheet:
Ingredient Declaration
• Fungal Amylase
• Used to adjust enzyme content in flour
• Produced in a lab setting from fungus cultures
• More consistent, concentrated than diastatic malt

© 2009 Cengage Learning. All Rights Reserved.
CHAPTER
6
How to Read a Flour Specification Sheet
• Analytical Specification
• Tests performed to determine:
– Moisture content
– Ash content
– Protein content
– Enzyme Activity

© 2009 Cengage Learning. All Rights Reserved.
CHAPTER
6
How to Read a Flour Specification Sheet:
Analytical Specification
• Moisture Content
• Law states flour must not be over 14% moisture content at end of milling
• Moisture content will vary after milling as storage conditions, climate change
• How to Read a Flour Specification Sheet:Analytical Specification
• Ash Content
• Ash content is a representation of the quantity of bran remaining in the flour after the milling process
• Bran is rich in minerals
• Minerals have the specific characteristics of not burning

© 2009 Cengage Learning. All Rights Reserved.
CHAPTER
6
How to Read a Flour Specification Sheet:
Analytical Specification
• Ash Content
• Test consists of incinerating flour at extremely high temperature
• All organic components of the flour will burn
• Minerals will only remain
• Most minerals of the flour are contained in the bran

© 2009 Cengage Learning. All Rights Reserved.
CHAPTER
6
How to Read a Flour Specification Sheet:
Analytical Specification
• Ash Content- Goals:
– Classify the flour
– Indication of flour hydration
– Indication of bread characteristics
– Indication of dough characteristics
• Water absorption and strength

© 2009 Cengage Learning. All Rights Reserved.
CHAPTER
6
How to Read a Flour Specification Sheet:
Analytical Specification
• Ash Content- Testing Procedure
• Performed on two samples of same flour
– Consistency in the results
• Five grams of flour (5.000gr) of flour scaled
– Use of platinum cup or special glass
• Cups are placed in 900˚C oven for 1 hour and 30 minutes, cooled and re-scaled
– Tare of the cup is subtracted and amount of ash calculated

© 2009 Cengage Learning. All Rights Reserved.
CHAPTER
6
How to Read a Flour Specification Sheet:
Analytical Specification
• Ash Content, results
• Expressed in % of flour (14% moisture content)
• Example
– .5% ash represents .5 grams of ash for 100 grams of flour (14% moisture content)
– .5% ash represents an extraction rate of 77-80%
– Whole wheat flours (100% extraction) have an ash content close to 1.5%

© 2009 Cengage Learning. All Rights Reserved.
CHAPTER
6
How to Read a Flour Specification Sheet:
Analytical Specification
• Ash Content, effects on the dough
• Fermentation
– Minerals used as nutrients by the yeast
– Higher amount of ash means faster fermentation activity
– Lower amount of ash means lower fermentation activity

© 2009 Cengage Learning. All Rights Reserved.
CHAPTER
6
How to Read a Flour Specification Sheet:
Analytical Specification
• Ash Content, effects on the dough
• Strength of the dough
– Ash interferes in gluten formation
– Impedes binding of gluten chains
• Decreases dough elasticity
• Increases dough extensibility
– Dough becomes more porous
• Lower gas retention

© 2009 Cengage Learning. All Rights Reserved.
CHAPTER
6
How to Read a Flour Specification Sheet:
Analytical Specification
• Ash Content, effects on the bread
• Crumb color– More ash increases crumb coloration
• Flavor– More ash increases bran flavor in bread
• Volume– More ash increases density of bread
• Lower volume and tighter crumb
• Crust– More ash increases sogginess of crust
• Bread need to dry more during baking

© 2009 Cengage Learning. All Rights Reserved.
CHAPTER
6
How to Read a Flour Specification Sheet:
Analytical Specification
• Protein Content
– Assess by scientific test
– Expressed in % of the flour
– Protein content influences:
• Mixing time
• Dough Hydration
• Rheological properties of the dough
• Final characteristic of product

© 2009 Cengage Learning. All Rights Reserved.
CHAPTER
6
How to Read a Flour Specification Sheet:
Analytical Specification
• Enzyme Activity (Falling Number)
• Represents enzyme activity in flour
• Enzyme: organic catalysts that perform specific actions of degradation
• Test measures time needed by enzymes to degrade a gelatinized blend of flour and water
• The more enzyme present in the flour, the faster the degradation

© 2009 Cengage Learning. All Rights Reserved.
CHAPTER
6
How to Read a Flour Specification Sheet:
Analytical Specification
• Enzyme Activity: Goals
• Determine enzyme activity of a specific flour– Important for fermentation activity during the baking
process
• Re-establish balance in flour enzyme content when necessary– Allow more regular fermentation activity for the
baker

© 2009 Cengage Learning. All Rights Reserved.
CHAPTER
6
How to Read a Flour Specification Sheet:
Analytical Specification
• Enzyme Activity: Effect on dough
• Flour with proper enzyme content
– Provides regular fermentation activity
• Too many enzymes
– Generate an excess of fermentation activity
– Can also produce sticky dough with a lack of strength

© 2009 Cengage Learning. All Rights Reserved.
CHAPTER
6
How to Read a Flour Specification Sheet:
Analytical Specification
• Enzyme Activity: Effect on bread
• High enzyme content
– Provides bread with sticky crumb and reddish crust coloration
• Low enzyme content
– Generates bread with smaller volume and pale crust color
© 2009 Cengage Learning. All Rights Reserved.
CHAPTER
6
How to Read a Flour Specification Sheet:
Farinograph
• Farinograph- General
• Scientific instrument used to assess different flour characteristics
– Potential hydration of the flour for a known consistency
– Mixing time needed to reach this consistency
– Mixing tolerance of the dough
– Point where the dough starts to be over-mixed

© 2009 Cengage Learning. All Rights Reserved.
CHAPTER
6
How to Read a Flour Specification Sheet:
Farinograph
• Farinograph- Description
• Bowl with mixing blades
– Mixing of the dough
• Dynamometer
– Measures force or friction of the dough during mixing
• Recording mechanism
– Calculates curve on special computer
– Records different values
© 2009 Cengage Learning. All Rights Reserved.
CHAPTER
6
How to Read a Flour Specification Sheet:
Farinograph
• The Farinograph Curve
• Horizontal reading are minutes
• Vertical reading is FU (Farinogram Units)
© 2009 Cengage Learning. All Rights Reserved.
CHAPTER
6
How to Read a Flour Specification Sheet:
Farinograph
• Arrival Time
– Time required for top of the curve to reach the 500 FU line after the mixer has been started and the water has been introduced
– Measurement of the rate at which flour absorbs water
– On a given variety of wheat, arrival time generally increases as protein increases

© 2009 Cengage Learning. All Rights Reserved.
CHAPTER
6
How to Read a Flour Specification Sheet:
Farinograph
• Dough Development Time
– Time between first addition of water and development of dough’s maximum consistency
– This value does not directly relate to mixing dough in a bakery
– Assists in making flour comparisons
© 2009 Cengage Learning. All Rights Reserved.
CHAPTER
6
How to Read a Flour Specification Sheet:
Farinograph
• Stability
– Difference in time between point at which top of the curve intercepts the 500 FU line (arrival time) and the point at which the top of the curve leaves the 500 FU line (departure time)
– Gives some indication of the flour’s tolerance for mixing

© 2009 Cengage Learning. All Rights Reserved.
CHAPTER
6
How to Read a Flour Specification Sheet:
Farinograph
• Departure Time
– Time from the first addition of water until the top of the curve leaves the 500 FU line
– Longer time indicates stronger flour
• Longer mixing time without degradation of the gluten structure
© 2009 Cengage Learning. All Rights Reserved.
CHAPTER
6
How to Read a Flour Specification Sheet:
Farinograph
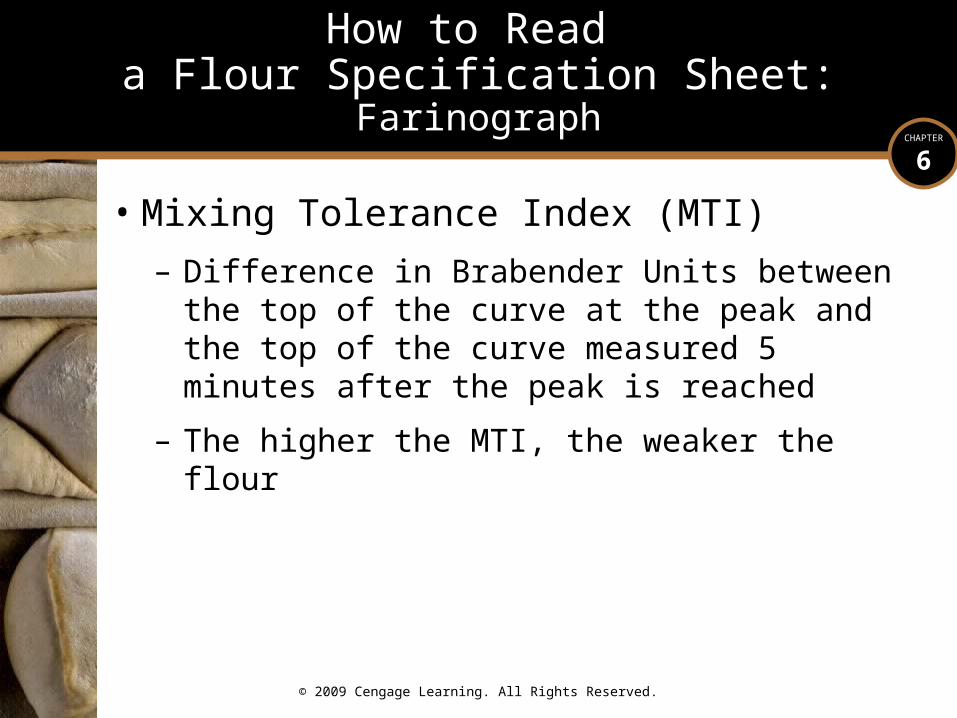
• Mixing Tolerance Index (MTI)
– Difference in Brabender Units between the top of the curve at the peak and the top of the curve measured 5 minutes after the peak is reached
– The higher the MTI, the weaker the flour
© 2009 Cengage Learning. All Rights Reserved.
CHAPTER
6
How to Read a Flour Specification Sheet:
Farinograph
• Farinograph values relate to mixing characteristics of dough
• In traditional baking where dough is less developed, farinograph values become less important

© 2009 Cengage Learning. All Rights Reserved.
CHAPTER
6
How to Read a Flour Specification Sheet
• Alveograph of Chopin
• Scientific instrument used to assess different flour characteristics
– Dough extensibility
– Dough elasticity
– Overall strength of dough
– Ratio or balance between extensibility and elasticity

© 2009 Cengage Learning. All Rights Reserved.
CHAPTER
6
How to Read a Flour Specification Sheet:
Alveograph of Chopin-Components
• Mixer
• Dough bubble blowing apparatus
• Recording dough manometer
• Dough sheeting assembly
© 2009 Cengage Learning. All Rights Reserved.
CHAPTER
6
How to Read a Flour Specification Sheet:Alveograph of Chopin-Values
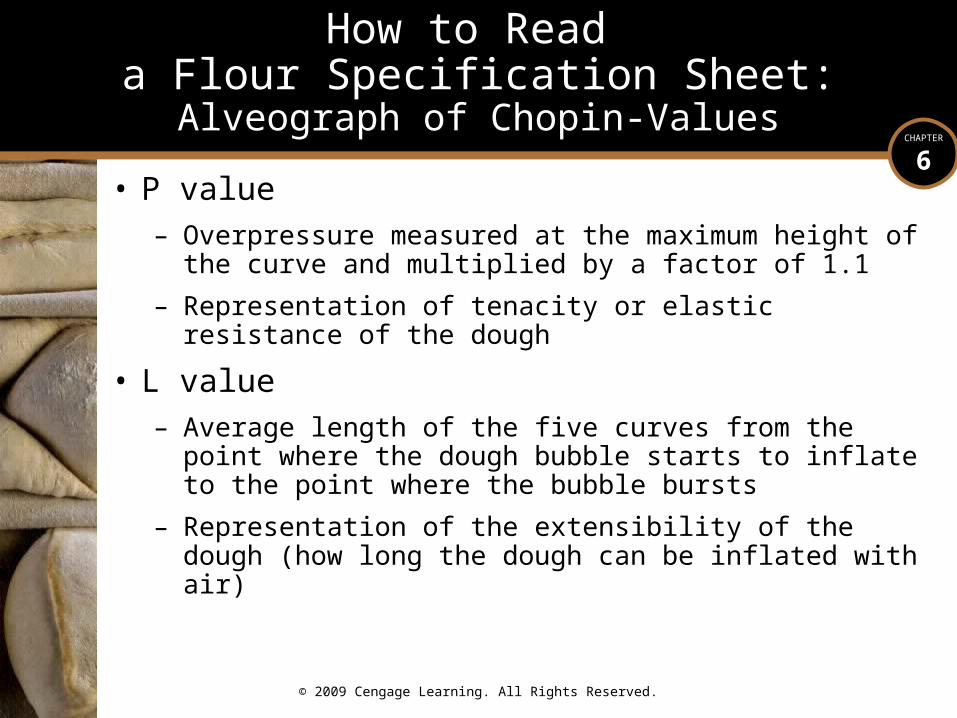
• P value– Overpressure measured at the maximum height of the curve
and multiplied by a factor of 1.1
– Representation of tenacity or elastic resistance of the dough
• L value– Average length of the five curves from the point where the
dough bubble starts to inflate to the point where the bubble bursts
– Representation of the extensibility of the dough (how long the dough can be inflated with air)

© 2009 Cengage Learning. All Rights Reserved.
CHAPTER
6
How to Read a Flour Specification Sheet:Alveograph of Chopin-Values
• P/L value– Ration between dough elasticity and dough extensibility
– Representation of the balance of these two main physical dough characteristics
• W value– Represents the energy needed to inflate the dough until it
ruptures
– Measured by the area under the curve and multiplied by 6.54
– Representation of the overall strength of the dough
© 2009 Cengage Learning. All Rights Reserved.
CHAPTER
6
How to Read a Flour Specification Sheet:
Alveograph of Chopin-Conclusion
• Alveograph gives indication of dough strength

© 2009 Cengage Learning. All Rights Reserved.
CHAPTER
6
How to Read a Flour Specification Sheet
• Additional Information
• May include:
– Kosher status
– Organic Certification
– Storage recommendations

© 2009 Cengage Learning. All Rights Reserved.
CHAPTER
6
Evaluation of Flour Baking Performance: How to Perform a Baking Tests
• Introduction
• Product specs are guidelines in selecting flour
• Baking test to evaluate:
– Working properties of flour
– Final product characteristics

© 2009 Cengage Learning. All Rights Reserved.
CHAPTER
6
Evaluation of Flour Baking Performance: How to Perform a Baking Tests
• Goal
– To determine the quality of the fermentation tolerance, crispness of the crust, crumb and crust color and flavor
– In order to have the most consistent results, an experienced baker must carry out tests
– Evaluation of Flour Baking Performance: How to Perform a Baking Tests
• Basic Method
– No Preferment
– Use a basic formula (baguette)
– Improved Mix
– Baguette Shape
– Variable length of final proof
– Normal baking conditions
– Cool bread before evaluation
© 2009 Cengage Learning. All Rights Reserved.
CHAPTER
6
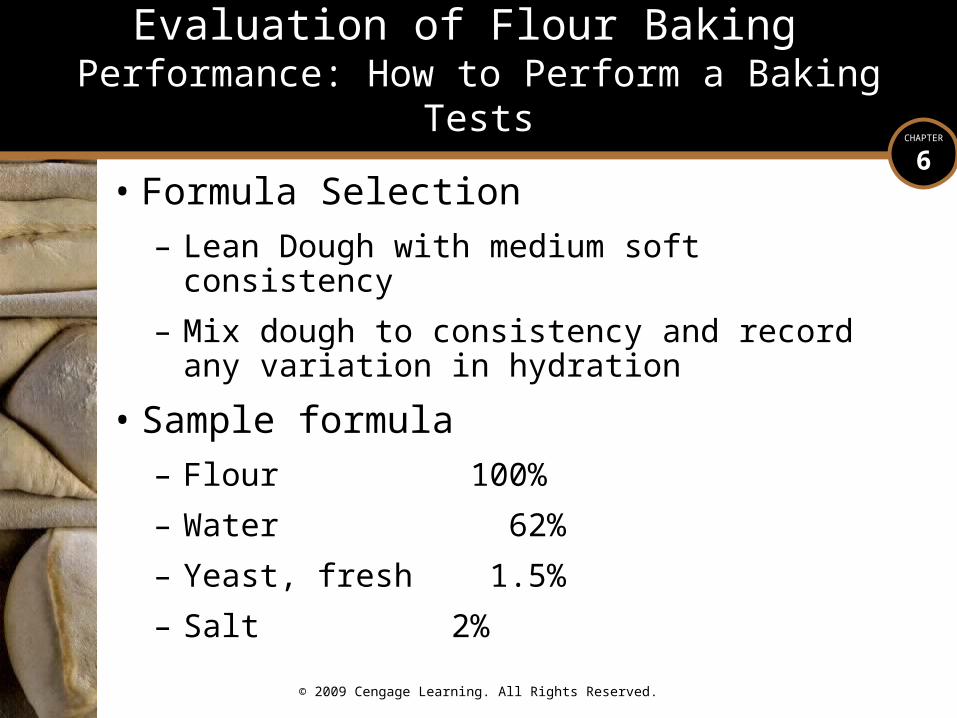
Evaluation of Flour Baking Performance: How to Perform a Baking Tests
• Formula Selection– Lean Dough with medium soft consistency
– Mix dough to consistency and record any variation in hydration
• Sample formula– Flour 100%
– Water 62%
– Yeast, fresh 1.5%
– Salt 2%

© 2009 Cengage Learning. All Rights Reserved.
CHAPTER
6
Evaluation of Flour Baking Performance: How to Perform a Baking Tests –
Baking Process
• Mixing
– Improved Mix
– Mix according to dough development, record time
– DDT is 75°-76°F (24°C)
– If DDT is not achieved, mix a new batch of dough with adjusted water temperature

© 2009 Cengage Learning. All Rights Reserved.
CHAPTER
6
Evaluation of Flour Baking Performance: How to Perform a Baking Tests –
Baking Process
• First Fermentation
– Based on quantity of yeast in formula
– 1.5% Fresh Yeast = 90 minutes
– Ideal fermentation conditions are 75°-77°F (24°-25°C) with Rh of 80%
© 2009 Cengage Learning. All Rights Reserved.
CHAPTER
6
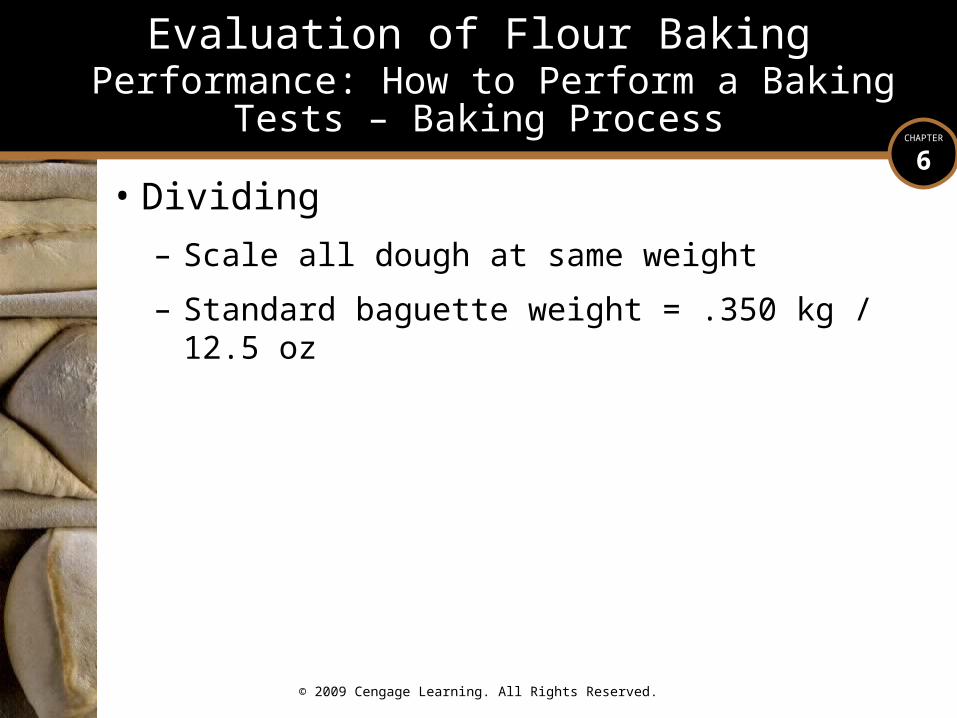
Evaluation of Flour Baking Performance: How to Perform a Baking Tests –
Baking Process
• Dividing
– Scale all dough at same weight
– Standard baguette weight = .350 kg / 12.5 oz

© 2009 Cengage Learning. All Rights Reserved.
CHAPTER
6
Evaluation of Flour Baking Performance: How to Perform a Baking Tests –
Baking Process
• Pre-Shaping
– Standard procedures:
• Rectangels for baguettes, rounds for batards
– If dough is weak, do not preshape tighter to compensate
© 2009 Cengage Learning. All Rights Reserved.
CHAPTER
6
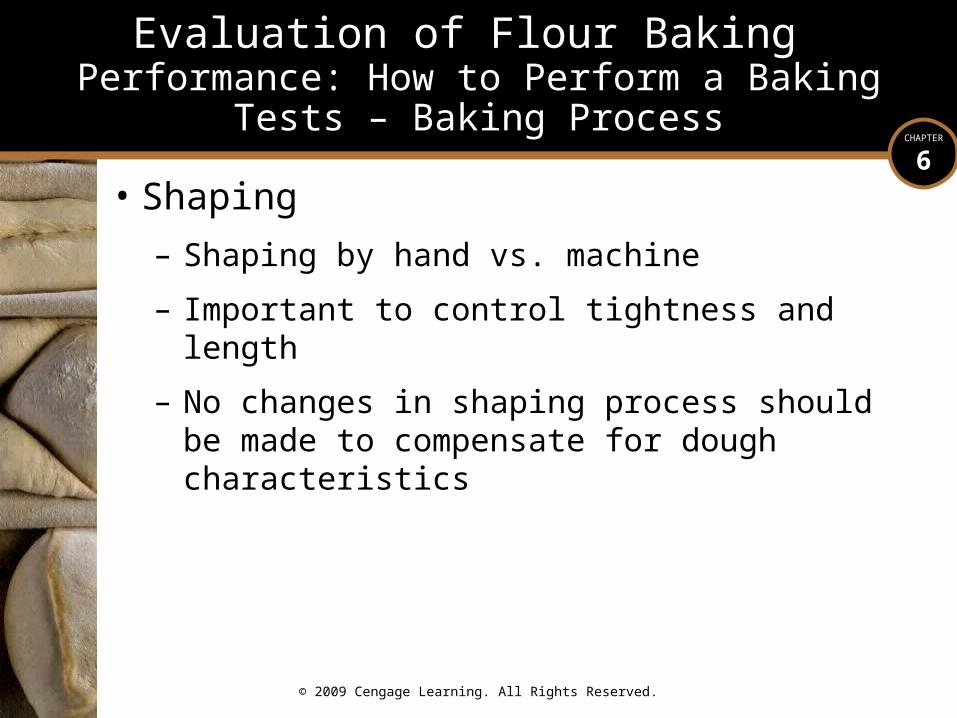
Evaluation of Flour Baking Performance: How to Perform a Baking Tests –
Baking Process
• Shaping
– Shaping by hand vs. machine
– Important to control tightness and length
– No changes in shaping process should be made to compensate for dough characteristics
© 2009 Cengage Learning. All Rights Reserved.
CHAPTER
6
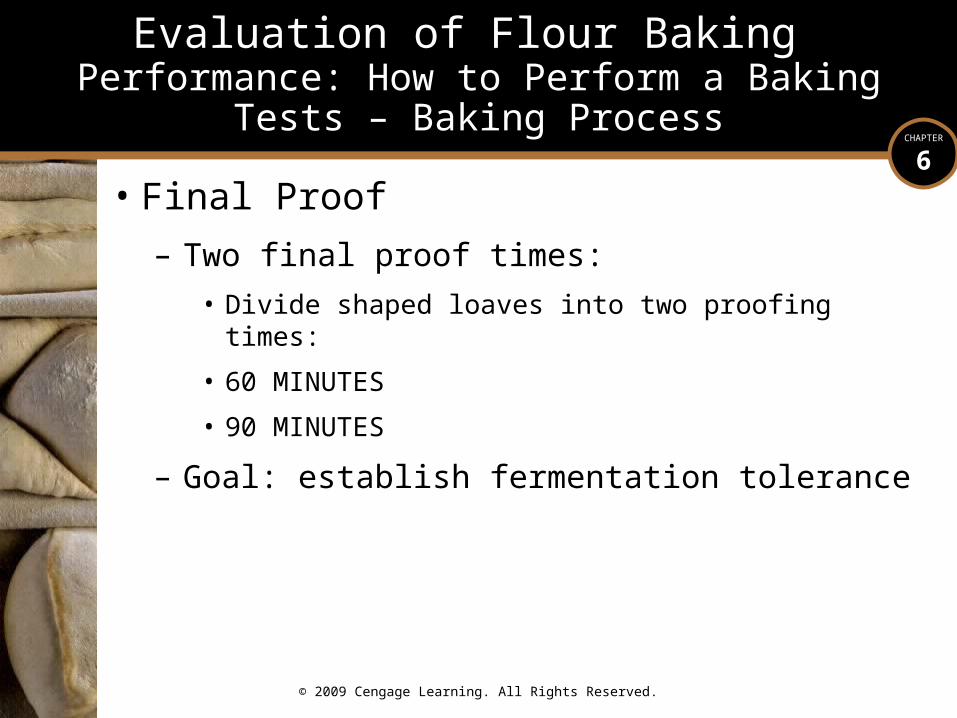
Evaluation of Flour Baking Performance: How to Perform a Baking Tests –
Baking Process
• Final Proof
– Two final proof times:
• Divide shaped loaves into two proofing times:
• 60 MINUTES
• 90 MINUTES
– Goal: establish fermentation tolerance

© 2009 Cengage Learning. All Rights Reserved.
CHAPTER
6
Evaluation of Flour Baking Performance: How to Perform a Baking Tests –
Baking Process
• Baking
– Deck oven with steam
– 20-25 minutes for baguette
– 25-30 minutes for batards
– Bake at control flour temperatures
• Can determine potential defects in crust coloration

© 2009 Cengage Learning. All Rights Reserved.
CHAPTER
6
Evaluation of Flour Baking Performance: How to Perform a Baking Tests –
Baking Process
• Cooling
– Cool for 90 minutes at room temperature
– Flavor and moisture level stabilize

© 2009 Cengage Learning. All Rights Reserved.
CHAPTER
6
Evaluation of Flour Baking Performance: How to Perform a Baking Tests –
Baking Process
• Alternative Method
– Use an existing product formula with different
• Mixing
• Shaping
• Baking
– Adhere to same principles as simple test.

© 2009 Cengage Learning. All Rights Reserved.
CHAPTER
6
Evaluation of Flour Baking Performance: How to Perform a Baking Tests
• Evaluation of Flour Performance
– Evaluate flour during entire process and record on evaluation form
– Numerical grading system evaluates entire process

© 2009 Cengage Learning. All Rights Reserved.
CHAPTER
6
Evaluation of Flour Baking Performance: How to Perform a Baking Tests
• Evaluations at Each Step of the Process
– Dough: during mixing, first fermentation, shaping, end of final proof
– Fermentation tolerance: after cooling
– Bread exterior: examine cross section, appearance, volume and crust
– Interior: examine color, hole and crumb structure
– Flavor: Based on value of 20 in test

© 2009 Cengage Learning. All Rights Reserved.
CHAPTER
6
Evaluation of Flour Baking Performance: How to Perform a Baking Tests
• After the Evaluation
– Determine practicality of flour usage
– Too many defects create inconsistencies
– Some defects may be corrected with:
• Use of preferment (fermentation tolerance)
• Use of autolyse (extensibility)
• Use of diastatic malt (crust color)

© 2009 Cengage Learning. All Rights Reserved.
CHAPTER
6
Compensating for Flour Deficiencies
• Millers make adjustments to compensate for differences in flour
• Major variables include:– Weather: rain, sun, growing cycle, fertilizer usage
– Economic: wheat prices, availability, transportation costs
• Baker needs to use technical knowledge to deal with inconsistencies

© 2009 Cengage Learning. All Rights Reserved.
CHAPTER
6
Compensating for Flour Deficiencies
• Water Absorption
– Flour absorbs variable amount of water:
• Humidity (origin of flour, storage conditions)
• Flour characteristics (protein, starch damage)
– Hold back water at beginning of mixing, add as needed
– Rate of hydration may change, but dough consistency shouldn’t over time
© 2009 Cengage Learning. All Rights Reserved.
CHAPTER
6
Compensating for Flour Deficiencies
• Maturation– Flour naturally improves as it ages.
– 2 weeks in summer / 3 weeks in winter
– Issues of maturing flour:• Storage
• Green flour
– Compensation:• ADA, Ascorbic Acid (Chemical)
• More preferment, folding the dough (formula, process)

© 2009 Cengage Learning. All Rights Reserved.
CHAPTER
6
Compensating for Flour Deficiencies
• Mixing Tolerance
– Development time of dough
– Most variation is at end of August to end of September
– Millers temper the two harvest of wheat
– Close attention to the development of the dough will prevent over mixing
© 2009 Cengage Learning. All Rights Reserved.
CHAPTER
6
Compensating for Flour Deficiencies
• Lack of Strength
– Rare in US if using bread flour
– Options to increase strength:
• lower dough hydration,
• Increase preferment
• Longer 1st fermentation with a fold
• Preshape and shape tighter
• Shorter final proof
• Ascorbic Acid

© 2009 Cengage Learning. All Rights Reserved.
CHAPTER
6
Compensating for Flour Deficiencies
• Excessive Strength
– Wheat for commercial uses vs. artisan
– Options to decrease strength
• Higher hydration
• Autolyse
• Liquid Preferments
• Reduce number of folds, if any
• Preshape and shape more loosely

© 2009 Cengage Learning. All Rights Reserved.
CHAPTER
6
Compensating for Flour Deficiencies
• Fermentation Tolerance– Influenced by climate conditions, class and variety of wheat,
age of flour
– Two main observations:
• Ability of dough to develop
• Ability for dough to trap gas
– Increase tolerance with:
• Preferments (including sourdough)
• Longer 1st fermentation
• Ascorbic Acid (15 – 30 ppm)

© 2009 Cengage Learning. All Rights Reserved.
CHAPTER
6
Compensating for Flour Deficiencies
• Enzyme Activity
– Enzymes affect rate of fermentation
– Results of not enough vs. too much
– Falling Number: 250-300
– Supplementation
• Diastatic Malted Barley Flour/Syrup
• Fungal Amalyase

© 2009 Cengage Learning. All Rights Reserved.
CHAPTER
6
Compensating for Flour Deficiencies
• Coloration
– Color of flour affects color of crumb, crust
– Creamy vs bleached colors
– Ash content

© 2009 Cengage Learning. All Rights Reserved.
CHAPTER
6
Compensating for Flour Deficiencies
• Flavor
– Flour will influence final flavor of bread
– Baking test must be performed
– Different flours processed the same way will produce different tasting breads

© 2009 Cengage Learning. All Rights Reserved.
CHAPTER
6
Compensating for Flour Deficiencies
• Conclusion
– Variables in flour consistency constantly change
– Bakers can use technical knowledge to adapt to working with different flour characteristics
– The goal is to produce consistent properties of dough
© 2009 Cengage Learning. All Rights Reserved.
CHAPTER
6
Working with Specialty Flours• Introduction
• A variety of others types of flour milled from wheat or different grains can be used in baking– offer customers bread with different flavors
– added nutritional value
• Some of these flours baking performance is different than wheat flour – Higher bran content and particle size
– different protein quality and/or quantity
• Many types of flours or meals come from a variety of seeds

© 2009 Cengage Learning. All Rights Reserved.
CHAPTER
6
Working with Specialty Flours• Main Types of Specialty Flour
– Whole wheat flour
– Rye
– Semolina
– Spelt
– Other grains

© 2009 Cengage Learning. All Rights Reserved.
CHAPTER
6
Working with Specialty Flours:Main Types of Specialty Flour
• Whole Wheat Flour
• Made by milling hard wheat
– Mostly spring wheat, but sometimes winter wheat
• All the kernel of wheat is used in the flour
– Fat from the germ will reduce the shelf life of the flour
• Different granulation of whole-wheat flour available
– Extra fine, fine, medium, coarse, extra coarse
– Different textures could be achieved in final product

© 2009 Cengage Learning. All Rights Reserved.
CHAPTER
6
Working with Specialty Flours:Main Types of Specialty Flour
• Changes in the Baking Process
• Mixing
– Higher hydration
• Bran absorb a lot of water
– Shorter mixing time
• Avoid to over work and tear the gluten
– Blending of regular flour
• Reinforce the gluten structure of the dough

© 2009 Cengage Learning. All Rights Reserved.
CHAPTER
6
Working with Specialty Flours:Main Types of Specialty Flour
• Changes in the Baking Process
• Fermentation
– Bran is rich in minerals: Faster fermentation
• Lower level of yeast
– High level of bran weakens the gluten structure
• Dough very porous: Shorter fermentation time
– Use of preferment advised
• Reinforce the strength of the dough

© 2009 Cengage Learning. All Rights Reserved.
CHAPTER
6
Working with Specialty Flours:Main Types of Specialty Flour
- Changes in the Baking Process
• Shaping– Short shape to favor oven kick
– Very gentle to avoid tearing the gluten
• Scoring– After shaping or before baking
• Depend on the % of W.W involved in the formula
– Cut perpendicular to the side of the dough• Favor a rounder cross section
© 2009 Cengage Learning. All Rights Reserved.
CHAPTER
6
Working with Specialty Flours:Main Types of Specialty Flour
- Changes in the Baking Process
• Baking
– Lower temperature for a longer period of time
– Open door at the end of the baking time
• Cooling
– Whole wheat bread need to cool down for at least 3 hours after baking
– Better aroma diffusion

© 2009 Cengage Learning. All Rights Reserved.
CHAPTER
6
Working with Specialty Flours:Main Types of Specialty Flour
• Rye Flour
• Made by milling kernels of rye
• Darker grain and more fibrous than wheat
• Yield a flour that is stronger flavored
• Lower baking performances compared to wheat
– Lower protein quantity and quality
– Lower ability to form a nice gluten structure
© 2009 Cengage Learning. All Rights Reserved.
CHAPTER
6
Working with Specialty Flours:Main Types of Specialty Flour
• Different types of Rye flour:
• White rye
– Made with the inside of the kernel of rye
• Dark rye
– Made with the outside of the kernel of rye
• Medium rye
– Made with all the inside of the kernel and some parts of the outside

© 2009 Cengage Learning. All Rights Reserved.
CHAPTER
6
Working with Specialty Flours:Main Types of Specialty Flour
• Different types of Rye flour:
• Rye meal– All the kernel of rye is used
– Could have different granulation• Extra fine, fine, medium, coarse, extra coarse
• Cracked rye– Chopped kernel of rye
– Need to be soaked before incorporation in the dough
© 2009 Cengage Learning. All Rights Reserved.
CHAPTER
6
Working with Specialty Flours:Main Types of Specialty Flour
• Changes in the Baking Process
• Mixing
– Higher hydration
• Rye flour has a higher absorption rate
– Longer mixing time in 1st speed, lower in 2nd speed
• Protect the gluten structure from the more “aggressive” action of the hook in second speed
© 2009 Cengage Learning. All Rights Reserved.
CHAPTER
6
Working with Specialty Flours:Main Types of Specialty Flour
- Changes in the Baking Process
• Fermentation– Rye is rich in minerals
• Faster fermentation
• Lower amount of yeast
– Rye generates poor gluten structure• Dough very porous
• Shorter fermentation time
– Use of preferment advised• Reinforce the strength of the dough

© 2009 Cengage Learning. All Rights Reserved.
CHAPTER
6
Working with Specialty Flours:Main Types of Specialty Flour
- Changes in the Baking Process
• Shaping
– Short shape to favor the oven kick
– Very gentle to avoid tearing the gluten
• Scoring
– Preferable to score the loaves after shaping
• Preserves the gas produced during the final proof

© 2009 Cengage Learning. All Rights Reserved.
CHAPTER
6
Working with Specialty Flours:Main Types of Specialty Flour
- Changes in the Baking Process
• Baking – Lower temperature for a longer period of time
– Open door at the end of the baking time
• Cooling– Rye bread need to cool down for at least 4 to 6
hours after baking• Better aromas diffusion
• Crumb not as sticky and more pleasant to eat

© 2009 Cengage Learning. All Rights Reserved.
CHAPTER
6
Working with Specialty Flours:Main Types of Specialty Flour
• Semolina Flour
• Made by milling durum wheat (hardest of all wheat)
• Wheat of choice for pasta products– High density, high protein content and gluten strength
• Sometimes used as specialty flour in bread baking
• Kernels are amber-colored and larger compared to other wheat classes– Yellow endosperm gives a golden coloration to the flour

© 2009 Cengage Learning. All Rights Reserved.
CHAPTER
6
Working with Specialty Flours:Main Types of Specialty Flour
Different types of Semolina:
• Durum flour
– Coarser granulation
• Semolina flour
– Finer granulation
– When durum is milled, the endosperm is ground into a granular product

© 2009 Cengage Learning. All Rights Reserved.
CHAPTER
6
Working with Specialty Flours:Main Types of Specialty Flour
- Changes in the Baking Process
• Mixing
– Higher hydration
• More protein, higher water absorption
– Longer mixing time
• More gluten to organize
– Use of autolyse when high level of semolina flour are used
• Improved dough extensibility
© 2009 Cengage Learning. All Rights Reserved.
CHAPTER
6
Working with Specialty Flours:Main Types of Specialty Flour
• Spelt Flour
• Distant cousin to modern wheat
• Its origin can be traced back to approximately 5000 BCE in the area now known as Iran
• Once commonly grown in North America, spelt was replaced at the beginning of this century by modern wheat varieties
– More suited to the high volume production techniques currently used on most American farms
© 2009 Cengage Learning. All Rights Reserved.
CHAPTER
6
Working with Specialty Flours:Main Types of Specialty Flour
• Spelt Flour
• Modern wheat varieties have been bred to be easier to grow and harvest, to increase yield or to have a higher protein content
• On the other hand, spelt has retained much of its original character – Less chemicals are used during the growing cycle
• Gluten sensitive individuals have been able to include spelt based food in their diets– Good source of fiber and B complex vitamins

© 2009 Cengage Learning. All Rights Reserved.
CHAPTER
6
Working with Specialty Flours:Main Types of Specialty Flour
Different types of Spelt flour
• Regular white spelt flour
– Similar to a straight grade wheat flour
• Whole spelt
– Made with the whole kernel of spelt

© 2009 Cengage Learning. All Rights Reserved.
CHAPTER
6
Working with Specialty Flours:Main Types of Specialty Flour
Changes in the baking process
• Mixing
– Protein more fragile
• Shorter mixing time to protect the gluten structure
• Fermentation
– Weaker gluten
– Gas accumulates faster
– Lower quantity of yeast

© 2009 Cengage Learning. All Rights Reserved.
CHAPTER
6
Working with Specialty Flours:Main Types of Specialty Flour
• Other Grains
– Quinoa flour, soy flour, amaranth flour, millet flour, buckwheat flour, oat meal, flax meal, sunflower meal...
– Balance other grains and wheat to ensure proper strength
– 20% of FW is a good starting point

© 2009 Cengage Learning. All Rights Reserved.
CHAPTER
6
Working with Specialty Flours:Main Types of Specialty Flour
• Specialty Flours and Preferments
• Specialty flours should be included in preferment
– Increased flavor development
– Preferment the weaker flour, final dough will have more strength
© 2009 Cengage Learning. All Rights Reserved.
CHAPTER
6
Working with Specialty Flours• Specialty Flours Conclusion
• The baker should have a good understanding of their functionality and adjust the baking process accordingly
• Mixing, fermentation, shaping, baking and cooling may have to be modified to achieve optimum bread quality
• Bakers can develop a variety of day-to-day or special occasion breads

© 2009 Cengage Learning. All Rights Reserved.
CHAPTER
6
Dough Conditioners• Introduction
• Used to improve the characteristics of the dough and the final product
• Some are natural, others are chemical, and some are processed from microbial sources
• Bread can be produced without any of these products, but when used properly, they can be helpful to compensate for flour deficiency or to achieve more consistent performance

© 2009 Cengage Learning. All Rights Reserved.
CHAPTER
6
Dough Conditioners• Oxidizers
• Strengthen the gluten bonds
– Chemical process between protein and oxygen
• Effect on the dough
– Strength, fermentation tolerance
• Effect on the bread
– Volume, cuts openings, crumb texture
• Main types added to flour
– Potassium bromate, Ascorbic acid, ADA

© 2009 Cengage Learning. All Rights Reserved.
CHAPTER
6
Dough Conditioners• Reducing Agents
• Limit dough elasticity and improve extensibility
• Reduce mixing time and improve machinability
• Beneficial for pizza dough, laminates and crackers
• Two most used: l-cystine and deactivated yeast

© 2009 Cengage Learning. All Rights Reserved.
CHAPTER
6
Dough Conditioners• Combined Action of Reducing Agents and
Oxidizers
• Oxydizers improve gas retention
• Reducing agents improve dough extensibility and workability
• Balance two agents with desired results through testing and evaluation

© 2009 Cengage Learning. All Rights Reserved.
CHAPTER
6
Dough Conditioners• Emulsifiers
• Chemical or natural: improve the bond between fat and water in flour
• Improve working properties of dough
• Provides larger volume product and limits staling of dough
• Selection: lecithin, DATEM, SSL, CSL, polysorbate 60 and mono and diglycerides
© 2009 Cengage Learning. All Rights Reserved.
CHAPTER
6
Dough Conditioners• Vital Wheat Gluten
• Processed and dried gluten forming proteins
• Used to add strength to dough
• Balance dough strength and extensibility
• May change final appearance and texture of bread – Larger volume, reddish, bitter crust, leathery crust

© 2009 Cengage Learning. All Rights Reserved.
CHAPTER
6
Dough Conditioners• Yeast Nutrients
• Used when available water is soft
• Inorganic salts add nutrients for yeast
• More consistent fermentation
• Essential for no-time dough
• Optional for traditional and artisan methods– Increased fermentation time, use of preferments
and extra folds may help

© 2009 Cengage Learning. All Rights Reserved.
CHAPTER
6
Dough Conditioners• Enzymes
• Definition– Protein that catalyzes a chemical reaction of
degradation
• Origin– Naturally, enzymes come from the germ of the
kernel of wheat
– Could be, when necessary supplemented to the flour during the milling process

© 2009 Cengage Learning. All Rights Reserved.
CHAPTER
6
Dough Conditioners:Enzymes
• Main Classes of Enzymes Used in Baking
• Two enzymatic systems are particularly important for the fermentation and the strength of the dough
– Amylase and protease

© 2009 Cengage Learning. All Rights Reserved.
CHAPTER
6
Dough Conditioners:Enzymes
• Amylases
• Causes the degradation of the complex sugar (starch) into less complex sugar (maltose)
• Very important for the fermentation activity– Supply the yeast in simple sugar when the simple sugars
naturally present in the flour are used up
• Very important for the crust coloration– Carmelization of the crust
• Supplementation: Diastatic Malt or Fungal Amalayze
© 2009 Cengage Learning. All Rights Reserved.
CHAPTER
6
Dough Conditioners:Enzymes
• Glucoamylases
• Break down dextrin chains into glucose sugars
• Improves rate and consistency of fermentation
• Used in leaner products and may replace use of lower quantities of sugar

© 2009 Cengage Learning. All Rights Reserved.
CHAPTER
6
Dough Conditioners:Enzymes
• Protease
• Break down gluten forming proteins: reducing agent
• Improves volume, but limits gas retention
• Best used to improve extensibility in products like laminated dough, puff pastry, pizza dough and crackers

© 2009 Cengage Learning. All Rights Reserved.
CHAPTER
6
Dough Conditioners:Enzymes
• Hemicellulase
• Break down and transform insoluble pentosans into soluble pentosans
• Improves gluten structure, workability and gas retention
• Finished products will have larger volume
© 2009 Cengage Learning. All Rights Reserved.
CHAPTER
6
Dough Conditioners:Enzymes
• Glucose Oxidase
• Converts glucose into gluconic acid (byproduct is hydrogen peroxide)
• Acts as oxidizer, increasing dough strength
• May be used to replace potassium bromate or ascorbic acid

© 2009 Cengage Learning. All Rights Reserved.
CHAPTER
6
Dough Conditioners:Enzymes
• Lipase
• Modify structure of lipids to improve gluten performance
• Some lipase transform fat into emulsifiers (similar to SSL or DATEM use)
• Use is limited to lean dough

© 2009 Cengage Learning. All Rights Reserved.
CHAPTER
6
Dough Conditioners• Enzymes- Usage Level
• Enzymes are typically blended for multipurpose usage
• Baking tests should be carried out to establish proper usage levels in conjunction with specific ingredients

© 2009 Cengage Learning. All Rights Reserved.
CHAPTER
6
Dough Conditioners• Fillers
• Using small quantities of highly concentrated ingredients can be challenging on a large level
• Blends are often made to make usage easier
• Common fillers include wheat and starch and should have no noticeable effect on the dough

© 2009 Cengage Learning. All Rights Reserved.
CHAPTER
6
Dough Conditioners• Dough Conditioner Conclusion
• Baker needs full knowledge of product for most effective usage
• Precision is a must in preparation
• Dough conditioners are not always necessary, however can aid in production and product quality issues
© 2009 Cengage Learning. All Rights Reserved.
CHAPTER
6
Chapter Conclusion• Flour is the main component of bread making
• Ingredient characteristics influence product characteristics
• The baker’s knowledge of flour can assist in the baking process
• The use of dough conditioners can aid in the baking process, if properly used