year 6 spirals project - lancsngfl.ac.uk6+spirals+project.doc · web viewcopies of the concentric...
TRANSCRIPT

YEAR 6 SPIRALS PROJECT
INTRODUCTION
This project is intended to encourage pupils to
Appreciate and be inspired by the beauty of mathematics. Enjoy working on mathematical activities Look for mathematics in the world in which they live. Discuss and apply different aspects of mathematics and develop the use of
mathematical vocabulary in the context of spirals.
The project is primarily concerned with consolidation of mathematical knowledge and applying this knowledge to new situations. It is intended that pupils of all abilities will be able to complete the activities, though the amount of support needed and the outcomes will vary. There is the opportunity to develop this into a cross–curricular project by developing the theme of ‘Spirals’ in other subjects.
The project is presented as a whole project using different activities rather than a series of individual lessons. It is intended that teachers will make their own decisions about how they wish to divide up the activities. Teachers may choose to use the activities as presented in the project, but they are encouraged to develop this project using their own ideas in order to provide an interesting and worthwhile learning experience for the pupils they teach.
LEARNING OBJECTIVES
Using and Applying Mathematics
Solve multi-step problems, and problems involving fractions, decimals and percentages; choose and use appropriate calculation strategies at each stage, including calculator use (Y6)
Tabulate systematically the information in a problem or puzzle; interpret solutions in the original context and check their accuracy (Y6)
Suggest, plan and develop lines of enquiry; collect, organise and present information, interpret results and review methods; identify and answer related questions (Y6)
Represent and interpret sequences, patterns and relationships involving numbers and shapes; suggest and test hypotheses; (Y6)
Explain reasoning and conclusions, using words, symbols or diagrams as appropriate (Y6)
Develop and evaluate lines of enquiry; identify, collect, organise and analyse relevant information; decide how best to represent conclusions and what further questions to ask (Y6/7)
1

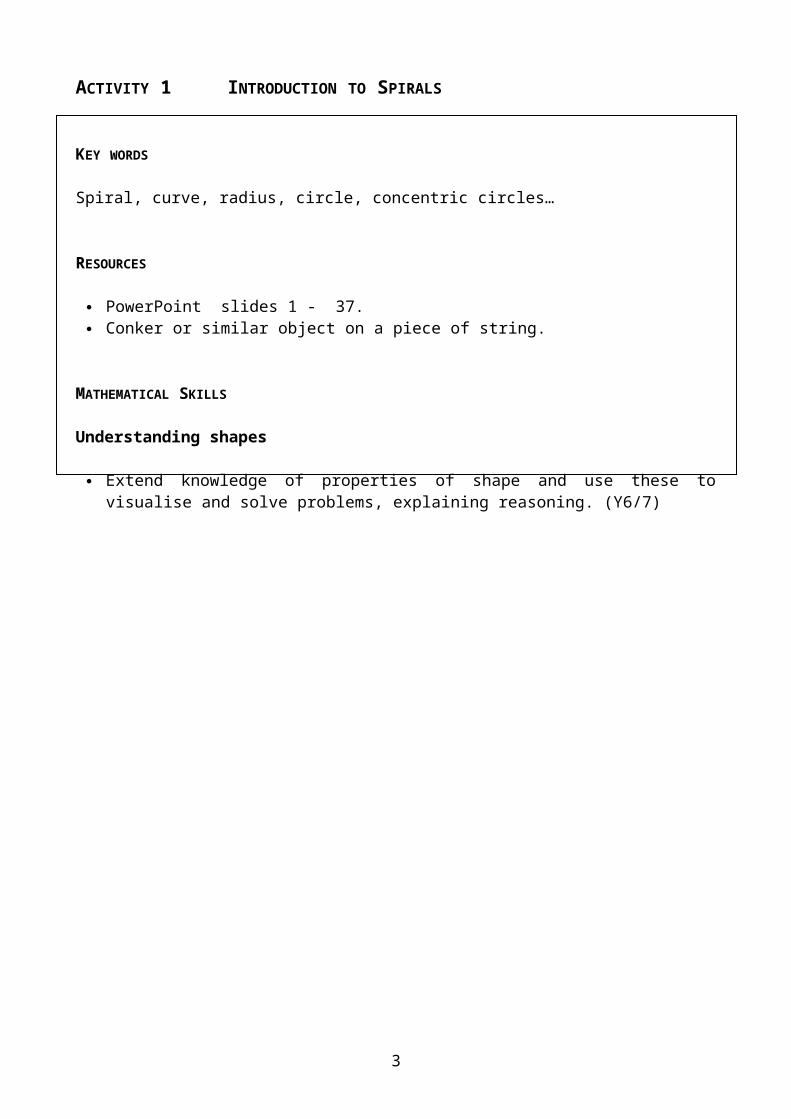
ACTIVITY 1 INTRODUCTION TO SPIRALS
KEY WORDS
Spiral, curve, radius, circle, concentric circles…
RESOURCES
PowerPoint slides 1 - 37. Conker or similar object on a piece of string.
MATHEMATICAL SKILLS
Understanding shapes
Extend knowledge of properties of shape and use these to visualise and solve problems, explaining reasoning. (Y6/7)
2
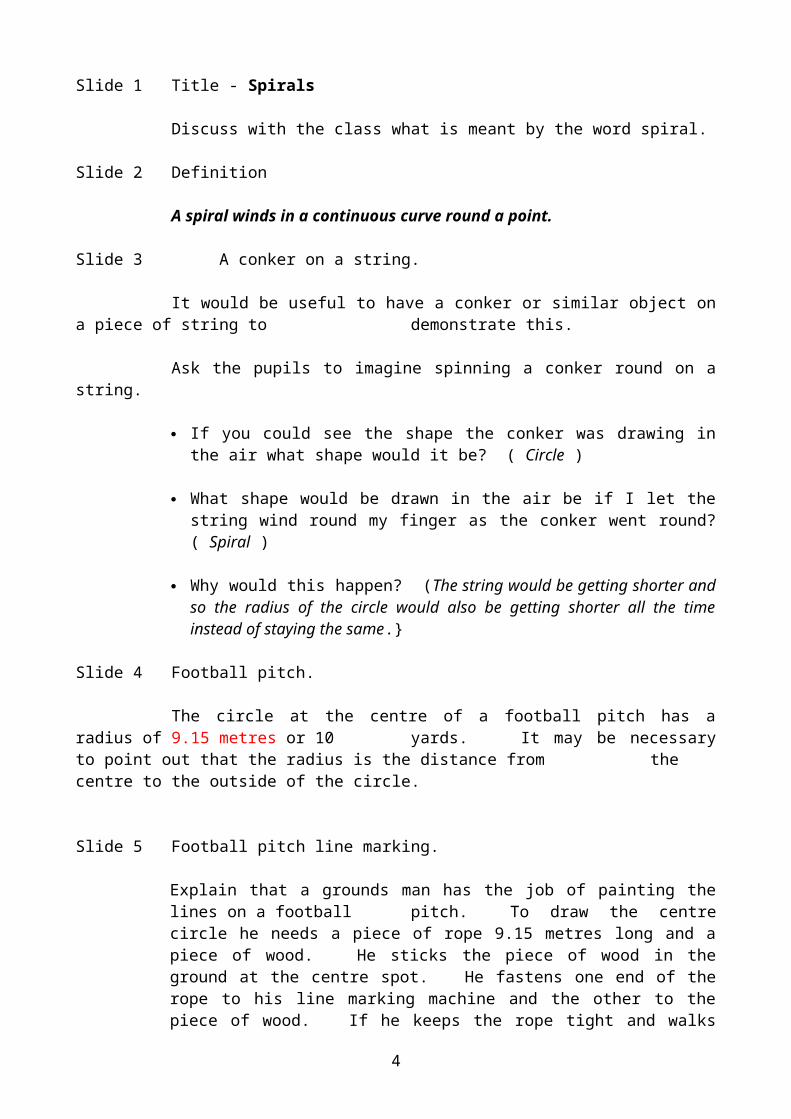
Slide 1 Title - Spirals
Discuss with the class what is meant by the word spiral.
Slide 2 Definition
A spiral winds in a continuous curve round a point.
Slide 3 A conker on a string.
It would be useful to have a conker or similar object on a piece of string to demonstrate this.
Ask the pupils to imagine spinning a conker round on a string.
If you could see the shape the conker was drawing in the air what shape would it be? ( Circle )
What shape would be drawn in the air be if I let the string wind round my finger as the conker went round? ( Spiral )
Why would this happen? (The string would be getting shorter and so the radius of the circle would also be getting shorter all the time instead of staying the same.}
Slide 4 Football pitch.
The circle at the centre of a football pitch has a radius of 9.15 metres or 10 yards. It may be necessary to point out that the radius is the distance from the centre to the outside of the circle.
Slide 5 Football pitch line marking.
Explain that a grounds man has the job of painting the lines on a football pitch. To draw the centre circle he needs a piece of rope 9.15 metres long and a piece of wood. He sticks the piece of wood in the ground at the centre spot. He fastens one end of the rope to his line marking machine and the other to the piece of wood. If he keeps the rope tight and walks round the stick with his machine he will draw a perfect circle with a radius of 9.15 metres.
What shape would the grounds man draw if the rope wrapped itself round the stake at the centre as he walked round? (Spiral)
Why would this happen? (The rope would be getting shorter and so the radius of the circle would also be getting shorter all the time instead of staying the same.}
Slide 6 Some spirals are man made. Others are found in natural things such as plants and animals.
3
Slides 7–37 (Details of the picture are written in the notes under each slide. These can be printed off to help the teacher to lead class discussion if required.)
These slides show examples of natural and man made spirals and provide an opportunity for class discussion. Pupils could be asked if they can think of any other examples of spirals they have seen. They may also provide ideas for some cross curricular spiral activities.
As an ICT task pupils could be asked to produce a poster or apresentation of their own showing examples of spirals in the world around them. ‘Google images’ is a useful source for this.
The appendix includes a template that can be used for writing spiral poems. (See Slide 10)
4

ACTIVITY 2 DRAWING SPIRALS USING CIRCLES
KEY WORDS
Spiral, circle, radius, sector, angle, full turn, degrees, centimetre, factor, multiple, clockwise, anticlockwise, protractor…
RESOURCES
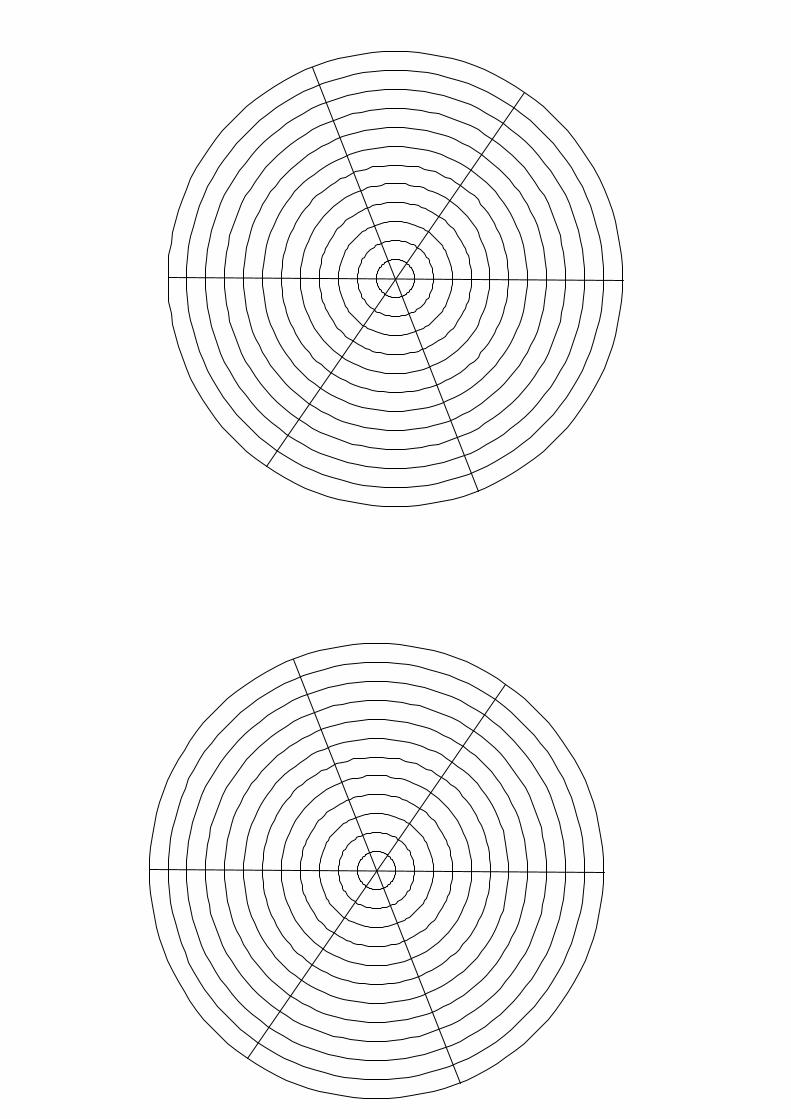
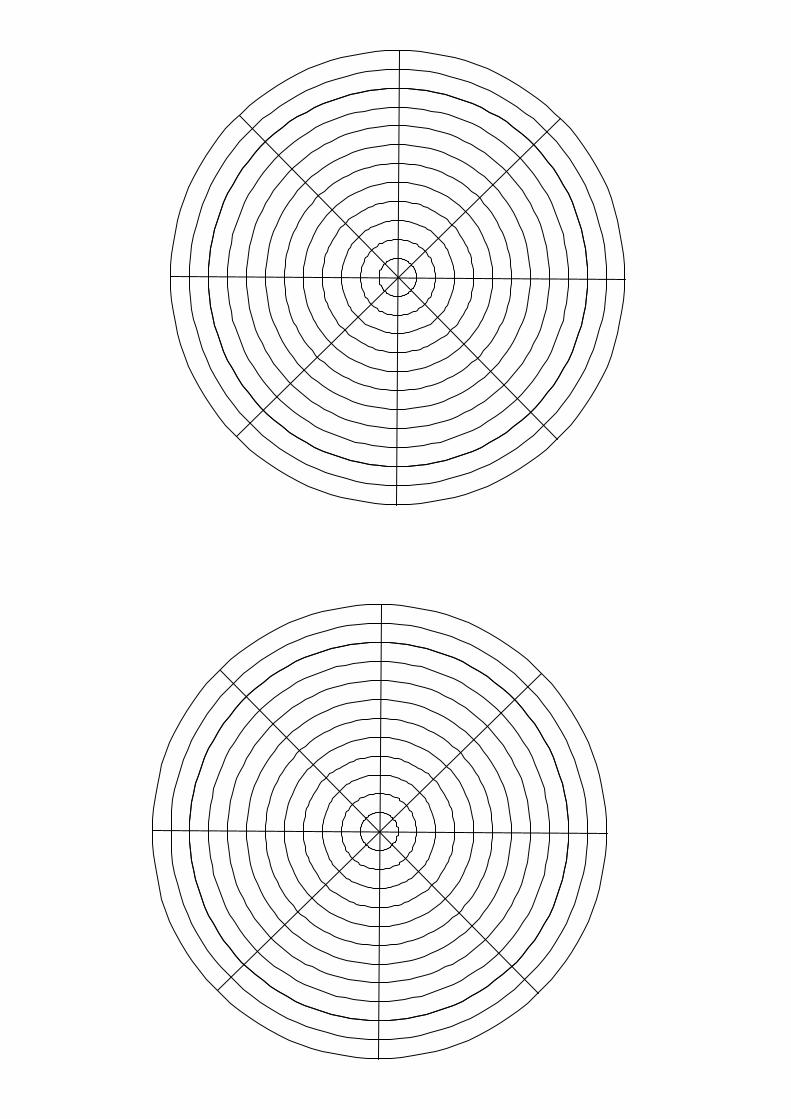
PowerPoint slides 38 - 65. Copies of the concentric circles divided into 6 and 8 sectors for each pupil. (See
Appendix) Rulers. Coloured pens or pencils. Protractors. (preferably 360 rather than 180) Plain paper.
MATHEMATICAL SKILLS
Counting and understanding number
Recognise proportions of a whole and use fractions to describe them. (Y6/7)
Knowing and Using Number Facts
Identify pairs of factors of whole numbers. (Y5) Recall quickly multiplication facts and use them to multiply pairs of multiples of 10 and
100; derive quickly corresponding division facts. (Y5)
Calculating
Consolidate and extend mental methods of calculation. (Y6/7)
Understanding Shape
Know the sum of the angles at a point. (Y6) Draw and measure lines to the nearest millimetre. (Y5)
Measuring
Solve problems by measuring. (Y6/7)
5
Slide 38 Title – Spirals in Circles.
Slide 39 Archimedean Spiral.
In this activity the pupils will draw spirals similar to an Archimedean spiral but using straight lines instead of curves.
Slide 40 Archimedes was a mathematician who lived in Greece from 287 BC to 212 BC.
Slide 41 Map showing Greece.
Slide 42 Archimedes drew a spiral by pulling the legs of a pair of compassesapart while turning the compasses.
Slide 43 Circles that are one inside the other and have the same centre arecalled concentric circles.
Explain that the pupils will be using concentric circles to help them to draw spirals.
Slide 44 Concentric circles divided into six sectors.
How many degrees are there in a full turn? (360)
How can we find out how many degrees there are in each of the six angles at the centre of the circle? (The angles are all the same and add up to 360. 360 6 = 60)
How many degrees are there in each of the angles at the centre of the circle? (60)
Slide 45–48 These slides demonstrate how to draw a spiral. Start at the point where oneof the radii crosses the outside circle. Using a coloured pencil or pen and moving clockwise, draw a line to the point where the next radius meets the second circle. Continue as shown on the slides to the centre of the circles.
Slide 49 Another spiral can be drawn in the same way starting at the point where another radius meets the outside circle.
Slides 50-51 This can be continue until six spirals have been drawn.
Slides 52-53 Similar spirals can be drawn on the concentric circles dividedinto eight sectors.
How many degrees are there in a full turn? (360)
How can we find out how many degrees there are in each of the eight angles at the centre of the circle? (The angles are all the same and add up to 360. 360 8 = 45)
6
How many degrees are there in each of the angles at the centre of the circle? (45)
Slides 54-57 Spiral patterns can be produced by drawing spirals going both clockwise and anticlockwise on the same diagram.
In the next part of this activity pupils will work on plain paper designing their own spirals without having the circles and radii to guide them.
Discuss the angles at the centre of the circles the pupils have already used i.e. 6 angles of 60 and 8 angles of 45.
What other angles could we have that would make a complete turn? (e.g. 12 angles of 30 etc)
This could lead to some whole class counting from 0 to 360 in numbers relating to the problem.
e.g. 0 , 30 , 60 , 90 , 120 , … 360 0 , 20 , 40 , 80 , 100 , … , 360 0 , 36 , 72 , 108 , 144 , …360 Etc
Slide 58 The pupils will need to use a protractor. A 180 protractor could be used but a 360 protractor is more suitable. The pupils need to decide how many degrees there will be between each of the “radii”. It is important that the pupils begin by putting a dot on the paper on which they will place the centre of the protractor. It is helpful to start with 0on the protractor at the top of the page.
Slides 59-60 e.g. If a pupil has decided to have 8 angles of 40 each, he/she would need to begin by marking 0 then 36, 72, … , 324 .
Slide 60 The pupils need to draw lines of equal length, say 8cm, from the centre through each of the marked points. These lines should be drawn faintly in pencil.
At this point the class could practice counting in halves from 0…
0 , ½, 1 , 1½ , 2 , 2½ , 3 , 3½ , …
Slides 61- 65 These slides show the construction of a spiral. Mark the end of the first line. Moving clockwise to the next line, put a mark ½cm from the end of the line. On the next line mark 1 cm from the end then 1½cm etc. Continue until the centre point is reached. The points should then be joined with a coloured pen or pencil. The number of lines making up the spiral will depend on the length of the construction lines. Construction lines can be erased when the spiral is complete.
7
This activity can be developed by using the same construction lines and adding new spirals or by drawing spirals with angles of different sizes at the centre point.
8
ACTIVITY 3 DRAWING SPIRALS USING SQUARES
KEY WORDS
Fraction, numerator, denominator, square, triangle, right-angled triangle, midpoint, centimetre, area, regular polygon…
RESOURCES
PowerPoint slides 66 – 81. Centimetre squared paper. 30 centimetre rulers. Pencils. Baravelle spiral recording sheet (Appendix). Coloured pencils. Calculators. Regular polygon templates.
MATHEMATICAL SKILLS
Counting and Understanding Number
Recognise approximate proportions of a whole and use fractions, decimals and percentages to describe and compare them for example when calculating areas. (Y6/7)
Knowing and using number facts
Use knowledge of multiplication facts to 10 x 10 to derive related multiplication facts. (Y6)
.Calculating
Calculate mentally with integers and decimals. (Y6) Use a calculator to solve problems. (Y6) Find fractions of whole number quantities relating fractions to division. (Y6) Consolidate and extend mental methods of calculation. (Y6/7)
Understanding Shape
Make and draw shapes with increasing accuracy and apply knowledge of their properties.(Y6)
Extend knowledge of properties of triangles and quadrilaterals and use these to visualise and solve problems, explaining reasoning with diagrams. (Y6/7)
Measuring
Solve problems, including area by measuring estimating and calculating. (Y6/7) Draw and measure lines to the nearest millimetre. (Y5)
9
Slide 66 Title – Spirals in squares.
Slide 67 Fractions of a whole activity. At this point it would be useful to check that all of the pupils are able to identify what fraction of a square has been shaded. There are 6 squares on the slide which appear one at a time on a mouse click. After each square appears ask the pupils how much of the square is yellow. In each case the answer will appear on a mouse click. For the first few squares the pupils could be asked to say how much of the square is coloured as a decimal number and as a percentage, but these becomedifficult numbers for the 5th and 6th squares.
Slide 68 Ask the pupils to continue the sequence of numbers and allow few minutes to do this. Some pupils will be able to go further than others with this. Ask them to write down a rule e.g. the numerator is always one and the denominator doubles each time. After pupils have written their ideas down some class discussion of this would be useful. The first three terms in the sequence are given. The next 6 will appear individually on a mouse click.
Slide 69 Introduction to Baravelle spirals – picture of complete spirals.
Slide 70 Ask the pupils to draw a square with sides 16cm long on centimetre squared paper. This can be done on centimetre squared paper. A template for this in included in the appendix and can be used if preferred.
Discuss the area of the square. There is an opportunity here to revise ideas associated with area. Discussion can include asking why multiplying 16 by 16 will give the area of the square and different ways in which 16 16 can calculated.
What do we mean by area?
What kind of units are used to measure area?
How can we find the area of the square?
What is the area of the square? ( 256 cm2 )
Pupils could keep a record of the size of each successive square to enable them to see the pattern in the numbers. A table has been provided for this in the appendix. This table can be continued beyond the number of squares drawn. This can be differentiated by asking more able pupils to complete more of the table. A calculator may be useful particularly for those extending the table. Pupils could work on this activity in pairs.
Slide 71 Ask the pupils to mark the midpoint of each side of the square.
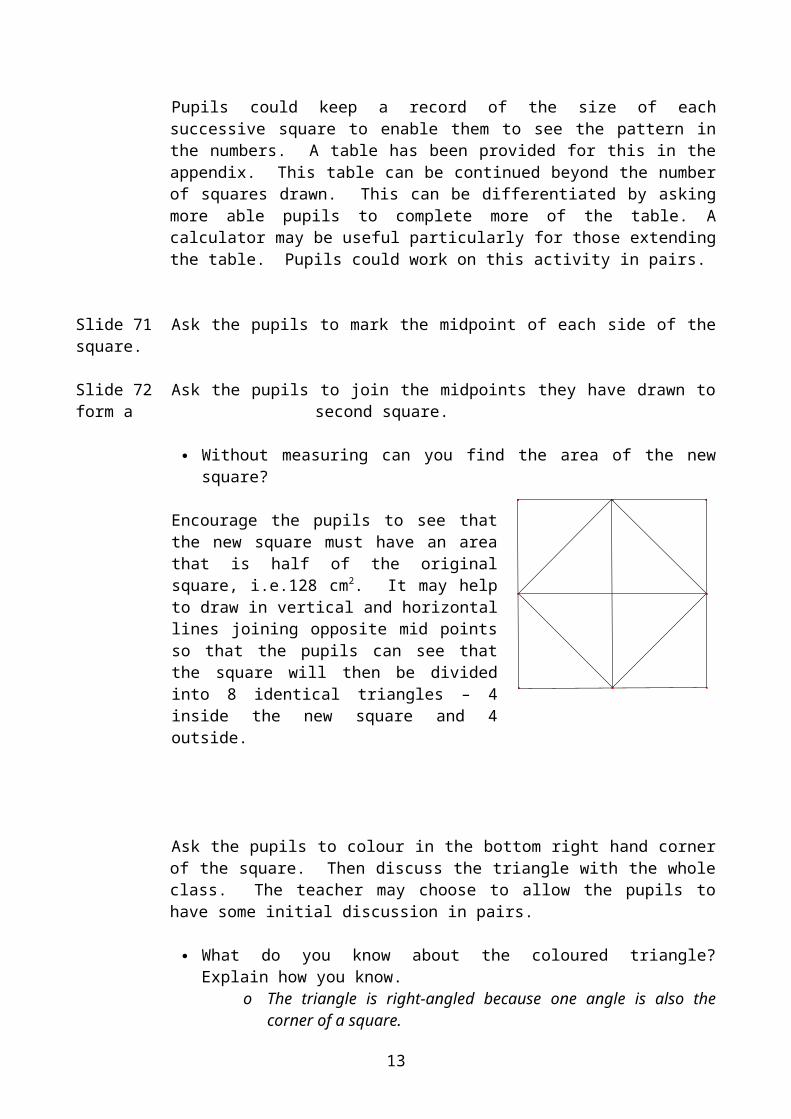
Slide 72 Ask the pupils to join the midpoints they have drawn to form a second square.
Without measuring can you find the area of the new square?
10
Encourage the pupils to see that the new square must have an area that is half of the original square, i.e.128 cm2. It may help to draw in vertical and horizontal lines joining opposite mid points so that the pupils can see that the square will then be divided into 8 identical triangles – 4 inside the new square and 4 outside.
Ask the pupils to colour in the bottom right hand corner of the square. Then discuss the triangle with the whole class. The teacher may choose to allow the pupils to have some initial discussion in pairs.
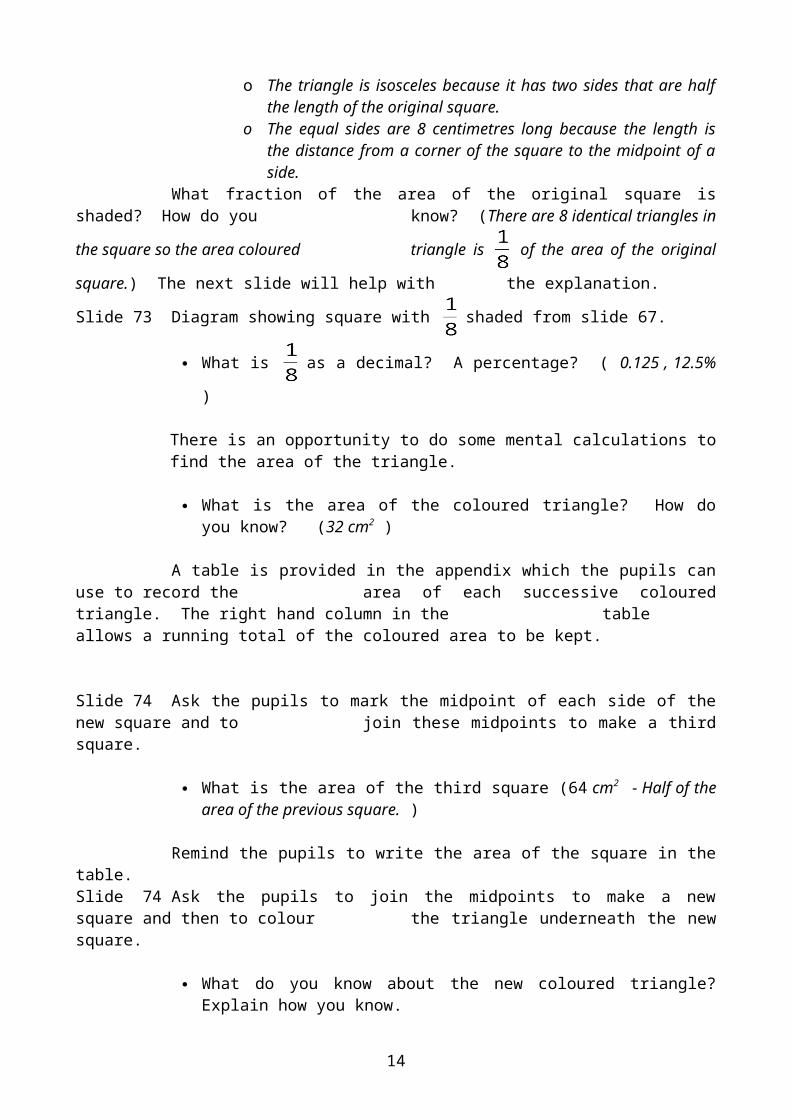
What do you know about the coloured triangle? Explain how you know.o The triangle is right-angled because one angle is also the
corner of a square.o The triangle is isosceles because it has two sides that are half
the length of the original square. o The equal sides are 8 centimetres long because the length is
the distance from a corner of the square to the midpoint of a side.
What fraction of the area of the original square is shaded? How do you know? (There are 8 identical triangles in the square so the area coloured
triangle is of the area of the original square.) The next slide will help with
the explanation.
Slide 73 Diagram showing square with shaded from slide 67.
What is as a decimal? A percentage? ( 0.125 , 12.5% )
There is an opportunity to do some mental calculations to find the area of the triangle.
What is the area of the coloured triangle? How do you know? (32 cm2 )
A table is provided in the appendix which the pupils can use to record the area of each successive coloured triangle. The right hand column in the table allows a running total of the coloured area to be kept.
Slide 74 Ask the pupils to mark the midpoint of each side of the new square and to join these midpoints to make a third square.
What is the area of the third square (64 cm2 - Half of the area of the previous square. )
Remind the pupils to write the area of the square in the table.
11
Slide 74 Ask the pupils to join the midpoints to make a new square and then to colour the triangle underneath the new square.
What do you know about the new coloured triangle? Explain how you know.
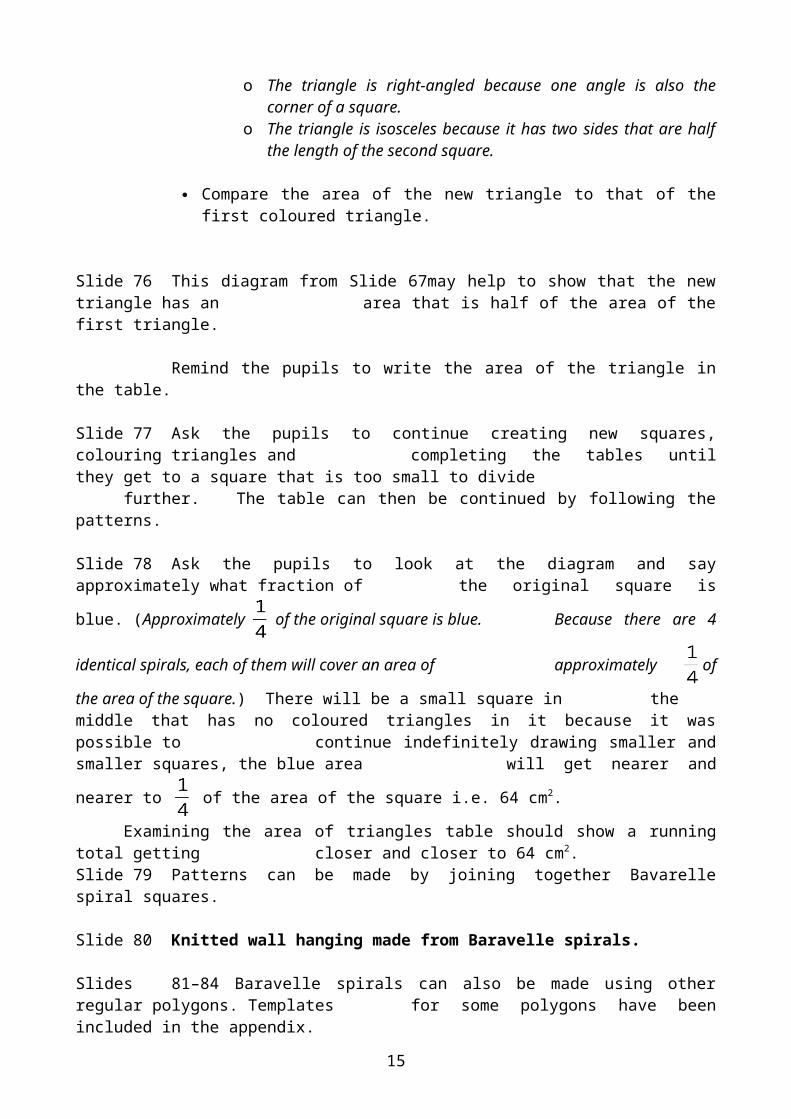
o The triangle is right-angled because one angle is also the corner of a square.
o The triangle is isosceles because it has two sides that are half the length of the second square.
Compare the area of the new triangle to that of the first coloured triangle.
Slide 76 This diagram from Slide 67may help to show that the new triangle has an area that is half of the area of the first triangle.
Remind the pupils to write the area of the triangle in the table.
Slide 77 Ask the pupils to continue creating new squares, colouring triangles and completing the tables until they get to a square that is too small to divide further. The table can then be continued by following the patterns.
Slide 78 Ask the pupils to look at the diagram and say approximately what fraction of
the original square is blue. (Approximately of the original square is blue.
Because there are 4 identical spirals, each of them will cover an area of
approximately of the area of the square.) There will be a small square in
the middle that has no coloured triangles in it because it was possible to continue indefinitely drawing smaller and smaller squares, the blue area
will get nearer and nearer to of the area of the square i.e. 64 cm2.
Examining the area of triangles table should show a running total getting closer and closer to 64 cm2.
Slide 79 Patterns can be made by joining together Bavarelle spiral squares.
Slide 80 Knitted wall hanging made from Baravelle spirals.
Slides 81–84 Baravelle spirals can also be made using other regular polygons. Templates for some polygons have been included in the appendix.
12
ACTIVITY 4 DRAWING FIBONACCI SPIRALS
KEY WORDS
Fibonacci sequence, semicircle, arc, square, rectangle, area…
RESOURCES
PowerPoint slides 85 105. 30 cm ruler. Pencil. Squared paper. (Appendix) Compasses.
MATHEMATICAL SKILLS
Knowing and using number facts
Use knowledge of multiplication facts to derive quickly squares of numbers to 12×12 and the corresponding squares of multiples of 10. (Y6)
Calculating
Calculate mentally with integers. (Y6)
Understanding Shape
Make and draw shapes with increasing accuracy and apply knowledge of their properties.
13
Slide 85 Title – The Fibonacci Spiral.
Slide 86 Leonardo of Pisa (1170 – 1250 AD) was an Italian mathematician. He is sometimes called Fibonacci.
Fibonacci is famous for helping to spread the Hindu Arabic numbers in Europe. These numbers replaced the Roman number system.
Slide 87 Map of Italy.
Slide 88 This slide gives the first five numbers of the Fibonacci sequence. Ask the pupils to look at these numbers and to say what the next number in the sequence will be. The next four numbers will appear on a mouse click. Discourage pupils who have seen the pattern from explaining it until all the numbers have appeared to give all of the pupils time to see the pattern. The next number in the sequence is found by adding the two previous numbers.When all of the sequence has been revealed ask someone to explain how the sequence is produced. Pupils could be asked to continue the sequence to say 15 or 20 terms.
Slide 89 Fibonacci numbers can be found in many places, for example the number of petals on a flower is often a Fibonacci number.
Slide 90 The numbers in the Fibonacci sequence can be used to form a spiral. This spiral can be found in natural things and is sometimes called the golden spiral.
Slide 91 Fibonacci numbers in a spiral.
Slide 92 The following sequence of slides shows how to construct a Fibonacci spiral. This is easiest to produce if 1cm squared paper is used. Squared paper is provided in the appendix. A page has been provided with the first two squares drawn in so that the pupils know where to begin to fit the spiral on the page. Pupils may find it helpful to have a list of Fibonacci numbers available while they are working on this spiral. There is the opportunity to discuss square numbers and the area of squares in this activity.
Remind the pupils of the numbers in the Fibonacci sequence…
0 , 1 , 1 , 2 , 3 , 5 , 8 , 13 , 21 , 34 , 55 , …
Explain that it is not possible to draw a square with side length 0cm so the first two squares each have side length 1 cm.
Slide 93 Ask the pupils to continue by drawing a square with side length 2cm to the left of the two squares.
Slide 94 The next square has side length 5cm and is drawn above the existing rectangle and then a square with side length 8cm is drawn to the right. It is important that the pupils understand that they must move clockwise each time they add a square.
14
Slide 95 Ask the pupils to continue to draw squares until they are unable to fit any more on the page.
Slide 96 The pupils will now use compasses and the squares they have drawn to produce a Fibonacci spiral. A dot and a cross have been marked on the pupils sheet to shown them the position of the centre of the arc.
Ask the pupils to set the compasses at 1 cm and placing the compasses on the dot to draw a semi circle as shown on the slide.
Slide 97 The second arc has a radius of 2cm and a cross has been drawn to mark the position of the point of the compasses.
Slide 98 This arc has a radius of 3cm.
Slide 99 This arc has a radius of 5cm.
Slide 100 The pupils should draw the remaining arcs to complete the spiral.
Slide 101 Pupils who have completed the spiral on the 1cm squared paper could try to draw a Fibonacci spiral on 0.5 cm squares so that more of the spiral can be drawn. A sheet with the starting squares marked on is available in the appendix.
Slide 102 Completed Fibonacci spiral drawn on 0.5 cm squared paper.
Slide 103 Fibonacci spiral with coloured squares. This could be used to discuss the area of each of the squares.
Slide 104 Fibonacci spiral drawn on a picture of a chameleon’s tail.
Slide 105 Fibonacci spiral drawn on a picture of an ear.
Slide 106 This slide shows the three types of spiral the pupils have drawn in this project. This provides a focus for an end of topic discussion on the work that has been covered, the mathematics that has been used and the things that have been learned. Seeking the views of the pupils about the project overall and the extent to which they have learned from it and enjoyed the activities would help in the evaluation of the project and inform future planning.
15

Appendix
Baravelle Spiral
Area of square 1 cm2
Area of square 2 cm2
Area of square 3 cm2
Area of square 4 cm2
Area of square 5 cm2
Area of square 6 cm2
Area of square 7 cm2
Area of square 8 cm2
Area of square 9 cm2
Area of square 10 cm2
Area of square 11 cm2
Area of square 12 cm2
Area of square 13 cm2
Area of square 14 cm2
Area of square 15 cm2
Running TotalArea of triangle 1 cm2 cm2
Area of triangle 2 cm2 cm2
Area of triangle 3 cm2 cm2
Area of triangle 4 cm2 cm2
Area of triangle 5 cm2 cm2
Area of triangle 6 cm2 cm2
Area of triangle 7 cm2 cm2
Area of triangle 8 cm2 cm2
Area of triangle 9 cm2 cm2
Area of triangle 10 cm2 cm2
Area of triangle 11 cm2 cm2
Area of triangle 12 cm2 cm2
Area of triangle 13 cm2 cm2
Area of triangle 14 cm2 cm2
Area of triangle 15 cm2 cm2
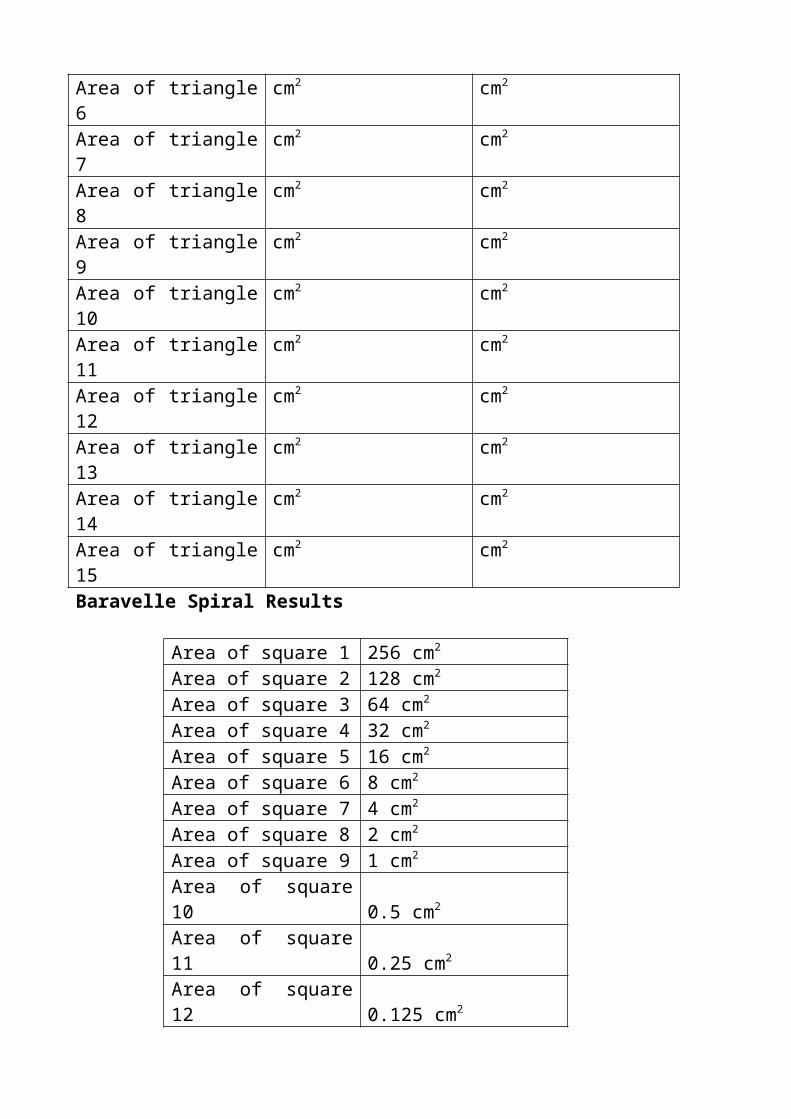
Baravelle Spiral Results
Area of square 1 256 cm2
Area of square 2 128 cm2
Area of square 3 64 cm2
Area of square 4 32 cm2
Area of square 5 16 cm2

Area of square 6 8 cm2
Area of square 7 4 cm2
Area of square 8 2 cm2
Area of square 9 1 cm2
Area of square 10 0.5 cm2
Area of square 11 0.25 cm2
Area of square 12 0.125 cm2
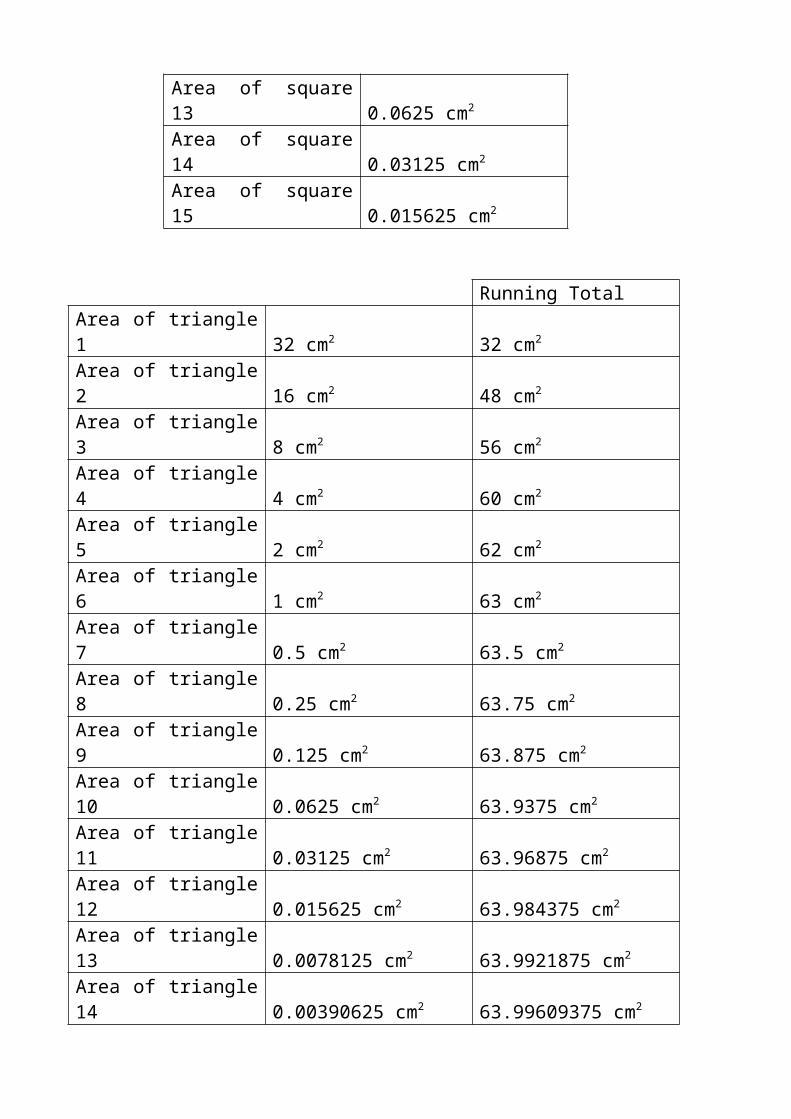
Area of square 13 0.0625 cm2
Area of square 14 0.03125 cm2
Area of square 15 0.015625 cm2
Running TotalArea of triangle 1 32 cm2 32 cm2
Area of triangle 2 16 cm2 48 cm2
Area of triangle 3 8 cm2 56 cm2
Area of triangle 4 4 cm2 60 cm2
Area of triangle 5 2 cm2 62 cm2
Area of triangle 6 1 cm2 63 cm2
Area of triangle 7 0.5 cm2 63.5 cm2
Area of triangle 8 0.25 cm2 63.75 cm2
Area of triangle 9 0.125 cm2 63.875 cm2
Area of triangle 10 0.0625 cm2 63.9375 cm2
Area of triangle 11 0.03125 cm2 63.96875 cm2
Area of triangle 12 0.015625 cm2 63.984375 cm2
Area of triangle 13 0.0078125 cm2 63.9921875 cm2
Area of triangle 14 0.00390625 cm2 63.99609375 cm2
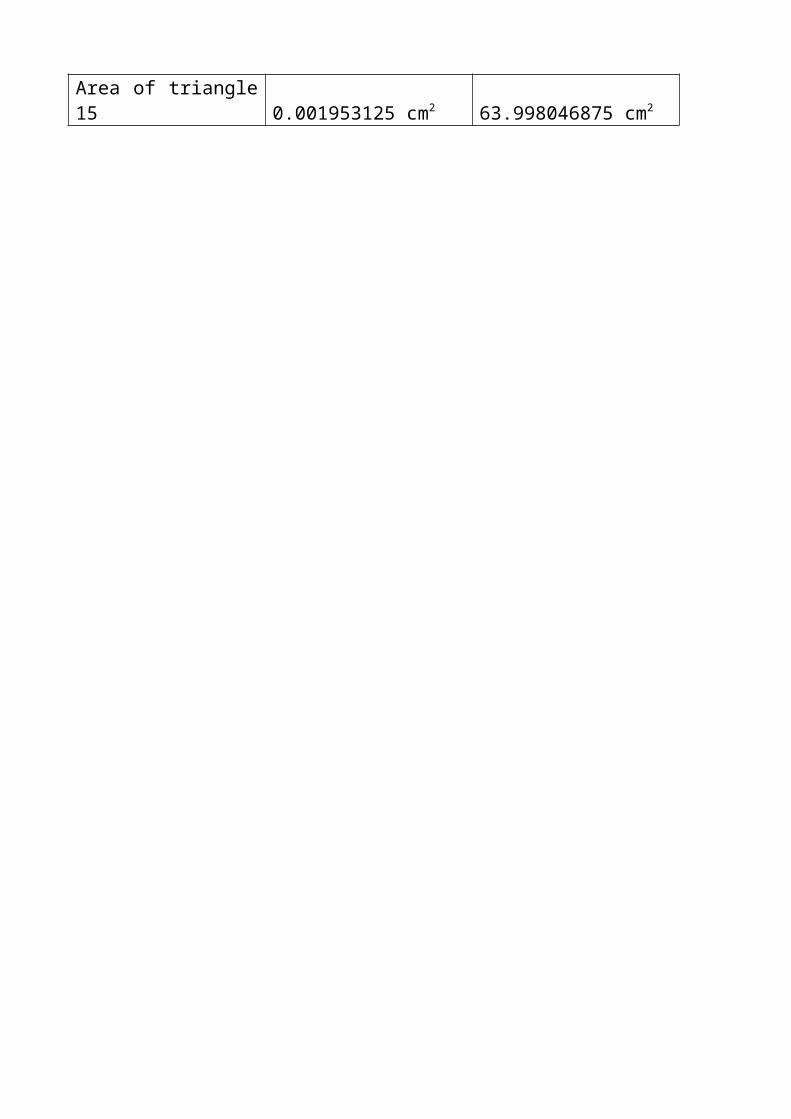
Area of triangle 15 0.001953125 cm2 63.998046875 cm2