windows server on azure: lab guide · pdf filewindows server on azure: lab guide ... exercise...
TRANSCRIPT

Spektra Systems LLC. Page 1 of 63
Windows Server on Azure: Lab Guide
Overview This lab guide will help you in creating a Windows Server VM, doing basic management operations
and taking backup of Virtual Machine on Azure.
Conditions and Terms of Use
This content is made available for community use. Accuracy of the information in the content is up-
to date as of 20th April 2017. Permission is hereby granted, free of charge, to any person obtaining
a copy of this document and associated files to deal in the document without restriction, including
without limitation the rights to use, copy, modify, merge, publish, distribute, sublicense, and/or sell
copies of the Document, and to permit persons to whom the Document is furnished to do so,
subject to the following conditions:
The above copyright notice and this permission notice shall be included in all copies or substantial
portions of the document.
THE DOCUMENT IS PROVIDED "AS IS", WITHOUT WARRANTY OF ANY KIND, EXPRESS OR IMPLIED,
INCLUDING BUT NOT LIMITED TO THE WARRANTIES OF MERCHANTABILITY, FITNESS FOR A
PURPOSE AND NONINFRINGEMENT. IN NO EVENT, SHALL THE AUTHORS OR COPYRIGHT
HOLDERS BE LIABLE FOR ANY CLAIM, DAMAGES OR OTHER LIABILITY, WHETHER IN AN ACTION OF
CONTRACT, TORT OR OTHERWISE, ARISING FROM, OUT OF OR IN CONNECTION WITH THE
SOFTWARE OR THE USE OR ANOTHER DEALINGS IN THE SOFTWARE.
Contents Windows Server on Azure: Lab Guide ................................................................................................................................. 1
Overview .............................................................................................................................................................. 1
Lab 1: Getting Started with Azure ......................................................................................................................................... 3
Lab Overview........................................................................................................................................................ 3
Prerequisites ........................................................................................................................................................ 3
Time Estimate ...................................................................................................................................................... 3
Exercise 1: Log into your Azure Portal ................................................................................................................. 4
Exercise 2: Verify access to the Subscription ....................................................................................................... 5

Spektra Systems LLC. Page 2 of 63
Lab 2: Create Windows Virtual Machine ............................................................................................................................ 8
Lab Overview........................................................................................................................................................ 8
Prerequisites ........................................................................................................................................................ 8
Time Estimate ...................................................................................................................................................... 8
Exercise 1: Create a Storage account ................................................................................................................... 9
Exercise 2: Create a Virtual Network ................................................................................................................. 14
Exercise 3: Create a Network Security Group .................................................................................................... 17
Exercise 4: Create a Public IP Address................................................................................................................ 23
Exercise 5: Create the Virtual Machine .............................................................................................................. 27
Exercise 6: Verify the deployed resources ......................................................................................................... 35
Lab 3: Connect to the Virtual Machine .............................................................................................................................38
Lab Overview...................................................................................................................................................... 38
Prerequisites ...................................................................................................................................................... 38
Time Estimate .................................................................................................................................................... 38
Exercise 1: Connect to Windows Server VM ................................................................................................... 38
Exercise 2: Power Operations on Virtual Machine ............................................................................................. 43
Lab 4: Managing Virtual Machines .....................................................................................................................................45
Exercise 1: Resize Virtual Machine ..................................................................................................................... 45
Exercise 2: Monitoring & Boot Diagnostics of Virtual Machine ......................................................................... 47
Exercise 3: Backup Virtual Machine ................................................................................................................... 55

Spektra Systems LLC. Page 3 of 63
Lab 1: Getting Started with Azure Lab Overview This lab will take you through Azure login and portal experience.
Prerequisites • Windows or a Mac machine with HTML5 supported browser such as Microsoft Edge, Internet
Explorer, Chrome or Firefox
• You should have registered in the training portal https://azuretraining.spektrasystems.com and
received the confirmation message with the credentials to login to the Azure portal.
Time Estimate 5 minutes

Spektra Systems LLC. Page 4 of 63
Exercise 1: Log into your Azure Portal In this exercise, you will log into the Azure Portal using your Azure credentials.
1. Launch a browser and Navigate to https://portal.azure.com. Provide the credentials that you
received via email. Click on Sign In.
Note : At the first login, you may have to change the password, if asked for.
2. Enter a new password. Then select Update password and sign in.

Spektra Systems LLC. Page 5 of 63
3. Now, you will be directed to the Azure Dashboard
Exercise 2: Verify access to the Subscription In this exercise, you will verify the type of role you are assigned in this Subscription.
1. Launch a browser and Navigate to https://portal.azure.com. Login with your Microsoft Azure
credentials.
Spektra Systems LLC. Page 6 of 63
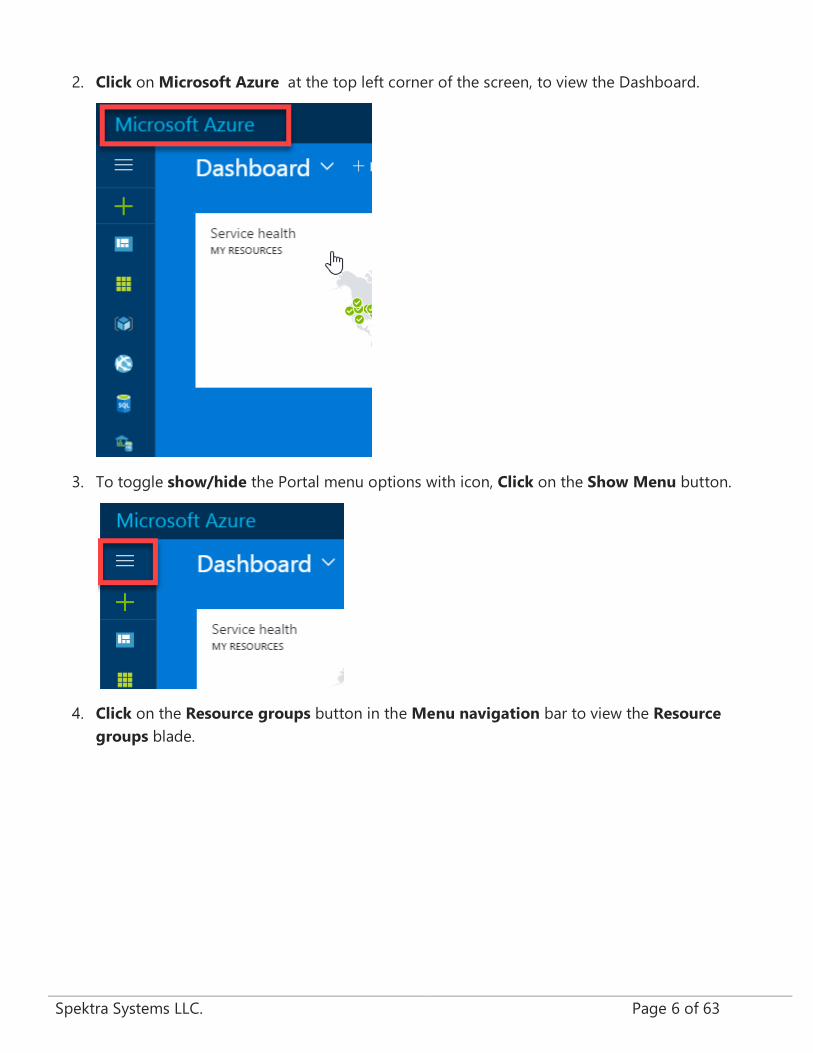
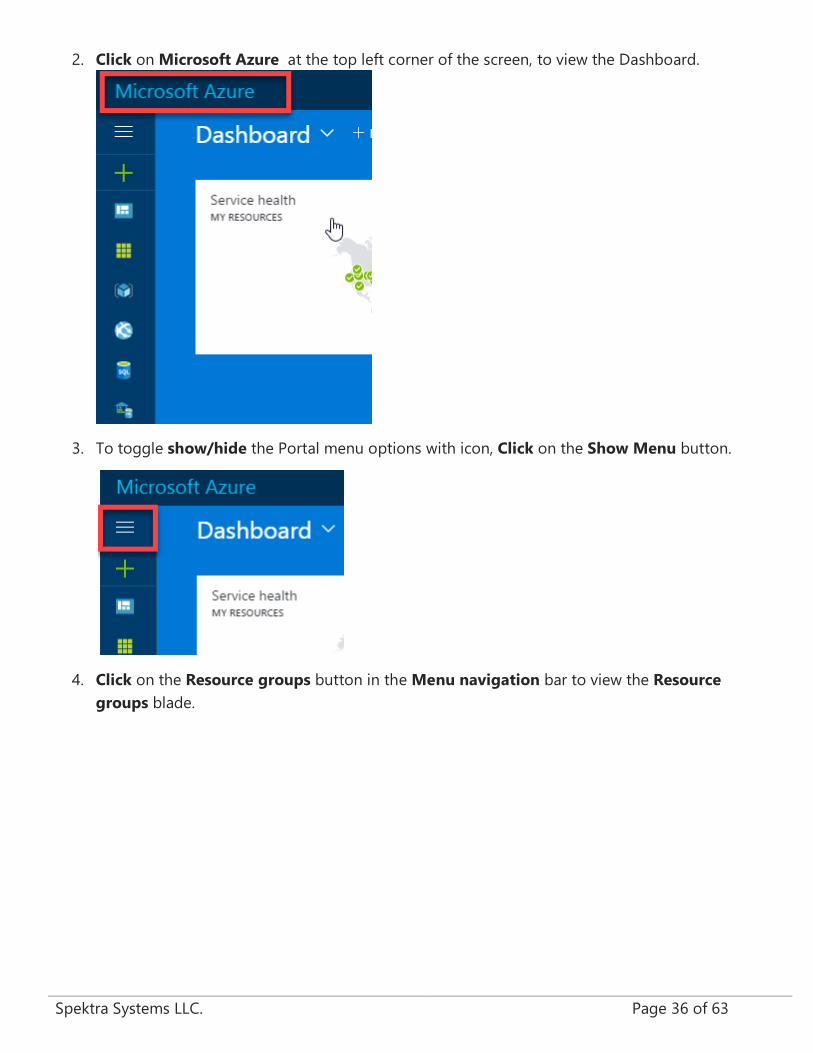
2. Click on Microsoft Azure at the top left corner of the screen, to view the Dashboard.
3. To toggle show/hide the Portal menu options with icon, Click on the Show Menu button.
4. Click on the Resource groups button in the Menu navigation bar to view the Resource
groups blade.

Spektra Systems LLC. Page 7 of 63
5. You will see a Resource Group on which you have access, click on it.
Note:
The Resource Group shown here is for demo purpose only. Actual name of the Resouce
Group that you see may differ.
6. Make a note of locationof the resource group(East US in example screenshot). You should
deploy all resources described in this lab guide in the same location.
7. From the Resource Group blade that come up, Select the Access Control ( IAM ) which is on
the left side of the blade.

Spektra Systems LLC. Page 8 of 63
8. In the new blade that come up, you can see the role that is assigned to you.
Lab 2: Create Windows Virtual Machine Lab Overview In this lab, you will
• Create a Windows Server 2012 R2 Datacenter Virtual Machine.
• Verify the deployed resources.
Prerequisites • Windows or a Mac machine with HTML5 supported browser such as Microsoft Edge, Internet
Explorer, Chrome or Firefox
• Lab 1 must be completed
Time Estimate 20 minutes

Spektra Systems LLC. Page 9 of 63
Exercise 1: Create a Storage account In this exercise, you will create a Standard Storage account for your Virtual Machine.
1. Launch a browser and navigate to https://portal.azure.com. Login with your Microsoft Azure
credentials.
2. In the Dashboard, click on the Show Menu button that appears on the top left corner. This will
expand the menus in the blade.
3. In the Menu that appears, Select +New.

Spektra Systems LLC. Page 10 of 63
4. In the New blade, Select Storage.
5. In the Storage blade that appears, Select Storage account.
6. In the Create Storage Account blade, configure the settings as follows:
• Name : winvmstorage
Note:
This name should be unique across Azure. Please use a different unique name or follow
Instructor Guidelines for details.
• Deployment model : Resource manager
• Account kind : General purpose

Spektra Systems LLC. Page 11 of 63
• Performance : Standard
• Replication : Locally-redundant storage (LRS)
• Storage service encryption : Disabled
• Subscription : Choose your subscription
• Resource Group : spektra-winvm-intro-trainee(Choose Use existing and scroll down to
see the Resource Group.)
• Location : Location of your resource group

Spektra Systems LLC. Page 12 of 63
7. After the configuration is done, Click on Create. A notification will appear at the top right
corner informing the initial status of deployment.
8. Click the notification icon to see the current status of deployment.
9. When the deployment is completed, a notification is raised as below.
10. To access the Storage Account just deployed, Select Resource Group in the Menu
navigation blade.
Spektra Systems LLC. Page 13 of 63
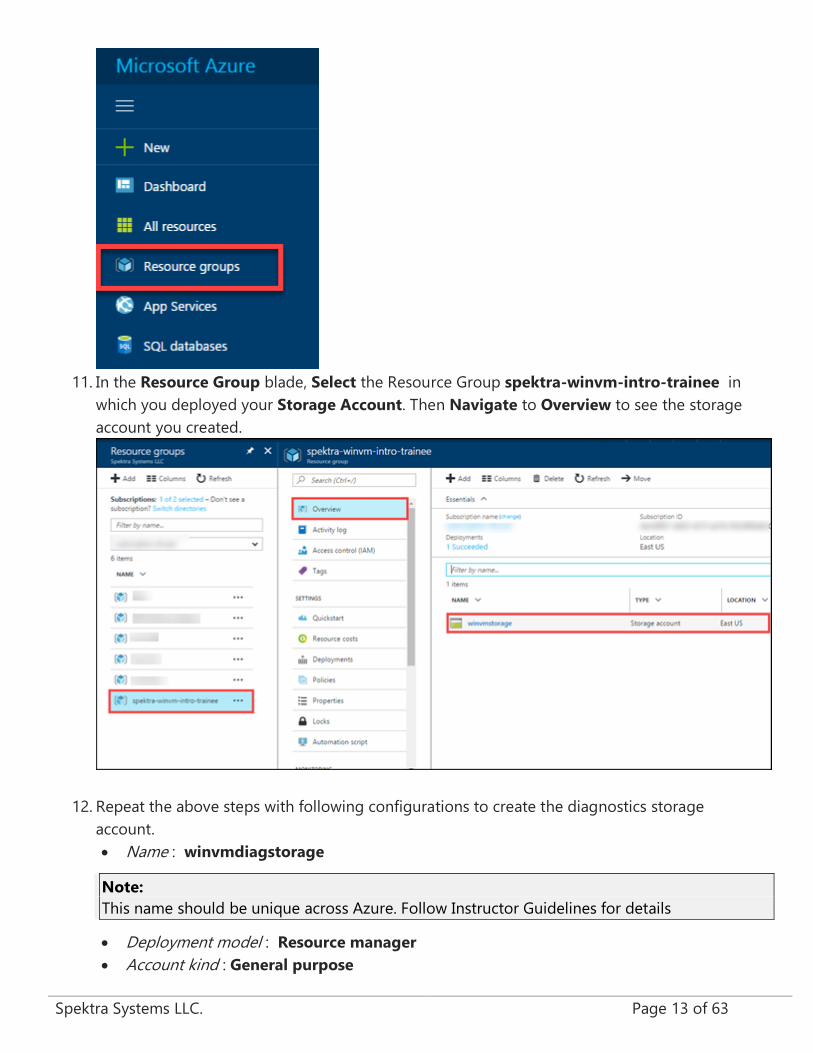
11. In the Resource Group blade, Select the Resource Group spektra-winvm-intro-trainee in
which you deployed your Storage Account. Then Navigate to Overview to see the storage
account you created.
12. Repeat the above steps with following configurations to create the diagnostics storage
account.
• Name : winvmdiagstorage
Note:
This name should be unique across Azure. Follow Instructor Guidelines for details
• Deployment model : Resource manager
• Account kind : General purpose

Spektra Systems LLC. Page 14 of 63
• Performance : Standard
• Replication : Locally-redundant storage (LRS)
• Storage service encryption : Disabled
• Subscription : Choose your subscription
• Resource Group : spektra-winvm-intro-trainee(Choose Use existing and scroll down to
see the Resource Group.)
• Location : Location of your resource group
13. Navigate to Resource Groups > spektra-winvm-intro-trainee> Overview to see the newly
created diagnostics storage account.
Exercise 2: Create a Virtual Network In this exercise, you will create a Virtual Network from Azure Portal.
1. Launch a browser and Navigate to https://portal.azure.com. Login with your Microsoft Azure
credentials.
2. Click on New in the Menu navigation bar on the left.

Spektra Systems LLC. Page 15 of 63
3. In the new blade, select Networking and then select Virtual Network.
4. Now, in the new blade that come up, select Resource Manager as the Deployment Model and
Click on Create button to create a new Virtual Network.
5. Provide the following configuration in the blade that come.
• Name : win-vnet
• Address space : 10.100.0.0/16
• Subnet name : win-vm-subnet
• Subnet address range : 10.100.0.0/24
• Subscription : Choose your subscription.
• Resource Group : spektra-winvm-intro-trainee(Choose Use existing and scroll down to
see the Resource Group.)
• Location : Location of your resource group

Spektra Systems LLC. Page 16 of 63
6. After the configuration is done, Click on Create. A notification will appear at the top right
corner informing the initial status of deployment.
7. Click the notification icon to see the current status of deployment.
8. When the deployment is completed, a notification is raised as below.

Spektra Systems LLC. Page 17 of 63
9. In the Resource Group blade, Select the Resource Group spektra-winvm-intro-trainee in
which you deployed your Virtual Network. Then Navigate to Overview to see the virtual
network you created.
Exercise 3: Create a Network Security Group In this exercise, you will create an Network Security Group from Azure Portal.
1. Launch a browser and Navigate to https://portal.Azure .com. Login with your Microsoft Azure
credentials.
2. Click on +New in the navigation bar on the left.

Spektra Systems LLC. Page 18 of 63
3. In the new blade, Search for “Network Security Group”.
4. From the new blade that come up Select the Network Security Group that is listed first.
5. Now, in the new blade that come up, Select Resource Manager as the Deployment Model and
Click on Create button to create a new Network Security Group.
6. Provide the following configuration in the blade that comes up.
• Name : win-nsg
• Subscription : Choose your subscription.
• Resource Group : spektra-winvm-intro-trainee(Choose Use existing and scroll down to see
the Resource Group.)
• Location : Location of your resource group

Spektra Systems LLC. Page 19 of 63
10. After the configuration is done, Click on Create. A notification will appear at the top right
corner informing the initial status of deployment
11. Click the notification icon to see the current status of deployment.
12. When the deployment is completed, a notification is raised as below.

Spektra Systems LLC. Page 20 of 63
13. In the Resource Group blade, Select the Resource Group spektra-winvm-intro-trainee in
which you deployed your Network Security Group. Then Navigate to Overview to see NSG
you created.
14. Click on win-nsg Network Security Group. A new blade comes up as shown below. Click on
Inbound Security Rules.

Spektra Systems LLC. Page 21 of 63
15. Click on Add.
16. In the Add inbound security rule blade, configure as follows and Click OK.
• Name: allow-RDP
• Priority: 100
• Source: Any
• Service: RDP
• Protocol: Keep default.
• Port range: Keep default.
• Action: Allow

Spektra Systems LLC. Page 22 of 63
17. A notification will appear at the top right corner informing the status.
18. Click the notification icon to see the current status of deployment.
19. When the deployment is completed, a notification is raised as below.

Spektra Systems LLC. Page 23 of 63
Exercise 4: Create a Public IP Address In this exercise, you will create the Public IP needed to connect to the Virtual Machine from internet.
1. Launch a browser and navigate to https://portal.azure.com. Login with your Microsoft Azure
credentials.
2. Click on the +New button on the top left corner of the portal and type “IP”. From the drop
down list, select Public IP address.
3. From the new blade that come up Select the Public IP address that is listed first.

Spektra Systems LLC. Page 24 of 63
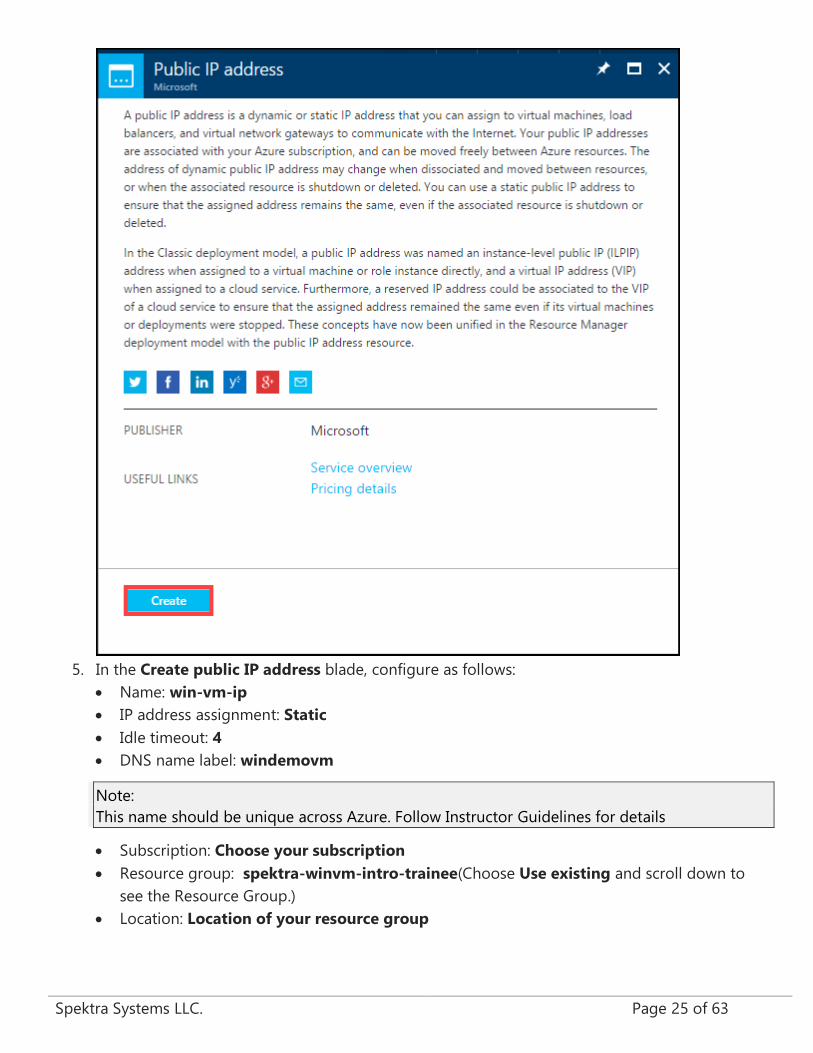
4. Click Create in the upcoming blade.
Spektra Systems LLC. Page 25 of 63
5. In the Create public IP address blade, configure as follows:
• Name: win-vm-ip
• IP address assignment: Static
• Idle timeout: 4
• DNS name label: windemovm
Note:
This name should be unique across Azure. Follow Instructor Guidelines for details
• Subscription: Choose your subscription
• Resource group: spektra-winvm-intro-trainee(Choose Use existing and scroll down to
see the Resource Group.)
• Location: Location of your resource group

Spektra Systems LLC. Page 26 of 63
6. After the configuration is done, Click on Create. A notification will appear at the top right
corner informing the initial status of deployment.
7. Click the notification icon to see the current status of deployment.
8. When the deployment is completed, a notification is raised as below.

Spektra Systems LLC. Page 27 of 63
9. In the Resource Group blade, Select the Resource Group spektra-winvm-intro-trainee in
which you deployed your Public IP address. Then Navigate to Overview to see the Public IP
address you created.
Exercise 5: Create the Virtual Machine In this exercise, you will use Windows Server 2012 R2 Datacenter an image available in the Azure
gallery to create the virtual machine.
1. Launch a browser and navigate to https://portal.azure.com. Login with your Microsoft Azure
credentials.
2. Click on the +New button on the top left corner of the portal and type “Windows Server”.
From the drop down list, select the version (Windows Server 2012 R2 Datacenter).

Spektra Systems LLC. Page 28 of 63
3. In the next blade that appears, Select the option Windows Server 2012 R2 Datacenter.
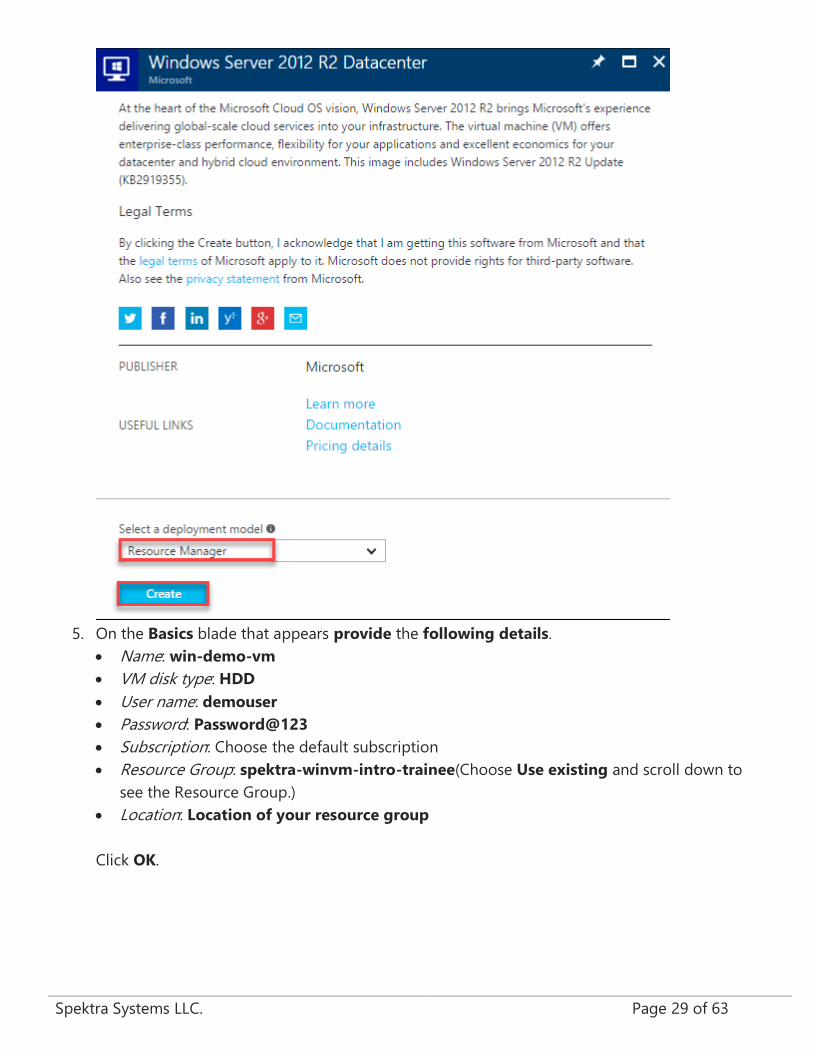
4. In the upcoming blade, select Resource Manager as the deployment model. Click on the
Create button.
Spektra Systems LLC. Page 29 of 63
5. On the Basics blade that appears provide the following details.
• Name: win-demo-vm
• VM disk type: HDD
• User name: demouser
• Password: Password@123
• Subscription: Choose the default subscription
• Resource Group: spektra-winvm-intro-trainee(Choose Use existing and scroll down to
see the Resource Group.)
• Location: Location of your resource group
Click OK.

Spektra Systems LLC. Page 30 of 63

Spektra Systems LLC. Page 31 of 63
6. In the Size blade, Click on View all.
7. From the list of VM sizes, select Standard A1 and click Select.
8. In the Settings blade, configure as follows:

Spektra Systems LLC. Page 32 of 63
• Use managed disks: NO
• Storage account : winvmstorage (created in ex 1)
• Virtual network : win-vnet (Created in exercise 2)
• Subnet : win-vm-subnet (Created in exercise 2)
• Network security group (firewall) : win-nsg (Created in exercise 3)
• Public IP address : win-vm-ip (Created in exercise 4)
• Availability set : None
• Boot diagnostics : Enabled
• Guest OS diagnostics : Enabled
• Diagnostics storage account : winvmdiagstorage (Choose from the list)
Click on OK after providing details.

Spektra Systems LLC. Page 33 of 63
9. In the Summary blade, verify everything is correct, and click OK.

Spektra Systems LLC. Page 34 of 63
10. Deployment will start automatically. You can see the notification on the notification icon.

Spektra Systems LLC. Page 35 of 63
11. Once the deployment is finished, you can view the status from the notification tab at the top.
Exercise 6: Verify the deployed resources In this exercise, you will verify the resources that were deployed during the virtual machine creation.
1. Launch a browser and Navigate to https://portal.azure.com. Login with your Microsoft Azure
credentials.
Spektra Systems LLC. Page 36 of 63
2. Click on Microsoft Azure at the top left corner of the screen, to view the Dashboard.
3. To toggle show/hide the Portal menu options with icon, Click on the Show Menu button.
4. Click on the Resource groups button in the Menu navigation bar to view the Resource
groups blade.

Spektra Systems LLC. Page 37 of 63
5. You will see a Resource Group which you have access to, click on it.
Note:
The Resource Group shown here is for demo purpose only. Actual name of the Resouce
Group that you see may differ.
6. The upcoming Resource Group blade lists all the resources in the Resource Group under
Overview.

Spektra Systems LLC. Page 38 of 63
7. In the resources blade, win-demo-vm is the Virtual Machine that was created and win-vnet
is the virtual network it is connected to. Along with those, two storage accounts, Network
Security Group, Network Interface, and a Public IP address should be visible.
Lab 3: Connect to the Virtual Machine Lab Overview In this lab, you will connect to the Windows Server 2012 R2 Datacenter Virtual Machine.
Prerequisites • Windows or a Mac machine with HTML5 supported browser such as Microsoft Edge, Internet
Explorer, Chrome or Firefox
• Lab 2 must be completed
Time Estimate 15 minutes
Exercise 1: Connect to Windows Server VM If you are using a Windows machine, Launch a browser and Navigate to https://portal.azure.com.
Login with your Microsoft Azure credentials.
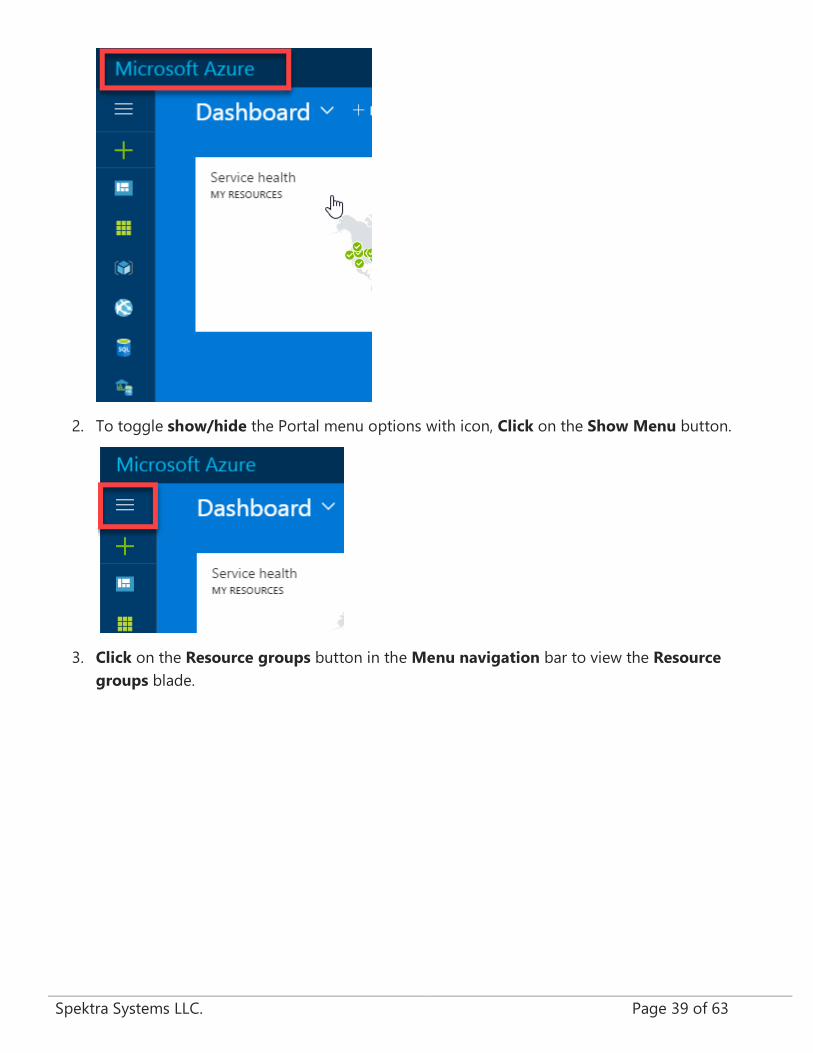
1. Click on Microsoft Azure at the top left corner of the screen, to view the Dashboard.
Spektra Systems LLC. Page 39 of 63
2. To toggle show/hide the Portal menu options with icon, Click on the Show Menu button.
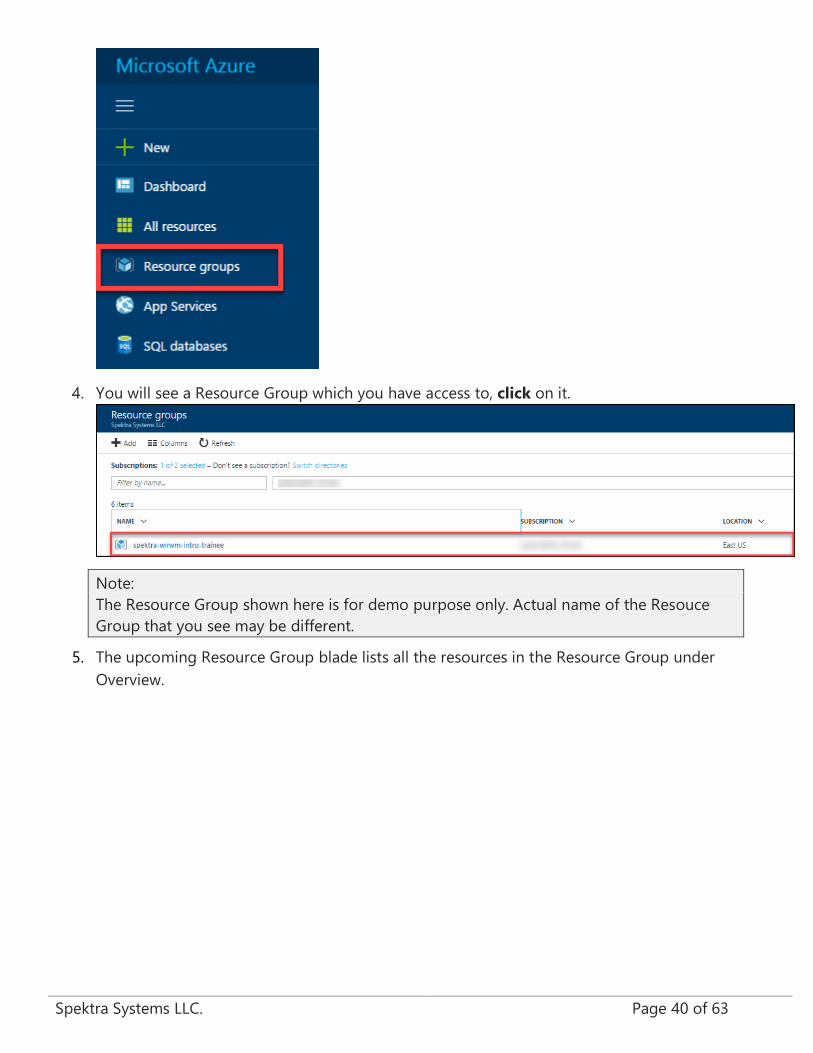
3. Click on the Resource groups button in the Menu navigation bar to view the Resource
groups blade.
Spektra Systems LLC. Page 40 of 63
4. You will see a Resource Group which you have access to, click on it.
Note:
The Resource Group shown here is for demo purpose only. Actual name of the Resouce
Group that you see may be different.
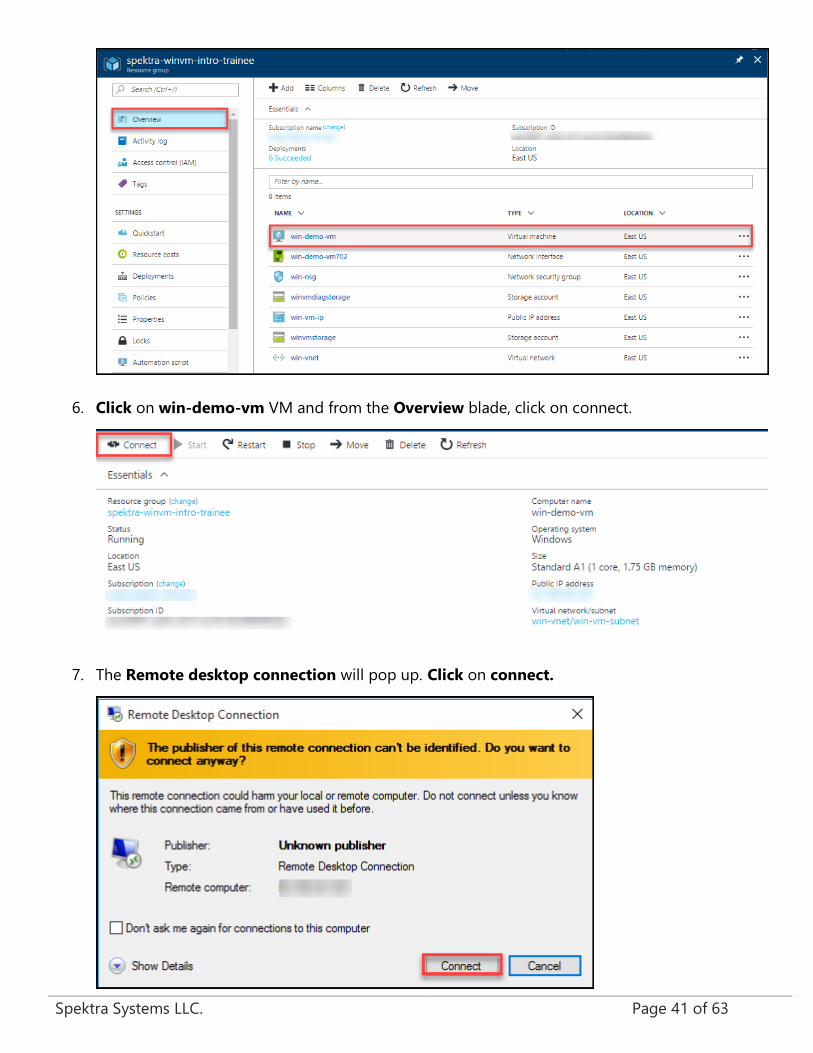
5. The upcoming Resource Group blade lists all the resources in the Resource Group under
Overview.
Spektra Systems LLC. Page 41 of 63
6. Click on win-demo-vm VM and from the Overview blade, click on connect.
7. The Remote desktop connection will pop up. Click on connect.
Spektra Systems LLC. Page 42 of 63
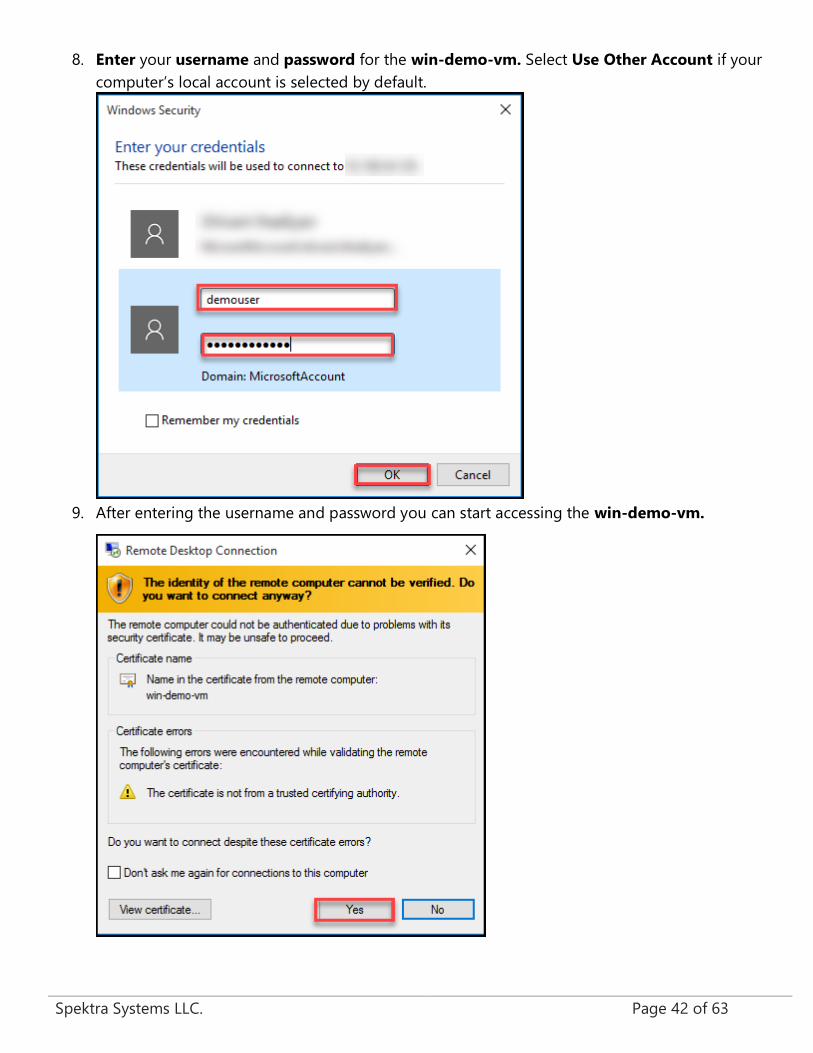
8. Enter your username and password for the win-demo-vm. Select Use Other Account if your
computer’s local account is selected by default.
9. After entering the username and password you can start accessing the win-demo-vm.

Spektra Systems LLC. Page 43 of 63
Exercise 2: Power Operations on Virtual Machine In this exercise, you will stop & start Virtual Machine from Azure Portal.
1. Click on Stop in the vm’s blade at the top.
2. A notification will appear at the top right corner informing the status.
3. Click the notification icon to see the current status of deployment.
Spektra Systems LLC. Page 44 of 63
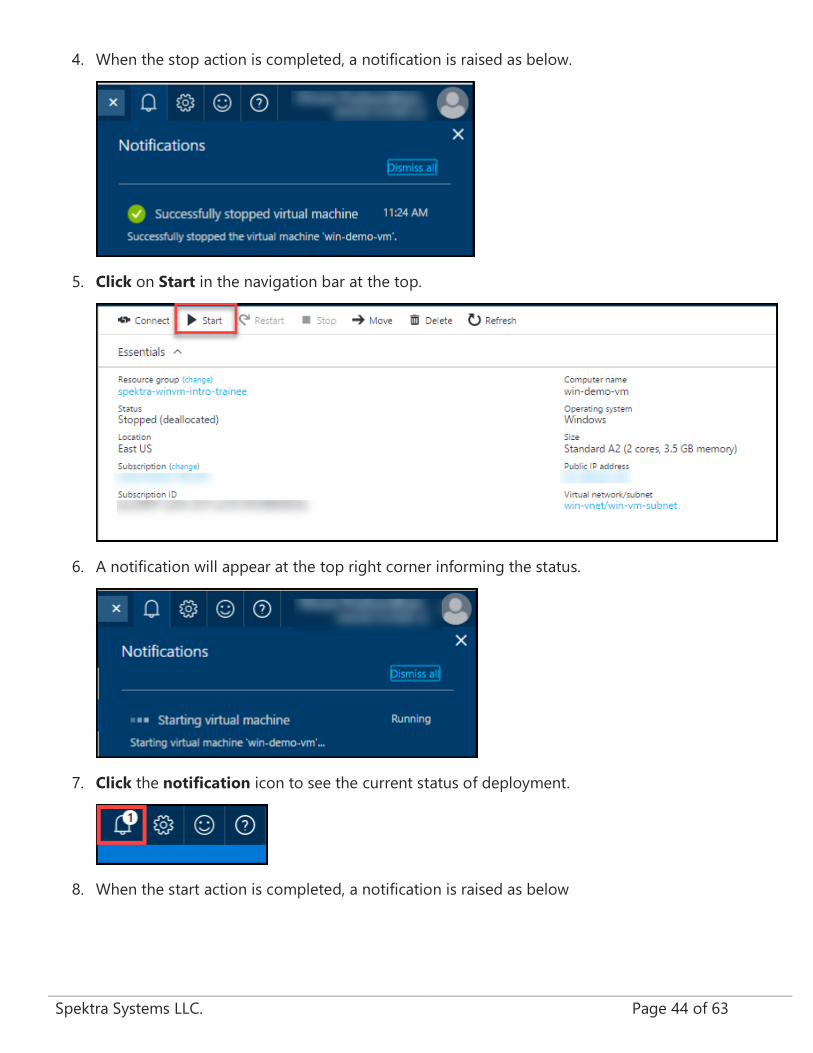
4. When the stop action is completed, a notification is raised as below.
5. Click on Start in the navigation bar at the top.
6. A notification will appear at the top right corner informing the status.
7. Click the notification icon to see the current status of deployment.
8. When the start action is completed, a notification is raised as below

Spektra Systems LLC. Page 45 of 63
Lab 4: Managing Virtual Machines Exercise 1: Resize Virtual Machine In this exercise, you will resize the Virtual Machine from Azure Portal.
1. Click on win-demo-vm VM and from the Overview blade, click on size.
2. In the Size blade, Click on View all.

Spektra Systems LLC. Page 46 of 63
3. A notification will appear at the top right corner informing the status.
4. Click the notification icon to see the current status of deployment.
5. When the resize action is completed, a notification is raised as below.

Spektra Systems LLC. Page 47 of 63
Exercise 2: Monitoring & Boot Diagnostics of Virtual Machine In this exercise, you will monitor and boot diagnostics of Virtual Machine from Azure Portal.
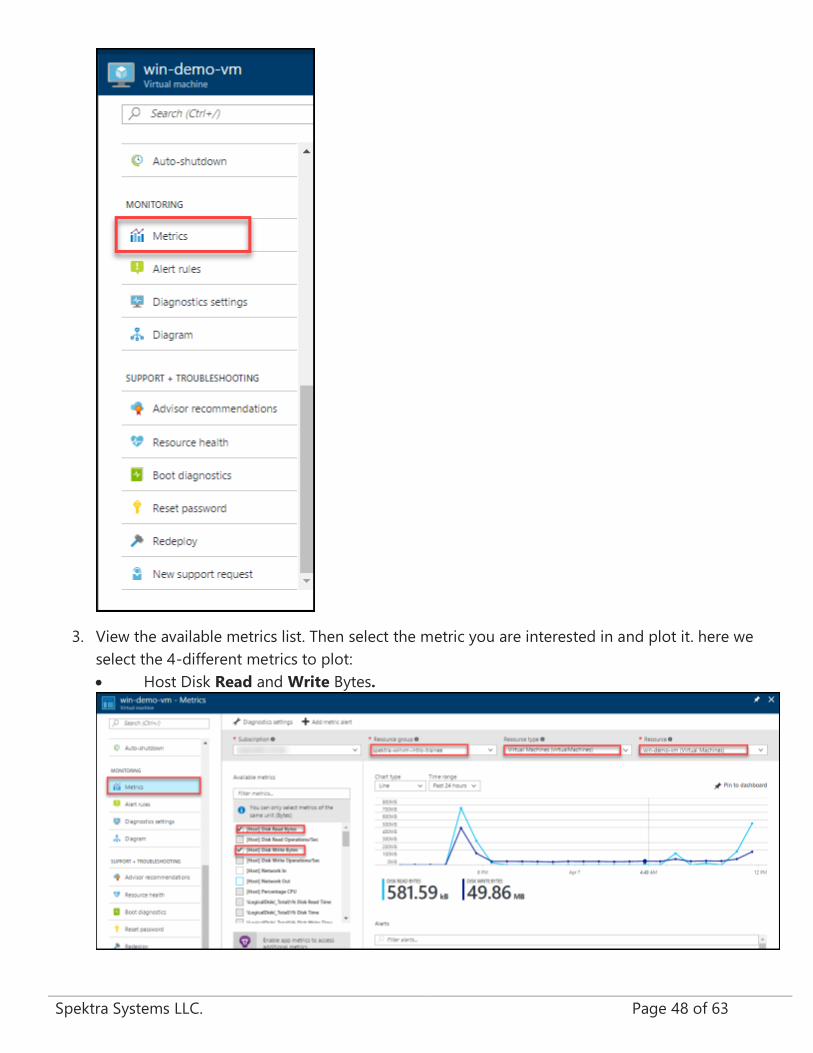
1. Click on win-demo-vm, Navigate to the Monitoring tab.
2. Navigate to the Monitoring tab, and then and select the Metrics option underneath it.
Spektra Systems LLC. Page 48 of 63
3. View the available metrics list. Then select the metric you are interested in and plot it. here we
select the 4-different metrics to plot:
• Host Disk Read and Write Bytes.

Spektra Systems LLC. Page 49 of 63
• Host Network In and Out.
• Host percentage CPU.
• Host memory.
4. Navigate to the Monitoring tab, and then and select the Alert rules option underneath it.
Click on Add metric alert.

Spektra Systems LLC. Page 50 of 63
5. In the Add metric alert blade, configure as follows:
• Name: CPU80-alert
• Description: This is alert demo for CPU Utilization
• Source: Metrics
• Subscription : Choose your subscription.
• Resource Group : spektra-winvm-intro-trainee
• Resource : win-demo-vm
• Condition : Greater than
• Threshold : 50
• Period: Over the last 5 minutes
After configuration is done, Click OK

Spektra Systems LLC. Page 51 of 63

Spektra Systems LLC. Page 52 of 63
6. When the alert creation is completed, a notification is raised as below.
7. You will see the add metric alert. This alert rules can check if a metric has crossed a certain
threshold. They can then notify you via email or fire a webhook.
8. For checking the metric is working, we are going to perform a load test. For this first we need
to connect to our virtual machine.
9. Here you need to download “Cpustress” Application to generate load. Now after you can set the
load value greater than provided in metric to test it. Login to the machine and download this
application.
Download CPUSTRESS here http://download.sysinternals.com/files/CPUSTRES.zip

Spektra Systems LLC. Page 53 of 63
10. Here on the image as you can see the cpu threshold generated is greater than 50 i.e. required
to trigger the metric.
11. Here metric is triggered and the mail is send to the email address previously provided at the
metric alert rule.
12. Now click on Boot Diagnostics under Support + Troubleshooting

Spektra Systems LLC. Page 54 of 63

Spektra Systems LLC. Page 55 of 63
13. In this blade, you will see console view of Windows Virtual Machine which show that VM is up
and running.
Exercise 3: Backup Virtual Machine
In this exercise, you will create a Backup for your Virtual Machine
Spektra Systems LLC. Page 56 of 63
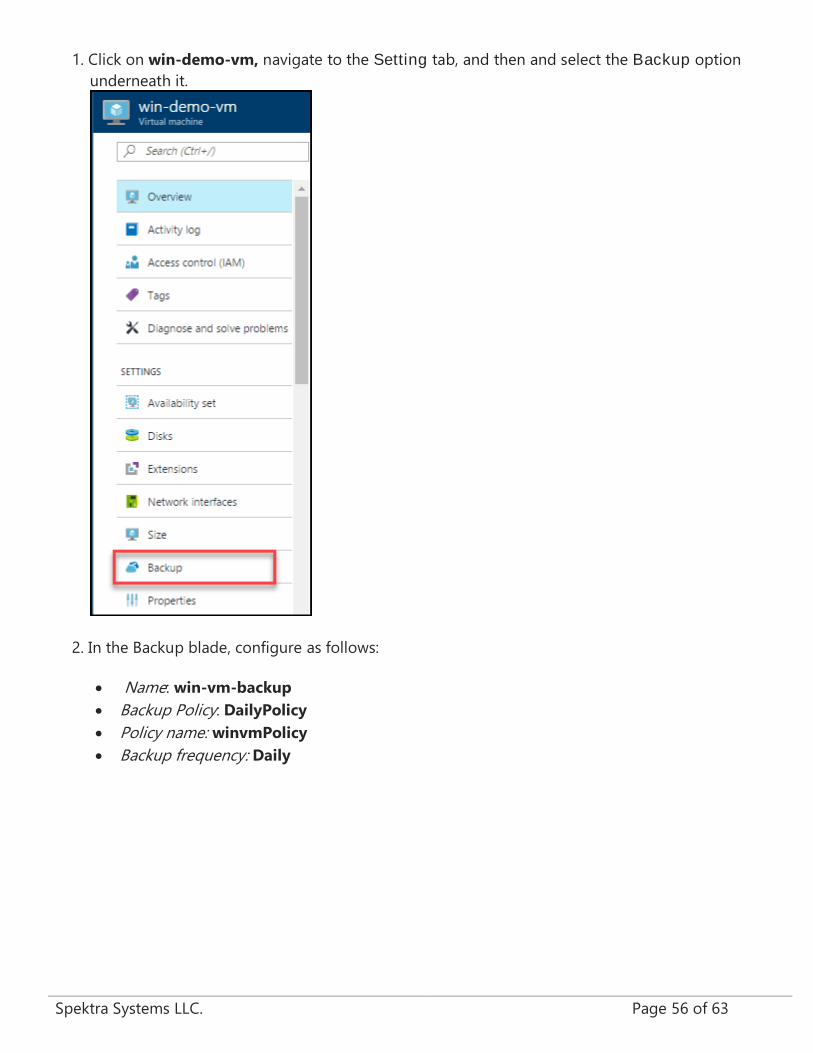
1. Click on win-demo-vm, navigate to the Setting tab, and then and select the Backup option
underneath it.
2. In the Backup blade, configure as follows:
• Name: win-vm-backup
• Backup Policy: DailyPolicy
• Policy name: winvmPolicy
• Backup frequency: Daily

Spektra Systems LLC. Page 57 of 63
Click on OK.
2. Click on Enable Backup.
3. A notification will appear at the top right corner informing the initial status of deployment.

Spektra Systems LLC. Page 58 of 63
4. Click the notification icon to see the current status of deployment.
5. When the deployment is completed, a notification is raised as below.
6. In the Resource Group blade, Select the Resource Group spektra-winvm-intro-trainee in
which you deployed your Backup vault. Then Navigate to Overview to see the winvm
backup you created.
7. Click On the winvm backup, click the number under Backup Items, or click the Backup
Items tile.

Spektra Systems LLC. Page 59 of 63
8. The Backup Items blade opens. select backup item.

Spektra Systems LLC. Page 60 of 63
9. The Backup Items list opens.
10. On the Backup Items list, click the ellipses ... to open the Context menu.

Spektra Systems LLC. Page 61 of 63
11. The Context menu appears.
12. On the Context menu, click Backup now.
13. The Backup Now blade opens, Click on Backup button.
Spektra Systems LLC. Page 62 of 63
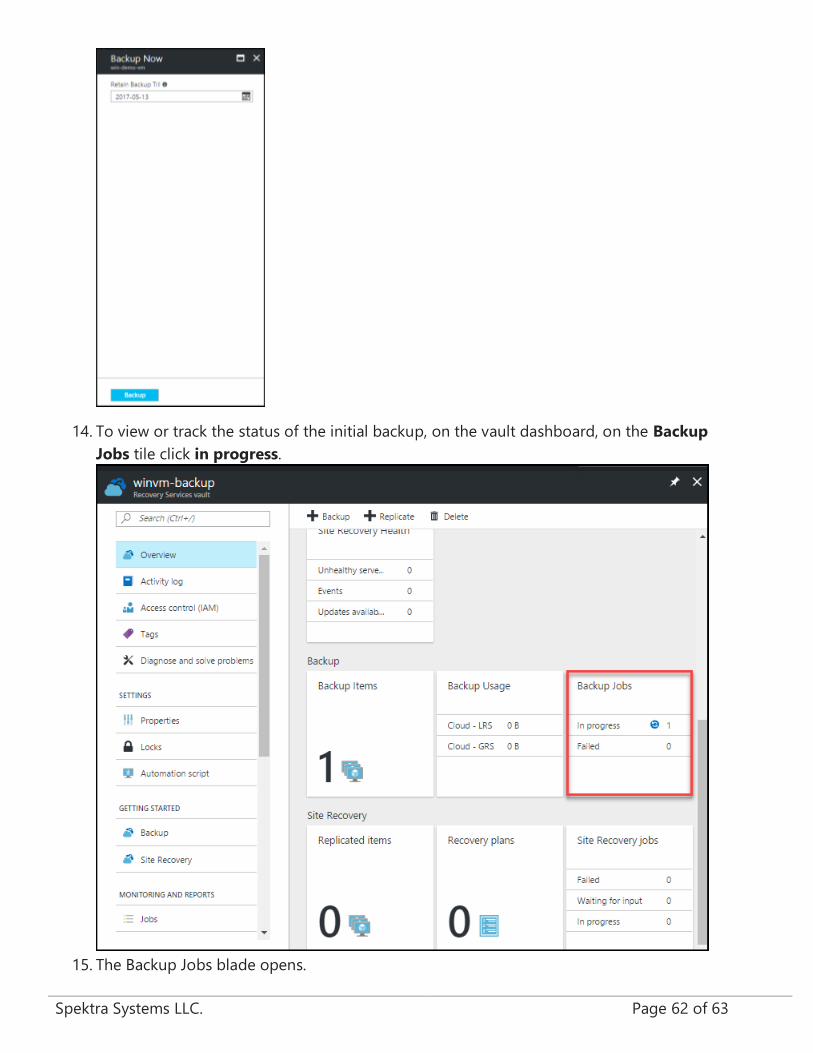
14. To view or track the status of the initial backup, on the vault dashboard, on the Backup
Jobs tile click in progress.
15. The Backup Jobs blade opens.

Spektra Systems LLC. Page 63 of 63
16. In the Backup jobs blade, you can see the status of all jobs. Check if the backup job for your
VM is still in progress, or if it has finished. When a backup job is finished, the status
is Completed.