what i didn't learn from my singing teacher but wish …db5amhs3i2xm.cloudfront.net/what i...
TRANSCRIPT

What I Didn't Learn From My Singing Teacher But Wish I Had
What I Didn't Learn From My Singing
Teacher But Wish I Had
By Aussie Vocal Coach
What I Didn't Learn From My Singing Teacher But Wish I Had
What I Didn't Learn From My Singing
Teacher But Wish I Had
By Aussie Vocal Coach
Ian Castle
Page 1
What I Didn't Learn From My Singing
Teacher But Wish I Had
What I Didn't Learn From My Singing Teacher But Wish I Had Page 2
Table of Contents
Overview: 4
Chapter One:
How to Discover and Release Tension 5
Chapter Two:
How to Breathe for Singing 10
Chapter Three:
How to Sing Low Notes using Chest Voice 17
Chapter Four:
How to Sing in Mixed Voice 23
Chapter Five:
How to Sing High Notes 30
Chapter Six:
How to Fix Breaks in Your Voice 37
What I Didn't Learn From My Singing Teacher But Wish I Had Page 3
Chapter Seven:
How to Improve the Sound of Your Voice 43
Chapter Eight:
Vocal Flexibility 53
Chapter Nine:
How to Apply Technique to Songs 56
Chapter Ten:
Vocal Health 62
The Final Word: 72
Disclaimer
The exercises and techniques outlined in the ebook are designed for singers of all levels of
ability. Vocal exercises carry an element of risk of vocal fatigue and damage and should be
performed with caution and responsibility. Aussie Vocal Coach Pty Ltd claims no
responsibility for the misuse of these techniques and exercises.
Copyright 2010 Aussie Vocal Coach Pty Ltd. All Rights Reserved. This copyrighted product
was written and distributed by Aussie Vocal Coach Pty Ltd. Authorized for private use only.
Federal Law provides civil and criminal penalties for the unauthorized reproduction,
exhibition, or distribution of this material.
What I Didn't Learn From My Singing Teacher But Wish I Had Page 4
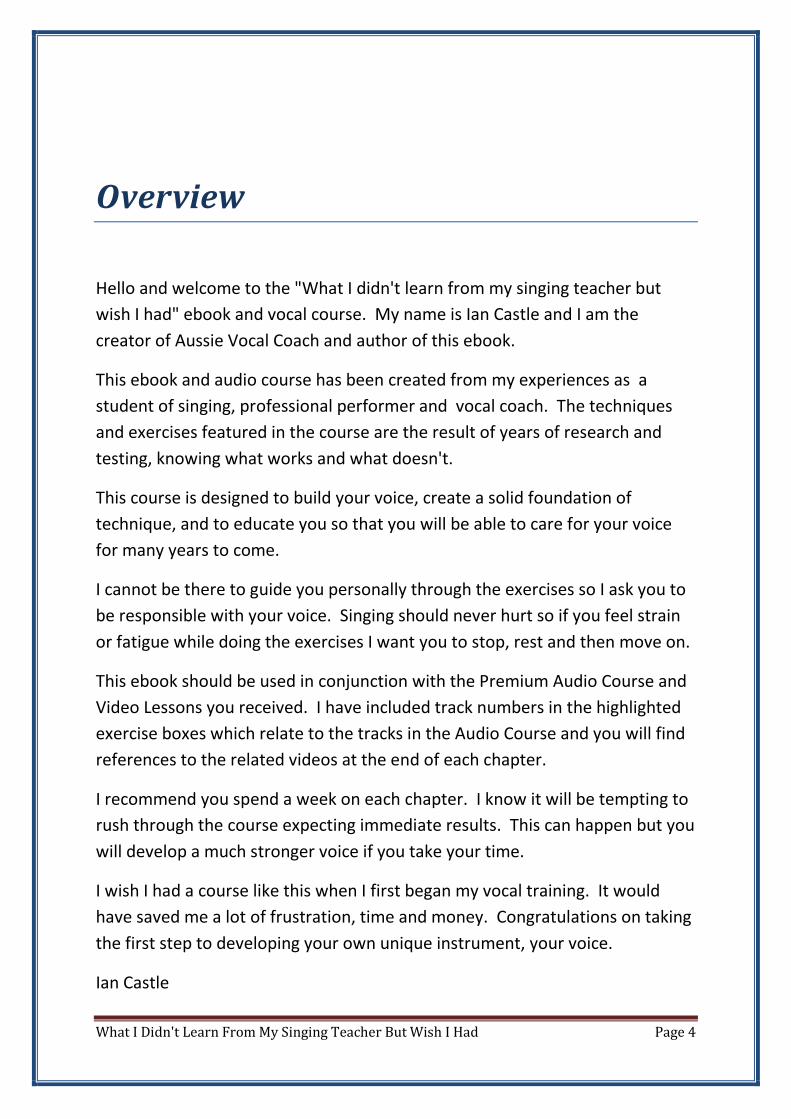
Overview
Hello and welcome to the "What I didn't learn from my singing teacher but
wish I had" ebook and vocal course. My name is Ian Castle and I am the
creator of Aussie Vocal Coach and author of this ebook.
This ebook and audio course has been created from my experiences as a
student of singing, professional performer and vocal coach. The techniques
and exercises featured in the course are the result of years of research and
testing, knowing what works and what doesn't.
This course is designed to build your voice, create a solid foundation of
technique, and to educate you so that you will be able to care for your voice
for many years to come.
I cannot be there to guide you personally through the exercises so I ask you to
be responsible with your voice. Singing should never hurt so if you feel strain
or fatigue while doing the exercises I want you to stop, rest and then move on.
This ebook should be used in conjunction with the Premium Audio Course and
Video Lessons you received. I have included track numbers in the highlighted
exercise boxes which relate to the tracks in the Audio Course and you will find
references to the related videos at the end of each chapter.
I recommend you spend a week on each chapter. I know it will be tempting to
rush through the course expecting immediate results. This can happen but you
will develop a much stronger voice if you take your time.
I wish I had a course like this when I first began my vocal training. It would
have saved me a lot of frustration, time and money. Congratulations on taking
the first step to developing your own unique instrument, your voice.
Ian Castle
What I Didn't Learn From My Singing Teacher But Wish I Had Page 5
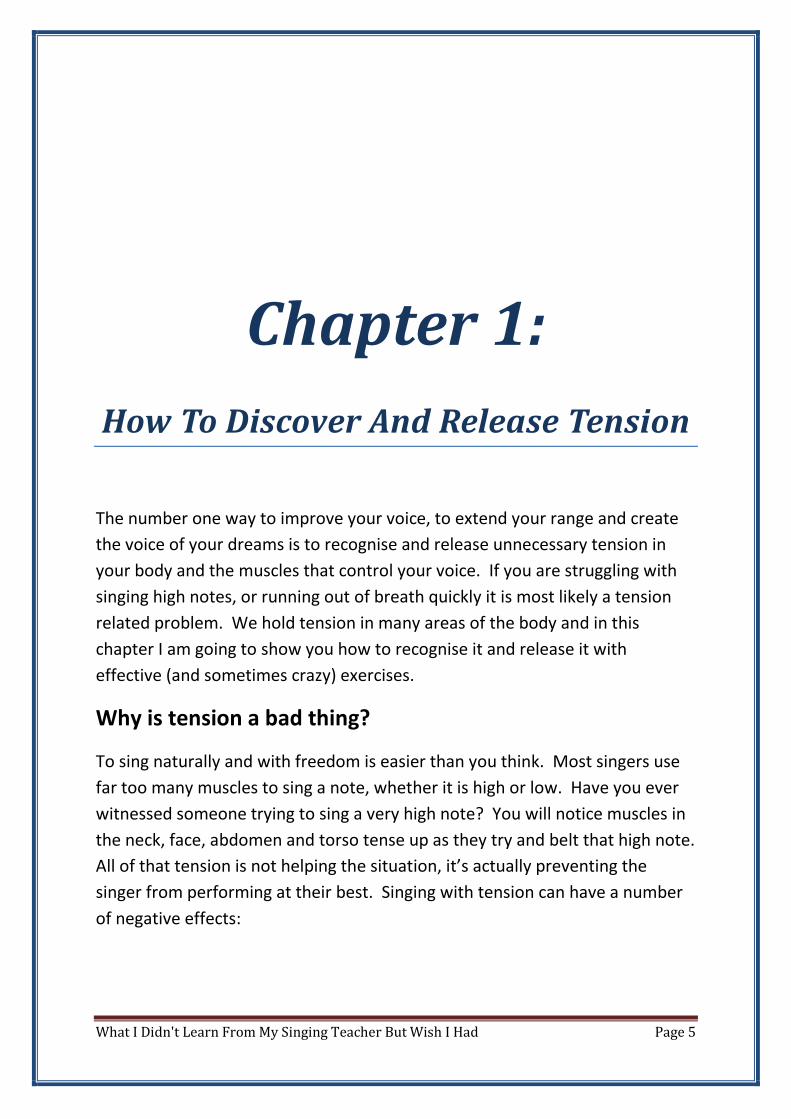
Chapter 1:
How To Discover And Release Tension
The number one way to improve your voice, to extend your range and create
the voice of your dreams is to recognise and release unnecessary tension in
your body and the muscles that control your voice. If you are struggling with
singing high notes, or running out of breath quickly it is most likely a tension
related problem. We hold tension in many areas of the body and in this
chapter I am going to show you how to recognise it and release it with
effective (and sometimes crazy) exercises.
Why is tension a bad thing?
To sing naturally and with freedom is easier than you think. Most singers use
far too many muscles to sing a note, whether it is high or low. Have you ever
witnessed someone trying to sing a very high note? You will notice muscles in
the neck, face, abdomen and torso tense up as they try and belt that high note.
All of that tension is not helping the situation, it’s actually preventing the
singer from performing at their best. Singing with tension can have a number
of negative effects:
What I Didn't Learn From My Singing Teacher But Wish I Had Page 6
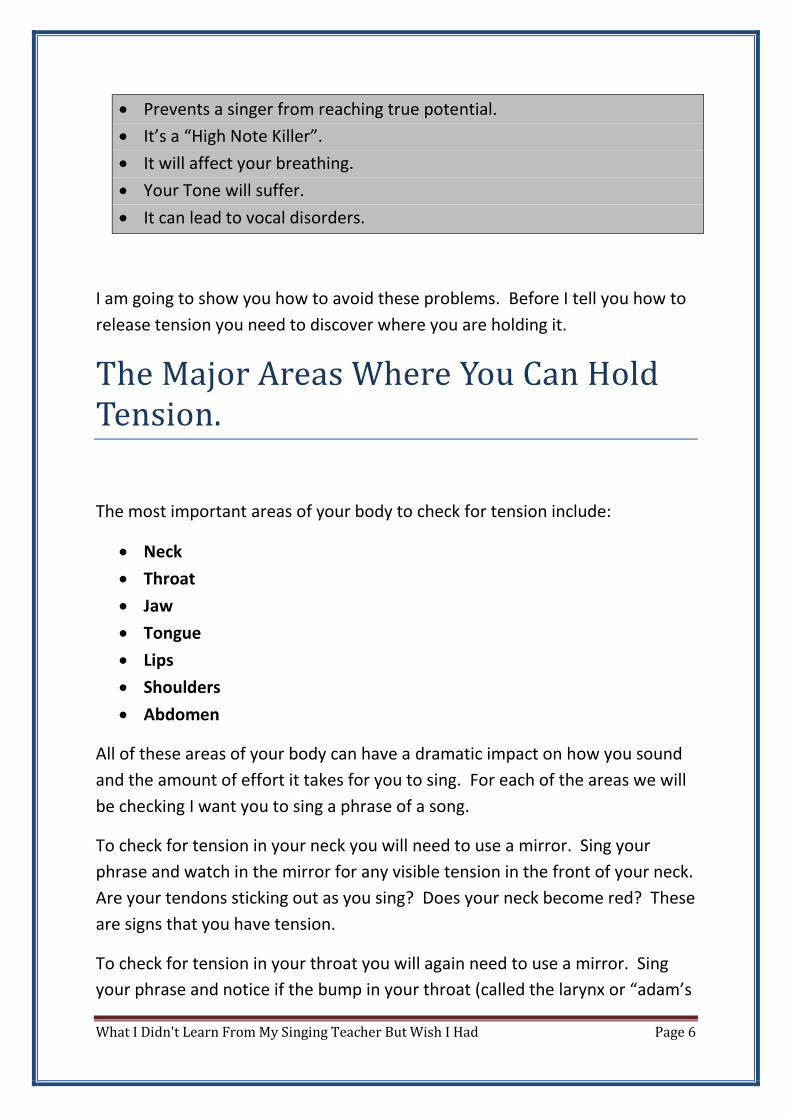
• Prevents a singer from reaching true potential.
• It’s a “High Note Killer”.
• It will affect your breathing.
• Your Tone will suffer.
• It can lead to vocal disorders.
I am going to show you how to avoid these problems. Before I tell you how to
release tension you need to discover where you are holding it.
The Major Areas Where You Can Hold
Tension.
The most important areas of your body to check for tension include:
• Neck
• Throat
• Jaw
• Tongue
• Lips
• Shoulders
• Abdomen
All of these areas of your body can have a dramatic impact on how you sound
and the amount of effort it takes for you to sing. For each of the areas we will
be checking I want you to sing a phrase of a song.
To check for tension in your neck you will need to use a mirror. Sing your
phrase and watch in the mirror for any visible tension in the front of your neck.
Are your tendons sticking out as you sing? Does your neck become red? These
are signs that you have tension.
To check for tension in your throat you will again need to use a mirror. Sing
your phrase and notice if the bump in your throat (called the larynx or “adam’s

What I Didn't Learn From My Singing Teacher But Wish I Had Page 7
apple”) starts to rise when you sing. This is a sign that the muscles which
control your voice are not coordinating the right way and will certainly lead to
vocal tension and fatigue.
Your Jaw is another common area for tension. I want you to sing your phrase
but this time chew at the same time! I know it sounds crazy but trust me on
this one. If you find it difficult to chew and sing at the same time you may be
holding some tension there. Tension in your jaw will affect the tone of your
voice. Your jaw is one of 3 articulators which determine your tone.
The second articulator and prime suspect when it comes to unwanted tension
is your tongue. I want you to sing your phrase with your mouth slightly open,
just enough so that you can see your tongue. See if you can keep your tongue
relaxed at the front of your mouth, sitting on your bottom teeth as you sing. If
you find that your tongue wants to retreat back into your throat as you sing it’s
a sign of tongue tension. This will affect your tone.
The third articulator is your lips. Singers often over stretch their lips when they
sing. Try it. Notice what it feels like to sing with tense lips. Now relax and sing
without the tension. This technique of experiencing the tension, then
experiencing the relaxation is a great way to program your brain to recognise
the difference. I encourage you to try this with all of the possible tension
areas.
Next we have the shoulders. This was a major tension area for me as a
student. To check for tension you will need your mirror. Stand in a natural
position. See if you can drop your shoulders from this position. Don’t force
them down, just see what happens if you relax them. Do they drop further? If
so, like me, you are holding some tension there.
Finally let’s check your abs. They need to be relaxed and tension free to allow
for optimal low breathing. Sing your phrase and check to see whether you are
tensing your abdomen as you sing. If so then you will need to work on relaxing
those muscles.
Remember, it’s a great idea to experience what it is like to sing with tension in
these areas of your body, then sing without the tension to re-program your
brain to recognise the difference.
What I Didn't Learn From My Singing Teacher But Wish I Had Page 8
How To Release Tension
Okay so now you have a good idea about where you can/are holding tension.
Let’s discuss some ways to release it.
Let’s start with your neck. Gently move your head from side to side and back
and forth. Get used to the feeling of relaxation. Now, sing your phrase while
doing the head movements. Doing this will prevent the muscles in your neck
tensing in one position. Another great exercise to release neck tension is
bending over to let your head drop and sway. This is very effective for
relieving tension in the back of your neck.
Some great exercises to release tension in your throat include:
• Humming
• Lip rolls
• Vocal Sighs
These exercises are excellent ways to keep your throat relaxed and your larynx
low. They allow the muscles that control your vocal cords to coordinate in the
right and most efficient way.
The best exercise to release jaw tension is actually the same one used to
discover it! Chewing. This will stretch the muscles that control your jaw,
allowing for more flexibility.
To eliminate tongue tension you can do 2 things:
1. Stick out your tongue as far as you can and hold it for 5 seconds. Repeat
3 times. This will stretch the root of your tongue which is responsible for
most tongue tension.
2. Hold the tip of your tongue with your fingers (gross I know!) and attempt
to sing your phrase with as much clarity as possible. This will stop your

What I Didn't Learn From My Singing Teacher But Wish I Had Page 9
tongue from pulling back into your throat. It will also add clarity to your
tone.
To release lip tension I suggest a lip roll. What is a lip roll? Think of the sound
“brrrr” a person makes when they are cold. You need to make your lips vibrate
together. It is impossible to do this with tense lips so it’s a good indicator that
you have released the tension.
Rolling your shoulders is the best way to relieve shoulder tension. Sing your
phrase while doing this.
Finally, to release tension in your abdomen, lie down and place an object on
your stomach. Your goal is to make the object move up and down as you
breathe in and out. If you can achieve this it means your diaphragm is
descending. This is very important for breathing and is impossible if you are
tensing your abs. Something else you can try is panting, yes just like a dog! Try
and make your stomach move in and out as you pant.
Well that’s it for chapter 1. I hope you learned something valuable about your
voice. I recommend incorporating these exercises into your daily vocal routine
to get the most out of your voice.
To view demonstrations of the exercises discussed in this chapter please refer
to Video 2: "Lesson 1 Tension"
What I Didn't Learn From My Singing Teacher But Wish I Had Page 10
Chapter 2:
How To Breathe For Singing
Breathing is everything for a singer. Sustaining long phrases, extending your
vocal range, developing more power and improving the sound of your voice all
begins with breathing.
It is advisable to use a mirror when developing your breathing skills, as the
techniques are very visual. You can also monitor your posture.
What does posture have to do with the way you breathe?
Your breathing muscles are attached to your skeletal frame. If your body is out
of balance or alignment you cannot perform skilled breathing which is
necessary for singing. It makes sense to create a balanced body before
learning anything else.
What is the difference between everyday breathing and breathing for
singing?
You already know how to breathe; it is one very important element of
sustaining life! The way we are taught to breathe from an early age is
adequate to oxygenate our bodies and to support everyday speech. This type
of breathing is called “tidal” breathing. It is very shallow and high in the lungs.
It isn’t adequate however to sustain skilled singing.
What I Didn't Learn From My Singing Teacher But Wish I Had Page 11
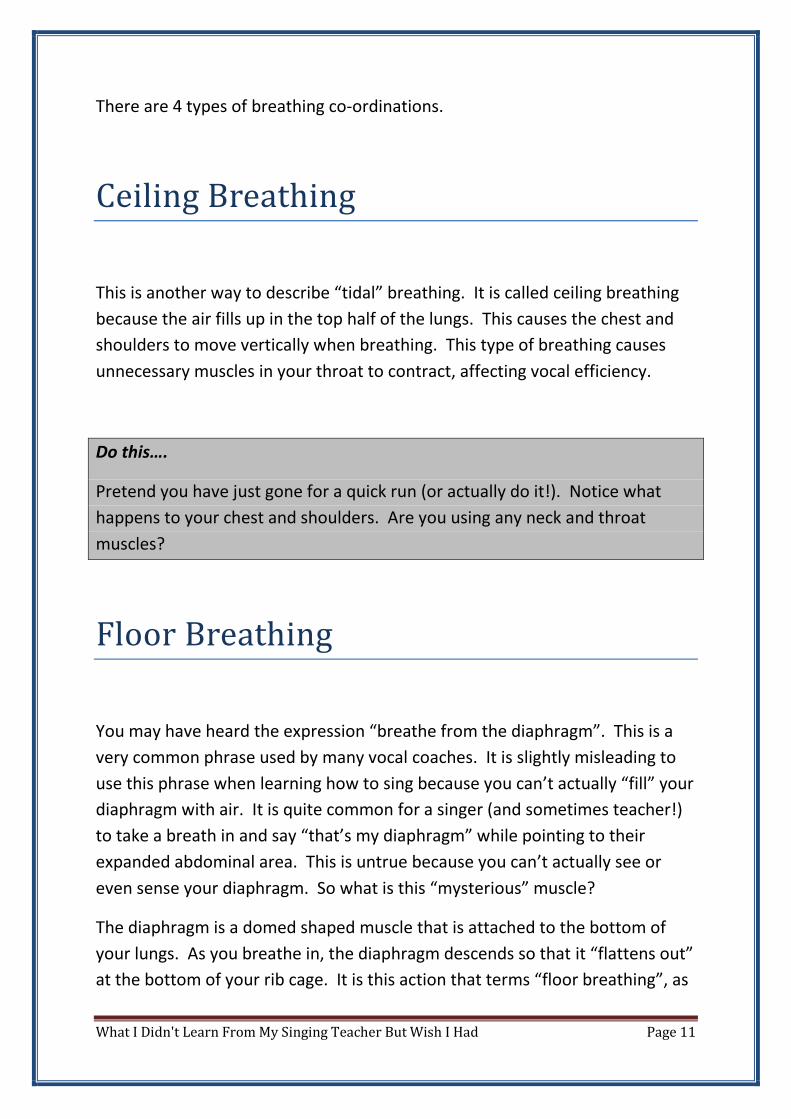
There are 4 types of breathing co-ordinations.
Ceiling Breathing
This is another way to describe “tidal” breathing. It is called ceiling breathing
because the air fills up in the top half of the lungs. This causes the chest and
shoulders to move vertically when breathing. This type of breathing causes
unnecessary muscles in your throat to contract, affecting vocal efficiency.
Do this….
Pretend you have just gone for a quick run (or actually do it!). Notice what
happens to your chest and shoulders. Are you using any neck and throat
muscles?
Floor Breathing
You may have heard the expression “breathe from the diaphragm”. This is a
very common phrase used by many vocal coaches. It is slightly misleading to
use this phrase when learning how to sing because you can’t actually “fill” your
diaphragm with air. It is quite common for a singer (and sometimes teacher!)
to take a breath in and say “that’s my diaphragm” while pointing to their
expanded abdominal area. This is untrue because you can’t actually see or
even sense your diaphragm. So what is this “mysterious” muscle?
The diaphragm is a domed shaped muscle that is attached to the bottom of
your lungs. As you breathe in, the diaphragm descends so that it “flattens out”
at the bottom of your rib cage. It is this action that terms “floor breathing”, as
What I Didn't Learn From My Singing Teacher But Wish I Had Page 12
the air is sent to the bottom of your lungs. As the diaphragm returns to its
resting position air is exhaled.
When the diaphragm “flattens out” it pushes the contents of your abdomen
down and out. This expansion of the abdomen gives the effect of the stomach
filling up with air.
Do this….
Stand with proper posture. Put your hand over your stomach. Do a series of
short “sh” sounds. The goal is to make your stomach move your hand. See if
you can now do the same exercise doing a pant. Gradually increase the speed
of the pant. It is important that you relax your abdominal muscles. If you
tighten these muscles the diaphragm cannot descend and flatten out. This is a
very common reason students struggle to develop floor breathing. As a result
ceiling and wall breathing will occur and you will quickly feel out of breath.
Wall Breathing
As the diaphragm flattens out it shifts the abdominal contents. It also forces
the lower ribs to expand. This expansion and contraction of the rib cage is
termed wall breathing. This type of breathing is also commonly referred to as
360 degree breathing.
Do this….
Place your hands under the bottom of your ribs. Experiment by taking a couple
of normal breaths, and then larger breaths. During the larger breaths you
should feel the lower ribs move out slightly.
What I Didn't Learn From My Singing Teacher But Wish I Had Page 13
So what breathing co-ordination is the best for singing?
A Combination Of Floor And Wall
Breathing.
Do this….
Sit on a chair or on the floor. Pull your knees up to your chest and wrap your
arms around your legs for support. Take a couple of normal breaths. Focus
the air to your pelvic area making sure that you relax your abs. As the air fills
up from the “floor” notice your lower ribs engage and expand. You should also
feel the muscles in your lower back stretch as well. Now take a more
energized breath. As you exhale make a “sh” sound. Repeat this process 3
times.
Return to a standing position. Adopt your correct posture and try to emulate
the combination breath while standing. It is important to maintain a high
sternum on the exhale. Collapsing will force the air out. Controlling the breath
is the key to skilled breathing.
How did you go?
If you are having trouble, go back and repeat the other exercises. Remember
muscles have memory and if repeated enough the co-ordination will become
automatic. You don’t want to be thinking “what are my abs doing right now”
in the middle of a performance!
Now is a great time to talk about breath inhalation. Have you taken notice of
how a singer breathes? Hearing the breath can destroy a musical phrase.
Some singers use an audible breath to add an effect to their sound. That is fine
if it is used for style purposes, but generally it is pretty annoying.
What I Didn't Learn From My Singing Teacher But Wish I Had Page 14
Large audible breaths tend to activate “ceiling” breathing. That breathy sound
that you hear is air rushing through your vocal folds. I will discuss the vocal
folds in more depth in the next lesson. This rush of air puts the folds under
pressure. Too much pressure and the use of unnecessary muscles in the throat
will create tension. Tension is the singer’s biggest enemy.
Learn to take a silent breath when singing. Breathe in a relaxed and open
manner. This will:
1. Feel better
2. Sound better
Do this….
Take 3 large audible breaths. Notice the feeling and the sound.
Now take 3 natural silent breaths. Notice the sense of ease and openness.
This time inhale over a 5 second period. You can choose to breathe through
the nose or mouth or both. It doesn’t matter which option you choose, just
make sure it is silent and free. Be aware that you are “filling up” from the floor
first, and then your ribs will engage.
The Exhale
You can control the amount of air you exhale while singing. It is commonly
called “breath control”.
So far you have learnt how to co-ordinate your body to breathe, you have
learnt to take a silent breath. To complete the cycle you need to learn how to
control the amount of air that is leaving your lungs. You don’t have to push
the air out. Your body is already accustomed to exhaling air so no added force
is needed to “push” it out.
What I Didn't Learn From My Singing Teacher But Wish I Had Page 15
Do this….
Adopt your correct posture. Take a silent breath in over 5 seconds. On the
exhale, make a “shh” sound. Make the exhale last as long as the inhale. A
common mistake that singers make is collapsing the sternum on the exhale.
This will force the air out quickly resulting in lack of breath. Keep your
sternum and chest high and resist the urge to collapse.
There are muscles that control the exhale. They are located in the abdominal
wall and rib cage. You can condition these muscles to enhance your breath
control by including stretching into your daily vocal regime.
There is an exercise to develop breath control that has been used for centuries
by famous classical singers. I will refer to this exercise as “Breath Pacing”. It is
very similar to the exercise you have just learnt, but with a small addition.
Do this….
Inhale on a silent breath for 5 seconds.
Suspend the breath for 5 seconds. When I say “suspend” I mean hold the
breath with your mouth open.
Exhale using a “shh” for 5 seconds.
Repeat this cycle 3 times.
When you get comfortable with 5 seconds do the cycle with 10 second
sections. Over time you will be able to increase this up to 30 seconds and
above.I encourage you to invest your time mastering breathing and breath
pacing before advancing through the program. You have now learnt the
second aspect of the foundation skills for singing.
What I Didn't Learn From My Singing Teacher But Wish I Had Page 16
Please refer to Video 3: "Lesson 1 Breathing" to view the exercises mentioned
in this chapter.
What I Didn't Learn From My Singing Teacher But Wish I Had Page 17
Chapter 3:
How To Sing Low Notes Using Chest
Voice
In this chapter I am going to share with you some techniques, tips and
exercises on how to sing low notes. Developing the lower part of your voice is
an often overlooked way to increase the range of your voice. Let’s firstly
discuss some reasons why you may be struggling in this area.
What’s Holding You Back?
• Wrong Compression
• Tension
• Resonance
• Beliefs
So what is vocal compression? It is simply the relationship between your vocal
cords and your air. When you are singing or speaking in the lower part of your
voice your vocal cords should remain quite “slack”. This allows air to pass
through your vocal cords easily. As you sing and speak higher the cords
What I Didn't Learn From My Singing Teacher But Wish I Had Page 18
lengthen and the space for the air to pass through decreases. This creates a
build up of pressure behind the vocal cords causing a “compressed” sound. I
encounter a lot of singers who try and use this compression in the lower part
of their voice to get more projection and volume into their low notes. When I
ask them how it feels, the usual response is “it feels like it’s getting stuck in my
throat”. The compression isn’t allowing the sound to vibrate and resonate in
their chest. More about that in a minute!
Singing low notes requires relaxation. Your body needs to be relaxed, your
vocal cords need to be relaxed, the muscles that control your cords need to be
relaxed. Sensing a theme here? Tension in your throat is going to result in the
same problems as compression. I’m going to share with you some exercises on
how to release throat tension shortly.
Where your sound resonates (vibrates) when you sing or speak can have an
impact on your ability to sing low. There are three major areas where your
sound can resonate:
• Your Chest
• Your Throat
• Your Head and Nose
Singers who have a naturally nasal or “heady” speaking voice can have a hard
time singing in their lower range. The head and nasal cavities are great for
singing high notes, but not so great when it comes to the low notes. To test
whether you have a nasal or “heady” speaking voice do this experiment:
Have a conversation with yourself and place your fingers on the bridge of your
nose. Feeling any vibration? Now place your hand on your chest and speak.
Any vibration there?
If you felt vibration only in your nose you have a nasal dominant voice and may
have issues singing low. If your only felt vibration in your chest you have a
chest dominant voice (which can lead to some high note problems). Did you
feel vibration in both areas? Great! You have a balanced voice which is
perfect for developing an even tone and range.
What I Didn't Learn From My Singing Teacher But Wish I Had Page 19
Your beliefs about your voice can often be the cause of vocal problems. If you
tell yourself that you can’t sing low then you are probably right. Singers
sometimes use the excuse “I’m a high singer, so I can’t sing low notes”. The
same applies with singers who say they can’t sing high. It’s not a matter of
“can’t” it’s just that they haven’t been shown the right way. Change your
beliefs into something positive and see what happens!
I can. I will. I must. I’m working on...
These are possibility beliefs and not a dead end CAN’T.
Sorry to get all “new age” on you... let’s get back to the reason for this chapter!
How To Sing Low Notes.
When you sing low notes the majority of the resonance needs to occur in your
chest. You may have heard of a term called “chest voice”. Chest voice is a
vocal register. You have 3:
1. Chest Voice
2. Mixed Voice
3. Head Voice
These are the areas of your voice where sound can resonate and are
responsible for allowing you to sing throughout your range. Your chest voice
handles the low notes. I’m not going to discuss the other two. I’ll save that for
another lesson.
To develop your chest voice there are 2 aspects you need to focus on:
1. Airflow
2. Relaxation
As I have already discussed, you don’t want a “compressed” sound when you
sing low. You need to get air flowing consistently through your vocal cords
What I Didn't Learn From My Singing Teacher But Wish I Had Page 20
without any pressure or tension. Try speaking in an “over the top” breathy
sound and aim to get some vibration in your chest while doing so. If you are
struggling, try exhaling on a long “HHHHH” and gradually add an “AHH” to the
breath. Once you have felt some vibration try doing the same exercise using
“PAHHHHH”. This will remove the excess breath. I need to stress that the use
of breathiness in your tone is only to help you discover your chest voice. To
take that sound higher will lead to problems with your upper range.
Relaxation is one of the most important aspects of singing, whether you are
singing high or low. I’ve already told you why it’s important, now I’m going to
share with you some tips on how to release tension in your voice and body.
• Imagine you’ve had a hard day at work. You get home and release a big
“SIGH”. Let the sigh slide right down as far as you can vocalise. Sighing
is a natural release of tension and is great for relaxing the muscles that
control your voice.
• Roll your shoulders and move your neck gently from side to side. This
will release any tension in those muscles. You can also do the sighing
exercise for great results.
• Don’t try and control your sound. Let it drop naturally. If you try and
force the sound lower it will get stuck in your throat.
Vocal Exercises To Develop Chest Voice
There are certain vocal exercises that are designed to develop and strengthen
your chest voice.
Chest Voice Exercise 1. Humming on a single note.
[Lesson 1: Track 3]
What I Didn't Learn From My Singing Teacher But Wish I Had Page 21
Humming is a great way to warm up your voice and naturally discover chest
voice. This exercise will be sung at a comfortable low pitch. Relax your mouth
and place your hand on your chest..
Chest Voice Exercise 2. Humming combined with a vowel.
[Lesson 1: Track 5]
This exercise builds on the previous one. It is designed to develop the shift
from pure resonance to a beautiful full-toned vowel. In this example we will
be using the “AH” vowel. You can experiment with other vowels as well. Place
your hand on your chest, relax your mouth and as you move from the hum to
the vowel let your jaw drop freely.
Chest Voice Exercise 3. A combined Hum and Vowel on an ascending and
descending 5 note scale. [Lesson 1: Track 7]
This exercise is similar to exercise 2 however this time we will be singing with
moving pitch and rhythm. Place your hand on your chest, relax your mouth
and as you sing the vowel and let your jaw drop freely. See if you can maintain
vibration in your chest and mouth throughout the scale.
Chest Voice Exercise 4. A Descending 5 note scale on “MAH”
[Lesson 1: Track 9]
This exercise will help you discover and develop the lower extremities of your
chest voice. Place your hand on your chest and as you sing “MAH” let your jaw
drop freely. As you sing lower don’t force the sound. Let your voice find it’s
natural lower limit.
This concludes the chapter on chest voice. I encourage you to practice these
exercises daily and become comfortable with them before moving on to the
next lesson.
What I Didn't Learn From My Singing Teacher But Wish I Had Page 22
To view demonstrations of the exercises discussed in this chapter please refer
to the following videos:
Video 4: Lesson 2 Introduction to Chest Voice
Video 5: Lesson 2 Male Demonstration
Video 6: Lesson 2 Female Demonstration
Video 7: Lesson 2 Piano Accompaniment
What I Didn't Learn From My Singing Teacher But Wish I Had Page 23
Chapter 4:
How To Sing In Mixed Voice
Let me ask you a couple of questions. Do you find that your voice hits a ceiling
as you sing higher? Do you feel a lot of strain as you sing higher? Does your
voice appear to have gaps in your range? If you answered yes to one or all of
these questions then chances are you are either struggling to find your mixed
voice or have no idea what it is and how it can help you.
I feel your pain. As a young singer I had some real issues with the higher part
of my voice. My voice would feel fine and sound great until I started to sing
higher. It was as if my voice was hitting a ceiling. It really frustrated me
because I had no idea why it was happening. The higher I tried to sing the
harder it became. My voice would eventually give up due to the amount of
work my “singing muscles” had to do. My teacher at the time offered no
solutions to me. He concluded that there must be something wrong with my
voice. This really affected my confidence and I developed a real fear of singing
high notes. I found myself forced to sing in a small range which didn’t do my
chances of making a career out of singing much good at all!
Fast forward 14 years and I do have a career as a professional singer and vocal
What I Didn't Learn From My Singing Teacher But Wish I Had Page 24
coach. I can now sing very high notes without feeling like I’m about to burst a
blood vessel! My voice is seamless from top to bottom and I’m not limited to
what I can perform. I don’t write these things to impress you, I write them to
give you hope because I was once in your shoes. I know your frustration and
pain, but I also know there is a solution.
My voice found its freedom when I found my mix voice.
What Is Mixed Voice?
Okay it’s time for me to go into teacher mode. I don’t want to bore you with
too much theory on how the voice works as I want this article to be of practical
value and not purely theoretical, but it is important that you know certain
things.
Your voice has three distinct areas:
• Chest Voice (The lowest part of your voice)
• Head Voice (The highest part of your voice)
• Mixed Voice (The area in between)
These areas are commonly called vocal registers. Chest voice is called that
because when you sing lower notes the sound should vibrate in your chest.
Head voice gets its title because as you sing higher the sound should vibrate in
the cavities of your head. Mixed voice is a combination of Chest and Head
voice. You get the best of both worlds. The nice full texture of the low notes
and the lighter less weighted sound of the higher notes.
What I Didn't Learn From My Singing Teacher But Wish I Had Page 25
Why Is Mixed Voice Important?
As you start to sing higher you need to drop weight from your voice. Nearly
every singer I have taught has come to me with this problem of carrying too
much weight into the higher part of their voice. The reason for this is related
to our speaking voice. We naturally speak in our chest voice. Try it. Put your
hand on your chest and say a few words. You should find that your chest
vibrates when you speak. Because we are very familiar with this part of our
voice it is natural for a singer to try and carry this sound up to the top of the
voice. This is where problems start to occur. The muscles that control the
vocal cords can only hold that “chest position” for a certain amount of notes
before it physically becomes impossible to do so. You will find that if you try
and carry that heavy sound up it will resemble a yell and the voice will
eventually hit a ceiling. Have you had this experience? The answer? Drop the
weight! I will tell you how in a moment.
The second important role of mixed voice is fixing breaks in the voice. There is
nothing more embarrassing as a singer than having your voice break or crack
during a performance. These breaks always occur in two places:
• Between chest and mixed voice.
• Between mixed and head voice.
I have some news for you that should make you feel better. Everyone has
these breaks in their voice. They are natural transition points commonly called
“bridges”. I’m only going to discuss the “first bridge” in this article which is
your break between chest voice and mixed voice. This is a very important part
of your voice because it primes your vocal cords (and singing muscles) to sing
higher.
What I Didn't Learn From My Singing Teacher But Wish I Had Page 26
Most singers are not aware of this first bridge and it is the main reason why I
struggled so much in my early days as a singer. I would take my chest voice up
past this transition point giving my voice absolutely no chance to “re-
coordinate” or change gears. The solution? Blend some head voice into your
sound before you get to the “bridge”. In fact it is a good idea to always have
an element of head voice present in your sound as it will help you create a
seamless voice.
Exercises To Develop Mixed Voice.
I am going to share with you two aspects of developing your mixed voice and
the exercises associated with them. The first and most vitally important is
keeping a low larynx as you start to sing higher. Your larynx is the bump in
your neck (also called the adam’s apple). To maintain a low larynx two great
exercises are:
1. A Liproll
2. A “dopey” “mum” sound.
To perform a liproll you need to blow air out and try and make your lips vibrate
together. Imagine the sound you make when it is bitterly cold, or similar to the
sound a horse makes. The liproll is very effective to drop weight from your
voice. The “dopey mum” sound will help keep your larynx low. I am going to
include some video links at the end of the article that will show you how to do
the exercises properly.
The second aspect of developing your mixed voice is the use of nasality.
Nasality will help transfer the vibration (resonance) into your head. Exercises
which I suggest are:
What I Didn't Learn From My Singing Teacher But Wish I Had Page 27
1. Scales and arpeggios using “mm”, “nn” and “ng”
2. Combining those nasal sounds with vowels.
My favourite exercises are scales using “ng” and the sound “nay”. If you are
struggling to work out how to do an “ng”, say the word “sing” and then hold
the “ng” at the end. It’s a great exercise for balancing the tone of your voice.
Mixed Voice Exercise 1. An ascending and descending 5 note scale on “NAY”
[Lesson 2: Track 2]
This exercise will allow your sound to start resonating in your nasal cavity.
Place a hand on both your throat and bridge of your nose and say “NAY”. You
should feel vibration in both areas. This is split resonance and the foundation
of mixed voice. When doing this exercise keep your tongue flat and allow your
jaw to drop freely.
Mixed Voice Exercise 2. An arpeggio ascending on MAH and Descending on
MEH [Lesson 2: Track 4]
This exercise will develop your ability to shift between vowel sounds while
maintaining mixed voice. The exercise will start in chest voice and ascend into
mixed voice. When doing this exercise keep your tongue flat for both the MAH
and MEH. Let your jaw drop freely and don’t widen your mouth as you sing
higher.
Mixed Voice Exercise 3. 5 note ascending scale on a liproll to a 5 note
descending scale on AH [Lesson 2: Track 6]
This exercise will help to drop the weight from your voice as you ascend into
mix. The Purpose of the liproll is to relax the muscles in your neck and keep
your larynx low as you sing higher. By vocalising an AH as you descend you will
train your muscles and larynx to stay relaxed and low.
Mixed Voice Exercise 4. A 5 note ascending and descending scale on “NG”
[Lesson 2: Track 8]
What I Didn't Learn From My Singing Teacher But Wish I Had Page 28
This exercise is perfect for developing a balanced mix between your chest
voice and head voice. The NG sound allows resonance to occur in the roof of
your mouth and nasal cavity simultaneously. To perform the NG sound simply
say the word “sing” and hold the “NG” at the end.
Mixed Voice Exercise 5. An Ascending Arpeggio on “NG” to the AH vowel
[Lesson 2: Track 10]
This exercise builds on exercise 4. You will be using the “NG” to create a
balanced mix of resonance and then transferring the “NG” to the AH Vowel.
Your goal here is to allow the vowel to resonate in the same areas as the “NG”.
Benefits Of The Mixed Voice.
There are some wonderful benefits you can expect when you discover and
develop your mixed voice:
• An Increased Range
• Increased Power
• A more impressive and meatier tone
• Boosted Self Esteem and Confidence
• The ability to sing in a variety of genres
• Eliminated strain
• Increased vocal endurance
Learning how to sing with mixed voice solved so many vocal issues that I
carried around for many years. Issues that held me back vocally and affected
What I Didn't Learn From My Singing Teacher But Wish I Had Page 29
my confidence. I hope this chapter has given you some hope and ideas that
you can use in your own vocal development.
To view demonstrations of the exercises discussed in this chapter please refer
to the following videos:
Video 8: Lesson 3 Introduction to Mixed Voice
Video 9: Lesson 3 Male Demonstration
Video 10: Lesson 3 Female Demonstration
Video 11: Lesson 3 Piano Accompaniment
What I Didn't Learn From My Singing Teacher But Wish I Had Page 30
Chapter 5:
How To Sing High Notes
In this chapter I am going to show you how to sing high notes without straining
your voice or suffering embarrassing breaks. I struggled for a very long time
when I was developing my voice. I can now sing in a much wider range and I
actually look forward to singing high notes! I am going to show you the Do’s
and Don’ts and take you through a system that you can apply to develop your
own voice.
The Major Reasons Why You Can’t Sing
High
• Wrong Information
• Too Much Weight In Your Voice
• Using The Wrong Amount Of Air
• Fear
There is a lot of information available online from a variety of teachers that
What I Didn't Learn From My Singing Teacher But Wish I Had Page 31
promise to show you how to sing high. Private singing teachers are also a
great source of expertise in this very specific singing topic. Unfortunately while
there is a lot of great and useful information there is also a lot of bad advice
and teaching in the industry. Unfortunately I didn’t get the right information
and teaching early on in my development. I actually lost range in the higher
part of my voice because of the techniques my teacher taught me. The title of
singing teacher or vocal coach brings with it an expectation of trust. My advice
to you is don’t blindly trust a teacher or expert. Experiment with techniques
and ideas and find what works for you.
Carrying too much weight into the higher part of your voice is another major
reason why singers struggle to sing high. So what is vocal weight? The lower
part of your voice (chest voice) has a different vocal structure than the higher
part of your voice (head voice). When you are singing low notes your vocal
cords a quite “slack” which allows vibration over most of the vocal cord. This
gives it a “meatier” tone. There are “singing muscles” which co-ordinate this
vocal cord position. The problem that I had and many other singers have is
trying to maintain this vocal cord position into the higher part of the voice.
The muscles and cords cannot maintain this position for long without resorting
to raising the larynx. The larynx is the bump you can see in your neck. You are
carrying too much weight up if you see the larynx rise when singing higher
notes.
The wrong amount of air can make it very hard to sing high notes. Too little air
and your voice will sound weak and unsupported. Too much air will cause your
vocal cords to be put under too much pressure and strain will occur. Many
coaches advise that you don’t need as much air when you sing higher because
there isn’t as much vocal cord surface to vibrate. This is only partly true.
When a student hears this advice the first reaction is too cut the amount of air
that they usually sing a note with. This usually results in a weak head voice, or
a flip into falsetto. While it is true that high notes require less air to pass over
the cords to create sound, this is not something that you need to control. It will
happen automatically. You need to maintain the same amount of air
throughout your entire range. The vocal cords will naturally “zip up” limiting
the amount of air that can pass through. By maintaining the same amount of
air you will create the right amount of pressure behind the cords to allow a
bigger and more focused sound in the head voice. Here’s a tip:
What I Didn't Learn From My Singing Teacher But Wish I Had Page 32
Do a series of strong “SHHHH” sounds before you attempt to sing a high
note.
Are you afraid of heights? I know I certainly am. This fear is also very
prominent in singing. This fear of singing high usually comes from past
experiences which we use as reference points. Perhaps you feel strain every
time you sing high. Maybe your voice breaks as soon as you sing high. Does
your voice end up sore after singing high notes? I know I have certainly
experienced all of those painful moments. What happens if you continue to
struggle with these problems is you develop a fear of singing high notes.
Basically you will start to tense up as soon as you know that “high note” is
coming, giving yourself no chance of hitting the note. I see this problem on a
daily basis. The earlier you can get over this fear the better. You need to give
yourself new reference points to reprogram your brain. You can do this by
doing specific exercises which I will share in this article.
How To Sing High Notes
Okay so we have now determined what has been holding you back. You know
the wrong things to do, so now let’s discuss the right things to do. The secret
to singing high tension free notes is accessing the head voice.
What Is The Head Voice?
The head voice is one of your vocal registers. You have three main ones:
1. Chest Voice (Lower notes)
2. Mixed Voice (Middle part of your voice)
3. Head Voice (High Notes)
It is called the head voice because the sound vibrates (resonates) in the
cavities of your head and nose. It is the most foreign part of your voice to
develop and experience because it is rarely used in speech. When we speak
we do so using the chest voice and occasionally the mixed voice. This is also
the reason why most singers drag the chest voice up too high. It is a familiar
part of the voice and the brain sends signals to take it higher.
What I Didn't Learn From My Singing Teacher But Wish I Had Page 33
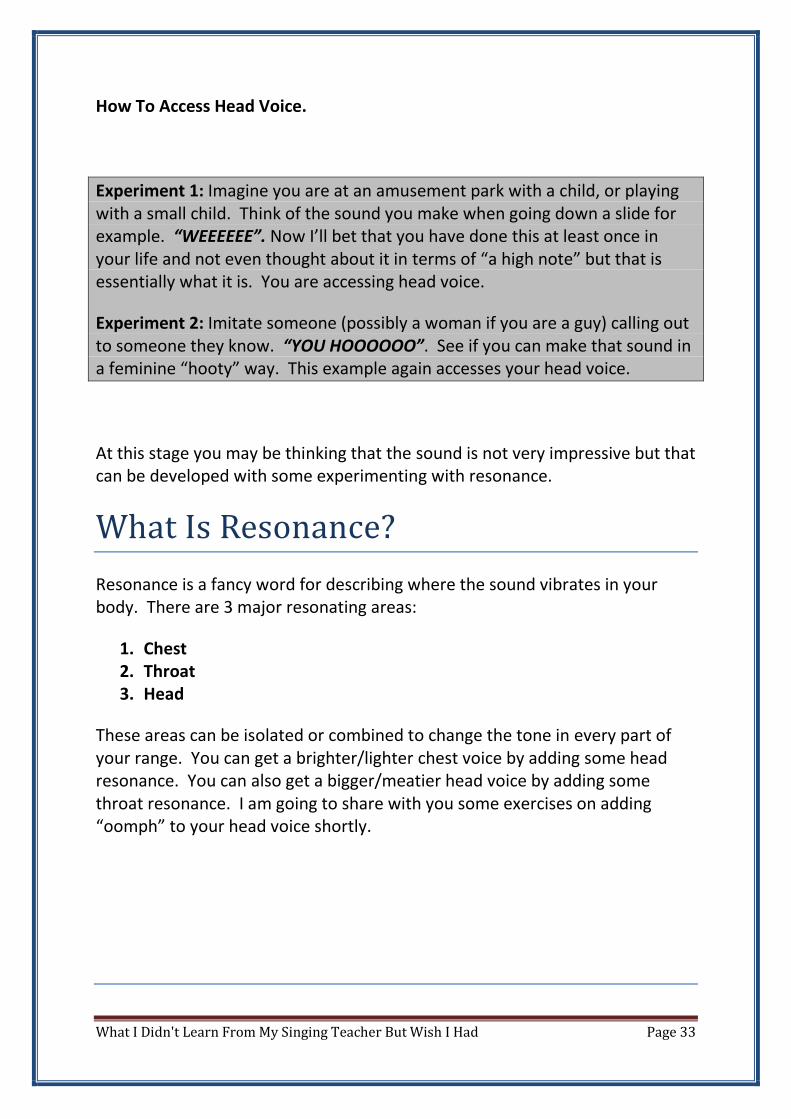
How To Access Head Voice.
Experiment 1: Imagine you are at an amusement park with a child, or playing
with a small child. Think of the sound you make when going down a slide for
example. “WEEEEEE”. Now I’ll bet that you have done this at least once in
your life and not even thought about it in terms of “a high note” but that is
essentially what it is. You are accessing head voice.
Experiment 2: Imitate someone (possibly a woman if you are a guy) calling out
to someone they know. “YOU HOOOOOO”. See if you can make that sound in
a feminine “hooty” way. This example again accesses your head voice.
At this stage you may be thinking that the sound is not very impressive but that
can be developed with some experimenting with resonance.
What Is Resonance?
Resonance is a fancy word for describing where the sound vibrates in your
body. There are 3 major resonating areas:
1. Chest
2. Throat
3. Head
These areas can be isolated or combined to change the tone in every part of
your range. You can get a brighter/lighter chest voice by adding some head
resonance. You can also get a bigger/meatier head voice by adding some
throat resonance. I am going to share with you some exercises on adding
“oomph” to your head voice shortly.
What I Didn't Learn From My Singing Teacher But Wish I Had Page 34
3 Secrets For Developing Head Voice
1. Moving Through Your Mix
2. A Low Larynx
3. Relaxation
Your mixed voice is the gateway to your high notes. Establishing vocal cord
connection during your transition into mixed voice will allow you to continue
up into head voice. This is a complete article in itself so I will include a link at
the end of this article for singers wanting to know more.
Keeping your larynx low as you ascend will help you transfer into head voice.
A rising larynx is a head voice killer! As I have already discussed, this will cause
your voice to become incredibly heavy. I’m sure you have experienced the
“break” or “flip” into falsetto as a result of this. To maintain a low larynx you
must practice singing in front of a mirror. This will give you a visual aid. The
exercises I suggest next will help your voice re-coordinate to allow a rested low
larynx.
Relaxation is so important when you sing, not just when singing high notes but
singing in any part of your range. Muscle strain will cause you many problems
in your quest to sing high notes. The muscles in your neck, face, and abdomen
all work together to create your voice and also limit its potential. Some areas
to watch for tension:
• Abdomen
• Shoulders
• Neck
• Jaw
• Tongue
• Lips
How to discover and release this tension is the topic for another article. Again,
using a mirror will help you become aware of your tension areas.
What I Didn't Learn From My Singing Teacher But Wish I Had Page 35
Exercises To Develop Head Voice
The following exercises are recommended for discovering and developing your
head voice. I suggest you start with:
• Liproll arpeggios
This will help you drop the weight from your voice. A liproll is a silly sound.
Imagine making the “BRRRR” sound when you are cold and adding a dopey
“UH” sound at the same time.
• Liproll to Vowel Arpeggios
This will help you drop the weight and help with muscle coordination as you
sing a vowel directly after the liproll. Your muscles have memory and will learn
the new position.
• Exercises on “GI” “GO” and “WI”
These exercises help with keeping the voice connected as you ascend. They
are also very effective for keeping your larynx low.
• Nasality exercises “NAY” “NYA”
Nasality is a great way to add some focus and brightness to your head voice.
These specific exercises incorporate some throat resonance which changes the
tone from “Hooty” to “Edgy”.
Head Voice Exercise 1: A Lip roll or tongue roll arpeggio.
[Lesson 3: Track 2]
This exercise is designed to relax the muscles in your neck and maintain a
consistent airflow. When doing the lip roll try and make the sound a little
dopey. This will keep your larynx low.
Head Voice Exercise 2: An ascending liproll arpeggio to a held top note on
"OO" [Lesson 3: Track 4]
What I Didn't Learn From My Singing Teacher But Wish I Had Page 36
This exercise builds on exercise one. By ascending with a liproll you will be
able to keep your larynx low and muscles relaxed. By sustaining an "OO" on
the top note you should notice a hooty sound. This is head voice. Do not
worry about volume at this stage.
Head Voice Exercise 3: An arpeggio on "MOM"
[Lesson 3: Track 6]
This exercise combines a nasality and a closed vowel. This is a perfect
combination for accessing head voice. The "M" of "MOM" will get your sound
in a forward in your face and the closed "O" of "MOM" will keep your mouth
from widening.
Head Voice Exercise 4: Ascending arpeggio on "MOM" to repeated top note
on "MI" ME" MO" "MOO" [Lesson 3: Track 8]
This exercise builds on all of the previous exercises of this lesson. You will be
sustaining a series of high notes in head voice during this exercise using the
sounds "MOM, MI, ME, MO, and MOO". Do not push yourself to high in this
exercise and keep your volume low.
By learning how to sing high notes by discovering and developing your head
voice you will be able to eliminate strain, drop the weight from your voice and
lose the fear of singing that plagues so many singers.
To view demonstrations of the exercises discussed in this chapter please refer
to the following videos:
Video 12: Lesson 4 Introduction to Head Voice
Video 13: Lesson 4 Male Demonstration
Video 14: Lesson 4 Female Demonstration
Video 15: Lesson 4 Piano Accompaniment

What I Didn't Learn From My Singing Teacher But Wish I Had Page 37
Chapter 6:
How To Fix Breaks In Your Voice
What is the most embarrassing thing that can happen to you when you sing?
Having your voice “break” or “crack” is certainly high on my list! This has
happened to me in the past in both a private and public situation. While it is
hopeful to think that people will remember the hundreds of perfect notes you
have sung in the performance, the reality is the moment your voice cracked
will be first and foremost in their memory. In this chapter I am going to share
with you the reasons why your voice breaks and how you can prevent it from
happening.
What Is A Vocal Break?
A vocal break is a sudden shift or jump between your vocal registers. The most
common break is from chest voice to head voice. Another break is from chest
voice to falsetto. This is particularly problematic for male singers who haven’t
developed their head voice. Have you had the experience of singing low in
your range and find that as you sing higher your voice flips into a weak
uncontrolled high sound? That’s a vocal break.
Why does it happen?
What I Didn't Learn From My Singing Teacher But Wish I Had Page 38
There are many reasons why your voice can break:
• Wrong muscle coordination
• Wrong airflow
• A rising larynx
• Fear
• Control
• Loss of connection
So what do I mean by muscle coordination? There are muscles that are
attached to your vocal cords. These muscles are responsible for lengthening
and shortening the cords which results in changes of pitch. The chest voice has
different muscle coordination than head voice. When singing low in your
range the cords are “slack” and relaxed. When you sing in head voice the
cords lengthen and become tighter. The reason your voice breaks in between
these two registers is muscle balance. There is too much influence from the
muscles that control the chest voice as you sing higher. Your muscles will get
to a point where they can’t stretch any further and a sudden “shift” or break
will occur.
Airflow can be the cause of vocal breaks. Too much air can bombard your
vocal cords with pressure and tension. Too little air can have the opposite
effect leaving your cords struggling to vibrate. There needs to be a balance
between the two. Your vocal cords need a consistent amount of pressurised
air to vibrate efficiently. You can find out more about airflow here.
A rising larynx is one of the major reasons for your voice breaking. It is very
closely related to muscle coordination. Your larynx is the bump you can see
and feel in your throat. Next time you sing, watch yourself in a mirror and
notice what your larynx does as you start to sing higher. Does it also start to
move higher? If it does, that means that you are pulling chest voice up too
high. This is also referred to as vocal weight. You will reach a point where
What I Didn't Learn From My Singing Teacher But Wish I Had Page 39
your tone starts to resemble a “yell”. If you try and take this weight up any
higher your voice will break.
Fear can do strange things to your mind and body. Perhaps you have had the
unfortunate experience of your voice breaking during a public performance?
This is certainly embarrassing and something you will want to avoid happening
again. Unfortunately when this happens once, you can get into the habit of
thinking that it will happen again. I know I have had this experience. It’s as if I
can see the note coming from a mile away. My body starts to tense, my throat
seizes up, my heart rate increases and then........”crack”. Fear can cause a lot
of tension in your body and throat and can actually be the cause of a vocal
break.
People feel the need to control things in their lives. This makes a person feel
safe. When we are not in control what do we feel? Uncertainty. So how does
this relate to singing? I’m sure you have heard the expression “that singer has
great control.” I’m going to go out on a limb here and suggest that control, for
a singer, is not necessarily a good thing. I believe it is also a big reason why
vocal breaks occur. If you are trying to control your voice then I believe at
some point you are going to run into tension problems. Your voice is designed
to be relaxed and free. We complicate things by trying to control our voice,
wanting to sound good, trying to sing higher, trying to sing louder. Our voice
will do these things naturally, if we let it. I’m suggesting that in order to fix
your vocal breaks you need to stop trying to control your voice around your
problems areas. Experiment with your voice, don’t be afraid to make some
mistakes and you will gain a greater feeling of freedom when you sing.
The biggest and most obvious vocal break is complete loss of connection. This
occurs when your voice flips into falsetto. Falsetto is very different from your
“connected” vocal registers. When you sing in chest, mixed and head voice
your vocal cords remain connected the entire time. Sound is created on the
What I Didn't Learn From My Singing Teacher But Wish I Had Page 40
inner edges of your vocal cords. When singing falsetto, sound is created on the
extreme external edges of the vocal cords and a breathy tone is created due to
the space between the cords. The break occurs when a singer extends chest
voice far beyond the speaking range. It is impossible to continue to sing higher
in this muscle and vocal cord position so the muscles and cords basically “give
up” which results in a break into falsetto.
How Can Vocal Breaks Be Fixed?
As you would have realised by now one of the major reasons for the breaks in
your voice is incorrect muscle coordination. You need to learn how to
transition between your vocal registers smoothly. You can reprogram your
muscles by learning how to sing with mixed voice.
Vocal Exercises To Achieve A Smooth
Voice.
I recommend the following exercises to help you “iron out” the breaks in your
voice:
Connection Exercise 1: Vocal Slides
[Lesson 4: Track 2]
This exercise will be used to check for connection. We will be sliding from low
to high and high to low. We will be using the "I" vowel.
This exercise can be done without a piano. There are no set starting points for
vocal slides. Just make sure you start in chest voice or head voice depending
on which direction you are sliding.
What I Didn't Learn From My Singing Teacher But Wish I Had Page 41
Connection Exercise 2: Lip roll slides
[Lesson 4: Track 3]
This exercise will help to correct any breaks that you noticed in the first
exercise. It will relax the muscles in your throat, keep your larynx low and
maintain a steady airflow which are all vital ingredients for a connected voice.
Connection Exercise 3: An Ascending arpeggio to an 8 note descending scale
using a lip roll. [Lesson 4: Track 4]
This exercise builds on exercise two. Instead of leaping though the registers
we will be moving by small steps as we descend back through the register
transitions. We are priming our vocal cords, muscles and air to co-ordinate for
connection.
Connection Exercise 4: An ascending arpeggio to an 8 note descending scale
on "MA" and "MI" [Lesson 4: Track 6]
This exercise is the same as exercise 3 however we will be substituting the lip
roll for the sounds "MA" and MI". Exercise 3 should have prepared your voice
to sing through your transitions with optimal co-ordination. Your goal is to sing
this exercise with the same freedom and relaxation as exercise3.
Connection Exercise 5: A double octave arpeggio on "NAY".
[Lesson 4: Track 8]
This exercise is a great test for singers with a large range. We will be singing
through two octaves while maintaining connection through each vocal register.
Keep your sound "edgy" and light for this exercise. Don't be discouraged if you
can't do this exercise at first. With dedicated practice of all the previous
exercises your range will increase.
Connection Exercise 6: Combination vocal slides
[Lesson 4: Track 10]
The final exercise is a combination of exercises 1 and 2. We will be using vocal
slides on a lip roll and an "I" vowel to check for connection and monitor our
progress.
What I Didn't Learn From My Singing Teacher But Wish I Had Page 42
Eliminating nasty breaks in your voice will boost your confidence as a singer
and allow you to sing with freedom without the fear of an embarrassing break.
To view demonstrations of the exercises discussed in this chapter please refer
to the following videos:
Video 16: Lesson 5 Introduction: Connected Voice
Video 17: Lesson 5 Male Demonstration
Video 18: Lesson 5 Female Demonstration
Video 19: Lesson 5 Piano Accompaniment
What I Didn't Learn From My Singing Teacher But Wish I Had Page 43
Chapter 7:
How To Improve The Sound Of Your
Voice
Are you happy with the way your voice sounds? Are you told that your voice
sounds too nasal, uninteresting, unclear, dark, airy or just plain bad? In this
chapter I am going to show you ways you can improve the sound of your voice.
I will be discussing:
• The different types of tone and their benefits and drawbacks.
• How your articulators affect the sound of your voice.
• The 5 major vowels and their relationship to your articulators.
• The role your air and vocal cords play to create a balanced tone.
• Exercises to improve your tone.
The Different Types Of Vocal Tone.
There are many ways to describe vocal tone. In most cases resonance (where
your sound vibrates) is the reason why your voice sounds the way it does. The

What I Didn't Learn From My Singing Teacher But Wish I Had Page 44
following are some of the most common types of vocal tone.
Nasal tone. If you get told that you sound too nasal when you sing, the
majority of your tone is resonating in your nasal cavity. Nasal tone can affect
your singing in a good way. Singers who have a nasal tone often have little
trouble singing in the higher part of their vocal range, however problems will
occur when singing in their lower range. Singers with a nasal tone find it hard
to transition into chest voice which results in a lack of depth to their tone. To
correct nasal tone you need to allow more sound to resonate in your throat.
Try dropping your jaw further when you sing.
Dark tone. Many low voice singers will suffer from a dark or heavy tone. This
type of tone is caused by the chest voice. Singers who have a dark, heavy tone
will sing very comfortably in their lower range but may run into problems
singing in the middle to higher part of their range. This is caused by pulling too
much weight (extending the chest voice) into the middle part of the voice. This
can be overcome by adding more nasality to your vocal tone. Try including an
"M", "NG" or "N" to your vocal exercises.
Throaty tone. If you get told that your tone is too throaty, you guessed it, your
sound is being produced (resonating) in your throat. The major culprit for this
type of singing is your larynx. Your larynx is the bump you can feel in the lower
part of your throat. Your larynx should remain in a rested position when you
sing. Singers who have a "throaty" tone will notice that their larynx moves up
and down according to the pitch they are singing. This will cause the sound to
get trapped in their throat and prevent their voice transitioning into head
voice. If you have a "throaty" tone you can improve it by making sure your
larynx stays in a rested position when you sing. Monitor yourself in a mirror
until it becomes automatic.
Light "flutey" tone. Many high voice singers will suffer from a light "flutey"
tone. This type of tone is caused by the head voice. Singers with this type of
tone will have no problem singing in their higher register but will have
What I Didn't Learn From My Singing Teacher But Wish I Had Page 45
problems singing in the lower part of their voice. This is caused by dragging
the head voice down into "chest voice territory". To correct this problem try
speaking a phrase in your normal speaking voice. Then sing the phrase,
maintaining the same tone as when you speak.
Breathy tone. This is a very common type of vocal tone and is caused by a lack
of connection of the vocal cords. Basically there is too much space between
the vocal cords when you sing. This allows a lot of air to pass through the
cords creating a breathy tone. To fix this problem try exercises that start with
a "G". This will close your vocal cords before sound is produced.
Pressed tone. This is the opposite of a breathy tone. Too much vocal cord
closure will cause your sound to become "pressed" or "strained". Too much air
trying to pass through a small space between your vocal cords is going to cause
tension and far too much pressure when you sing. There is a proper balance
between your air and vocal cords which I will be discussing later in this article.
"Muddy" tone. This type of tone represents a lack of clarity when you sing. It
can be caused by your articulators, your lips, tongue and jaw. Each of these
articulators can have a dramatic impact on the tone and clarity of your voice. I
will be discussing this in much more detail next.
How Your Articulators Affect The Sound
Of Your Voice.
Your articulators are your lips, tongue and jaw. These three things shape your
words and work together to create your tone. If any of these articulators are
tense or are in an improper position your tone will suffer. There are exercises
that you can do to relax and relieve tension.

What I Didn't Learn From My Singing Teacher But Wish I Had Page 46
Lip rolls and an exercise moving between "OO--EE" to stretch your lips.
Stretch your tongue by sticking it out as far as you can and hold it for 5
seconds. A tongue roll will also help relieve tension at its root.
Chewing and yawning are great exercises to stretch your jaw.
As an experiment try singing a phrase of your favourite song with tension in
these 3 areas. Notice how your tone changes.
The 5 Major Vowels And Their
Relationship To Your Articulators.
We will now look at the five major vowels, the neutral position and the
positioning of your articulators.
The Neutral Position
When at rest the tongue is relaxed, sitting on the lower teeth. The jaw is
slightly dropped and the lips relaxed and slightly parted. I am going to refer to
this position as Neutral.
Exercise
I want you to say “I E A O U”
Notice the different jaw, tongue and lip positions for each vowel.
What I Didn't Learn From My Singing Teacher But Wish I Had Page 47
Say it again, but this time with tense and tight articulators. Do you notice the
difference?
The Five Vowels.
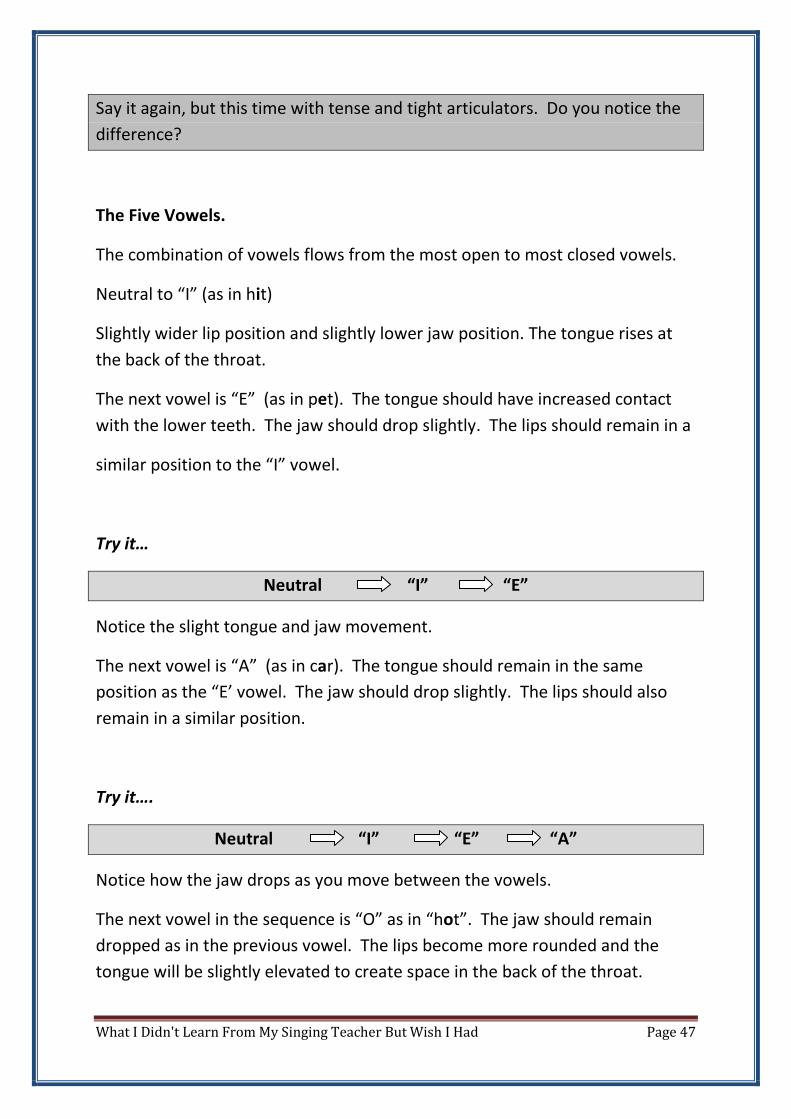
The combination of vowels flows from the most open to most closed vowels.
Neutral to “I” (as in hit)
Slightly wider lip position and slightly lower jaw position. The tongue rises at
the back of the throat.
The next vowel is “E” (as in pet). The tongue should have increased contact
with the lower teeth. The jaw should drop slightly. The lips should remain in a
similar position to the “I” vowel.
Try it…
Neutral “I” “E”
Notice the slight tongue and jaw movement.
The next vowel is “A” (as in car). The tongue should remain in the same
position as the “E’ vowel. The jaw should drop slightly. The lips should also
remain in a similar position.
Try it….
Neutral “I” “E” “A”
Notice how the jaw drops as you move between the vowels.
The next vowel in the sequence is “O” as in “hot”. The jaw should remain
dropped as in the previous vowel. The lips become more rounded and the
tongue will be slightly elevated to create space in the back of the throat.
What I Didn't Learn From My Singing Teacher But Wish I Had Page 48
Try it….
Neutral “I” “E” “A” “O”
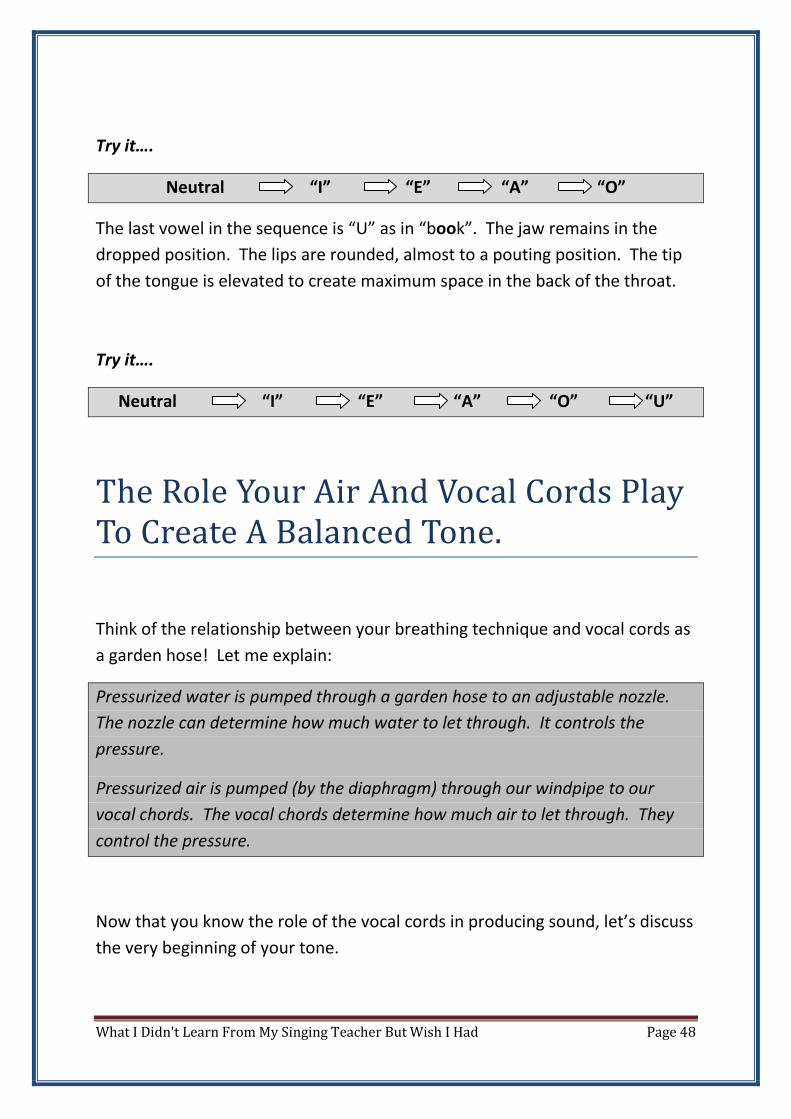
The last vowel in the sequence is “U” as in “book”. The jaw remains in the
dropped position. The lips are rounded, almost to a pouting position. The tip
of the tongue is elevated to create maximum space in the back of the throat.
Try it….
Neutral “I” “E” “A” “O” “U”
The Role Your Air And Vocal Cords Play
To Create A Balanced Tone.
Think of the relationship between your breathing technique and vocal cords as
a garden hose! Let me explain:
Pressurized water is pumped through a garden hose to an adjustable nozzle.
The nozzle can determine how much water to let through. It controls the
pressure.
Pressurized air is pumped (by the diaphragm) through our windpipe to our
vocal chords. The vocal chords determine how much air to let through. They
control the pressure.
Now that you know the role of the vocal cords in producing sound, let’s discuss
the very beginning of your tone.
What I Didn't Learn From My Singing Teacher But Wish I Had Page 49
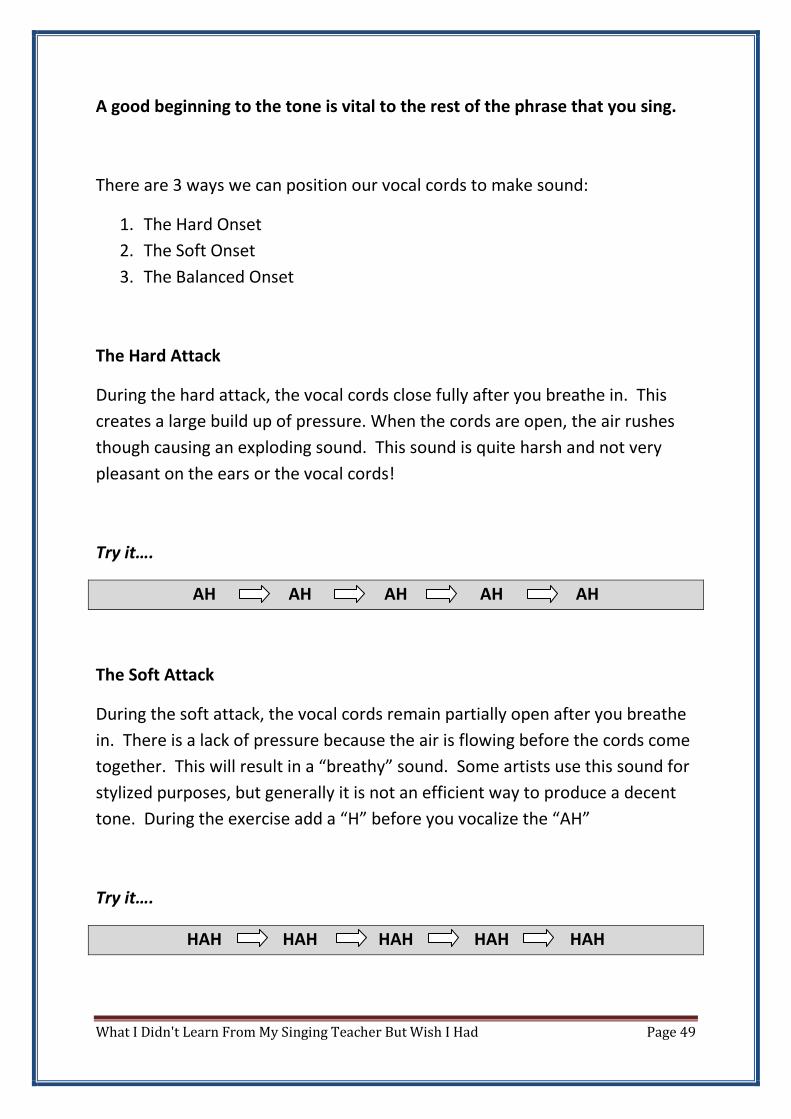
A good beginning to the tone is vital to the rest of the phrase that you sing.
There are 3 ways we can position our vocal cords to make sound:
1. The Hard Onset
2. The Soft Onset
3. The Balanced Onset
The Hard Attack
During the hard attack, the vocal cords close fully after you breathe in. This
creates a large build up of pressure. When the cords are open, the air rushes
though causing an exploding sound. This sound is quite harsh and not very
pleasant on the ears or the vocal cords!
Try it….
AH AH AH AH AH
The Soft Attack
During the soft attack, the vocal cords remain partially open after you breathe
in. There is a lack of pressure because the air is flowing before the cords come
together. This will result in a “breathy” sound. Some artists use this sound for
stylized purposes, but generally it is not an efficient way to produce a decent
tone. During the exercise add a “H” before you vocalize the “AH”
Try it….
HAH HAH HAH HAH HAH
What I Didn't Learn From My Singing Teacher But Wish I Had Page 50
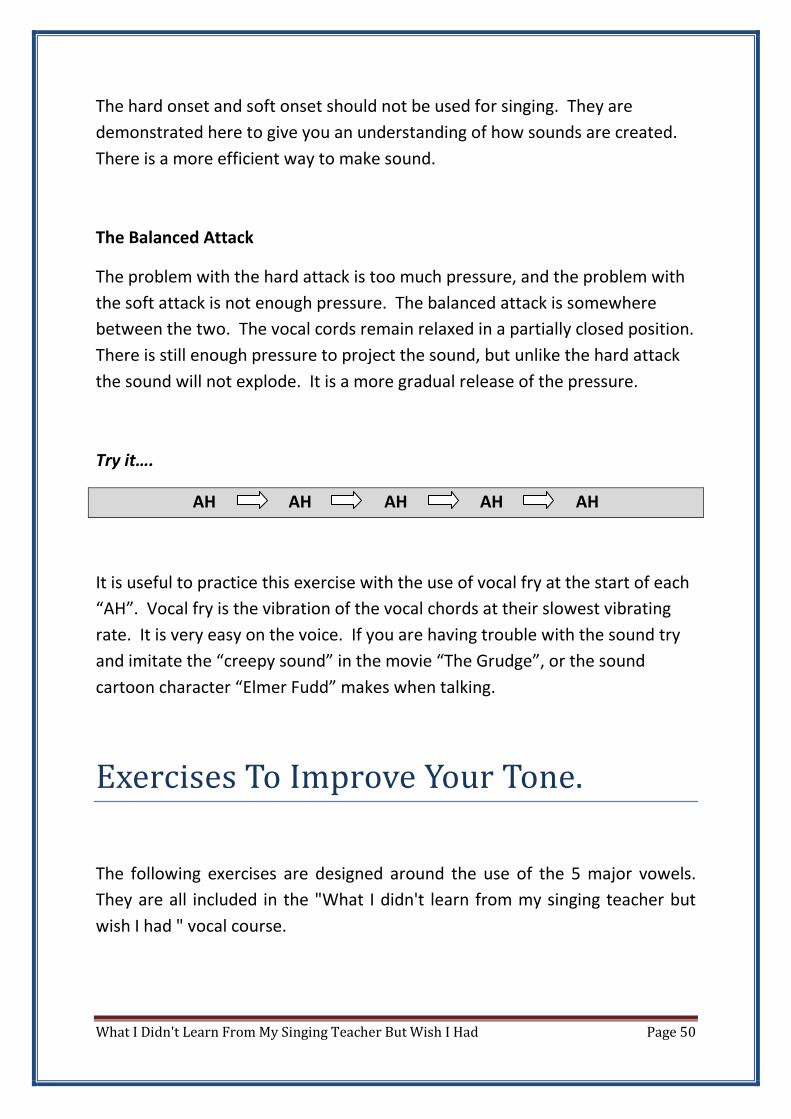
The hard onset and soft onset should not be used for singing. They are
demonstrated here to give you an understanding of how sounds are created.
There is a more efficient way to make sound.
The Balanced Attack
The problem with the hard attack is too much pressure, and the problem with
the soft attack is not enough pressure. The balanced attack is somewhere
between the two. The vocal cords remain relaxed in a partially closed position.
There is still enough pressure to project the sound, but unlike the hard attack
the sound will not explode. It is a more gradual release of the pressure.
Try it….
AH AH AH AH AH
It is useful to practice this exercise with the use of vocal fry at the start of each
“AH”. Vocal fry is the vibration of the vocal chords at their slowest vibrating
rate. It is very easy on the voice. If you are having trouble with the sound try
and imitate the “creepy sound” in the movie “The Grudge”, or the sound
cartoon character “Elmer Fudd” makes when talking.
Exercises To Improve Your Tone.
The following exercises are designed around the use of the 5 major vowels.
They are all included in the "What I didn't learn from my singing teacher but
wish I had " vocal course.
What I Didn't Learn From My Singing Teacher But Wish I Had Page 51
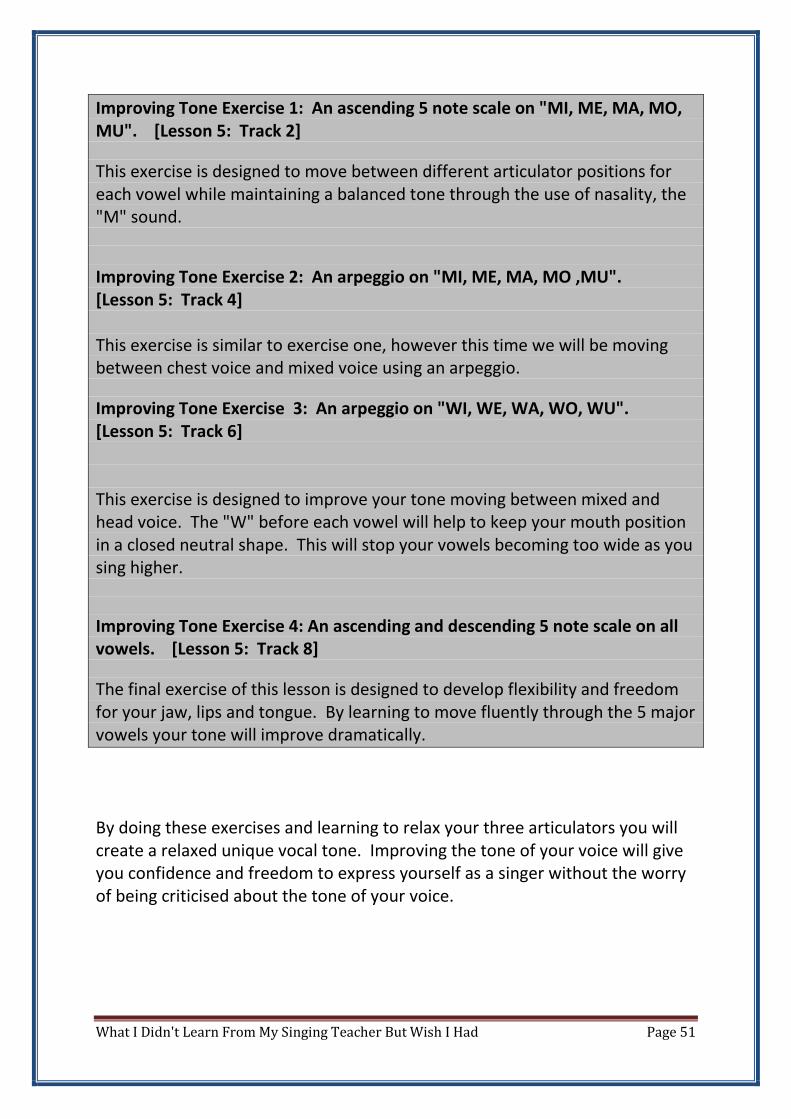
Improving Tone Exercise 1: An ascending 5 note scale on "MI, ME, MA, MO,
MU". [Lesson 5: Track 2]
This exercise is designed to move between different articulator positions for
each vowel while maintaining a balanced tone through the use of nasality, the
"M" sound.
Improving Tone Exercise 2: An arpeggio on "MI, ME, MA, MO ,MU".
[Lesson 5: Track 4]
This exercise is similar to exercise one, however this time we will be moving
between chest voice and mixed voice using an arpeggio.
Improving Tone Exercise 3: An arpeggio on "WI, WE, WA, WO, WU".
[Lesson 5: Track 6]
This exercise is designed to improve your tone moving between mixed and
head voice. The "W" before each vowel will help to keep your mouth position
in a closed neutral shape. This will stop your vowels becoming too wide as you
sing higher.
Improving Tone Exercise 4: An ascending and descending 5 note scale on all
vowels. [Lesson 5: Track 8]
The final exercise of this lesson is designed to develop flexibility and freedom
for your jaw, lips and tongue. By learning to move fluently through the 5 major
vowels your tone will improve dramatically.
By doing these exercises and learning to relax your three articulators you will
create a relaxed unique vocal tone. Improving the tone of your voice will give
you confidence and freedom to express yourself as a singer without the worry
of being criticised about the tone of your voice.
What I Didn't Learn From My Singing Teacher But Wish I Had Page 52
To view demonstrations of the exercises discussed in this chapter please refer
to the following videos:
Video 20: Lesson 6 Introduction: Improving Tone
Video 21: Lesson 6 Male Demonstration
Video 22: Lesson 6 Female Demonstration
Video 23: Lesson 6 Piano Accompaniment
What I Didn't Learn From My Singing Teacher But Wish I Had Page 53
Chapter 8:
Vocal Flexibility
Now that you have spent some time developing the tone of your voice you can
start to add some of the finer skills required for singing. You should be aware
of an improvement to the power of your voice at this stage. This power comes
from proper breath control and resonance. Good singing combines both
power and flexibility. Flexibility is vital in fast rhythmic patterns. You only
have to listen to popular music today to realize flexibility is an important
ingredient to your overall voice. Christina Aguilera and Mariah Carey are
excellent examples of flexibility in popular music. In my opinion these
“embellishments” are overdone, but they do demonstrate excellent agility.
Flexibility in vocal pitch is also a key area of singing that needs to be mastered.
Improper breath support and vocal onset will become very apparent if time
has not been taken to control the breathing technique.
Agility must become a part of a singer’s daily routine. The following exercises
will build in difficulty as you progress.
Exercises To Develop Vocal Flexibility
What I Didn't Learn From My Singing Teacher But Wish I Had Page 54
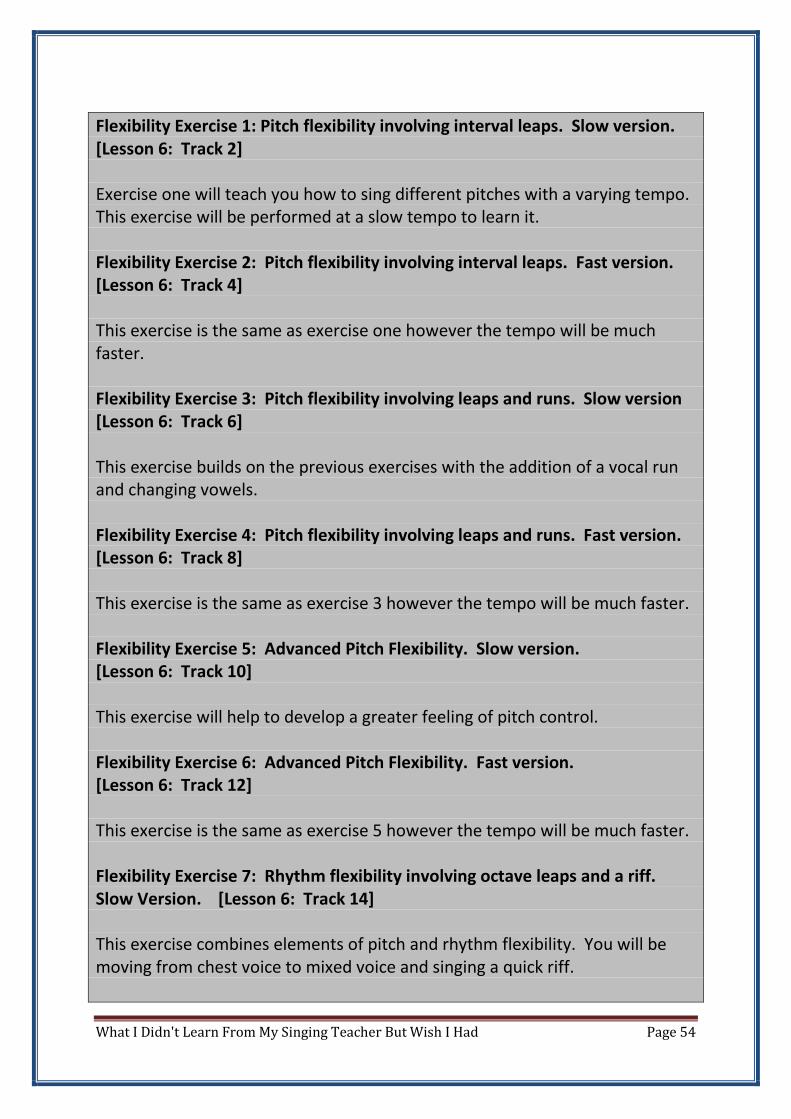
Flexibility Exercise 1: Pitch flexibility involving interval leaps. Slow version.
[Lesson 6: Track 2]
Exercise one will teach you how to sing different pitches with a varying tempo.
This exercise will be performed at a slow tempo to learn it.
Flexibility Exercise 2: Pitch flexibility involving interval leaps. Fast version.
[Lesson 6: Track 4]
This exercise is the same as exercise one however the tempo will be much
faster.
Flexibility Exercise 3: Pitch flexibility involving leaps and runs. Slow version
[Lesson 6: Track 6]
This exercise builds on the previous exercises with the addition of a vocal run
and changing vowels.
Flexibility Exercise 4: Pitch flexibility involving leaps and runs. Fast version.
[Lesson 6: Track 8]
This exercise is the same as exercise 3 however the tempo will be much faster.
Flexibility Exercise 5: Advanced Pitch Flexibility. Slow version.
[Lesson 6: Track 10]
This exercise will help to develop a greater feeling of pitch control.
Flexibility Exercise 6: Advanced Pitch Flexibility. Fast version.
[Lesson 6: Track 12]
This exercise is the same as exercise 5 however the tempo will be much faster.
Flexibility Exercise 7: Rhythm flexibility involving octave leaps and a riff.
Slow Version. [Lesson 6: Track 14]
This exercise combines elements of pitch and rhythm flexibility. You will be
moving from chest voice to mixed voice and singing a quick riff.
What I Didn't Learn From My Singing Teacher But Wish I Had Page 55
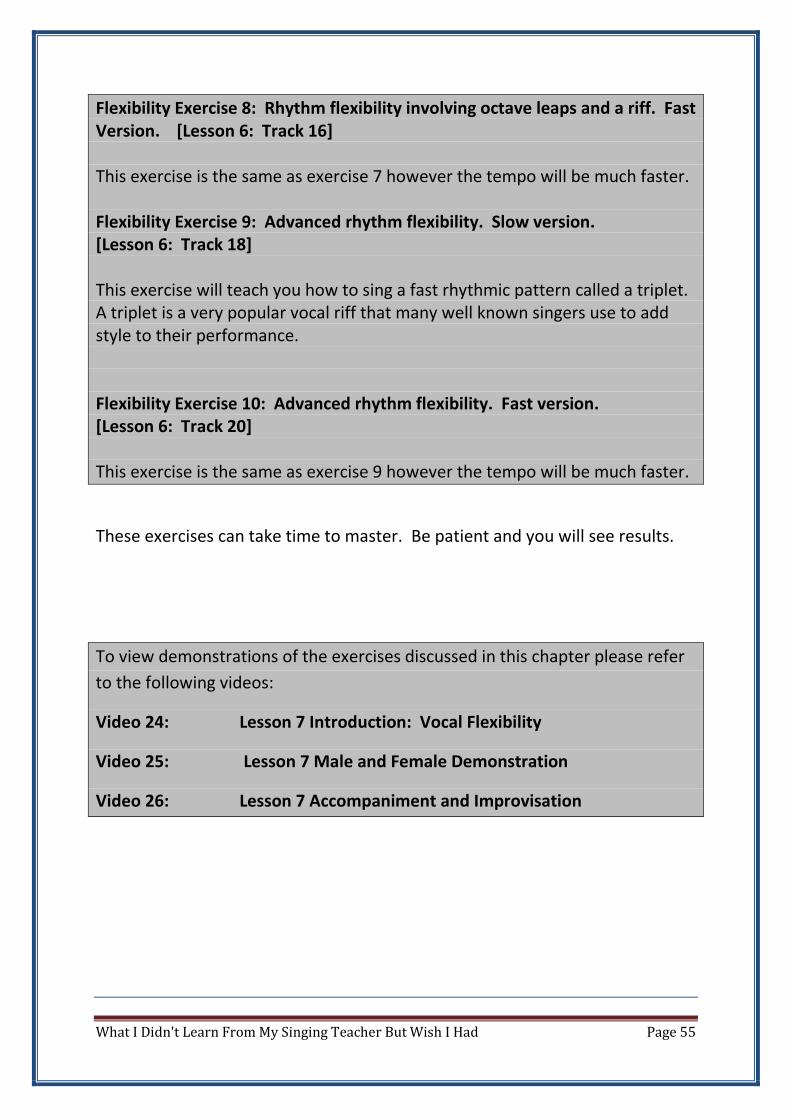
Flexibility Exercise 8: Rhythm flexibility involving octave leaps and a riff. Fast
Version. [Lesson 6: Track 16]
This exercise is the same as exercise 7 however the tempo will be much faster.
Flexibility Exercise 9: Advanced rhythm flexibility. Slow version.
[Lesson 6: Track 18]
This exercise will teach you how to sing a fast rhythmic pattern called a triplet.
A triplet is a very popular vocal riff that many well known singers use to add
style to their performance.
Flexibility Exercise 10: Advanced rhythm flexibility. Fast version.
[Lesson 6: Track 20]
This exercise is the same as exercise 9 however the tempo will be much faster.
These exercises can take time to master. Be patient and you will see results.
To view demonstrations of the exercises discussed in this chapter please refer
to the following videos:
Video 24: Lesson 7 Introduction: Vocal Flexibility
Video 25: Lesson 7 Male and Female Demonstration
Video 26: Lesson 7 Accompaniment and Improvisation
What I Didn't Learn From My Singing Teacher But Wish I Had Page 56
Chapter 9:
How To Apply Technique To Songs
Singing exercises are very effective to improve the sound of your voice.
Singing scales and arpeggios when done right will expand your range, develop
power and allow you to sing with more freedom. There is one major drawback
with vocal exercises though, they aren’t exactly the most inspiring things to
sing! I’m sure you would much rather sit at the piano, or grab your guitar and
sing a selection of your favourite songs for an hour instead of grinding away
singing countless “mums”, “nays” and lip rolls!
In this chapter I am going to show you how you can apply many popular vocal
exercises and techniques to songs. This will make the process of developing
your voice much more enjoyable and you will see “real world” improvements
to your range and tone. I am going to discuss a series of scenarios you may
face when working on a particular song.
What I Didn't Learn From My Singing Teacher But Wish I Had Page 57
Scenario One:
You are having trouble hitting a certain high note in one of your favourite
songs.
Let’s say that you are working on a particular song that has a high note that
you are finding difficult to hit. What most singers do is attempt to hit the note
over and over again which will lead to frustration and a mental block regarding
the note. Sound familiar?
The solution:
Step One: Isolate the phrase and treat it like a vocal exercise.
Step Two: Substitute the words in the phrase with a lip roll. Lip roll the
phrase at least three times in a row. This will train your singing muscles to
relax. You may also want to do a strong “SHHH” sound in between lip rolls.
This will make sure you airflow is activated.
Step Three: Isolate the note before the high note and also the one after it. Lip
roll (or tongue roll) these three notes five times in a row, again adding a
“SHHH” between each attempt.
Step Four: Replace the lip roll with a vowel of your choice. I recommend
either “EEE” or “OOO” as these will help keep your mouth in a neutral (not
widened) position. Sing the three notes on your chosen vowel five more times,
each time adding a bit more volume. Make sure you don’t start out too loud!
Step Five: Sing the three notes again but this time add the words.
Step Six: Sing the phrase again as written (with words).
This six step system is very effective for conquering high notes within a song.
What I Didn't Learn From My Singing Teacher But Wish I Had Page 58
Scenario Two:
You are having trouble hitting a series of low notes within a phrase.
Let’s say you are more comfortable singing in the middle and upper parts of
your voice and you are working on a song that has a series of low notes in a
verse. You find that your voice gets “stuck” and unable to sing the notes with
any volume.
The Solution:
Step One: Isolate the phrase and treat it like a vocal exercise.
Step Two: Do three strong “SHHH” sounds. Low notes allow more air to
pass the through the vocal cords so you need a consistent flow.
Step Three: Speak the phrase. Your speaking voice uses the same vocal
structure as you chest voice. Now try and speak the phrase “on pitch”.
Step Four: Replace the words with an “AHH” vowel. Try and maintain the
same tone as when you were speaking the phrase. Put your hand on your
chest and make sure that you are feeling vibration in your chest cavity while
doing this exercise.
Step Five: Sing the phrase again adding the words.
This is a great five step system for accessing you chest voice. When doing
these exercises make sure you keep a tension free throat. It will allow your
sound to descend much easier.
Scenario Three:
You are having trouble sustaining a phrase which sits right in the middle of
your voice.
What I Didn't Learn From My Singing Teacher But Wish I Had Page 59
Let’s say that the chorus of a song you are working on has a series of notes
which sit right in the middle of your voice. You find that your voice shifts
between head voice and chest voice causing your tone to become very
inconsistent. You have tried singing it with a louder volume but find that your
voice tires quickly.
The Solution:
Step One: Isolate the phrase and treat it as a vocal exercise.
Step Two: Replace the words of the phrase with a lip roll. This will help to
keep your singing muscles relaxed and your larynx low. Do this three times.
Step Three: Sing the phrase using the word “mum”. Do this three times
adding a strong “SHHH” between each attempt.
Step Four: Sing the phrase using the word “nay”. Do this three times adding
a strong “SHHH” between each attempt. Try and add a crying sound to your
“nay”.
Step Five: Sing the phrase again adding the words. Try and maintain a crying
sound to your tone.
This five step system is great for singing in mixed voice. It is designed to train
your muscles to stay relaxed and maintain a low larynx. The crying sound helps
to shift resonance into the nasal cavity.
Scenario Four:
You are told that your tone is “muddy” and your words are hard to understand.
Singing is really just another form of communication. If your words and tone
are not clear you will have trouble connecting with an audience. The following
exercises and techniques will help to clear up your tone.
What I Didn't Learn From My Singing Teacher But Wish I Had Page 60
Step One: Isolate the phrase and treat it as a vocal exercise.
Step Two: Stick out your tongue and attempt to sing the phrase with as
much clarity as you can. This will get your articulators (tongue, lips and jaw)
working overtime. If you find that your tongue retreats back into your mouth
move to step three.
Step Three: Repeat previous exercise but hold your tongue with your fingers
to stop it moving back into your mouth. The tongue is a major reason for most
tone problems.
Step Four: Sing the phrase again with words. Focus on making the words as
clear as you can. You should find that your tone is greatly improved.
This four step system for improving tone is a fantastic way to add clarity to
your voice.
Bonus Tips:
Tip One: If you have a word that has two distinct vowels directly after each
other, always make the first vowel longer than the second. This is called a
diphthong.
Tip Two: Always make the vowels in your words longer than the
consonants. This will help create a very smooth tone. Having shorter vowels
will create a choppy tone.
Tip Three: If you are finding a high note pretty much impossible to hit try
having a bit of fun with it. Siren on vowels “ee” and “oo” as high as you can.
When you feel a bit more relaxed have a go at singing the high note again.
Don’t take things to seriously. Have a bit of fun with your voice and notice the
difference it makes to your energy.
What I Didn't Learn From My Singing Teacher But Wish I Had Page 61
Singing exercises for hours on end can often be a boring and mundane task. By
isolating phrases in your favourite songs and treating them as vocal exercises
you will see instant improvements to your voice and have a bit of fun doing it!
To view demonstrations of the exercises discussed in this chapter please refer
to the following videos:
Video 27: AVC Masterclass Part 1
Video 28: AVC Masterclass Part 2
Video 29: AVC Masterclass Part 3
What I Didn't Learn From My Singing Teacher But Wish I Had Page 62
Chapter 10:
Vocal Health
Having the most unique instrument in the world requires certain discipline to
ensure it is kept in pristine condition. Unlike other instruments you can’t go
out and buy a new one if something happens to your voice.
Some key areas that we as singers can control are:
1. Environment
2. Diet
3. Smoking and Alcohol
Environment
Our bodies react to extreme changes in temperature and humidity. It is
important to try and keep your body at a regulated temperature when
possible. Avoid breathing in cold air.
Avoid speaking at high levels over a prolonged period of time. The most
common occurrences are sport carnivals and trying to speak over loud music at
parties and clubs.
What I Didn't Learn From My Singing Teacher But Wish I Had Page 63
Smoking And Alcohol
Everyone is aware of the dangers that smoking poses to your health. It is not
my intention to push these points as everyone has the right to make their own
choices in life. However if you are serious about singing it is wise to know how
smoke affects the voice.
Smoking causes trauma to the delicate membrane of the throat and vocal
chords. The heat causes irritation and the membrane secretes to counter the
effects of dryness. This is why smokers constantly have to “clear” their voice.
To the trained singer, the effect of passive smoke can cause temporary
irritation which will be serious enough to cause discomfort.
Would a brass player leave their instrument out it the rain?
Would a singer knowingly inhale smoke?
It’s your decision
Alcohol
Alcohol dehydrates the body. Your voice needs hydration to function properly.
I’m not saying that you should never drink alcohol, but certainly not on the day
that you have to sing and preferably not the night before. If you do get into a
situation where you feel obliged to have a drink make sure you have a glass of
water for every glass of alcohol. This will keep you hydrated.
The Triple Whammy
The effects of these “voice killers” in isolation have a negative effect on your
instrument. When combined they cause “Vocal Destruction”.
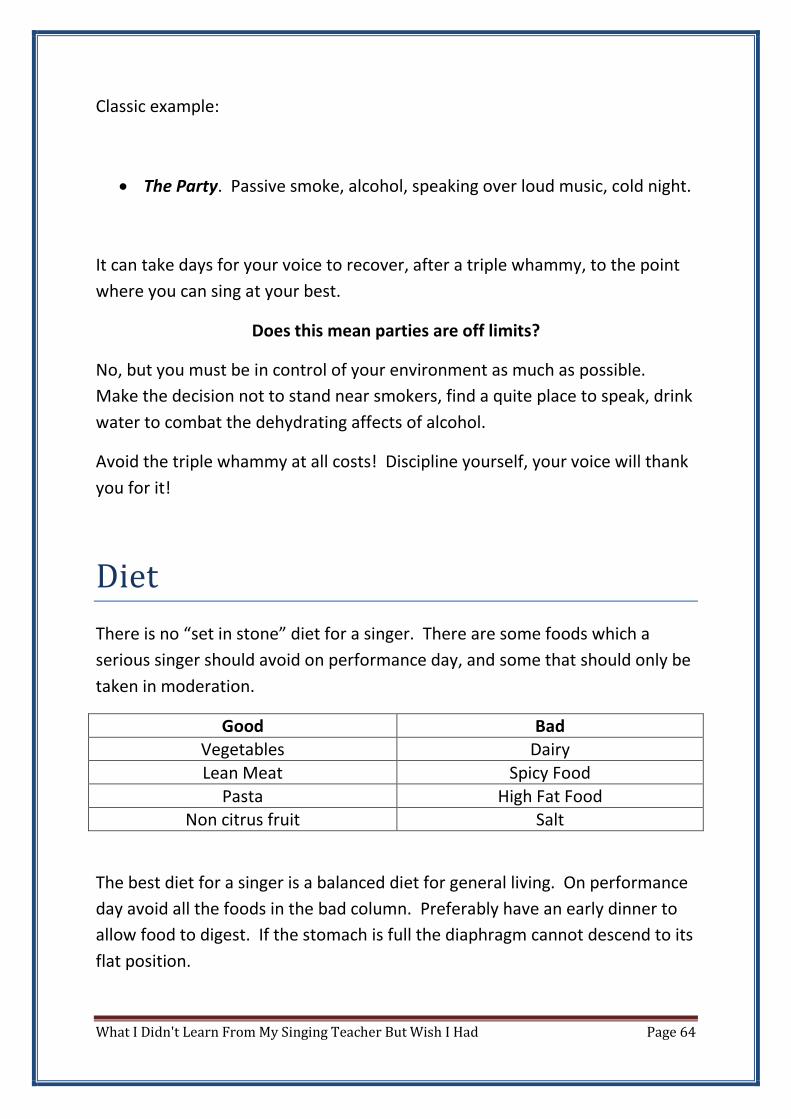
What I Didn't Learn From My Singing Teacher But Wish I Had Page 64
Classic example:
• The Party. Passive smoke, alcohol, speaking over loud music, cold night.
It can take days for your voice to recover, after a triple whammy, to the point
where you can sing at your best.
Does this mean parties are off limits?
No, but you must be in control of your environment as much as possible.
Make the decision not to stand near smokers, find a quite place to speak, drink
water to combat the dehydrating affects of alcohol.
Avoid the triple whammy at all costs! Discipline yourself, your voice will thank
you for it!
Diet
There is no “set in stone” diet for a singer. There are some foods which a
serious singer should avoid on performance day, and some that should only be
taken in moderation.
Good Bad
Vegetables Dairy
Lean Meat Spicy Food
Pasta High Fat Food
Non citrus fruit Salt
The best diet for a singer is a balanced diet for general living. On performance
day avoid all the foods in the bad column. Preferably have an early dinner to
allow food to digest. If the stomach is full the diaphragm cannot descend to its
flat position.
What I Didn't Learn From My Singing Teacher But Wish I Had Page 65
So does this mean that to be a singer you have to give up all of your favourite
foods and alcohol?
NO
I absolutely love sitting down to a beautiful thai dinner with a glass of red wine.
I just make sure I don’t have to sing the next day!
What To Do If You Are Sick.
As I sit here in my flu induced incapacitated state, I thought I might write an
article detailing how to sing when you are sick or not vocally 100%.
There have been many times in my life as a singer where I have had to sing
while under the effects of a nasty flu or fatigue from a heavy vocal session the
night before.
For most singers the first reaction to this situation is PANIC! This is a naturally
reaction to such a situation. Negative thoughts immediately start to rush
through your mind:
• “I’m going to embarrass myself”
• “If I cancel I will let so many people down”
• “I could damage my voice”
• “My reputation will be tarnished”
These are all thoughts that I have had myself over the years and they are all
valid thoughts. However it doesn’t have to be all doom and gloom. There are
certain things you can do to give yourself the best chance to get through a
performance with little to no evidence that you weren’t at your best.
The First Question You Should Ask Yourself
How serious is it? Are your symptoms affecting your vocal ability or not? It is
very possible to sing through a simple cold or virus. As long as your vocal cords
What I Didn't Learn From My Singing Teacher But Wish I Had Page 66
aren’t being affected, physically your voice and performance ability shouldn’t
change.
Let’s say that your voice has been affected and you are finding it hard to sing,
you have lost range and control. What then? Don’t panic just yet.
Your first step is to go and see your Doctor. I know that sounds like a no-
brainer but so many singers put this off until the last minute. If it’s an infection
to your sinus (like what I have right now!) throat or chest, the earlier you get
on medication the quicker you will be back at your best.
Medication
There are many lozenges and remedies on the market that will relieve pain and
inflammation. You need to keep away from anything that contains alcohol or
menthol as they can dehydrate the voice and make it ever harder to sing. You
also need to avoid anything with antiseptic in it. Yes antiseptic will numb the
pain but it will also numb the control of your voice. What I suggest in the form
of self medication is:
• Non Alcoholic Lozenges
• A Quality Vocal Spray
• Honey and Lemon Drinks
There are plenty of lozenges on the market which are singer friendly. I
recommend Slippery Elm Cherry Lozenges. If in doubt ask your pharmacist. A
quality vocal spray is vital to replace saliva and relieve dryness in the throat. I
use Farleys Entertainers Secret Throat Relief Spray which is readily available on
the net. Honey and lemon drinks are great soothe the throat and clear the
nasal cavity. Here is the recipe I use:
• Squeeze 2 Lemons
• 1 Tablespoon of Honey
• 2 Dissolved Paracetamol Tablets
• 1 Cup of Boiling Water
What I Didn't Learn From My Singing Teacher But Wish I Had Page 67
Every 10% Helps
There isn’t an instant miracle cure that is going to get your voice back to its
brilliant best. There are however other things which I called the 10 percenters
that when combined can take you from the despair of being 40% vocally fit to a
more manageable 80% vocal fitness. I have already discussed the use of self
medication which will usually get you an extra 10%.
Steaming your voice is a great way to relieve swelling, dryness and nasal
congestion. There are a few ways you can do this:
• A Hot Shower (with exhaust fan off)
• The Pot and Towel Technique
• Steam Inhaler
• Humidifier
A hot shower first thing in the morning with the exhaust fan off is a great way
to get your voice heading in the right direction. By closing the room off and
turning the exhaust fan off you will create a sauna effect which will add instant
moisture to your throat and help clear your sinus. I always combine this with a
gentle vocal warm up for an instant 10% improvement to my voice.
Throughout the day you should continue to steam your voice as it will help
reduce any swelling in your throat and vocal cords. There are a few ways you
can do this:
Have multiple hot showers throughout the day, which isn’t the strategy I
advise. Your family or housemates won’t appreciate the lack of hot water at
the end of the day, or the massive energy bill at the end of the month!
Use the Pot and Towel Technique. This involves boiling a pot of water and
sitting with your head hovering over the steam. Placing a towel over your
head and pot will keep the steam from escaping and create a mini sauna for
your face.
What I Didn't Learn From My Singing Teacher But Wish I Had Page 68
My preferred steaming technique is the use of a personal steam inhaler. They
are compact enough to take with you to your gig or dressing room and unlike
the pot and towel technique you will isolate the steam to your throat and nose
and not your entire face! I recommend Mabis Healthcare Steam Inhaler.
A humidifier is a device which will add steam to a room. It is especially
effective for use at night while you are sleeping. The moisture in the air will
help to relieve waking up with a dry scratchy throat. I recommend Vicks UV
99.999% Germ Free Humidifier
Steaming your voice throughout the day and before a performance will help
you gain an extra 10%.
The Importance Of A Vocal Warm Up
Warming up your voice is always a good idea. When you are sick or fatigued it
is VITAL. Not all warm ups are created equal. The vocal warm up routine that
you would normally use when vocally fit will be too strenuous on your swollen
and sore throat. There is a particular system of warming up that I use when I
am sick.
• Step One: Gentle warm up to get the vocal cords vibrating. I do this in
the shower first thing in the morning so that the steam helps wake the
cords up. I do gentle hums and vocal fry to start, then some lip roll
slides. All at low volume.
• Step Two: Maintain vocal silence until midday and repeat the gentle
warm up with slightly increased volume. I will do this for 10 minutes.
• Step Three: 15 minute vocal warm up including lip rolls, vocal fry, and
resonance exercises. I do this about 1 hour before I have to sing on
stage, usually in a hot shower!
With the Full Day Vocal Warm Up I know that my voice will improve by 10% by
performance time. It is important that you maintain vocal rest throughout the
What I Didn't Learn From My Singing Teacher But Wish I Had Page 69
day. This will give your vocal cords time to rest and recover.
Watch What You Eat
Certain foods can have a positive and negative effect on your voice. You need
to avoid foods which are going to cause a reaction in your throat. These
include:
• Spicy Foods
• Dairy Products
• Salty Products
Spicy foods can cause acid reflux, which causes stomach acid to make its way
up into your throat and effectively burning your vocal cords. Dairy products
will create mucus in your throat. The coughing action required to get rid of it
will irritate your cords. Salty products will dry out your throat.
Foods that will help you if you aren’t feeling great include:
• Fresh Fruit and Vegetables
• Unsalted Almonds
• Lean Meat
• Pasta
• Plenty of Water
Fruit and vegetables are very high in water content. This will help your body
stay hydrated. Almonds are a great source of energy as they are high in
protein. Lean meat and pasta is also high in protein and carbohydrates.
Singing can take a lot of energy so these foods will help you physically get
through a performance. Water will contribute to the hydration of your throat
and body.
By eating the right foods and drinking plenty of water you can gain an extra
10% to help you perform close to your best. If you drown your sorrows in the
What I Didn't Learn From My Singing Teacher But Wish I Had Page 70
bad foods it will have you back at square one in no time!
So Let’s Do The Math.
In isolation all of these suggestions can make a small improvement to your
voice. If you do everything you can to get your voice to a reasonable singing
state, most of the time you will get through a performance with no one even
realising you are sick or fatigued.
• Singer Safe Medication 10%
• Steaming Your Voice 10%
• Vocal Warm Up Routine 10%
• Eating and Drinking Right 10%
By combining the above strategies you can improve your incapacitated voice
by up to 40%. So even if you are only feeling 40 or 50% vocally fit it is possible
to get to 80 - 90% which is certainly “performable”.
The Worst Case Scenario
There will be times when you have to face the fact that your voice isn’t up to
singing. This could be either prolonged vocal fatigued or a complete lack of
voice caused by laryngitis. Sometimes you have to make tough decisions and
you need to make them based on the long term ramifications rather than the
short term.
Singing when you physically are not up to it can lead to long term problems.
You can be scarred physically (vocal cord nodules) and mentally. What would
you rather do:
Perform anyway and risk vocal damage and have your reputation as a quality
singer tarnished.
OR
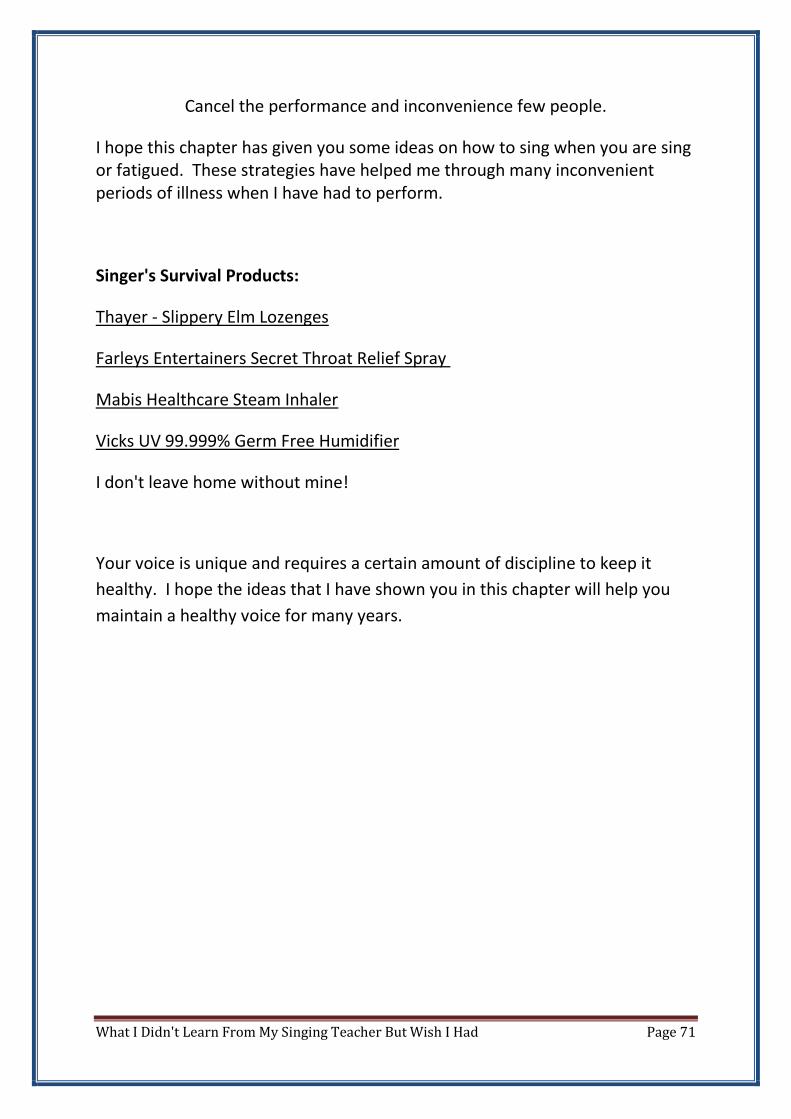
What I Didn't Learn From My Singing Teacher But Wish I Had Page 71
Cancel the performance and inconvenience few people.
I hope this chapter has given you some ideas on how to sing when you are sing
or fatigued. These strategies have helped me through many inconvenient
periods of illness when I have had to perform.
Singer's Survival Products:
Thayer - Slippery Elm Lozenges
Farleys Entertainers Secret Throat Relief Spray
Mabis Healthcare Steam Inhaler
Vicks UV 99.999% Germ Free Humidifier
I don't leave home without mine!
Your voice is unique and requires a certain amount of discipline to keep it
healthy. I hope the ideas that I have shown you in this chapter will help you
maintain a healthy voice for many years.

What I Didn't Learn From My Singing Teacher But Wish I Had Page 72
The Final Word
Learning to sing and developing your voice is a life long journey. There will be
times when you will hit walls with your voice. There will be times when you
feel your progress slowing. Don't feel discouraged by these moments. Instead
look at them as a sign that you need to learn something new. Explore new
ideas and techniques and don't be afraid to experiment with your voice.
The techniques, ideas and exercises presented to you in this ebook, video
lessons and audio course are designed to get you heading in the right direction
with your voice. Use them as a constant reference as you move forward with
your vocal development. You can combine your favourite exercises and
techniques with the teachings of other vocal coaches. In fact I encourage you
to learn from as many different coaches as you can. Discover what works best
for your voice.
If you need to contact me directly please send an email to:
Your Coach and Friend,
Ian Castle

What I Didn't Learn From My Singing Teacher But Wish I Had Page 73