welcome to the fuller cardigan - cashmerette...welcome to the fuller cardigan sewalong! this guide...
TRANSCRIPT
Welcome to the Fuller Cardigan sewalong!
This guide will provide you with step-by-step instructions and photos as you sew your first (or fifth) Fuller Cardigan. So let’s get started!
First up, we need to pick our size. Thanks to the three cup sizes it’s more likely that you’ll fit in a “straight” Cashmerette Pattern than many other companies, but of course we all vary and chances are you may not be perfectly in one size. The good news is that sewing gives you tons of flexibility, and it’s easy to grade between sizes.
How to Choose Your Size
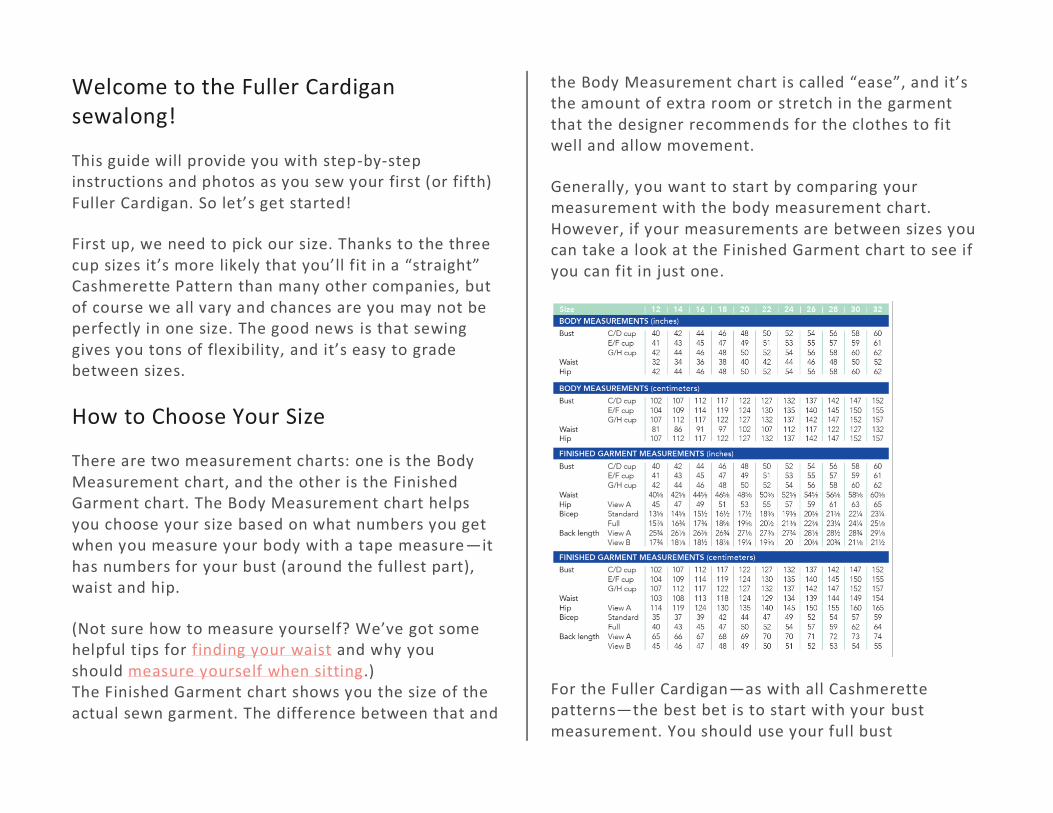
There are two measurement charts: one is the Body Measurement chart, and the other is the Finished Garment chart. The Body Measurement chart helps you choose your size based on what numbers you get when you measure your body with a tape measure—it has numbers for your bust (around the fullest part), waist and hip.
(Not sure how to measure yourself? We’ve got some helpful tips for finding your waist and why you should measure yourself when sitting.) The Finished Garment chart shows you the size of the actual sewn garment. The difference between that and
the Body Measurement chart is called “ease”, and it’s the amount of extra room or stretch in the garment that the designer recommends for the clothes to fit well and allow movement.
Generally, you want to start by comparing your measurement with the body measurement chart. However, if your measurements are between sizes you can take a look at the Finished Garment chart to see if you can fit in just one.
For the Fuller Cardigan—as with all Cashmerette patterns—the best bet is to start with your bust measurement. You should use your full bust
3
measurement, which is around the fullest part of your bust. Because of the cup sizing, you may find you could fit in two different bust sizes. In that case you want to pick the overall size that’s closest to your waist size. So for instance, if your bust is 44″, you could theoretically be a 14 G/H or a 16 C/D. Which one should you pick? Take a look at the waist measurement–if yours is closer to 34″ (size 14), then go with the 14 G/H. If yours is closer to 36″ (size 16), then go with the 16 C/D.
Don’t fret if the cup size doesn’t match up with your bra size–there is so much variation in bra sizing that it’s not possible to perfectly line them up. Use your actual full bust measurement and you’ll be fine.
Grading Between Sizes
If your bust, waist, and hip measurements end up in many different sizes, you may want to grade between sizes. There is a good bit of wearing ease in the waist of the Fuller Cardigan, so if your waist is less than a few inches bigger than the measurement according to your bust size, you don’t need to grade up unless you want more ease.
If you’re sewing View B, the fit at the waist is somewhat boxy (although it has the appearance of being more fitted if you’re wearing it with the a fit -and-flare dress, like Jenny is on the cover). If you want
a more fitted look, simply grade down two sizes. Learn more about how the Fuller Cardigan should fit here. For a run-down of how to grade between sizes on pattern like the Fuller, check out this tutorial here. Still not sure what size to use? You can write to us here for additional fitting advice, or consider signing up for the Cashmerette Fit Clinic!
Preparing the Pattern and the Fabric
Now that we’ve chosen our size and graded if necessary, it’s time to prepare our pattern and fabric so that we’ll be all ready to sew next time!
Here’s our fabric prep checklist:
• Wash and dry your fabric to make sure it’s pre -shrunk and you’re not going to get any nasty surprises later!
• Press your fabric so it’s nice and flat. Check to see if you get any iron shine when you press the right side. If so, you’ll want to use a press cloth when pressing between steps.
• If this is your first time making a Fuller, we recommend using an inexpensive fabric that has similar weight and stretch to your final fabric, in case further adjustments are needed.
And here’s what you need to do to prepare your pattern:
4
• If you’re using the PDF pattern and are printing your PDF pattern at home, you’ll need to print and assemble it. Here are some pointers to help you. If you want to get it printed, here are some suggestions.
• Either cut or trace off your pattern pieces. If you’re using a paper pattern, making adjustments, or are going to make any other sizes in the future, we definitely recommend tracing.
Finally, it’s time to cut into our fabric! • Cut all pieces, following the layout diagrams in the
pattern. Don’t forget to also cut the interfacing pieces! • Transfer all the markings to the fabric. For the notches,
make a little snip into the fabric within the seam allowance (so no more than 1/4″ / 6mm).
Apply the Interfacing
We’re almost ready to sew! All that’s left to do is apply the interfacing. On the wrong side of the facing pieces, apply lightweight fusible interfacing following the manufacturer instructions to the front and back facing pieces.
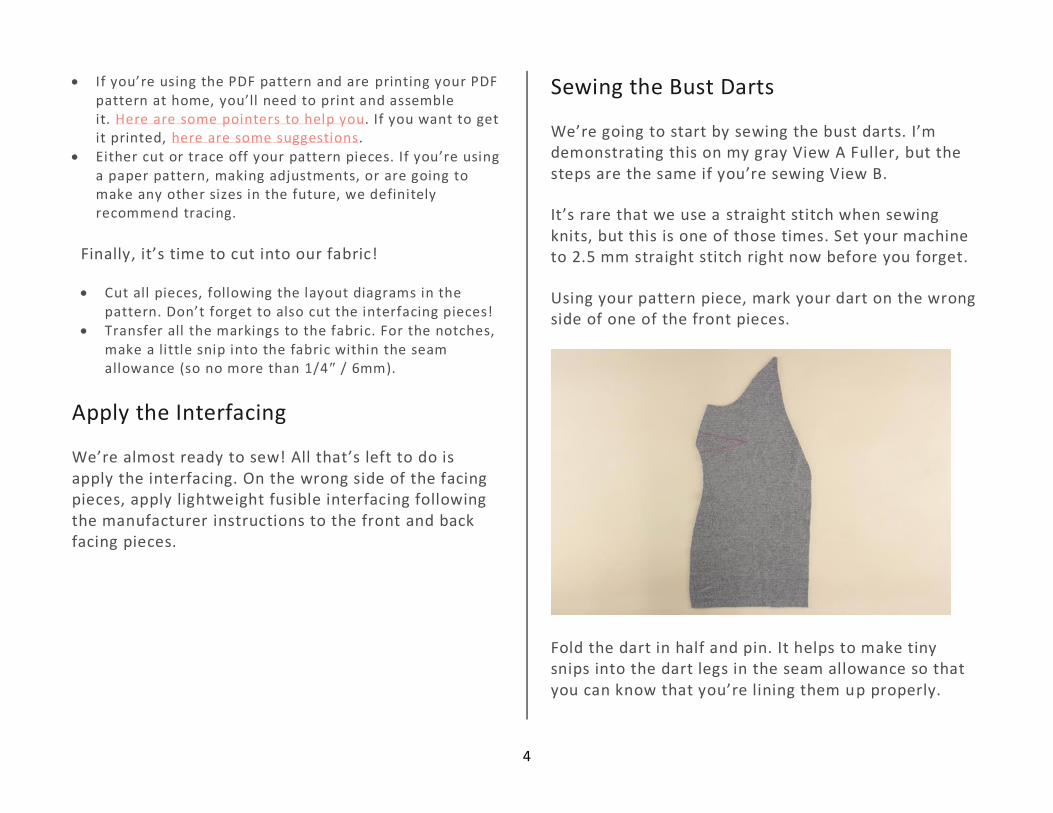
Sewing the Bust Darts
We’re going to start by sewing the bust darts. I’m demonstrating this on my gray View A Fuller, but the steps are the same if you’re sewing View B.
It’s rare that we use a straight stitch when sewing knits, but this is one of those times. Set your machine to 2.5 mm straight stitch right now before you forget.
Using your pattern piece, mark your dart on the wrong side of one of the front pieces.
Fold the dart in half and pin. It helps to make tiny snips into the dart legs in the seam allowance so that you can know that you’re lining them up properly.
5
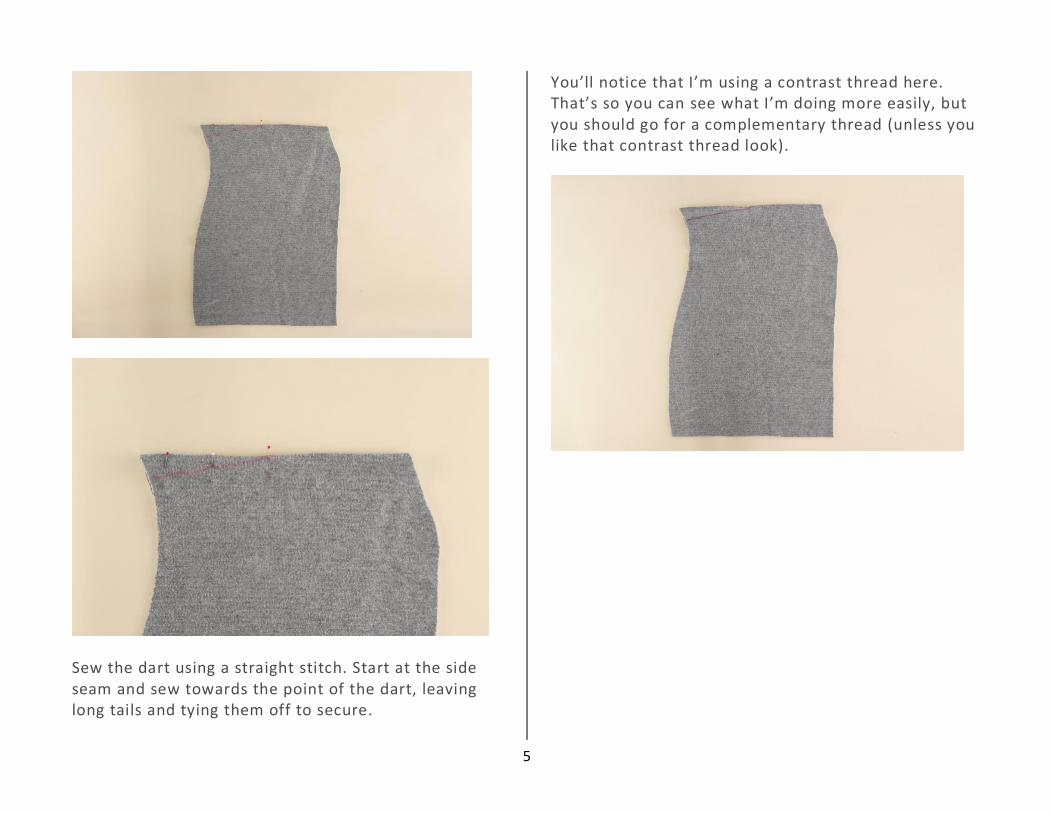
Sew the dart using a straight stitch. Start at the side seam and sew towards the point of the dart, leaving long tails and tying them off to secure.
You’ll notice that I’m using a contrast thread here. That’s so you can see what I’m doing more easily, but you should go for a complementary thread (unless you like that contrast thread look).
6
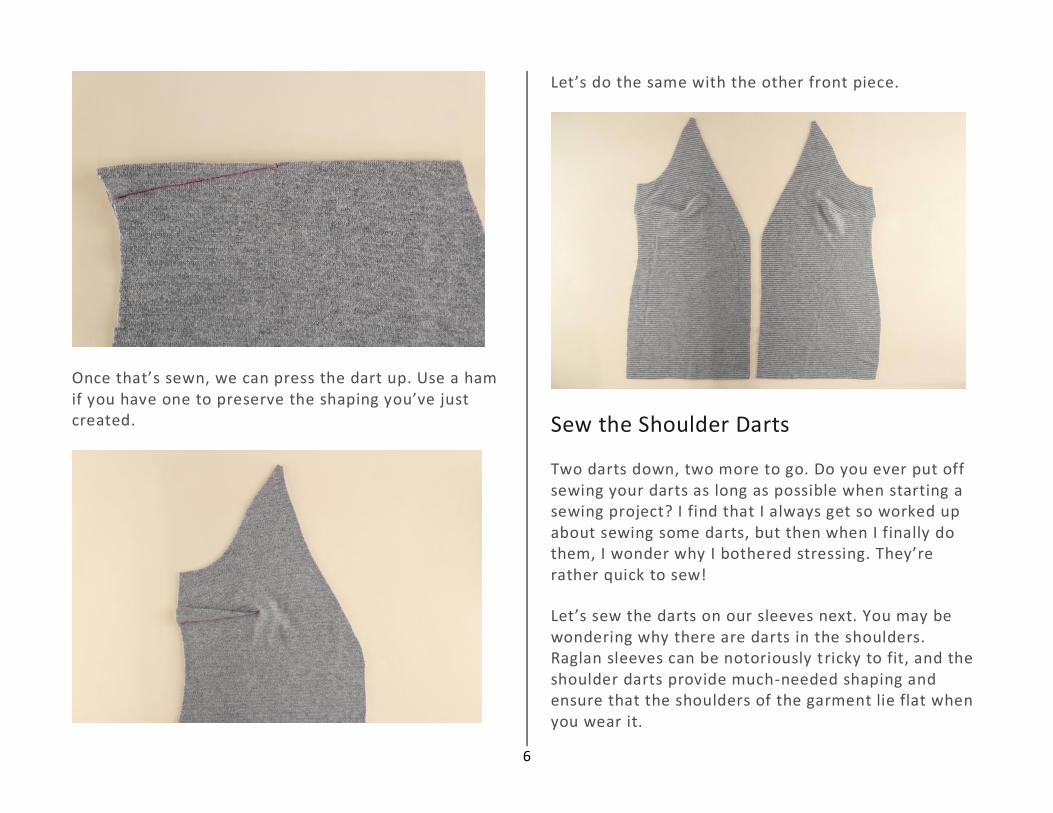
Once that’s sewn, we can press the dart up. Use a ham if you have one to preserve the shaping you’ve just created.
Let’s do the same with the other front piece.
Sew the Shoulder Darts
Two darts down, two more to go. Do you ever put off sewing your darts as long as possible when starting a sewing project? I find that I always get so worked up about sewing some darts, but then when I finally do them, I wonder why I bothered stressing. They’re rather quick to sew!
Let’s sew the darts on our sleeves next. You may be wondering why there are darts in the shoulders. Raglan sleeves can be notoriously tricky to fit, and the shoulder darts provide much-needed shaping and ensure that the shoulders of the garment lie flat when you wear it.

7
Using our sleeve pattern piece, we’re going to mark the shoulder dart.
Now we fold the dart in half and pin it.
Again with the straight stitch, we’re going to sew this dart.
8
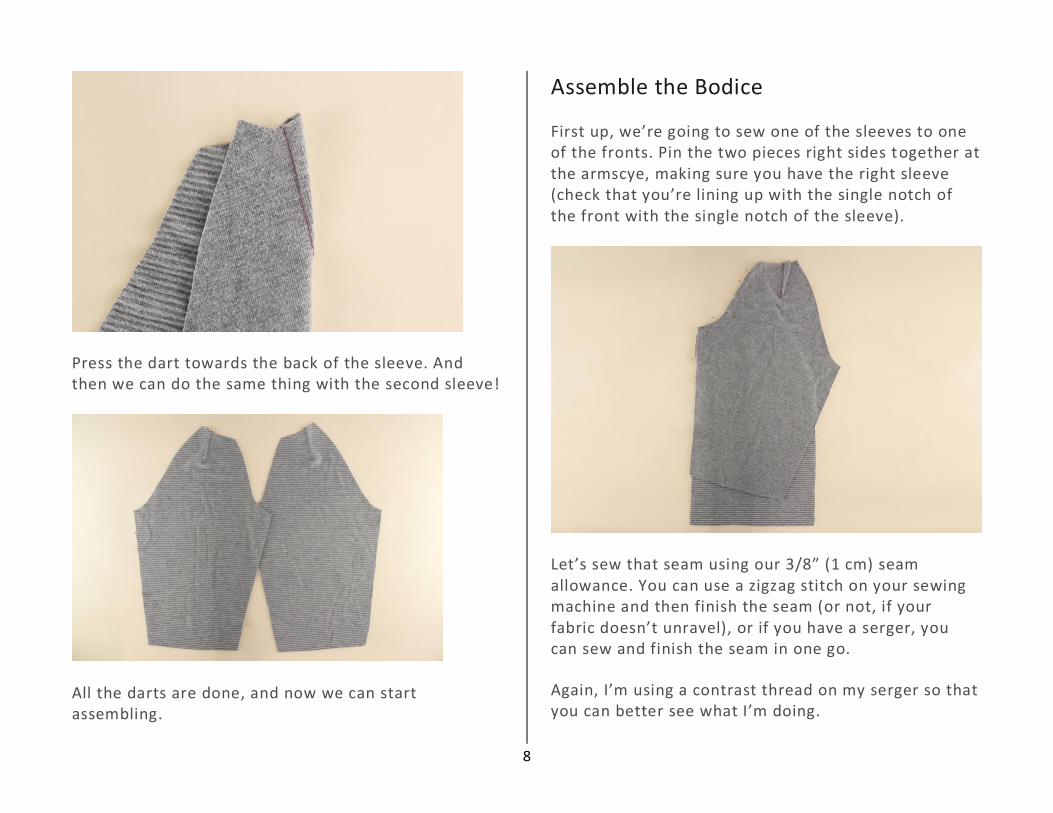
Press the dart towards the back of the sleeve. And then we can do the same thing with the second sleeve!
All the darts are done, and now we can start assembling.
Assemble the Bodice
First up, we’re going to sew one of the sleeves to one of the fronts. Pin the two pieces right sides together at the armscye, making sure you have the right sleeve (check that you’re lining up with the single notch of the front with the single notch of the sleeve).
Let’s sew that seam using our 3/8” (1 cm) seam allowance. You can use a zigzag stitch on your sewing machine and then finish the seam (or not, if your fabric doesn’t unravel), or if you have a serger, you can sew and finish the seam in one go.
Again, I’m using a contrast thread on my serger so that you can better see what I’m doing.
9
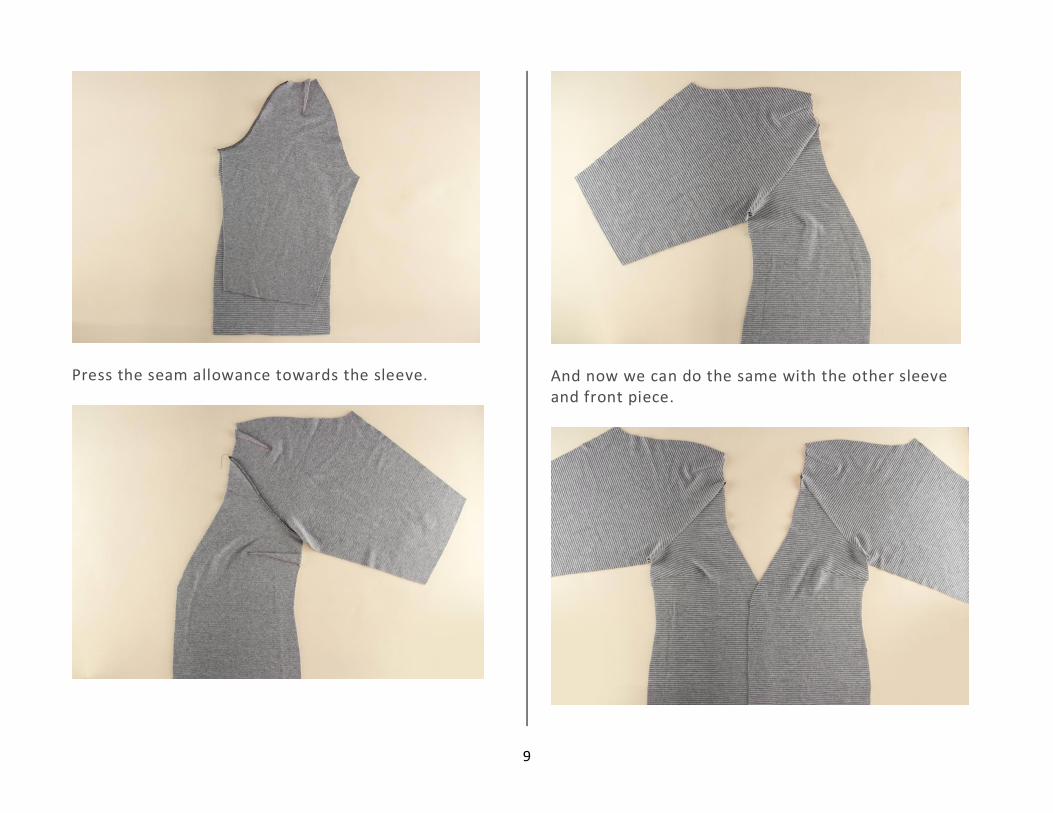
Press the seam allowance towards the sleeve.
And now we can do the same with the other sleeve and front piece.
10
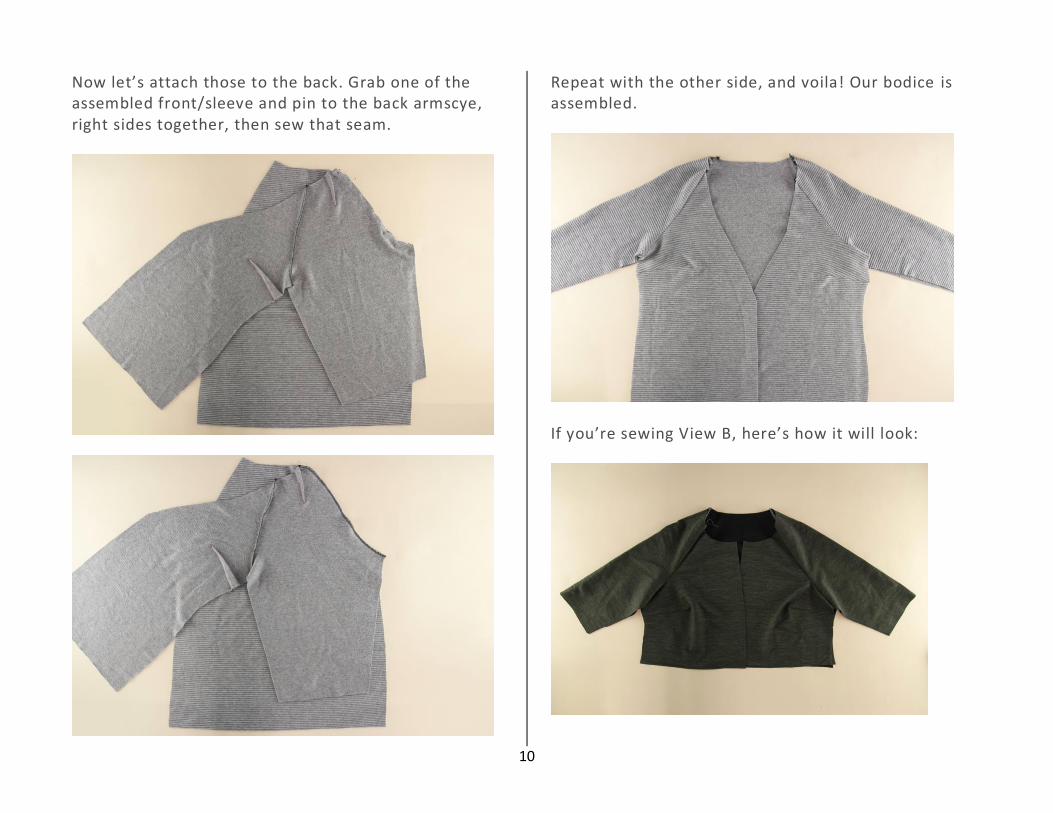
Now let’s attach those to the back. Grab one of the assembled front/sleeve and pin to the back armscye, right sides together, then sew that seam.
Repeat with the other side, and voila! Our bodice is assembled.
If you’re sewing View B, here’s how it will look:
11
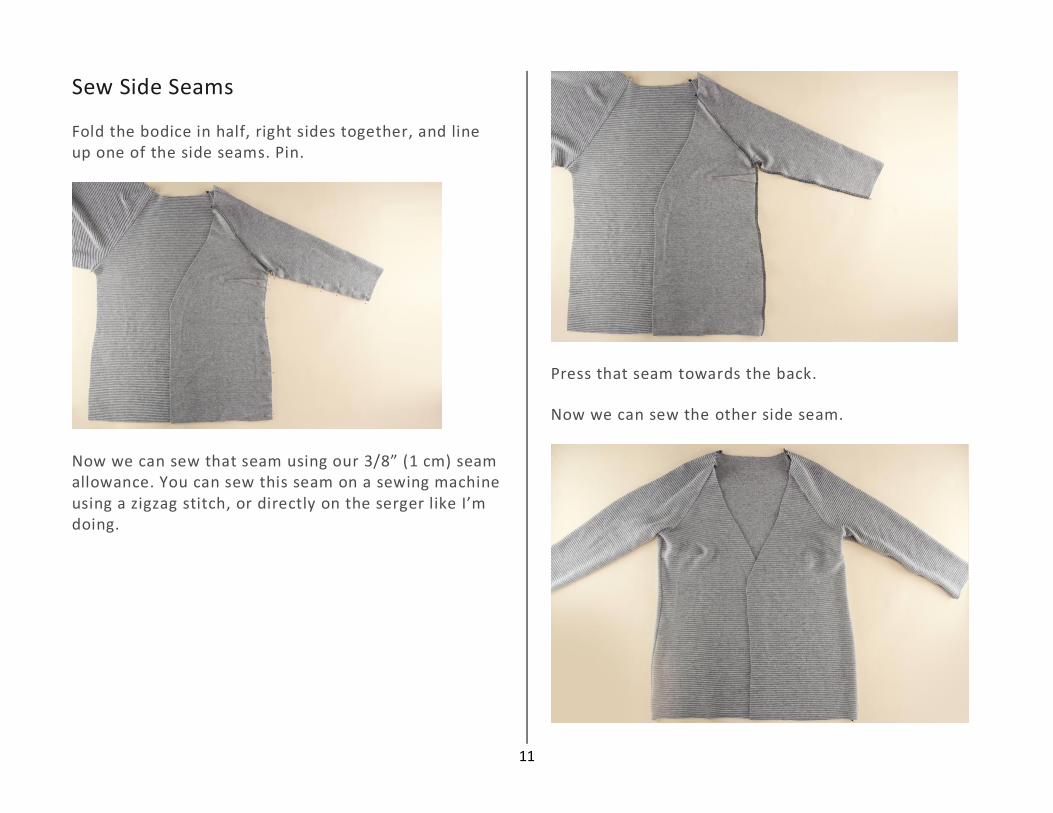
Sew Side Seams
Fold the bodice in half, right sides together, and line up one of the side seams. Pin.
Now we can sew that seam using our 3/8” (1 cm) seam allowance. You can sew this seam on a sewing machine using a zigzag stitch, or directly on the serger like I’m doing.
Press that seam towards the back.
Now we can sew the other side seam.

12
Okay, that’s done!
Assemble the Facing
Next, we’re going to assemble the facing. Don’t forget to apply the interfacing to your facing pieces before sewing.
Start by pinning one of the shoulder facings to one of the front facings. You’ll want to pin the more angled end of the shoulder facing, the one slightly further away from the notch.
Sew that seam using the 3/8” (1 cm) seam allowance and press the seam allowance towards the front facing.
Let’s do the same with the other shoulder facing and front facing.
13
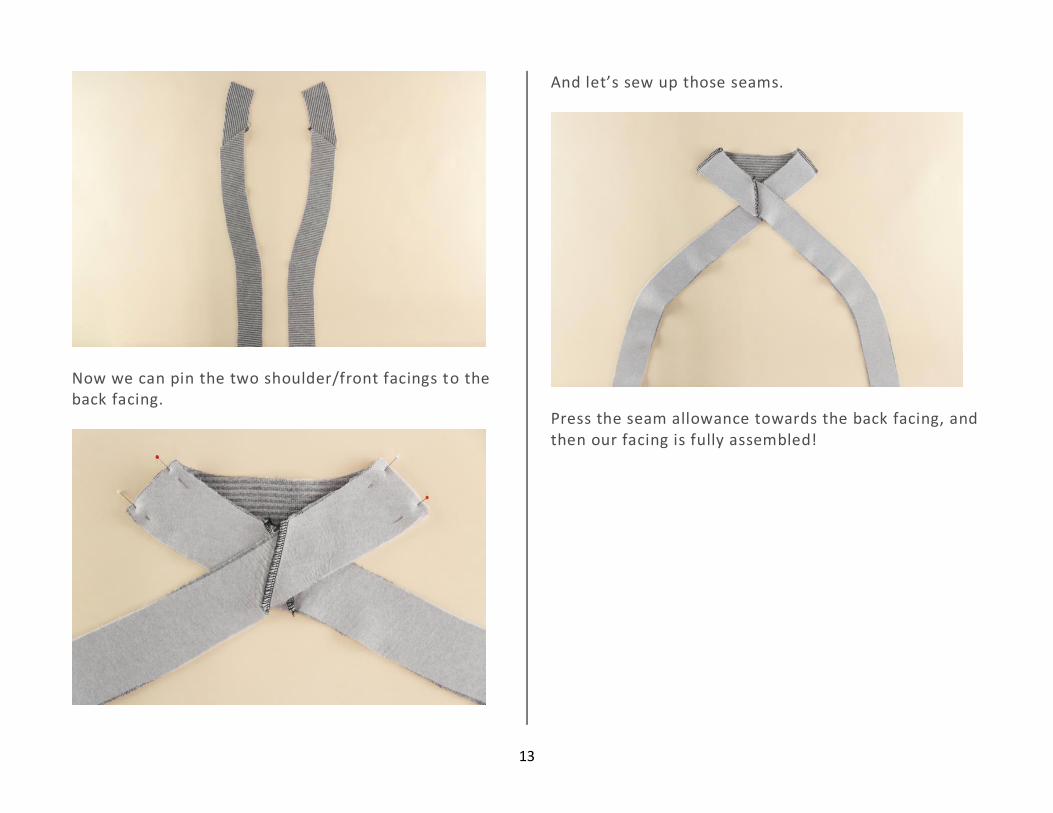
Now we can pin the two shoulder/front facings to the back facing.
And let’s sew up those seams.
Press the seam allowance towards the back facing, and then our facing is fully assembled!

14
As a last step, you can finish the outer edge of the facing, either by serging the edge as I’m doing, or by folding the outer edge to the wrong side by 3/8” (1 cm), snipping into the seam allowance to get i t to lay flat, and then topstitching the whole way around.
The facing looks slightly different for View B, but the construction steps are still the same. Here’s how your View B facing will look when you’re done:
15
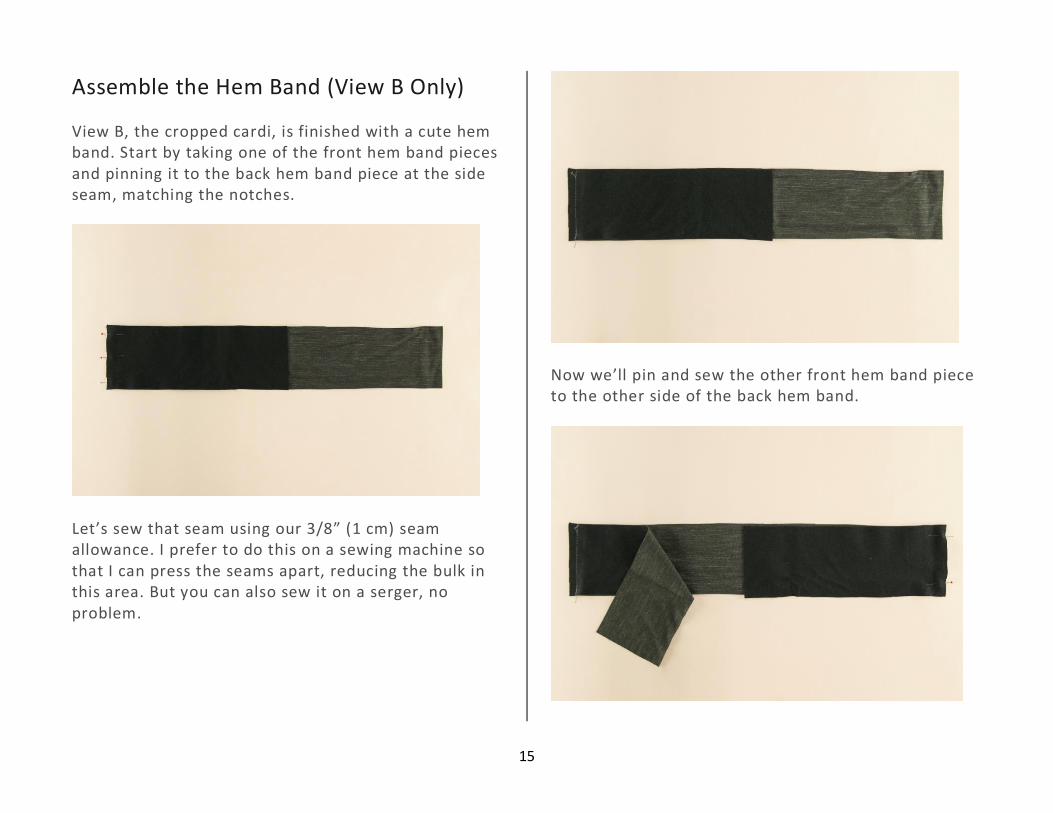
Assemble the Hem Band (View B Only)
View B, the cropped cardi, is finished with a cute hem band. Start by taking one of the front hem band pieces and pinning it to the back hem band piece at the side seam, matching the notches.
Let’s sew that seam using our 3/8” (1 cm) seam allowance. I prefer to do this on a sewing machine so that I can press the seams apart, reducing the bulk in this area. But you can also sew it on a serger, no problem.
Now we’ll pin and sew the other front hem band piece to the other side of the back hem band.

16
Here’s how it looks from the right side:
We need to finish the two ends of the hem band. To do this, fold the hem band in half, right sides together, and pin the two ends. Sew.
17
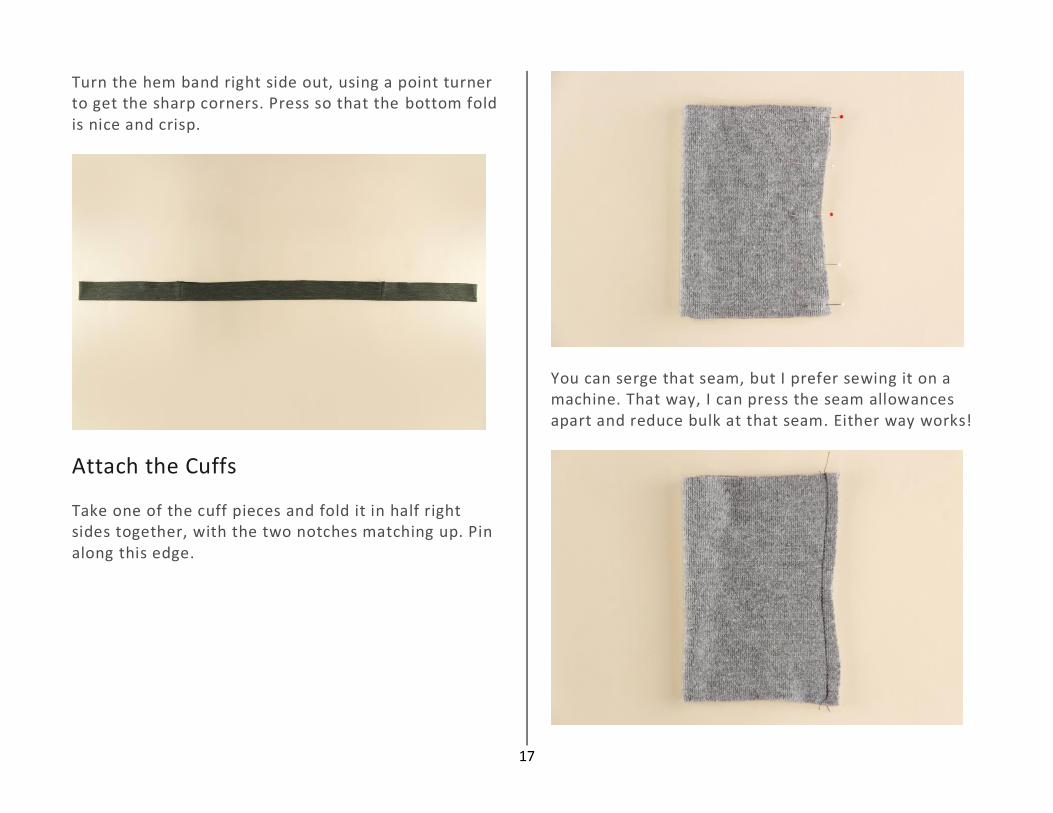
Turn the hem band right side out, using a point turner to get the sharp corners. Press so that the bottom fold is nice and crisp.
Attach the Cuffs
Take one of the cuff pieces and fold it in half right sides together, with the two notches matching up. Pin along this edge.
You can serge that seam, but I prefer sewing it on a machine. That way, I can press the seam allowances apart and reduce bulk at that seam. Either way works!

18
Now fold the cuff in half, wrong sides together. To do this, you flip one side of the cuff right side out while keeping the other side inside out, aligning the raw edges. Press.
There we have it! A sleeve cuff.
Let’s do the same with the other cuff.

19
If you’re sewing View B, the sleeve cuffs are a bit narrower for a more delicate look.
Now we can attach the cuffs to the sleeves. With the sleeve right side out, slide one of the cuffs over the sleeve and align the raw edges (all three layers). Pin.
Let’s sew through all those layers. I usually sew it on a sewing machine first, and then check that I’ve sewn through all the layers without any tucks before finishing the edge with the serger. But you can sew directly on the serger if you’re feeling confident.
20
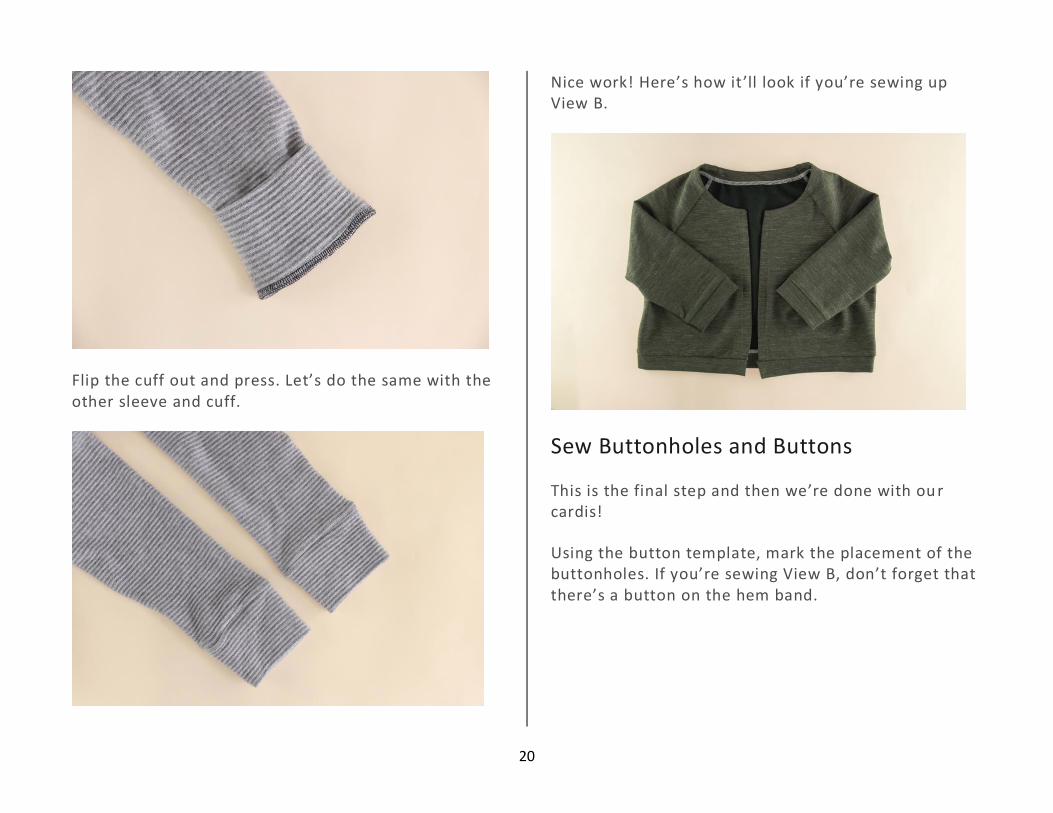
Flip the cuff out and press. Let’s do the same with the other sleeve and cuff.
Nice work! Here’s how it’ll look if you’re sewing up View B.
Sew Buttonholes and Buttons
This is the final step and then we’re done with ou r cardis!
Using the button template, mark the placement of the buttonholes. If you’re sewing View B, don’t forget that there’s a button on the hem band.
21
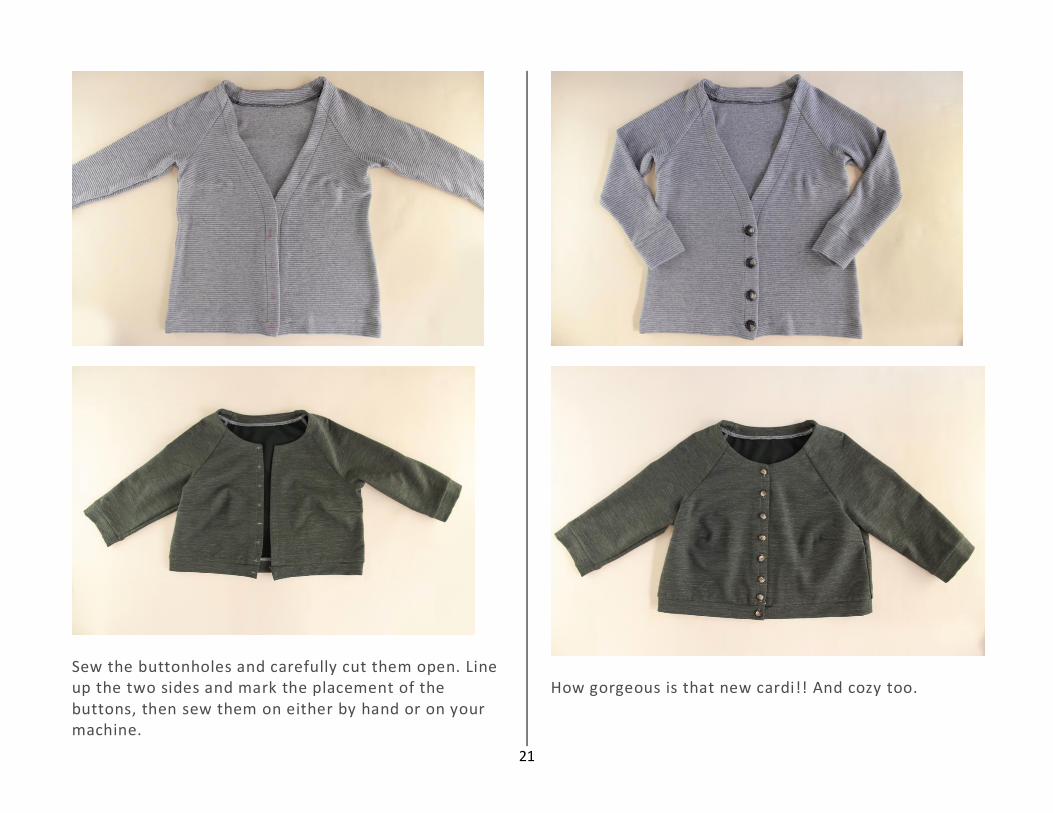
Sew the buttonholes and carefully cut them open. Line up the two sides and mark the placement of the buttons, then sew them on either by hand or on your machine.
How gorgeous is that new cardi!! And cozy too.
22
That’s a wrap for our Fuller Cardigan sewalong! If you have any questions about any of the steps, feel free to drop them in a comment be low and we’ll be happy to help.
Loving your new Fuller? Be sure to tag us in your photos and use the hashtag #FullerCardigan on social media.