w407 eco loud & eco alpaca eclipse headband loud & eco alpaca eclipse headband w407. eco...
TRANSCRIPT
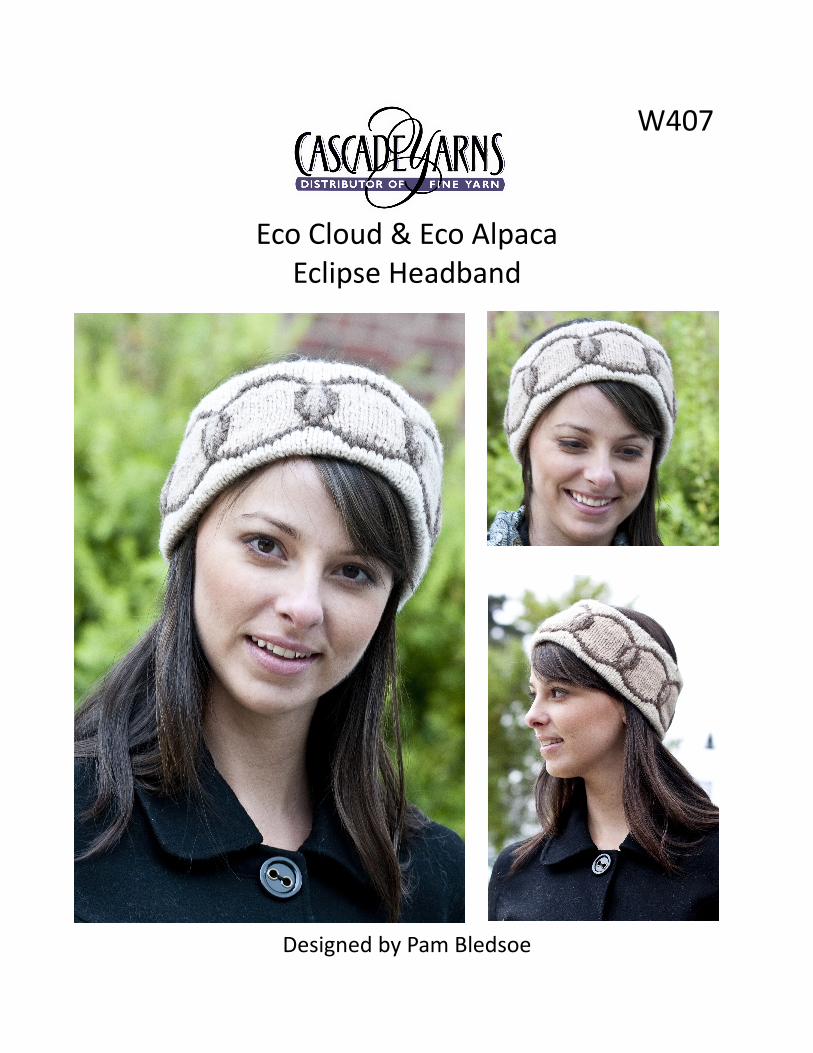
Designed by Pam Bledsoe
Eco Cloud & Eco Alpaca Eclipse Headband
W407
Eco Cloud and Eco Alpaca Eclipse Headband Designed by Pam Bledsoe
Final Measurements: 21” head circumference and 3 ½” wide Materials:
Cascade Eco Cloud, 1 skein each of colors # 1802 (Color A), 1803 (Color B) and 1804 (Color C)
Cascade Eco Alpaca, 1 skein color #1523 Primary needle: One 16” circular needle, size 9, or size to obtain gauge Holding needle: One 24” or longer circular needle, any size up to size 9 (used to hold stitch-
es to enable kitchener stitch) Tapestry needle Size J Crochet hook and waste yarn for provisional cast-on
Gauge: 19 stitches = 4 inches in stockinette stitch, 27 rounds = 4 inches in stockinette stitch (Note: Headband is started with a provisional cast-on, then knit in stockinette stitch, with Fair Isle, intarsia and duplicate stitch elements. Multiple threads are run under the duplicate stitches to enhance the circle designs. Live stitches from the provisional cast-on are then picked up with the 2nd circular needle, the headband is folded, and the 2 rounds of live stitches are joined with kitchener stitch. After finishing, there will be 26 rounds on the solid color side, and 25 rounds on the design side.) Loosely crochet a chain of 110 stitches with waste yarn. With Color C and the primary circular needle, starting on the 5th chain stitch from either end of the chain, pick up and knit through the bumps on the back of the chain for 96 stitches. Place a marker to indicate the beginning of a round. Join the ends on the circular needle, making sure the stitches are not twisted. Knit 25 rows in Color C. End Color C. Attach Color A and knit 3 rounds. Knit rounds 1 through 4 of Chart 1 for 8 patterns of this 12 stitch repeat with Colors A and B, using Fair Isle methods. Wrap floating threads in back at least every 6 stitches. After round 4, end Color A. Cut 8 lengths of color C, 42 inches long each. Knit rounds 5 through 15 of Chart 1, using one of the 8 lengths of Color C in intarsia method for each of the circle intersection areas, carrying Color B across the back. (Note: The intarsia area will pull in a little, creating the puffy texture at the circle intersections.) Knit rounds 16 through 19 using Fair Isle method and colors A and B as shown in Chart 1. End Col-or B. Knit 3 rounds with Color A. End Color A.
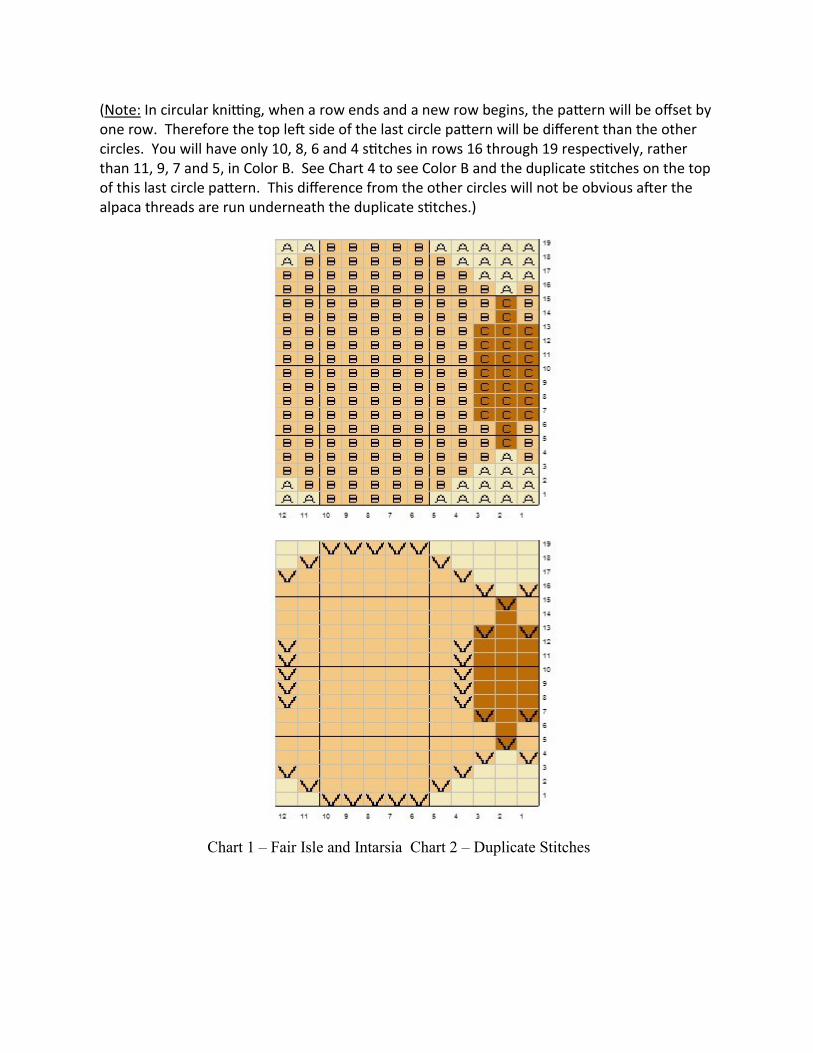
(Note: In circular knitting, when a row ends and a new row begins, the pattern will be offset by one row. Therefore the top left side of the last circle pattern will be different than the other circles. You will have only 10, 8, 6 and 4 stitches in rows 16 through 19 respectively, rather than 11, 9, 7 and 5, in Color B. See Chart 4 to see Color B and the duplicate stitches on the top of this last circle pattern. This difference from the other circles will not be obvious after the alpaca threads are run underneath the duplicate stitches.)
Chart 1 – Fair Isle and Intarsia Chart 2 – Duplicate Stitches

Chart 3 – Running Threads
Chart 4 – Variation in Last Circle Pattern
Using 2 strands of alpaca and the tapestry needle, create duplicate stitches where the Vs appear
in Chart 2, for all 8 pattern repeats. These duplicate stitches should be fairly loose, because 4
alpaca threads need to run under them.
Using 4 strands of alpaca (about 24” long each) and the tapestry needle, run the threads under
the duplicate stitches but on top of the main stockinette stitches, for each of the 8 circle patterns.
The route for running the threads under the duplicate stitches of each circle pattern is shown by
the red line through the Vs in Chart 3. Run the threads under both legs of the Vs (duplicate
stitches) in Rounds 1 through 7 and 19, but only under the outer leg of the Vs in the duplicate
stitches in Rounds 8 through 18 of Chart 3. (Since you will be going through the Vs in rows 5
and 15 twice, there will be 8 threads running under those stitches when you have finished.)

Pull the threads slightly snug to help create the circle appearance, but not too tightly because
you want them to still have some stretch.
Weave in all thread ends on the back side.
Remove the chain stitch used for casting on and pick up the live stitches with the second circu-
lar needle. Fold the headband in half, and join the live stitches with Color C in kitchener stitch.
(Charts generated by Stitch and Motif Maker software. Test knitted by Bunny Pfister.)