vmeyesuper iphone cellphone monitoring client english manual manual/mobile monitor/vmeyesuper... ·...
TRANSCRIPT
vMEyeSuper iPhone Cellphone Monitoring client English manual
Contents
Written by:the test department
Write the date:2013.9.2
Version:V1.0
2
Contents ..................................................................................................... 1
1. Introduction ........................................................................................... 3
1.1 Brief Introduction ............................................................................. 3
1.2 Main Functions................................................................................. 3
2. Installation ............................................................................................. 4
2.1 Acquire vMEyeSuper ....................................................................... 4
3. Application Running ............................................................................... 5
3.1 Interface Description ........................................................................ 5
3.2 Live Preview .................................................................................... 8
3.3 Add Device ....................................................................................... 9
3.4 Switch Channel .............................................................................. 12
3.5 PTZ Control ................................................................................... 14
3.6 Local Video .................................................................................... 14
3.7 Photos ............................................................................................. 16
3.8 Remote Playback ............................................................................ 16
3.9 Online Alarm .................................................................................. 17
3.10 Intercom ....................................................................................... 18
3.11 Switch Language .......................................................................... 18
3
1. Introduction
1.1 Brief Introduction
vMEyeSuper is the video surveillance application developed for iPhone OS.
This application can be used on iPhone, iPod Touch and iPad, supports iOS that is
higher than 3.0 released.
This document mainly introduces how to set and use vMEyeSuper software for
iOS.
1.2 Main Functions
Main Functions:
Support Chinese, English;
View the cameras on real time via wifi and GPRS;
Adopt direct connection, without third party server transfer;
Support multi-channel switching (32 channel max);
Support remote play;
Support device configuration, modification and delete;
Support IP and DDNS access;
Support Pan, Tilt & Zoom control;
Support Snap-shot and view;
Support video records and view;
Support alarm reminding;
4
Support intercom;
2. Installation
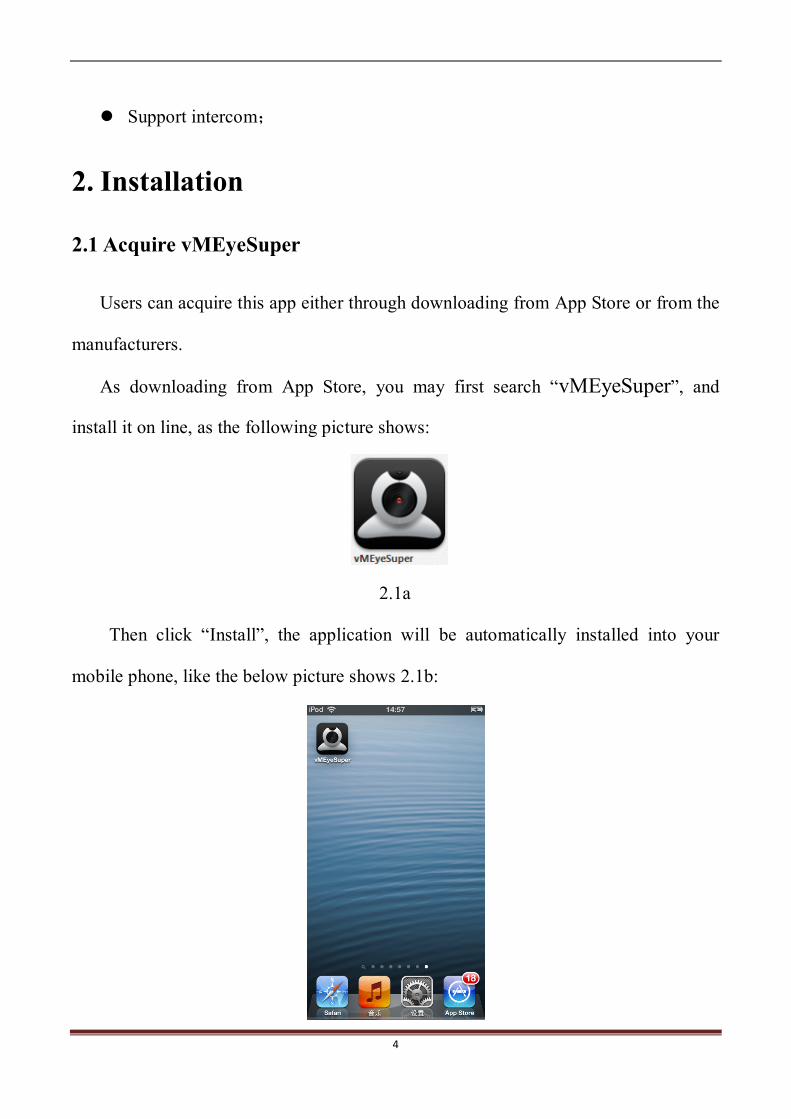
2.1 Acquire vMEyeSuper
Users can acquire this app either through downloading from App Store or from the
manufacturers.
As downloading from App Store, you may first search “vMEyeSuper”, and
install it on line, as the following picture shows:
2.1a
Then click “Install”, the application will be automatically installed into your
mobile phone, like the below picture shows 2.1b:
5
2.1b
3. Application Running
3.1 Interface Description
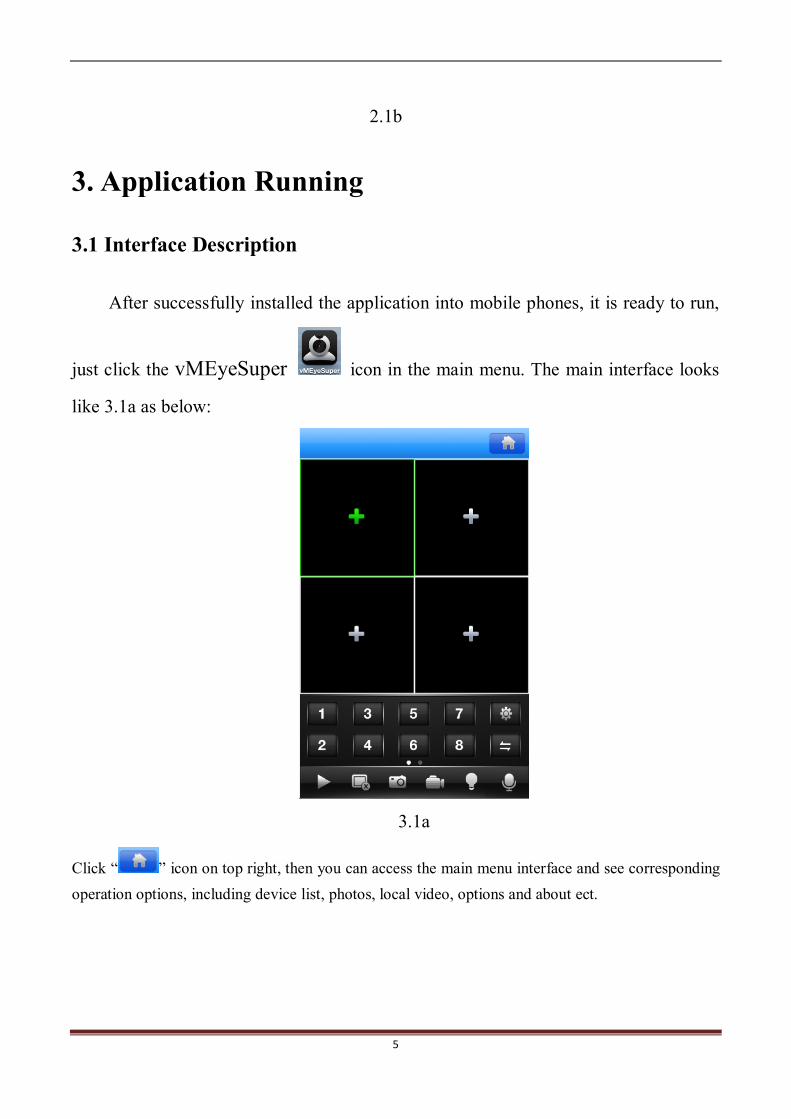
After successfully installed the application into mobile phones, it is ready to run,
just click the vMEyeSuper icon in the main menu. The main interface looks
like 3.1a as below:
3.1a
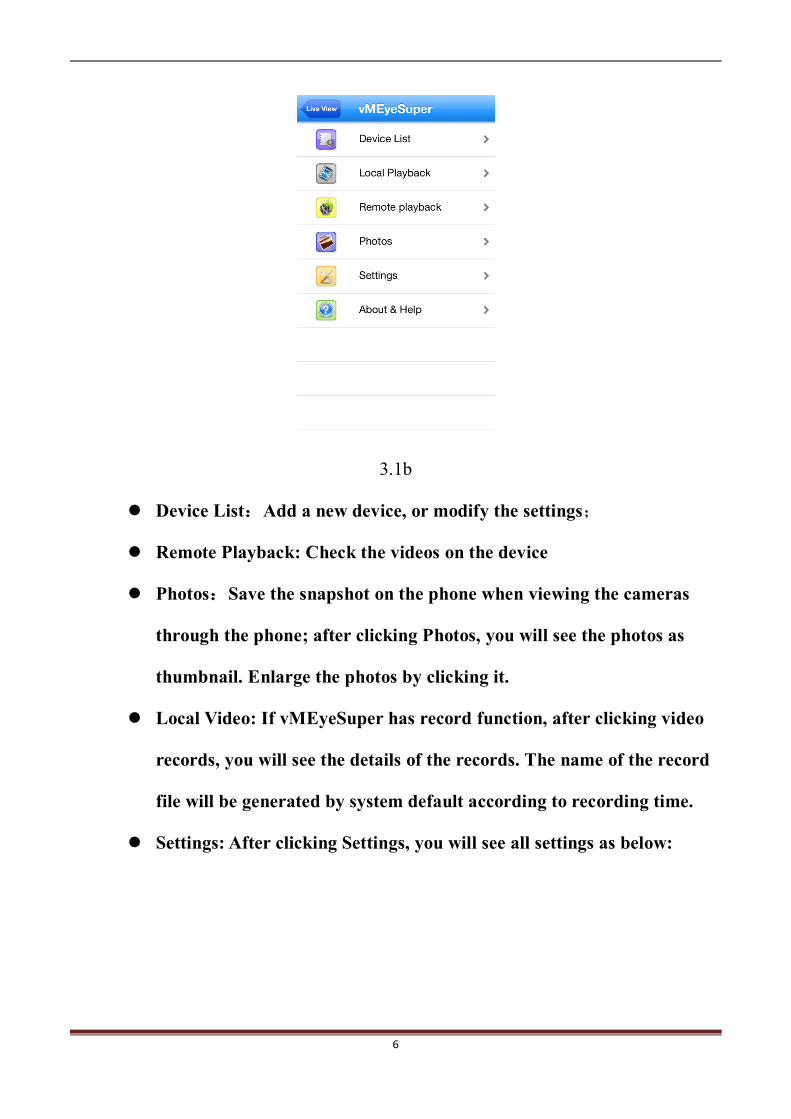
Click “ ” icon on top right, then you can access the main menu interface and see corresponding operation options, including device list, photos, local video, options and about ect.
6
3.1b
Device List:Add a new device, or modify the settings;
Remote Playback: Check the videos on the device
Photos:Save the snapshot on the phone when viewing the cameras
through the phone; after clicking Photos, you will see the photos as
thumbnail. Enlarge the photos by clicking it.
Local Video: If vMEyeSuper has record function, after clicking video
records, you will see the details of the records. The name of the record
file will be generated by system default according to recording time.
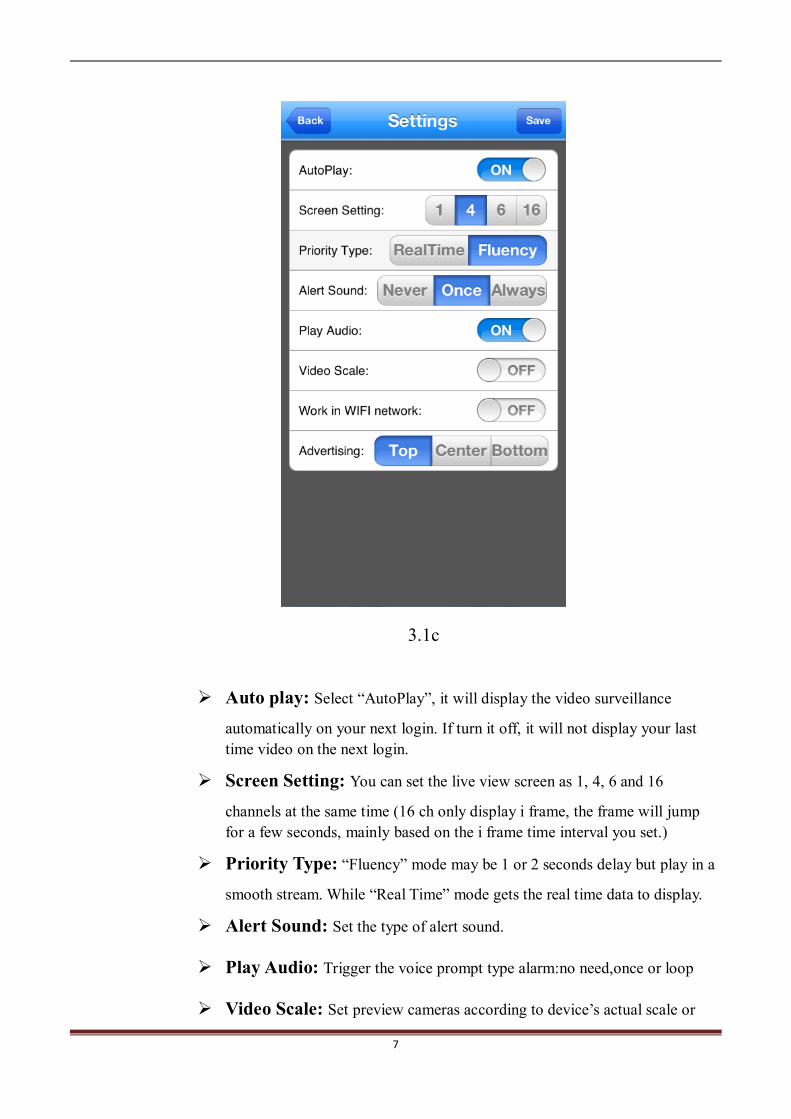
Settings: After clicking Settings, you will see all settings as below:
7
3.1c
Auto play: Select “AutoPlay”, it will display the video surveillance
automatically on your next login. If turn it off, it will not display your last time video on the next login.
Screen Setting: You can set the live view screen as 1, 4, 6 and 16
channels at the same time (16 ch only display i frame, the frame will jump for a few seconds, mainly based on the i frame time interval you set.)
Priority Type: “Fluency” mode may be 1 or 2 seconds delay but play in a
smooth stream. While “Real Time” mode gets the real time data to display.
Alert Sound: Set the type of alert sound.
Play Audio: Trigger the voice prompt type alarm:no need,once or loop
Video Scale: Set preview cameras according to device’s actual scale or
8
stretching automatically according to the windows.
Work in WIFI network: Will only work in WIFI after setting.
Advertising: Set the position of the advertisement.
About:The related information of the application.
3.2 Live Preview
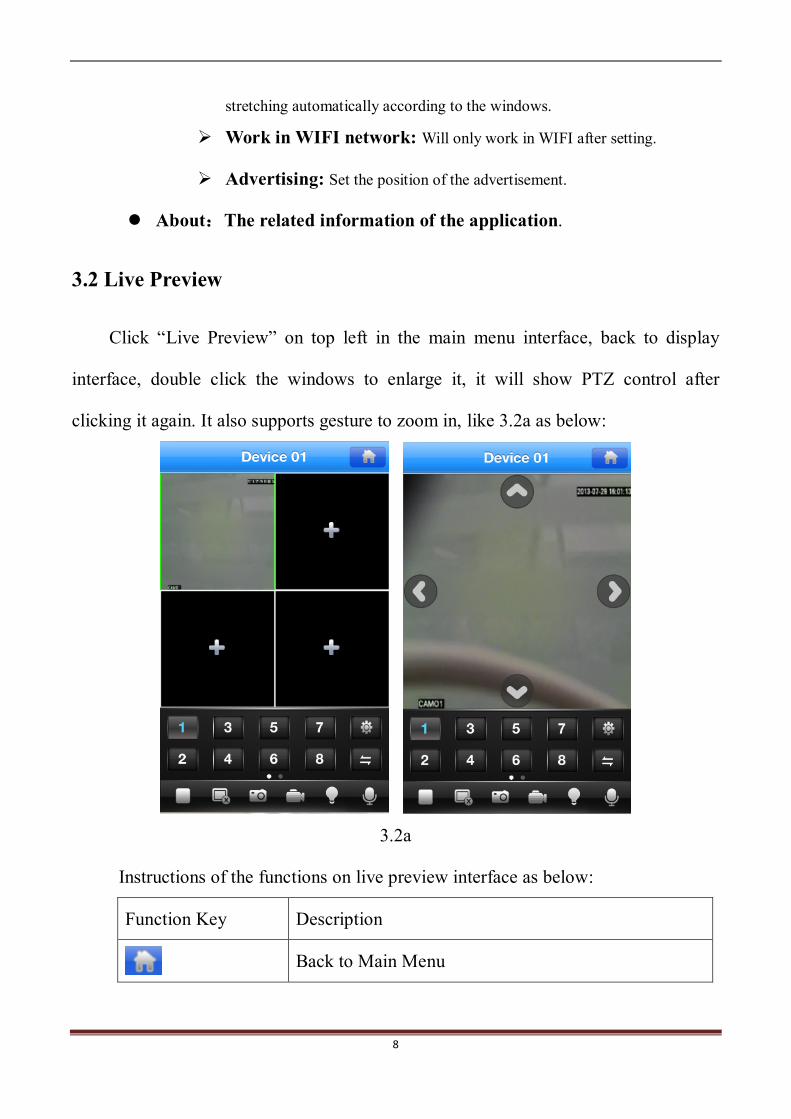
Click “Live Preview” on top left in the main menu interface, back to display
interface, double click the windows to enlarge it, it will show PTZ control after
clicking it again. It also supports gesture to zoom in, like 3.2a as below:
3.2a
Instructions of the functions on live preview interface as below:
Function Key Description
Back to Main Menu

9
Channel selecting: You can select the channels playing
Select the group of channels
/ Play / Stop
Delete Display Records
Snapshot
Video Records
Quick Access Device List, edit and select the device
Alert Prompt
Intercom
Left Slip to Display PTZ Control Button
Control the directions of the camera
/ Zoom in / Zoom out
Convergence control and Control aperture
3.3 Add Device
If this is the first time to use vMEyeSuper app, you need to put in all the
information needed. Steps as below:
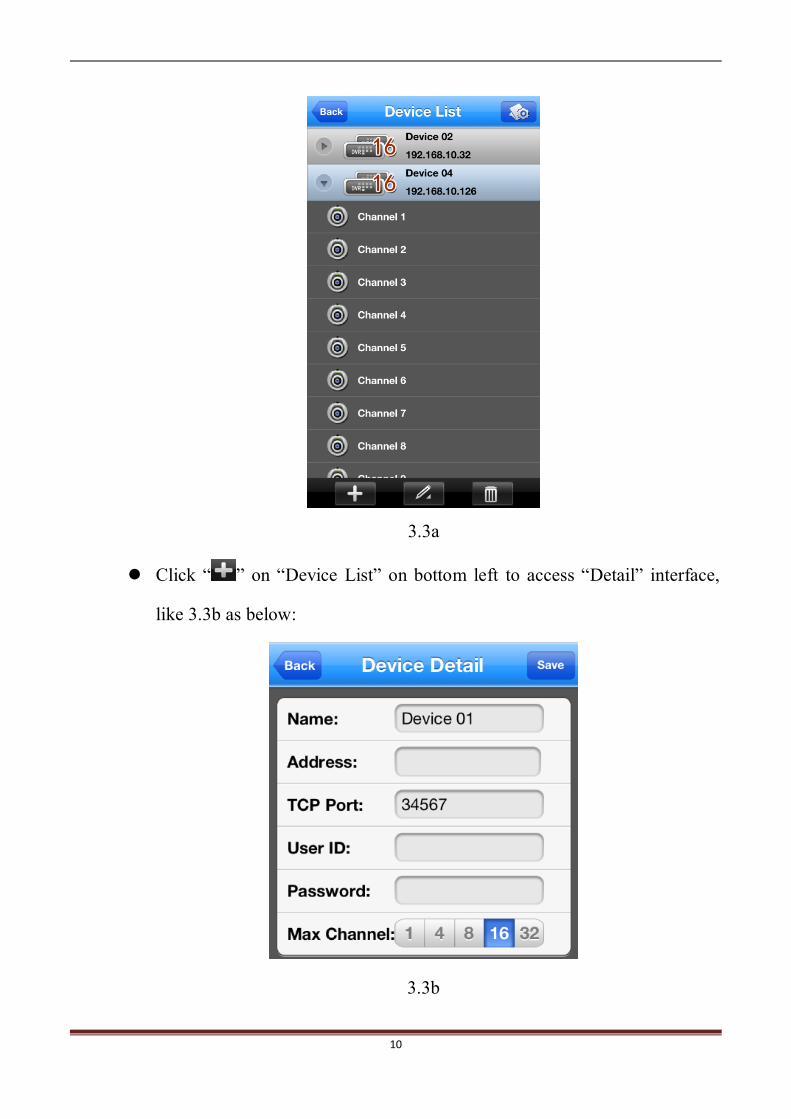
Click “ ” to access “Device List” interface, the list is blank as this time, like 3.3a as
below:
10
3.3a
Click “ ” on “Device List” on bottom left to access “Detail” interface,
like 3.3b as below:
3.3b
11
Name: The names of equipment, which can help you identify different devices, for examples, you can type the names based on the location of the equipment. The name will be showed on the topside title bar of display interface.
Address: DVR/IPC IP address or DDNS. (Must be an Internet address) Port: It means TCP port, and you can acquire TCP port in the setting information
of the device. Please use the default port: 34567. User ID: the default user name of terminal device is “admin”. Password: the default password of terminal device is blank, match with user
name, . Max Channel: the channels of your DVR supported, 32 channels max.
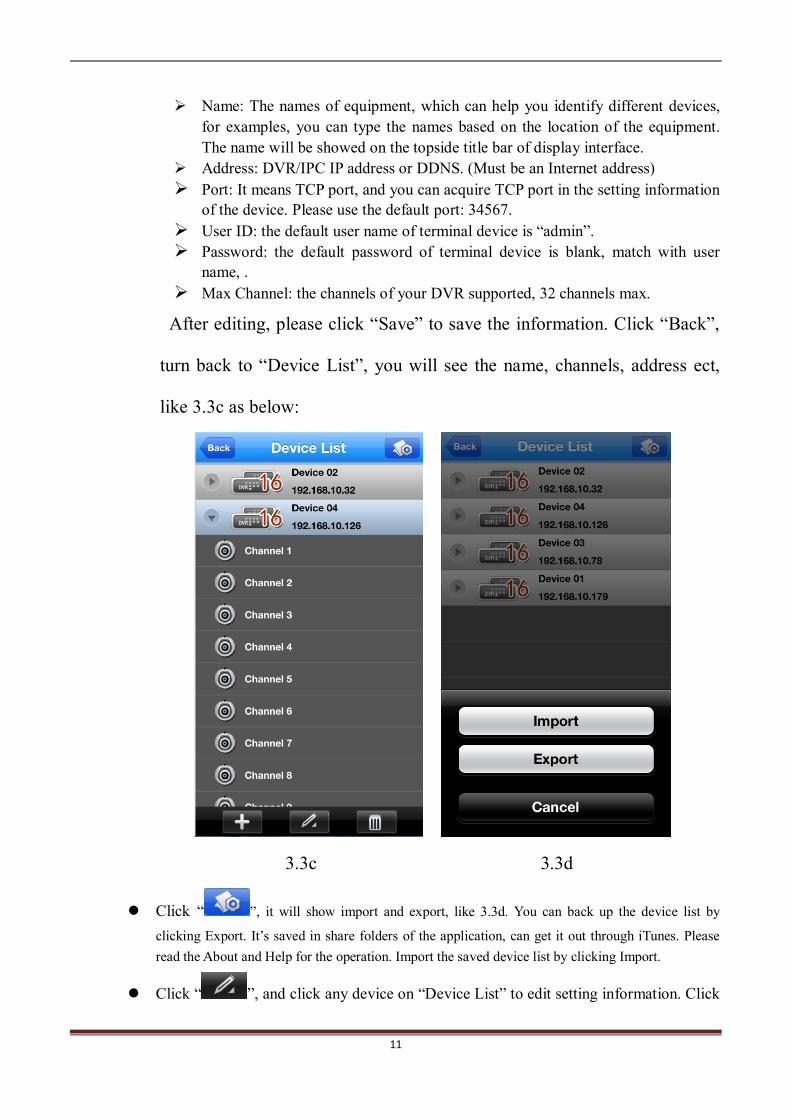
After editing, please click “Save” to save the information. Click “Back”,
turn back to “Device List”, you will see the name, channels, address ect,
like 3.3c as below:
3.3c 3.3d
Click “ ”, it will show import and export, like 3.3d. You can back up the device list by
clicking Export. It’s saved in share folders of the application, can get it out through iTunes. Please read the About and Help for the operation. Import the saved device list by clicking Import.
Click “ ”, and click any device on “Device List” to edit setting information. Click

12
“Save” to finish the modification.
Click “ ” to delete the selected device. For example, click 64 in “Device List”, will show notice like 3.3e, select “Yes”, and delete 64.
3.3e
3.4 Switch Channel
Switch the channels within the same device:
Switch the channels within the same device, you could select the numbers
of the display windows showed in Area 2 in 3.4a to switch the channels; if the
number of the channels is over 8 channels, you could select Area 3 to switch
channel-group, then select the other numbers in this channel-group to switch the
channels;
13
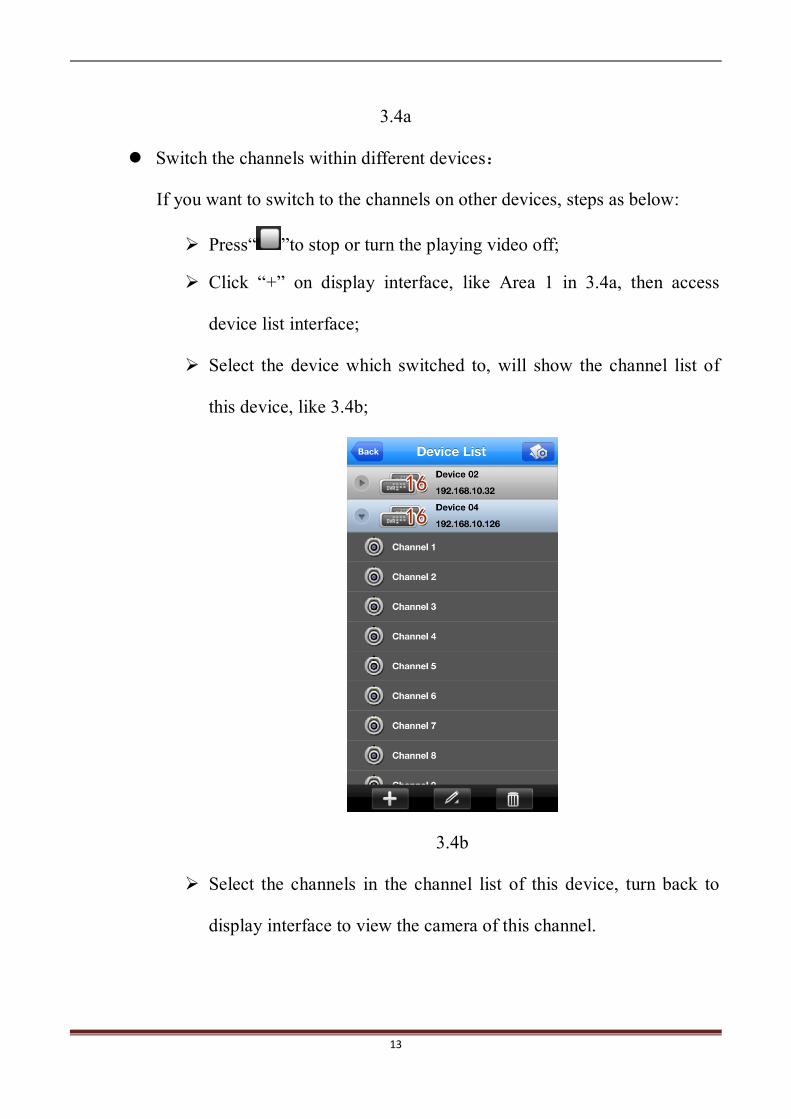
3.4a
Switch the channels within different devices:
If you want to switch to the channels on other devices, steps as below:
Press“ ”to stop or turn the playing video off;
Click “+” on display interface, like Area 1 in 3.4a, then access
device list interface;
Select the device which switched to, will show the channel list of
this device, like 3.4b;
3.4b
Select the channels in the channel list of this device, turn back to
display interface to view the camera of this channel.
14
3.5 PTZ Control
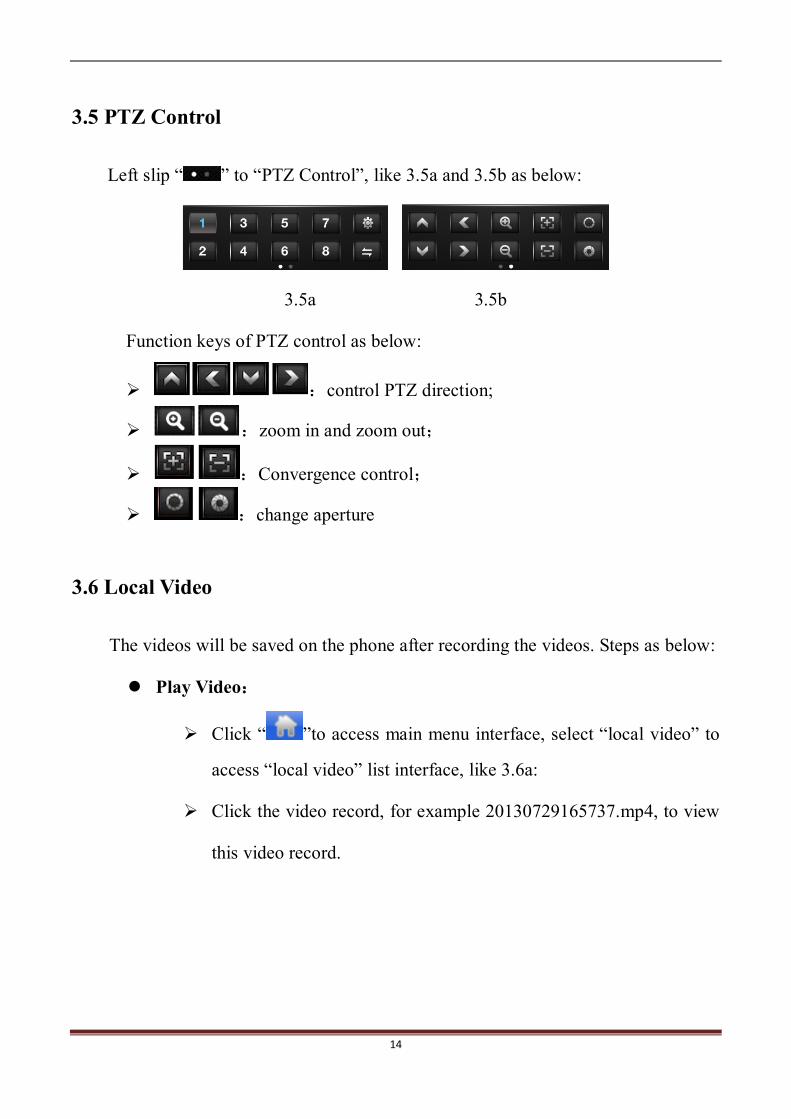
Left slip “ ” to “PTZ Control”, like 3.5a and 3.5b as below:
3.5a 3.5b
Function keys of PTZ control as below:
:control PTZ direction;
:zoom in and zoom out;
:Convergence control;
:change aperture
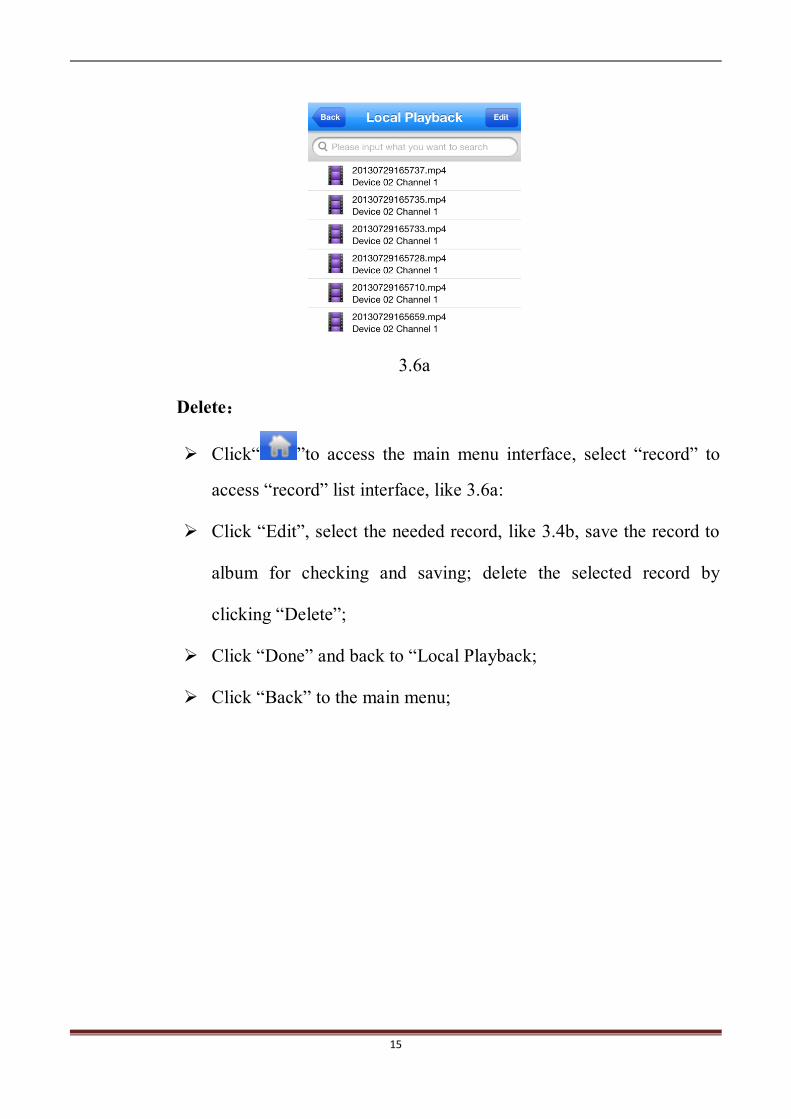
3.6 Local Video
The videos will be saved on the phone after recording the videos. Steps as below:
Play Video:
Click “ ”to access main menu interface, select “local video” to
access “local video” list interface, like 3.6a:
Click the video record, for example 20130729165737.mp4, to view
this video record.
15
3.6a
Delete:
Click“ ”to access the main menu interface, select “record” to
access “record” list interface, like 3.6a:
Click “Edit”, select the needed record, like 3.4b, save the record to
album for checking and saving; delete the selected record by
clicking “Delete”;
Click “Done” and back to “Local Playback;
Click “Back” to the main menu;

16
3.6b
3.7 Photos
The photos are the snap-shot when viewing the cameras which saved on the album.
You also can check and batch save and delete ect. The steps are the same as 3.4.
3.8 Remote Playback
The application can visit the device remotely, collect the records saved from the
device, to remote playback. Select time, device and channel and click “Search”, then
click any record to playback.

17
3.8a
3.9 Online Alarm
There is any alarm prompt from any channels when previewing, click the
prompt button to check the alarm message from the corresponding device and
channels (alarm time and type). You can click “Edit” to delete or clear the alarm
message, like 3.9a:

18
3.9a
3.10 Intercom
Intercom for the selecting device. Click “ ” and active as “ ”. Talk between
application and device for each other, to intercom.
3.11 Switch Language
When you switch the language on your phone, the language of the application
will be changed as well. For example, it’s switched to English on your phone; the
language of the application will be switched to English as well.