using the web-based training tool myfloridamarketplace
TRANSCRIPT

Using the Web-Based Training Tool
MyFloridaMarketPlace
2
The OnDemand Browser-based Player allows you to learn while you work. You can gain well-rounded knowledge of software functionality, complete with conceptual understanding and hands-on experience, by learning how to use the program in a simulated environment and while working with your own “live” data. The OnDemand Browser-based Player will demonstrate how to complete a task or guide you as you work.
What is the OnDemand Player?
3
The Main Window
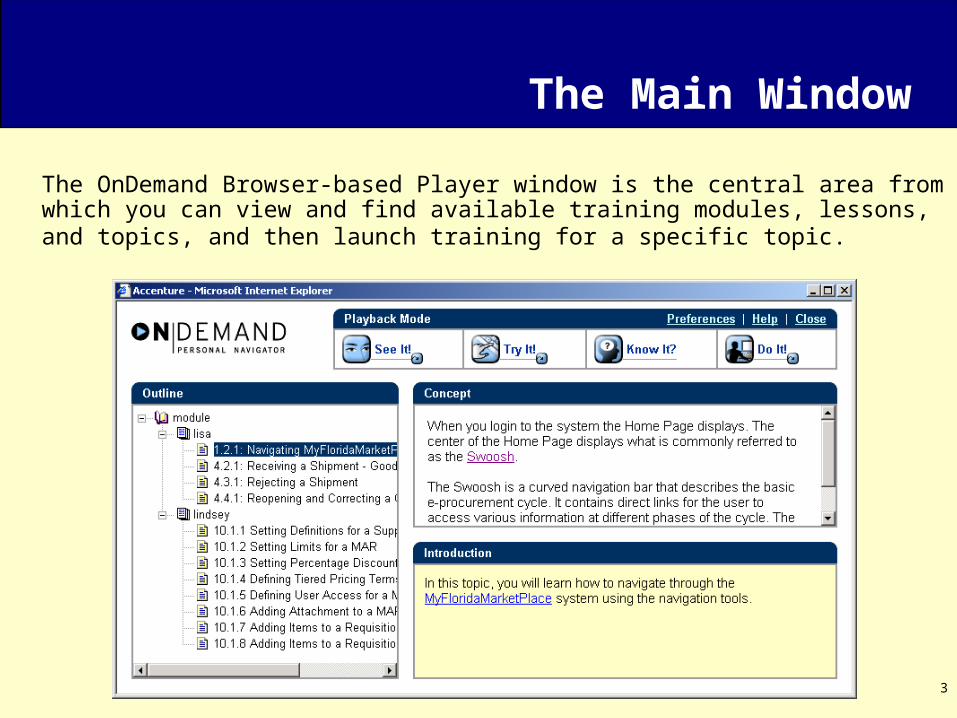
The OnDemand Browser-based Player window is the central area from which you can view and find available training modules, lessons, and topics, and then launch training for a specific topic.
4
The Outline Pane
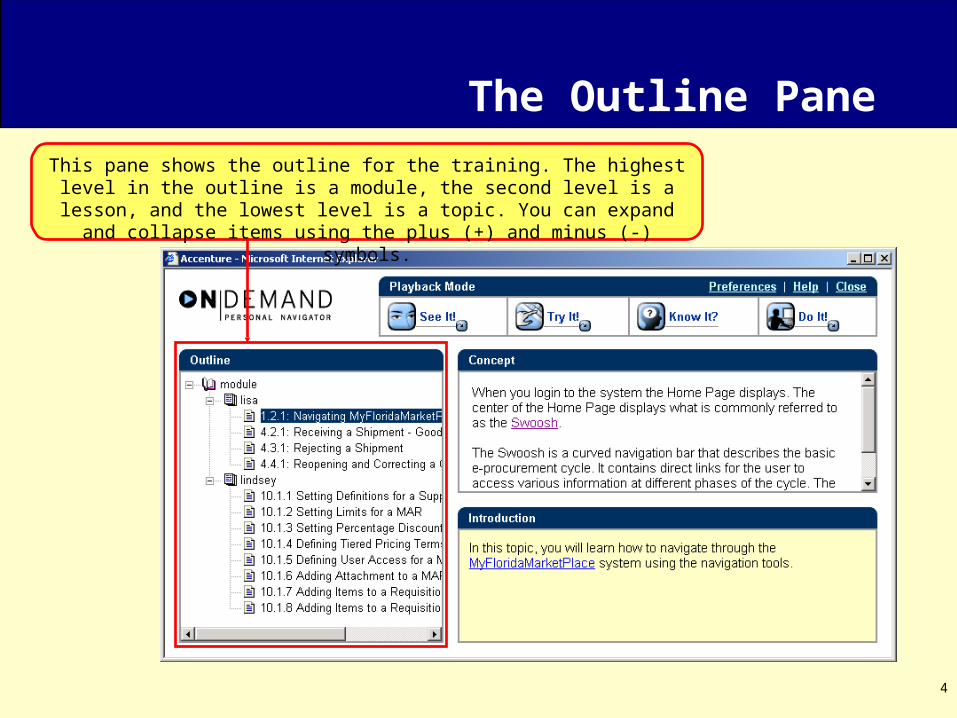
This pane shows the outline for the training. The highest level in the outline is a module, the second level is a lesson, and the lowest level is a topic. You can expand and collapse items using the plus (+) and minus (-) symbols.
5
The Concept Pane
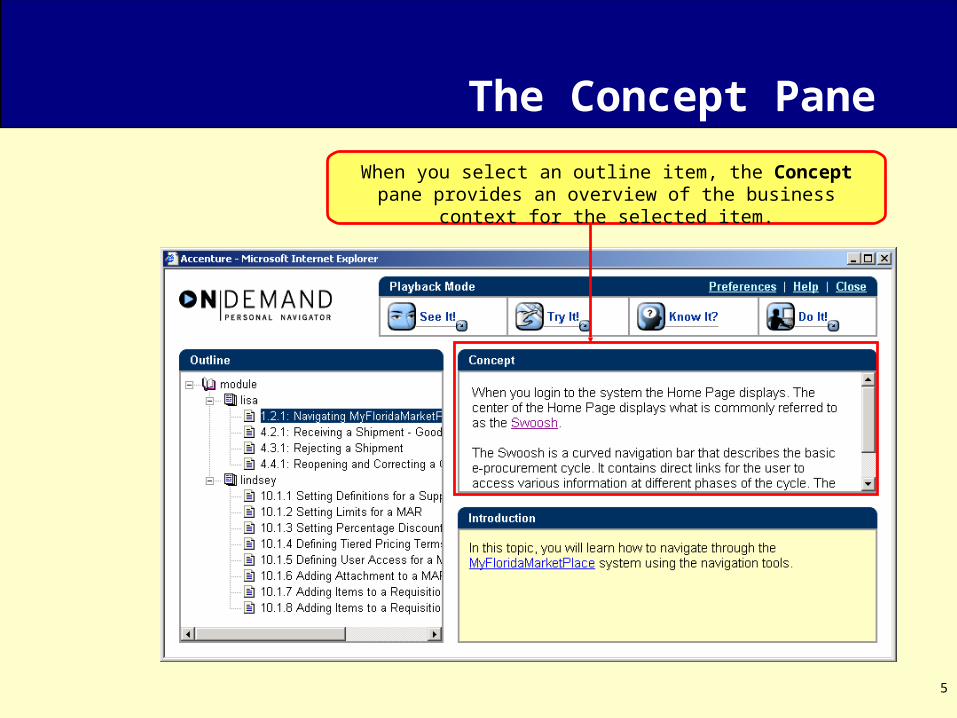
When you select an outline item, the Concept pane provides an overview of the business context for the selected item.
6
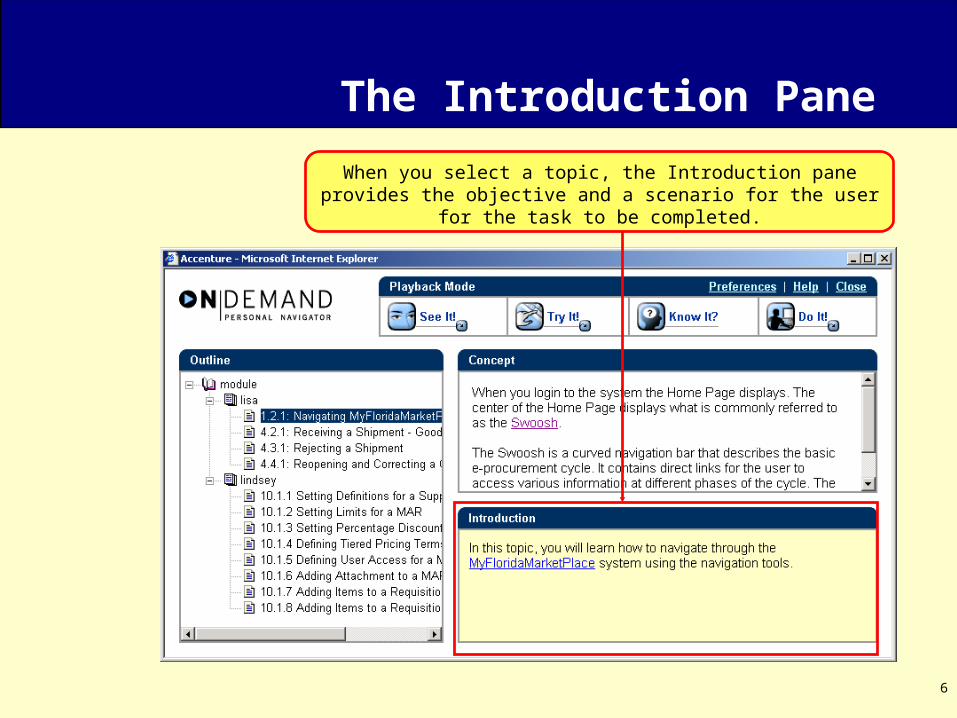
The Introduction Pane
When you select a topic, the Introduction pane provides the objective and a scenario for the user for the task to be completed.
7
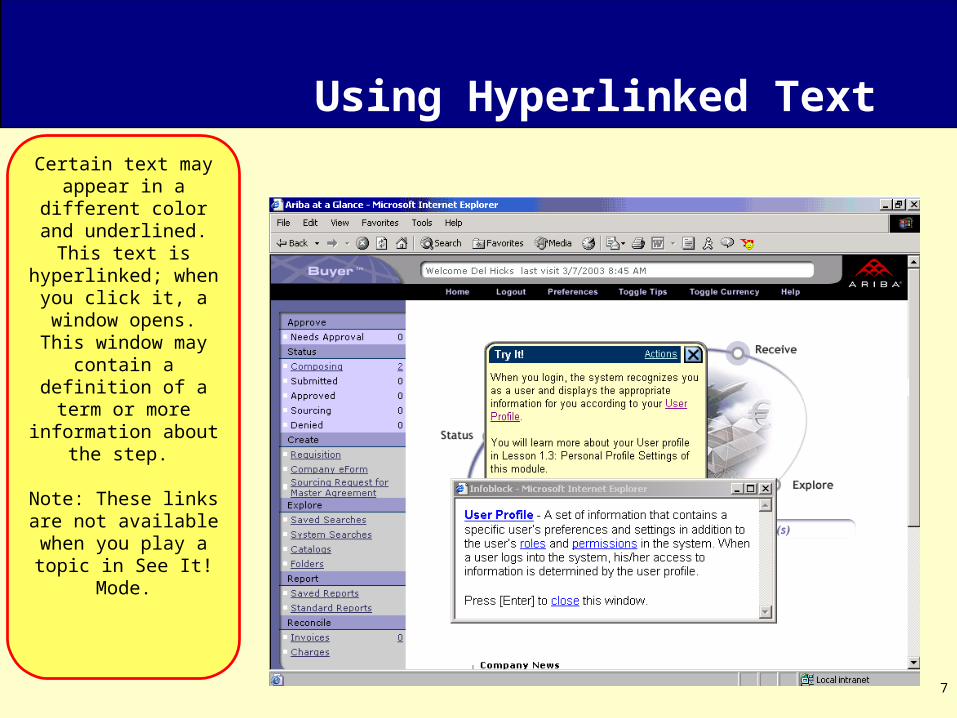
Using Hyperlinked TextCertain text may
appear in a different color and underlined.
This text is hyperlinked; when you
click it, a window opens. This window
may contain a definition of a term or
more information about the step.
Note: These links are not available when
you play a topic in See It! Mode.
8
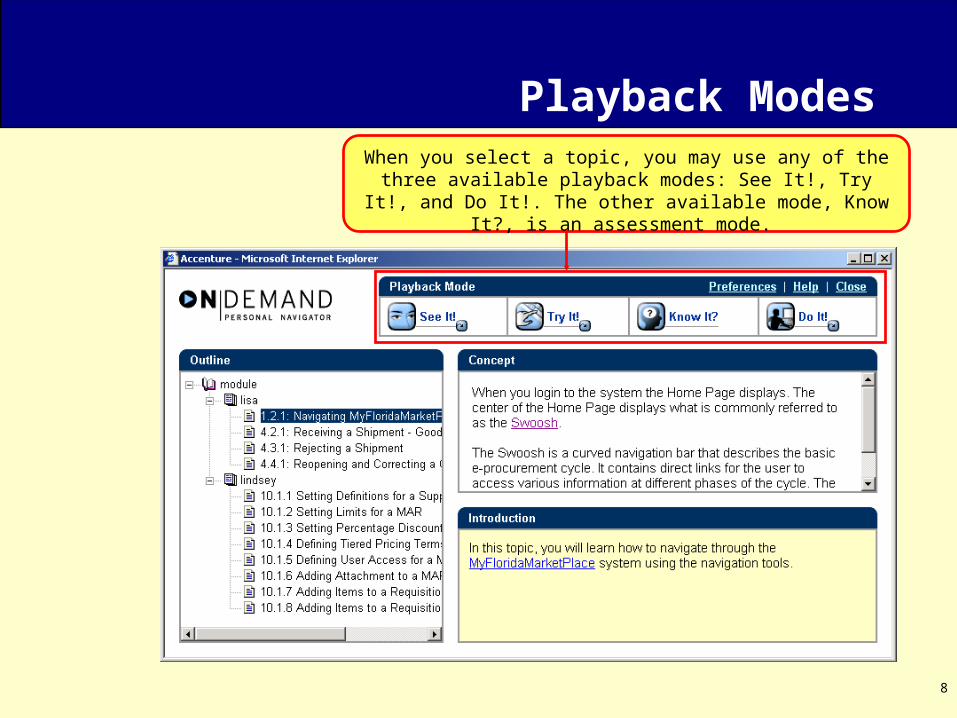
Playback ModesWhen you select a topic, you may use any of the three available playback modes: See It!, Try It!, and Do It!. The other available
mode, Know It?, is an assessment mode.
9
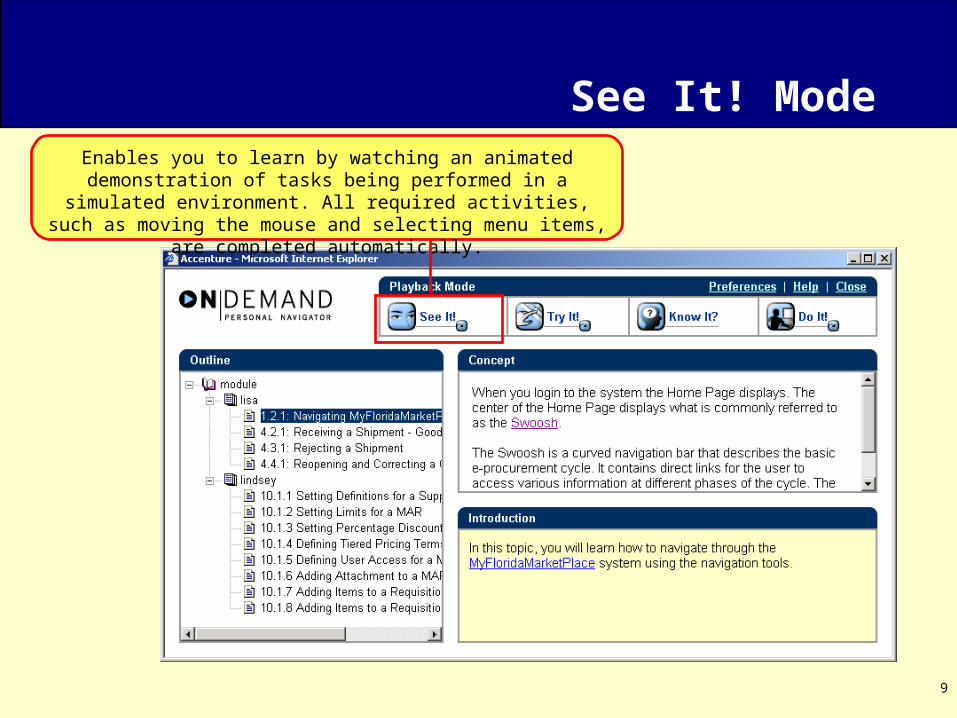
See It! ModeEnables you to learn by watching an animated demonstration of tasks being performed in a simulated environment. All required
activities, such as moving the mouse and selecting menu items, are completed automatically.

10
Playing a Topic in See It! ModeSee It! Mode runs
automatically. Click the Pause link in the
bubble to pause it, and click the Resume button to resume
playback. You can also advance to the
next step manually by pressing the [Enter]
key. You can stop it at any time by clicking the Close button in the bubble, or by
pressing the [Escape] key on your keyboard.
11
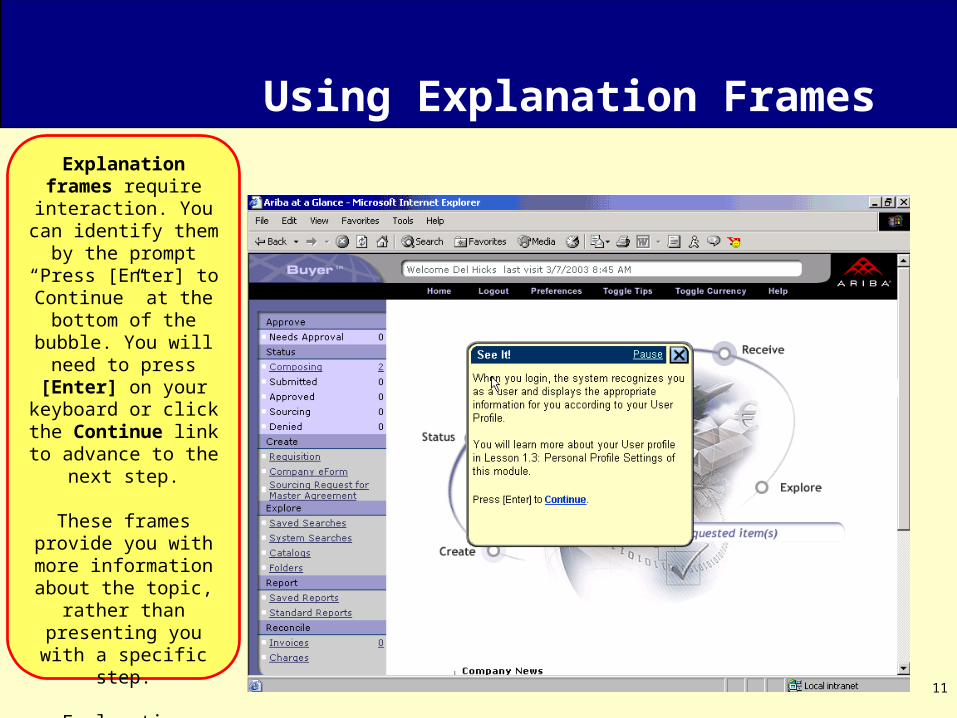
Using Explanation FramesExplanation frames require interaction.
You can identify them by the prompt “Press [Enter] to Continue” at
the bottom of the bubble. You will need to press [Enter] on
your keyboard or click the Continue link to advance to the next
step.
These frames provide you with more
information about the topic, rather than
presenting you with a specific step.
Explanation frames also appear in Try It!
mode.

12
Try It! ModeEnables you to learn interactively by prompting you for the necessary mouse clicks or keystrokes to complete tasks in a simulated environment. When you are working in Try It! mode, you see a marquee around the location where you need to complete an action. If you make a mistake, you
are prompted to try again.

13
Playing a Topic in Try It! ModeWhen you are working
in Try It! mode, the OnDemand Browser-based Player places a marquee around the location where you
need to complete an action. If you make a
mistake, you are prompted to try again.
As Try It! mode provides a simulated environment, active
data and system settings in your application are
protected.
Whenever text input is required, the text must be entered exactly as suggested to advance
to the next step.

14
Using Alternatives
If the Show next alternative action icon (a two-headed
arrow) appears in the bubble, an alternative
action or path is available. An
Alternative Action is one action that causes the same result as the
primary action. An Alternative Path allows
you to complete a series of actions that
lead to the same result as the primary path.
Alternatives paths and actions are available
in Try It! Mode and Do It! Mode.
15
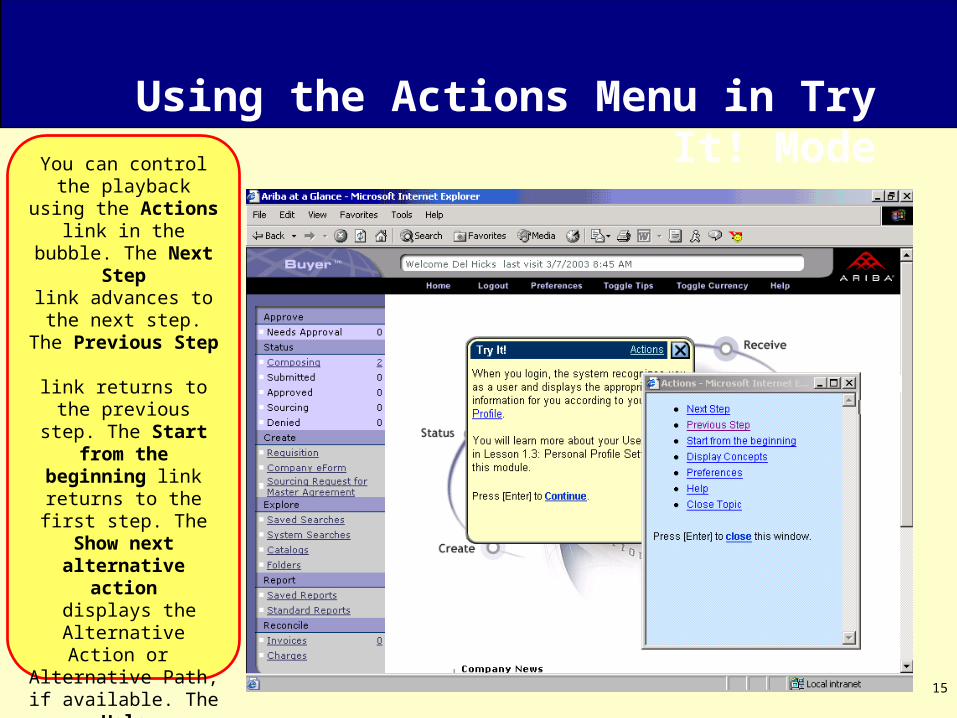
Using the Actions Menu in Try It! ModeYou can control the playback using the Actions link in the
bubble. The Next Steplink advances to the
next step. The Previous Step
link returns to the previous step. The
Start from the beginning link returns to the first step. The
Show next alternative action
displays the Alternative Action or
Alternative Path, if available. The Help
link displays the Help window. The Close
Topic link exits Try It! mode.
16
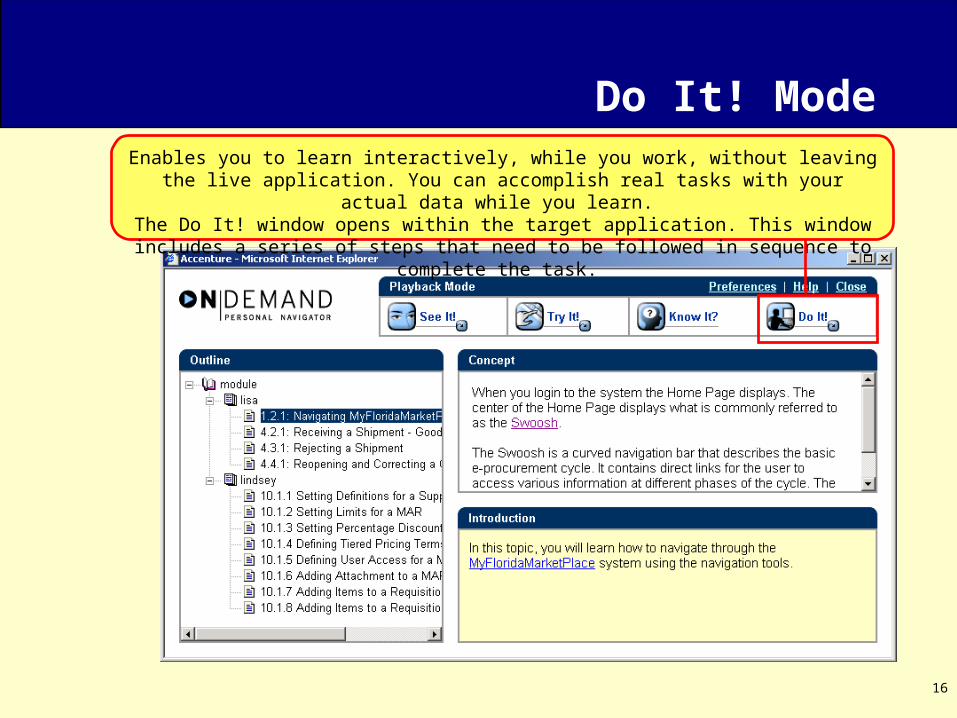
Do It! ModeEnables you to learn interactively, while you work, without leaving the live application. You
can accomplish real tasks with your actual data while you learn. The Do It! window opens within the target application. This window includes a series of
steps that need to be followed in sequence to complete the task.
17
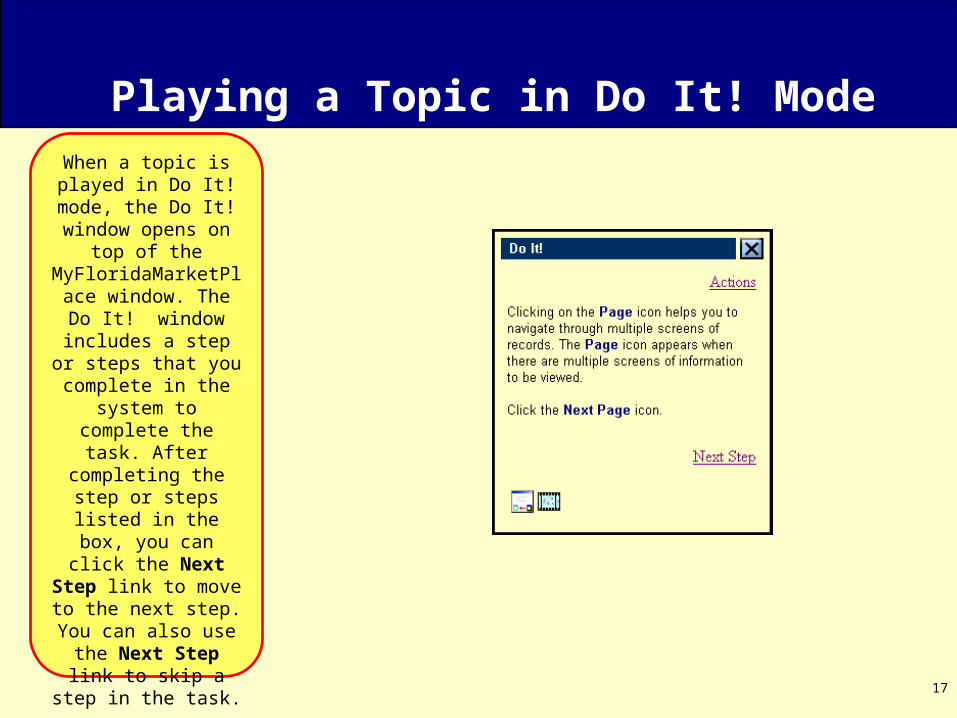
Playing a Topic in Do It! ModeWhen a topic is played in Do It! mode, the Do It! window opens on
top of the MyFloridaMarketPlace
window. The Do It! window includes a
step or steps that you complete in the
system to complete the task. After
completing the step or steps listed in the box, you can click the Next Step link to move to
the next step. You can also use the Next
Step link to skip a step in the task.
18
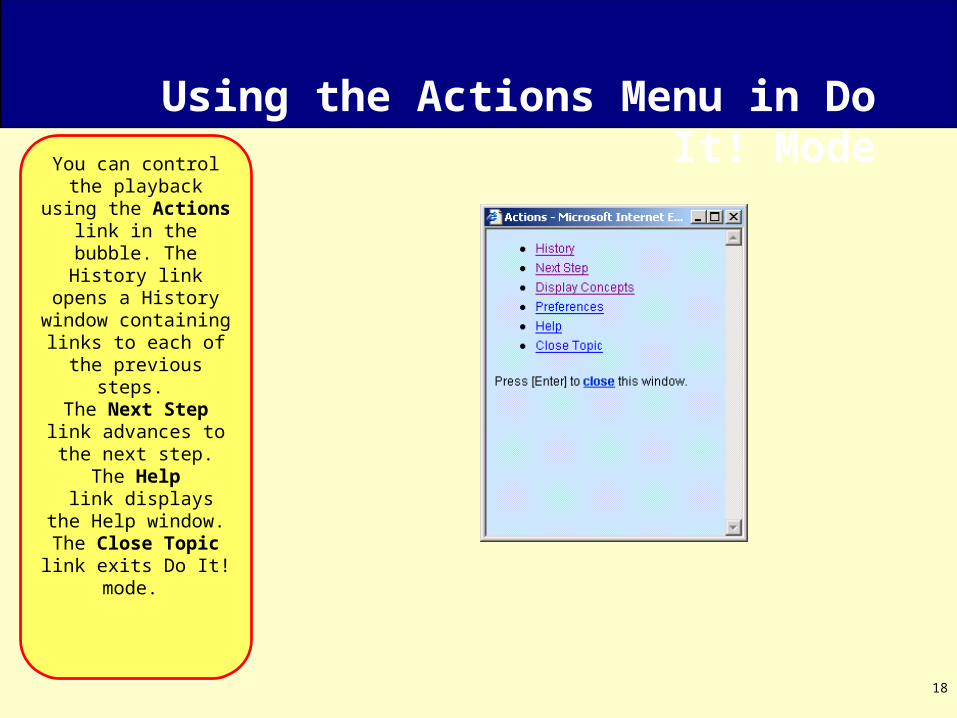
Using the Actions Menu in Do It! ModeYou can control the playback using the Actions link in the bubble. The History link opens a History window containing links to each of the
previous steps. The Next Step
link advances to the next step. The Help
link displays the Help window. The Close
Topic link exits Do It! mode.
19
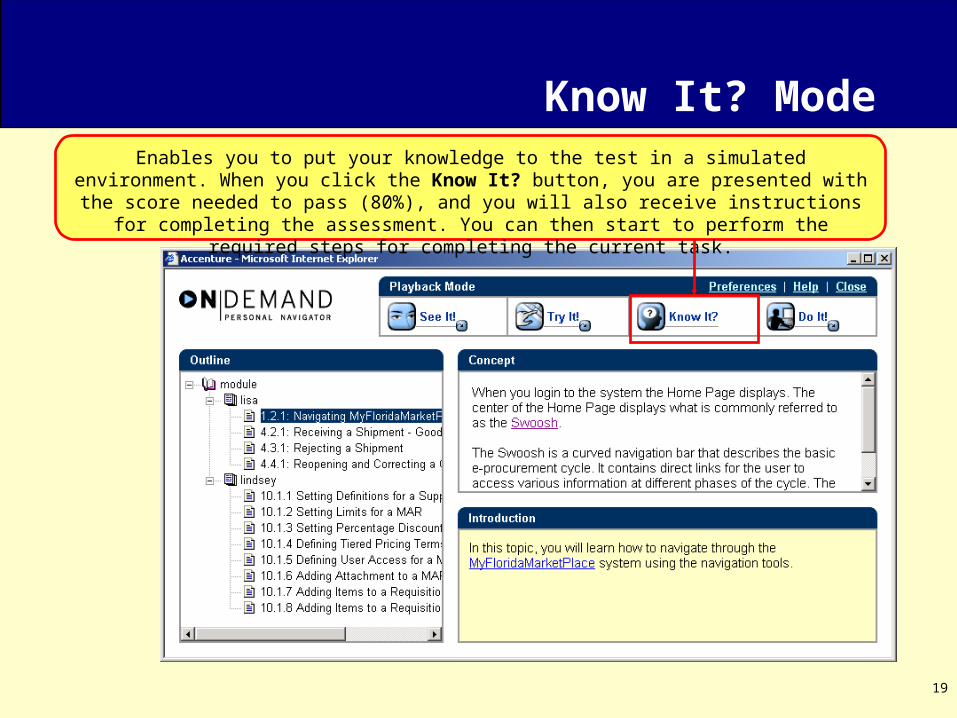
Know It? ModeEnables you to put your knowledge to the test in a simulated environment. When you click the
Know It? button, you are presented with the score needed to pass (80%), and you will also receive instructions for completing the assessment. You can then start to perform the required
steps for completing the current task.
20
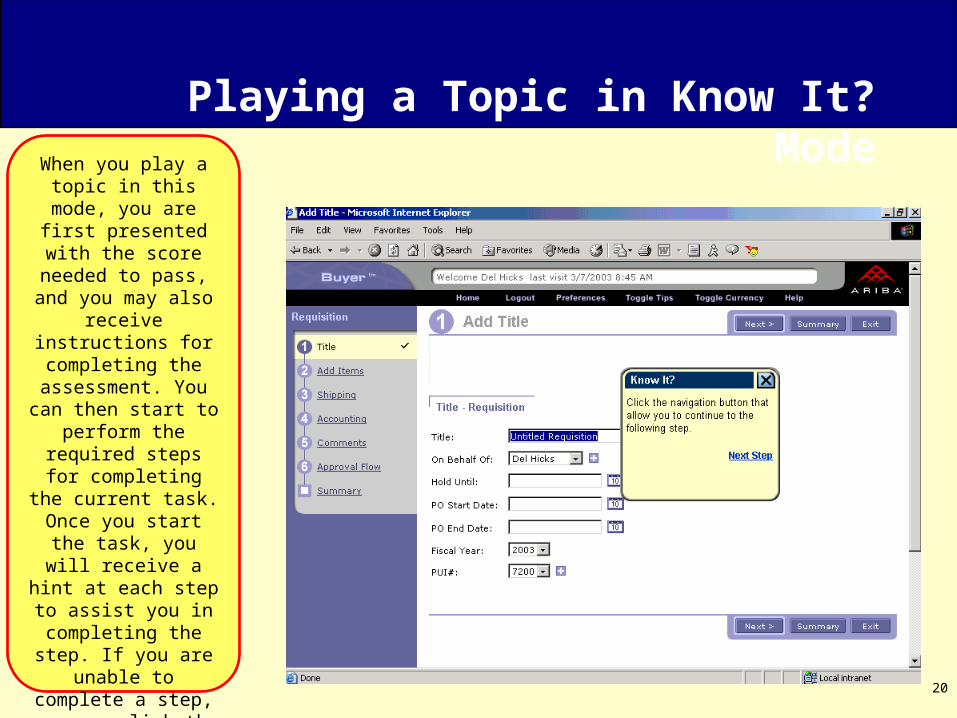
Playing a Topic in Know It? ModeWhen you play a topic in this mode, you are
first presented with the score needed to pass,
and you may also receive instructions for
completing the assessment. You can then start to perform the required steps for completing the current task. Once you start
the task, you will receive a hint at each step to assist you in
completing the step. If you are unable to
complete a step, you may click the Next Step link. A window opens to tell you that you will be graded as incorrect if the step is completed for you.
21
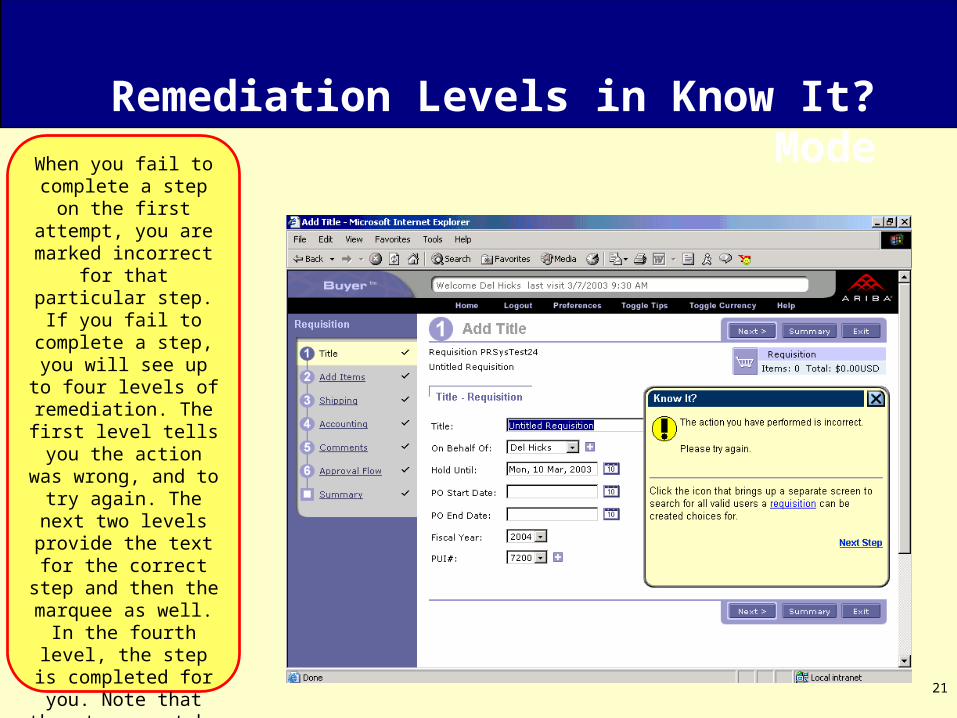
Remediation Levels in Know It? ModeWhen you fail to
complete a step on the first attempt, you are marked incorrect for that particular step. If you fail to complete a
step, you will see up to four levels of
remediation. The first level tells you the
action was wrong, and to try again. The next two levels provide the
text for the correct step and then the
marquee as well. In the fourth level, the
step is completed for you. Note that the
steps must be completed exactly as
they were in Try It! Mode to be correct.
22
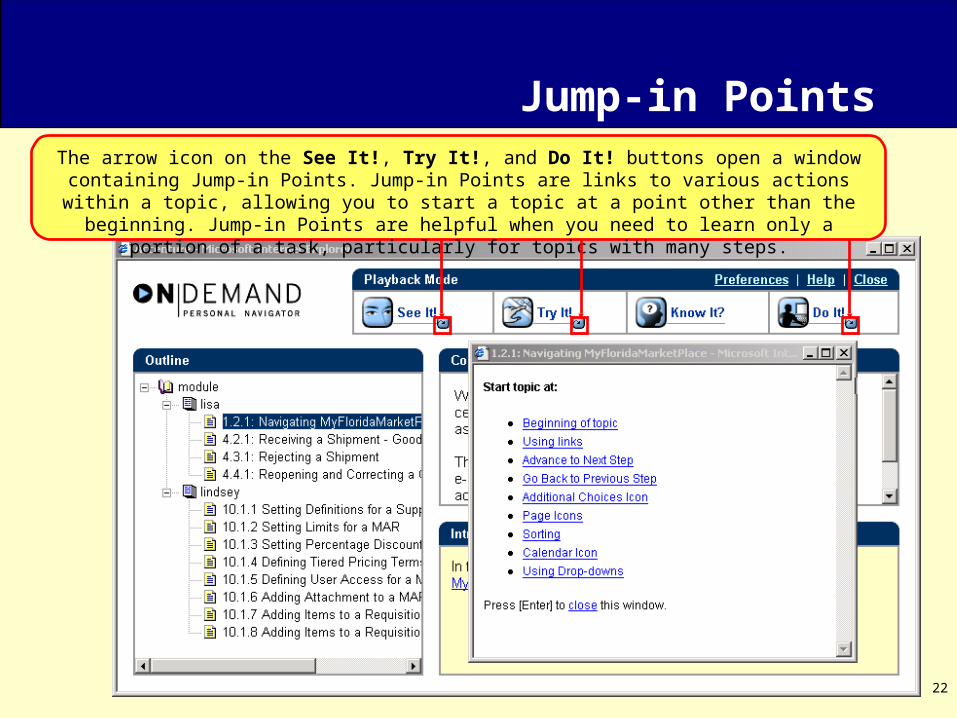
Jump-in PointsThe arrow icon on the See It!, Try It!, and Do It! buttons open a window containing Jump-in Points.
Jump-in Points are links to various actions within a topic, allowing you to start a topic at a point other than the beginning. Jump-in Points are helpful when you need to learn only a portion of a
task, particularly for topics with many steps.
23
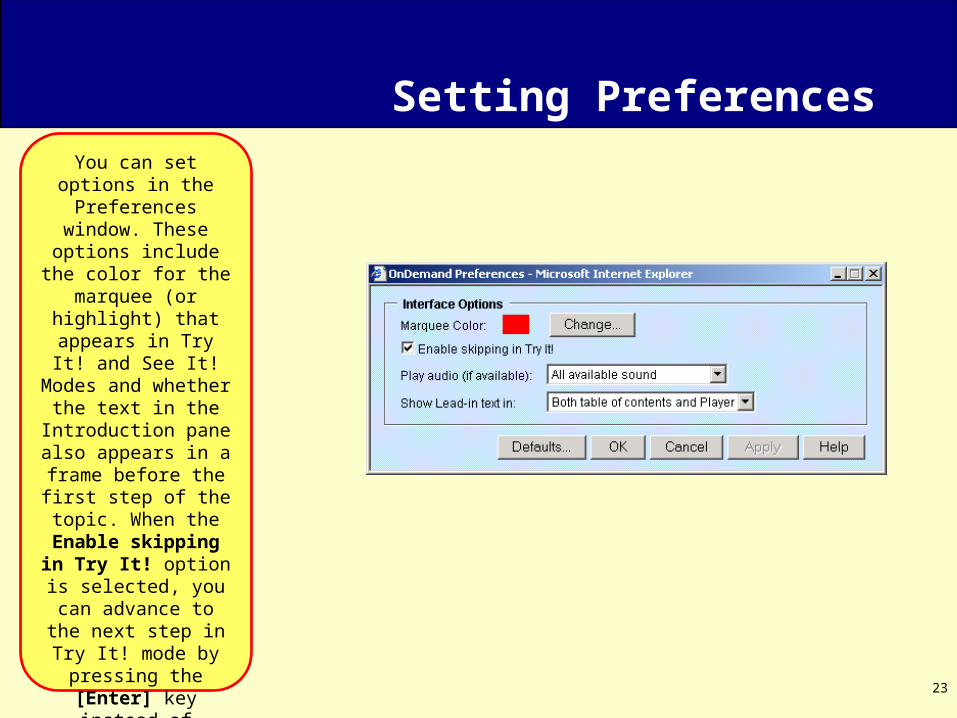
Setting PreferencesYou can set options in
the Preferences window. These
options include the color for the marquee
(or highlight) that appears in Try It! and
See It! Modes and whether the text in the Introduction pane also
appears in a frame before the first step of the topic. When the Enable skipping in
Try It! option is selected, you can
advance to the next step in Try It! mode by pressing the [Enter]
key instead of performing the action.