using the salesforce adapter - oracle · oracle cloud using the salesforce adapter, release 17.3...
TRANSCRIPT

Oracle® CloudUsing the Salesforce Adapter
Release 17.3E66628-07September 2017

Oracle Cloud Using the Salesforce Adapter, Release 17.3
E66628-07
Copyright © 2015, 2017, Oracle and/or its affiliates. All rights reserved.
Primary Author: Mark Kennedy
This software and related documentation are provided under a license agreement containing restrictions onuse and disclosure and are protected by intellectual property laws. Except as expressly permitted in yourlicense agreement or allowed by law, you may not use, copy, reproduce, translate, broadcast, modify,license, transmit, distribute, exhibit, perform, publish, or display any part, in any form, or by any means.Reverse engineering, disassembly, or decompilation of this software, unless required by law forinteroperability, is prohibited.
The information contained herein is subject to change without notice and is not warranted to be error-free. Ifyou find any errors, please report them to us in writing.
If this is software or related documentation that is delivered to the U.S. Government or anyone licensing it onbehalf of the U.S. Government, then the following notice is applicable:
U.S. GOVERNMENT END USERS: Oracle programs, including any operating system, integrated software,any programs installed on the hardware, and/or documentation, delivered to U.S. Government end users are"commercial computer software" pursuant to the applicable Federal Acquisition Regulation and agency-specific supplemental regulations. As such, use, duplication, disclosure, modification, and adaptation of theprograms, including any operating system, integrated software, any programs installed on the hardware,and/or documentation, shall be subject to license terms and license restrictions applicable to the programs.No other rights are granted to the U.S. Government.
This software or hardware is developed for general use in a variety of information management applications.It is not developed or intended for use in any inherently dangerous applications, including applications thatmay create a risk of personal injury. If you use this software or hardware in dangerous applications, then youshall be responsible to take all appropriate fail-safe, backup, redundancy, and other measures to ensure itssafe use. Oracle Corporation and its affiliates disclaim any liability for any damages caused by use of thissoftware or hardware in dangerous applications.
Oracle and Java are registered trademarks of Oracle and/or its affiliates. Other names may be trademarks oftheir respective owners.
Intel and Intel Xeon are trademarks or registered trademarks of Intel Corporation. All SPARC trademarks areused under license and are trademarks or registered trademarks of SPARC International, Inc. AMD, Opteron,the AMD logo, and the AMD Opteron logo are trademarks or registered trademarks of Advanced MicroDevices. UNIX is a registered trademark of The Open Group.
This software or hardware and documentation may provide access to or information about content, products,and services from third parties. Oracle Corporation and its affiliates are not responsible for and expresslydisclaim all warranties of any kind with respect to third-party content, products, and services unless otherwiseset forth in an applicable agreement between you and Oracle. Oracle Corporation and its affiliates will not beresponsible for any loss, costs, or damages incurred due to your access to or use of third-party content,products, or services, except as set forth in an applicable agreement between you and Oracle.
Contents
Preface
Audience vi
Documentation Accessibility vi
Related Resources vi
Conventions vi
1 Getting Started with the Salesforce Adapter
Salesforce Adapter Capabilities 1-1
What Application Version Is Supported? 1-2
About Oracle Integration Cloud Service 1-2
About Oracle Integration Cloud Service Connections 1-2
About Oracle Integration Cloud Service Integrations 1-3
Common Message Exchange Patterns 1-3
About Salesforce Adapter Use Cases 1-4
Typical Workflow for Creating and Including an Adapter Connection in an Integration1-5
2 Creating a Salesforce Adapter Connection
Prerequisites for Creating a Connection 2-1
Understanding Salesforce Constraints 2-1
Creating the Salesforce Adapter Enterprise WSDL 2-2
Creating the Salesforce Adapter Outbound Messaging WSDL 2-2
Creating the Salesforce Adapter Custom WSDL 2-3
Uploading an SSL Certificate 2-3
Creating a Connection 2-5
Adding a Contact Email 2-6
Configuring Connection Properties 2-6
Configuring Connection Security 2-7
Testing the Connection 2-7
Editing a Connection 2-7
Cloning a Connection 2-8
iii
Deleting a Connection 2-9
Refreshing Integration Metadata 2-9
3 Creating an Integration
4 Adding the Salesforce Adapter Connection to an Integration
Configuring Basic Information Properties 4-1
What You Can Do from the Basic Info Page 4-1
What You See on the Basic Info Page 4-2
Configuring Salesforce Trigger Outbound Messaging Properties 4-2
What You Can Do from the Salesforce Trigger Outbound Messaging Page 4-2
What You See on the Salesforce Trigger Outbound Messaging Page 4-3
Configuring Salesforce Trigger Response Properties 4-3
What You Can Do from the Salesforce Trigger Response Page 4-3
What You See on the Salesforce Cloud Trigger Response Page 4-4
Configuring Salesforce Trigger Callback Response Properties 4-4
What You Can Do from the Salesforce Trigger Callback Response Page 4-4
What You See on the Salesforce Trigger Callback Response Page 4-5
Configuring Salesforce Invoke Basic Information Properties 4-6
What You Can Do from the Salesforce Cloud Invoke Basic Info Page 4-6
What You See on the Salesforce Invoke Basic Info Page 4-6
Configuring Salesforce Invoke Operation Properties 4-7
What You Can Do from the Salesforce Cloud Invoke Operations Page 4-7
What You See on the Salesforce Invoke Operations Page 4-8
Configuring Salesforce Invoke Header Properties 4-9
What You Can Do from the Salesforce Cloud Invoke Headers Page 4-9
What You See on the Salesforce Invoke Headers Page 4-9
Configuring Salesforce Invoke Custom Operations Properties 4-12
What You Can Do from the Salesforce Cloud Invoke Custom Operations Page 4-12
What You See on the Salesforce Cloud Invoke Custom Operations Page 4-12
Reviewing Configuration Values on the Summary Page 4-13
What You Can Do from the Summary Page 4-13
What You See on the Summary Page 4-13
Performing Salesforce Adapter Postconfiguration Tasks 4-14
5 Creating Mappings and Lookups in Integrations
iv

6 Administering Integrations
v
Preface
Using the Salesforce Adapter describes how to configure the Salesforce Adapter as aconnection in an integration in Oracle Integration Cloud Service.
Topics
• Audience
• Documentation Accessibility
• Related Resources
• Conventions
AudienceUsing the Salesforce Adapter is intended for developers who want to use theSalesforce Adapter in integrations in Oracle Integration Cloud Service.
Documentation AccessibilityFor information about Oracle's commitment to accessibility, visit the OracleAccessibility Program website at http://www.oracle.com/pls/topic/lookup?ctx=acc&id=docacc.
Access to Oracle Support
Oracle customers that have purchased support have access to electronic supportthrough My Oracle Support. For information, visit http://www.oracle.com/pls/topic/lookup?ctx=acc&id=info or visit http://www.oracle.com/pls/topic/lookup?ctx=acc&id=trsif you are hearing impaired.
Related ResourcesSee these Oracle resources:
• Oracle Cloud
http://cloud.oracle.com
• Using Oracle Integration Cloud Service
• Using the Oracle Mapper
ConventionsThe following text conventions are used in this document:
Preface
vi
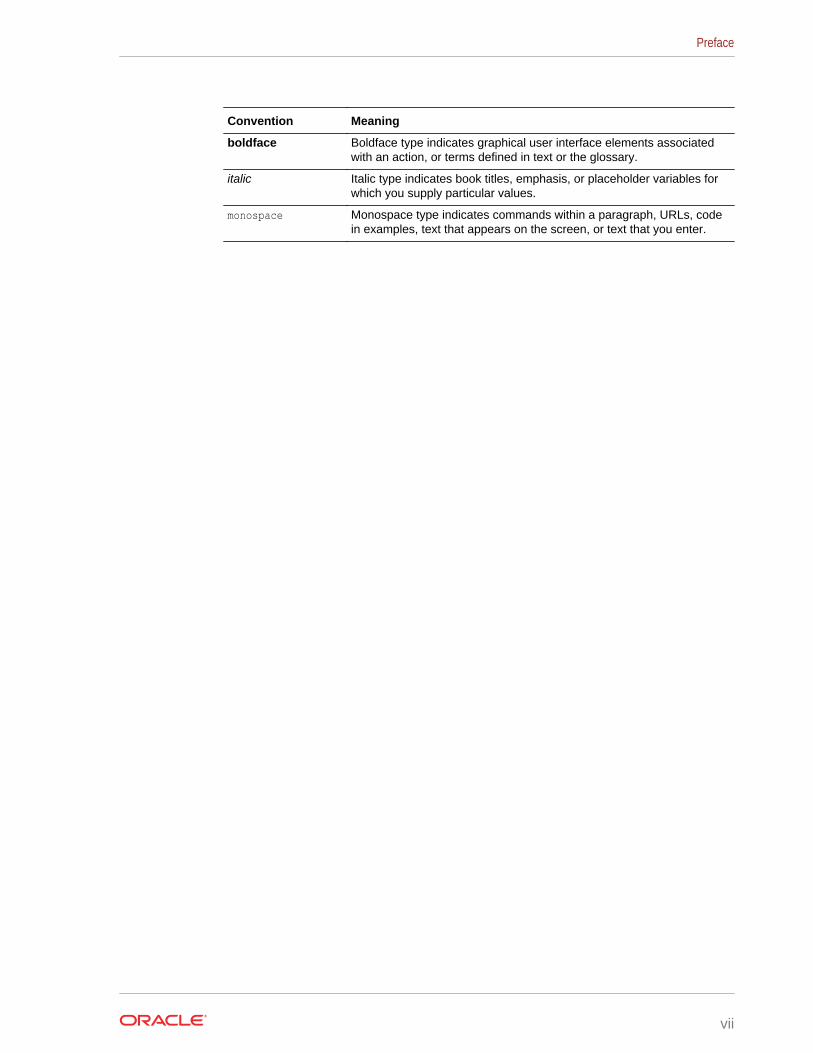
Convention Meaning
boldface Boldface type indicates graphical user interface elements associatedwith an action, or terms defined in text or the glossary.
italic Italic type indicates book titles, emphasis, or placeholder variables forwhich you supply particular values.
monospace Monospace type indicates commands within a paragraph, URLs, codein examples, text that appears on the screen, or text that you enter.
Preface
vii
1Getting Started with the Salesforce Adapter
Review the following conceptual topics to learn about the Salesforce Adapter and howto use it as a connection in integrations in Oracle Integration Cloud Service. A typicalworkflow of adapter and integration tasks is also provided.
Topics
• Salesforce Adapter Capabilities
• What Application Version Is Supported?
• About Oracle Integration Cloud Service
• About Oracle Integration Cloud Service Connections
• About Oracle Integration Cloud Service Integrations
• Common Message Exchange Patterns
• About Salesforce Adapter Use Cases
• Typical Workflow for Creating and Including an Adapter Connection in anIntegration
Salesforce Adapter CapabilitiesThe Salesforce Adapter enables you to create an integration with Salesforce CRMapplications.
The Salesforce Adapter provides the following benefits:
• Integrates easily with the Salesforce application’s WSDL file to produce asimplified, integration-centric WSDL.
• Contacts the Salesforce application to fetch metadata information about businessobjects.
• Provides invoke (target) support for performing the following type of operationsagainst business objects fetched from the Salesforce application:
– CRUD (create, get, update, and destroy) operations
– Salesforce Object Query Language (SOQL) or Salesforce Object SearchLanguage (SOSL) query operations
• Provides invoke (outbound) support for using a custom WSDL that includescustom Apex classes exposed as SOAP web services.
• Provides trigger (source) messaging support for objects through use of theSalesforce outbound messaging WSDL.
• Provides trigger (source) callback support.
• Provides metadata caching support. See Refreshing Integration Metadata.
Video
1-1
Video
Video
What Application Version Is Supported?For information about which application version is supported by this adapter, see theadapter certification matrix:
Oracle Integration Adapters Certification
About Oracle Integration Cloud ServiceOracle Integration Cloud Service is a complete, secure, but lightweight integrationsolution that enables you to connect your applications in the cloud. It simplifiesconnectivity between your applications and connects both your applications that live inthe cloud and your applications that still live on premises. Oracle Integration CloudService provides secure, enterprise-grade connectivity regardless of the applicationsyou are connecting or where they reside.
Oracle Integration Cloud Service provides native connectivity to Oracle Software as aService (SaaS) applications, such as Oracle Sales Cloud, Oracle RightNow Cloud,and so on. Oracle Integration Cloud Service adapters simplify connectivity by handlingthe underlying complexities of connecting to applications using industry-wide bestpractices. You only need to create a connection that provides minimal connectivityinformation for each system. Oracle Integration Cloud Service lookups map thedifferent codes or terms used by the applications you are integrating to describesimilar items (such as country or gender codes). Finally, the visual data mapperenables you to quickly create direct mappings between the trigger and invoke datastructures. From the mapper, you can also access lookup tables and use standardXPath functions to map data between your applications.
Once you integrate your applications and activate the integrations to the runtimeenvironment, the dashboard displays information about the running integrations so youcan monitor the status and processing statistics for each integration. The dashboardmeasures and tracks the performance of your transactions by capturing and reportingkey information, such as throughput, the number of messages processed successfully,and the number of messages that failed processing. You can also manage businessidentifiers that track fields in messages and manage errors by integrations,connections, or specific integration instances.
About Oracle Integration Cloud Service ConnectionsConnections define information about the instances of each configuration you areintegrating. Oracle Integration Cloud Service includes a set of predefined adapters,which are the types of applications on which you can base your connections, such asOracle Sales Cloud, Oracle Eloqua Cloud, Oracle RightNow Cloud, and others. Aconnection is based on an adapter. For example, to create a connection to a specificRightNow Cloud application instance, you must select the Oracle RightNow adapterand then specify the WSDL URL, security policy, and security credentials to connect toit.
Video
Chapter 1What Application Version Is Supported?
1-2

About Oracle Integration Cloud Service IntegrationsIntegrations are the main ingredient of Oracle Integration Cloud Service. An integrationincludes at the least a trigger (source) connection (for requests sent to OracleIntegration Cloud Service) and invoke (target) connection (for requests sent fromOracle Integration Cloud Service to the target) and the field mapping between thosetwo connections.
When you create your integrations, you build on the connections you already createdby defining how to process the data for the trigger (source) and invoke (target)connections. This can include defining the type of operations to perform on the data,the business objects and fields against which to perform those operations, requiredschemas, and so on. To make this easier, the most complex configuration tasks arehandled by Oracle Integration Cloud Service. Once your trigger (source) and invoke(target) connections are configured, the mappers between the two are enabled so youcan define how the information is transferred between the trigger (source) and invoke(target) data structures for both the request and response messages.
Video
Common Message Exchange PatternsYou can use the Salesforce Adapter in a variety of message exchange patterns,including the following:
Sending Multiple Records in a Single Message
The Salesforce Adapter Send Outbound Message action can send multiple records ina single message at specific times, particularly when a bulk data import occurs withinSalesforce. Up to 100 records can be sent in a single message request. For example,if an outbound message trigger is enabled for Account create and Account is createdin bulk in Salesforce.com, there are multiple records (up to 100 records) coming fromSalesforce in a single message.
In the following scenario, the integration receives a single message containing multiplerecords. To support this scenario, you must configure the mapper when the requestrecord shows a single occurrence, but contains multiple records. For this example, thesteps to map the Notification element when it shows a single occurrence are shown.
1. Click the Mapper icon in your integration.
2. Click the parent element in the Target section (for example, the element Accountfor Salesforce Account).
The Build Mappings page is displayed.
3. Add a for-each loop to the parent element.
a. Click the Mapping Components tab in the bottom left corner.
b. Expand XSL Elements.
c. Drag and drop the for-each function to the parent element of the Targetsection (for this example, Account).
Chapter 1About Oracle Integration Cloud Service Integrations
1-3
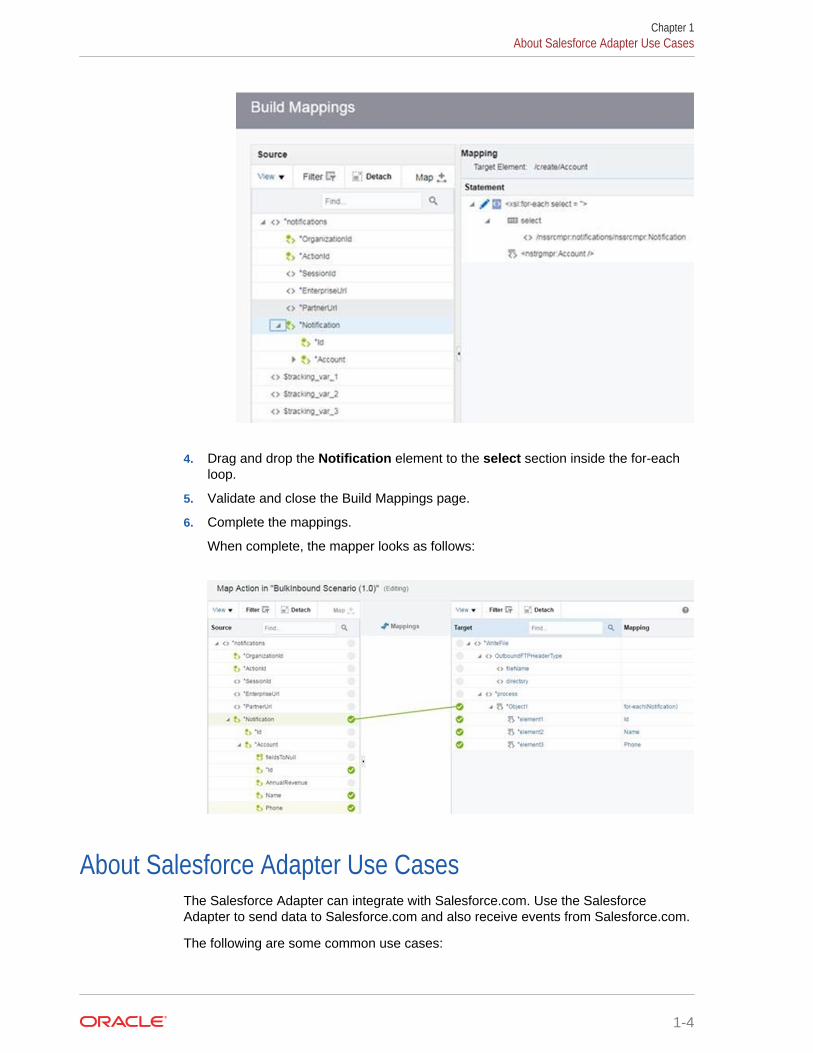
4. Drag and drop the Notification element to the select section inside the for-eachloop.
5. Validate and close the Build Mappings page.
6. Complete the mappings.
When complete, the mapper looks as follows:
About Salesforce Adapter Use CasesThe Salesforce Adapter can integrate with Salesforce.com. Use the SalesforceAdapter to send data to Salesforce.com and also receive events from Salesforce.com.
The following are some common use cases:
Chapter 1About Salesforce Adapter Use Cases
1-4
• Account and contact synchronization between Salesforce and ERP (such asOracle E-Business Suite and Netsuite).
• Opportunity to order synchronization between Salesforce and ERP systems.
• Employee on-boarding from HCM systems to Salesforce.com.
Typical Workflow for Creating and Including an AdapterConnection in an Integration
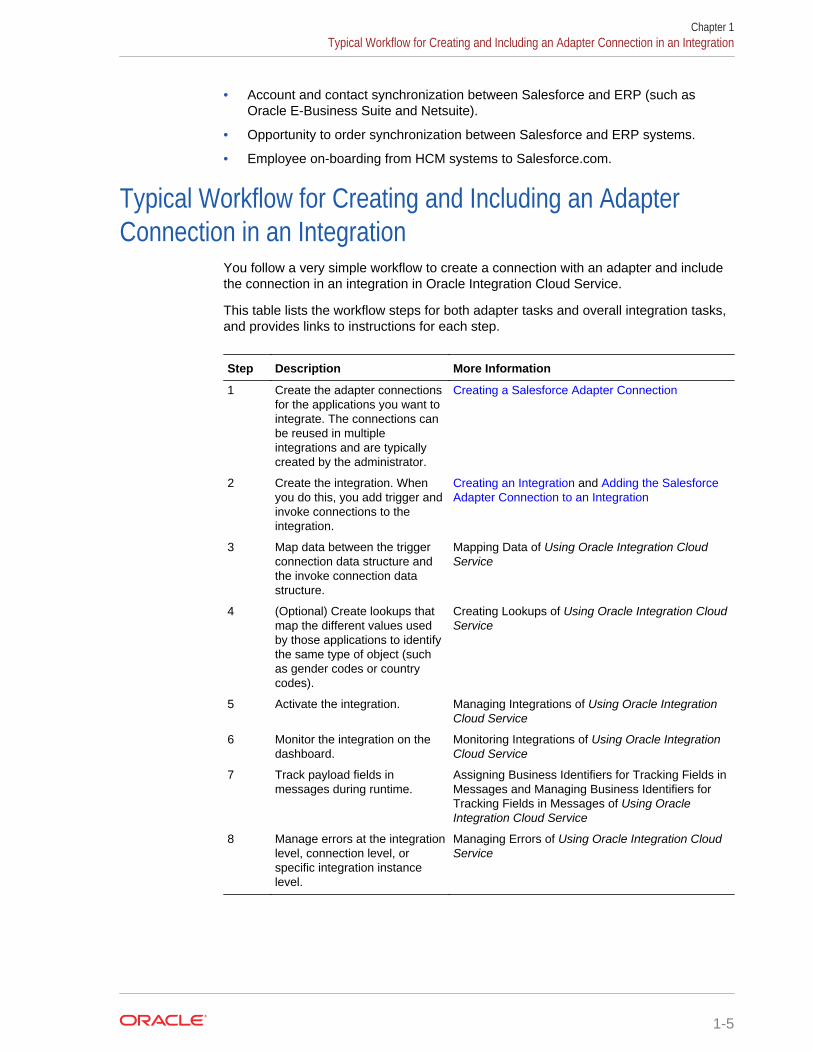
You follow a very simple workflow to create a connection with an adapter and includethe connection in an integration in Oracle Integration Cloud Service.
This table lists the workflow steps for both adapter tasks and overall integration tasks,and provides links to instructions for each step.
Step Description More Information
1 Create the adapter connectionsfor the applications you want tointegrate. The connections canbe reused in multipleintegrations and are typicallycreated by the administrator.
Creating a Salesforce Adapter Connection
2 Create the integration. Whenyou do this, you add trigger andinvoke connections to theintegration.
Creating an Integration and Adding the SalesforceAdapter Connection to an Integration
3 Map data between the triggerconnection data structure andthe invoke connection datastructure.
Mapping Data of Using Oracle Integration CloudService
4 (Optional) Create lookups thatmap the different values usedby those applications to identifythe same type of object (suchas gender codes or countrycodes).
Creating Lookups of Using Oracle Integration CloudService
5 Activate the integration. Managing Integrations of Using Oracle IntegrationCloud Service
6 Monitor the integration on thedashboard.
Monitoring Integrations of Using Oracle IntegrationCloud Service
7 Track payload fields inmessages during runtime.
Assigning Business Identifiers for Tracking Fields inMessages and Managing Business Identifiers forTracking Fields in Messages of Using OracleIntegration Cloud Service
8 Manage errors at the integrationlevel, connection level, orspecific integration instancelevel.
Managing Errors of Using Oracle Integration CloudService
Chapter 1Typical Workflow for Creating and Including an Adapter Connection in an Integration
1-5
2Creating a Salesforce Adapter Connection
A connection is based on an adapter. You define connections to the specific cloudapplications that you want to integrate. The following topics describe how to defineconnections.
Topics
• Prerequisites for Creating a Connection
• Uploading an SSL Certificate
• Creating a Connection
• Editing a Connection
• Cloning a Connection
• Deleting a Connection
• Refreshing Integration Metadata
Prerequisites for Creating a ConnectionYou must satisfy the following prerequisites to create a connection with the SalesforceAdapter:
• Understand Salesforce constraints. See Understanding Salesforce Constraints.
• If you are new to Salesforce, you must create a free Salesforce developmentorganization. This registration provides you with the ability to create a WSDL touse in an integration. Visit https://www.salesforce.com.
• Create the type of WSDL to use in an integration:
– Enterprise WSDL. See Creating the Salesforce Adapter Enterprise WSDL.
– Outbound messaging WSDL. See Creating the Salesforce Adapter OutboundMessaging WSDL.
– Custom WSDL: See Creating the Salesforce Adapter Custom WSDL.
Understanding Salesforce ConstraintsYou must be aware of the following constraints before configuring the SalesforceAdapter.
• The Salesforce Adapter uses the SalesForceDotCom (SFDC) API for all activities.Therefore, it is subject to any Salesforce API limitations.
• Not all the push topic queries are supported by Salesforce. See Supported PushTopic Queries and Unsupported PushTopic Queries.
• Client applications must adhere to Salesforce’s SOAP API support policy andbackward compatibility terms. These terms are available at SFDC SOAP APISupport Policy.
2-1
Creating the Salesforce Adapter Enterprise WSDLYou must create the Salesforce Adapter enterprise WSDL to include in an integration.You then specify this WSDL when creating a Salesforce Adapter connection on theConnections page.
To create the Salesforce Adapter enterprise WSDL:
1. Log in to your Enterprise, Unlimited, or Developer Edition Salesforce.com account.Open the Web browser and enter the following URL:
www.salesforce.com
2. Log in to Salesforce.com using a valid user name and password.
You must log in as an administrator or user with the Modify All Data permission.Logins are checked to ensure that they are from a known IP address.
3. Under App Setup, Expand Develop and click API to display the WSDL downloadpage.
4. If the organization has managed packages installed in the organization, clickGenerate Enterprise WSDL. Salesforce prompts you to select the version of eachinstalled package to include in the generated WSDL or right-click GenerateEnterprise WSDL and save it to a local directory.
In the right-click menu, Internet Explorer users can choose Save Target As, whileMozilla Firefox users can choose Save Link As to save it to the local directory.
The Save dialog is displayed.
5. Provide a name for the WSDL file and a location to save the file on your filesystem, and click Save. For information about uploading this WSDL when creatinga connection, see Configuring Connection Properties.
Creating the Salesforce Adapter Outbound Messaging WSDLYou can create an outbound messaging WSDL for the Salesforce Adapter. You thenselect this WSDL when configuring the Salesforce Adapter as a trigger in theOutbound Messaging page of the Adapter Endpoint Configuration Wizard.
This process consists of several steps:
• The outbound message consists of a workflow, approval, or milestone action thatsends your specified information to your specified endpoint. You configureoutbound messaging in the Salesforce setup menu. Afterward, you configure theendpoint.
To create a workflow rule:
1. Log in to your Salesforce account and go to Setup.
2. Under the App Setup menu, expand Create, followed by Workflow &Approvals.
3. Select a workflow rule or approval process as per your integrationrequirement.
4. Click Create New, provide the required information in the following wizards,and click Save.
Chapter 2Prerequisites for Creating a Connection
2-2

a. For the workflow rule, click Edit under the Workflow Action menufollowed by Add Workflow Action, and then New Outbound Message.
b. For the approval process, click Add New (you can select for one or moreactions including Submission, Approval, Rejection, and Recall)followed by New Outbound Message.
Outbound messaging WSDLs associated with approval processes or entitlementprocesses are also supported and consumed by the adapter.
• Create the Salesforce outbound messaging WSDL at www.salesforce.com. Youthen select this WSDL to receive outbound message notifications from theSalesforce application on the Outbound Messaging page in the Adapter EndpointConfiguration Wizard. For instructions, see What You See on the SalesforceTrigger Outbound Messaging Page.
To create the Salesforce outbound messaging WSDL:
1. Log in to your Salesforce account and go to Setup > Outbound Messages.
2. Select the required object, and click Next.
3. Enter other required details (in the Endpoint URL field, enter a dummy URL),and click Save.
4. Click Generate WSDL to download the WSDL.
5. Drag the Salesforce Adapter to the trigger (inbound) section of the integrationcanvas. This invokes the Adapter Endpoint Configuration Wizard.
6. Browse for the generated WSDL on the Outbound Messaging page.
7. Activate the integration and copy the endpoint URL from the integrationinformation icon.
8. Go to the Outbound Messaging section at www.salesforce.com and replacethe dummy URL you entered in Step 3 with the real endpoint URL.
Creating the Salesforce Adapter Custom WSDLYou can create a custom WSDL that includes custom Apex classes written onforce.com and exposed as SOAP web services. This enables external applications toaccess your code and application.
You then select the custom WSDL when configuring the Salesforce Adapter in theinvoke direction on the Basic Info page of the Adapter Endpoint Configuration Wizard..For instructions, see What You See on the Salesforce Invoke Basic Info Page.
For more information about custom WSDLs, see Exposing Apex Methods as SOAPWeb Services.
Uploading an SSL CertificateCertificates are used to validate outbound SSL connections. If you make an SSLconnection in which the root certificate does not exist in Oracle Integration CloudService, an exception is thrown. In that case, you must upload the appropriatecertificate. A certificate enables Oracle Integration Cloud Service to connect with
Chapter 2Uploading an SSL Certificate
2-3

external services. If the external endpoint requires a specific certificate, request thecertificate and then upload it into Oracle Integration Cloud Service.
To upload an SSL certificate:
1. From the Oracle Integration Cloud Service home page, click the
menu in the upper left corner.
2. Click Settings > Certificates.
All certificates currently uploaded to the trust store are displayed in the Certificatesdialog. The Filter By > Type list displays the following details:
• Preinstalled: Displays the certificates automatically installed in OracleIntegration Cloud Service. These certificates cannot be deleted.
• Uploaded: Displays the certificates uploaded by individual users. Thesecertificates can be deleted and updated.
You can also search for certificates in the Search field. The search results arelimited to a maximum of ten records sorted by name for performance and usabilityreasons. To ensure that your search results are more granular, enter as much ofthe certificate name as possible.
3. Click Upload at the top of the page.
4. In the Upload Certificate dialog box, select the certificate type. Each certificatetype enables Oracle Integration Cloud Service to connect with external services.
• Trust Certificate: Use this option to upload a trust certificate.
a. Enter a unique alias for the certificate.
b. Click Browse, then select the trust file (for example, .cer or .crt) toupload.
• Message Protection Certificate: Use this option to upload a keystorecertificate with SAML token support. Create, read, update, and delete (CRUD)operations are supported on this type of certificate.
a. Enter a unique alias for the certificate.
b. Click Browse, then select the certificate file (.cer or .crt) to upload.
• Identity Certificate: Use this option to upload a certificate for two-way SSLcommunication.
a. Click Browse, then select the keystore file (.jks) to upload.
b. Enter the password of the keystore being imported.
c. Enter the comma-separated list of aliases from the keystore beingimported.
d. Enter the comma-separated list of passwords corresponding to keyaliases.
e. If you want to display the passwords in clear text, select Show KeyPassword(s). This enables you to ensure that you are correctly entering alist of keystore passwords.
5. Click Upload.
Chapter 2Uploading an SSL Certificate
2-4
6. Click the certificate name to view details such as the subject of the certificate, theissuer of the certificate, the date the certificate was issued, and the date thecertificate expires.
Creating a ConnectionThe first step in creating an integration is to create the connections to the applicationswith which you want to share data.
1. In the Oracle Integration Cloud Service home page, click Connections.
2. Click Create.
The Create Connection — Select Adapter dialog is displayed.
3. Select an adapter from the dialog. You can also search for the type of adapter touse by entering a partial or full name in the Search field, and clicking Search.
The Create New Connection dialog is displayed.
4. Enter the information to describe the connection.
• Enter a meaningful name to help others find your connection when they beginto create their own integrations. The name you enter is automatically added incapital letters to the Identifier field. If you modify the identifier name, do notinclude a blank space (for example, Sales Opportunity).
• Select the role (direction) in which to use this connection (trigger, invoke, orboth). Only the roles supported by this adapter are displayed for selection.When you select a role, only the connection properties and security policiesappropriate to that role are displayed on the Connections page. If you selectan adapter that supports both invoke and trigger, but select only one of thoseroles, then try to drag the adapter into the section you did not select, youreceive an error (for example, configure an Oracle RightNow Cloud Adapter asonly an invoke, but drag the adapter to the trigger section).
• Enter an optional description of the connection.
Chapter 2Creating a Connection
2-5
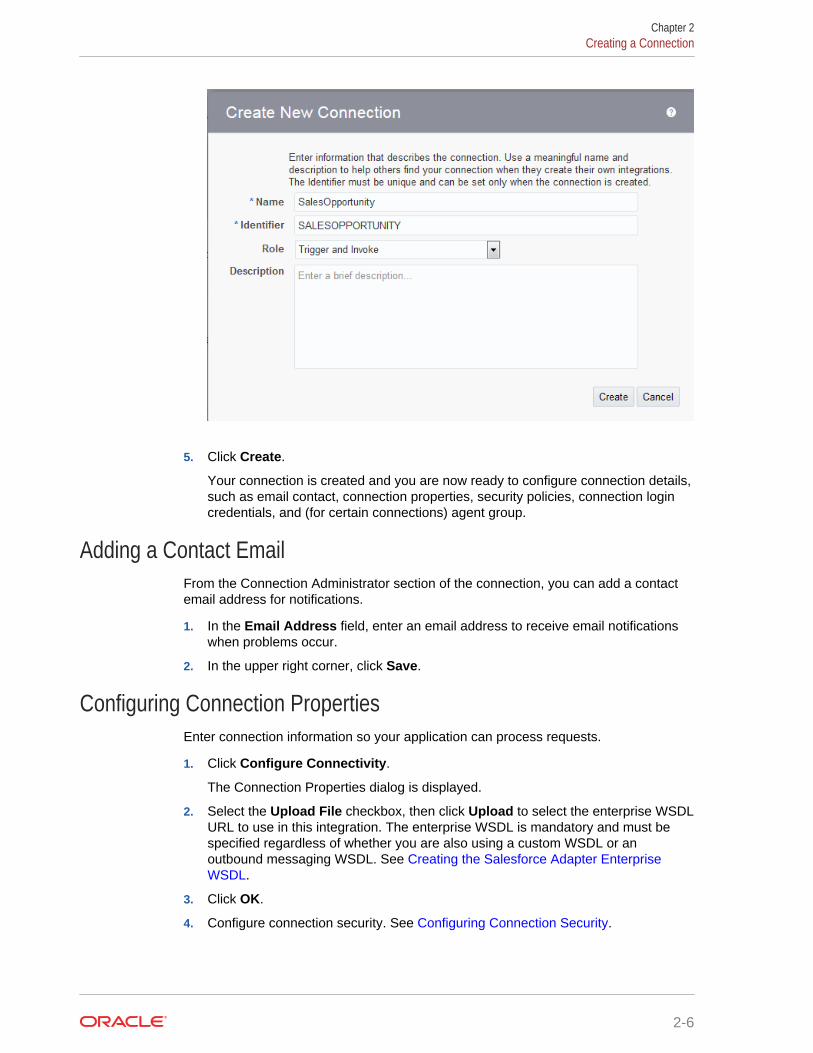
5. Click Create.
Your connection is created and you are now ready to configure connection details,such as email contact, connection properties, security policies, connection logincredentials, and (for certain connections) agent group.
Adding a Contact EmailFrom the Connection Administrator section of the connection, you can add a contactemail address for notifications.
1. In the Email Address field, enter an email address to receive email notificationswhen problems occur.
2. In the upper right corner, click Save.
Configuring Connection PropertiesEnter connection information so your application can process requests.
1. Click Configure Connectivity.
The Connection Properties dialog is displayed.
2. Select the Upload File checkbox, then click Upload to select the enterprise WSDLURL to use in this integration. The enterprise WSDL is mandatory and must bespecified regardless of whether you are also using a custom WSDL or anoutbound messaging WSDL. See Creating the Salesforce Adapter EnterpriseWSDL.
3. Click OK.
4. Configure connection security. See Configuring Connection Security.
Chapter 2Creating a Connection
2-6
Configuring Connection SecurityConfigure security for your Salesforce Adapter connection by selecting the securitypolicy and security token.
1. Click Configure Credentials.
2. Enter your login credentials:
a. Select the security policy. Only the Salesforce Login Token policy issupported. It cannot be deselected.
b. Enter the username and password that provide access to the destination webservice.
c. Reenter the password a second time.
3. Click OK.
Testing the ConnectionTest your connection to ensure that it is successfully configured.
1. In the upper right corner of the page, click Test.
2. Select the type of connection testing to perform:
• Validate and Test: Performs a full validation of the WSDL, includingprocessing of the imported schemas and WSDLs. Complete validation cantake several minutes depending on the number of imported schemas andWSDLs. No requests are sent to the operations exposed in the WSDL.
• Test: Connects to the WSDL URL and performs a syntax check on the WSDL.No requests are sent to the operations exposed in the WSDL.
If successful, the following message is displayed and the progress indicator shows100%.Connection connection_name was tested successfully.
3. If your connection was unsuccessful, an error message is displayed with details.Verify that the configuration details you entered are correct.
4. When complete, click Save, then click Close.
Editing a ConnectionYou can edit connection settings after creating a new connection.
1. On the Oracle Integration Cloud Service home page, click Connections.
2. On the Connections page, search for the connection name.
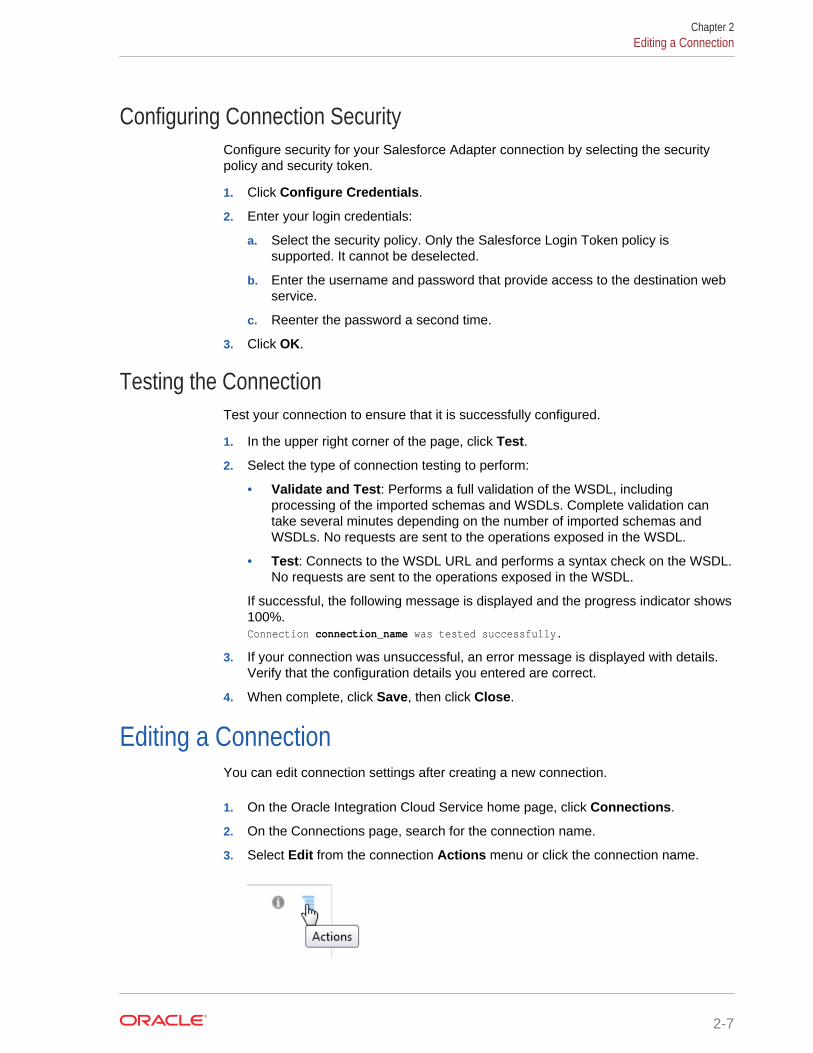
3. Select Edit from the connection Actions menu or click the connection name.
Chapter 2Editing a Connection
2-7
The Connection page is displayed.
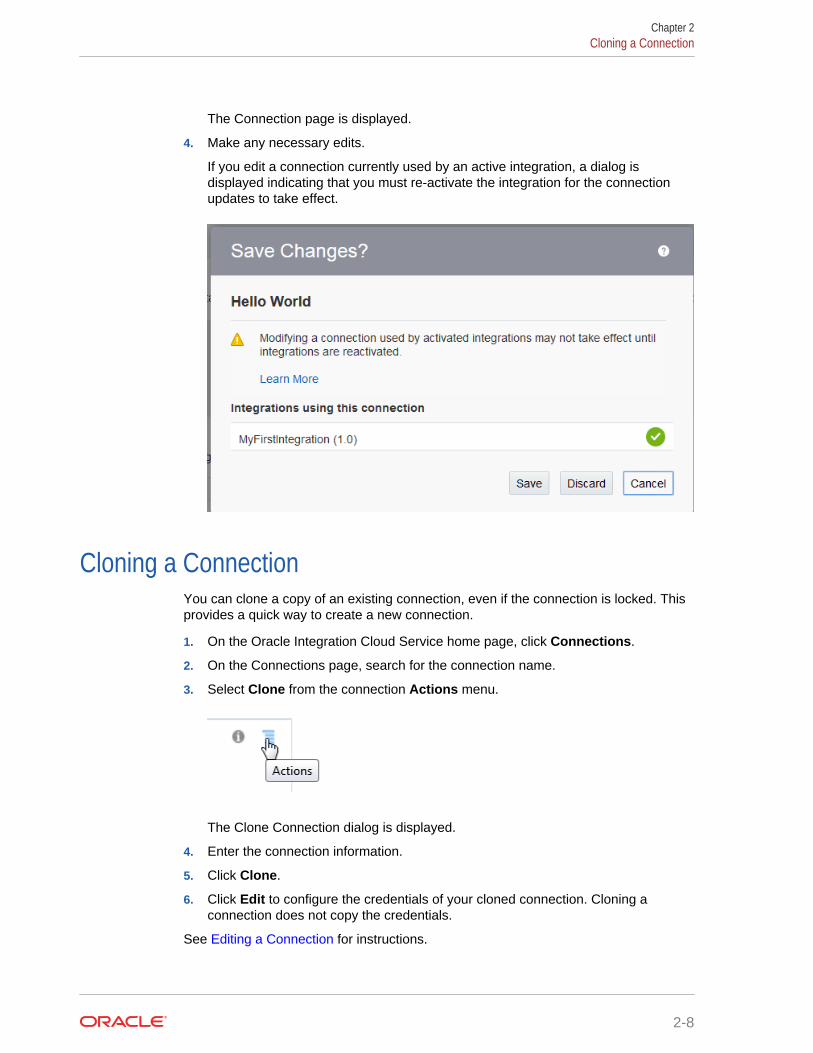
4. Make any necessary edits.
If you edit a connection currently used by an active integration, a dialog isdisplayed indicating that you must re-activate the integration for the connectionupdates to take effect.
Cloning a ConnectionYou can clone a copy of an existing connection, even if the connection is locked. Thisprovides a quick way to create a new connection.
1. On the Oracle Integration Cloud Service home page, click Connections.
2. On the Connections page, search for the connection name.
3. Select Clone from the connection Actions menu.
The Clone Connection dialog is displayed.
4. Enter the connection information.
5. Click Clone.
6. Click Edit to configure the credentials of your cloned connection. Cloning aconnection does not copy the credentials.
See Editing a Connection for instructions.
Chapter 2Cloning a Connection
2-8
Deleting a ConnectionYou can delete a connection from the connection menu.
1. On the Oracle Integration Cloud Service home page, click Connections.
2. On the Connections page, search for the connection name.
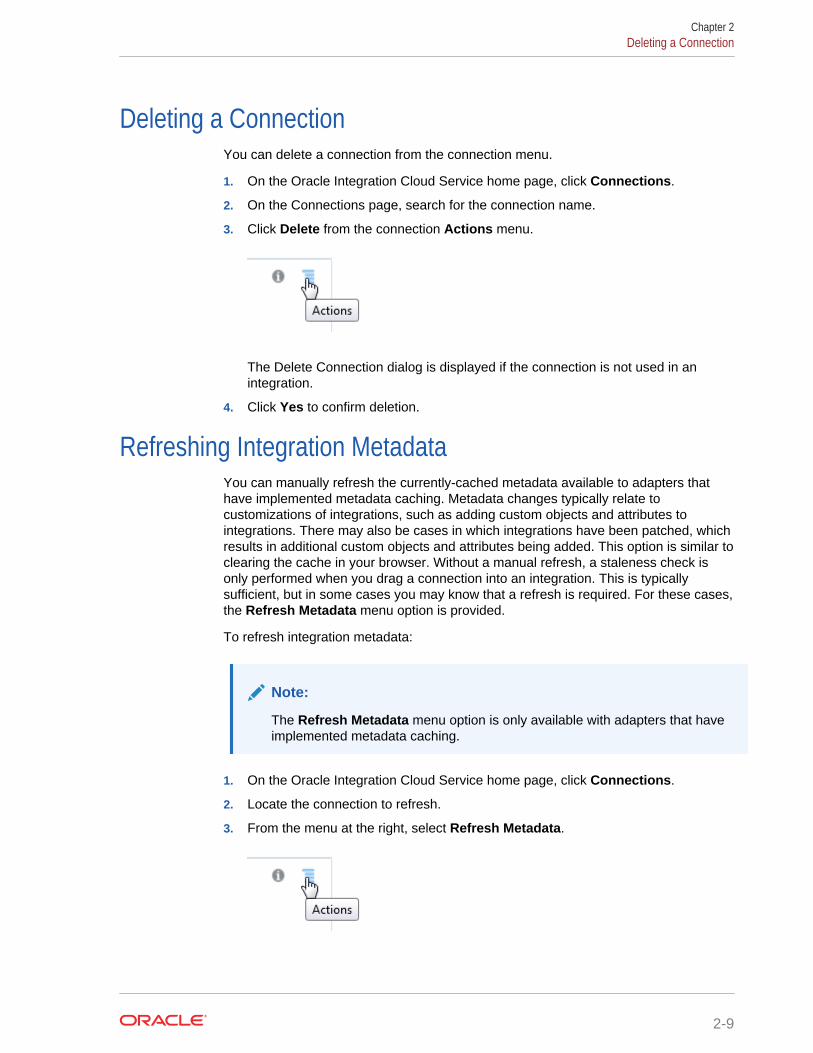
3. Click Delete from the connection Actions menu.
The Delete Connection dialog is displayed if the connection is not used in anintegration.
4. Click Yes to confirm deletion.
Refreshing Integration MetadataYou can manually refresh the currently-cached metadata available to adapters thathave implemented metadata caching. Metadata changes typically relate tocustomizations of integrations, such as adding custom objects and attributes tointegrations. There may also be cases in which integrations have been patched, whichresults in additional custom objects and attributes being added. This option is similar toclearing the cache in your browser. Without a manual refresh, a staleness check isonly performed when you drag a connection into an integration. This is typicallysufficient, but in some cases you may know that a refresh is required. For these cases,the Refresh Metadata menu option is provided.
To refresh integration metadata:
Note:
The Refresh Metadata menu option is only available with adapters that haveimplemented metadata caching.
1. On the Oracle Integration Cloud Service home page, click Connections.
2. Locate the connection to refresh.
3. From the menu at the right, select Refresh Metadata.
Chapter 2Deleting a Connection
2-9

A message is displayed indicating that the refresh was successful.
Metadata refresh for connection "connection_type" has been initiated successfully.
Chapter 2Refreshing Integration Metadata
2-10
3Creating an Integration
Integrations use the adapter connections you created to your applications, and definehow information is shared between those applications. You can create, import, modify,or delete integrations; create integrations to publish or subscribe to messages; addand remove request and response enrichment triggers; and create routing paths fordifferent invoke endpoints in integrations. Click the following topic for more information:
Topic
• Creating Integrations (in Using Oracle Integration Cloud Service)
3-1
4Adding the Salesforce Adapter Connectionto an Integration
When you drag the Salesforce Adapter into the trigger and invoke areas of anintegration, the Adapter Endpoint Configuration Wizard is invoked. This wizard guidesyou through configuration of the Salesforce Adapterendpoint properties.
The following sections describe the wizard pages that guide you through configurationof the Salesforce Adapter as a trigger or invoke in an integration.
Topics
• Configuring Basic Information Properties
• Configuring Salesforce Trigger Outbound Messaging Properties
• Configuring Salesforce Trigger Response Properties
• Configuring Salesforce Trigger Callback Response Properties
• Configuring Salesforce Invoke Basic Information Properties
• Configuring Salesforce Invoke Operation Properties
• Configuring Salesforce Invoke Header Properties
• Configuring Salesforce Invoke Custom Operations Properties
• Reviewing Configuration Values on the Summary Page
• Performing Salesforce Adapter Postconfiguration Tasks
Configuring Basic Information PropertiesYou can enter a name and description on the Basic Info page of each adapter in yourintegration.
Topics
• What You Can Do from the Basic Info Page
• What You See on the Basic Info Page
What You Can Do from the Basic Info PageYou can specify the following values on the Basic Info page. The Basic Info page isthe initial wizard page that is displayed whenever you drag an adapter to the section ofthe integration canvas supported by your adapter.
• Specify a meaningful name.
• Specify a description of the responsibilities.
4-1
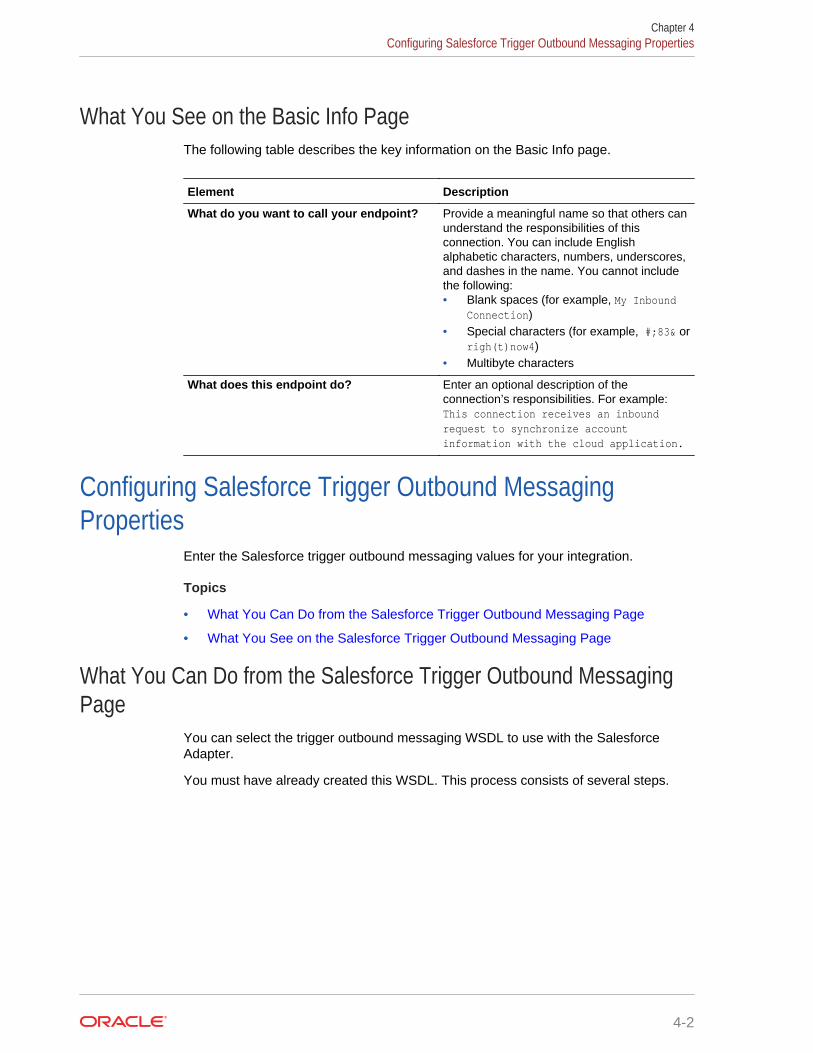
What You See on the Basic Info PageThe following table describes the key information on the Basic Info page.
Element Description
What do you want to call your endpoint? Provide a meaningful name so that others canunderstand the responsibilities of thisconnection. You can include Englishalphabetic characters, numbers, underscores,and dashes in the name. You cannot includethe following:• Blank spaces (for example, My Inbound
Connection)• Special characters (for example, #;83& or
righ(t)now4)• Multibyte characters
What does this endpoint do? Enter an optional description of theconnection’s responsibilities. For example:This connection receives an inboundrequest to synchronize accountinformation with the cloud application.
Configuring Salesforce Trigger Outbound MessagingProperties
Enter the Salesforce trigger outbound messaging values for your integration.
Topics
• What You Can Do from the Salesforce Trigger Outbound Messaging Page
• What You See on the Salesforce Trigger Outbound Messaging Page
What You Can Do from the Salesforce Trigger Outbound MessagingPage
You can select the trigger outbound messaging WSDL to use with the SalesforceAdapter.
You must have already created this WSDL. This process consists of several steps.
Chapter 4Configuring Salesforce Trigger Outbound Messaging Properties
4-2

What You See on the Salesforce Trigger Outbound Messaging PageThe following table describes the key information on the trigger Outbound Messagingpage.
Element Description
Select the OutboundMessaging WSDL
Select the invoke Salesforce outbound messaging WSDL toreceive outbound message notifications from the Salesforceapplication.
Note: You must first create a workflow rule and generate anoutbound messaging WSDL. Outbound messaging WSDLsassociated with approval processes or entitlement processesare also supported and consumed by the adapter.
1. Browse for and select the invoke Salesforce outboundmessaging WSDL
2. Activate the integration and copy the endpoint URL fromthe integration information icon.
3. Go to the Outbound Messaging section at www.salesforce.com and replace the dummy URL youpreviously entered with the real endpoint URL.
Configuring Salesforce Trigger Response PropertiesEnter the Salesforce trigger response values for your integration.
Topics
• What You Can Do from the Salesforce Trigger Response Page
• What You See on the Salesforce Cloud Trigger Response Page
What You Can Do from the Salesforce Trigger Response PageYou can configure the response parameters for the Salesforce Adapter.
You can select the type of callback response to send as a response document fromthe integration flow to the Salesforce Cloud application.
• Configure to send no callback response.
• Configure the operation and business objects to use for a successful callbackresponse.
• Configure the operation and business objects for a callback response for a failedintegration flow.
Chapter 4Configuring Salesforce Trigger Response Properties
4-3

What You See on the Salesforce Cloud Trigger Response PageThe following table describes the key information on the trigger Response page.
Element Description
Send a response Deselect if no callback response is required.
Configuration a Successful CallbackResponse
Select Configure to configure the operationand business objects to use for a successfulcallback response.
Configuration a Failure Callback Response Select Configure to configure the operationand business objects for a callback responsefor a failed integration flow. The option toconfigure a failure callback response getsenabled only after the configuration ofsuccessful callback response.
Edit Click to edit the operation or business objectsof a successful or failed callback response.
This button is displayed after you configure asuccessful callback response, a failed callbackresponse, or both.
Header Click to configure the header properties for theselected operation. The headers available forconfiguration are based on the type ofoperation you selected.
This button is displayed after you configure asuccessful callback response, a failed callbackresponse, or both.
Reset Click to reset the operation and headerconfiguration to the default values.
This button is displayed after you configure asuccessful callback response, a failed callbackresponse, or both.
Configuring Salesforce Trigger Callback ResponseProperties
Enter the Salesforce trigger callback response values for your integration.
Topics
• What You Can Do from the Salesforce Trigger Callback Response Page
• What You See on the Salesforce Trigger Callback Response Page
What You Can Do from the Salesforce Trigger Callback ResponsePage
You can configure the callback response parameters for the Salesforce Adapter.
Chapter 4Configuring Salesforce Trigger Callback Response Properties
4-4
• Configure the operation and business objects to use for a successful callbackresponse.
• Configure the operation and business objects for a callback response for a failedintegration flow.
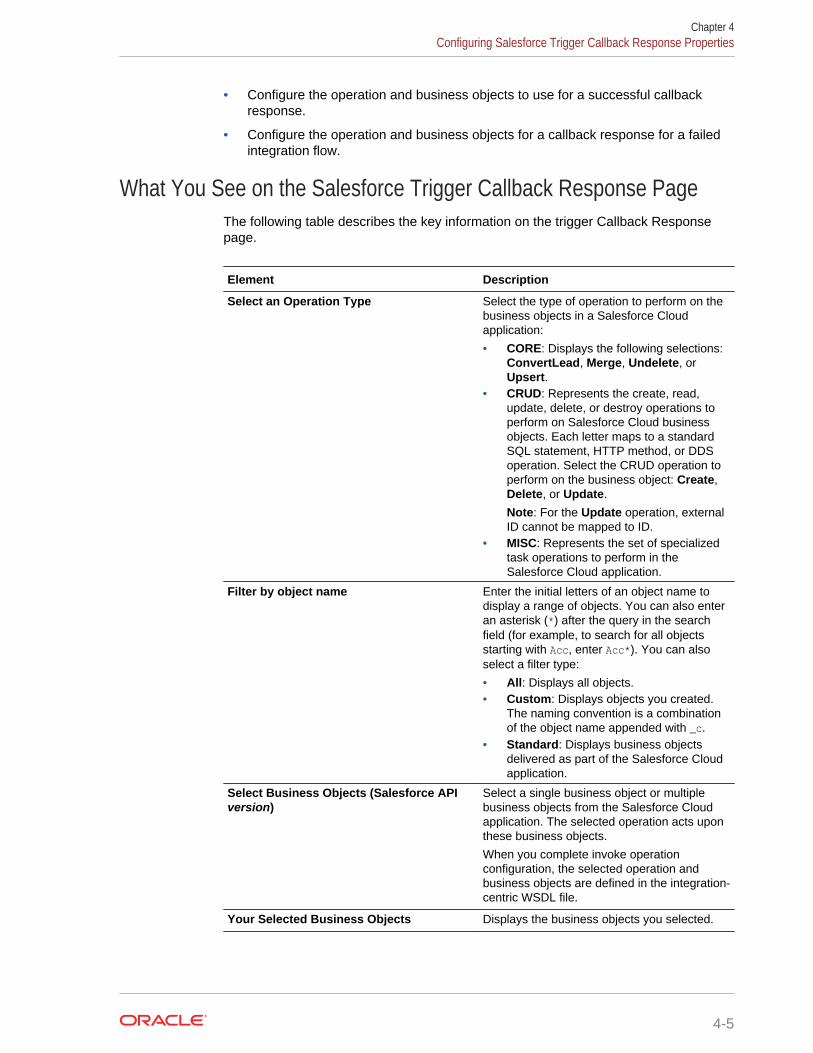
What You See on the Salesforce Trigger Callback Response PageThe following table describes the key information on the trigger Callback Responsepage.
Element Description
Select an Operation Type Select the type of operation to perform on thebusiness objects in a Salesforce Cloudapplication:
• CORE: Displays the following selections:ConvertLead, Merge, Undelete, orUpsert.
• CRUD: Represents the create, read,update, delete, or destroy operations toperform on Salesforce Cloud businessobjects. Each letter maps to a standardSQL statement, HTTP method, or DDSoperation. Select the CRUD operation toperform on the business object: Create,Delete, or Update.
Note: For the Update operation, externalID cannot be mapped to ID.
• MISC: Represents the set of specializedtask operations to perform in theSalesforce Cloud application.
Filter by object name Enter the initial letters of an object name todisplay a range of objects. You can also enteran asterisk (*) after the query in the searchfield (for example, to search for all objectsstarting with Acc, enter Acc*). You can alsoselect a filter type:
• All: Displays all objects.• Custom: Displays objects you created.
The naming convention is a combinationof the object name appended with _c.
• Standard: Displays business objectsdelivered as part of the Salesforce Cloudapplication.
Select Business Objects (Salesforce APIversion)
Select a single business object or multiplebusiness objects from the Salesforce Cloudapplication. The selected operation acts uponthese business objects.
When you complete invoke operationconfiguration, the selected operation andbusiness objects are defined in the integration-centric WSDL file.
Your Selected Business Objects Displays the business objects you selected.
Chapter 4Configuring Salesforce Trigger Callback Response Properties
4-5
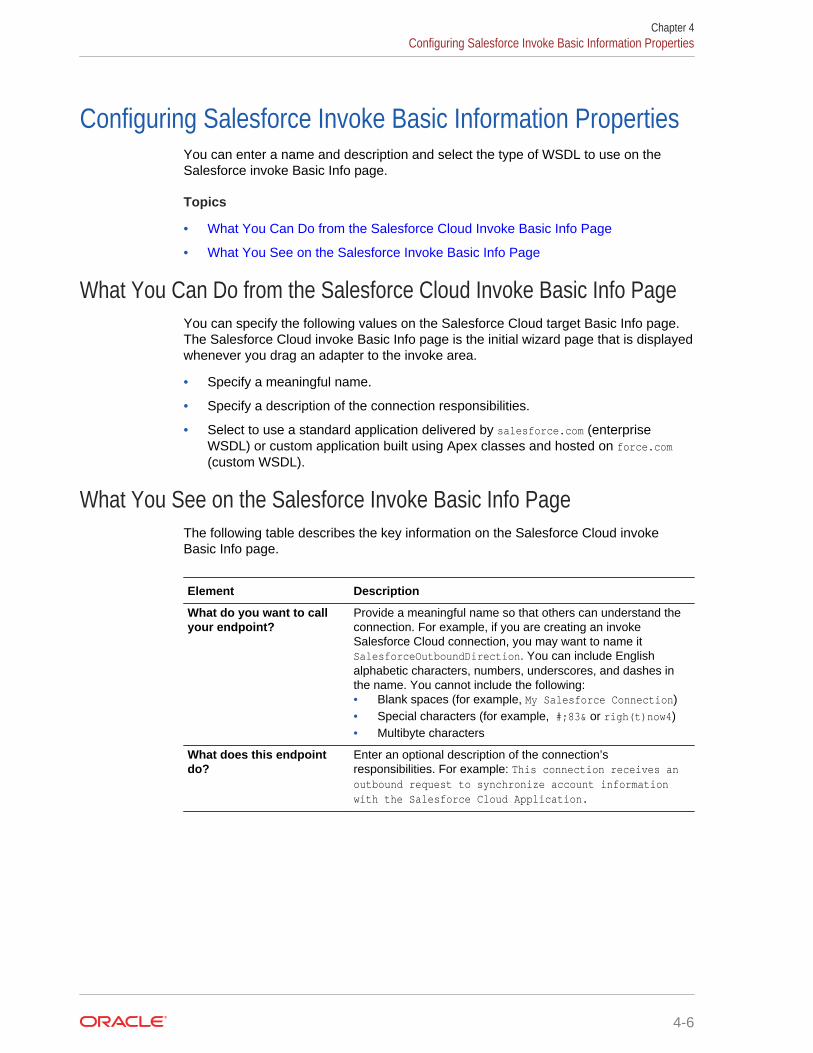
Configuring Salesforce Invoke Basic Information PropertiesYou can enter a name and description and select the type of WSDL to use on theSalesforce invoke Basic Info page.
Topics
• What You Can Do from the Salesforce Cloud Invoke Basic Info Page
• What You See on the Salesforce Invoke Basic Info Page
What You Can Do from the Salesforce Cloud Invoke Basic Info PageYou can specify the following values on the Salesforce Cloud target Basic Info page.The Salesforce Cloud invoke Basic Info page is the initial wizard page that is displayedwhenever you drag an adapter to the invoke area.
• Specify a meaningful name.
• Specify a description of the connection responsibilities.
• Select to use a standard application delivered by salesforce.com (enterpriseWSDL) or custom application built using Apex classes and hosted on force.com(custom WSDL).
What You See on the Salesforce Invoke Basic Info PageThe following table describes the key information on the Salesforce Cloud invokeBasic Info page.
Element Description
What do you want to callyour endpoint?
Provide a meaningful name so that others can understand theconnection. For example, if you are creating an invokeSalesforce Cloud connection, you may want to name itSalesforceOutboundDirection. You can include Englishalphabetic characters, numbers, underscores, and dashes inthe name. You cannot include the following:• Blank spaces (for example, My Salesforce Connection)• Special characters (for example, #;83& or righ(t)now4)• Multibyte characters
What does this endpointdo?
Enter an optional description of the connection’sresponsibilities. For example: This connection receives anoutbound request to synchronize account informationwith the Salesforce Cloud Application.
Chapter 4Configuring Salesforce Invoke Basic Information Properties
4-6
Element Description
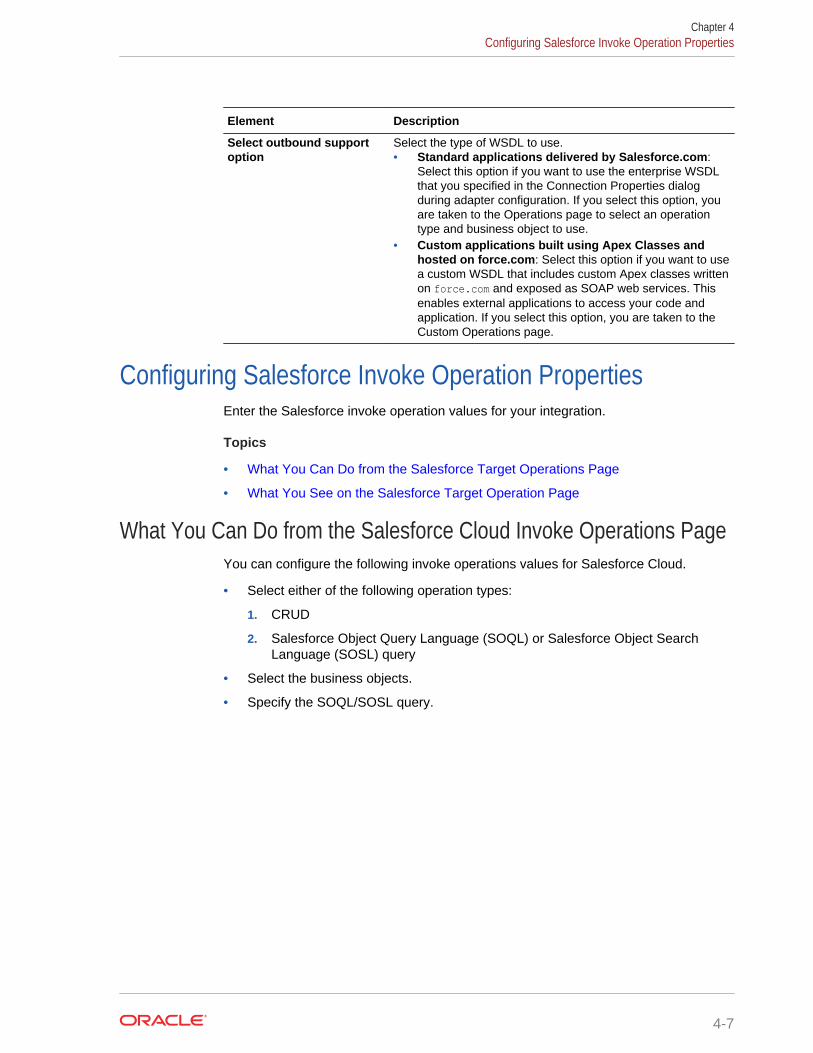
Select outbound supportoption
Select the type of WSDL to use.• Standard applications delivered by Salesforce.com:
Select this option if you want to use the enterprise WSDLthat you specified in the Connection Properties dialogduring adapter configuration. If you select this option, youare taken to the Operations page to select an operationtype and business object to use.
• Custom applications built using Apex Classes andhosted on force.com: Select this option if you want to usea custom WSDL that includes custom Apex classes writtenon force.com and exposed as SOAP web services. Thisenables external applications to access your code andapplication. If you select this option, you are taken to theCustom Operations page.
Configuring Salesforce Invoke Operation PropertiesEnter the Salesforce invoke operation values for your integration.
Topics
• What You Can Do from the Salesforce Target Operations Page
• What You See on the Salesforce Target Operation Page
What You Can Do from the Salesforce Cloud Invoke Operations PageYou can configure the following invoke operations values for Salesforce Cloud.
• Select either of the following operation types:
1. CRUD
2. Salesforce Object Query Language (SOQL) or Salesforce Object SearchLanguage (SOSL) query
• Select the business objects.
• Specify the SOQL/SOSL query.
Chapter 4Configuring Salesforce Invoke Operation Properties
4-7
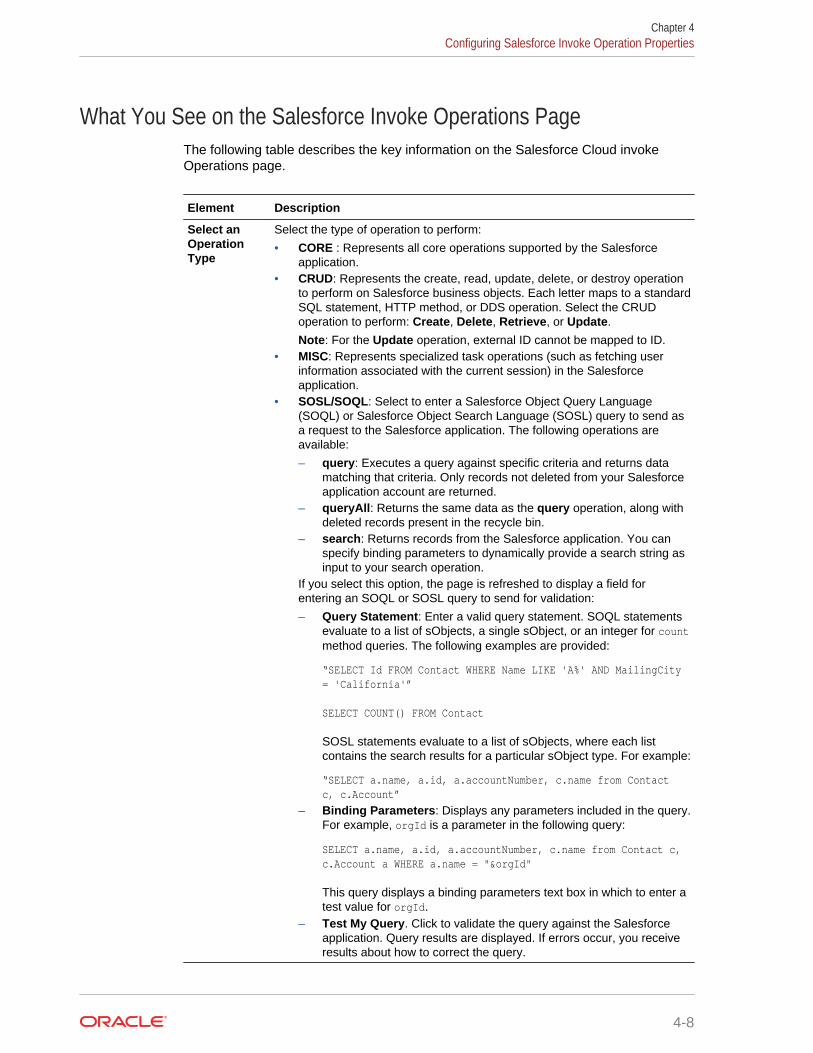
What You See on the Salesforce Invoke Operations PageThe following table describes the key information on the Salesforce Cloud invokeOperations page.
Element Description
Select anOperationType
Select the type of operation to perform:
• CORE : Represents all core operations supported by the Salesforceapplication.
• CRUD: Represents the create, read, update, delete, or destroy operationto perform on Salesforce business objects. Each letter maps to a standardSQL statement, HTTP method, or DDS operation. Select the CRUDoperation to perform: Create, Delete, Retrieve, or Update.
Note: For the Update operation, external ID cannot be mapped to ID.• MISC: Represents specialized task operations (such as fetching user
information associated with the current session) in the Salesforceapplication.
• SOSL/SOQL: Select to enter a Salesforce Object Query Language(SOQL) or Salesforce Object Search Language (SOSL) query to send asa request to the Salesforce application. The following operations areavailable:
– query: Executes a query against specific criteria and returns datamatching that criteria. Only records not deleted from your Salesforceapplication account are returned.
– queryAll: Returns the same data as the query operation, along withdeleted records present in the recycle bin.
– search: Returns records from the Salesforce application. You canspecify binding parameters to dynamically provide a search string asinput to your search operation.
If you select this option, the page is refreshed to display a field forentering an SOQL or SOSL query to send for validation:
– Query Statement: Enter a valid query statement. SOQL statementsevaluate to a list of sObjects, a single sObject, or an integer for countmethod queries. The following examples are provided:
“SELECT Id FROM Contact WHERE Name LIKE 'A%' AND MailingCity = 'California'”
SELECT COUNT() FROM Contact
SOSL statements evaluate to a list of sObjects, where each listcontains the search results for a particular sObject type. For example:
“SELECT a.name, a.id, a.accountNumber, c.name from Contact c, c.Account”
– Binding Parameters: Displays any parameters included in the query.For example, orgId is a parameter in the following query:
SELECT a.name, a.id, a.accountNumber, c.name from Contact c, c.Account a WHERE a.name = "&orgId"
This query displays a binding parameters text box in which to enter atest value for orgId.
– Test My Query. Click to validate the query against the Salesforceapplication. Query results are displayed. If errors occur, you receiveresults about how to correct the query.
Chapter 4Configuring Salesforce Invoke Operation Properties
4-8
Element Description
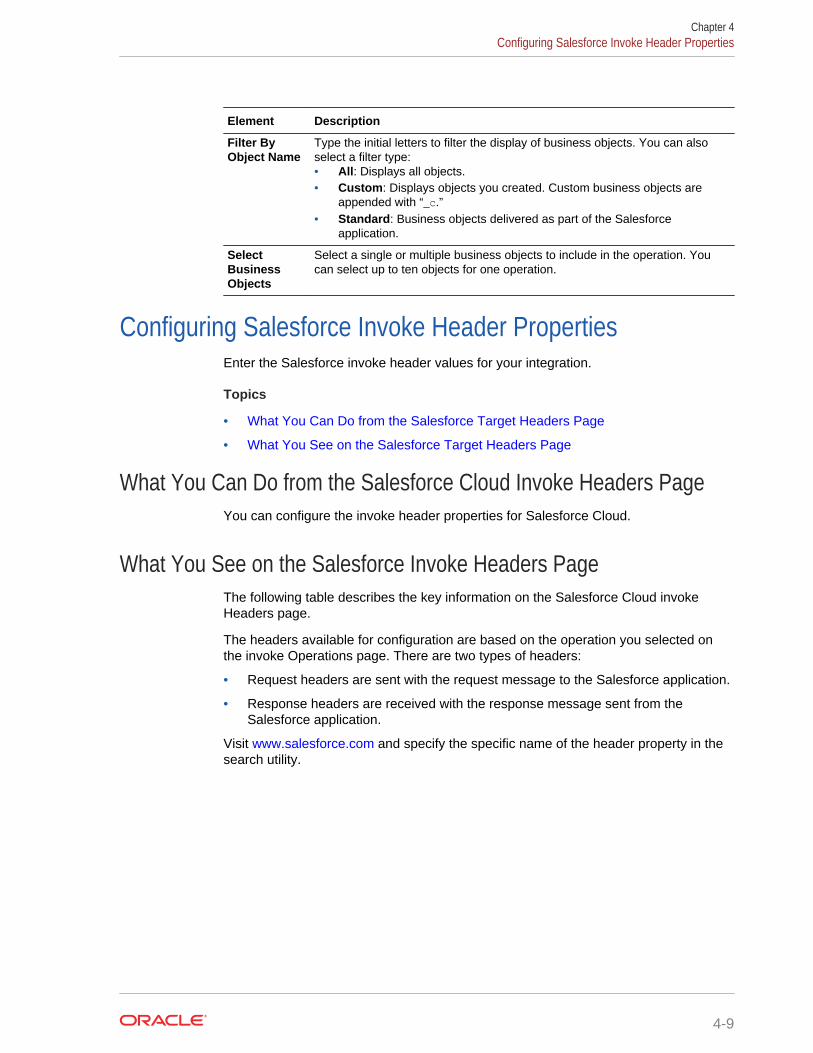
Filter ByObject Name
Type the initial letters to filter the display of business objects. You can alsoselect a filter type:• All: Displays all objects.• Custom: Displays objects you created. Custom business objects are
appended with “_c.”• Standard: Business objects delivered as part of the Salesforce
application.
SelectBusinessObjects
Select a single or multiple business objects to include in the operation. Youcan select up to ten objects for one operation.
Configuring Salesforce Invoke Header PropertiesEnter the Salesforce invoke header values for your integration.
Topics
• What You Can Do from the Salesforce Target Headers Page
• What You See on the Salesforce Target Headers Page
What You Can Do from the Salesforce Cloud Invoke Headers PageYou can configure the invoke header properties for Salesforce Cloud.
What You See on the Salesforce Invoke Headers PageThe following table describes the key information on the Salesforce Cloud invokeHeaders page.
The headers available for configuration are based on the operation you selected onthe invoke Operations page. There are two types of headers:
• Request headers are sent with the request message to the Salesforce application.
• Response headers are received with the response message sent from theSalesforce application.
Visit www.salesforce.com and specify the specific name of the header property in thesearch utility.
Chapter 4Configuring Salesforce Invoke Header Properties
4-9
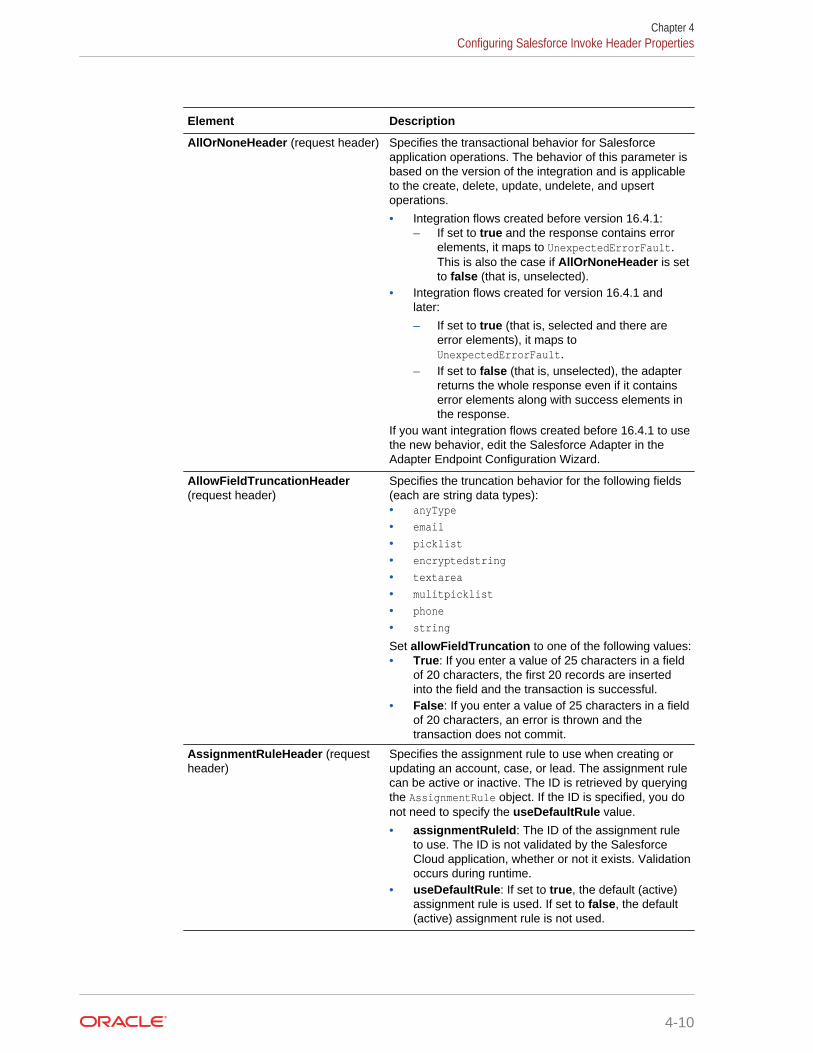
Element Description
AllOrNoneHeader (request header) Specifies the transactional behavior for Salesforceapplication operations. The behavior of this parameter isbased on the version of the integration and is applicableto the create, delete, update, undelete, and upsertoperations.
• Integration flows created before version 16.4.1:– If set to true and the response contains error
elements, it maps to UnexpectedErrorFault.This is also the case if AllOrNoneHeader is setto false (that is, unselected).
• Integration flows created for version 16.4.1 andlater:
– If set to true (that is, selected and there areerror elements), it maps toUnexpectedErrorFault.
– If set to false (that is, unselected), the adapterreturns the whole response even if it containserror elements along with success elements inthe response.
If you want integration flows created before 16.4.1 to usethe new behavior, edit the Salesforce Adapter in theAdapter Endpoint Configuration Wizard.
AllowFieldTruncationHeader(request header)
Specifies the truncation behavior for the following fields(each are string data types):• anyType
• picklist
• encryptedstring
• textarea
• mulitpicklist
• phone
• string
Set allowFieldTruncation to one of the following values:• True: If you enter a value of 25 characters in a field
of 20 characters, the first 20 records are insertedinto the field and the transaction is successful.
• False: If you enter a value of 25 characters in a fieldof 20 characters, an error is thrown and thetransaction does not commit.
AssignmentRuleHeader (requestheader)
Specifies the assignment rule to use when creating orupdating an account, case, or lead. The assignment rulecan be active or inactive. The ID is retrieved by queryingthe AssignmentRule object. If the ID is specified, you donot need to specify the useDefaultRule value.
• assignmentRuleId: The ID of the assignment ruleto use. The ID is not validated by the SalesforceCloud application, whether or not it exists. Validationoccurs during runtime.
• useDefaultRule: If set to true, the default (active)assignment rule is used. If set to false, the default(active) assignment rule is not used.
Chapter 4Configuring Salesforce Invoke Header Properties
4-10

Element Description
EmailHeader (request header) Specifies whether or not to send a notification email. Youcan set the following properties:• triggerAutoResponseEmail
– true: Triggers automatic response rules forleads and cases.
– false: Automatic response rules for leads andcases are not triggered.
• triggerOtherEmail– true: The email is triggered outside the
organization.– false: The email is not triggered outside the
organization.• triggerUserEmail
– true: The email is triggered and sent to users inthe organization. This email is triggered by anumber of events such as adding comments toa case or updating a task.
– false: The email is not triggered and sent tousers in the organization.
DebuggingHeader (request header) Specify the debugging log level. The following log levelsare supported:• NONE (least verbose)• DEBUGONLY• DB• PROFILING• CALLOUT• DETAIL (most verbose)
MruHeader (request header) The Salesforce application shows the most recently used(MRU) items. In API version 7.0 or later, the list is notupdated by itself. Use MruHeader to update the list.Using this header can negatively impact performance.Set updateMru to one of the following values:• true: The list of MRU items is updated in the
Salesforce application.• false: The list of most recently used items is not
updated in the Salesforce application.
PackageVersionHeader (requestheader)
Specifies the package version for any installed package.The package version identifies the components in apackage. The package version follows the formatmajorNumber.minorNumber.patchNumber (for example,3.4.5, where 3 refers to majorNumber, 4 refers tominorNumber, and 5 refers to patchNumber) .
QueryOptions (request header) Specifies the batch size for queries. The default value is500, the minimum value is 200, and the maximum valueis 2000.
DebuggingInfo (response header) This information is only returned if the debugLevelrequest header is sent with the request payload to theSalesforce application.
Chapter 4Configuring Salesforce Invoke Header Properties
4-11
Element Description
LimitInfoHeader (response header) Provides information about the limitations of API calls ona per-day basis for the organization.• current:
The number of calls already used in theorganization.
• Limit:The organization’s limit for the specified limit type.
• Type:
The limit information type specified in the headerAPI REQUESTS (contains limit information about APIcalls for the organization).
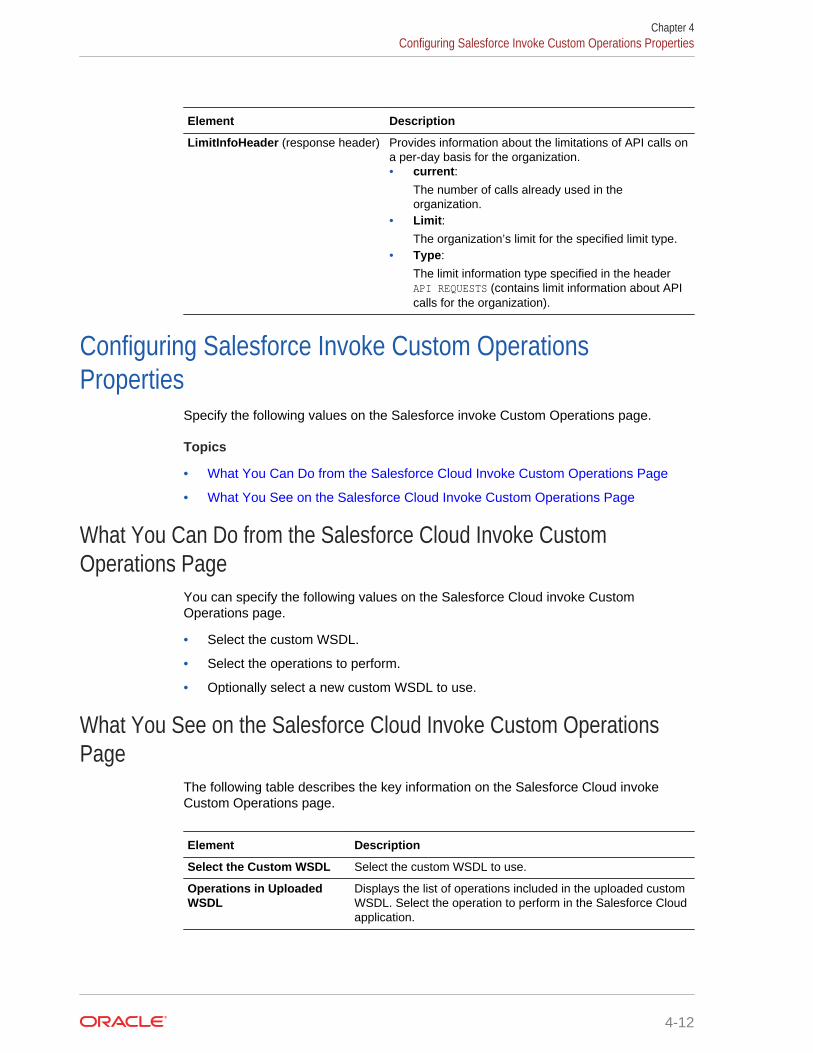
Configuring Salesforce Invoke Custom OperationsProperties
Specify the following values on the Salesforce invoke Custom Operations page.
Topics
• What You Can Do from the Salesforce Cloud Invoke Custom Operations Page
• What You See on the Salesforce Cloud Invoke Custom Operations Page
What You Can Do from the Salesforce Cloud Invoke CustomOperations Page
You can specify the following values on the Salesforce Cloud invoke CustomOperations page.
• Select the custom WSDL.
• Select the operations to perform.
• Optionally select a new custom WSDL to use.
What You See on the Salesforce Cloud Invoke Custom OperationsPage
The following table describes the key information on the Salesforce Cloud invokeCustom Operations page.
Element Description
Select the Custom WSDL Select the custom WSDL to use.
Operations in UploadedWSDL
Displays the list of operations included in the uploaded customWSDL. Select the operation to perform in the Salesforce Cloudapplication.
Chapter 4Configuring Salesforce Invoke Custom Operations Properties
4-12

Element Description
Select New Custom WSDL Click Choose File to select the custom WSDL to use. Thisselection replaces any previously uploaded WSDL file. Afterselecting the new WSDL, return to the Operations inUploaded WSDL list and select the new operation to use.
To use a custom WSDL that includes custom Apex classeswritten on force.com and exposed as SOAP web services, see Exposing Apex Methods as SOAP Web Services.
Reviewing Configuration Values on the Summary PageYou can review the specified adapter configuration values on the Summary page.
Topics
• What You Can Do from the Summary Page
• What You See on the Summary Page
What You Can Do from the Summary PageYou can review configuration details from the Summary page. The Summary page isthe final wizard page for each adapter after you have completed your configuration.
• View the configuration details you defined for the adapter. For example, if youhave defined an inbound trigger (source) adapter with a request business objectand immediate response business object, specific details about this configurationare displayed on the Summary page.
• Click Done if you want to save your configuration details.
• Click a specific tab in the left panel or click Back to access a specific page toupdate your configuration definitions.
• Click Cancel to cancel your configuration details.
What You See on the Summary PageThe following table describes the key information on the Summary page.
Element Description
Summary Displays a summary of the configurationvalues you defined on previous pages of thewizard.
The information that is displayed can vary byadapter. For some adapters, the selectedbusiness objects and operation name aredisplayed. For adapters for which a generatedXSD file is provided, click the XSD link to viewa read-only version of the file.
To return to a previous page to update anyvalues, click the appropriate tab in the leftpanel or click Back.
Chapter 4Reviewing Configuration Values on the Summary Page
4-13
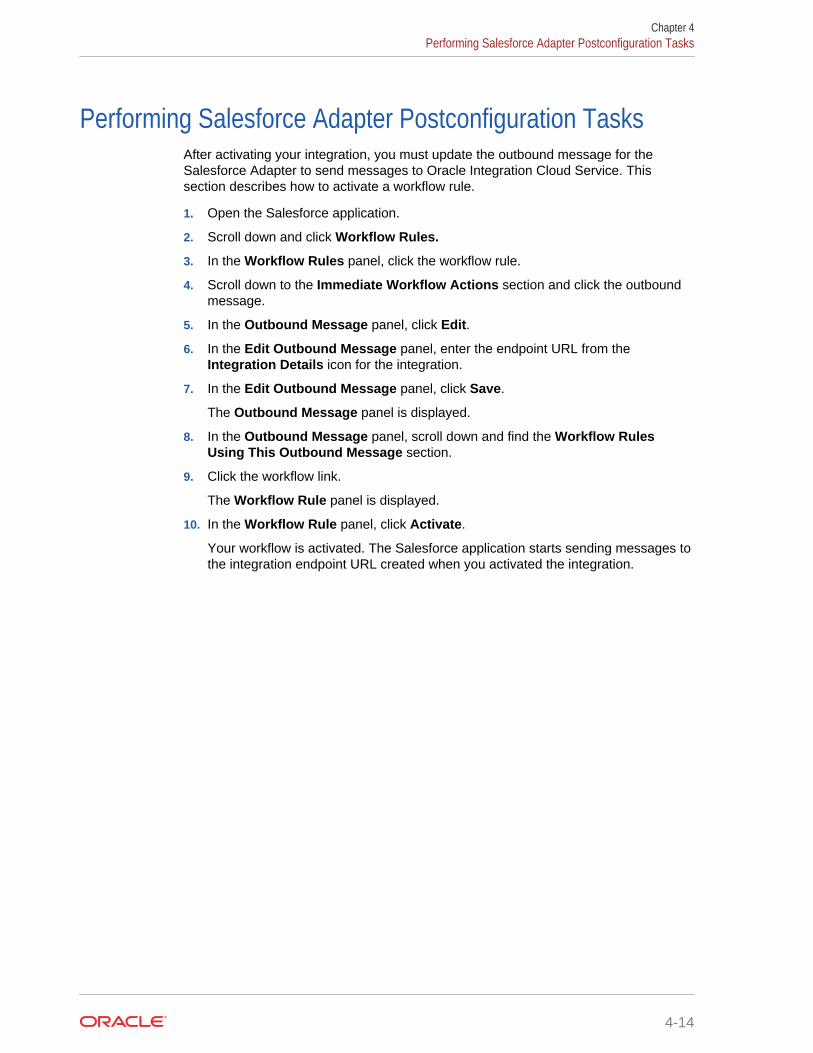
Performing Salesforce Adapter Postconfiguration TasksAfter activating your integration, you must update the outbound message for theSalesforce Adapter to send messages to Oracle Integration Cloud Service. Thissection describes how to activate a workflow rule.
1. Open the Salesforce application.
2. Scroll down and click Workflow Rules.
3. In the Workflow Rules panel, click the workflow rule.
4. Scroll down to the Immediate Workflow Actions section and click the outboundmessage.
5. In the Outbound Message panel, click Edit.
6. In the Edit Outbound Message panel, enter the endpoint URL from theIntegration Details icon for the integration.
7. In the Edit Outbound Message panel, click Save.
The Outbound Message panel is displayed.
8. In the Outbound Message panel, scroll down and find the Workflow RulesUsing This Outbound Message section.
9. Click the workflow link.
The Workflow Rule panel is displayed.
10. In the Workflow Rule panel, click Activate.
Your workflow is activated. The Salesforce application starts sending messages tothe integration endpoint URL created when you activated the integration.
Chapter 4Performing Salesforce Adapter Postconfiguration Tasks
4-14
5Creating Mappings and Lookups inIntegrations
You must map data between trigger (source) connections and invoke (target)connections in integrations. You can also optionally create lookups in integrations.
Topics
• Mapping Data (in Using Oracle Integration Cloud Service)
• Creating Lookups (in Using Oracle Integration Cloud Service)
5-1
6Administering Integrations
Oracle Integration Cloud Service provides you with the information and tools requiredto activate, monitor, and manage your integrations in the runtime environment.
Topic
• Administering Oracle Integration Cloud Service (in Using Oracle Integration CloudService)
6-1