user’s manual - satlinksat-link.co.uk/store/ws-6906_manual.pdf · (2). lnb type: select proper...
TRANSCRIPT
USER’S MANUALTHE PROFESSIONAL EQUIPMENT
USER’S MANUAL
01 digital satellite meter 02
THE PROFESSIO NAL EQUIPMENT
digiital satellite meter
DIGITAL SATELLITE METERUSER’S MANUAL
Please read this manual carefully before using your meter for thefirst time.The technical specifications and operating methodsincluded in this manual are subject to changes without notice. Incase of any inquires after a period of usage, please contact themanufacturer.Please charge the battery before using your meter for the firsttime.(Recommend 5 hours)
Contents
Chapter I. Introduction .................................................... 2Chapter II. Function ........................................................ 2
A. Front Panel ...................................................................................2
B. Quick operation guide...................................................................2 C. The Menu Operation..............................................................5
1. Channel.............................................................................62. Installation .......................................................................133. System .............................................................................174. Tools ...............................................................................19
Chapter III. Specification ............................................... 22
Chapter I IntroductionThis meter is simple and convenient for setting and aligning asatellite dish.Using the parameters of satellite, you can set and align a satellitedish quickly,easily and accurately.
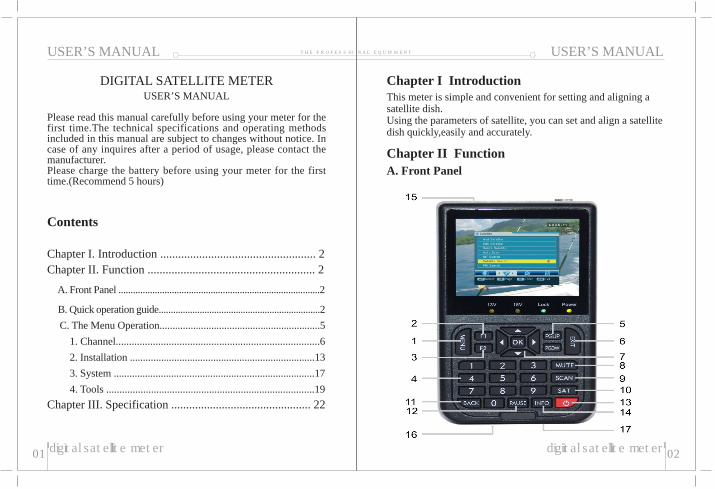
Chapter II FunctionA. Front Panel
USER’S MANUAL
USER’S MANUAL
03 digital satellite meter 04
THE PROFESSIO NAL EQUIPMENT
digital satellite meter
1. Menu:Press to display the main menu on the screen2. F1: Turn on or off the LCD screen3. F2: In standby mode, when you can not turn off the finder
through , press and hold F2 key for 2 seconds toforce shutdown the finder
4. 0-9: Press to enter required numbers in the input box orselect a channel to watch
5 . PGUP: Open or close the voice when signal is locked6. Exit: Press to return to the previous menu or escape from
the item7. : Move cursor up/down/left/right,Page
up/down,volume +/-8. Mute: Press to temperarity cut off the sound of the program9. Scan: Press to enter the Auto Scan menu10. Sat: Press to display the satellite list of searched channels11. Back: Moves to the previous channel12. Pause: Press to switch between Pause and Play13. : Press to swith between Operation and power off modes14. Info: Press to show information of the current channel15. Power:To switch on/off the battery power16. Charge port: To connect with the charger cord.17. USB Port: Connect to PC to upgrade.
USER’S MANUAL
USER’S MANUAL
05 digital satellite meter 06
THE PROFESSIO NAL EQUIPMENT
digital satellite meter
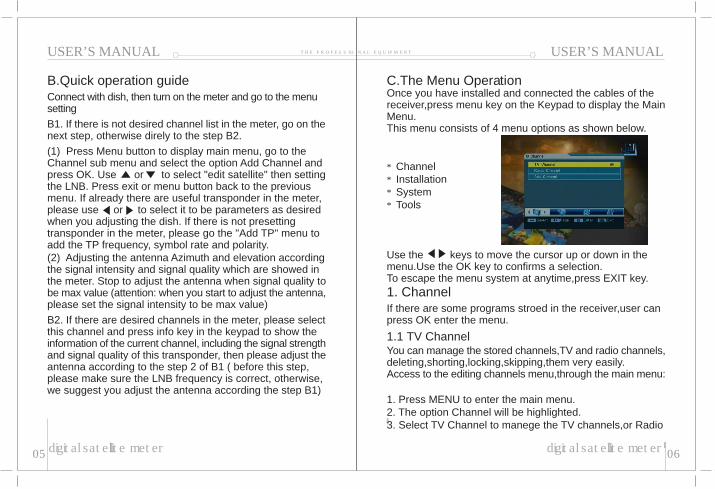
C.The Menu OperationOnce you have installed and connected the cables of thereceiver,press menu key on the Keypad to display the MainMenu.This menu consists of 4 menu options as shown below.
* Channel* Installation* System* Tools
Use the keys to move the cursor up or down in themenu.Use the OK key to confirms a selection.To escape the menu system at anytime,press EXIT key.1. ChannelIf there are some programs stroed in the receiver,user canpress OK enter the menu.
1.1 TV ChannelYou can manage the stored channels,TV and radio channels,deleting,shorting,locking,skipping,them very easily.Access to the editing channels menu,through the main menu:
1. Press MENU to enter the main menu.2. The option Channel will be highlighted.3. Select TV Channel to manege the TV channels,or Radio
USER’S MANUAL
B.Quick operation guideConnect with dish, then turn on the meter and go to the menusettingB1. If there is not desired channel list in the meter, go on thenext step, otherwise direly to the step B2.(1) Press Menu button to display main menu, go to theChannel sub menu and select the option Add Channel andpress OK. Use or to select "edit satellite" then settingthe LNB. Press exit or menu button back to the previousmenu. If already there are useful transponder in the meter,please use or to select it to be parameters as desiredwhen you adjusting the dish. If there is not presettingtransponder in the meter, please go the "Add TP" menu toadd the TP frequency, symbol rate and polarity.(2) Adjusting the antenna Azimuth and elevation accordingthe signal intensity and signal quality which are showed inthe meter. Stop to adjust the antenna when signal quality tobe max value (attention: when you start to adjust the antenna,please set the signal intensity to be max value)B2. If there are desired channels in the meter, please selectthis channel and press info key in the keypad to show theinformation of the current channel, including the signal strengthand signal quality of this transponder, then please adjust theantenna according to the step 2 of B1 ( before this step,please make sure the LNB frequency is correct, otherwise,we suggest you adjust the antenna according the step B1)
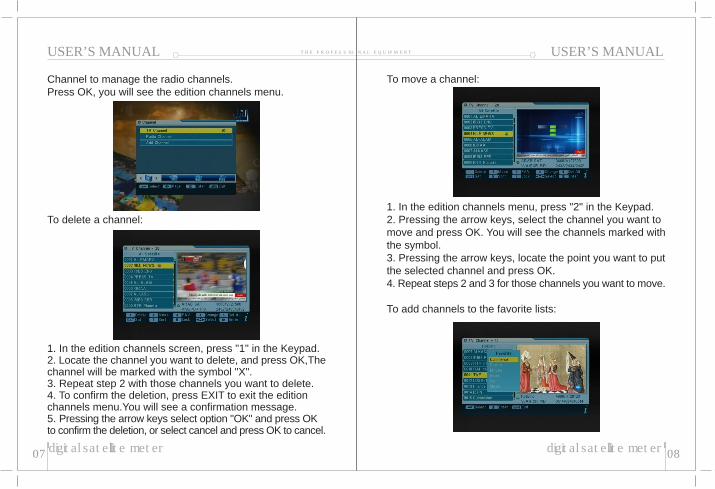
Channel to manage the radio channels.Press OK, you will see the edition channels menu.
To delete a channel:
1. In the edition channels screen, press "1" in the Keypad.2. Locate the channel you want to delete, and press OK,Thechannel will be marked with the symbol "X".3. Repeat step 2 with those channels you want to delete.4. To confirm the deletion, press EXIT to exit the editionchannels menu.You will see a confirmation message.5. Pressing the arrow keys select option "OK" and press OKto confirm the deletion, or select cancel and press OK to cancel.
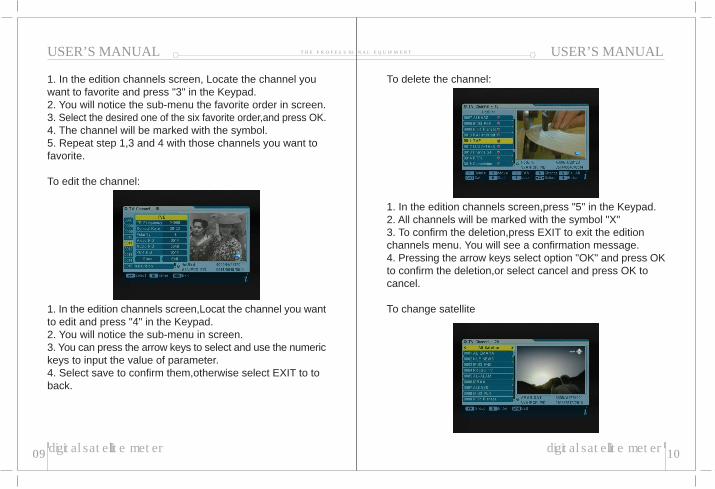
To move a channel:
1. In the edition channels menu, press "2" in the Keypad.2. Pressing the arrow keys, select the channel you want tomove and press OK. You will see the channels marked withthe symbol.3. Pressing the arrow keys, locate the point you want to putthe selected channel and press OK.4. Repeat steps 2 and 3 for those channels you want to move.
To add channels to the favorite lists:
USER’S MANUAL
07 digital satellite meter 08
THE PROFESSIO NAL EQUIPMENT
digital satellite meter
USER’S MANUAL
1. In the edition channels screen, Locate the channel youwant to favorite and press "3" in the Keypad.2. You will notice the sub-menu the favorite order in screen.3. Select the desired one of the six favorite order,and press OK.4. The channel will be marked with the symbol.5. Repeat step 1,3 and 4 with those channels you want tofavorite.
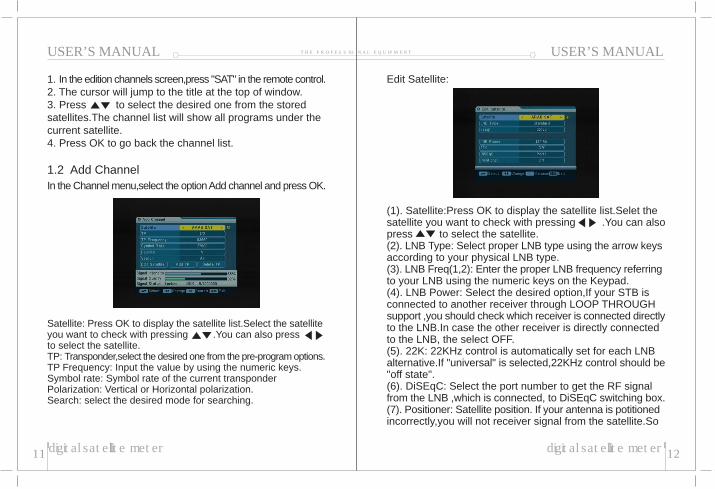
To edit the channel:
1. In the edition channels screen,Locat the channel you wantto edit and press "4" in the Keypad.2. You will notice the sub-menu in screen.3. You can press the arrow keys to select and use the numerickeys to input the value of parameter.4. Select save to confirm them,otherwise select EXIT to toback.
To delete the channel:
1. In the edition channels screen,press "5" in the Keypad.2. All channels will be marked with the symbol "X"3. To confirm the deletion,press EXIT to exit the editionchannels menu. You will see a confirmation message.4. Pressing the arrow keys select option "OK" and press OKto confirm the deletion,or select cancel and press OK tocancel.
To change satellite
USER’S MANUAL
09 digital satellite meter 10
THE PROFESSIO NAL EQUIPMENT
digital satellite meter
USER’S MANUAL
1. In the edition channels screen,press "SAT" in the remote control.2. The cursor will jump to the title at the top of window.3. Press to select the desired one from the storedsatellites.The channel list will show all programs under thecurrent satellite.4. Press OK to go back the channel list.
1.2 Add ChannelIn the Channel menu,select the option Add channel and press OK.
Satellite: Press OK to display the satellite list.Select the satelliteyou want to check with pressing .You can also pressto select the satellite.TP: Transponder,select the desired one from the pre-program options.TP Frequency: Input the value by using the numeric keys.Symbol rate: Symbol rate of the current transponderPolarization: Vertical or Horizontal polarization.Search: select the desired mode for searching.
Edit Satellite:
(1). Satellite:Press OK to display the satellite list.Selet thesatellite you want to check with pressing .You can alsopress to select the satellite.(2). LNB Type: Select proper LNB type using the arrow keysaccording to your physical LNB type.(3). LNB Freq(1,2): Enter the proper LNB frequency referringto your LNB using the numeric keys on the Keypad.(4). LNB Power: Select the desired option,If your STB isconnected to another receiver through LOOP THROUGHsupport ,you should check which receiver is connected directlyto the LNB.In case the other receiver is directly connectedto the LNB, the select OFF.(5). 22K: 22KHz control is automatically set for each LNBalternative.If "universal" is selected,22KHz control should be"off state".(6). DiSEqC: Select the port number to get the RF signalfrom the LNB ,which is connected, to DiSEqC switching box.(7). Positioner: Satellite position. If your antenna is potitionedincorrectly,you will not receiver signal from the satellite.So
USER’S MANUAL
11 digital satellite meter 12
THE PROFESSIO NAL EQUIPMENT
digital satellite meter
USER’S MANUAL
the STB provides DiSEqC 1.2 to let you have exact informationto direct you antenna toward a satellite.
Satellite: Select the desired satellite.TP: Select the desired transponder.Position No.&Save: Select the position No. or null.Limit setup: Setting of limits for the antenna.Movement: The satellite can now be turned into the desireddirection using the arrow buttons.Continuous Move: The satellite can be continuous movedto the desired direction.Recalculation: Press OK to recalculate.Go to Reference: A dtarting point for the satellite searchfunction can be selected by pressing the OK button.Add TP: Add a new transponder for the current satellite.Delete TP: Delete the current transponder.
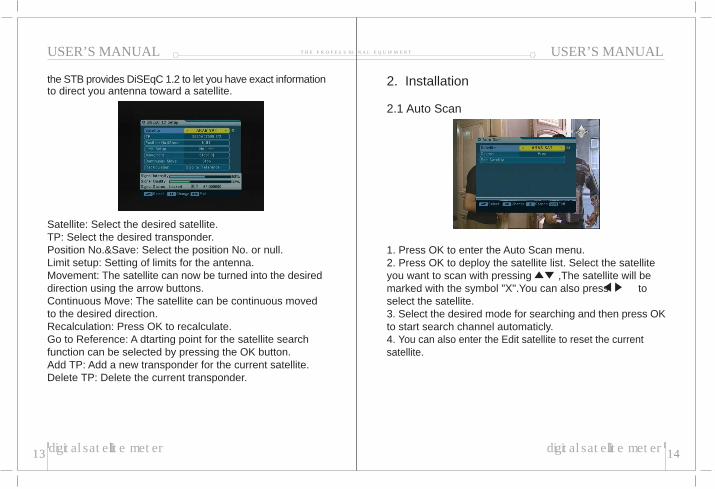
2. Installation
2.1 Auto Scan
1. Press OK to enter the Auto Scan menu.2. Press OK to deploy the satellite list. Select the satelliteyou want to scan with pressing ,The satellite will bemarked with the symbol "X".You can also press toselect the satellite.3. Select the desired mode for searching and then press OKto start search channel automaticly.4. You can also enter the Edit satellite to reset the currentsatellite.
USER’S MANUAL
13 digital satellite meter 14
THE PROFESSIO NAL EQUIPMENT
digital satellite meter
USER’S MANUAL
USER’S MANUAL
15 digital satellite meter 16
THE PROFESSIO NAL EQUIPMENT
digital satellite meter
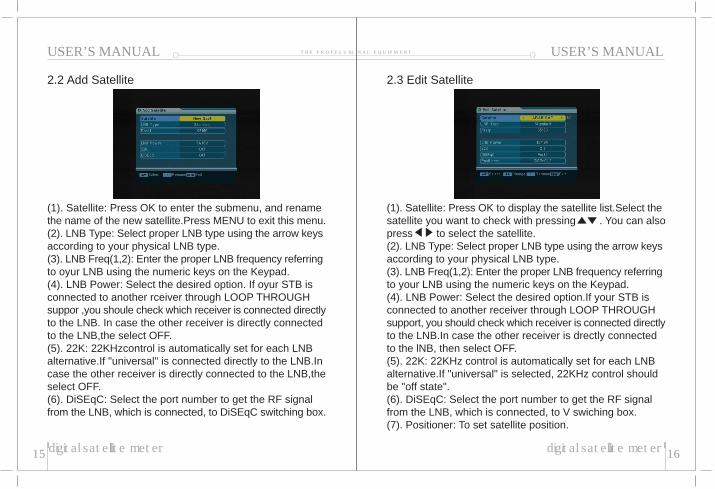
2.2 Add Satellite
(1). Satellite: Press OK to enter the submenu, and renamethe name of the new satellite.Press MENU to exit this menu.(2). LNB Type: Select proper LNB type using the arrow keysaccording to your physical LNB type.(3). LNB Freq(1,2): Enter the proper LNB frequency referringto oyur LNB using the numeric keys on the Keypad.(4). LNB Power: Select the desired option. If oyur STB isconnected to another rceiver through LOOP THROUGHsuppor ,you shoule check which receiver is connected directlyto the LNB. In case the other receiver is directly connectedto the LNB,the select OFF.(5). 22K: 22KHzcontrol is automatically set for each LNBalternative.If "universal" is connected directly to the LNB.Incase the other receiver is directly connected to the LNB,theselect OFF.(6). DiSEqC: Select the port number to get the RF signalfrom the LNB, which is connected, to DiSEqC switching box.
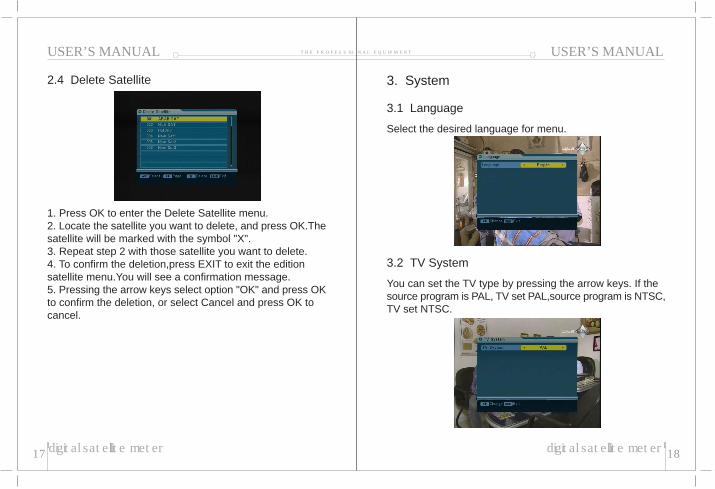
2.3 Edit Satellite
(1). Satellite: Press OK to display the satellite list.Select thesatellite you want to check with pressing . You can alsopress to select the satellite.(2). LNB Type: Select proper LNB type using the arrow keysaccording to your physical LNB type.(3). LNB Freq(1,2): Enter the proper LNB frequency referringto your LNB using the numeric keys on the Keypad.(4). LNB Power: Select the desired option.If your STB isconnected to another receiver through LOOP THROUGHsupport, you should check which receiver is connected directlyto the LNB.In case the other receiver is drectly connectedto the lNB, then select OFF.(5). 22K: 22KHz control is automatically set for each LNBalternative.If "universal" is selected, 22KHz control shouldbe "off state".(6). DiSEqC: Select the port number to get the RF signalfrom the LNB, which is connected, to V swiching box.(7). Positioner: To set satellite position.
USER’S MANUAL
USER’S MANUAL
17 digital satellite meter 18
THE PROFESSIO NAL EQUIPMENT
digital satellite meter
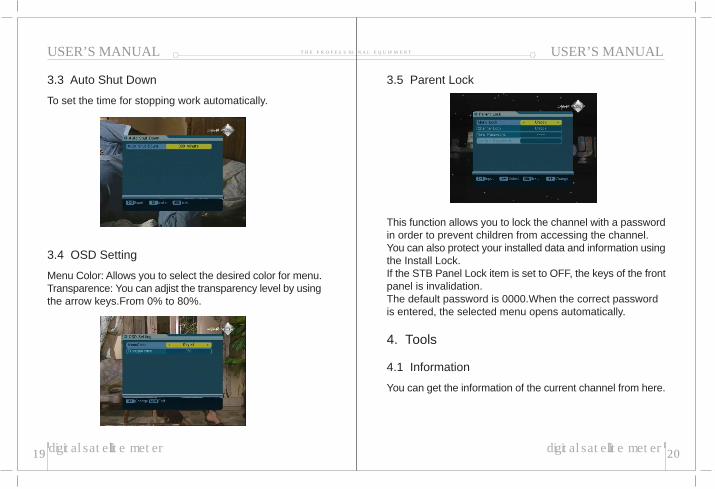
2.4 Delete Satellite
1. Press OK to enter the Delete Satellite menu.2. Locate the satellite you want to delete, and press OK.Thesatellite will be marked with the symbol "X".3. Repeat step 2 with those satellite you want to delete.4. To confirm the deletion,press EXIT to exit the editionsatellite menu.You will see a confirmation message.5. Pressing the arrow keys select option "OK" and press OKto confirm the deletion, or select Cancel and press OK tocancel.
3. System
3.1 Language
Select the desired language for menu.
3.2 TV System
You can set the TV type by pressing the arrow keys. If thesource program is PAL, TV set PAL,source program is NTSC,TV set NTSC.
USER’S MANUAL
USER’S MANUAL
19 digital satellite meter 20
THE PROFESSIO NAL EQUIPMENT
digital satellite meter
3.3 Auto Shut Down
To set the time for stopping work automatically.
3.4 OSD Setting
Menu Color: Allows you to select the desired color for menu.Transparence: You can adjist the transparency level by usingthe arrow keys.From 0% to 80%.
3.5 Parent Lock
This function allows you to lock the channel with a passwordin order to prevent children from accessing the channel.You can also protect your installed data and information usingthe Install Lock.If the STB Panel Lock item is set to OFF, the keys of the frontpanel is invalidation.The default password is 0000.When the correct passwordis entered, the selected menu opens automatically.
4. Tools
4.1 Information
You can get the information of the current channel from here.
USER’S MANUAL
USER’S MANUAL
digital satellite meter
THE PROFESSIO NAL EQUIPMENT
digital satellite meter
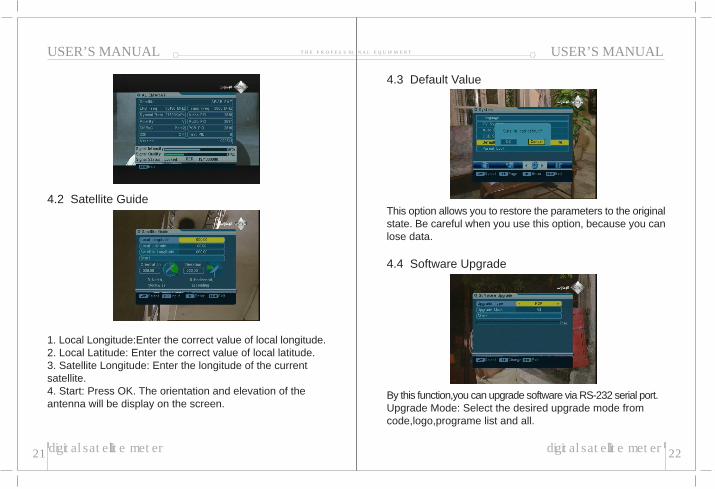
4.2 Satellite Guide
1. Local Longitude:Enter the correct value of local longitude.2. Local Latitude: Enter the correct value of local latitude.3. Satellite Longitude: Enter the longitude of the currentsatellite.4. Start: Press OK. The orientation and elevation of theantenna will be display on the screen.
4.3 Default Value
This option allows you to restore the parameters to the originalstate. Be careful when you use this option, because you canlose data.
4.4 Software Upgrade
By this function,you can upgrade software via RS-232 serial port.Upgrade Mode: Select the desired upgrade mode fromcode,logo,programe list and all.
USER’S MANUAL
21 22
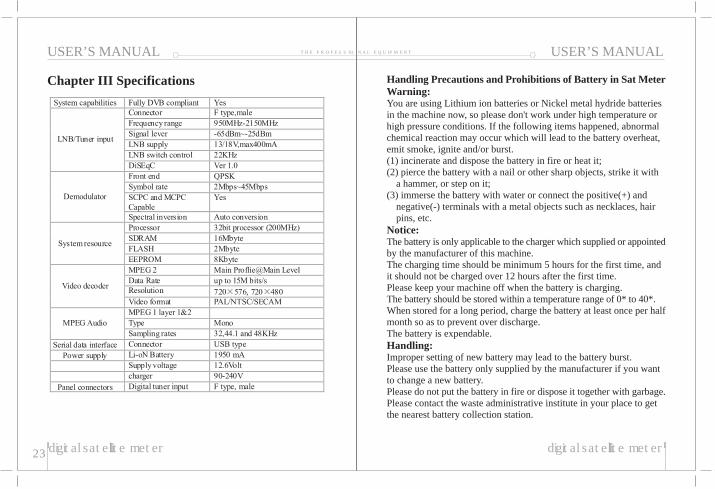
Chapter III Specifications
USER’S MANUAL
digital satellite meter
THE PROFESSIO NAL EQUIPMENT
digital satellite meter
USER’S MANUAL
23 22
Handling Precautions and Prohibitions of Battery in Sat MeterWarning:You are using Lithium ion batteries or Nickel metal hydride batteriesin the machine now, so please don't work under high temperature orhigh pressure conditions. If the following items happened, abnormalchemical reaction may occur which will lead to the battery overheat,emit smoke, ignite and/or burst.(1) incinerate and dispose the battery in fire or heat it;(2) pierce the battery with a nail or other sharp objects, strike it with
a hammer, or step on it;(3) immerse the battery with water or connect the positive(+) and
negative(-) terminals with a metal objects such as necklaces, hairpins, etc.
Notice:The battery is only applicable to the charger which supplied or appointedby the manufacturer of this machine.The charging time should be minimum 5 hours for the first time, andit should not be charged over 12 hours after the first time.Please keep your machine off when the battery is charging.The battery should be stored within a temperature range of 0* to 40*.When stored for a long period, charge the battery at least once per halfmonth so as to prevent over discharge.The battery is expendable.Handling:Improper setting of new battery may lead to the battery burst.Please use the battery only supplied by the manufacturer if you wantto change a new battery.Please do not put the battery in fire or dispose it together with garbage.Please contact the waste administrative institute in your place to getthe nearest battery collection station.