unix intro and basic c shell scripting - meetbsdcontents.meetbsd.ir/ebook/unix-csh.pdf · unix...
TRANSCRIPT
UNIX Intro and Basic C shell Scripting
Khaldoun [email protected]
December 2nd 2010 Why.N.How
1
This talk introduces the audience to the basic use of the UNIX/Linux command line tools and to basic C shell scripting.

Text 2010/12/02 Why.N.How
Why the command line?
>?
Old-school Command Line Interface
Touch
Mouse
???2
First, some words of motivation:
In a time of increasingly advanced and often *usefully* simplified interfaces, why use something as old and seemingly retrograde as the command line?
The fact remains that when it comes to power, flexibility, speed and automation (“scriptability”), the command line is still the best human-computer interface we have. Its old-school look and feel belies a truly powerful set of tools for doing scientific computing.
The main disadvantage of this interface is its still-steep learning curve. This talk is here to soften that slope and to enable you to begin learning on your own by introducing a few basic concepts and examples.
Rigor is secondary here: command line, unix shell, terminal, etc. All these words technically refer to disparate concepts that you may in time wish to distinguish from one another. But for the purposes of this talk, if you are entering text commands at a text-only prompt, that is all you need to worry about.
(For the curious, we will focus on the tcsh shell, and I am demonstrating this in the Mac OS X Terminal program.)

Text 2010/12/02 Why.N.How
• Power• Flexibility • Speed • Scriptability
3
Old-school Command Line Interface
Why the command line?

Text 2010/12/02 Why.N.How
1. Intro – making rm (to delete files) safer2. Grab-bag of basic commands & info3. Command options. grep and find
4. A sample backup script5. Output redirection & pipes6. Input parameters7. Looping8. Conditional statements
4
OutlineThis talk will proceed by practical example. I will expand on relevant concepts as they come up.
Intro to Linux & command line
Intro to scripting
Unix/Linux/GNU and all related topics can be dry enough as it is. This is why this talk essentially skips general expository material as much as possible. Weʼll dive in by example right away. The general concepts of how the command line works will be discussed when they come up.
As such, this talk is organized informally by what I deemed useful for a first-time or near-first-time user. The basic idea is to get you comfortable “moving around” the command line and to get you writing scripts asap. The fine details, youʼll pick up along the way.

Text 2010/12/02 Why.N.How5
Part I
Intro to Linux & command line

• A big obstable in the early part of this learning curve is fear of breaking something
• First step to not breaking stuff: not accidentally deleting stuff
• The rm (remove) command deletes files or directories... but there’s no “Recycle Bin”!
• Commands/programs/files introduced: • ls (list files)
• rm (delete files)
• man (diplay manual pages)
• alias (replace typed command by another)
• pico (text editor)
• ~/.cshrc (shell configuration file)
Text 2010/12/02 Why.N.How6
Example 1: making rm safer
Example 1: The command line grants the user more power than most other interfaces, but as a result it also grants more power to break things. Itʼs important to feel comfortable when learning to use the command line, so itʼs best to minimize the chance that anything will go wrong.
rm (short for “remove”) is the command to delete a file or files (possibly including folders depending on command line options – see later slides). It is a problematic command at first because it acts right away without confirmation (“Are you sure you want to...”) and without a recycle bin. Itʼs best to correct this behavior so as to make it safer by adding a confirmation. At the very least, youʼll feel more comfortable knowing that youʼre much less likely to delete anything accidentally.
While this may get tedious after you get comfortable with the command line, itʼs also a useful example to demonstrate a few basic commands.

Text 2010/12/02 Why.N.How7
Example 1: making rm safer
Type ls to list the contents of the current
directory (folder)
Type rm file1 to delete file1 forever.
Note that the next ls shows that file1 is gone.
No undo here!
Note: always press ENTER or RETURN to execute the command(s) youʼve just typed. ENTER is not carriage return (next line)! Think before you validate :)

Text 2010/12/02 Why.N.How8
Example 1: making rm safer
Type man rm and hit ENTER to show the manual entry for rm
Note the structure: -Name -Synopsis (usage) -Description -Options
What we’re looking for!
Now letʼs see if we can glean something about rm by reading its manual entry. Type man rm and hit ENTER. man is a terrifically useful resource. Anytime that you are having trouble with a command, or that youʼre not sure how a particular command works, your first stop is to check whether it has an entry in man (not all commands do). If it does, itʼs often the best way to learn how a command works.
Note: to scroll in man, hit SPACE. To scroll backwards hit the letter b. To quit and return to the command line, type q. To search for a phrase, type /, then type the query, then type ENTER. While in search mode, hit n to go to the next match, and p to go to the previous match.
You can learn more about man by typing man man and hitting ENTER.... but sadly, itʼs not obvious how to navigate from the man entry for man, which is why I include it here.

Text 2010/12/02 Why.N.How9
Example 1: making rm safer
Any answer other than “y” will be interpreted as “no”, including just
typing ENTER
Now if we type rm -i file2, the system asks to
confirm first.
Note: the confirmation “dialog” will specify the type of file that youʼre trying to delete. In this case, I created empty files, hence the message you see here.

Text 2010/12/02 Why.N.How10
Example 1: making rm saferOf course remembering to
type “rm -i” each time isn’t exactly useful.
So this is where alias comes in. If you have a command that
you execute often, you can give it an alias. For example, I use as alias for ls -l, which lists
files with more details (permissions, time, size, etc)
We can make an alias for rm -i so it’s easier to type. Better yet, let’s just make it such that when you type rm, the system interprets it as
rm -i
There are two things going on here. We could make an alias that allows you to type “del” of “safe_rm” or anything you like to mean “rm -i”. But if safety is what youʼre after, you can simply make it so that you alias “rm” itself to mean “rm -i”.

Text 2010/12/02 Why.N.How11
Example 1: making rm saferFinally, you should note that any alias you use is only in use during your current log in session. As
soon as you close that terminal, all the aliases you created will be gone. To make this change permanent, you can include it as a line in your .cshrc file, which is a configuration file that is read-in every time you open a new c shell. Here I use the text editor pico to perform this task.
Comments (indicated by the initial “#”): these lines are not
interpreted.
The line we’re adding
Previously existing lines: we can leave these alone
Built-in instructions for pico: ^X means Control-X
We want to modify the file .cshrc (pronounced, “dot-C-S-H-R-C”. The period at the beginning is the first character in the file name, and is not optional). This file is located in your home directory (a sort of “My Documents” for Linux). The character “~” is an alias for your home directory, whatever its actual location in the filesystem is. The slash, /, is the separator between folders in a hierarchy, or between the folder and the file at the end of the file path.
You will need to use a text editor at some point in your work, and you might as well get used to it asap. This is not the same as a word processor in that a text editor always manipulates plain text files (no fonts, no page layouts, etc... just text). pico is a good first choice because it comes with built-in instructions on how to use it as soon as you launch it (see the bottow of your terminal window). To save the file after youʼve modified it, type ^O (Control-O). To exit, type ^X (Control-X).
Text 2010/12/02 Why.N.How12
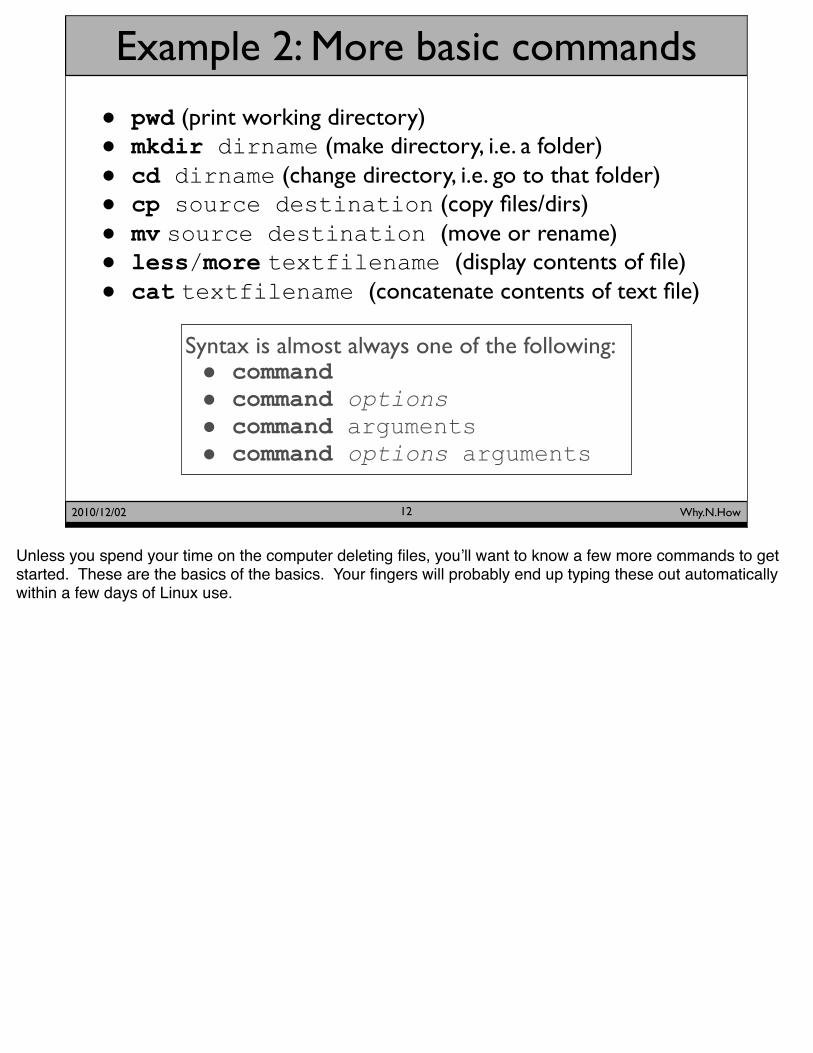
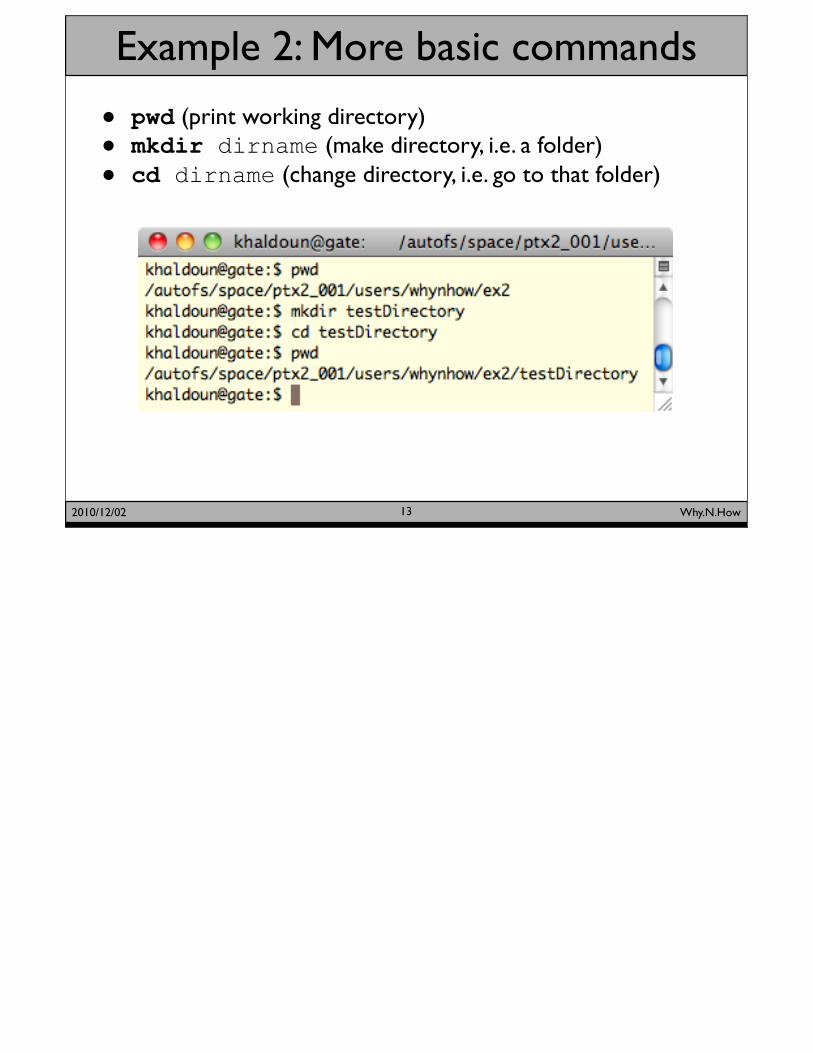
Example 2: More basic commands
• pwd (print working directory)
• mkdir dirname (make directory, i.e. a folder)
• cd dirname (change directory, i.e. go to that folder)
• cp source destination (copy files/dirs)
• mv source destination (move or rename)
• less/more textfilename (display contents of file)
• cat textfilename (concatenate contents of text file)
Syntax is almost always one of the following:• command • command options • command arguments• command options arguments
Unless you spend your time on the computer deleting files, youʼll want to know a few more commands to get started. These are the basics of the basics. Your fingers will probably end up typing these out automatically within a few days of Linux use.
Text 2010/12/02 Why.N.How13
Example 2: More basic commands
• pwd (print working directory)
• mkdir dirname (make directory, i.e. a folder)
• cd dirname (change directory, i.e. go to that folder)

Text 2010/12/02 Why.N.How14
Example 2: More basic commands
• cp source destination (copy files/dirs)
• mv source destination (move or rename)
We copy the file testFile, and name the copy copyFile. We then move the copyFile into
the testDirectory. We then verify that everything is
as we intended using a couple ls statements (well, “ls -l” aliased to “ll”)

Text 2010/12/02 Why.N.How15
Example 2: More basic commands
more allows you to view text files (no editing). It dumps out the contents of the file to the
terminal window.
less performs the same function, but it more powerful and better suited for longer files (scrolling, searching, etc).
• less/more textfilename (display contents of file)
Getting around a file using less works like it does when using man:
To scroll, hit SPACE. To scroll backwards hit the letter b. To quit and return to the command line, type q. To search for a phrase, type /, then type the query, then type ENTER. While in search mode, hit n to go to the next match, and p to go to the previous match.

. Current directory
.. Parent directory (up one level)~ User’s home directory
often used as ./ ../ and ~/ since the forward slash denotes separation between directories in Unix paths
* matches any number of any characters? matches one of any character[abc] matches a or b or c
Also useful: the TAB key autocompletes
Text 2010/12/02 Why.N.How16
Example 2: Useful info
These are just a few of the useful things to know about typing commands in the command line.

Text 2010/12/02 Why.N.How17
Example 2: Useful info
Current directory (ex2)
Parent directory (whynhow)
No file called “test”
One file and one directory that match test* (meaning
“test” followed by anything, including followed by
nothing)
On TAB autocompletion: it is not necessary to type “ls testFile” to list this file. Itʼs enough to type “ls testF” and then press the TAB key. The command line autocompletes to the only completion available. If you type “ls t” then TAB, it will autocomplete to “test” and then wait for user input to differentiate between testFile and testDirectory.
The parent directory is the one that contains the current directory. So if you create a directory called whynhow (as I did) and then create inside it directories called ex1, ex2, etc, then whynhow is the parent directory or ex1, ex2, etc.

• ls -l (list in long format)
• ls -a (list all files including hidden)
• ls -t (list and sort by time)
• ls -r (list and reverse sort order)
• Combinations possible: ls -latr (list all files in long format in reverse order of recently modified)
Text 2010/12/02 Why.N.How18
Example 3: command options
Almost all commands include options you can invoke if need be. The syntax is usually command -option.
We first take ls as an example.

Text 2010/12/02 Why.N.How19
Example 3: command options
Listing files with additional info
Listing all files including hidden
Listing files, sorting by time
Listing files, sorting by time, reverse order
Any file which begins with a dot (e.g. “.filename”) is by default a hidden file, which will not be shown by ls unless specified. Here Iʼve created a file named .hiddenfile to demonstrate how to show it with ls -a.
Listing by time defaults to showing you the oldest files at the bottom. If youʼre interested in seeing the newest files, itʼs best to use -r to reverse the order and have the newest files at the bottom. This is because a long scrolling list will chop off (in your terminal window) the top of the list.

• grep searches for string (i.e. text) matches inside filesgrep pattern filelist
• find searches for files matching certain conditions: find directory -name ‘filename’
Text 2010/12/02 Why.N.How20
grep and findgrep and find are good examples of the power of the
tools you’ll typically use on Linux. They both become very powerful as you learn to use their options, but start out as
relatively straightforward pattern-matching tools.
Note the difference between grep and find in syntax. grep places the files to be searched after the pattern, whereas find first specifies the directory. Besides the order, note that grep asks for a file list (so all the files in the present directory would be ./*), whereas find asks for just a directory (./).

Text 2010/12/02 Why.N.How21
grep and find
3 files in this directory
First file contains 2 names and 2 empty lines (shown by
more)
Second file contains 1 name and 1 empty lines
Third file is empty
grep commands to search for these patterns in all the files that are in the current
directory
Being able to match patterns from inside a file is extremely useful, especially once you include matching conditions using *, ?, and other matching syntax. Youʼll be going through log files and code considerably faster than you would otherwise.

Text 2010/12/02 Why.N.How22
grep and find
Quotation marks are required for pattern matching
or the search will fail
Note that grep searches the contents of files, and will not match a file that has the
searched pattern only its filename (here khfile)
Use find to search for patterns in file names, or files times, or many many
other file attributes (check the man page!)
In addition to these simple examples, you can tailor these tools to your liking. Use grep with the -v option to invoke anti-matching: it will find the lines that do not match the specified pattern. Use find with time specifiers to find files older than n minutes or newer than m days. And much much more. Check the man pages!

Text 2010/12/02 Why.N.How23
Part II
Intro to shell scripting

• A script is a sequence of commands stored in a text file that can be run like any other command
• The use of programming constructs such as variables, loops and conditional statements make this more powerful than just a saved list of commands
Text 2010/12/02 Why.N.How24
Scripting basics
At first, a script is useful because it saves you the trouble of typing in the commands you need repeatedly. If you find yourself performing the same series of steps over and over (say on several data sets), itʼs not only more convenient, but also better for the reproducibility of your experiment & analysis to write this series of steps into a script, and then simply run the script.
But the true power of scripting lies in the fact that it enables the use of important algorithmic & programming contructs (with little user overhead such as compilation of code, etc). If your work requires loops and conditional statements using command line commands, scripting isnʼt simply a convenience; itʼs the only way to get your work done.

#!/bin/csh
# comment here: very basic backup
cd parentdirectory
rsync -avr originDir backupDir/
Type this into a file called backup.csh
chmod u+x ./backup.csh
./backup.csh
Then make it executable & run it!
Text 2010/12/02 Why.N.How25
Example 4: a backup script
This will demonstrate the simple command list version of a script.
One of the most important computing habits to develop is the use of regular backups. So weʼll demonstrate putting together a very simple backup script. This script will copy some data from a directory called originDir (modify for your own needs) to a destination called backupDir. This very simple backup overwrites any previous backup in the destination directory. In other words, any files which have changed in the origin will replace the older files in the destination. However, it will not delete files from the destination if they have been deleted from the source. The options used for rsync are: -a for archive mode (preserve time stamps, file attribures, etc), -v for verbose so that we see output on the terminal screen of what rsync is doing at all times, and -r to recursively enter directories and sync everything inside them as well.
After we have written a file called backup.csh, we have to specify that this file is now executable (i.e. not just readable – for viewing, and writeable – for modifying, but also executable like any other command). We do so with the chmod command. The syntax is: u for user permission (as opposed to group or other), x for executable, and + for add this permission (as opposed to remove it).
We then run the script using ./backup.csh. We specify the location of the executable as “this directory” (using ./) or the system may not know where to find this now-brand-new command called “backup.csh”.

• The output from command and any errors normally get dumped to the terminal screen• It’s useful to save them when running scripts so that you can
examine if anything went wrong• command > somelogfile will save the output of
command into the file somelogfile
• command >& somelogfile will save the output of AND any errors resulting from command into the file somelogfile
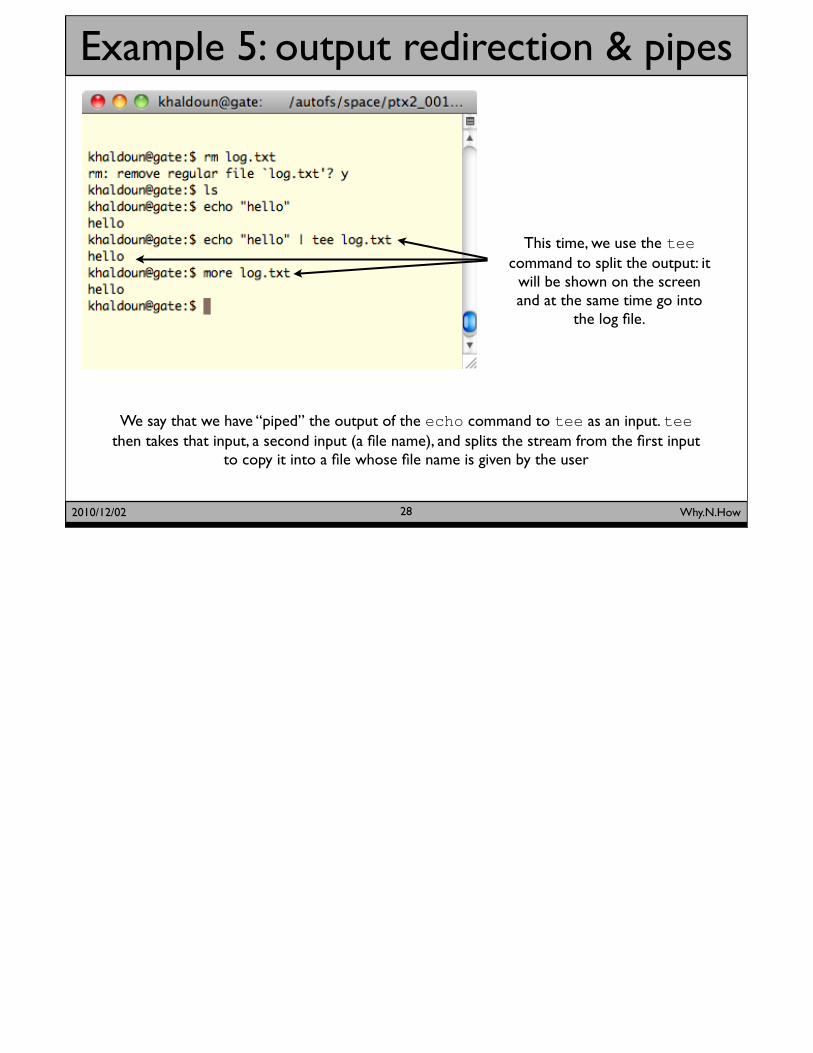
• >> and >>& append to the file somelogfile instead of replacing it• You can also pipe the output of one command to be the
input of another command using |(SHIFT-backslash on most keyboards). See example using tee and wc
Text 2010/12/02 Why.N.How26
Example 5: output redirection & pipes

Text 2010/12/02 Why.N.How27
Example 5: output redirection & pipes
log.txt is empty to start
We redirect the output of the echo command into
log.txt, and check the content
We try a command we know will give an error, but >> does not seem to redirect to the
log file
The use of >>& allows us to redirect for the normal output
and the error output
Text 2010/12/02 Why.N.How28
Example 5: output redirection & pipes
This time, we use the tee command to split the output: it
will be shown on the screen and at the same time go into
the log file.
We say that we have “piped” the output of the echo command to tee as an input. tee then takes that input, a second input (a file name), and splits the stream from the first input
to copy it into a file whose file name is given by the user

• You can pass input parameters to your script just like you would to other commands: myscript param1 param2
• Inside the script, these parameters are referenced with $1 $2 etc
• Although it’s needless complication for the simple backup script, we’ll use this for origin & destination to demonstrate
Text 2010/12/02 Why.N.How29
Example 6: input parameters

Text 2010/12/02 Why.N.How30
Example 6: input parameters
#!/bin/cshset origin = $1set destination = $2echo ""echo "the directory $origin will be backed up to $destination"
Type this into a file called backup_prep.csh

• Two ways to loop: foreach and while
• foreach is demonstrated here
#!/bin/csh
foreach flipangle (30 60 90 120)
set cmd = (ls -l data_flip${flipangle})
echo $cmd
eval $cmd
end
Credit to A. Stevens for exposure to the very useful “eval”
Text 2010/12/02 Why.N.How31
Example 7: Looping

Text 2010/12/02 Why.N.How32
Example 7: Looping
The script loops through all the values listed in foreach, and
executes a command each time.
The last value produces an error, since there is no file with the
name data_flip120: an excellent time to have a log so that you can
track how your script ran.

• Structure of if statements is simple:
if (expression) then commands ...else if (expression) then commands ... ...else commands ...endif
• The fun is in what you can put in (expression)
Text 2010/12/02 Why.N.How33
Conditional statements
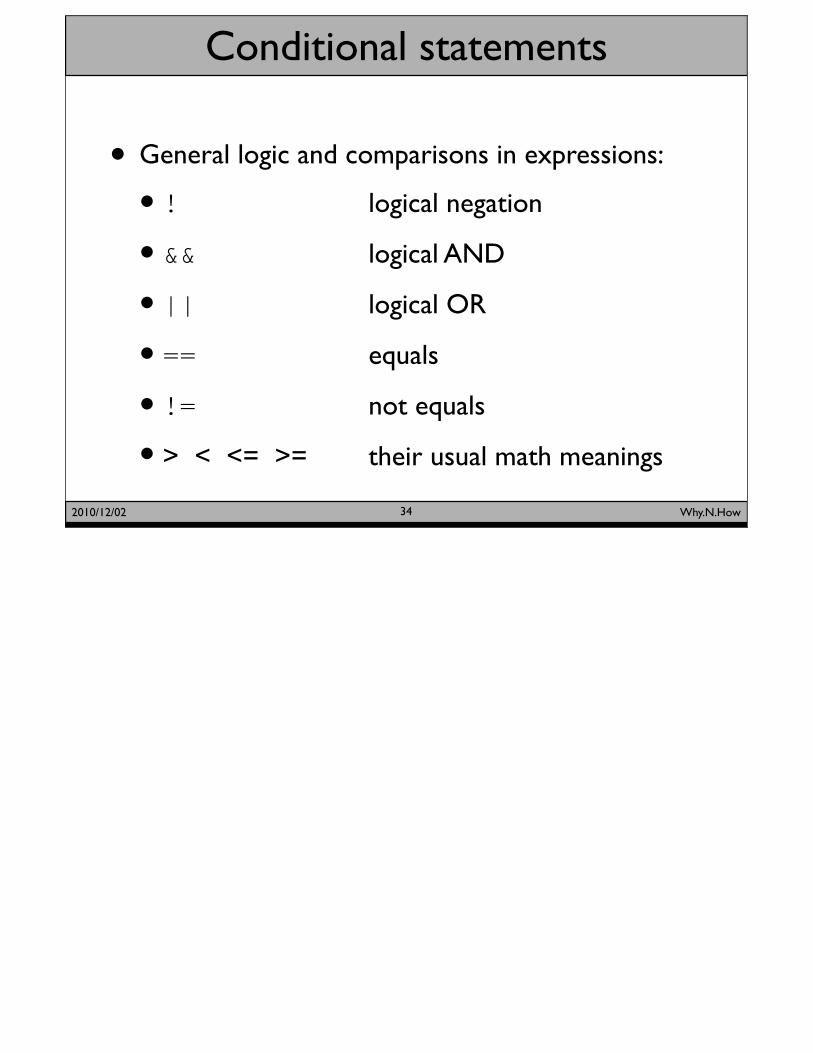
• General logic and comparisons in expressions:
•! logical negation
•&& logical AND
•|| logical OR
•== equals
•!= not equals
•> < <= >= their usual math meanings
Text 2010/12/02 Why.N.How34
Conditional statements

• File operators
•-e file true if file exists
•-d dir true if dir exists and is a directory
•-z file true if file exists and is zero size
•More at www.csem.duke.edu/Cluster/csh_basics.htm or at man csh (“File inquiry operators”)
Text 2010/12/02 Why.N.How35
Conditional statements

• Always look at the manual page for any command you’re not familiar with, or at the very least Google the command for some basic info.
• Searching man pages (and less output) is done with / followed by the search phrase followed by RETURN/ENTER. Cycling through results is done with n (next) and p (previous). Quitting is done with q.
• Keep track of learned commands and hints in a text file as you go along. Learning Linux/C shell/scripting really means learning, then forgetting, then relearning, etc.
• Don’t hesitate to email if there are any questions arising from this discussion later on: [email protected]
Text 2010/12/02 Why.N.How36
General Hints