unicloud 6.2.0 installation and administration guide · unicloud 6.2.0 installation and...
TRANSCRIPT
UniCloud 6.2.0 Installation and Administration Guide
Univa Corporation <[email protected]>
August 2017 – Version 1.16
Contents
About This Guide 7Trademarks . . . . . . . . . . . . . . . . . . . . . . . . . . . . . . . . . . . . . . . . . . . . . . . . . . . . . . . . . . 7
UniCloud Quickstart 8Manual quickstart installation . . . . . . . . . . . . . . . . . . . . . . . . . . . . . . . . . . . . . . . . . . . . . . . . 8
Overview . . . . . . . . . . . . . . . . . . . . . . . . . . . . . . . . . . . . . . . . . . . . . . . . . . . . . . . . 8
Prerequisites . . . . . . . . . . . . . . . . . . . . . . . . . . . . . . . . . . . . . . . . . . . . . . . . . . . . . . 8
Quickstart Installation . . . . . . . . . . . . . . . . . . . . . . . . . . . . . . . . . . . . . . . . . . . . . . . . . 10
UniCloud/Grid Engine Amazon EC2 AMI . . . . . . . . . . . . . . . . . . . . . . . . . . . . . . . . . . . . . . . . . 15
Overview . . . . . . . . . . . . . . . . . . . . . . . . . . . . . . . . . . . . . . . . . . . . . . . . . . . . . . . . 15
Prerequisites . . . . . . . . . . . . . . . . . . . . . . . . . . . . . . . . . . . . . . . . . . . . . . . . . . . . . . 15
Creating the Cluster . . . . . . . . . . . . . . . . . . . . . . . . . . . . . . . . . . . . . . . . . . . . . . . . . . 15
About UniCloud 18Supporting the Datacenter Lifecycle . . . . . . . . . . . . . . . . . . . . . . . . . . . . . . . . . . . . . . . . . . . . 19
Understanding UniCloud Architecture . . . . . . . . . . . . . . . . . . . . . . . . . . . . . . . . . . . . . . . . . . . 20
Detailed Installation Guide 21Hardware and Software Requirements . . . . . . . . . . . . . . . . . . . . . . . . . . . . . . . . . . . . . . . . . . . 21
CPU . . . . . . . . . . . . . . . . . . . . . . . . . . . . . . . . . . . . . . . . . . . . . . . . . . . . . . . . . . . 21
Memory . . . . . . . . . . . . . . . . . . . . . . . . . . . . . . . . . . . . . . . . . . . . . . . . . . . . . . . . . 21
Operating Systems . . . . . . . . . . . . . . . . . . . . . . . . . . . . . . . . . . . . . . . . . . . . . . . . . . . 21
Network . . . . . . . . . . . . . . . . . . . . . . . . . . . . . . . . . . . . . . . . . . . . . . . . . . . . . . . . . 21
Disk Space . . . . . . . . . . . . . . . . . . . . . . . . . . . . . . . . . . . . . . . . . . . . . . . . . . . . . . . 21
Hypervisor/Cloud Support . . . . . . . . . . . . . . . . . . . . . . . . . . . . . . . . . . . . . . . . . . . . . . 21
Compute Node Requirements . . . . . . . . . . . . . . . . . . . . . . . . . . . . . . . . . . . . . . . . . . . . . 22
Preparing For Installation . . . . . . . . . . . . . . . . . . . . . . . . . . . . . . . . . . . . . . . . . . . . . . . . . . 22
Configuring Network Access . . . . . . . . . . . . . . . . . . . . . . . . . . . . . . . . . . . . . . . . . . . . . . 22
1
UniCloud 6.2.0 Installation and Administration Guide Contents
Firewall Configuration . . . . . . . . . . . . . . . . . . . . . . . . . . . . . . . . . . . . . . . . . . . . . . . . . 23
Puppet . . . . . . . . . . . . . . . . . . . . . . . . . . . . . . . . . . . . . . . . . . . . . . . . . . . . . . . . . 23
OS Package Repositories . . . . . . . . . . . . . . . . . . . . . . . . . . . . . . . . . . . . . . . . . . . . . . . . 23
SELinux . . . . . . . . . . . . . . . . . . . . . . . . . . . . . . . . . . . . . . . . . . . . . . . . . . . . . . . . . 24
Installing UniCloud . . . . . . . . . . . . . . . . . . . . . . . . . . . . . . . . . . . . . . . . . . . . . . . . . . . . . 24
Unarchiving and Installing the Software . . . . . . . . . . . . . . . . . . . . . . . . . . . . . . . . . . . . . . . 24
Running unicloud-setup . . . . . . . . . . . . . . . . . . . . . . . . . . . . . . . . . . . . . . . . . . . . . . . 25
UniCloud Fundamentals 26
Command-line interface . . . . . . . . . . . . . . . . . . . . . . . . . . . . . . . . . . . . . . . . . . . . . . . . . . . 26
Software and Hardware profiles . . . . . . . . . . . . . . . . . . . . . . . . . . . . . . . . . . . . . . . . . . . . . . . 27
Hardware profiles . . . . . . . . . . . . . . . . . . . . . . . . . . . . . . . . . . . . . . . . . . . . . . . . . . . . 27
Software profiles . . . . . . . . . . . . . . . . . . . . . . . . . . . . . . . . . . . . . . . . . . . . . . . . . . . . 29
Hardware and software profile mapping . . . . . . . . . . . . . . . . . . . . . . . . . . . . . . . . . . . . . . . 30
Kits and Components . . . . . . . . . . . . . . . . . . . . . . . . . . . . . . . . . . . . . . . . . . . . . . . . . . . . 31
Overview . . . . . . . . . . . . . . . . . . . . . . . . . . . . . . . . . . . . . . . . . . . . . . . . . . . . . . . . 31
Display list of installed kits . . . . . . . . . . . . . . . . . . . . . . . . . . . . . . . . . . . . . . . . . . . . . . 31
Installing kits . . . . . . . . . . . . . . . . . . . . . . . . . . . . . . . . . . . . . . . . . . . . . . . . . . . . . . 31
Components . . . . . . . . . . . . . . . . . . . . . . . . . . . . . . . . . . . . . . . . . . . . . . . . . . . . . . . 31
Display all installed components . . . . . . . . . . . . . . . . . . . . . . . . . . . . . . . . . . . . . . . . . . . 32
Display list of enabled components . . . . . . . . . . . . . . . . . . . . . . . . . . . . . . . . . . . . . . . . . . 32
Enabling Components . . . . . . . . . . . . . . . . . . . . . . . . . . . . . . . . . . . . . . . . . . . . . . . . . 32
Removing Kits . . . . . . . . . . . . . . . . . . . . . . . . . . . . . . . . . . . . . . . . . . . . . . . . . . . . . 33
Cluster synchronization . . . . . . . . . . . . . . . . . . . . . . . . . . . . . . . . . . . . . . . . . . . . . . . . 33
Base Kit . . . . . . . . . . . . . . . . . . . . . . . . . . . . . . . . . . . . . . . . . . . . . . . . . . . . . . . . . 33
Users . . . . . . . . . . . . . . . . . . . . . . . . . . . . . . . . . . . . . . . . . . . . . . . . . . . . . . . . . . . . . . 35
Configuring UniCloud for provisioning 36
Networking Requirements . . . . . . . . . . . . . . . . . . . . . . . . . . . . . . . . . . . . . . . . . . . . . . . . . . 36
Adding the Provisioning NIC . . . . . . . . . . . . . . . . . . . . . . . . . . . . . . . . . . . . . . . . . . . . . . . . 36
Multiple Provisioning NICs . . . . . . . . . . . . . . . . . . . . . . . . . . . . . . . . . . . . . . . . . . . . . . 37
Enabling UniCloud Components for Provisioning . . . . . . . . . . . . . . . . . . . . . . . . . . . . . . . . . . . . . 37
Package-based Node Provisioning . . . . . . . . . . . . . . . . . . . . . . . . . . . . . . . . . . . . . . . . . . . . . . 38
Installing an OS Kit . . . . . . . . . . . . . . . . . . . . . . . . . . . . . . . . . . . . . . . . . . . . . . . . . . 38
Image-based Node Provisioning . . . . . . . . . . . . . . . . . . . . . . . . . . . . . . . . . . . . . . . . . . . . . . . 39
Setting up for image-based node provisioning . . . . . . . . . . . . . . . . . . . . . . . . . . . . . . . . . . . . 39
Clonezilla Customization . . . . . . . . . . . . . . . . . . . . . . . . . . . . . . . . . . . . . . . . . . . . . . . . 40
v 2

UniCloud 6.2.0 Installation and Administration Guide Contents
Operating System Provisioning Considerations . . . . . . . . . . . . . . . . . . . . . . . . . . . . . . . . . . . . . . 40
Anaconda/Kickstart . . . . . . . . . . . . . . . . . . . . . . . . . . . . . . . . . . . . . . . . . . . . . . . . . . 40
Special Configurations . . . . . . . . . . . . . . . . . . . . . . . . . . . . . . . . . . . . . . . . . . . . . . . . . . . . 41
Setting up NAT for UniCloud compute nodes . . . . . . . . . . . . . . . . . . . . . . . . . . . . . . . . . . . . 42
Enable IP forwarding on the UniCloud installer . . . . . . . . . . . . . . . . . . . . . . . . . . . . . . . . . . . 42
Enable NAT . . . . . . . . . . . . . . . . . . . . . . . . . . . . . . . . . . . . . . . . . . . . . . . . . . . . . . . 42
Managing Clusters 43
Adding Nodes . . . . . . . . . . . . . . . . . . . . . . . . . . . . . . . . . . . . . . . . . . . . . . . . . . . . . . . . . 43
Adding physical nodes or virtual machines by MAC address . . . . . . . . . . . . . . . . . . . . . . . . . . . . 43
Manually adding a node . . . . . . . . . . . . . . . . . . . . . . . . . . . . . . . . . . . . . . . . . . . . . . . . 43
Reboot and/or reinstalling nodes . . . . . . . . . . . . . . . . . . . . . . . . . . . . . . . . . . . . . . . . . . . . . . 43
Deleting nodes . . . . . . . . . . . . . . . . . . . . . . . . . . . . . . . . . . . . . . . . . . . . . . . . . . . . . . . . 44
Idling and activating nodes . . . . . . . . . . . . . . . . . . . . . . . . . . . . . . . . . . . . . . . . . . . . . . . . . 44
Idle/activate semantics . . . . . . . . . . . . . . . . . . . . . . . . . . . . . . . . . . . . . . . . . . . . . . . . . 45
Shutting down and Starting up Nodes . . . . . . . . . . . . . . . . . . . . . . . . . . . . . . . . . . . . . . . . . . . 45
Transferring nodes between software profiles . . . . . . . . . . . . . . . . . . . . . . . . . . . . . . . . . . . . . . . . 45
Migrating virtual nodes . . . . . . . . . . . . . . . . . . . . . . . . . . . . . . . . . . . . . . . . . . . . . . . . . . . 46
Resource tagging . . . . . . . . . . . . . . . . . . . . . . . . . . . . . . . . . . . . . . . . . . . . . . . . . . . . . . . 46
Tagging operations . . . . . . . . . . . . . . . . . . . . . . . . . . . . . . . . . . . . . . . . . . . . . . . . . . . 46
Querying resources by tag . . . . . . . . . . . . . . . . . . . . . . . . . . . . . . . . . . . . . . . . . . . . . . . 47
Advanced Topics 48
Managing Operating System Updates . . . . . . . . . . . . . . . . . . . . . . . . . . . . . . . . . . . . . . . . . . . 48
Red Hat Enterprise Linux . . . . . . . . . . . . . . . . . . . . . . . . . . . . . . . . . . . . . . . . . . . . . . . 48
CentOS . . . . . . . . . . . . . . . . . . . . . . . . . . . . . . . . . . . . . . . . . . . . . . . . . . . . . . . . . 48
Puppet & MCollective . . . . . . . . . . . . . . . . . . . . . . . . . . . . . . . . . . . . . . . . . . . . . . . . . . . . 49
UniCloud Puppet Integration & Extensibility . . . . . . . . . . . . . . . . . . . . . . . . . . . . . . . . . . . . . . . 50
Overview . . . . . . . . . . . . . . . . . . . . . . . . . . . . . . . . . . . . . . . . . . . . . . . . . . . . . . . . 50
Integrating external/third-party Puppet modules . . . . . . . . . . . . . . . . . . . . . . . . . . . . . . . . . . 50
Simple Puppet Recipes . . . . . . . . . . . . . . . . . . . . . . . . . . . . . . . . . . . . . . . . . . . . . . . . . 51
Dependencies on UniCloud . . . . . . . . . . . . . . . . . . . . . . . . . . . . . . . . . . . . . . . . . . . . . . 56
Resource Adapters 57
Resource adapter configuration profiles . . . . . . . . . . . . . . . . . . . . . . . . . . . . . . . . . . . . . . . . . . . 57
Creating a resource adapter configuration profile . . . . . . . . . . . . . . . . . . . . . . . . . . . . . . . . . . 57
Adding nodes using resource adapter configuration profile . . . . . . . . . . . . . . . . . . . . . . . . . . . . . 57
Importing an existing resource adapter configuration . . . . . . . . . . . . . . . . . . . . . . . . . . . . . . . . 57
v 3
UniCloud 6.2.0 Installation and Administration Guide Contents
List all resource adapter configuration profiles . . . . . . . . . . . . . . . . . . . . . . . . . . . . . . . . . . . . 57
Show specific resource adapter configuration profile . . . . . . . . . . . . . . . . . . . . . . . . . . . . . . . . . 58
Deleting resource adapter configuration profiles . . . . . . . . . . . . . . . . . . . . . . . . . . . . . . . . . . . 58
Amazon Web Services resource adapter . . . . . . . . . . . . . . . . . . . . . . . . . . . . . . . . . . . . . . . . . . 58
Overview . . . . . . . . . . . . . . . . . . . . . . . . . . . . . . . . . . . . . . . . . . . . . . . . . . . . . . . . 58
Installing the AWS resource adapter kit . . . . . . . . . . . . . . . . . . . . . . . . . . . . . . . . . . . . . . . 58
Creating AWS Hardware Profile . . . . . . . . . . . . . . . . . . . . . . . . . . . . . . . . . . . . . . . . . . . . 59
Updating AWS resource adapter configuration . . . . . . . . . . . . . . . . . . . . . . . . . . . . . . . . . . . . 60
AWS resource adapter configuration reference . . . . . . . . . . . . . . . . . . . . . . . . . . . . . . . . . . . . 61
AMI Requirements . . . . . . . . . . . . . . . . . . . . . . . . . . . . . . . . . . . . . . . . . . . . . . . . . . . 63
Security Group Requirements . . . . . . . . . . . . . . . . . . . . . . . . . . . . . . . . . . . . . . . . . . . . . 63
DNS and AWS . . . . . . . . . . . . . . . . . . . . . . . . . . . . . . . . . . . . . . . . . . . . . . . . . . . . . 63
AWS resource adapter usage . . . . . . . . . . . . . . . . . . . . . . . . . . . . . . . . . . . . . . . . . . . . . . 65
Best Practices . . . . . . . . . . . . . . . . . . . . . . . . . . . . . . . . . . . . . . . . . . . . . . . . . . . . . . 65
EC2 Spot Instance support . . . . . . . . . . . . . . . . . . . . . . . . . . . . . . . . . . . . . . . . . . . . . . 67
Advanced Topics . . . . . . . . . . . . . . . . . . . . . . . . . . . . . . . . . . . . . . . . . . . . . . . . . . . . 69
Identity & Access Mangagement (IAM) Policy Requirements . . . . . . . . . . . . . . . . . . . . . . . . . . . 71
Troubleshooting . . . . . . . . . . . . . . . . . . . . . . . . . . . . . . . . . . . . . . . . . . . . . . . . . . . . . 73
Google Compute Engine resource adapter . . . . . . . . . . . . . . . . . . . . . . . . . . . . . . . . . . . . . . . . . 74
Overview . . . . . . . . . . . . . . . . . . . . . . . . . . . . . . . . . . . . . . . . . . . . . . . . . . . . . . . . 74
Installing the Google Compute Engine resource adapter kit . . . . . . . . . . . . . . . . . . . . . . . . . . . . 74
Google Compute Engine resource adapter configuration reference . . . . . . . . . . . . . . . . . . . . . . . . . 75
Creating Google Compute Engine hardware profile . . . . . . . . . . . . . . . . . . . . . . . . . . . . . . . . . 75
Google Compute Engine firewall rules . . . . . . . . . . . . . . . . . . . . . . . . . . . . . . . . . . . . . . . . 75
Google Compute Engine resource adapter usage . . . . . . . . . . . . . . . . . . . . . . . . . . . . . . . . . . . 76
Advanced Topics . . . . . . . . . . . . . . . . . . . . . . . . . . . . . . . . . . . . . . . . . . . . . . . . . . . . 76
Microsoft Azure resource adapter kit . . . . . . . . . . . . . . . . . . . . . . . . . . . . . . . . . . . . . . . . . . . . 78
Overview . . . . . . . . . . . . . . . . . . . . . . . . . . . . . . . . . . . . . . . . . . . . . . . . . . . . . . . . 78
Setting up Azure for UniCloud . . . . . . . . . . . . . . . . . . . . . . . . . . . . . . . . . . . . . . . . . . . . 78
Installing the Azure resource adapter . . . . . . . . . . . . . . . . . . . . . . . . . . . . . . . . . . . . . . . . . 79
Azure resource adapter configuration . . . . . . . . . . . . . . . . . . . . . . . . . . . . . . . . . . . . . . . . . 80
Creating Azure hardware profile . . . . . . . . . . . . . . . . . . . . . . . . . . . . . . . . . . . . . . . . . . . 81
Azure resource tagging . . . . . . . . . . . . . . . . . . . . . . . . . . . . . . . . . . . . . . . . . . . . . . . . . 81
Azure resource adapter configuration reference . . . . . . . . . . . . . . . . . . . . . . . . . . . . . . . . . . . 81
Azure VM image requirements . . . . . . . . . . . . . . . . . . . . . . . . . . . . . . . . . . . . . . . . . . . . 83
Azure security group requirements . . . . . . . . . . . . . . . . . . . . . . . . . . . . . . . . . . . . . . . . . . 83
v 4
UniCloud 6.2.0 Installation and Administration Guide Contents
DNS and Azure . . . . . . . . . . . . . . . . . . . . . . . . . . . . . . . . . . . . . . . . . . . . . . . . . . . . . 83
Azure resource adapter usage . . . . . . . . . . . . . . . . . . . . . . . . . . . . . . . . . . . . . . . . . . . . . 84
Best Practices . . . . . . . . . . . . . . . . . . . . . . . . . . . . . . . . . . . . . . . . . . . . . . . . . . . . . . 85
Advanced Topics . . . . . . . . . . . . . . . . . . . . . . . . . . . . . . . . . . . . . . . . . . . . . . . . . . . . 85
Troubleshooting . . . . . . . . . . . . . . . . . . . . . . . . . . . . . . . . . . . . . . . . . . . . . . . . . . . . . 85
VMware vSphere® 5 Resource Adapter Kit . . . . . . . . . . . . . . . . . . . . . . . . . . . . . . . . . . . . . . . . 86
Overview . . . . . . . . . . . . . . . . . . . . . . . . . . . . . . . . . . . . . . . . . . . . . . . . . . . . . . . . 86
Installing the VMware vSphere® Resource Adapter Kit . . . . . . . . . . . . . . . . . . . . . . . . . . . . . . 86
Configuration . . . . . . . . . . . . . . . . . . . . . . . . . . . . . . . . . . . . . . . . . . . . . . . . . . . . . . 86
VMware vSphere User Permissions . . . . . . . . . . . . . . . . . . . . . . . . . . . . . . . . . . . . . . . . . . 87
Creating VMware vSphere® Virtual Machines . . . . . . . . . . . . . . . . . . . . . . . . . . . . . . . . . . . . 88
Advanced Topics . . . . . . . . . . . . . . . . . . . . . . . . . . . . . . . . . . . . . . . . . . . . . . . . . . . . 89
VMware vSphere® Troubleshooting . . . . . . . . . . . . . . . . . . . . . . . . . . . . . . . . . . . . . . . . . . 90
Grid Engine and UniCloud Integration 91
Overview . . . . . . . . . . . . . . . . . . . . . . . . . . . . . . . . . . . . . . . . . . . . . . . . . . . . . . . . . . . 91
Standalone Grid Engine cluster . . . . . . . . . . . . . . . . . . . . . . . . . . . . . . . . . . . . . . . . . . . . . . . 91
UniCloud integration with existing Grid Engine cluster . . . . . . . . . . . . . . . . . . . . . . . . . . . . . . . . . 91
Prerequisites . . . . . . . . . . . . . . . . . . . . . . . . . . . . . . . . . . . . . . . . . . . . . . . . . . . . . . 91
Configuration steps for (existing) Grid Engine cluster . . . . . . . . . . . . . . . . . . . . . . . . . . . . . . . 92
Configuration steps for UniCloud installer . . . . . . . . . . . . . . . . . . . . . . . . . . . . . . . . . . . . . . 93
Grid Engine cluster configuration . . . . . . . . . . . . . . . . . . . . . . . . . . . . . . . . . . . . . . . . . . . . . . 95
Command reference . . . . . . . . . . . . . . . . . . . . . . . . . . . . . . . . . . . . . . . . . . . . . . . . . . 95
Advanced Topics . . . . . . . . . . . . . . . . . . . . . . . . . . . . . . . . . . . . . . . . . . . . . . . . . . . . . . . 98
How do I automatically add execd hosts to a Grid Engine hostgroup? . . . . . . . . . . . . . . . . . . . . . . 98
Adding UniCloud-managed hosts to a specific queue . . . . . . . . . . . . . . . . . . . . . . . . . . . . . . . . 98
How do I set the slot count on execd hosts? . . . . . . . . . . . . . . . . . . . . . . . . . . . . . . . . . . . . . 98
Managing Grid Engine submit hosts . . . . . . . . . . . . . . . . . . . . . . . . . . . . . . . . . . . . . . . . . 98
Grid Engine Webservice . . . . . . . . . . . . . . . . . . . . . . . . . . . . . . . . . . . . . . . . . . . . . . . . 99
Grid Engine installation customizations . . . . . . . . . . . . . . . . . . . . . . . . . . . . . . . . . . . . . . . 99
Grid Engine Puppet module reference . . . . . . . . . . . . . . . . . . . . . . . . . . . . . . . . . . . . . . . . 100
Upgrading Univa Grid Engine . . . . . . . . . . . . . . . . . . . . . . . . . . . . . . . . . . . . . . . . . . . . . . . . 101
v 5
UniCloud 6.2.0 Installation and Administration Guide Contents
Other Kits 101
Simple Policy Engine Kit . . . . . . . . . . . . . . . . . . . . . . . . . . . . . . . . . . . . . . . . . . . . . . . . . . 101
Overview . . . . . . . . . . . . . . . . . . . . . . . . . . . . . . . . . . . . . . . . . . . . . . . . . . . . . . . . 101
Installing the Simple Policy Engine Kit . . . . . . . . . . . . . . . . . . . . . . . . . . . . . . . . . . . . . . . 101
Managing the Simple Policy Engine . . . . . . . . . . . . . . . . . . . . . . . . . . . . . . . . . . . . . . . . . 102
Policy Rule Types . . . . . . . . . . . . . . . . . . . . . . . . . . . . . . . . . . . . . . . . . . . . . . . . . . . 102
Cloud Bursting . . . . . . . . . . . . . . . . . . . . . . . . . . . . . . . . . . . . . . . . . . . . . . . . . . . . . 102
Troubleshooting . . . . . . . . . . . . . . . . . . . . . . . . . . . . . . . . . . . . . . . . . . . . . . . . . . . . . 105
SNMP Kit . . . . . . . . . . . . . . . . . . . . . . . . . . . . . . . . . . . . . . . . . . . . . . . . . . . . . . . . . . . 106
Overview . . . . . . . . . . . . . . . . . . . . . . . . . . . . . . . . . . . . . . . . . . . . . . . . . . . . . . . . 106
Installing the SNMP Kit . . . . . . . . . . . . . . . . . . . . . . . . . . . . . . . . . . . . . . . . . . . . . . . . 106
Customizing /etc/snmp/snmpd.conf . . . . . . . . . . . . . . . . . . . . . . . . . . . . . . . . . . . . . . . . . 106
Troubleshooting 107
Overview . . . . . . . . . . . . . . . . . . . . . . . . . . . . . . . . . . . . . . . . . . . . . . . . . . . . . . . . . . . 107
Log file formatting and convention . . . . . . . . . . . . . . . . . . . . . . . . . . . . . . . . . . . . . . . . . . . . . 107
Installation and setup logging . . . . . . . . . . . . . . . . . . . . . . . . . . . . . . . . . . . . . . . . . . . . . . . . 107
Logging Configuration . . . . . . . . . . . . . . . . . . . . . . . . . . . . . . . . . . . . . . . . . . . . . . . . . . . . 108
Adjusting default log level . . . . . . . . . . . . . . . . . . . . . . . . . . . . . . . . . . . . . . . . . . . . . . . . . . 108
Changing from “DEBUG” (default) to “TRACE” . . . . . . . . . . . . . . . . . . . . . . . . . . . . . . . . . . 108
Comprehensive List of Log Files . . . . . . . . . . . . . . . . . . . . . . . . . . . . . . . . . . . . . . . . . . . 108
Troubleshooting failed UniCloud installation . . . . . . . . . . . . . . . . . . . . . . . . . . . . . . . . . . . . . . . 110
Troubleshooting failed compute node provisioning . . . . . . . . . . . . . . . . . . . . . . . . . . . . . . . . . . . . 110
Appendix A: UniCloud End-User License Agreement (EULA) 112
Appendix B: Univa-supplied Hardware and Software Profile Templates 116
Appendix C: Advanced UniCloud VPN Configuration 117
Appendix D: Deprecations and obsoletions 118
Appendix E: Uninstalling UniCloud 119
v 6
UniCloud 6.2.0 Installation and Administration Guide About This Guide
About This Guide
This guide contains information for IT staff and end-users who will be installing, configuring, and managing UniCloud 6.2.Information about specific software kits is provided in the associated kit guides.
For detailed information on any UniCloud command, consult the standard manual pages using man <command>. Manualpages are automatically installed as part of the UniCloud software installation.
For those eager to get started, consult the “Quickstart” section for a quick run-through a sample installation.
© 2015-2017 Univa Corporation. All rights reserved. This manual or parts thereof may not be reproduced in any form ormedia without the express written consent of Univa Corporation.
Trademarks
All trademarks mentioned within this document are the property of their respective owners.
v 7
UniCloud 6.2.0 Installation and Administration Guide UniCloud Quickstart
UniCloud Quickstart
Manual quickstart installation
Overview
This section describes a sample installation on UniCloud in three different scenarios- on-premise, hybrid (on-premise +cloud-based using Amazon EC2), and cloud-based (also using Amazon EC2).Note: if installing on other cloud providers, such as Google Compute Engine or Microsoft Azure, the basic installationprocedure outlined below can be followed, substituting the documented EC2-specific configuration for the appropriate cloudprovider resource adapter.It is strongly recommended to read this manual prior to performing the steps in this section.Commands listed in this “Quickstart” section are intended to be run as the root user on the UniCloud installer node.
Prerequisites
General
• CPU/RAM requirementsThe UniCloud installer requires a minimum of 8GB RAM and a modern 64-bit CPU. A single-core is sufficient. Addi-tional RAM and/or cores will offer increased UniCloud throughput and performance.For Amazon EC2-based installation, the instance type m4.large (or equivalent) is the suggested minimum.
• Disk space requirementsNot including the OS installation media (required only for on-premise compute node provisioning), UniCloud requires<300MB of disk space.For installations supporting on-premise compute node provisioning and locally hosted OS installation media, the diskrequirements increase to <8GB.
• Supported operating systemRed Hat Enterprise Linux (RHEL) or CentOS 6.x or 7.x.RHEL/CentOS 7.x is recommendedUniCloud installation has been validated tested on “official” RHEL and CentOS AMIs on Amazon EC2.If hosting the UniCloud installer on Amazon Web Services (AWS), refer to UniCloud AWS Identity & Access Manage-ment (IAM) role policy requirements.
• Disable SELinuxAt the present time, UniCloud requires SELinux to be in permissive mode or disabled completely.
• Synchronize system clockUniCloud depends on an accurate system clock during installation when SSL/TLS certificates for Puppet, HTTPs, etc.are created. Failure to sync the system clock may result in unexpected behaviour.
yum -y install ntpdate
Sync using a well-known time server. For example:ntpdate 0.centos.pool.ntp.org
• (recommended) Refresh YUM package cacheIt is recommended to run yum makecache fast prior to installing UniCloud to ensure YUM package repositories arevalidated.
v 8
UniCloud 6.2.0 Installation and Administration Guide UniCloud Quickstart
Installation specific requirements
• On-premise installation
– Dedicated server or virtual machine for UniCloud installer node* 1 (or more) servers or virtual machines for UniCloud compute node(s)* Compute nodes must be connected to UniCloud installer node through a private network
• Hybrid (on-premise + cloud) installation
– (optional) VPN connection from on-premise to Amazon EC2Although not strictly necessary, it is recommended to have an externally managed, persistent VPN connectionbetween on-premise network and Amazon.
• Amazon EC2-based installation
– Amazon EC2 authorization and credentialsAmazon EC2 credentials are required when configuring the AWS resource adapter. These are used to allowUniCloud to manage AWS resources.The credentials used to configure the AWS resource adapter must be authorized to create/delete AWS resources(minimally Amazon EC2 and Amazon VPC).
– (optional) Amazon Virtual Private Cloud (VPC)Using an Amazon VPC allows the UniCloud installation to use an isolated section of the AWS cloud. Advancedfeatures, such as the use of externally managed DNS server, require the use of an Amazon VPC.
– (optional) Enable ‘optional’ repository on RHELWhen installing on Red Hat Enterprise Linux 6 or 7 (RHEL), it is necessary to enable the ‘optional’ repository tosatisfy package dependencies.* RHEL 6
yum-config-manager --enable \rhui-REGION-rhel-server-releases -optional
* RHEL 7
yum-config-manager --enable rhui-REGION-rhel-server-optional
v 9
UniCloud 6.2.0 Installation and Administration Guide UniCloud Quickstart
Quickstart Installation
1. Extract UniCloud distribution tarballCopy UniCloud distribution to dedicated UniCloud server/instance and extract the UniCloud distribution tarball intothe current directory:
tar jxf unicloud*tar.bz2
It may be necessary to install bzip2 to extract the tarball:
yum -y install bzip2
2. Install UniCloudNote: if attempting to install UniCloud on a server where UniCloud (any version) has been previously installed, pleaserefer to Appendix E: Uninstalling UniCloud before proceeding! It is strongly recommended to install UniCloud on afresh installation of RHEL/CentOS.The base installation of UniCloud is performed in two steps. The first step performed by the install-unicloud.shscript creates the installation directory (/opt/unicloud; the installation directory currently cannot be changed. Thiswill be addressed in a future UniCloud release)
cd unicloud* && ./install-unicloud.sh
The second step of UniCloud installation is the set up and configuration. This includes initializing the database,installation of default kit(s), initializing Puppet, etc.Assuming install-unicloud.sh ran without error, next run unicloud-setup.sh as follow:
/opt/unicloud/bin/unicloud-setup --defaults
Note: If the default network port settings used by UniCloud conflict with other service(s) in your installation environ-ment, run unicloud-setup without the --defaults option and answer the prompts.Hint: if the installation fails for any reason, it can be restarted by specifying the --force option as follows:
/opt/unicloud/bin/unicloud-setup <options> --force
This will cause the installer to skip all checks and (hopefully) proceed without error. Typically the main reason whythe setup might fail is due to network connectivity problems attempting to connect to the required YUM packagerepositories.At this point, the UniCloud installation is complete and ready to be configured.Source UniCloud environment before proceeding:
source /opt/unicloud/etc/unicloud.sh
3. (optional) Enable local DNS serverOn-premise/hybrid/custom cloud-based installations onlyDNS services are provided on UniCloud using the Dnsmasq DNS server.Enable the built-in Dnsmasq DNS server to resolve host names of UniCloud managed compute nodes.
enable-component -p dns/opt/puppetlabs/bin/puppet agent --verbose --onetime \
--no-daemonize
While not required, it is also possible to enable local DNS name resolution to provide support for custom DNS domainnames when UniCloud is hosted on EC2.
v 10
UniCloud 6.2.0 Installation and Administration Guide UniCloud Quickstart
4. (optional) Enable DHCP/TFTP server for PXE booting compute nodesRequired only for provisioning on-premise compute nodesDHCP/TFTP is required to PXE boot on-premise compute nodes to use the Anaconda/Kickstart node provisioningmechanism.
enable-component -p dhcpd/opt/puppetlabs/bin/puppet agent --verbose --onetime \
--no-daemonize
5. (optional) Add provisioning network interfaceOn-premise and hybrid installations onlyIf enabling support for provisioning on-premise compute nodes, it is also necessary to add a provisioning networkinterface. Compute nodes will be provisioned using this interface to isolate traffic from the ‘public’ LAN.The argument to the --nic option is the network interface connected to the provsioning network. The provisioningnetwork must be configured prior to adding nodes.
add-nic --nic=eth1
Use the update-network command to change provisioning network related settings.
6. (optional) Install operating system mediaRequired only for provisioning on-premise compute nodesUniCloud requires access to operating system media to install on-premise compute nodes.For example, to install CentOS mirror URL:
install-os-kit --mirror --media http://<url to CentOS mirror>/opt/puppetlabs/bin/puppet agent --verbose --onetime \
--no-daemonize
This will instruct UniCloud to proxy HTTP access to the provided CentOS mirror from UniCloud-managed computenodes on the provisioning network without the need to enable NAT or have the provisioning network routed to theInternet.It is often desirable to create a local CentOS repository mirror for bandwidth and performance issues.
7. Create software profile for compute nodesThis software profile will be used to represent compute nodes in the UniCloud/Grid Engine cluster. The software profilename can be arbitrary.For on-premise compute nodes:
create-software-profile --name execd
For cloud-based compute nodes:
create-software-profile --name execd --no-os-media-required
The option --no-os-media-required allows creation of a software profile without an association to (local) installationmedia. Since cloud-based instances already have an operating system installed, it is not necessary to define theinstallation media.
8. Create hardware profile for compute nodesThis hardware profile will used to represent compute nodes in the UniCloud/Grid Engine cluster. The hardware profilename is arbitrary.For on-premise nodes and cloud-based nodes in a hybrid installation:
create-hardware-profile --name execd --defaults
v 11
UniCloud 6.2.0 Installation and Administration Guide UniCloud Quickstart
The --defaults option instructs UniCloud to use the provisioning network when adding nodes to this hardware profile.For cloud-based installations:create-hardware-profile –name execd
9. Map software and hardware profilesProfiles must be mapped in order for UniCloud to identify a valid compute node provisioning configuration.
set-profile-mapping --software-profile execd --hardware-profile \execd
10. (optional) Configure Anaconda/Kickstart file templateOn-premise compute nodes onlyPrior to adding compute nodes, it is recommended to configure the root password in the Kickstart file template($TORTUGA_ROOT/config/kickstart.tmpl).This is to potentially allow connecting to compute node(s) that failed to provision successfully using SSH. The rootpassword setting is found under rootpw in the Anaconda Kickstart template file.Consult Kickstart reference documentation for additional information.
11. (optional) Install AWS resource adapterHybrid and EC2-based installations onlyIf using an alternate cloud provider, substitute the appropriate resource adapter kit here, along with resource adapterconfiguration.Installing the AWS resource adapter allows provisioning of compute nodes on Amazon EC2.
install-kit --i-accept-the-eula kit-awsadapter -*.tar.bz2enable-component -p awsadapter -6.2.0-0 management -6.2/opt/puppetlabs/bin/puppet agent --verbose --onetime \
--no-daemonize
1. Configure AWS resource adapterThe adapter-mgmt command is used to manage resource adapter configuration profiles.
adapter-mgmt create --resource -adapter aws \--profile default \--setting awsAccessKey=<AWS access key> \--setting awsSecretKey=<AWS secret key> \--setting keypair=<AWS keypair name> \--setting ami=<ami-XXXXXXXX > \--setting instancetype=<AWS instance type> \--setting user_data_script_template=<bootstrap script \
template> \--setting securitygroup=<AWS security group>
Use one of the following values for user_data_script_template:• bootstrap.tmpl for RHEL/CentOS 6 & 7 instances• bootstrap.python3.tmpl for Fedora 23/24/25• bootstrap.amazonlinux.tmpl for recent Amazon Linux versions• bootstrap.debian.tmpl for recent Debian/Ubuntu versions• bootstrap.suse.tmpl for SUSE Linux/openSUSE versions
For proof-of-concept installations and environments without an existing VPN connection to AWS, enable the built-inOpenVPN point-to-point VPN as follows:
v 12
UniCloud 6.2.0 Installation and Administration Guide UniCloud Quickstart
adapter-mgmt update --resource-adapter aws --profile default \--setting vpn=true
adapter-mgmt update can be used to manage resource adapter configuration profile settings.
1. Create hardware profile to represent EC2 nodesThe following commands create a hardware profile named execd-aws.
create-hardware -profile --name execd-aws --defaults
Configure newly created hardware profile for use with Amazon EC2:
update-hardware -profile --name execd-aws \--resource -adapter aws --location remote
Note: if installing in a hybrid environment using an externally managed VPN, set argument to --location toremote-vpn, instead of remote. This will cause the AWS resource adapter to use IP addresses from the AmazonVPC subnet.
2. Map hardware and software profilesBecause the software profile “execd” was previously created and can be shared between local nodes/virtual ma-chines and EC2-based instances, it is not necessary to create another software profile.Map EC2 hardware profile to existing “execd” software profile:
set-profile-mapping --software -profile execd --hardware-profile \execd-aws
12. Install Univa Grid EngineNow that the UniCloud base installation is complete, it is necessary to install Univa Grid Engine.In this example, the Grid Engine qmaster will be run on the UniCloud installer node.
1. Install UGE kit
install-kit kit-uge*.tar.bz2
2. Create default Grid Engine clusterThe command uge-cluster is used to configure UGE clusters under UniCloud. In this example, the UGEcell/cluster is named “default”.
uge-cluster create defaultuge-cluster update default \
--add-qmaster-swprofile Installeruge-cluster update default \
--var \sge_cell_netpath="%(qmaster)s:%(sge_root)s/%(cell_name)s"
uge-cluster update default --var manage_nfs=false
3. Enable Grid Engine qmaster component on UniCloud installer.
enable-component -p qmaster/opt/puppetlabs/bin/puppet agent --onetime --verbose \
--no-daemonize
4. Validate installation of qmasterIt is recommended to validate the installation of the qmaster.Source the UGE environment
. /opt/uge-8.5.3/default/common/settings.sh
v 13
UniCloud 6.2.0 Installation and Administration Guide UniCloud Quickstart
Hint: Use the UGE qhost command to display list of hosts known to the UGE cluster.5. NFS export the default Grid Engine spool directory
Install NFS support, if necessary:
yum -y install nfs-utils
Ensure NFS server service is running:RHEL/CentOS 6.x:
service nfs restart
or RHEL/CentOS 7.x:
systemctl restart nfs
Add the following entry to /etc/exports:
/opt/uge-8.5.3 *(rw,async)
Finally, export the filesystem:
exportfs -a
Hint: if running on the UniCloud installer on Amazon EC2, use security group to allow and/or restrict access tothe UniCloud installer, as necessary. This document assumes the security group is configured to allow all trafficbetween the UniCloud installer and compute instances.
6. Enable execd component on software profile(s)Enabling the execd component will make nodes in the “execd” software profile automatically part of the UGEcluster.
enable-component --software -profile execd execd
7. Update UGE cluster configuration
uge-cluster update default --add-execd-swprofile execd
13. Adding compute nodesTo add nodes to the on-premise UniCloud/UGE cluster or physical nodes in hybrid installation use the add-nodescommand as follows:
add-nodes --count 3 \--software-profile execd --hardware-profile execd
Add nodes on EC2-based UniCloud installation:
add-nodes --count 3 \--software-profile execd --hardware-profile execd-aws
Check status of newly added node(s) using the get-node-status command.Once the node has reached Installed state, it is available to be used.Nodes will be created momentarily and automatically added to the UGE cluster. Use qhost to display UGE clusterhost list.UniCloud automatically configures key-based authentication for managed nodes using the root user SSH credentials.
v 14

UniCloud 6.2.0 Installation and Administration Guide UniCloud Quickstart
UniCloud/Grid Engine Amazon EC2 AMI
Overview
Univa provides a Amazon Machine Image (AMI) that has UniCloud and Univa Grid Engine pre-installed and pre-configured.Starting UniCloud via the AMI is the easiest way to create a cluster completely in Amazon EC2 with a few simple clicks andconfiguration.
Prerequisites
You must have access to the Univa UniCloud AMI. If you do not have access please contact Univa Support [email protected] your account representative and provide them your Amazon Account number.
You need to understand how to launch Amazon instances in Amazon EC2 from the Amazon console or the command-line.
We highly recommend that you create (or use) an existing Amazon VPC to launch your UniCloud cluster. If you are notcomfortable with Amazon VPC please read the following or ask your IT/network administrator for assistance.
Creating the Cluster
1. From the Amazon EC2 console launch an instance using the AMI provided by Univa. Choose the following to ensurereliable operation:
• at least m4.large instance type• choose your VPC for the network type• Ensure the subnet is the correct one for your VPC• (optional) choose the IAM role• Select a security group in the VPC• Select the ssh key pair to use for this instance
Then review your selection and launch the instance.
2. Once the instance has launched and completed its checks you should be able to ssh into the instance using the keypairyou selected during launch, for example:
ssh -i "<your keypair.pem>" \centos@ec2 -XX-XXX-XX-XXX.compute -1.amazonaws.com
Note: you must login as centos and use sudo to change users.
3. Switch to root using sudo -i to run all UniCloud commands.4. run get-node-status from the command line, for example:
[root@ip -10-0-0-153 ~]# get-node-statusInstaller (OS: centos -7.3-x86_64) \
-------------------------------------------
ip-10-0-0-153.ec2.internalHardware Profile: InstallerBoot: DiskStatus: Installed/Active, Locked: HardLocked
[root@ip -10-0-0-153 ~]#
v 15
UniCloud 6.2.0 Installation and Administration Guide UniCloud Quickstart
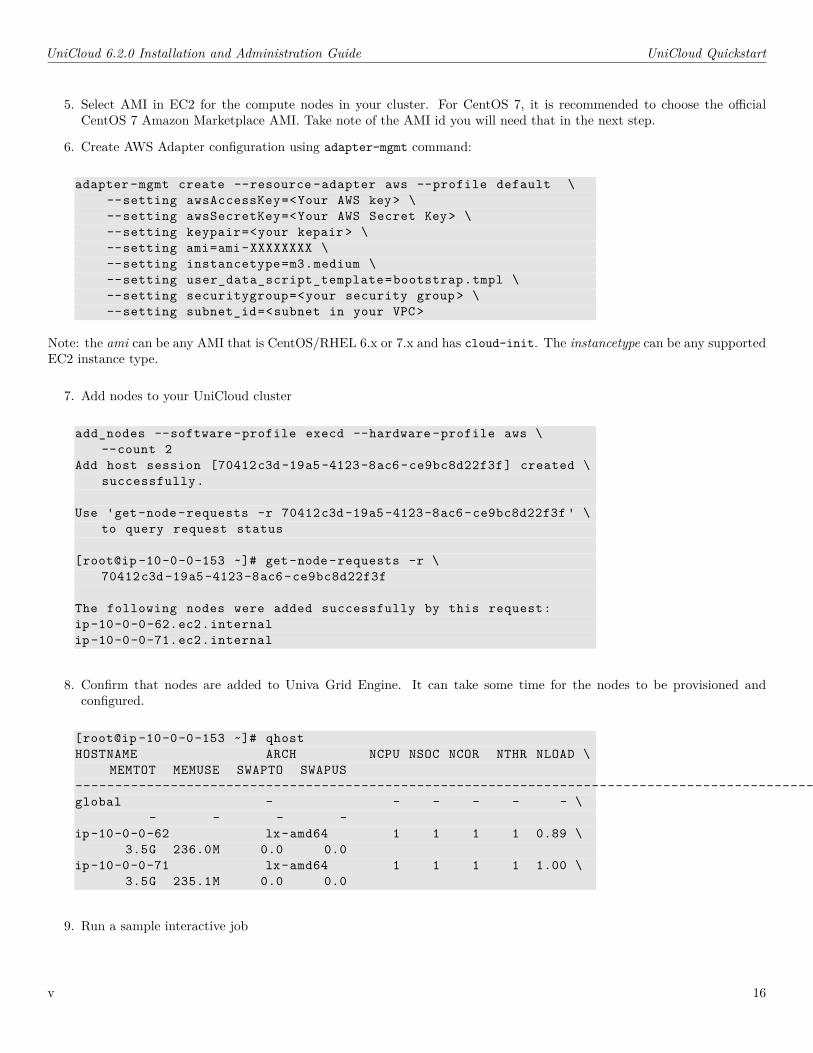
5. Select AMI in EC2 for the compute nodes in your cluster. For CentOS 7, it is recommended to choose the officialCentOS 7 Amazon Marketplace AMI. Take note of the AMI id you will need that in the next step.
6. Create AWS Adapter configuration using adapter-mgmt command:
adapter-mgmt create --resource -adapter aws --profile default \--setting awsAccessKey=<Your AWS key> \--setting awsSecretKey=<Your AWS Secret Key> \--setting keypair=<your kepair> \--setting ami=ami-XXXXXXXX \--setting instancetype=m3.medium \--setting user_data_script_template=bootstrap.tmpl \--setting securitygroup=<your security group> \--setting subnet_id=<subnet in your VPC>
Note: the ami can be any AMI that is CentOS/RHEL 6.x or 7.x and has cloud-init. The instancetype can be any supportedEC2 instance type.
7. Add nodes to your UniCloud cluster
add_nodes --software-profile execd --hardware -profile aws \--count 2
Add host session [70412c3d-19a5-4123-8ac6-ce9bc8d22f3f] created \successfully.
Use 'get-node-requests -r 70412c3d-19a5-4123-8ac6-ce9bc8d22f3f ' \to query request status
[root@ip -10-0-0-153 ~]# get-node-requests -r \70412c3d-19a5-4123-8ac6-ce9bc8d22f3f
The following nodes were added successfully by this request:ip-10-0-0-62.ec2.internalip-10-0-0-71.ec2.internal
8. Confirm that nodes are added to Univa Grid Engine. It can take some time for the nodes to be provisioned andconfigured.
[root@ip -10-0-0-153 ~]# qhostHOSTNAME ARCH NCPU NSOC NCOR NTHR NLOAD \
MEMTOT MEMUSE SWAPTO SWAPUS----------------------------------------------------------------------------------------------global - - - - - - \
- - - -ip-10-0-0-62 lx-amd64 1 1 1 1 0.89 \
3.5G 236.0M 0.0 0.0ip-10-0-0-71 lx-amd64 1 1 1 1 1.00 \
3.5G 235.1M 0.0 0.0
9. Run a sample interactive job
v 16
UniCloud 6.2.0 Installation and Administration Guide UniCloud Quickstart
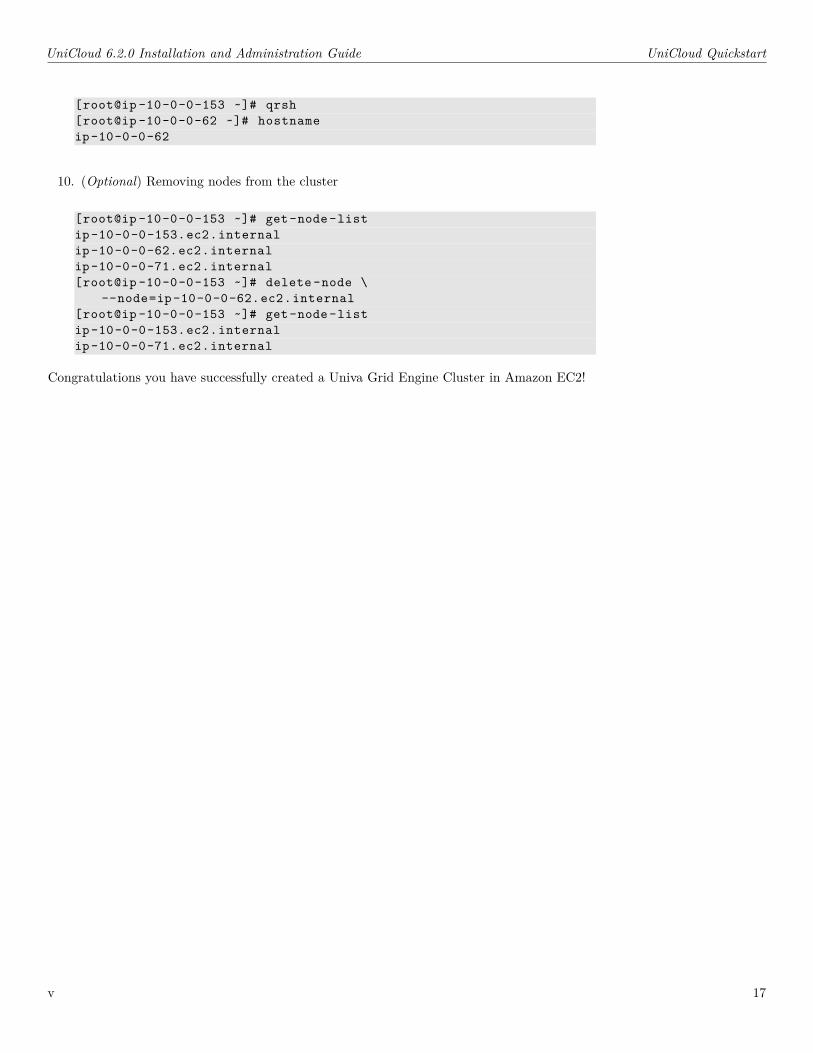
[root@ip -10-0-0-153 ~]# qrsh[root@ip -10-0-0-62 ~]# hostnameip-10-0-0-62
10. (Optional) Removing nodes from the cluster
[root@ip -10-0-0-153 ~]# get-node-listip-10-0-0-153.ec2.internalip-10-0-0-62.ec2.internalip-10-0-0-71.ec2.internal[root@ip -10-0-0-153 ~]# delete-node \
--node=ip-10-0-0-62.ec2.internal[root@ip -10-0-0-153 ~]# get-node-listip-10-0-0-153.ec2.internalip-10-0-0-71.ec2.internal
Congratulations you have successfully created a Univa Grid Engine Cluster in Amazon EC2!
v 17
UniCloud 6.2.0 Installation and Administration Guide About UniCloud
About UniCloud
In today’s datacenter, it is no longer sufficient to simply install and configure systems, then hand them over to users.Maintenance and upgrades require frequent adjustments, hardware advances arrive faster than ever, and IT staff are expectedto provide users with the “latest and greatest” technologies without interrupting their work.
In recent years, the adoption of virtualization and mainstream arrival of cloud computing have improved datacenter efficientlyexponentially. Multiple users can now simultaneously access a system in a truly secure manner. Previously unused capacitycan be recaptured, and costs are reduced as datacenter capacity can more closely align with actual need.
Virtualization allows a datacenter to evolve into a private cloud, where users make requests for computing resources, thedatacenter fulfills those requests, and jobs get done without planning around downtime and interruptions.
Companies with limited resources have access to options which limit the need for maintaining physical datacenters. Variouspublic cloud services offer a virtually unlimited resource pool of on-demand computing and storage resources, with pay-as-you-go and subscription-based offerings.
The most flexible datacenter combines these options, providing a private cloud and utilizing resources from public clouds forextra capacity on-demand. This hybrid cloud approach offers a kind potential which is only beginning to be realized.
UniCloud is a cloud orchestration and management system which integrates with public and private clouds, automating theallocation of resources and their software configurations. Unlike other solutions, UniCloud offers a single, consistent interfaceregardless of the underlying API or control panel.
Leveraging the power and flexibility of the open-source Puppet configuration management tool, UniCloud brings the full powerof Puppet to handle complex software configuration management. Nodes can be reconfigured on the fly or pre-configuredbefore installation, all on-demand.
Software “kits” add the ability for UniCloud to automate almost any kind of decision based upon any criteria. UniCloud canreconfigure datacenters automatically, making adjustments based on customized metrics, cost, or performance. UniCloudcan optimize resources as and when needed.
UniCloud also fulfills the promise of hybrid clouds by offering usable cloud bursting. Unlike manual configurations whereusers must consider where nodes are physically located and how to access them, UniCloud sets up a secure VPN so users seeeverything as part of a single datacenter. There is no need to know about different APIs or access mechanisms.
On top of what it can already do, UniCloud is also an extensible platform. It supports new capabilities which are specific toan organization’s proprietary needs. Since UniCloud is written in Python and uses Puppet, it is easy to create recipes andscripts to handle unique datacenter requirements.
Here are just a few examples of what UniCloud can do. Note that some of these examples require the installation of additional,optional software kits from Univa:
• Automatically install an operating system, then install and configure application software on a physical computer overthe network (OS and application software stack provisioning).
• Create and manage virtual machines on a local hypervisor in a datacenter.• Request and manage nodes hosted in a public cloud service such as Amazon EC2 or a local cloud, such as OpenStack.• Integrate with application software and reconfigure systems based on cost, current use, or any kind of end-user cus-
tomized metric.• Enable “cloud bursting” to get users’ the critical resources needed to complete a time-sensitive project on-time and
on-budget, especially when the time and cost associated with traditional methods of purchasing and installing newhardware are impractical.
v 18
UniCloud 6.2.0 Installation and Administration Guide About UniCloud
Supporting the Datacenter Lifecycle
UniCloud assists in performing common tasks supporting the lifecycle of a datacenter server.
UniCloud can provision physical hardware with an operating system and software application stack.
UniCloud abstracts complex virtualization APIs to manage virtual machines using a single, consistent interface.
UniCloud helps migrate virtual machines off of hardware which must be taken offline for upgrades, maintenance, or decom-missioning, leaving users unaffected.
UniCloud performs reallocation of “compute” nodes from one task to another.
UniCloud obtains resources from clouds to cloud burst, virtually integrating public and private clouds into a single, unified,secure datacenter.
v 19
UniCloud 6.2.0 Installation and Administration Guide About UniCloud
Understanding UniCloud Architecture
UniCloud treats datacenters, virtual machines, and cloud computing resources or instances as a cluster. Unlike the traditionaluse of this term, however, UniCloud clusters can be subdivided to cater to specific users, tasks, or functions.
Clusters in UniCloud are collections of nodes. A node is simply a representation of a machine, be it a physical computer, avirtual machine, or a cloud resource. Nodes can even be ‘placeholders’ used to pre-approve the allocation of cloud resourceswithout actually starting them, avoiding usage charges.
Most nodes in UniCloud are called compute nodes, regardless of what task they are performing. There is also a specialnode, called the installer node (also sometimes referred to as the “primary installer”), which is the node actually runningthe UniCloud software. It is responsible for managing the cluster, the software applications running on nodes, and can alsoprovision nodes.
Nodes in UniCloud are managed through the definition of hardware profiles and software profiles. These profiles tell UniCloudhow nodes should be configured (or even if they should be managed by UniCloud at all), and are the building blocks used tomanage a cluster.
v 20
UniCloud 6.2.0 Installation and Administration Guide Detailed Installation Guide
Detailed Installation Guide
Hardware and Software Requirements
The first step in installing UniCloud is to select a machine for use as the installer node. This can be a physical machine or avirtual machine and must already be running a supported operating system (RHEL/CentOS 6.x or 7.x).
It is strongly recommended that UniCloud be installed on a dedicated server. It may co-exist with an existing dedicated UGEqmaster host.
CPU
UniCloud supports any modern x86-architecture 64-bit CPU. Larger clusters benefit from more powerful processors as moreincoming requests can be handled simultaneously.
Memory
UniCloud requires a minimum of 4 GB. Additional memory can improve system throughput and handling of requests fromnodes in the cluster, and improves the efficiency of the installer.
Operating Systems
UniCloud officially supports the following operating systems:
• Red Hat Enterprise Linux x86-64 7.x and 6.x• CentOS x86-64 7.x and 6.x
Network
UniCloud requires an IP-enabled network.
Any IP networking configuration supported by the host operating system(s) is supported.
Disk Space
UniCloud requires less than 200MB of disk space for the core software. The actual disk space needed may be higher, ifadditional OS package dependencies must also be installed.
If configured for physical or virtual node provisioning, UniCloud will require additional disk space to store OS packages in arepository. This will depend on both the number and size of the operating systems being provisioned. For example, the twoCentOS 6.x installation DVDs require approximately 5GB of disk space.
This space requirement can be reduced by using symbolic links, NFS-mounted directories, and networked HTTP proxyrepositories. See the documentation for configuring node provisioning for further details.
Hypervisor/Cloud Support
UniCloud supports the following cloud and virtualization platforms:
• Amazon Elastic Compute Cloud (EC2)• Google Compute Engine
v 21
UniCloud 6.2.0 Installation and Administration Guide Detailed Installation Guide
• Microsoft Azure• OpenStack• VMware vSphere® versions 5.x
Support for hypervisors/virtualization and public clouds is provided through the installation of additional software feature“kits”.
Resource adapter “kits” are not automatically installed as part of the base UniCloud software and may be installed after thebase installation.
Refer to the documentation for the kit for any additional requirements.
Compute Node Requirements
UniCloud does not impose restrictions on the hardware or software required for compute nodes. The operating system andapplication software to be installed on nodes in the cluster (if any) determines these requirements.
Preparing For Installation
Configuring Network Access
The base UniCloud installation has minimal network topology requirements. If UniCloud will be used to provision computenodes, additional network setup will be required after the core UniCloud software is installed and configured.
UniCloud includes the ability to provision physical nodes in the base installation. It supports flexible network configurationsin this mode. For example, it supports multi-homed systems providing Internet and local network access on separate networkcards. It also supports systems using a single network card with multiple VLANs providing these functions.
Regardless of network configuration, the installer must have a fully-qualified domain name (FQDN) resolvable via DNS.This can be verified by observing that the output of hostname --fqdn is a full-qualified domain name in the formathostname.domainname.
Likewise, the command hostname --domain must return a valid DNS domain name before proceeding with the installation.
If either of these commands do not return the correct values, some common resolutions include:
1. Adding an entry to /etc/hosts for the host name with the following format:
a.b.c.d hostname.domainname hostname
2. Defining the installer’s FQDN in /etc/sysconfig/network using the directive HOSTNAME="...".Note: changing this setting requires a system reboot in order for the change to take effect.
3. Configuring the DNS server specified in /etc/resolv.conf to resolve the installer’s name as a fully-qualified DNSname.
4. Configuring the public DHCP server (if one is used) to issue the proper FQDN to the system when it requests its IPaddress.
The UniCloud installation program requires Internet access to download packages from Puppet Labs, EPEL, and packages inthe Python Package Index (pypi). Compute nodes do not normally require access to the Internet, as they typically retrievepackages from the installer.
Once UniCloud is configured and operational, the installer no longer requires Internet access. Additional software kits mayrequire Internet access during their installation and configuration to resolve dependencies, however.
v 22
UniCloud 6.2.0 Installation and Administration Guide Detailed Installation Guide
Firewall Configuration
If possible, firewalls on UniCloud installer and compute nodes should be disabled to maximize speed and compatibility.
To disable the firewall, run the following commands as root on RHEL/CentOS 6.x:
/etc/init.d/iptables save/etc/init.d/iptables stopchkconfig iptables off
or on RHEL/CentOS 7.x:
systemctl stop firewalldsystemctl disable firewalld
If this is not practical for security reasons, a firewall may be used as long as it provides access to the necessary ports:
Port Protocol Description22 tcp ssh53 udp/tcp DNS (installer)67 udp/tcp DHCP (only req’d for on-premise node provisioning) (installer)68 udp/tcp DHCP (only req’d for on-premise node provisioning) (installer)111 udp/tcp rpcbind (req’d for NFS)1194 udp/tcp OpenVPN (only required when using point-to-point VPN; installer)2049 udp/tcp NFS (installer)6444 tcp Grid Engine qmaster (installer) default6445 tcp Grid Engine execd (compute) default8008 TCP UniCloud “internal” web server (installer)8140 TCP Puppet server (installer)8443 TCP UniCloud web service (installer)61614 TCP ActiveMQ (req’d by MCollective) (installer)
Note: it may be necessary to open additional ports depending on system configuration and/or applications in use.
Warning: An overly restrictive firewall can cause connectivity issues in a cluster if not properly configured. As a firsttroubleshooting step, if possible, temporarily disable the firewall if network connectivity issues are suspected.
Puppet
A standalone Puppet Server is automatically installed during UniCloud installation.
UniCloud has been tested and validated against Puppet 4.9.0. Newer versions of Puppet 4.x should generally work withoutproblem, and will be tested for official support as they are released.
If required, different versions of Puppet may be used on compute nodes. This may be useful for configurations where UniCloudwill not be provisioning the operating system for nodes, or for imaged node provisioning. In this case, all compute nodesmust have a Puppet version equal to or greater than the version on the installer node.
The default installation hosts a Puppet master (server), including ActiveMQ, and MCollective.
OS Package Repositories
UniCloud requires access to OS repositories to resolve software dependencies. These repositories, including any for paid/reg-istered OS support, must be installed and configured prior to installation.
v 23
UniCloud 6.2.0 Installation and Administration Guide Detailed Installation Guide
Access to EPEL or Puppet repositories is handled internally by the UniCloud installer and need not be pre-configured.The command yum search kernel can verify access to OS package repositories. If this command does not list a number ofpackages, including kernel.x86_64, the OS package repositories are not configured correctly and UniCloud installation willfail.Red Hat Enterprise Linux (RHEL) users must ensure the “optional” repository is enabled. Assuming the node has beenregistered with Red Hat Network, this repository can be enabled using yum-config-manager (from the yum-utils package):RHEL 7 Server:
yum-config-manager --enable rhel-7-server-optional -rpms
RHEL 7 Server on AWS:yum-config-manager --enable rhui-REGION-rhel-server-optional
RHEL 6 Server:yum-config-manager --enable rhel-6-server-optional -rpms
RHEL 6 Server on AWS:yum-config-manager --enable \
rhui-REGION-rhel-server-releases-optional
SELinux
UniCloud is not compatible with SELinux when in “Enforcing” mode.Please ensure SELinux is in “Permissive” mode or disabled entirely.The file /etc/sysconfig/selinux contains the configuration for SELinux.Hint: Use setenforce Permissive to disable SELinux until the next reboot, but be sure to update /etc/sysconfig/selinuxto have the setting persist after reboot.
Installing UniCloud
NOTE: UniCloud must be installed as the root user.
Unarchiving and Installing the Software
UniCloud is distributed as a bzip2 compressed tar file. Install bzip2 as follows, if necessary:yum install bzip2
Unpack the software and change to the directory containing the software as follows:tar xjf unicloud -*.tar.bz2cd unicloud -*
Begin the installation process by running the installation script in that directory:./install-unicloud.sh
SQLite is used as the default backing database.The installer accepts a few options, which can be viewed by running ./install-unicloud.sh --help. The importantoptions are:
v 24
UniCloud 6.2.0 Installation and Administration Guide Detailed Installation Guide
• --verbose or -v to enable more detailed output.• --force to force the installer to run even if the $TORTUGA_ROOT directory already exists; this should only be used if an
error occurred and the installer now refuses to run.
Installing UniCloud takes several minutes. The actual time required depends on the speed of the installer’s Internet connectionand what dependencies must be installed.
NOTE: EPEL and Puppet repositories will, on occasion, fail to respond, causing transient errors and installation failure. Ifthis happens, verify the OS repositories (see above), then re-run the installer. It can sometimes take several attempts beforethe external repositories respond.
Running unicloud-setup
NOTE: unicloud-setup must be run as the ‘root’ user
unicloud-setup configures UniCloud to run on the installer. Setup times are dependent upon system speed, and generallyrange from 5-15 minutes.
Before running setup, source the UniCloud environment. Setup will install the environment in /etc/profile.d so it isautomatically available to new shells or terminals.
To run setup:
/opt/unicloud/bin/unicloud -setup
After accepting the software EULA (required to proceed), answer the following questions:
1. What location should be used as the depot directory? (default /depot)2. What administrative username and password should be used?
The ‘depot directory’ is used by UniCloud to store (mostly package) files required by compute nodes provisioned by UniCloud.Multiple YUM repositories will be created in this directory. The disk space required depends on the number of operatingsystems installed for provisioning, as well as what optional software kits are added.
The depot directory may be mounted from a remote server, provided it is mounted automatically upon boot and allows fullaccess to the root user. This generally means you must disable root squash on an NFS-exported volume, although it may bepossible to map root to a user with full access to the volume.
UniCloud maintains its own user namespace. These users can be designated as administrators of specific hardware andsoftware profiles. The default UniCloud installation has a single administrator. UniCloud users can be added, deleted, andpasswords changed, after setup is complete.
v 25
UniCloud 6.2.0 Installation and Administration Guide UniCloud Fundamentals
UniCloud Fundamentals
Command-line interface
UniCloud offers a command-line interface usable for scripting, with all commands contained in the directory$TORTUGA_ROOT/bin. The installation program installs manual pages accessible via the standard Linux man <command>syntax.
Useful options accepted by all UniCloud commands include:
• -h, -?, or --help – display a summary of options supported by the command• -v – print the version of the UniCloud command and exit• --username USERNAME – Specifies a UniCloud username• --password PASSWORD – Specifies a UniCloud password
v 26
UniCloud 6.2.0 Installation and Administration Guide UniCloud Fundamentals
Software and Hardware profiles
Software and hardware profiles are used to manage logical groupings of similar nodes in UniCloud.
Hardware profiles
OverviewA hardware profile tells UniCloud about what and where a node is, be it physical, virtual, or cloud-based. The hardwareprofile gives UniCloud the information it must know to manage the node - for example, what virtualization or cloud providermight be used.Hardware profiles also specify the default operating system kernel. Since public cloud providers frequently bundle hardwareinformation with a base software image, this allows UniCloud to properly manage them. For example, Amazon EC2 specifiesan ‘AMI’ which not only dictates things like disk storage, but also a complete image of the root filesystem and kernel.The hardware profile of a node cannot be changed.UniCloud creates a hardware profile called Installer automatically. This profile is specifically reserved for use by theinstaller, and should not be used for other nodes. It cannot be modified or deleted.
Creating Hardware ProfilesHardware profiles are created using the create-hardware-profile command.For example, to create a hardware profile using the default hardware profile template:
create-hardware-profile --name LocalIron
This command will create a hardware profile that represents physical nodes.To get a list of the available templates, run create-hardware-profile --list-templates.If --xml-file is not specified, the default hardware profile template (found in $TORUTGA_ROOT/share/templates/hardware/defaultHardwareProfile.tmpl.xml)is used.See Appendix B for more information on the templates shipped with UniCloud.The following arguments are optional:
• --xml-file <TEMPLATEPATH> or -x <TEMPLATEPATH> – The full path of the XML hardware profile template.
• --name <NAME> – The name of the hardware profile. Best kept to a short descriptive name such as “LocalIron” or“Mfg_model_500”.
• --description <DESCRIPTION> – A human-readable description of the intended use for the hardware profile. Stored,but not interpreted, by UniCloud. The description may contain spaces, if quoted.
• --os <name-version-arch> – If provisioning is enabled and multiple OS kits are installed, this selects the OS for theprofile. If unspecified, the OS running on the installer node is used.
• --idleSoftwareProfile <PROFILENAME> – Used for physical nodes. If a node is idled using the idle-node command,it is forced into this software profile.
Idle profiles are useful when a software profile (see below) includes an application with an “expensive” or limited license.When the node is idled, the idle profile eliminates the application from the node, freeing up the license. This is generallyunnecessary for virtual machine nodes, which are deleted entirely instead of idled.The nodes using a given hardware profile do not actually need to have identical hardware. They must, however, be inter-changeable in terms of how they can be managed (created, deleted, turned on or off, etc) at the hardware level.Virtual machines which will be created and managed outside of UniCloud should be treated as physical machines. UniClouddoes not ‘detect’ if a node is physical or virtual.
v 27
UniCloud 6.2.0 Installation and Administration Guide UniCloud Fundamentals
Network SettingsBefore a hardware profile can be used, it must have an associated provisioning NIC and network. This identifies the networksettings for all nodes created in that hardware profile and defines the connectivity between the UniCloud installer and computenodes.The network parameters are set using update-hardware-profile and the options --add-provisioning-nic and--add-network to associate a provisioning NIC and network, respectively.For example, when provisioning VMware vSphere-based compute nodes, if the provisioning NIC (that is, the NIC connectedto the provisioning/management network on the UniCloud installer) has an IP address 10.0.0.1 and the provisioning/man-agement network is “10.0.0.0/255.255.255.0”, the following command-line would be used:
update-hardware-profile --name PROFILE --add-provisioning -nic \10.0.0.1 \--add-network 10.0.0.0/255.255.255.0/eth0
Effectively, this command sets up the specified hardware profile to be connected to the UniCloud installer via the networkinterface with the IP address 10.0.0.1 on the network 10.0.0.0/255.255.255.0.Note: the device name eth0 reflects the name of the NIC on the compute node, not the device name of the provisioningNIC on the installer.Traditionally, the public network device name on the UniCloud installer would be eth0 and the provisioning/managementnetwork device name would be eth1.
Updating hardware profilesThe list of current hardware profiles is given by get-hardware-profile-list. Detailed information is available usingget-hardware-profile --name <HWPROFILENAME>.To modify a hardware profile, use update-hardware-profile. Most fields can be updated, but things set during provisioning(such as the OS, kernel, and name format) will only take effect for future nodes, not existing nodes.The following command changes the host name format of the hardware profile Rack2:
update-hardware-profile --name Rack2 --name-format rack2-#NN
Nodes not provisioned and/or managed by UniCloud can be added by setting the hardware profile location to be “remote”,using the command update-hardware-profile --name <NAME> --location remote. This is useful in cases where Uni-Cloud must be aware of, but not necessarily manage, a node. For example, this allows the addition of externally managedhypervisors and/or other infrastructure nodes to the cluster.Hardware profiles used for virtual machines require a hypervisor software profile. The relationship of (hardware profile)virtual machine, hosted by a (software profile) hypervisor, running on a (hardware profile) physical machine, is configuredusing:
update-hardware-profile --name <NAME> --hypervisor -profile \PROFILE
Additionally, virtual machine hardware profiles require a resource adapter, used to manage the hypervisor. This is doneusing the --resource-adapter <ADAPTER> option and tells UniCloud what API will be used for management. See the kitdocumentation supplying the resource adapter for more details.The command get-resource-adapter-list lists available resource adapters.
Deleting hardware profilesHardware profiles can be deleted using the delete-hardware-profile command. Hardware profiles cannot be deleted untilassociated nodes nodes are first deleted.
delete-hardware-profile --name Rack2
v 28
UniCloud 6.2.0 Installation and Administration Guide UniCloud Fundamentals
Software profiles
Overview
A software profile describes the software “stack” or configuration (applications + operating system), as well as the disk setupfor a managed node.
Software profiles may explicitly require that certain software packages be installed via YUM. The software profile also indicatesthe components (defined within software kits) that should be enabled and configured.
Nodes are added to software profiles when they are added to the cluster. Unlike the associated hardware profile, the softwareprofile associated with a node can be changed at any time. When the software profile of a node is changed, the entire node,including the operating system, is reinstalled to ensure the software configuration is “clean”.
The software profile Installer is automatically created when UniCloud is first installed. This profile is specifically reservedfor use by the installer, and should not be used to provision additional nodes. Components may be enabled and disabled onthis profile to configure features, but the profile cannot be deleted.
Display list existing software profiles
The list of current software profiles is given by get-software-profile-list.
Display software profile detail
Detailed information (in XML format) is available using get-software-profile --name <NAME>.
Creating a software profile
Create software profiles using the ‘create-software-profile command.
The following arguments are optional:
• --xml-file <PATH> or -x <PATH> – The full path of the template.• --name <NAME> – The name of the software profile. Best kept to a short descriptive name such as “AppName” or
“Engineering_Dept”.• --description <DESCRIPTION> – A human-readable description of the intended use for the software profile. Stored,
but not interpreted, by UniCloud. The description may contain spaces, if quoted.• --os <name-version-arch> – If provisioning is enabled and multiple OS kits are installed, this selects the default OS
for the profile. This option requires that the hardware profile used allows the software profile to override the OS spec.
If --xml-file is not specified, the default software profile template (found in $TORUTGA_ROOT/share/templates/software/defaultSoftwareProfile.tmpl.xml)is used.
To get a list of the available software profile templates, run create-software-profile --list-templates.
See Appendix B for more information on the templates shipped with UniCloud.
The default software profile template (defaultSoftwareProfile.tmpl.xml) file defines a swap partition size of 0 and a rootpartition with the <grow>true</grow> option set. This causes UniCloud to create a swap partition using the operatingsystem recommended size, and allocate all remaining disk space space for the root partition.
Note that Linux operating systems can take a long time to format a large partition when the grow option is set.
Disk partitioning information is relevant when provisioning an operating system, but is otherwise ignored. Changing thepartitioning information in a software profile only affects new nodes created with that profile, and does not reconfigureexisting nodes.
v 29
UniCloud 6.2.0 Installation and Administration Guide UniCloud Fundamentals
Example
The following command will create a software profile named Compute provisioned with the same operating system as theUniCloud installer:
create-software-profile --name Compute
It is also possible to create software profiles for different operating systems (assuming the OS kit has already been installed.See below for more details.). This command would set the operating system of nodes created in the Compute software profileto RHEL 6.4 x86_64:
create-software-profile --name Compute --os rhel-7.3-x86_64
When creating software profiles to represent cloud-based nodes, the argument --no-os-media-required can be used to avoidthe need to install OS installation media:
create-software-profile --name Compute --no-os-media-required
The --no-os-media-required argument is only effective when provisioning cloud-based compute nodes, which have anoperating system image defined and a pre-existing operating system installation.
Updating software profiles
To modify a software profile, use update-software-profile. Most fields can be updated, but things set during provisioning(such as the OS, kernel, name format, or disk partitioning) will only affect future nodes, not existing nodes. Software packagesare updated on all existing nodes the next time the cluster is updated.
Software profiles can be edited using the following command:
update-software-profile --name <NAME> ...
Note: it is not possible to change the operating system of an existing software profile.
The schedule-update command will then synchronize the cluster.
Deleting software profiles
Software profiles can be deleted using the delete-software-profile command. Software profiles with associated nodescannot be deleted until the nodes are first deleted. In addition, hypervisor software profiles cannot be deleted if they arereferenced in an existing hardware profile.
Example:
delete-software-profile --name Compute
Hardware and software profile mapping
Hardware and software profiles must be mapped, or associated, together.
For example, this prevents addition of non-functioning nodes. As an example, it would prevent attempting to install ahypervisor onto a virtual node.
The UniCloud administrator can create mappings using the command:
set-profile-mapping --hardware -profile <HWPROFILE > \--software-profile <SWPROFILE >
Hardware and software profiles are unmapped using the delete-profile-mapping command.
v 30
UniCloud 6.2.0 Installation and Administration Guide UniCloud Fundamentals
Kits and Components
Overview
A kit is the UniCloud packaging format for applications that will be installed and managed by UniCloud.
Some kits include applications that extend the capabilities of UniCloud, such as adding support for cloud providers and/orhypervisors. These kits are commonly called resource adapter kits. Other kits include application software, such as UnivaGrid Engine.
UniCloud itself automatically installs a kit called the base software kit. This kit contains components that are fundamentalto the core operation of UniCloud. Components contained within this kit can be enabled on the installer node to configureadditional UniCloud functionality.
Kits distributed are as bzip2 compressed archive files.
The kit filename has the following format:
kit-<name>-<version>-<iteration >.tar.bz2
Display list of installed kits
The get-kit-list command will display all installed kits (application + operating system):
[root@unicloud ~]# get-kit-listawsadapter -6.2.0-0base -6.2.0-0centos -7.0-0ganglia -3.7.2-1gce-6.2.0-0simple_policy_engine -6.2.0-0snmp -6.2.0-0uge-8.5.3-0
To display operating system kits only, use the --os argument:
get-kit-list --os
Installing kits
Kits are installed using the following command:
install-kit kit-sample -1.0-0.tar.bz2
Components
Kits contain one or more components. Components are logical “packages” providing the Puppet recipes and integration logicneeded to use the software in the kit.
For basic kits (ie. resource adapter), a single component may be sufficient. More complex kits include multiple components,especially when an application includes client and server functionality.
See the kit documentation for details on what components it provides, what those components do, and how to configurethem.
v 31
UniCloud 6.2.0 Installation and Administration Guide UniCloud Fundamentals
Display all installed components
Use get-component-list to display all available components.[root@unicloud ~]# get-component -listsnmp -6.2.0-0 snmpd -6.2base -6.2.0-0 core -6.2base -6.2.0-0 installer -6.2base -6.2.0-0 dhcpd -6.2base -6.2.0-0 dns-6.2awsadapter -6.2.0-0 management -6.2gce-6.2.0-0 management -6.2uge-8.5.3-0 qmaster -8.5.3uge-8.5.3-0 execd -8.5.3simple_policy_engine -6.2.0-0 engine -6.2ganglia -3.7.2-1 gmetad -3.7.2ganglia -3.7.2-1 gmond -3.7.2centos -7.0-0 centos -7.0-x86_64 -7.0
Display list of enabled components
Using the argument --software-profile or -p (shortcut to --software-profile Installer), the list of componentsenabled on the specified software profile will be displayed.For example, to display the components enabled on the UniCloud installer:
[root@unicloud ~]# get-component -list --software -profile \Installer
base -6.2.0-0 installer -6.2base -6.2.0-0 dns-6.2uge-8.5.3-0 qmaster -8.5.3simple_policy_engine -6.2.0-0 engine -6.2
or using the shortcut:get-component -list -p
To display the components enabled on software profile “Compute”:get-component -list --software -profile Compute
Enabling Components
Components are enabled per software profile using the enable-component command. For example, to enable the pdshcomponent on the UniCloud installer:
enable-component -p base -6.2.0-0 pdsh -6.2
Hint: Since it is unlikely to be another component named “pdsh”, use the command-line shortcut:enable-component -p pdsh
Components are disabled using the disable-component command.Note: due to the nature of uninstalling software from existing compute nodes, it is highly recommended to reinstall/re-provision compute nodes after changing the enabled components.The schedule-update command must be used after components have been enabled/disable to synchronize the cluster. Seethe “Cluster Synchronization” section.
v 32
UniCloud 6.2.0 Installation and Administration Guide UniCloud Fundamentals
Removing Kits
Kits are removed using the delete-kit command. A kit may not be deleted if any of its components are enabled on asoftware profile. The ‘base’ and ‘clonezilla’ kits may not be deleted at all.
delete-kit --name badkit --version 6.2 --iteration 0
Never attempt to delete a kit if a component was enabled or disabled, and the cluster is currently being synchronized. Doingso will lead to unpredictable results.
Cluster synchronization
Whenever a hardware or software profile is changed, the changes are made to the information stored in the UniCloud database.These changes will take effect on any future nodes added to the cluster. In many cases, however, the changes include software(re)configurations which must be applied to existing nodes in the cluster as well.
Any pending changes can be pushed to the cluster using the schedule-update command. This command triggers the Puppetagents on nodes in the cluster to configure the nodes as specified by their profiles, including any changes that need to bemade.
Puppet performs updates asynchronously in the background and as such, does not guarantee a specific completion time. Theamount of time needed depends on the number of nodes affected, and the scope of the changes.
Base Kit
The “base” kit is a special kit which is included automatically when you install UniCloud. It contains components to managebuilt-in UniCloud features.
Internal use base components
The following components in the base kit are internally used by UniCloud and should never be explicitly enabled or disabled:
• core• installer
Base component: dhcpd
The dhcpd component can be enabled only on the Installer software profile.
If enabled, the installer node will configure and manage a DHCP server running on any “provisioning” networks defined inUniCloud.
This component must be enabled to provision local (non-cloud) nodes.
Enable the dhcpd component with the command:
enable-component -p base -6.2.0-0 dhcpd -6.2/opt/puppetlabs/bin/puppet agent --onetime --no-daemonize \
--verbose
/opt/puppetlabs/bin/puppet agent --onetime --no-daemonize is used to synchronize only the UniCloud installer.schedule-update could also be used (as described above), however since this component is only applicable to the installernode, it is unnecessary to schedule an entire cluster update.
v 33
UniCloud 6.2.0 Installation and Administration Guide UniCloud Fundamentals
Base component: dns
The dns component provides domain name services (DNS) for nodes managed/provisioned by UniCloud. It is necessary toenable this component for most installation types.
Note: The dns component can be enabled only on the Installer software profile.
When enabled, the UniCloud installer node will automatically set up and configure a DNS server that has a mapping entryfor every node in the system to its associated IP address.
Enable the dns component with the command:
enable-component -p base -6.2.0-0 dns-6.2/opt/puppetlabs/bin/puppet agent --onetime --no-daemonize
DNS Configuration: Dnsmasq
The UniCloud-managed Dnsmasq service is configured through the template file $TORTUGA_ROOT/config/dnsmasq.conf.tmpl.
If the template file does not exist, UniCloud will automatically create a barebones configuration file, which is automaticallywritten to /etc/dnsmasq.conf.
A sample Dnsmasq template file exists in $TORTUGA_ROOT/config/dnsmasq.conf.tmpl.example, which is very similar tothe boilerplate template used in the absence of this file.
Do not modify /etc/dnsmasq.conf directly as it will be overwritten by UniCloud.
Any modifications made to the Dnsmasq configuration template must be reflected in the UniCloud system by runninggenconfig dns (as root) on the UniCloud installer. Restart the Dnsmasq service as follows:
RHEL/CentOS 5/6:
service dnsmasq restart
RHEL/CentOS 7:
systemctl restart dnsmasq
Consult Dnsmasq documentation for further configuration details.
Base component: pdsh
The pdsh component can be enabled on the Installer software profile. If enabled, the pdsh (Parallel Distributed Shell)command will be installed. This command is used by UniCloud when managing non-virtual nodes to reboot nodes, but isalso available for generic use.
Normally this component must be enabled to provision physical nodes. It is not necessary to enable this component if thepdsh program is already in the system PATH for every compute node.
v 34
UniCloud 6.2.0 Installation and Administration Guide UniCloud Fundamentals
Users
Although UniCloud must be installed as the root user, and UniCloud commands will work when run as the root user, it maynot always be desirable to do this for security reasons. UniCloud supports UniCloud-specific users so non-system accountscan run commands. UniCloud users are not the same as system users, and different system users are not prohibited fromusing the same UniCloud username/password.
The UniCloud administrative user is created during UniCloud setup. UniCloud commands run by the root Linux user areconsidered to be run by this administrative user without requiring that a username or password be specified.
The commands add-admin, delete-admin, get-admin, get-admin-list, and update-adminmanage UniCloud-specific users.Compute nodes in the cluster are accessed “normally” using the standard access method(s) for their operating systems.
The commands add-admin-to-profile and delete-admin-from-profile set the hardware and/or software profiles to whicha user has access. Other than the main UniCloud administrative user, users should only be granted access to the profilesthey will use.
v 35
UniCloud 6.2.0 Installation and Administration Guide Configuring UniCloud for provisioning
Configuring UniCloud for provisioning
UniCloud can provision operating system software on a node. Nodes are booted (be they bare metal/physical nodes whichare powered on, or virtual machine nodes which are allocated and started on a hypervisor), and UniCloud detects themthrough a DHCP request, then assigns an IP address and boots the OS installer remotely.
The OS installer runs in unattended mode, reboots the machine once the OS is installed. After first boot, Puppet installsany software defined by the software profile of the node.
Before this can happen, however, UniCloud needs to copy the necessary files to boot and install the OS.
UniCloud also sets up SSH key-based authentication on compute nodes to allow connecting from the UniCloud installer tomanaged compute nodes as the root user using SSH without a password. By default, the default Kickstart file tempateassigns a random root password to all compute nodes for security purposes.
Networking Requirements
UniCloud requires a private network for provisioning. This network will be managed by the installer node. This networkdoes not require Internet access, and may be implemented with a VLAN.
Example 1: The installer has two NICs: eth0 and eth1. The eth0 interface is connected to the ‘public’ network. The eth1interface is connected only to the systems in the datacenter as nodes and hypervisors, and carries the provisioning network.
Example 2: The installer has a single NIC, eth0. The eth0 interface is connected to the ‘public’ network. An eth0.10sub-interface is defined in the OS for use as a tagged VLAN, and the switch port is set to allow tagged traffic for VLAN 10.The eth0 interfaces of the systems in the datacenter serving as nodes and hypervisors are connected to ports on the switchset to place all untagged traffic on VLAN 10.
Adding the Provisioning NIC
Provisioning network(s) are registered with UniCloud using the add-nic utility. For example:
add-nic --nic <interface >
A typical dual-homed UniCloud installer may have the private/provisioning network connected to the eth1 device. Thefollow command-line would be used to register the private/provisioning network:
add-nic --nic eth1
If the interface is associated with a VLAN (in this example, VLAN ID 100), the command-line would be as follows:
add-nic --nic eth1.100
Hint: add-nic --autodetect to get a list of detected network interfaces on the UniCloud installer node.
UniCloud automatically obtains networking information based on the network interface you select. The networking configu-ration of the specified network interface can also be manually overridden. See add-nic command usage (add-nic --help)for more information.
Important firewall note: If a firewall is running on the UniCloud installer, please see the section “Firewall Configuration”under “Planning for Installation” to verify proper configuration. Incorrect firewall configurations will cause provisioningfailures.
v 36
UniCloud 6.2.0 Installation and Administration Guide Configuring UniCloud for provisioning
Multiple Provisioning NICs
UniCloud supports multiple private/provisioning network subnets.
For example, if eth1 and eth2 on the UniCloud installer were connected to private/provisioning network subnets, theprovisioning NICs would be added successively as follows:
add-nic --nic=eth1add-nic --nic=eth2
When multiple provisioning networks are used, it is necessary to configure UniCloud to uniquely identify the provisioningsubnets.
Add the following to the [dns] section in the DNS component configuration file ($TORTUGA_ROOT/config/base/dns-component.conf):
[dns]...enable_interface_aliases = True...
This will configure the UniCloud DNS host name assignment such that the UniCloud installer has a unique identifier on eachprivate/provisioning subnet.
Note: if adding a second provisioning NIC with existing compute nodes, the existing compute nodes will need to be refreshed.Run schedule-update to synchronize DNS changes.
Enabling UniCloud Components for Provisioning
Enable the following base components on the installer for provisioning:
• dhcpd
– Enables ISC DHCP daemon on provisioning network
• dns
– Enables DNS services on provisioning network
• pdsh (optional)
– Parallel distributed shell for performing batch operations on many nodes
These components are enabled using enable-component. For example:
enable-component -p base -6.2.0-0 dhcpd -6.2enable-component -p base -6.2.0-0 dns-6.2
Use get-component-list to see the exact name of the components and versions.
Before synchronizing the cluster, it might be desirable to change component configuration. Refer to section on DNS configu-ration prior to completing the cluster synchronization.
schedule-update must be run after enabling components to synchronize the installer configuration.
v 37
UniCloud 6.2.0 Installation and Administration Guide Configuring UniCloud for provisioning
Package-based Node Provisioning
Installing an OS Kit
An OS “kit” is a special kind of software kit. Instead of an archive file, it is installed using the installation CD/DVD of anoperating system. The only component of an OS kit is the OS itself, and this component cannot be enabled or disabled onany profile, and is treated as a special case, referenced in the hardware and sometimes software profile of a node.
You must install an OS kit in order to provision compute nodes.
To install an OS kit, use the install-os-kit command. This command has several special flags:
• --media – specifies the location of the OS media, which should be the location of the installation DVDs for that OS;see below for supported types
• --symlinks – specifies that symbolic links should be used instead of copying files, to save space
The media accepted includes file directories, such as the mount point of a physical DVD or copy of all its files, the name ofan ISO file (which will have its contents copied), or a web-based repository of the format http://<repositorylocation>/.You can use multiple media by separating them with a comma, as in --media /media/disk1,/media/disk2.
Symbolic linking is supported only for directories, and not ISOs or web repositories. UniCloud does not verify or check thatthe files are always available after a reboot, so this option should only be used if you have a permanent copy of the fileson the local system, or you automatically mount it upon every reboot. If these files are not present when you attempt toprovision a node, it will fail and your only indication will be at the node’s attached terminal screen.
The files copied when you install an OS kit are placed into the depot directory, selected during installation, defaulting to/depot.
Note that symbolic linking is supported only for directories, where the files are always available. You cannot symlink an ISOor proxied location.
Examples
Install (proxy) OS media through a mirror:
install-os-kit --mirror --media http://<CentOS mirror \URL>/centos -6.4-x86_64/
If using this method of installing OS media, it is highly recommended that the URL is for a host on your local network dueto performance reasons. Specifying a remote URL, for example that of a “true” CentOS mirror, will result in much slowercompute node provisioning time.
Install OS media from locally mounted media:
install-os-kit --media /media/disc1,/media/disc2
This copies the contents of the OS media found in subdirectories /media/disc1 and /media/disc2 into UniCloud.
Install (symlink) OS media from locally mounted media:
install-os-kit --media /media/disc1,/media/disc2 --symlinks
Note: this requires that the media is always available at the specified paths.
Install OS media from ISOs:
install-os-kit --media /isos/centos1.iso,/isos/centos2.iso
v 38
UniCloud 6.2.0 Installation and Administration Guide Configuring UniCloud for provisioning
Image-based Node Provisioning
UniCloud supports image-based node provisioning through the use of the included Clonezilla kit. Clonezilla is an OpenSource disk imaging/cloning application.
UniCloud currently does not support Clonezilla SE (Server Edition). The support for Clonezilla is limited to unicast imagedeployment. For larger deployments, it is recommended to stagger installation of many nodes.
Setting up for image-based node provisioning
1. Create an image of an (existing) compute node using Clonezilla LiveThis node image will be considered the “golden master” from which all further compute nodes will be deployed. Allinstance specific files (ie. ssh host keys, Puppet certificates, log files, any files containing host names, etc) should beremoved.UniCloud can be used to perform the initial compute node provisioning from which the image will be taken. Forexample, use the package-based installation procedure outline above and create a Clonezilla image from that node.UniCloud expects to find Clonezilla images under /export/clonezilla on the UniCloud installer. Ensure this directoryis exported by NFS.
2. Preparing Clonezilla files for UniCloudDownload Clonezilla Live zip file from the Clonezilla website.UniCloud has been tested using the the “alternate” version.At the time of this writing, the filename is clonezilla-live-20151012-wily-amd64.zip.In order to remain Clonezilla version agnostic, UniCloud expects the Clonezilla Live file under the path/tmp/clonezilla-live.zip.Copy or symlink the Clonezilla Live zip archive into /tmp/clonezilla-live.zip on the UniCloud installer.
cp clonezilla -live -20151012-wily-amd64.zip \/tmp/clonezilla -live.zip
3. Install and enable Clonezilla in UniCloudInstall the Clonezilla kit
install-kit kit-clonezilla -6.2.0-0.tar.bz2
Enable Clonezilla manager component
enable-component -p clonezilla -6.2.0-0 manager -6.2/opt/puppetlabs/bin/puppet agent --onetime --no-daemonize \
--verbose
4. Create Clonezilla-enabled hardware & software profilesThe hardware profile template ($TORTUGA_ROOT/kits/kit-clonezilla-6.2.0-0/clonezillaHwProfile.tmpl.xml)contains the necessary settings to enable Clonezilla. In particular, the installType element is set to “clonezilla”.The profile template(s) may be further customized as necessary.
cd $TORTUGA_ROOT/kits/kit-clonezilla -6.2.0-0create-software-profile -x clonezillaSwProfile.tmpl.xml \
--name clonezillacreate-hardware-profile -x clonezillaHwProfile.tmpl.xml \
--name clonezillaset-profile-mapping --hardware-profile clonezilla \
--software-profile clonezilla
v 39
UniCloud 6.2.0 Installation and Administration Guide Configuring UniCloud for provisioning
Any node(s) added to the clonezilla hardware and software profile will now be deployed using Clonezilla.
5. (optional) Change resource adapter/hypervisor profileIf provisioning in a virtualization environment, it is necessary to change the resource adapter and hypervisor profilesettings of the clonezilla hardware profile.For example, to enable the VMware vSphere resource adapter:
update-hardware-profile --name clonezilla --resource-adapter \vmware_adapter
This step is only necessary if provisioning onto nodes other than bare metal.
6. Associate provisioning NIC and network with clonezilla hardware profileThis step is required as UniCloud no longer automatically assigns the network settings to hardware profiles.Use update-hardware-profile --set-provisioning-nic ... --add-network ... to set the appropriate provision-ing network settings for the newly created clonezilla hardware profile.
7. Complete the installationUse clonezilla-setup to complete the installation of Clonezilla. It associates the Clonezilla node image (found under/export/clonezilla) with the clonezilla hardware and software profiles.
cd $TORTUGA_ROOT/kits/kit-clonezilla -6.2.0-0./setup-clonezilla --software-profile clonezilla \
--hardware-profile clonezilla --image <image name>
where <image name> is the name of Clonezilla node image directory contained within /export/clonezilla
8. Add nodesClonezilla is now enabled for the hardware and software profile clonezilla. Use add-nodes to add nodes:
add-nodes -n1 --software-profile clonezilla --hardware-profile \clonezilla
Clonezilla Customization
The UniCloud integration with Clonezilla includes two custom scripts: ocs.tmpl and postrun.tmpl. These templates arefound in under $TORTUGA_ROOT/kits/kit-clonezilla-6.2.0-0.
These script templates are updated using update-clonezilla. The files are written into /var/lib/tftpboot/tortuga andare used by the Clonezilla PXE boot process.
The file ocs.tmpl can be modified, for example, to change the location of the NFS shared directory containing the Clonezillaimage.
The file postrun.tmpl can be used to alter the commands run after a node is deployed from an image and prior to first boot.
Operating System Provisioning Considerations
Anaconda/Kickstart
Nodes using package-based provisioning are provisioned using the standard Anaconda/Kickstart installation mechanism. Thedefault Kickstart file template is found under $TORTUGA_ROOT/config/kickstart.tmpl and may be customized to suit theend-user’s needs.
It is also possible to create software profile specific Kickstart files using the following naming convention:
v 40
UniCloud 6.2.0 Installation and Administration Guide Configuring UniCloud for provisioning
$TORTUGA_ROOT/config/kickstart -<NAME>.tmpl
where NAME is the software profile name. In the following example, the kickstart template would be used by the Computesoftware profile:
$TORTUGA_ROOT/config/kickstart -Compute.tmpl
Consult your operating system vendors documentation for further information about valid Kickstart file configuration.
Special Configurations
After completing the steps in this section, you may in some cases need to change the provisioning network parameters. Youcan view the network using the get-network-list command. You can modify the network using update-network.
Some important items to note about the provisioning network:
The --start-ip option can be used to change the lowest (start) IP address that will be given out via DHCP. This is usefulif you have pre-allocated and placed systems on the provisioning network which will not be managed or known to UniCloud.For example to change the start IP of the network 10.2.0.0/255.255.255.0 to 10.2.0.3, the following command can be used:
update-network --network 10.2.0.0/255.255.255.0 --start-ip \10.2.0.3
The --increment option allows you to reserve multiple IP addresses for each node which is provisioned, if needed:
update-network --network 10.2.0.0/255.255.255.0 --increment 2
Nodes provisioned will be assigned every other IP addresses.
It is unnecessary to set the VLAN options or DHCP/static options in the provisioning network when following the configu-ration actions described earlier in this section.
v 41
UniCloud 6.2.0 Installation and Administration Guide Configuring UniCloud for provisioning
Setting up NAT for UniCloud compute nodes
Use the following commands to enable IP forwarding through the UniCloud installer along with network address translation(NAT) for the compute nodes:
Enable IP forwarding on the UniCloud installer
echo 1 > /proc/sys/net/ipv4/ip_forward
Enable NAT
In this example, it is assumed eth0 on the UniCloud installer is connected to the “public” network and eth1 is the privateor provisioning network.
/sbin/iptables -t nat -A POSTROUTING -o eth0 -j MASQUERADE/sbin/iptables -A FORWARD -i eth0 -o eth1 -m state \
--state RELATED,ESTABLISHED -j ACCEPT/sbin/iptables -A FORWARD -i eth1 -o eth0 -j ACCEPT
v 42
UniCloud 6.2.0 Installation and Administration Guide Managing Clusters
Managing Clusters
Managing a cluster in UniCloud essentially means just a few things. Nodes can be added and removed, and configured (aswell as transitioned between configurations). Virtual nodes may also be migrated between hypervisors, where supported.
Adding Nodes
Nodes are added to a UniCloud cluster using the add-nodes command.
The add-nodes command has the basic syntax:
add-nodes --count <NUMBER> --hardware -profile XXXX \--software -profile YYYY
where XXXX is the name of an existing hardware profile and YYYY is the name of an existing software profile.
As of UniCloud 6.2.0, the add-nodes command now operates asynchronously. When add-nodes is run, it will returnimmediately after validating the request. Use the CLI get-node-requests to check on status of node requests.
Adding physical nodes or virtual machines by MAC address
Use the --mac-addr argument to add-nodes when adding physical (on-premise) nodes for PXE booting and Anacondainstallation.
For example:
add-nodes --mac-addr AA:BB:CC:DD:EE:FF \--software-profile XXXX --hardware -profile YYYY
This command will add a node entry for an on-premise node and allow that node to be provisioned accordingly.
Manually adding a node
To add a node not provisioned by UniCloud, but may be managed (such as a node which is a pre-installed hypervisor), usethe following syntax:
add-nodes --hardware -porofile XXXX --software -profile YYYY \--host-name <HOSTNAME > [--mac-addr <MAC ADDRESS> \--ip-address <IP ADDRESS >]
If a node to be added is not on the provisioning network, the hardware profile (see the associated section) must have it’slocation set to remote, or UniCloud will attempt to reserve an IP address on the provisioning network and use it for thenode.
Nodes added in this manner do not automatically update their status. Use the update-node-status --status Installedcommand to mark a node added in this manner as ready for use.
Reboot and/or reinstalling nodes
Existing nodes can be rebooted using the reboot-node command-line interface.
For example:
reboot-node --node <nodespec >
v 43
UniCloud 6.2.0 Installation and Administration Guide Managing Clusters
The --reinstall option added to the reboot-node command-line will force a reinstallation (where it makes sense; forexample, on physical nodes). When supported by the resource adapter, nodes will be automatically reset to initiate thereprovisioning.
reboot-node --node <nodespec > --reinstall
Deleting nodes
Nodes are deleted using the delete-node --node <nodespec> command. The “nodespec” parameter may be a comma-separated list of nodes, and may include wildcards. The asterisk (*) wildcard must be quoted to avoid shell interpretation,but a percentage sign (%) may be used as an alternative without the need for escaping/quoting.
The --force flag may be useful to delete nodes which are in a state other than Installed. In some situations, however, nodedeletion will be blocked. For example, a hypervisor node may not be deleted while hosting other nodes.
Example:
Delete node named “compute-01”:
delete-node --node compute -01
Delete all nodes matching the wildcard “compute*“:
delete-node --node "compute*"
Note: wildcard spec must be escaped (or quoted) for use in bash.
As of UniCloud 6.2.0, delete-node runs asynchronously and will now return immediately after it is run. Use the CLIget-node-requests to check the status of a delete-node request.
Idling and activating nodes
An “idle” node is one that is known by UniCloud but is currently inactive. This state may be useful if the software associatedwith a given profile uses an expensive license, and that license must be freed.
Idled nodes are reinstalled/reprovisioned once (re)activated. Copy any important data from the local disk before idling.
For example, to idle the node “compute-01.private”:
idle-node --node compute -01.private
To activate an idled node and bring it back to the installed state, use the command activate-node --node <nodespec> \--software-profile <SWP NAME>. The software profile must be specified as part of the activation sequence because thenode does not retain a history of previous software profiles used.
For example, to reactivate the idle node “compute-01.private” in the software profile Compute:
activate-node --node compute -01.private --software -profile \Compute
(Re)activating a node requires a reprovision, and will take the same amount of time as provisioning the node initially.
v 44
UniCloud 6.2.0 Installation and Administration Guide Managing Clusters
Idle/activate semantics
Node idle/activate semantics vary across resource adapters and are typically useful only for UniCloud hybrid cluster instal-lations.
For example, for Amazon EC2-based compute nodes within a UniCloud hybrid cluster, idle nodes maintain presence inUniCloud, however have no “backing” instance in Amazon EC2.
Idle/activate on VMware vSphere simply means stopping a virtual machine (for idle), and (re)starting that VM (for activate).
Idle/activate semantics do not apply to physical nodes.
Shutting down and Starting up Nodes
The shutdown-node command will issue an OS shutdown command via the resource adapter.
This is useful for nodes which should no longer be running at all, but should remain “known” to the cluster.
For example, to shutdown the node “vm-01”:
shutdown-node --node vm-01
Note: shutting down a physical node will turn off the power, requiring either remote power capabilities or a visit to thephysical location to restore power at a later time.
The startup-node --node <nodespec> command will start a node which was previously shut down. In most cases, this isuseful for virtual nodes in a local cloud. The --destination option can be used, if supported, to select a hypervisor to runthe virtual node.
Transferring nodes between software profiles
Any node, regardless of whether it is physical or virtual, may have its software profile changed using the transfer-node CLI.This command will re-provision (as necessary) the node to bring into compliance with the new software profile.
Transfer node (in Installed state) to new software profile:
transfer-node --node <node name> --software -profile <dest \software profile>
For example, to transfer 1 node:
transfer-node --count 1 --software -profile <dest software \profile>
Note: the “destination” software profile must already have been mapped to use the node’s hardware profile.
Transfer 6 nodes from source software profile:
transfer-node --count 6 --src-software -profile execd \--software-profile Compute
UniCloud does its best to make an intelligent determination of which nodes to transfer, favoring idle and unused nodes whenpossible.
v 45
UniCloud 6.2.0 Installation and Administration Guide Managing Clusters
Migrating virtual nodes
Virtual machines may be migrated between hypervisors using the migrate-node CLI. Obviously, this only makes sense onsupported virtualization platforms and does not apply to physical or cloud-based nodes.
The migration can be performed using “live migration” where the node state is not changed and the node remains runningduring the migration. THis functionality is limited to reosurce adapters/hypervisors that allow “hot” migration.
Support for migration is dependent upon the hypervisor resource adapter.
Note: The --with-shutdown option is required if “live” migration is not supported by the hypervisor (rare).
Resource tagging
UniCloud supports resource (nodes, software profiles, and hardware profiles) tagging, similar to what is offered by cloudproviders.
Tagging operations
Add resource tag
Add node tag:
uc-tag add --node <node name> --tag <key>=<value>
Add software profile tag:
uc-tag add --software -profile <swprofile name> --tag \<key>=<value>
Add hardware profile tag:
uc-tag add --hardware -profile <hwprofile name> --tag \<key>=<value>
Remove tag from resource
Remove tag from node:
uc-tag remove --node <node name> --tag <key>
Remove tag from software profile:
uc-tag remove --software -profile <swprofile name> --tag <key>
Remove tag from hardware profile:
uc-tag remove --hardware -profile <hwprofile name> --tag <key>
Delete (unregister) tag
The uc-tag delete command removes (unregisters) tag and removes it from all resources.
uc-tag delete --force --tag <key>
v 46
UniCloud 6.2.0 Installation and Administration Guide Managing Clusters
List all tags/values
uc-tag list
Querying resources by tag
Nodes
get-node-status --tag <key>
get-node-list --tag <key>
Software profiles
get-software-profile-list --tag <key>
Hardware profiles
get-hardware-profile-list --tag <key>
v 47

UniCloud 6.2.0 Installation and Administration Guide Advanced Topics
Advanced Topics
Managing Operating System Updates
Red Hat Enterprise Linux
As Red Hat Enterprise Linux (RHEL) is a commercially licensed operating system, access to the OS media and patchesis done through the subcription service. This requires that all RHEL nodes in UniCloud must be properly licensed andregistered with RHEL, either by proxy to a site-local license server or to Red Hat itself.Aside from configuring the UniCloud installer for compute node access to the external network, nothing special needs to bedone to manage operating system updates.
CentOS
When compute nodes are provisioned by UniCloud, they are provisioned using the OS media provided by install-os-kit.For most users, this would be the downloadable DVD OS media for major release versions of CentOS. For example, CentOS5.8 or 6.4.Between each major release, the CentOS team releases update packages available from the ‘updates’ repository. It is theseupdated packages that present an issue.As part of the UniCloud installation procedure, the installer downloads and caches dependent packages later required whenprovisioning compute nodes. This includes packages such as Puppet, MCollective, and their dependencies. These packagesare subsequently dependent on core OS packages (ie. python-devel, ruby, and others). Therein lies the “problem”- if thepatchlevel of the OS on the installer is different than that of the OS media, the cached packages will have dependencies onOS packages newer than what is available on the OS media.There are three viable solutions or workarounds for this issue:
1. no patches2. automatic patches through connected compute node3. manually managed patches
Hint: Custom Puppet modules associated with compute software profiles and/or custom repositories added to the defaultKickstart file template are useful for managing YUM repositories for compute nodes. The built-in Apache HTTP Server onthe UniCloud installer can also be used to host package updates.
Scenario 1: No patchesThe UniCloud installer is fixed at the patchlevel of the OS media used to provision compute nodes.For example, if the installer is running CentOS 6.3, it stays at CentOS 6.3 for its lifetime. In other words, the ‘updates’repository (defined in ‘/etc/yum.repos.d/CentOS-Base.repo’) must be disabled.Note: No patched packages can be installed on the installer prior to installation of UniCloud!All compute nodes will be provisioned from the CentOS 6.3 OS media as supplied by the administrator.Pros:
• simplest configuration
Cons:
• no OS patches. This is not recommended for Internet connected nodes or outward facing nodes• may present issues for certain applications requiring OS patches
v 48
UniCloud 6.2.0 Installation and Administration Guide Advanced Topics
Scenario 2: Automatic patches through connected compute nodes
This scenario follows the default CentOS updates repository strategy.
When dealing with compute nodes on a UniCloud provisioning network, it is easily possible to grant them external access byusing network address translation (NAT) as built into the Linux kernel.
See the section below on setting up NAT on the UniCloud installer to enable external network access from UniCloud computenodes.
Pros:
• all OS patches, including security patches, are available to all nodes in the cluster
Cons:
• compute nodes require access to ‘updates’ package repository
Scenario 3: Manually managed patches
When a compute node is provisioned by UniCloud, it installs the base operating system from the OS media as provided by‘install-os-kit’. Packages which constitute the UniCloud “base” kit are installed from ‘/depot/kits/base/6.2.0-0/noarch’.
Updated packages can be dropped into this directory and will be automatically available to UniCloud provisioned computenodes.
Note: after updating packages in /depot/kits/base/6.2.0-0/noarch, it is required to run createrepo to updatethe UniCloud base** kit YUM repository metadata.**
The key packages are puppet-*, mcollective-*, and the ruby dependencies.
Pros:
• flexibility
Cons:
• manual package dependency management
Puppet & MCollective
UniCloud uses MCollective to trigger Puppet runs using the MCollective puppet plugin from the UniCloud installer node.
The end-user can manually trigger Puppet runs using the MCollective command mco puppet .... For example, the followingcommand will trigger a Puppet run on the node “compute-01.private”:
mco puppet runonce -I compute -01.private
Multiple nodes can be specified:
mco puppet runonce -I compute -01.private -I compute -02.private
If the -I argument is excluded, the Puppet will be run on all UniCloud managed nodes. This is the command the UniCloudCLI schedule-update calls.
It is also possible to do basic troubleshooting using the MCollective ping plugin:
mco ping
v 49
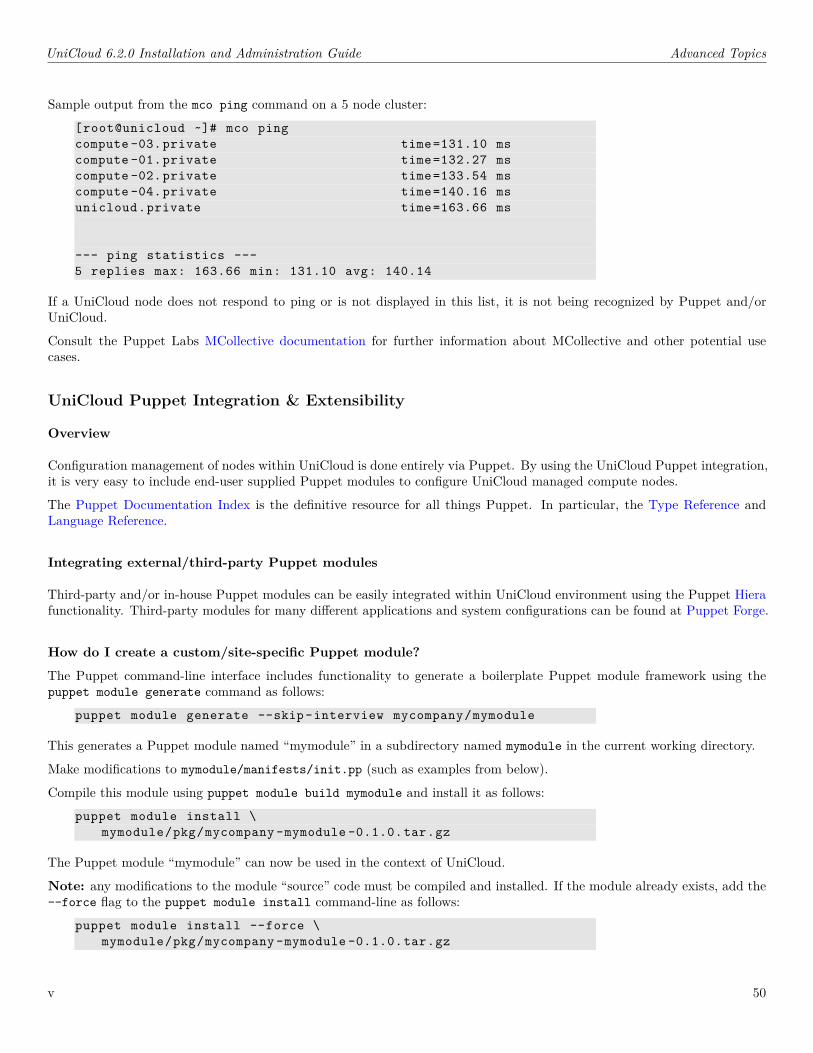
UniCloud 6.2.0 Installation and Administration Guide Advanced Topics
Sample output from the mco ping command on a 5 node cluster:[root@unicloud ~]# mco pingcompute -03.private time=131.10 mscompute -01.private time=132.27 mscompute -02.private time=133.54 mscompute -04.private time=140.16 msunicloud.private time=163.66 ms
--- ping statistics ---5 replies max: 163.66 min: 131.10 avg: 140.14
If a UniCloud node does not respond to ping or is not displayed in this list, it is not being recognized by Puppet and/orUniCloud.
Consult the Puppet Labs MCollective documentation for further information about MCollective and other potential usecases.
UniCloud Puppet Integration & Extensibility
Overview
Configuration management of nodes within UniCloud is done entirely via Puppet. By using the UniCloud Puppet integration,it is very easy to include end-user supplied Puppet modules to configure UniCloud managed compute nodes.
The Puppet Documentation Index is the definitive resource for all things Puppet. In particular, the Type Reference andLanguage Reference.
Integrating external/third-party Puppet modules
Third-party and/or in-house Puppet modules can be easily integrated within UniCloud environment using the Puppet Hierafunctionality. Third-party modules for many different applications and system configurations can be found at Puppet Forge.
How do I create a custom/site-specific Puppet module?The Puppet command-line interface includes functionality to generate a boilerplate Puppet module framework using thepuppet module generate command as follows:
puppet module generate --skip-interview mycompany/mymodule
This generates a Puppet module named “mymodule” in a subdirectory named mymodule in the current working directory.
Make modifications to mymodule/manifests/init.pp (such as examples from below).
Compile this module using puppet module build mymodule and install it as follows:puppet module install \
mymodule/pkg/mycompany -mymodule -0.1.0.tar.gz
The Puppet module “mymodule” can now be used in the context of UniCloud.
Note: any modifications to the module “source” code must be compiled and installed. If the module already exists, add the--force flag to the puppet module install command-line as follows:
puppet module install --force \mymodule/pkg/mycompany -mymodule -0.1.0.tar.gz
v 50
UniCloud 6.2.0 Installation and Administration Guide Advanced Topics
Adding Puppet module to all UniCloud-managed resourcesTo apply a Puppet module to all UniCloud-managed resources, including the UniCloud installer, edit the file/etc/puppetlabs/code/environments/production/hieradata/unicloud-extra.yaml and define the classes valueas follows:
---version: 5
classes:- <Puppet module/class name>
or using the example module mymodule from above:---version: 5
classes:- mymodule
This will cause the module mymodule to apply to all nodes in the UniCloud environment, including the UniCloud installer.
Adding Puppet module to specific software profileCreate a YAML file /etc/puppetlabs/code/environments/production/hieradata/unicloud-<NAME>.yaml, where“NAME” is the software profile name where the Puppet module/classes are to be applied. Please note, this filename is casesensitive.For example, to add the module “docker” to the software profile “execd”, create a file named /etc/puppetlabs/code/environments/%{environment}/hieradata/unicloud-execd.yaml.The contents of this standard YAML formatted file would appear as follows:Note: this assumes the Puppet module module is previously installed. Modify metadata.json in your custom Puppetmodule to add a dependency on the “docker” module to have it automatically installed when “mymodule” is installed.
---version: 5
classes:- docker
or using the mymodule example above:---version: 5
classes:- mymodule
mymodule would only apply to nodes in the software profile “execd”.
Simple Puppet Recipes
The examples below are simplistic in nature, however having many Puppet type references configuring many applicationsand/or configuration files or users/groups will result in a large amount of code. Refer to the Puppet “Language: Basics”guide for further information on creating Puppet classes, organizing Puppet files/modules/classes, and general tips on codingfor Puppet in an efficient and maintainable manner.Using the mymodule example from previous, this code could be pasted into mymodule/manifests/init.pp to be applied tothe configured nodes (either all nodes, or only the software profile for which the module was enabled).
v 51
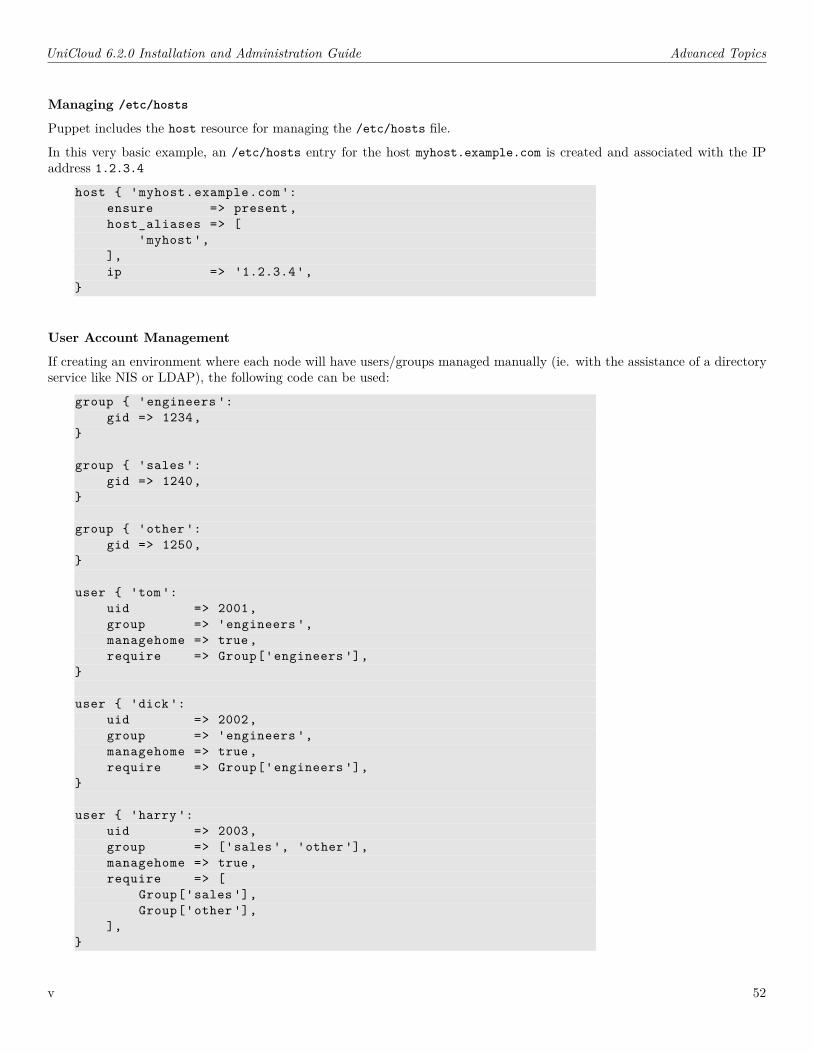
UniCloud 6.2.0 Installation and Administration Guide Advanced Topics
Managing /etc/hosts
Puppet includes the host resource for managing the /etc/hosts file.
In this very basic example, an /etc/hosts entry for the host myhost.example.com is created and associated with the IPaddress 1.2.3.4
host { 'myhost.example.com':ensure => present,host_aliases => [
'myhost',],ip => '1.2.3.4',
}
User Account Management
If creating an environment where each node will have users/groups managed manually (ie. with the assistance of a directoryservice like NIS or LDAP), the following code can be used:
group { 'engineers ':gid => 1234,
}
group { 'sales':gid => 1240,
}
group { 'other':gid => 1250,
}
user { 'tom':uid => 2001,group => 'engineers ',managehome => true,require => Group['engineers '],
}
user { 'dick':uid => 2002,group => 'engineers ',managehome => true,require => Group['engineers '],
}
user { 'harry':uid => 2003,group => ['sales', 'other'],managehome => true,require => [
Group['sales'],Group['other'],
],}
v 52
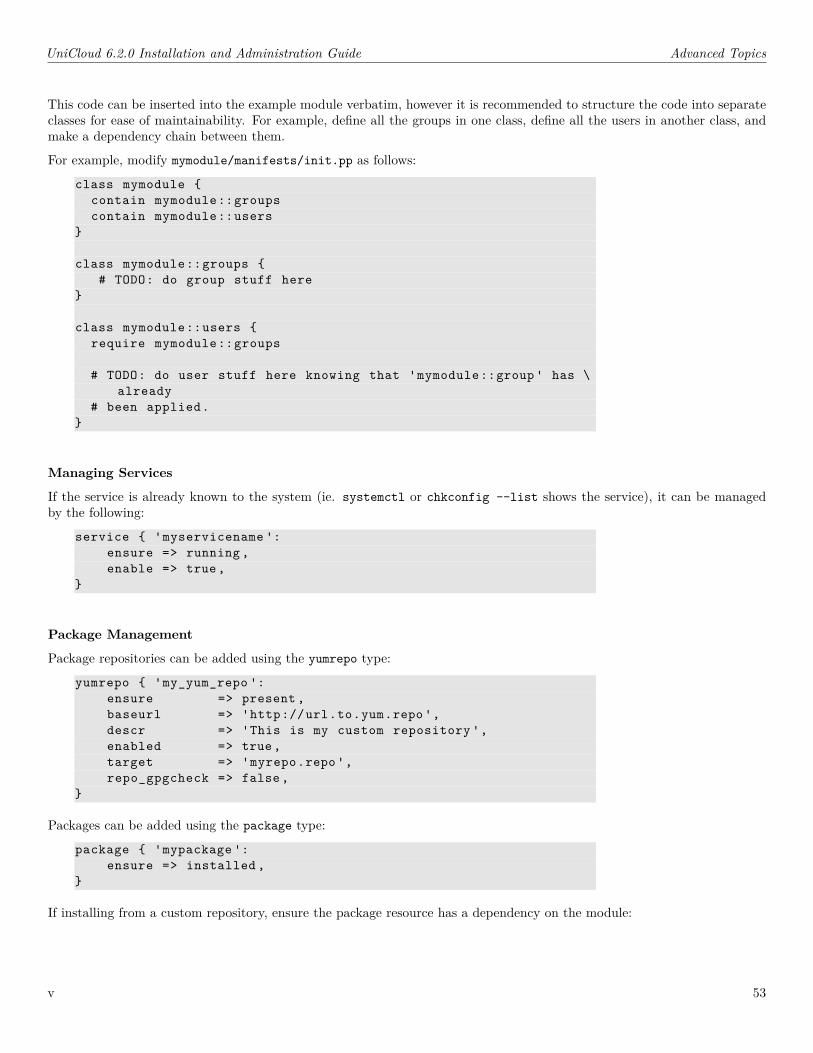
UniCloud 6.2.0 Installation and Administration Guide Advanced Topics
This code can be inserted into the example module verbatim, however it is recommended to structure the code into separateclasses for ease of maintainability. For example, define all the groups in one class, define all the users in another class, andmake a dependency chain between them.
For example, modify mymodule/manifests/init.pp as follows:
class mymodule {contain mymodule::groupscontain mymodule::users
}
class mymodule::groups {# TODO: do group stuff here
}
class mymodule::users {require mymodule::groups
# TODO: do user stuff here knowing that 'mymodule::group' has \already
# been applied.}
Managing Services
If the service is already known to the system (ie. systemctl or chkconfig --list shows the service), it can be managedby the following:
service { 'myservicename ':ensure => running,enable => true,
}
Package Management
Package repositories can be added using the yumrepo type:
yumrepo { 'my_yum_repo ':ensure => present,baseurl => 'http://url.to.yum.repo',descr => 'This is my custom repository ',enabled => true,target => 'myrepo.repo',repo_gpgcheck => false,
}
Packages can be added using the package type:
package { 'mypackage ':ensure => installed ,
}
If installing from a custom repository, ensure the package resource has a dependency on the module:
v 53
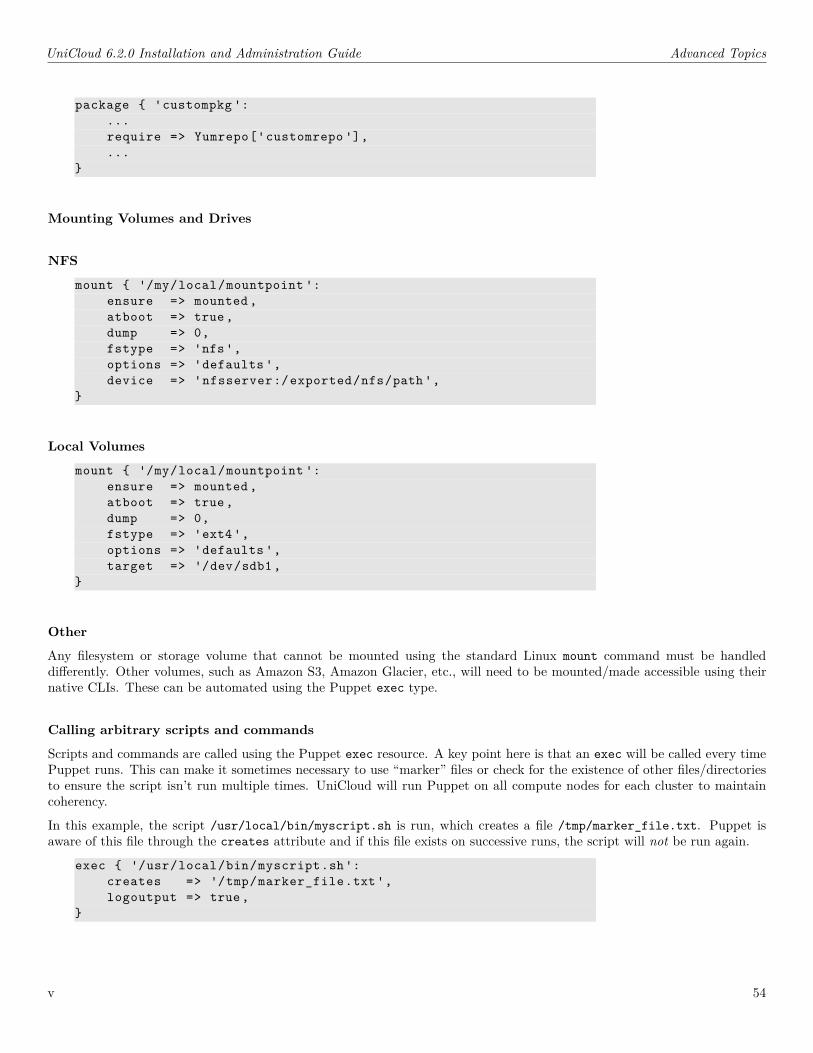
UniCloud 6.2.0 Installation and Administration Guide Advanced Topics
package { 'custompkg ':...require => Yumrepo['customrepo '],...
}
Mounting Volumes and Drives
NFS
mount { '/my/local/mountpoint ':ensure => mounted,atboot => true,dump => 0,fstype => 'nfs',options => 'defaults ',device => 'nfsserver:/exported/nfs/path',
}
Local Volumes
mount { '/my/local/mountpoint ':ensure => mounted,atboot => true,dump => 0,fstype => 'ext4',options => 'defaults ',target => '/dev/sdb1,
}
Other
Any filesystem or storage volume that cannot be mounted using the standard Linux mount command must be handleddifferently. Other volumes, such as Amazon S3, Amazon Glacier, etc., will need to be mounted/made accessible using theirnative CLIs. These can be automated using the Puppet exec type.
Calling arbitrary scripts and commands
Scripts and commands are called using the Puppet exec resource. A key point here is that an exec will be called every timePuppet runs. This can make it sometimes necessary to use “marker” files or check for the existence of other files/directoriesto ensure the script isn’t run multiple times. UniCloud will run Puppet on all compute nodes for each cluster to maintaincoherency.
In this example, the script /usr/local/bin/myscript.sh is run, which creates a file /tmp/marker_file.txt. Puppet isaware of this file through the creates attribute and if this file exists on successive runs, the script will not be run again.
exec { '/usr/local/bin/myscript.sh':creates => '/tmp/marker_file.txt',logoutput => true,
}
v 54
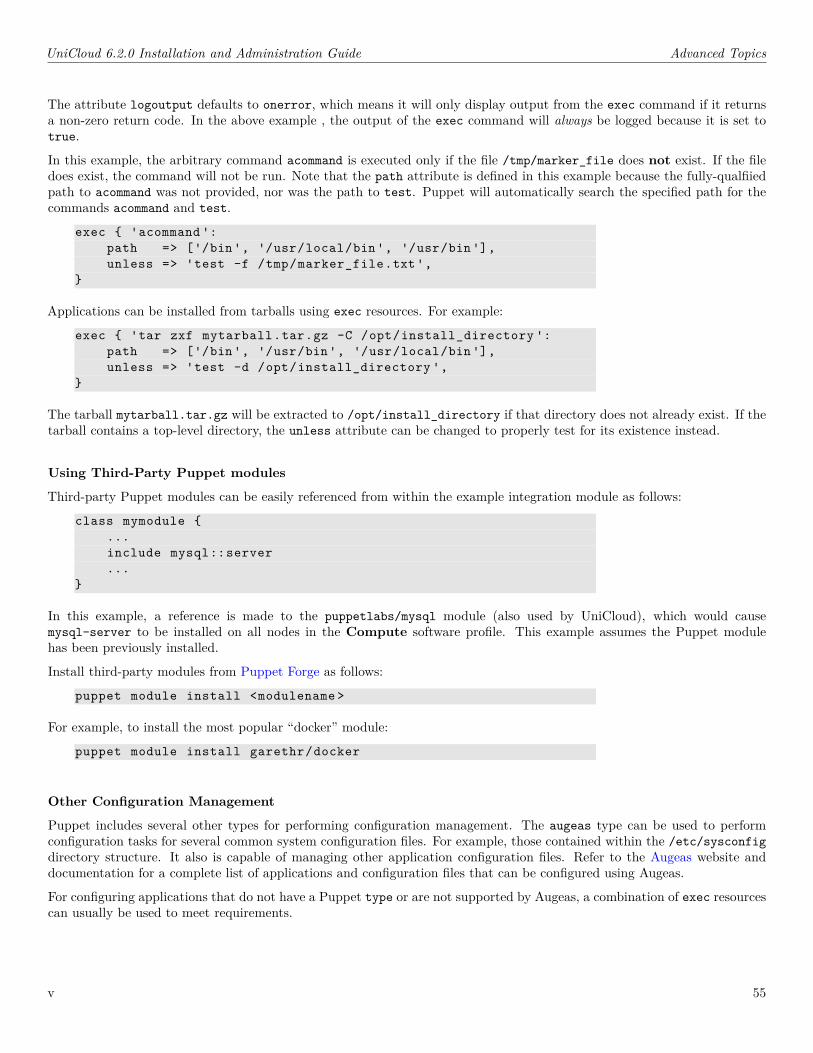
UniCloud 6.2.0 Installation and Administration Guide Advanced Topics
The attribute logoutput defaults to onerror, which means it will only display output from the exec command if it returnsa non-zero return code. In the above example , the output of the exec command will always be logged because it is set totrue.
In this example, the arbitrary command acommand is executed only if the file /tmp/marker_file does not exist. If the filedoes exist, the command will not be run. Note that the path attribute is defined in this example because the fully-qualfiiedpath to acommand was not provided, nor was the path to test. Puppet will automatically search the specified path for thecommands acommand and test.
exec { 'acommand ':path => ['/bin', '/usr/local/bin', '/usr/bin'],unless => 'test -f /tmp/marker_file.txt',
}
Applications can be installed from tarballs using exec resources. For example:
exec { 'tar zxf mytarball.tar.gz -C /opt/install_directory ':path => ['/bin', '/usr/bin', '/usr/local/bin'],unless => 'test -d /opt/install_directory ',
}
The tarball mytarball.tar.gz will be extracted to /opt/install_directory if that directory does not already exist. If thetarball contains a top-level directory, the unless attribute can be changed to properly test for its existence instead.
Using Third-Party Puppet modules
Third-party Puppet modules can be easily referenced from within the example integration module as follows:
class mymodule {...include mysql::server...
}
In this example, a reference is made to the puppetlabs/mysql module (also used by UniCloud), which would causemysql-server to be installed on all nodes in the Compute software profile. This example assumes the Puppet modulehas been previously installed.
Install third-party modules from Puppet Forge as follows:
puppet module install <modulename >
For example, to install the most popular “docker” module:
puppet module install garethr/docker
Other Configuration Management
Puppet includes several other types for performing configuration management. The augeas type can be used to performconfiguration tasks for several common system configuration files. For example, those contained within the /etc/sysconfigdirectory structure. It also is capable of managing other application configuration files. Refer to the Augeas website anddocumentation for a complete list of applications and configuration files that can be configured using Augeas.
For configuring applications that do not have a Puppet type or are not supported by Augeas, a combination of exec resourcescan usually be used to meet requirements.
v 55
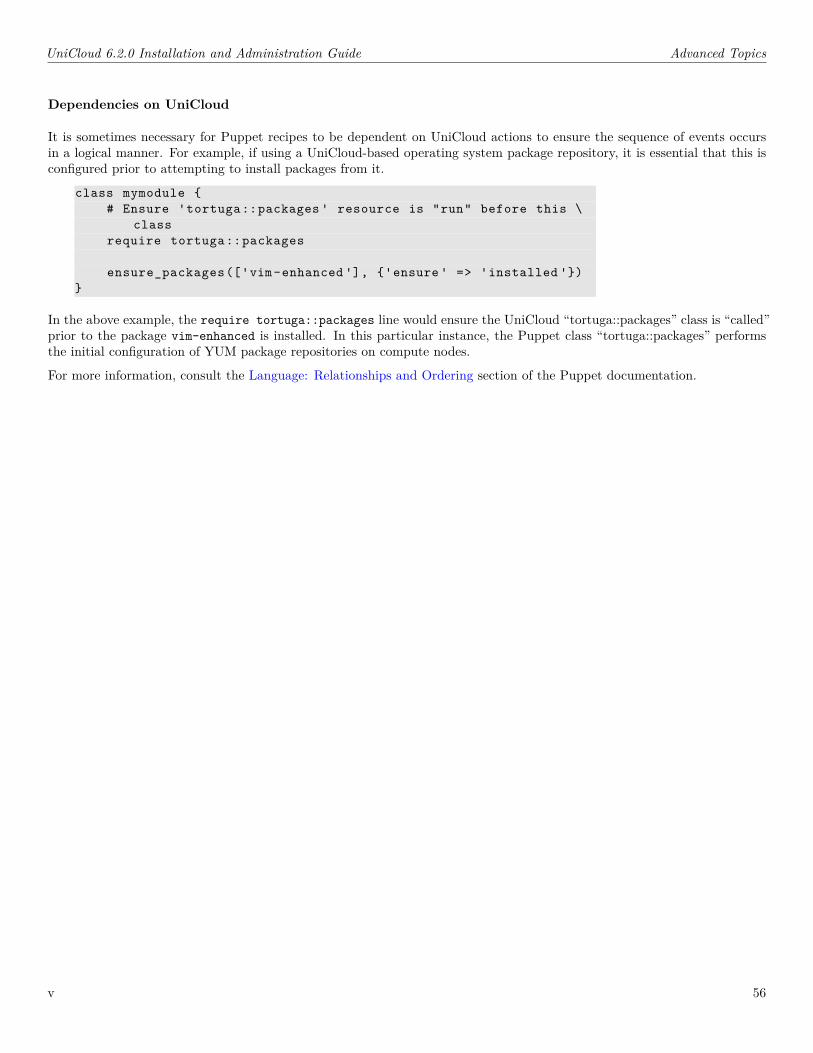
UniCloud 6.2.0 Installation and Administration Guide Advanced Topics
Dependencies on UniCloud
It is sometimes necessary for Puppet recipes to be dependent on UniCloud actions to ensure the sequence of events occursin a logical manner. For example, if using a UniCloud-based operating system package repository, it is essential that this isconfigured prior to attempting to install packages from it.
class mymodule {# Ensure 'tortuga::packages ' resource is "run" before this \
classrequire tortuga::packages
ensure_packages(['vim-enhanced '], {'ensure' => 'installed '})}
In the above example, the require tortuga::packages line would ensure the UniCloud “tortuga::packages” class is “called”prior to the package vim-enhanced is installed. In this particular instance, the Puppet class “tortuga::packages” performsthe initial configuration of YUM package repositories on compute nodes.
For more information, consult the Language: Relationships and Ordering section of the Puppet documentation.
v 56
UniCloud 6.2.0 Installation and Administration Guide Resource Adapters
Resource Adapters
Resource adapters are the “connectors” between UniCloud and virtualization and cloud platforms.
Resource adapter configuration profiles
Starting with UniCloud 6.2.0, resource adapter configuration is managed using the adapter-mgmt command-line interface.This functionality obsoletes the need for resource adapter configuration files previously found in $TORTUGA_ROOT/config/adapter-defaults-*.conf.
It is also no longer necessary to create resource adapter configuration profiles mapped to hardware profile names.
Creating a resource adapter configuration profile
Create a resource adapter configuration profile named “example” for the “aws” resource adapter:
adapter-mgmt create --resource -adapter aws --profile example \--setting key=value
This command creates a resource adapter configuration profile named “example” with one setting (key=value).
Using the -A example option when running add-nodes would instruct UniCloud to obtain resource adapter configurationfrom this profile.
Adding nodes using resource adapter configuration profile
The default resource adapter configuration profile is used for all add-nodes requests that do not override the resourceadapter configuration profile.
When the option -A <profile name> is specified, the resource adapter configuration profile with the specified name is used.If this profile does not exist, an error will be displayed. If the profile specified does not contain the full set of resource adapterconfiguration settings (ie. credentials), the system will automatically use the “missing” values from the default profile.
Importing an existing resource adapter configuration
For users of UniCloud versions prior to 6.2.0, the resource adapter configuration was contained within a file. These existingresource adapter configurations may be imported as follows:
adapter-mgmt import --resource -adapter aws --adapter-config \<filename >
This will create a default resource adapter configuration profile for the specific resource adapter as well as individualconfiguration profiles for all sections listed in the adapter configuration file.
List all resource adapter configuration profiles
For example, to list all resource adapter configuration profiles for the “aws” resource adapter, use the following command-line:
adapter-mgmt list --resource -adapter aws
v 57
UniCloud 6.2.0 Installation and Administration Guide Resource Adapters
Show specific resource adapter configuration profile
To display all settings for a specific resource adapter configuration profile:
adapter-mgmt show --resource -adapter aws --profile default
All “secret” information (ie. AWS access/secret keys, passwords, etc.) will be hidden from the output of adapter-mgmt showby default. To display all information, add the --all argument. For example:
adapter-mgmt show --all --resource -adapter aws --profile default
Deleting resource adapter configuration profiles
Delete the resource adapter configuration profile “example” from the “aws” resource adapter:
adapter-mgmt delete --resource -adapter aws --profile example
Amazon Web Services resource adapter
Overview
Amazon Elastic Compute Cloud support is enabled in UniCloud through the installation and activation of the AWS resourceadapter kit.
The AWS resource adapter kit provides a resource adapter that can be used to perform the following functions on anAWS-compatible cloud:
• Add and delete node instances• Run a UniCloud installer node from within an AWS-compatible cloud• Run a UniCloud installer node from outside an AWS-compatible cloud (also known as hybrid mode)• Automatically manage an OpenVPN point-to-point VPN from a private datacenter to an AWS-compatible cloud
The AWS adapter maps each AWS instance to a UniCloud compute node. It also adds support for cloud bursting. Whenused in conjunction with the UniCloud Simple Policy Engine, it allows for user-defined policy to automatically add (andremove) AWS-based compute nodes based on user-defined metrics (such as cluster load).
Installing the AWS resource adapter kit
The AWS Adapter Kit installs as a standard kit using install-kit:
install-kit kit-awsadapter -6.2.0-0.tar.bz2
After installing the AWS Adapter Kit and enabling the management component, the following changes are made withinUniCloud:
1. The AWS hardware profile is created. This profile uses the AWS resource adapter for node management. Any nodesprovisioned in a mapped software profile (see documentation for set-profile-mapping) with be provisioned on theconfigured AWS cloud provider.Note: the AWS hardware profile is only created if a provisioning network is configured at the time of the AWS AdapterKit being installed. It can be manually created as described below.
2. Create resource adapter configuration profile
v 58
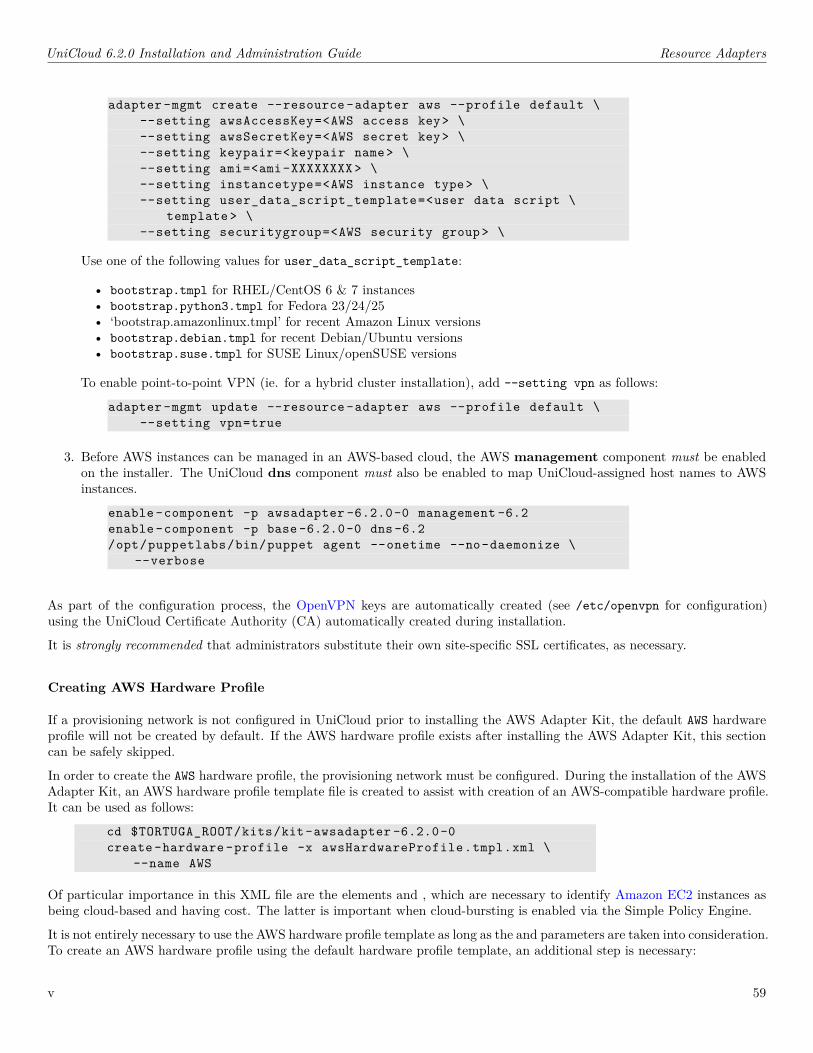
UniCloud 6.2.0 Installation and Administration Guide Resource Adapters
adapter-mgmt create --resource-adapter aws --profile default \--setting awsAccessKey=<AWS access key> \--setting awsSecretKey=<AWS secret key> \--setting keypair=<keypair name> \--setting ami=<ami-XXXXXXXX> \--setting instancetype=<AWS instance type> \--setting user_data_script_template=<user data script \
template > \--setting securitygroup=<AWS security group> \
Use one of the following values for user_data_script_template:
• bootstrap.tmpl for RHEL/CentOS 6 & 7 instances• bootstrap.python3.tmpl for Fedora 23/24/25• ‘bootstrap.amazonlinux.tmpl’ for recent Amazon Linux versions• bootstrap.debian.tmpl for recent Debian/Ubuntu versions• bootstrap.suse.tmpl for SUSE Linux/openSUSE versions
To enable point-to-point VPN (ie. for a hybrid cluster installation), add --setting vpn as follows:
adapter-mgmt update --resource-adapter aws --profile default \--setting vpn=true
3. Before AWS instances can be managed in an AWS-based cloud, the AWS management component must be enabledon the installer. The UniCloud dns component must also be enabled to map UniCloud-assigned host names to AWSinstances.
enable-component -p awsadapter -6.2.0-0 management -6.2enable-component -p base -6.2.0-0 dns-6.2/opt/puppetlabs/bin/puppet agent --onetime --no-daemonize \
--verbose
As part of the configuration process, the OpenVPN keys are automatically created (see /etc/openvpn for configuration)using the UniCloud Certificate Authority (CA) automatically created during installation.
It is strongly recommended that administrators substitute their own site-specific SSL certificates, as necessary.
Creating AWS Hardware Profile
If a provisioning network is not configured in UniCloud prior to installing the AWS Adapter Kit, the default AWS hardwareprofile will not be created by default. If the AWS hardware profile exists after installing the AWS Adapter Kit, this sectioncan be safely skipped.
In order to create the AWS hardware profile, the provisioning network must be configured. During the installation of the AWSAdapter Kit, an AWS hardware profile template file is created to assist with creation of an AWS-compatible hardware profile.It can be used as follows:
cd $TORTUGA_ROOT/kits/kit-awsadapter -6.2.0-0create-hardware-profile -x awsHardwareProfile.tmpl.xml \
--name AWS
Of particular importance in this XML file are the elements and , which are necessary to identify Amazon EC2 instances asbeing cloud-based and having cost. The latter is important when cloud-bursting is enabled via the Simple Policy Engine.
It is not entirely necessary to use the AWS hardware profile template as long as the and parameters are taken into consideration.To create an AWS hardware profile using the default hardware profile template, an additional step is necessary:
v 59
UniCloud 6.2.0 Installation and Administration Guide Resource Adapters
create-hardware-profile --name AWSupdate-hardware-profile --name AWS --location remote --cost \
10
For advanced installations, it may be desirable to set the “cost” of the cloud-based instances to be higher and/or lower if theinstallation has multiple AWS hardware profiles associated with different instance types.
Either method of creating the AWS hardware profile is equally valid.
Updating AWS resource adapter configuration
Use the command-line tool adapter-mgmt update to update an existing resource adapter configuration.
For example, to change the instance type for “default” resource adapter configuration profile:
adapter-mgmt update -r aws -p default -s instancetype=XXXXXXXX
See the AWS resource adapter configuration reference for valid settings for the AWS resource adapter.
v 60
UniCloud 6.2.0 Installation and Administration Guide Resource Adapters
AWS resource adapter configuration reference
This section lists the valid settings for the AWS resource adapter.
• amiAMI ID to be used when launching compute node instances.Paravirtual (PV) and hardware virtual machine (PVM) AMIs are supported, however PVM AMIs are recommendedfor better performance. 64-bit AMIs must be used in either instance.
• awsAccessKey and awsSecretKeyThese are the API keys for the cloud user account under which instances should be managed. A pre-existing AWSaccount is required prior to using the UniCloud AWS resource adapter.
• block_device_mapSpecify block device map for compute node instances.See “Advanced Topics: AWS instance block device mapping” section below for full detail and examples.
• cloud_init and user_data_script_templateThese control the scripts that set up and configure Puppet and fully integrate the instance into a UniCloud cluster.The cloud_init parameter may be set to false if UniCloud should create instances (nodes), but do no managementof the software on those nodes.The default cloud-init script $TORTUGA_ROOT/config/bootstrap.tmpl can be modified by the end-user to performcustom bootstrapping of AWS nodes added by UniCloud.Note: cloud_init does not need to be set if user_data_script_template is set.
• endpointThis is intended primarily for other AWS-compatible clouds. It should be set to the hostname or IP address of thesystem that accepts API requests for managing instances.Note: This setting is not required for Amazon EC2 and is intended mainly for cloud providers with an AWS-compatibleAPI.
• iam_instance_profile_nameIAM Instance Profile (IIP) name to associate with the instance(s).This is the name of the IAM Role to associate with UniCloud-launched instances. If the UniCloud installer is hostedon EC2 and IAM is in effect, the IAM role policy must include the “iam:PassRole” permission.
• instancetypeCompute node instance typeSpecify the type of compute node instances created in the AWS cloud. The instance must support 64-bit images, andfurther must support the image specified by ami. Since no prelaunch validation of the instancetype is performed,errors related to an invalid instance type are reported at instance launch time.Consult corresponding AWS provider documentation for valid values.
• keypairName of a keypair previously defined in the AWS-compatible cloud, allowing SSH access.Note: The specified keypair must previously exist.
v 61
UniCloud 6.2.0 Installation and Administration Guide Resource Adapters
• manage_resolv_conf, dns_search, dns_options, dns_nameserversAllow the compute node bootstrap process to manage /etc/resolv.conf. This enables support for a custom DNSsuffix outside of the configuration provided by Amazon VPC.dns_search specifies the DNS search order to be configured on compute node instances.dns_options specifies the “options” field in /etc/resolv/conf on compute node instances.dns_nameservers specifies the “nameservers” field in /etc/resolv.conf on compute node instances and is a space-separated list of IP addresses.See the section DNS and AWS for additional information.
• region, zone, and placementgroupUniCloud will automtically use region “us-east-1” on AWS (or first available region on non-AWS plaforms).For example, to use zone “us-east-1e”, set the following:
region = us-east-1zone = us-east-1e
Specify “zone” and/or “placementgroup” to further customize exact location where compute node instances will belaunched.
• securitygroupMust be set to a security group allowing unrestricted access between the UniCloud installer and compute instances.If the security group is not specified, a security group named ‘default’ will be used. The end-user is responsible forproperly configuring access through the security group.
• subnet_idSpecify the Amazon VPC subnet ID for instances to use.Note: only the subnet_id (and not the VPC ID) need to be specified in the AWS resource adpater configuration.
• tagsUser-defined AWS tags are automatically added to all instances. Tags in AWS can be used to classify or group similarinstances. For example, to clearly identify all instances within in the same cluster.They should be specified as key-value pairs in the format key:value. Multiple tags should be separated by spaces.For keys and/or values containing spaces, enclose the spaces in double-quotes.Simple example:
adapter-mgmt update --resource-adapter aws --profile default \--setting "tags=owner=admin"
Tag name/values containing spaces:
adapter-mgmt update --resource-adapter aws --profile default \--setting tags="key=value \"this is the tag name=this is \
the tag value\""
Multiple tags:
adapter-mgmt update --resource-adapter aws --profile default \--setting tags="Name=\"execd host\" ostype=centos"
• use_instance_hostnameWhen set to “true”, the AWS-assigned host name will be used. This requires the hardware profile name format to beset to “*” (see update-hardware-profile documentation for information on setting hardware profile name format).When disabled (value false), the hardware profile name format is used to generate host names.
v 62
UniCloud 6.2.0 Installation and Administration Guide Resource Adapters
When UniCloud is hosted on AWS, use_instance_hostname is automatically enabled and can be disabled, whichrequires additional DNS configuration.See section DNS and AWS.
• vpnThe AWS resource adapter will automatically configure a point-to-point OpenVPN connection to have the node appearas if it is on the local provisioning network. Setting vpn to false will disable this behavior. This behavior also relieson cloud_init being set to true.By default, OpenVPN is configured to use the network 172.16.2.0 as the point-to-point address between the UniCloudinstaller and node instances. Consult Appendix C Advanced UniCloud VPN Configuration.
Refer to the Advanced Topics section below for further discussion on supporting multiple clouds. This capability can also beused to support different instance types for different hardware profiles.
AMI Requirements
All AMIs for Amazon EC2 used for deploying UniCloud compute nodes must contain a UniCloud-compatible operatingsystem and have cloud-init enabled for bootstrapping.
For most UniCloud installations, a custom AMI containing a compatible operating system (with cloud-init enabled) andinstallation-specific applications and/or datasets would be optimal. When creating custom AMIs, be sure to be aware ofoperating system state (ie. host name) contained within image snapshots used to create the AMI.
Amazon EC2
Red Hat Enterprise Linux and CentOS both offer access to AMIs through the AWS Marketplace. In either case, there isno additional charge for the software through the AWS Marketplace, however Red Hat AMIs require access to the Red HatNetwork (subscriptiona available through Red Hat).
Third-party AMIs (created by vendors other than Red Hat and CentOS) may also be used, as well as custom AMIs as longas they meet cloud-init requirements.
Security Group Requirements
The recommended configuration for AWS-based clouds is a security group which grants full access to all other instancesrunning in the same security group. This prevents communications from being blocked internally.
If this configuration is not possible, see the Firewall Configuration section in this manual for a list of ports which must beallowed in the security group.
The security group used by AWS instances launched by UniCloud must allow incoming traffic on port 1194/udp to supportOpenVPN.
DNS and AWS
In the on-premise UniCloud installer (hybrid installation) scenario, UniCloud will automatically generate host names for AWSinstances. These generated host names are resolved using the built-in DNS server. For an AWS-based UniCloud installer,it is possible to configure UniCloud to allow generating host names and using a custom DNS suffix. This functionality isprovided in addition to the Amazon VPC functionality that allows for custom name servers and DNS domain.
v 63
UniCloud 6.2.0 Installation and Administration Guide Resource Adapters
How do I use a custom DNS suffix for compute node instances?
Through the use of the built-in support for a UniCloud-managed DNS server, it is possible to have a custom DNS domainassigned to your compute nodes.
The following steps are required to enable a custom DNS suffix:
1. Set custom DNS zone
set-private-dns-zone cloud.univa.com
2. Update hardware profile(s) name format
update-hardware-profile --name execd --name-format aws-#NN
3. Enable DNS server on UniCloud
enable-component -p dnspuppet agent --onetime --no-daemonize
Restart Grid Engine qmaster to allow DNS settings to take place.
service sgemaster.unicloud stopservice sgemaster.unicloud start
4. Apply settings to AWS resource adapter
adapter-mgmt update -r aws -p default \-s manage_resolv_conf=true \-s use_instance_hostname=false
How do I specify custom DNS options, search spec and/or nameservers for compute node instances?
Enable managed /etc/resolv.conf and specify dns_options, dns_search, and/or dns_nameservers. For example:
adapter-mgmt update -r aws -p default \-s manage_resolv_conf=true \-s dns_options="timeout:2 attempts:5" \-s dns_nameservers="8.8.8.8 8.8.4.4" \-s dns_search="mydomain yourdomain"
The resulting /etc/resolv.conf on the compute node instance would be similar to as follows:
options timeout:2 attempts:5search mydomain yourdomainnameserver <IP address of UniCloud installer >nameserver 8.8.8.8nameserver 8.8.4.4
In general, it’s not usually desirable to set dns_nameservers as it will cause the DNS resolution behaviour to be differentfrom that of the UniCloud installer. Use customized DNS configuration on the UniCloud installer and let the built-in DNSserver propagate those settings to the compute nodes.
v 64
UniCloud 6.2.0 Installation and Administration Guide Resource Adapters
AWS resource adapter usage
Supported Node OperationsThe AWS adapter supports the following UniCloud node management commands:
• activate-node• add-nodes• delete-node• idle-node• reboot-node• transfer-node• shutdown-node• startup-node
The AWS adapter does not support the following node operation commands as they do not make sense within the context ofcloud-based compute nodes:
• checkpoint-node• migrate-node
Networking ConsiderationsThe AWS Adapter automatically configures an OpenVPN virtual private network when the UniCloud installer is installedlocally (ie. not cloud-based). By default, the VPN is not configured if the UniCloud installer itself is running on AmazonEC2.The VPN requires a network address space in which to create compute nodes. For a hybrid environment where the installeris physical and the compute nodes are entirely cloud-based, this network can be attached to a interface defined by Ethernetalias (ie. eth0:0). It does not need to be an actual physical network connected to a physical Ethernet interface.To enable a true hybrid environment with local compute nodes (physical and/or virtual) and cloud-based compute nodes,the network used for the VPN needs to be the same as the network where the local compute nodes are connected.
Adding NodesNodes are added using the UniCloud add-nodes command. Specifying an AWS-enabled hardware profile (hardware profilewith resource adapter set to awsadapter) automatically causes UniCloud to use the AWS resource adapter to manage thenodes.For example, the following command-line will add 4 AWS nodes to the software profile Compute and hardware profile AWS:
add-nodes --count 4 --software -profile Compute \--hardware -profile AWS
Best Practices
Amazon Virtual Private Cloud (VPC)Using an Amazon VPC, allows an administrator more control over their compute instances. This includes allowing settingof instance IP addresses, network address space, routing, DNS, etc.Ensure the setting subnet_id is applied when using an Amazon VPC:
adapter-mgmt update --resource -adapter aws --profile default \--setting subnet_id=<subnet-XXXXXXXX >
Please refer to Amazon VPC documentation for further information.
v 65
UniCloud 6.2.0 Installation and Administration Guide Resource Adapters
VPN or AWS Direct Connect
When using an external VPN (ie. VPN not managed by UniCloud) or AWS Direct Connect, ensure the vpn setting is set tofalse:
adapter-mgmt update --resource -adapter aws --profile default \--setting vpn=false
or remove it entirely (VPN is disabled by default):
adapter-mgmt update --resource -adapter aws --profile default \--delete-setting vpn
In this context, the vpn setting refers to the use of the UniCloud-managed, point-to-point OpenVPN feature. Setting vpn tofalse informs UniCloud that AWS instances created can be accessed directly via their IP address and/or host name and donot need an OpenVPN connection created.
For proof-of-concept (POC) testing, demos, etc., it is sufficient to use the built-in OpenVPN point-to-point capability, howeverit is not intended to replace a properly secured, corporate VPN. It is strongly recommended to disable the UniCloud-managedVPN and use an externally managed VPN.
Note: Because of the flexibility of UniCloud, it is also possible to have some nodes connected via VPN and others directlyconnected. Set vpn = true or vpn = false on resource adapter configuration profile(s) as necessary. A typical UniCloudinstallation would have all nodes accessible either through the UniCloud-managed OpenVPN connection or directly.
v 66
UniCloud 6.2.0 Installation and Administration Guide Resource Adapters
EC2 Spot Instance support
OverviewUniCloud EC2 Spot Instance support allows UniCloud to manage spot instances requested through the UniCloud providedcommand-line interfaces.
The basic workflow is as follows:
• Check current spot instance price using the UniCloud CLI get-current-spot-instance-price.This utility uses the existing AWS resource adapter configuration to determine AWS region, availability zone, andinstance type.Use the --resource-adapter-configuration argument to specify a configuration profile other than “default”.
• Request spot instances to be added to specific software/hardware profileRequest 6 spot instances at the price of $0.0299/hour (2.99 cents per hour). Nodes will be added to the software andhardware profile “execd”, respectively:
request-spot-instances --price 0.0299 --software-profile execd \--hardware-profile execd --count 6
Nodes do not appear in output of get-node-status until the spot instance requests have been fulfilled.
• Display existing spot instance requests known to UniCloud using list-spot-instance-requests.
• Cancel spot instance requests using cancel-spot-instance-requests.
Note: spot instance requests made within the AWS Management Console or through AWS command-line interfaces are notknown to UniCloud and will not automatically join the UniCloud-managed cluster.
Prerequisites
• UniCloud must either be hosted on AWS or using an externally managed VPN or Direct Connect (ie. not using theintegrated support for OpenVPN)This is necessary because of the need for AWS-assigned instance host names.UniCloud spot instance support currently does not support hybrid, point-to-point VPN configurations.
• AWS resource adapter must be previously configuredEnsure add-nodes works against the “default” resource adapter configuration profile prior to attempting to use spotinstance support.
Setting up EC2 Spot Instance supportEC2 Spot Instance support is not enabled by default in UniCloud. The EC2 Spot Instance support daemon (awsspotd) mustbe manually enabled and started before it is capable of requesting and monitoring spot instance requests.
1. Configure AWS credentialsIf not using AWS Identity and Access Management, it is necessary to configure a credentials file.Create a /root/.boto file with these contents:
[Credentials]aws_access_key_id = YOURACCESSKEYaws_secret_access_key = YOURSECRETKEY
v 67
UniCloud 6.2.0 Installation and Administration Guide Resource Adapters
2. Enable and start awsspotd serviceRHEL/CentOS 7
systemctl enable awsspotdsystemctl start awsspotd
RHEL/CentOS 6
chkconfig awsspotd onservice awsspotd start
3. Make spot instance requestsWhen spot instance requests are fulfilled, nodes will be automatically added to the UniCloud environment.If spot instances are marked for termination/terminated, nodes will be automatically removed from the cluster.
Configuration
For example, to change the AWS region to us-west-2, add the following line to /etc/sysconfig/awsspotd as follows:
AWSSPOTD_OPTIONS="--region us-west-2"
Troubleshooting
• Use AWS management console or AWS CLI to query spot instance requests.
• awsspotd (UniCloud AWS Spot Instance support service) also logs verbosely to /var/log/unicloud.
• Use systemctl status awsspotd (or service awsspotd status on RHEL/CentOS
6) to ensure spot instance support daemon is running. Use journalctl -u awsspotd to see any console output fromthe daemon on RHEL/CentOS 7.
EC2 Spot Instance limitations/known issues
• Logging/debugging/troubleshootingEC2 Spot Instance operations may not be logged with sufficient verbosity to assist with debugging.Please contact Univa Support [email protected] for assistance in troubleshooting failed EC2 Spot Instance operations.
• No support for multiple AWS accountsOnly the account credentials defined by the IAM profile (or Boto credentials file) are currently used by the EC2 SpotInstance support.
• Spot Fleets not currently supportedEC2 Spot Fleets are not currently supported in this release.
v 68
UniCloud 6.2.0 Installation and Administration Guide Resource Adapters
Advanced Topics
AWS instance block device mapping
AWS allows setting various parameters on the block devices (virtual hard drives) associated with an instance. This includessetting the root device size, the disk type (ie. standard or SSD), # of IOPS, and encryption.
These settings are exposed through the AWS resource adapter using the option block_device_map in the AWS configurationfile. See the example below.
Refer to the Amazon EC2 command-line reference for block device mapping syntax and options.
Note: not all block device mappings are valid for all instance types. Not all instance types have the option of addingephemeral storage. Some instance types permit multiple ephemeral disks. See instance type details at Amazon EC2 InstanceTypes.
As with all configuration options, adding to the [default] section will change the setting for all AWS instances managedby UniCloud. These options can be set on hardware profile specific sections as well. Substitute [default] in the followingexamples as necessary.
Example: set root device (/dev/sda) size to 60GB
adapter-mgmt update --resource -adapter aws --profile default \--setting block_device_map=/dev/sda=:60
Note the leading ‘:’ is necessary to delineate the first argument (snapshot_id) from the second (size).
The root device name can be obtained by displaying details of the AMI. For official RHEL/CentOS 6 AMIs, it is usually/dev/sda or /dev/sda1 and for official RHEL/CentOS 7 AMIs, it is /dev/xvda.
Example: use SSD root device
• General purpose SSD:Enable the General Purpose (gp2) SSD
adapter-mgmt --resource-adapter aws --profile default \setting block_device_map=/dev/sda1=:::gp2
• High performance SSD:Enable high performance SSD with io1 modifier followed by the requested operations per second:
adapter-mgmt --resource-adapter aws --profile default \setting block_device_map=/dev/sda1=:::io1:1000
The same block_device_map settings may be applied to EBS volumes using the same syntax. Note: if is not possible tochange the device type of an ephemeral volume. Refer to EC2 documentation regarding the disk type associated with instancetypes that support ephemeral disks.
Example: Use 20GB SSD-backed root device
adapter-mgmt --resource -adapter aws --profile default \setting block_device_map=/dev/sda1=:60::gp2
v 69
UniCloud 6.2.0 Installation and Administration Guide Resource Adapters
Example: add an ephemeral disk
adapter-mgmt --resource-adapter aws --profile default \--setting block_device_map=/dev/xvdb=ephemeral0
For Amazon EC2 instance types that have the option of multiple ephemeral disks, separate the block device mappings usingcommas:
adapter-mgmt --resource-adapter aws --profile default \--setting \
block_device_map=/dev/xvdb=ephemeral0 ,/dev/xvdc=ephemeral1
Example: set root device size and add an ephemeral disk
Separate device mappings with a comma.
adapter-mgmt --resource-adapter aws --profile default \--setting block_device_map=/dev/sda=:60,/dev/sdb=ephemeral0
Example: add EBS (data) volume
Create 100GB EBS volume attached on /dev/xvdc and marked for deletion on termination.
adapter-mgmt --resource-adapter aws --profile default \--setting block_device_map=/dev/xvdc=:100:true
Using Amazon EC2-assigned instance host names
By default, UniCloud will automatically assign host names to managed Amazon EC2 instances using the name formatdefined in the EC2-enabled hardware profile. For example, the default name format for UniCloud-managed EC2 instances is“aws-#NN”, meaning UniCloud-assigned instance host names would be aws-01.<private DNS suffix>, aws-02.<private DNSsuffix>, aws-03.<private DNS suffix>, and so on.
The default naming behaviour can be modified for UniCloud installations where a VPN or AWS Direct Connect is in use.
First, enable use_instance_hostname in $TORTUGA_ROOT/config/adapter-defaults-aws.conf for all or selected hardwareprofiles. To enable this feature for all hardware profiles, and therefore, all UniCloud-managed instances, the [default] sectionwould be configured as follows:
adapter-mgmt --resource-adapter aws --profile default \--setting use_instance_hostname=true
Note: The resource adapter configuration profile setting use_instance_hostname is only applicable if the VPN is disabled.Ensure the setting vpn=false is set on the default resource adapter configuration profile.
Once this setting has been enabled, it is necessary to configure the hardware profiles to allow use of EC2 assigned host names.
update-hardware-profile --name <hardwareprofilename > \--name-format '*'
Note: Failure to update AWS-enabled hardware profiles will result in errors when attempting to add AWS nodes.
v 70
UniCloud 6.2.0 Installation and Administration Guide Resource Adapters
Compute instances without Internet access
For security purposes, especially when using Amazon VPC, it is often desirable to disallow instances from accessing theInternet. In the context of UniCloud, for example, this implies that all operating system packages must be served by theUniCloud installer (or other AWS infrastructure node).
The default cloud-init script (template found in $TORTUGA_ROOT/config/bootstrap.tmpl) generated for compute in-stances by UniCloud assumes compute instances will have unrestricted Internet access. This script template must bemodified by the end-user to properly retrieve package dependencies from the UniCloud installer or other infrastructure node.
Multiple AWS-compatible Clouds
By default, the AWS adapter supports a single AWS-compatible cloud. However, it is possible to configure it to supportmultiple clouds simultaneously, such as both Amazon EC2 or multiple different profiles for Amazon EC2.
Each AWS configuration is associated with a single hardware profile. To create an additional AWS-compatible hardwareprofile, copy the pre-defined AWS profile as follows:
copy-hardware-profile --src AWS --dst <NAME>
If desired, update the new profile using update-hardware-profile to specify a different description, different modules, nodename format, etc.
All AWS-enabled hardware profiles may use the same resource adapter configuration profile, or it may be desirable to createnew resource adapter configuration profiles for different instance types, availability zones, etc.
In this example, the AWS resource adapter configuration profiles might look as follows:
adapter-mgmt create --resource -adapter aws --profile default \--setting awsAccessKey=XXXXXXXXXXXXXXXX \--setting awsSecretKey=YYYYYYYYYYYYYYYY \--setting ami=ami-XXXXXXXX
Add nodes to EC2:
add-nodes --count 3 \--software-profile <swprofile > \--hardware-profile <hwprofile >
Remember, if the resource adapter configuration profile is not specified, the default is used.
Identity & Access Mangagement (IAM) Policy Requirements
If using IAM when the UniCloud installer is hosted on Amazon EC2, minimally, the following IAM role policy must containthe following actions:
• ec2:RebootInstances• ec2:DescribeImages• ec2:DescribeVpcAttribute• ec2:DescribeVpcs• ec2:DescribeDhcpOptions• ec2:DescribeSubnets• ec2:RunInstances• ec2:StartInstances• ec2:StopInstances• ec2:TerminateInstances• ec2:DescribeInstances
v 71
UniCloud 6.2.0 Installation and Administration Guide Resource Adapters
• ec2:DescribeInstanceStatus• ec2:CreateTags• ec2:DescribeTags
IAM Role Usage
The IAM role must be specified as a parameter when launching the EC2 instance that is acting as the UniCloud installer.This applies to the official UniCloud AMI as well as any custom-built UniCloud installer instances.
The above list of IAM Policy actions does not include permitting passing of the IAM role. This means EC2 instances launchedby UniCloud will not be able to “inherit” the IAM policy.
Refer to AWS Identity & Access Management documentation for further details.
v 72
UniCloud 6.2.0 Installation and Administration Guide Resource Adapters
Troubleshooting
Troubleshooting AWS issues can be tedious. Check /var/log/unicloud and output of get-node-requests for any immedi-ately obvious errors. In the case of AWS IAM related issues, permissions errors are logged.
Next check network connectivity between the UniCloud installer and AWS instances. Using simple ping is usually enough,although AWS security groups can also restrict access to specific network ports.
The following are some commonly observed issues when working with UniCloud and AWS.
1. EC2 instances unable to communicate with UniCloud installer/VPN gatewayHybrid installation onlyEnsure security group of EC2 instances allow inbound port 1194 (UDP) network traffic. This is the port used byOpenVPN.
2. EC2 instances are launched but never provisioned; unable to ping instances created by UniCloudaffects only UniCloud installer hosted in EC2
• Ensure security group of UniCloud installer matches the security group of the compute nodes.• Ensure security group allows access to instances within same security group.• Ensure UniCloud installer is on same Amazon VPC subnet as compute nodes
3. EC2 instances launch but do not appear to be running and/or are inaccessibleAdvanced EC2 instance types (ie. r4 series) require Linux driver support for the Amazon Elastic Network Adapter(ena). This support is not built into the official CentOS AMIs, for example. Amazon Linux and some Debian/UbuntuAMIs do include support for ena.
4. Ephemeral devices configured via block_device_map are not configuredEnsure the requested instance type supports ephemeral disks. Some instance types (ie. m4 series) are EBS only anddo not support ephemeral disks.
v 73
UniCloud 6.2.0 Installation and Administration Guide Resource Adapters
Google Compute Engine resource adapter
Overview
Google Compute Engine support is enabled in UniCloud through the installation and activation of the Google ComputeEngine resource adapter kit.The Google Compute Engine resource adapter kit provides a resource adapter that can be used to perform the followingfunctions on the Google Compute Engine platform:
• Add/delete node (virtual machine) instances• Run a UniCloud installer node from within Google Compute Engine• Run a UniCloud installer node from outside Google Compute Engine (also known as hybrid mode)• Automatically manage an OpenVPN point-to-point VPN from on-premise to Google Compute Engine
The Google Compute Engine resource adapter maps each virtual machine to a UniCloud compute node. It also enables cloudbursting when used in conjunction with the UniCloud Simple Policy Engine.
Installing the Google Compute Engine resource adapter kit
Use install-kit to install the Google Compute Engine resource adapter kit:install-kit kit-gce-6.2.0-0.tar.bz2
Once installed, the “management” component is enabled on the UniCloud installer as follows:enable-component -p gce-6.2.0-0 management -6.2/opt/puppetlabs/bin/puppet agent --onetime --no-daemonize
Using the Google Cloud Platform Console, create and download credentials to be used with the UniCloud Google ComputeEngine resource adapter. Refer to the Google documentation “Manage APIs in the Cloud Platform Console” for informationon setting up API keys. UniCloud is capable of using either a P12 key file or a JSON authentication file, both of which areavailable through the Google Cloud Platform credentials management console.When using a P12 key file, it is necessary to configure the settings key and service_account_email. When using a JSONauthentication file, these values are provided and only the setting json_keyfile is required.It is recommended to copy the P12 key file or JSON authentication file to $TORTUGA_ROOT/config. If not copying either theP12 key file or JSON authentication file to $TORTUGA_ROOT/config, it is necessary to specify the full file path to the optionskey or json_keyfile, respectively.Configure the Google Compute Engine resource adapter using the adapter-mgmt command-line interface.
adapter-mgmt create --resource -adapter gce --profile default \--setting default_ssh_user=centos \--setting image_url=<image_url > \--setting json_keyfile=<filename of json authentication \
file> \--setting network=default \--setting project=<project name> \--setting startup_script_template=startup_script.py \--setting type=n1-standard -1 \--setting zone=us-east1-b
To enable support for point-to-point VPN (ie. for a hybrid cluster installation), add the following setting:adapter-mgmt update --resource -adapter gce --profile default \
--setting vpn=true
Refer to the section “Google Compute Engine resource adapter configuration reference” below for further information.
v 74
UniCloud 6.2.0 Installation and Administration Guide Resource Adapters
Google Compute Engine resource adapter configuration reference
Setting Descriptionzone Zone in which compute resources are created. Zone names can be
obtained from Console or using gcloud compute regions listkey Filename/path of P12 key file as provided by Google Compute Platformjson_keyfile Filename/path of JSON authentication file as provided by Google
Compute Platformservice_account_email Email address as provided by Google Compute Platformtype Virtual machine type. For example, “n1-standard-1”network Name of network where virtual machines will be createdproject Name of Google Compute Engine projectvpn Set to “true” to enable OpenVPN point-to-point VPN for hybrid
installations (default is “false”)startup_script_template Filename of “bootstrap” script used by UniCloud to bootstrap compute
nodesimage_url URL of Google Compute Engine image to be used when creating compute
nodes. This URL can be obtained from the Google Compute Engineconsole or through the gcloud command-line interface *
default_ssh_user Username of default user on created VMs. ‘centos’ is an appropriate valuefor CentOS-based VMs.
tags Keywords (separated by spaces)
* Use the following gcloud command-line to determine the value for image_url for CentOS 7:
gcloud compute images describe \$(gcloud compute images list -r 'centos -7.*' \
--format='value(name)') \--project centos-cloud --format='value(selfLink)'
Creating Google Compute Engine hardware profile
Create a default Google Compute Engine-enabled hardware profile:
create-hardware-profile \--xml-file=$(find $TORTUGA_ROOT/kits -name \
gceHardwareProfile.tmpl.xml) --name execd
Map the newly created hardware profile to an existing software profile or create new software profile as necessary.
Nodes can then be added using the add-nodes command-line interface.
Google Compute Engine firewall rules
All nodes within the UniCloud-managed environment on Google Compute Engine must be unrestricted access to each other.This is the Google Compute Platform default.
Nodes accessed externally (through SSH) minimally have SSH, and optionally, OpenVPN ports enabled.
v 75
UniCloud 6.2.0 Installation and Administration Guide Resource Adapters
Google Compute Engine resource adapter usage
Supported Node Operations
The Google Compute Engine resource adapter supports the following UniCloud node management commands:
• activate-node• add-nodes• delete-node• idle-node• reboot-node• transfer-node• shutdown-node• startup-node
The Google Compute Engine resource adapter does not support the following node operation commands as they do not makesense within the context of cloud-based compute nodes:
• checkpoint-node• migrate-node
Networking Considerations
The Google Compute Engine resource adapter automatically configures an OpenVPN virtual private network when theUniCloud installer is installed on-premise. The VPN is not configured when the UniCloud installer is hosted within theGoogle Compute Engine environment.
The VPN requires a network address space in which to create compute nodes. For a hybrid environment where the installeris physical and the compute nodes are entirely cloud-based, this network can be attached to a interface defined by Ethernetalias (ie. eth0:0). It does not need to be an actual physical network connected to a physical Ethernet interface.
To enable a true hybrid environment with local compute nodes (physical and/or virtual) and cloud-based compute nodes,the network used for the VPN needs to be the same as the network where the local compute nodes are connected.
Adding Nodes
Nodes are added using the UniCloud add-nodes command. Specifying an Google Compute Engine-enabled hardware profile(hardware profile with resource adapter set to gce) automatically causes UniCloud to use the Google Compute Engine resourceadapter to manage the nodes.
For example, the following command-line will add 4 Google Compute Engine nodes to the software profile execd and hardwareprofile execd:
add-nodes --count 4 --software -profile execd \--hardware-profile execd
See Advanced Topics for additional information about enabling support for creating preemptible virtual machines.
Advanced Topics
Enabling support for preemptible virtual machines
UniCloud supports Google Compute Engine preemptible virtual machines through a standalone “helper” daemon in UniCloudcalled gce_monitord. This daemon must be enabled/started after configuring the Google Compute Engine resource adapter.
v 76
UniCloud 6.2.0 Installation and Administration Guide Resource Adapters
gce_monitord will poll Google Compute Engine resources every 60s monitoring preemptible virtual machines that may havebeen terminted by Google Compute Engine. These nodes will be automatically removed from the UniCloud-managed cluster.
Note: gce_monitord will only monitor Google Compute Engine VM instances created/launched by UniCloud.
Enable support for preemptible virtual machines:
1. Configure Google Compute Engine resource adapter
2. Enable and start gce_monitordRHEL/CentOS 7
systemctl enable gce_monitordsystemctl start gce_monitord
RHEL/CentOS 6
chkconfig gce_monitord onservice gce_monitord start
Once preemptible support has been enabled, add nodes to UniCloud using the “–extra-arg preemptible” option. For example:
add-nodes --software -profile execd --hardware -profile execd \--extra-arg preemptible --count 6
This command would add 6 preemptible nodes to the “execd” hardware profile and “execd” software profile.
Google Compute Engine VM image requirements
All custom virtual machine images must conform to the guidelines set by Google Compute Platform. The “startup script”mechanism (enabled by default in Google-provided images) is used by UniCloud to bootstrap compute instances. Thismechanism must be preserved for custom, non-Google provided images.
v 77
UniCloud 6.2.0 Installation and Administration Guide Resource Adapters
Microsoft Azure resource adapter kit
Overview
As with other cloud providers, UniCloud provides Microsoft Azure support through the use of a resource adapter.
The UniCloud/Azure integration is currently limited to creation of Virtual Machines (VMs). It will not manage, nor interferewith, other Azure resources, such as storage accounts, virtual networks/subnets/network security groups, etc. These resourcesmust be created prior to using the UniCloud/Azure integration.
Note: the Azure resource adapter requires RHEL/CentOS 7 and will not work on older OS versions. This is a limitationof the Microsoft Azure Python SDK which does not support Python 2.6 (the distribution version of Python included withRHEL/CentOS 6). UniCloud is, however, able to deploy RHEL/CentOS 6 compute nodes.
Please refer to official Microsoft Azure documentation for further explanation of Azure terms referenced within this document.
Setting up Azure for UniCloud
Before using UniCloud with the Microsoft Azure resource adapter, it is necessary to create resources within the Azureenvironment.
1. Obtain Azure credentialsThis requires setting up an application under Azure Active Directory.A helpful tutorial can be found here and from Microsoft “Integrating applications with Azure Active Directory”The Azure resource adapter requires the following:
• Client ID• Subscription ID• Tenant ID• Secret
These values can be obtained from the Azure portal as part of the app registration in Azure Active Directory.
2. Install Azure CLI 2.0For ease of use, it is strongly recommended to install the Azure CLI into the UniCloud (Python 2.7) environment asfollows:
/opt/unicloud/bin/pip install azure-cli
The Azure CLI can also be installed on other host(s) running Linux, Windows, or MacOS.Official Microsoft documentation is available from here
3. Create resource group, as necessary.UniCloud can use an existing Azure resource group or a new resource group can be created.In this example, the resource group is named “uc-cluster” and the location is “canadacentral”.
az group create --name uc-cluster --location canadacentral
Hint: use az account list-locations --query "[].name" to query available locations.
4. Create virtual network vnet1 in resource group uc-cluster, as necessary
az network vnet create --resource-group uc-cluster \--location canadacentral --name vnet1
v 78

UniCloud 6.2.0 Installation and Administration Guide Resource Adapters
5. Create network security group unicloudnsg, as necessary
az network nsg create --resource-group uc-cluster \--location canadacentral --name unicloudnsg
Allow incoming ssh (22/tcp) connections
az network nsg rule create --resource-group uc-cluster \--nsg-name unicloudnsg --name ssh --priority 100 \--destination -address-prefix "*" \--destination -port-range 22 --access Allow \--protocol Tcp --description "Allow incoming ssh"
If setting up a hybrid UniCloud environment and using the built-in OpenVPN point-to-point VPN support, also allowincoming OpenVPN (1194/udp) connections as follows:
az network nsg rule create --resource-group uc-cluster \--nsg-name unicloudnsg --name openvpn --priority 100 \--destination -address-prefix "*" \--destination -port-range 1194 --access Allow \--protocol Udp --description "Allow incoming OpenVPN"
6. Create subnet subnet1 in virtual network vnet1
az network vnet subnet create \--resource-group uc-cluster --vnet-name vnet1 \--name subnet1 \--address-prefix 10.0.0.0/24 \--network-security-group unicloudnsg
7. Create storage account unicloudstorage in resource group uc-cluster
az storage account create --resource-group uc-cluster \--location canadacentral --sku Premium_LRS \--kind Storage --name unicloudstorage
Installing the Azure resource adapter
The Azure resource adapter is distributed via the Azure resource adapter kit included with the UniCloud distribution.
Note: it is not necessary to extract the contents of the tar.bz2 file in order to install the kit.
Install the Azure resource adapter kit by running the following command as root on a UniCloud installer host:
install-kit --i-accept-the-eula kit-azureadapter -6.2.0-0.tar.bz2
The Azure resource adapter is enabled as follows, again run as root:
enable-component -p azureadapter -6.2.0-0 management -6.2/opt/puppetlabs/bin/puppet agent --onetime --no-daemonize \
--verbose
The Azure resource adapter kit is now installed and ready to be configured.
v 79
UniCloud 6.2.0 Installation and Administration Guide Resource Adapters
Azure resource adapter configuration
As with all other resource adapters in UniCloud, the resource adapter must be configured with cloud provider specific settings.This minimally includes the Azure access credentials, resource group, storage account, location, VM size, virtual network,subnet, security group, etc.Use the adapter-mgmt tool to create/update the resource adapter configuration profile.
1. Create the default resource adapter configuration profile for Azure:This example configures the Azure resource adapter to use Ubuntu 16.04 (Xenial) compute nodes in a hybrid environ-ment (on-premise UniCloud installer).
adapter-mgmt create --resource-adapter azure --profile default \-s subscription_id=<Azure subscription id> \-s client_id=<client id> \-s tenant_id=<tenant id> \-s secret="<secret >" \-s resource_group=<Azure resource group> \-s storage_account=<Azure storage account> \-s location=<location> \-s size=<azure VM size> \-s default_login=ubuntu \-s security_group=<Azure security group name> \-s virtual_network_name=<Azure virtual network name> \-s subnet_name=<Azure subnet name> \-s image_urn=Canonical:UbuntuServer:16.04.0-LTS:latest \-s cloud_init_script_template=ubuntu_bootstrap.py.tmpl
Note: the CentOS images provided by OpenLogic do not enable cloud-init or the Microsoft Azure Linux Guest Agent(aka waagent). This prevents them for being used as UniCloud-managed compute nodes as there is no mechanism toautomatically run a boot script.Resource adapter configuration profiles can be updated using adapter-mgmt update.Use adapter-mgmt show -r azure -p default to display current settings:
[root@unicloud ~]# adapter-mgmt show -r azure -p defaultResource adapter: azureProfile: defaultConfiguration:
- client_id = <REDACTED >- default_login = ubuntu- image_urn = Canonical:UbuntuServer:16.04.0-LTS:latest- location = canadacentral- resource_group = unicloud- secret = <REDACTED >- security_group = unicloudnsg- size = Basic_A0- storage_account = unicloudstorage1- subnet_name = default- subscription_id = <REDACTED >- tenant_id = <REDACTED >- cloud_init_script_template = ubuntu_bootstrap.py.tmpl- virtual_network_name = vnet1
2. Copy example Ubuntu bootstrap script into placeThis is a sample, end-user modifiable bootstrap script for UniCloud-managed compute nodes.
v 80
UniCloud 6.2.0 Installation and Administration Guide Resource Adapters
cp \$TORTUGA_ROOT/kits/kit-azureadapter -6.2.0-0/ubuntu_bootstrap.py.tmpl \\$TORTUGA_ROOT/config/
Compute nodes will not converge (join the UniCloud-managed cluster) if this script is not copied into place.
Creating Azure hardware profile
Create a hardware profile named azure for all Azure nodes:
create-hardware-profile --name azureupdate-hardware-profile --name azure --resource -adapter azure \
--location remote
Azure resource tagging
User-defined tags are automatically added to all instances. Tags in Microsoft Azure can be used to classify or group resources.For example, to clearly identify all resources within in the same cluster.
They should be specified as key-value pairs in the format key:value. Multiple tags must be separated by spaces.
For keys and/or values containing spaces, enclose the spaces in double-quotes.
Example:
adapter-mgmt update --resource -adapter azure \--profile default \--setting "tags=owner:admin"
Tag name/values containing spaces:
adapter-mgmt update --resource -adapter azure \--profile default \--setting tags="key:value \"this is the tag name:this is \
the tag value\""
Azure resource adapter configuration reference
Required settings
The following Azure resource adapter configuration settings are mandatory.
• subscription_idAzure subscription ID; obtainable from azure CLI or Management Portal
• client_idAzure client ID; obtainable from azure CLI or Management Portal
• tenant_idAzure tenant ID; obtainable from azure CLI or Management Portal
• secretAzure client secret; obtainable from azure CLI or Management Portal
v 81
UniCloud 6.2.0 Installation and Administration Guide Resource Adapters
• resource_groupAzure resource group where UniCloud will create virtual machines
• storage_accountAzure storage account where virtual disks for UniCloud-managed nodes will be created
• locationAzure region in which to create virtual machines
• size“Size” of virtual machine instancesreference: Sizes for Linux virtual machines in Azure
• default_loginDefault user login on compute nodes. A login is created by default on UniCloud-managed compute nodes for thespecified user.
• virtual_network_nameName of virtual network to associate with virtual machines
• subnet_nameName of subnet to be used within configured virtual network
• image_urnURN of desired operating system VM imageNote: image and image_urn are mutually exclusive settings. Use image_urn for specifying a VM image from theAzure repository.
• imageName of VM imageNote: image and image_urn are mutually exclusive settings. Use image for configuring new VMs to use a VM imageavailable in the resource group.
• cloud_init_script_templateUse this setting to specify the filename/path of the cloud-init script template. If the path is not fully-qualified (doesnot start with a leading forward slash), it is assumed the script path is $TORTUGA_ROOT/config.Note: this setting is only applies to VM images that are [cloud-init][cloud-init] enabled (ie. the official Ubuntu VMimage provided on Azure). The OpenLogic-provided CentOS VM images on Azure are not cloud-init enabled.
• user_data_script_templateFile name of bootstrap script template to be used on compute nodes. If the path is not fully-qualified (ie. does notstart with a leading forward slash), it is assumed the script path is $TORTUGA_ROOT/configThis is the script run by WALinuxAgent when VMs are initially booted.Note: the official OpenLogic-provided CentOS VM images on Azure are WALinuxAgent enabled, however do notenable the ability to launch a bootstrap script. A custom or alternative VM image with this functionality enabled mustbe used. Consult the official WALinuxAgent reference for more information.
v 82
UniCloud 6.2.0 Installation and Administration Guide Resource Adapters
Optional settings
• allocate_public_ipDefault: “true”When disabled (value “false”), VMs created by UniCloud will not have a public IP address.
• storage_account_typeUse specified storage account type when using an VM image.Current default is to use “Standard_LRS”. Options are “Standard_LRS” or “Premium_LRS”.“Premium_LRS” provides support for higher performance SSD backed OS disks.
• tagsSpace-separated “key=value” pairs.
• vpnDefault is false (disabled)Enable point-to-point VPN connections between UniCloud installer using OpenVPN.VPN should not be enabled when the UniCloud installer is hosted on Azure.Do not enable vpn setting if using an externally managed site-to-site VPN solution.
Azure VM image requirements
Microsoft Azure virtual machines use Microsoft Azure Linux Guest Agent (aka waagent) as a mechanism to pass user scriptsand metadata into Azure virtual machine instances at launch time.
Extraction and execution of scripts contained within metadata is disabled in the waagent configuration by default.
The Ubuntu VM images provided enable both waagent as well as cloud-init.
Any end-user provided VM images are recommended to include support for both waagent as well as cloud-init. UniCloudrequires cloud-init to properly bootstrap Azure VMs and incorporate them into the UniCloud-managed cluster.
Azure security group requirements
For hybrid UniCloud installations, it is recommended the network security group minimally allows ssh (22/tcp) connections.If using the built-in point-to-point OpenVPN, it is also required to allow port 1193/udp.
Azure network security groups are created with open access for outbound network traffic and unrestricted connectivity tovirtual machines within the same network/subnet.
DNS and Azure
The default built-in Azure DNS server implements only forward DNS. Grid Engine requires both forward and reverse (IP tohost name) DNS resolution. For this reason, it is necessary to enable the built-in UniCloud DNS server as follows:
enable-component -p dnsgenconfig dns/opt/puppetlabs/bin/puppet agent --onetime --no-daemonize \
--verbose
Refer to the section in this manual on configuring and/or customizing the built-in UniCloud DNS server for more information.
If using an external/custom DNS server, ensure it provides forward and reverse DNS resolution for UniCloud managed nodes.
v 83
UniCloud 6.2.0 Installation and Administration Guide Resource Adapters
Azure resource adapter usage
Supported node operations
The Microsoft Azure resource adapter supports the following UniCloud node management commands:
• activate-node• add-nodes• delete-node• idle-node• reboot-node• transfer-node• shutdown-node• startup-node
The Azure resource adapter does not support the following node operation commands as they do not make sense within thecontext of cloud-based compute nodes:
• checkpoint-node• migrate-node
Networking considerations
The Azure resource Adapter automatically configures an OpenVPN virtual private network when the UniCloud installer isinstalled on-premise. The VPN is not automatically configured if the UniCloud installer itself is running on Azure.
The VPN requires a network address space in which to create compute nodes. For a hybrid environment where the installer ison-premise and the compute nodes are entirely cloud-based, this network can be attached to a interface defined by Ethernetalias or VLAN(ie. eth0:0). It does not need to be an actual physical network connected to a physical Ethernet interface.
To enable a true hybrid environment with on-premise compute nodes (physical and/or virtual) and cloud-based computenodes, the network used for the VPN needs to be the same as the network where the local compute nodes are connected ornetwork routing must be configured appropriately.
Adding Azure nodes
Assuming hardware and software profiles have been created as described above, adding nodes in the Azure environment isdone using the add-nodes command.
The following example will create 6 nodes on Azure using the software profile execd and hardware profile execd-azure.
add-nodes --count 6 \--software-profile execd \--hardware-profile execd-azure
It is assumed the software profile execd is mapped to hardware profile execd-azure and the hardware profile execd-azureis properly configured as per the above.
If using a resource adapter configuration profile, use the --resource-adapter-configuration (or the -A shortcut) argument:
add-nodes --count 6 \--software-profile execd \--hardware-profile execd-azure \--resource-adapter-configuration otherzone
where otherzone is the name of an existing Azure resource adapter configuration profile.
v 84
UniCloud 6.2.0 Installation and Administration Guide Resource Adapters
Best Practices
• Create a unique Azure resource group and storage accounts for UniCloud to prevent “cross-polination” of UniCloud-managed resources with other resources within the same Microsoft Azure account.
Advanced Topics
Hosting UniCloud installer on Microsoft Azure
UniCloud can be hosted entirely on Microsoft Azure. This entails running a dedicated Azure VM instance for the UniCloudinstaller, which will then be able to provision compute nodes.
Standard_DS2_v2 is the recommended minimum Azure VM size to be used for the UniCloud installer. Azure VM sizes mayvary across Azure datacenter locations.
Troubleshooting
There are currently no Azure-specific debug options within UniCloud. Due to the newness of the Azure resource adapter,debug logging in UniCloud is currently verbose by default.
Refer to the UniCloud log file (/var/log/unicloud) for further information on failed operations.
v 85
UniCloud 6.2.0 Installation and Administration Guide Resource Adapters
VMware vSphere® 5 Resource Adapter Kit
Overview
The VMware vSphere® 5 Resource Adapter allows UniCloud to integrate with the VMware vSphere® environment withinUniCloud. Once configured, it is possible to seamlessly create VMware vSphere® virtual machines in an existing VMwarevSphere® infrastructure.
UniCloud interacts only with a VMware vCenter Server. It is not capable of interacting directly with VMware vSphere®(ESXi) Hypervisors.
Installing the VMware vSphere® Resource Adapter Kit
The VMware vSphere® Resource Adapter kit installs as a standard kit using install-kit:
install-kit kit-vmware -6.2.0-0.tar.bz2
Enable the management component to complete the installation:
enable-component -p vmware -6.2.0-0 management -6.2/opt/puppetlabs/bin/puppet agent --onetime --no-daemonize
This registers the resource adapter in UniCloud, and provides the bindings in UniCloud to allow it to integrate with a VMwarevSphere® infrastructure.
Configuration
The VMware vSphere® resource adapter must be configured before it is used.
There are two configuration files that must be properly configured in order for UniCloud to function correctly:
• $TORTUGA_ROOT/config/vmware_vcenter_auth.conf• $TORTUGA_ROOT/config/adapter-defaults-vmware.conf
Consult your site’s VMware vSphere® administrator for specifics required in the configuration of the VMware vSphere®resource adapter.
adapter-defaults-vmware.conf
The configuration file adapter-defaults-vmware.conf specifies the host name of the VMware vSphere® vCenter Server,user credentials, and the necessary settings specific to your site’s VMware vSphere® infrastructure.
The configuration file section [vcenter] has the following options:
• hostname (mandatory) – host name or IP address of the VMware vSphere® vCenter server
• username (mandatory) – user name of a VMware vSphere® vCenter user with sufficient rights for creating/deleting,starting/stopping, and configuring virtual machines created by UniCloud.Although, the “Administrator” user has such rights, it is recommended to create a VMware vSphere® user for UniCloud.
• password (mandatory) – password for the abovementioned user name
• datacenter (mandatory) – Name of VMware vSphere® datacenter where UniCloud will create virtual machines
• pool (optional) – Name of the resource pool where UniCloud will create virtual machines
v 86
UniCloud 6.2.0 Installation and Administration Guide Resource Adapters
• path (optional) – Resource path where UniCloud will create virtual machines.The path must be defined relative to the datacenter. For example, if the full path (including the datacenter) is/datacenter1/accounting/unicloud, the datacenter should be configured as datacenter1 and the path should beaccounting/unicloud:
...datacenter = datacenter1path = accounting/unicloud...
If the path is not specified, virtual machines created by UniCloud will be directly under the datacenter folder.
The configuration file section [datastore] has the following options:
• label (mandatory) – name of the datastore that will be used to contain virtual disks created by UniCloud
adapter-defaults-vmware.conf
The file adapter-defaults-vmware.conf contains the default properties of virtual machines created and provisioned byUniCloud. These are defined in the section [resource-adapter]:
• ramsize (default: 1024) – Amount of memory (in MB) to allocate to UniCloud created virtual machines.• ncpus (default: 1) – Number of virtual CPUs to allocate to UniCloud created virtual machines.• disksize (default: 8) – Size (in GB) of virtual hard disk allocated to UniCloud created virtual machines.
These settings take effect immediately and only virtual machines created after the settings have changed will be affected.
The network configuration is also contained within this configuration file. The configuration of networking can happen inone of two ways- per hypervisor or globally. The “per hypervisor” method is only relevent when explicitly defining whichVMware vSphere® hypervisors will be used by UniCloud. The default behaviour in UniCloud is to automatically use anyand all available hypervisors within the specified datacenter (as defined in vmware_vcenter_auth.conf).
The [networks] section specifies the global mapping of VMware vSphere® virtual network to UniCloud provisioning network.
For example, to map the network 172.16.0.0/255.255.255.0 in UniCloud to the VMware vSphere® virtual network named“VM Network” connected to VMware virtual switch vSwitch0, use the following configuration file syntax:
...[networks]172.16.0.0/255.255.255.0 = vSwitch0 ,VM Network...
Note: it is not uncommon to have multiple entries for provisioning and/or public networks.
The VMware vSphere® network specified in this mapping must be directly connected to the UniCloud installer. Withoutconnectivity, it will not be possible for UniCloud to provision nodes on this interface.
VMware vSphere User Permissions
As previously mentioned, it is strongly recommended that the resource adapter be configured to use a VMware vCenter userother than Administrator.
This non-Administrator VMware vCenter user must have the following privileges:
• Datastore
v 87
UniCloud 6.2.0 Installation and Administration Guide Resource Adapters
– Allocate space– Browse datastore
• Host
– Local Operations* Create virtual machine* Delete virtual machine* Manage user groups* Reconfigure virtual machine
• Network
– Assign network
• Resource
– Assign virtual machine to resource pool
• Virtual Machine
– (all privileges)
Hint: use the “Roles” functionality in vSphere to assign the privileges to multiple Windows users.
Consult your site’s VMware vSphere® administrator for additional information regarding user creation and/or assigningprivileges to Windows users and/or VMware vSphere users.
Creating VMware vSphere® Virtual Machines
VMware vSphere® virtual machines are created using standard UniCloud techniques:
1. Create a hardware profile representing VMware vSphere® compute nodes
create-hardware-profile --name vmware
Modify the hardware profile to use the VMware vSphere® resource adapter:
update-hardware-profile --name vmware --resource-adapter \vmware_adapter
This step is essential to ensure UniCloud is configured to use VMware vSphere® to create nodes associated with thishardware profile.Perform any other hardware profile customization (ie. host name format) at this stage.
2. (optional) Create software profile for VMware vSphere® compute nodesThis step is unnecessary if another compute software profile has been created elsewhere as part of the UniCloud setupprocess.
create-software-profile --name Compute
In order to successfully create a software profile for compute nodes, it is necessary for OS media to be installed andprovisioning network must be setup correctly in UniCloud.
3. (optional) Enable UniCloud provisioning componentsIf not already enabled, it is also necessary to enable the provisioning components:
enable-component -p base -6.2.0-0 dhcpd -6.2enable-component -p base -6.2.0-0 dns-6.2/opt/puppetlabs/bin/puppet agent --onetime --no-daemonize
v 88
UniCloud 6.2.0 Installation and Administration Guide Resource Adapters
Hint: Change DNS configuration (in $TORTUGA_ROOT/config/base/dns-component.comf) to use Dnsmasq prior torunning the /opt/puppetlabs/bin/puppet agent command, if desired.
4. Add one VMware vSphere® compute node with the following commandadd-nodes -n1 --software-profile Compute --hardware-profile \
vmware
If everything is properly configured, the newly added compute node will be created and immediately begin provisioning.Any misconfiguration in the VMware vSphere® configuration files will result in failure and an error message output tothe console.UniCloud will randomly select the hypervisor used by the compute node based on those available within the configureddatacenter.
Advanced Topics
Manually Specifying HypervisorsIn a VMware vSphere® environment where not all hypervisors are available to or should be used by UniCloud, it is possibleto manually configure the available hypervisors.
1. Create a hardware profile where VMware vSphere® hypervisors will representedcreate-hardware-profile --name Hypervisors --no-defaultsupdate-hardware-profile --name Hypervisors --name-format '*' \
--location remote
2. Create a software profile where VMware vSphere® hypervisors will be representedcreate-software-profile --name Hypervisors
3. Map the software and hardware profilesset-profile-mapping --software-profile Hypervisors \
--hardware-profile Hypervisors
4. Add one or more VMware vSphere® hypervisors. The host names of these hypervisors can be determined by browsingthe datacenter in the VMware vSphere® Web Client.
add-nodes --host-name hypervisor01.local --software-profile \Hypervisors \--hardware-profile Hypervisors
Adjust the host name “hypervisor01.local” to properly reflect those chosen from your VMware vSphere® datacenter.Add as many hypervisors here as needed.Manually set node status to “Installed”. This step is necessary to inform UniCloud of the availability of the specifiedhypervisors. Setting the node status to something other “Installed” effectively marks the hypervisor(s) as being offline.
update-node-status --node hypervisor01.local --status Installed
5. Following the procedure described in the section “Creating VMware vSphere® Virtual Machines” to create hardwareand software profiles for VMware vSphere®-based compute nodes.Ensure the hardware profile created in this step is properly configured to use the hypervisor(s) added above.Configure the compute node hardware profile to instruct UniCloud to use hypervisors defined in the Hypervisorssoftware profile:
update-hardware-profile --name vmware --hypervisor -profile \Hypervisors
v 89
UniCloud 6.2.0 Installation and Administration Guide Resource Adapters
VMware vSphere® Troubleshooting
Unregistered/remnant virtual machines
If UniCloud attempts to add a virtual machine with the same name as an existing, but unregistered virtual machine, theresource adapter will display an error similar to the following:
Could not find a VM with path '[datastore1] \vm-01.private/vm-01.private.vmx'
Because of a built-in automatic renaming mechanism in VMware vCenter Server, it will automatically create the new VM ina different folder than expected. This results in the resource adapter being unable to find the files associated with that VM.
The suggested workaround is to either move or rename the previously existing VM folder within the datastore. If this is notpossible, it is necessary to change the host name format of UniCloud-created VMware virtual machines.
v 90
UniCloud 6.2.0 Installation and Administration Guide Grid Engine and UniCloud Integration
Grid Engine and UniCloud Integration
Overview
The UniCloud/Univa Grid Engine integration allows setting up a Grid Engine cluster with minimal effort. This sectiondescribes possible Grid Engine installation customizations and administrative workflows that exist beyond the basic GridEngine tools.
Standalone Grid Engine cluster
In a typical UniCloud/Grid Engine installation, the Grid Engine qmaster runs on the same host as the UniCloud installer.
UniCloud integration with existing Grid Engine cluster
This section describes how to integrate UniCloud into an existing Grid Engine cluster.
The included recipe uses Amazon EC2-based compute instances as Grid Engine execd hosts, however the configuration stepsare identical for any supported UniCloud resource adapter.
The following scenarios are supported to enable UniCloud-managed execd hosts running on:
• Amazon EC2• Google Compute Engine• Microsoft Azure• VMware vSphere• OpenStack (hosted or on-premise)
or any combination of the above. This allows, for example, a single Grid Engine cluster to span multiple cloud-providers.
The key to this configuration is network accessibility and DNS configuration:
• The NFS shared Grid Engine spool directory must be accessible by the cloud instances.• Nodes started on hypervisors and/or cloud-based instances must share the same DNS namespace as the (existing) Grid
Engine qmaster host.
Prerequisites
For our example Grid Engine cluster, we know the following:
Item Valueqmaster host name qmaster-01.example.comSGE_ROOT /opt/uge-8.5.3SGE_CELL defaultGrid Engine admin user sgeGrid Engine admin UID 500Grid Engine admin group sgeGrid Engine admin GID 500
Grid Engine installation directory shared over NFS
v 91
UniCloud 6.2.0 Installation and Administration Guide Grid Engine and UniCloud Integration
The path /opt/uge-8.5.3 is shared by NFS from the qmaster host qmaster-01.example.com.
[root@qmaster -01 ~]# showmount -eExport list for qmaster -01:/opt/uge-8.5.3 *
UniCloud AWS resource adapter
Ensure UniCloud is able to create EC2 instances in your configured Amazon VPC before proceeding with the Grid Engineintegration.
EC2 instances created by UniCloud must be able to reach “Installed” state without user intervention.
Network connectivity/VPN
Network connectivity must exist between the UniCloud installer, Grid Engine qmaster, and any EC2 instances.
This will require properly configured VPN (software or hardware) or Amazon Direct Connect, security group(s), and AWSaccess tokens.
Note: the built-in UniCloud-managed OpenVPN point-to-point VPN cannot be used for Grid Engine integration.
Amazon VPC
Set domain name and domain name server, as necessary, in “DHCP options set” associated with Amazon VPC. This step isimperative to ensure the assigned host names are resolvable on both the Grid Engine qmaster host and the UniCloud installerhost.
The Grid Engine qmaster host and UniCloud installer hosts must have the same DNS settings.
EC2 instances started as part of the Amazon VPC must have a host name resolvable on both the qmaster host and theUniCloud installer host. This may require predefining DNS entries for all possible IP addresses in the Amazon VPC subnet.
One possibility is for the DNS server managed by UniCloud to be the canonical DNS server. This would require/etc/resolv.conf on the qmaster host to be configured to use the UniCloud managed DNS server. For example:
search ...options ...nameserver <IP address of UniCloud installer >nameserver ...
This is only one option and may NOT be required for your installation.
Consult your network administrator for further information.
Configuration steps for (existing) Grid Engine cluster
1. On a Grid Engine administrative host, ensure the UniCloud installer host is added to the list of trusted hosts:
qconf -ah <public hostname or FQDN of UniCloud installer >
For example:
qconf -ah unicloud.example.com
This gives UniCloud the ability to add/remove execd hosts from the existing Grid Engine cluster.
v 92
UniCloud 6.2.0 Installation and Administration Guide Grid Engine and UniCloud Integration
Configuration steps for UniCloud installer
1. Ensure user/group of owner of NFS shared Grid Engine cell directory exists on UniCloud installer.This may require either connecting the UniCloud installer to an existing NIS domain or LDAP configuration or simplycreating a local user and group with matching uid and gid as that of the Grid Engine administrator on the qmasterhost.For example, if the NFS shared cell directory has ownership of sge:sge (uid: 500, gid: 500), then a local user ‘sge’ (uid:500) and local group ‘sge’ (gid: 500) must be created.To create a local group/user sge with uid/gid 500/500:
groupadd --gid 500 sgeuseradd --uid 500 --gid 500 sge
2. Create the mount point on the UniCloud installer to correspond with SGE_ROOT
mkdir -p /opt/uge-8.5.3
Note: It is necessary that this path is identical to that of SGE_ROOT on the qmaster host because the environment scripts($SGE_ROOT/$SGE_CELL/common/settings.sh and $SGE_ROOT/$SGE_CELL/common/settings.csh) are configured thisway.
3. Mount the shared Grid Engine installation using NFSIn this example, “qmaster-01.example.com” is the qmaster for the existing Grid Engine cluster:
mount qmaster -01.example.com:/opt/uge-8.5.3 /opt/uge-8.5.3
4. Source the Grid Engine environment
. /opt/uge-8.5.3/default/common/settings.sh
5. Install Grid Engine kit, if necessary
install-kit kit-uge-8.5.3-0.tar.bz2
6. Copy directory helper scripts to $SGE_ROOTThis is a set of “helper” scripts used by UniCloud to manage Grid Engine.Note: due to network security and/or restrictions, the root user on the UniCloud installer may not have writepermissions in the NFS-mounted $SGE_ROOT. In that case, copy these files as the Grid Engine adminisrtrative user(sge, in this example). Alternatively, use rsync or scp to copy files to the qmaster host.
su - -s /bin/bash sgesource /opt/uge-8.5.3/default/common/settings.shrsync -av \
/etc/puppetlabs/code/environments/production/modules/tortuga_kit_uge/files/setup \$SGE_ROOT
This will create a directory setup under $SGE_ROOT.
7. Configure Grid Engine on UniCloudCreate default Grid Engine cluster
uge-cluster create default
Add settings for newly created Grid Engine cluster:
v 93
UniCloud 6.2.0 Installation and Administration Guide Grid Engine and UniCloud Integration
uge-cluster update default \--var unmanaged_qmaster=true \--var uge_user=sge \--var uge_uid=500 \--var uge_group=sge \--var uge_gid=500 \--var \
sge_cell_netpath=qmaster -01.example.com:/opt/uge-8.5.3/default
Note: the NFS path specified by sge_cell_netpath must contain an accessible IP address or DNS resolvable hostname. If using a host name, it must be DNS resolvable from the EC2 instance. It may or may not require a fully-qualifieddomain name.In our basic example, all nodes contained in software profiles with the execd component enabled will be added to theexisting Grid Engine cluster.
8. Enable the execd component on the desired software profile(s)
enable-component --software-profile execd execduge-cluster update default --add-execd-swprofile execd
Repeat this step if multiple software profiles will contain execd nodes.
9. Add the “unicloud” complex resource to the Grid Engine cluster
qconf -sc >/tmp/unicloud_complexes.txtecho "unicloud unicloud BOOL == YES NO FALSE 0" \
>>/tmp/unicloud_complexes.txtqconf -Mc /tmp/unicloud_complexes.txtrm -f /tmp/unicloud_complexes.txt
All nodes added by UniCloud have the complex value unicloud=TRUE. This is to distinguish between pre-existing GridEngine compute nodes, and compute nodes added by UniCloud.
10. Add nodes in UniCloudAny nodes added to a UniCloud software profile with the execd component enabled should now be automatically addedto the existing Grid Engine cluster with the qmaster hosted on the host qmaster-01.example.com.Conversely, nodes deleted from UniCloud will automaticaly removed from the Grid Engine cluster.
add-nodes -n<count> --software-profile execd --hardware-profile \<name>
11. Display all Grid Engine nodes added by UniCloudSince all UniCloud-managed resources have the associated complex resource unicloud, they can be queried as follows:
qstat -f -l unicloud
v 94
UniCloud 6.2.0 Installation and Administration Guide Grid Engine and UniCloud Integration
Grid Engine cluster configuration
Grid Engine cluster configuration under UniCloud is managed using the uge-cluster command-line tool.
Command reference
Display all UGE clusters
List Grid Engine clusters using uge-cluster list.
For example:
[root@c7inst ~]# uge-cluster listdefault
Adding the --verbose option will display all clusters and software profile and settings for each cluster.
[root@c7inst ~]# uge-cluster list --verboseCluster name: default
Qmaster software profiles:- Installer (Installer software profile)
Execd software profiles:- execd (execd Nodes)
Settings:- shared_install: true- manage_nfs: false- uge_user: ugeadmin- sge_cell_netpath: %(qmaster)s:%(sge_root)s/%(cell_name)s- uge_group: ugeadmin- uge_uid: 2002- uge_gid: 2002- sge_root: /opt/uge-lives-here
Display UGE cluster settings
uge-cluster show <cluster name>
For example, the following command displays the UGE cluster configuration for the Grid Engine cluster default:
uge-cluster show default
Adding the --verbose argument will display Grid Engine node details.
[root@c7inst ~]# uge-cluster show default --verboseCluster name: default
Qmaster software profiles:- Installer (Installer software profile)
- c7inst.univa.comExecd software profiles:
- execd (execd Nodes)- compute -01.private- compute -02.private
Settings:- shared_install: true- manage_nfs: false- uge_user: ugeadmin
v 95

UniCloud 6.2.0 Installation and Administration Guide Grid Engine and UniCloud Integration
- sge_cell_netpath: %(qmaster)s:%(sge_root)s/%(cell_name)s- uge_group: ugeadmin- uge_uid: 2002- uge_gid: 2002- sge_root: /opt/uge-lives-here
Add execd software profile to Grid Engine clusterUniCloud is not limited to having a single software profile designated as an execd software profile. Enabling the execdcomponent on additional software profiles allows, for example, multiple different operating systems and/or software stacksto become Grid Engine compute nodes:
uge-cluster update default \--add-execd-swprofile <software profile name>
Remove execd software profile from Grid Engine clusterFirst, disable the execd component from the software profile:
disable-component --software -profile <software profile name>
Update Grid Engine cluster configuration:uge-cluster update default \
--delete-execd-swprofile <software profile name>/opt/puppetlabs/bin/puppet agent --no-daemonize --verbose \
--onetime
Support for additional Grid Engine clustersUniCloud and Grid Engine support multiple concurrent Grid Engine clusters.Creating additional Grid Engine clusters with UniCloud is as simple as creating new software and hardware profiles torepresent nodes comprising the new Grid Engine cluster.
Automatically create hardware/software profilesUse the following command to create a UGE cluster named “cluster2” and automatically create associated hardware andsoftware profiles:
uge-cluster create cluster2 --create-profiles
Note: the hardware and software profiles are named similarly, however they are unique profiles. It is possible torename either or in order to prevent possible confusion. See the documentation for update-hardware-profile andupdate-software-profile for syntax for renaming profiles.After running this command, add node to “cluster2-qmaster”:
add-nodes -n1 \--software-profile cluster2 -qmaster \--hardware-profile cluster2 -qmaster
Add compute (execd) nodes to the new cluster as follows:add-nodes -n3 \
--software-profile cluster2 -execd \--hardware-profile cluster2 -execd
v 96
UniCloud 6.2.0 Installation and Administration Guide Grid Engine and UniCloud Integration
Manually create hardware/software profiles
1. Create profile(s) for qmaster, as necessary
create-software-profile ... --name cluster2-qmaster
Hint: use copy-software-profile to copy an existing software profile.Do not forget to map the software profile to an existing hardware profile or create new hardware profile as necessary.Enable qmaster component on software profile:
enable-component --software-profile cluster2-qmaster qmaster
2. Create profile(s) for execd nodes, as necessary.
create-software-profile ... --name cluster2-execd
Enable execd component on software profile:
enable-component --software-profile cluster2-execd execd
3. Register new Grid Engine cluster
uge-cluster create cluster2uge-cluster update cluster2 \
--add-qmaster-swprofile cluster2-qmasteruge-cluster update cluster2 \
--add-execd-swprofile cluster2-execduge-cluster update cluster2 \
--var \sge_cell_netpath="%(qmaster)s:%(sge_root)s/%(cell_name)s"
uge-cluster update cluster2 --var manage_nfs=true
Adjust sge_cell_netpath configuration as appropriate for site-specific configuration (ie. network attached storage). Ifusing customized settings, set value of manage_nfs to false, which implies that UniCloud will automatically managethe NFS shared spool directory for execd hosts.
4. Add node(s) to the Grid Engine cluster, as appropriateAdd qmaster node(s):
add-nodes ... --software-profile cluster2-qmaster ...
Add execd node(s):
add-nodes ... --software-profile cluster2-execd ...
v 97
UniCloud 6.2.0 Installation and Administration Guide Grid Engine and UniCloud Integration
Advanced Topics
How do I automatically add execd hosts to a Grid Engine hostgroup?
By simply creating a file $SGE_ROOT/$SGE_CELL/common/config.<NAME> (where NAME is the software profile name) withthe hostgroup name as the only entry in the file.For example, to have nodes in the “execd” software profile automatically join the hostgroup “@myhosts”, run the followingcommand:
echo "@myhosts" >$SGE_ROOT/$SGE_CELL/common/config.execd
Software profile name is case-sensitive and must match the exact name displayed by get-software-profile-list.All hosts added to the “execd” software profile will now be automatically added to the “@myhosts” hostgroup.Tip: this process can be repeated for any number of software profiles. This makes it possible to create a separate soft-ware/hardware profile for each instance/VM type/size, Grid Engine hostgroup(s) associated with that and, if desired, aseparate Grid Engine queue associated with those hostgroup(s).Note: the hostgroup “@myhost” must already exist. Use the Grid Engine command qconf -ahgrp to create a new hostgroup.Consult Grid Engine documentation for further information on qconf command syntax.
Adding UniCloud-managed hosts to a specific queue
Create a queue in Grid Engine using qconf -aq and associate that queue with the hostgroup that UniCloud automaticallyadds nodes to (see above)For example:
qconf -mattr queue hostlist "@myhosts" all.q
Slot availability can be displayed using qstat -f.
How do I set the slot count on execd hosts?
Since UniCloud does not have the ability to query cloud provider instance/VM CPU/core attributes, it is necessary tomanually set the slot count(s) for execd nodes. The easiest way to do this is to automatically associate UniCloud managedhosts with a hostgroup (see above).Then modify the queue ‘slots’ attribute to include the hostgroup containing the UniCloud managed hosts. For example, runthe following command to set the per-instance slot count to 2 for all hosts in @mygroup, which is associated with the queueall.q:
qconf -mattr queue slots "[@myhosts=2]" all.q
Managing Grid Engine submit hosts
Enable the submit component (from the UGE kit) on desired software profile(s):enable-component --software -profile <software profile name> \
submituge-cluster update <Grid Engine cluster> \
--add-submit-swprofile <software profile name>/opt/puppetlabs/bin/puppet agent --onetime --no-daemonize \
--verbose
Any new nodes added to specified software profile will become Grid Engine submit hosts.Note: do not enable the UGE submit component on hosts that have the UGE execd component already enabled.
v 98
UniCloud 6.2.0 Installation and Administration Guide Grid Engine and UniCloud Integration
Grid Engine Webservice
The Grid Engine webservice can be enabled as follows (assuming the qmaster is running on the same host as the UniCloudinstaller):
enable-component -p webservice/opt/puppetlabs/bin/puppet agent --onetime --no-daemonize \
--verbose
Please refer to official Univa Grid Engine webservice documentation for further information.
Grid Engine installation customizations
After enabling the qmaster component and prior to running the Puppet sync, the installation file template for Grid Enginemay be modified to change installation defaults.For example, if using non-default spooling method, different network port numbers, etc., these values can be changed suchthat UniCloud deploys customized Grid Engine installation.This file is managed by Puppet and found in /etc/puppetlabs/code/environments/production/modules/... \tortuga_kit_uge/templates/qmaster.conf.tmpl.Note: the values for ADMIN_HOST_LIST, SUBMIT_HOST_LIST, and EXEC_HOST_LIST will be automatically managed by Uni-Cloud.Refer to official Univa Grid Engine documentation for further details on available customiztaions.
Setting Grid Engine user/group/uid/gidAdd the following settings to /etc/puppetlabs/code/environments/production/hieradata/unicloud-common.yaml:
tortuga_kit_uge::uge_user (default: sge)tortuga_kit_uge::uge_uid (default: 269)tortuga_kit_uge::uge_group (default: sge)tortuga_kit_uge::uge_gid (default: 269)
Note: Any UID/GID/user/group changes made to an existing cluster are apt to cause problems. Ensure UGE cluster doesnot have any existing execd nodes prior to making these changes.Optionally, management of the Grid Engine user/group can be disabled with the setting:
tortuga_kit_uge::qmaster::manage_user: false
This is useful when the Grid Engine user/group is managed by a directory service, such as NIS or LDAP.
NFS client mount optionsCustom NFS client mount options are required for execd hosts using Hiera.Set the value in /etc/puppetlabs/code/environments/production/hieradata/unicloud-common.yaml (or in a softwareprofile specific Hiera file) as follows:
tortuga_kit_uge::execd::nfs_mount_options:- defaults
The value of tortuga_kit_uge::execd::nfs_mount_options can also be a properly formatted string (comma-separatedvalues in the format of the fstab mount options):
tortuga_kit_uge::execd::nfs_mount_options: vers=3,intr
v 99
UniCloud 6.2.0 Installation and Administration Guide Grid Engine and UniCloud Integration
Shared vs. standalone execd installationThis option allows sharing of the Grid Engine installation directory over NFS. Default behaviour is to install UGE binarieslocally on all execd nodes.Use the following command to enable NFS shared installations:
uge-cluster update <UGE CLUSTER NAME> --var shared_install=true
All execd nodes in the specified cluster will NFS mount the Grid Engine root directory (which must be manually exportedby NFS from the UniCloud installer/qmaster host), instead of installing Grid Engine on the local filesystem.Hint: it is recommended not to use this installation type when running cloud-based execd nodes in an hybrid configuration.This would cause bottlenecks in executing Grid Engine binaries over the VPN/WAN connection to the cloud provider.
Grid Engine Puppet module reference
The UniCloud Grid Engine Puppet module exposes many user configurable settings for customizing Grid Engine installationthrough UniCloud.The following settings can be configured through Hiera (/etc/puppetlabs/code/environments/production/hieradata/common.yamlor a software profile specific Hiera configuration):
Common settingstortuga_kit_uge::uge_user (default: sge)tortuga_kit_uge::uge_uid (default: 269)tortuga_kit_uge::uge_group (default: sge)tortuga_kit_uge::uge_gid (default: 269)tortuga_kit_uge::cluster_name (default: unicloud)tortuga_kit_uge::manage_user (default: true)tortuga_kit_uge::managed_install (default: true)tortuga_kit_uge::manage_nfs (default: false)tortuga_kit_uge::sge_qmaster_port (default: 6444)tortuga_kit_uge::sge_execd_port (default: 6445)
qmastertortuga_kit_uge::qmaster::sge_roottortuga_kit_uge::qmaster::cell_nametortuga_kit_uge::qmaster::manage_servicetortuga_kit_uge::qmaster::manage_nfstortuga_kit_uge::qmaster::manage_usertortuga_kit_uge::qmaster::managed_installtortuga_kit_uge::qmaster::sge_qmaster_porttortuga_kit_uge::qmaster::sge_execd_port
execdtortuga_kit_uge::execd::sge_roottortuga_kit_uge::execd::cell_nametortuga_kit_uge::execd::managed_installtortuga_kit_uge::execd::manage_usertortuga_kit_uge::execd::manage_servicetortuga_kit_uge::execd::shared_install
v 100
UniCloud 6.2.0 Installation and Administration Guide Other Kits
Upgrading Univa Grid Engine
The Grid Engine installation deployed by UniCloud can be upgraded using the standard Grid Engine upgrade procedure (seeGrid Engine documentation for further details).It is strongly recommended to consult Univa Support [email protected] prior to attempting the Grid Engine upgradeprocedure for the first time.The procedure for upgrading the Grid Engine kit as as follows:
1. Use disable-component to disable all Grid Engine components (qmaster, execd, submit, and webservice). Make anote of which software profile(s) have which components enabled.For example:
disable-component -p qmasterdisable-component -p webservicedisable-component --software-profile execd execd
2. Remove the existing (old) Grid Engine kit using delete-kit
3. Install updated (new) Grid Engine kit using install-kit
4. Re-enable the components on the profiles noted from the first step.
5. Copy Grid Engine distribution tarballs into $TORTUGA_ROOT/www_int
6. Install updated Puppet modulepuppet module install --force \
$TORTUGA_ROOT/kits/kit-uge-8.5.3-0/univa-tortuga_kit_uge -8.5.3.tar.gz
7. Follow official Grid Engine upgrade procedure
Please note, this procedure will not upgrade existing execd compute nodes without manual intervention (notably, changingthe NFS exported spool directory), although with some manual steps it is possible.
Other Kits
Simple Policy Engine Kit
Overview
The Simple Policy Engine provides automation and logic for node management and operations within UniCloud. Thisincludes adding and/or removing compute resources to a UniCloud and/or Grid Engine cluster.
Installing the Simple Policy Engine Kit
Install the Simple Policy Engine Kit using the following command:install-kit kit-simple_policy_engine -6.2.0-0.tar.bz2
Installing the Simple Policy Engine Kit adds a single component, intended to be enabled on the installer node:enable-component -p simple_policy_engine -6.2.0-0 engine -6.2/opt/puppetlabs/bin/puppet agent --onetime --no-daemonize
The engine component of the Simple Policy Engine must be enabled in order to activate the Simple Policy Engine.
v 101
UniCloud 6.2.0 Installation and Administration Guide Other Kits
Managing the Simple Policy Engine
The Simple Policy Engine is managed by several command-line interfaces:
• get-rule-list – Display list of all rules installed in the Simple Policy Engine• get-rule – Get an XML dump of specified rule along with execution statistics• add-rule – Add a rule to the Simple Policy Engine• enable-rule – Enable a previously disabled rule• disable-rule – Disable a rule• post-application-data – Post application data to an installed rule. Usually called by a rule action, however it may
be called manually from a shell prompt.• delete-rule – Remove a rule from the Simple Policy Engine
As with all UniCloud commands, man pages for Simple Policy Engine commands are available via man <command>
Policy Rule Types
All examples referenced below can be found under the examples subdirectory in the kit installation directory($TORTUGA_ROOT/kits/kit-simple_policy_engine-6.2.0-0/examples)
Cloud Bursting
One of the most useful features of the Simple Policy Engine is to automate management of Grid Engine cluster computeresources. This is done by adding and/or removing compute (execd) nodes automatically based on a user-defined condition.
The Simple Policy Engine includes example scripts and rules for creating a “zero node queue”, which automatically increas-es/decreases Grid Engine cluster resources based on queue backlog.
Installation/Setup
Install the Simple Policy Engine as follows and then proceed with the automatic or manual configuration of bursting.
install-kit --i-accept-the-eula \kit-simple_policy_engine -6.2.0-0.tar.bz2
enable-component -p engine/opt/puppetlabs/bin/puppet agent --onetime --no-daemonize
Automatic installation
The automatic installation assumes Univa Grid Engine is installed and a resource adapter is installed and configured.
If using a resource adapter other than AWS, Google Compute Engine or Azure please follow the manual installation procedure.
Change to Simple Policy Engine simple_burst example directory and run enable-cloud-bursting.sh:
cd $(find $TORTUGA_ROOT/kits -type d -name simple_burst)./enable-cloud-bursting.sh
This script will create hardware and software profiles named execd-burst as well as a Grid Engine queue burst.q.
Any Grid Engine jobs submitted to burst.q will be queued until 10 or more pending jobs exist, at which time UniCloud willautomatically launch EC2 compute instances to add compute resources to the Grid Engine cluster.
This does not prevent other (non-bursted) compute nodes from running pending jobs. It is also possible to (manually) addnon-burstable nodes (ie. physical/on-premise nodes) to the queue burst.q.
v 102
UniCloud 6.2.0 Installation and Administration Guide Other Kits
Manual procedure
1. Create software profile execd-burst
create-software-profile --name execd-burst --no-os-media-required
Enable execd component:
enable-component --software-profile execd-burst execd
2. Add execd-burst software profile to UGE cluster configuration
uge-cluster update default --add-execd-swprofile execd-burst
3. Map to existing hardware profileIn this example, the hardware profile execd-burst already exists.
set-profile-mapping --software-profile execd-burst \--hardware-profile execd-burst
4. Create Grid Engine configurationCreate hostgroup @bursthosts:
EDITOR=true qconf -ahgrp @bursthosts
Create queue burst.q:
EDITOR=true qconf -aq burst.q
Add @bursthosts to burst.q hostlist:
qconf -mattr queue hostlist @bursthosts burst.q
Add qmaster host to @bursthosts hostgroup and create “dummy” slots entry to keep queue burst.q “open”. Theqmaster host will not run jobs (unless explicitly configured to do so). It is used to keep the queue burst.q “open”despite not having any allocated compute hosts.
qconf -aattr hostgroup hostlist $(hostname -s) @bursthostsqconf -mattr queue slots "[$(hostname -s)=0]" burst.q
5. Copy example scripts/rules to working directoryIt is recommended to copy the example rules to a “working” directory. This example uses the directory$TORTUGA_ROOT/rules.
mkdir $TORTUGA_ROOT/rulesSRCDIR=$(find $TORTUGA_ROOT/kits -type d -name simple_burst)cp -ar $SRCDIR/* $TORTUGA_ROOT/rules
Adjust hardcoded paths appropriately:
cd $TORTUGA_ROOT/rulessed -i -e "s|${SRCDIR}|$TORTUGA_ROOT/rules|g" *.xml *.sh
6. Ensure hosts in “execd-burst” software profile are automatically added to @bursthosts hostgroupCreate the software profile configuration file:
echo "@bursthosts" >$SGE_ROOT/$SGE_CELL/common/config.execd-burst
Adjust $SGE_ROOT/$SGE_CELL to suit non-default UGE root directory.
v 103
UniCloud 6.2.0 Installation and Administration Guide Other Kits
7. Install idle node detection scriptCreate a symlink to the simple idle node detection script
ln -s get-idle-node.simple get-idle-node
This Python script can be modified to suit needs. It is provided as an example only.
8. Install Simple Policy Engine rulesThe polling rule (found in XML template file post_basic_resource.xml) polls the queue burst.q every 5 minutesand creates a temporary reporting file, which is sent to the Simply Policy Engine for evaluation.Note: make modifications (ie. polling interval) prior to installing the polling rule. This may include changing theUGE cell directory.
add-rule --desc-file basic_burst.xmladd-rule --desc-file basic_unburst.xmladd-rule --desc-file post_basic_resource.xml
Use get-rule-list to display installed rules. Output should appear as follows:
[root@unicloud rules]# get-rule-listsimple_burst/burstPoller (type: poll, status: enabled)simple_burst/basicUnburst (type: receive, status: enabled)simple_burst/basicBurst (type: receive, status: enabled)
The Simple Policy Engine rules are now active.
9. Submit jobs to the burst.q queue
qsub -q burst.q /opt/uge-8.5.3/examples/jobs/sleeper.sh 100
The Simple Policy Engine will now automatically add one compute node if 10 (or more) jobs are pending at the nextpolling interval.Conversely, the Simple Policy Engine will automatically remove inactive (ie. nodes not currently running jobs) whenless than 10 pending jobs exist in burst.q.
Advanced idle node detection
The included script get-idle-node.simple is used by the Simple Policy Engine to detect when a compute node is idle. Itis very simplistic and does not factor in node “cost” (ie. the “cost” of cloud-based node instances vs. on-premise physicalnodes), nor instance run time.
Because cloud-based instances incur expense and are billed in intervals, it is may be desirable to allow compute node(s) torun for the entire billing interval. For example, on Amazon EC2, the billing interval is 1 hour (60 minutes). If the SimplePolicy Engine were to terminate an instance only a few minutes into the billing interval, compute resources will be removeddespite having been billed for the entire interval.
The script get-idle-node.ec2 attempts to keep an EC2 instance running for the entire billing period by not allowingtermination until the 57th (user-configurable) minute of the billable hour.
Move the script get-idle-node out of place and copy get-idle-node.ec2 to get-idle-node to use this advanced termina-tion logic.
Adjusting the cloud bursting environment
v 104

UniCloud 6.2.0 Installation and Administration Guide Other Kits
Polling interval
Change the value of pollPeriod in the rule “simple_burst/burstPoller” (defined in post_basic_resource.xml). Defaultvalue is 300 seconds.
It is also recommended to change the value of POLLING_INTERVAL in the helper script idleOneNode.sh.
After changing the polling interval, apply the change as follows:
delete-rule --app-name simple_burst --rule-name burstPolleradd-rule --desc-file post_basic_resource.xml
Burst condition
The Simple Policy Engine rule “simple_burst/basicBurst” (as defined in the rule XML file basic_burst.xml) contains thelogic to determine how many pending jobs must exist in burst.q before a burst condition is reached.
This file can be found in the Simple Policy Engine kit directory:
find $TORTUGA_ROOT/kits -type d -name simple_burst
or if using the automatic installation procedure:
$TORTUGA_ROOT/rules
Adjust the value of triggerValue in the condition __neededNodes__.
Default:
...<condition metricXPath="__neededNodes__" evaluationOperator=">" \
triggerValue="10"><description >Needed nodes must be greater than \
10</description ></condition >...
Adjusted to require only 5 pending jobs before bursting:
...<condition metricXPath="__neededNodes__" evaluationOperator=">" \
triggerValue="5"><description >Needed nodes must be greater than 5</description >
</condition >...
After making the change to the rule, it is necessary to delete the current rule and apply the updated rule:
delete-rule --app-name simple_burst --rule-name basicBurstadd-rule --desc-file basic_burst.xml
Troubleshooting
The Simple Policy Engine verbosely logs to /var/log/unicloud.
v 105
UniCloud 6.2.0 Installation and Administration Guide Other Kits
SNMP Kit
Overview
The SNMP kit allows for automated installation and configuration of the SNMP daemon snmpd on software profiles on whichthe component is enabled.
SNMP functionality is provided by the net-snmp package.
Installing the SNMP Kit
Install the SNMP kit using the install-kit command-line interface:
install-kit kit-snmp -6.2.0-0.tar.bz2
This installs the component snmpd-6.2, which can be enabled on any software profile.
For example, to enable on the Compute software profile:
enable-component --software -profile Compute snmp -6.2.0-0 \snmpd -6.2
schedule-update
Once complete, any existing nodes in the Compute software profile will have snmpd enabled and running.
Customizing /etc/snmp/snmpd.conf
With the SNMP kit enabled, the snmpd.conf configuration file is managed by UniCloud.
Any changes should be applied to the configuration file template found in:
/etc/puppetlabs/code/environments/production/modules/tortuga_kit_snmp/templates/snmpd.conf.erb
Consult the Net-SNMP documentation for further information.
v 106
UniCloud 6.2.0 Installation and Administration Guide Troubleshooting
Troubleshooting
Overview
Installation, configuration, and day-to-day operations in UniCloud updates several log files, which can be used to identifyUniCloud failures or error conditions.
Due to the nature of some operations and external dependencies on network services, for example, some failed operationscannot be logged through the standard UniCloud logging mechanism. An example of this is network traffic blocked by afirewall or misconfiguration in no network connectivity, and others.
When such symptoms of “total failure” occur (i.e. nothing is working), it is necessary to resort to primitive TCP/IP debuggingprocedures to ensure basic connectivity.
Log file formatting and convention
The log files are formatted with e date/time stamp, the log level (INFO, ERROR, WARNING, TRACE), the process ID(pid) of the process that created the log entry, and then the entry itself. All content after the pid is free-form and may notconform to any one style suitable for parsing.
Commonly, DEBUG and TRACE messages will show the Python module name before the operation. This also applies tolog messages generated by the resource adapters, with the difference being the resource adapter name will appear in bracketsbefore the log message.
Installation and setup logging
There are several “stages” to a UniCloud installation. Each of these installation and setup “stages” generates and/or updateslog files.
The first stage is install-unicloud.sh, which is run after unarchiving the distribution tarball. This operation creates andupdates the log file /tmp/install-unicloud.log.
The output contained in this log file is mostly from the commands run by the install-unicloud.sh script. It is not astructured log file and is mostly only useful if the initial installation process failed. This file can be safely removed onceinstallation is complete.
The next stage is setting up UniCloud after installation. Running unicloud-setup to complete the installation processresults in multiple log files generated:
• /tmp/bootstrap.log - output of the serverless Puppet bootstrapping process automatically run during the initialUniCloud setup.
• /tmp/unicloud_setup.log - another Puppet run output to apply UniCloud installer changes made during the setupprocess.
The main UniCloud log file /var/log/unicloud is also created and updated during the execution of unicloud-setup.
The creation of the UniCloud Certificate Authority (CA) generates two files in /tmp:
• /tmp/tortuga-ca.log.*• /tmp/tortuga-server.log.*
Other log files, such as those created/updated by ActiveMQ, MCollective, Apache HTTP Server, and MySQL will also becreated/updated during UniCloud setup.
v 107
UniCloud 6.2.0 Installation and Administration Guide Troubleshooting
Logging Configuration
The log level is configured through $TORTUGA_ROOT/config/log.conf. This is a self-documented configuration file for thestandard Python logging facility used by UniCloud.
While it can be configured to redirect logging to different sinks, change filename(s) of log files, etc, it is strongly recommendedto adjust nothing more than the log level unless comfortable with the complexity of this configuration file.
Refer to the Python documentation for additional configuration information.
Adjusting default log level
The current UniCloud distribution has DEBUG level logging enabled by default. This causes additional logging, which canbe useful during initial installation and setup.
Note: changing to “trace” log level will result in much more logging and may hinder UniCloud performance because of APIlevel logging.
Changing from “DEBUG” (default) to “TRACE”
Change from “debug” loglevel:
[LoggerLevels]root=debugexpressions: ^.*$=debug
to “trace”:
[LoggerLevels]root=traceexpressions: ^.*$=trace
After changing this setting, restart the webservice to ensure it takes effect.
RHEL/CentOS 6
service tortugawsd restart
RHEL/CentOS 7
systemctl restart tortugawsd
Tip: backup the original log.conf and run the command “sed -ie 's/debug/trace/g' $TORTUGA_ROOT/config/log.conf”to enable trace logging. Restart the UniCloud webservice as recommended above.
Comprehensive List of Log Files
• /tmp/install-unicloud.sh (*)• /tmp/bootstrap.log (*)• /tmp/unicloud_setup.log (*)• /var/log/unicloud• /var/log/unicloud_resourceAdapter• /var/log/unicloud_rules• /var/log/unicloud_webService• /tmp/unicloud-vpn.log (*)• /tmp/tortuga-ca.log.* (*)
v 108
UniCloud 6.2.0 Installation and Administration Guide Troubleshooting
• /tmp/tortuga-server.log.* (*)• /var/log/httpd/unicloudint_{access,error}_log (Apache HTTP Server)• /var/log/httpd/unicloudws_{access,error}_log (Apache HTTP Server)
* denotes log files that are created once and never further updated. They typically include raw command output and arestrictly for debugging purposes.
The following system log files will also contain output as a result of UniCloud being installed and running:
• /var/log/messages• /var/log/activemq/*• /var/log/mcollective• /var/log/httpd/*• /var/log/mysqld.log
v 109

UniCloud 6.2.0 Installation and Administration Guide Troubleshooting
Troubleshooting failed UniCloud installation
There are several reasons why UniCloud may fail to install successfully:
1. Intermittent networkingSurprisingly, not all corporate LANs are created equally and intermittent networking may cause temporary outageand and Internet accessibility issues. The UniCloud installation process depends on reliable Internet access to retrievepackage dependencies.If the UniCloud installation (install-unicloud.sh) succeeds, and the setup stage fails (unicloud-setup), it is possibleto retry the setup simply by calling unicloud-setup --force ....Consult log /tmp/install-unicloud.sh if the installation failure occurred during install-unicloud.sh, and logs/tmp/bootstrap.log',/tmp/unicloud_setup.logif the installation failure occurred duringunicloud-setup‘.
2. Lack of general Internet accessSome sites do not permit open access to the Internet, which results in an immediate, failed UniCloud installation.The UniCloud installation procedure depends on unrestricted access to HTTP (port 80) and HTTPS (port 443) serviceson various remote sites to retrieve package dependencies. The installer does not explicitly disable proxies, and shouldadhere to any system-wide proxy settings.Please contact [email protected] for further support when installing UniCloud in an environment where Internetaccess is unavailable.
3. Misconfigured/malfunctioning DNSThe host name returned by the command hostname --fqdn must be a fully-qualified, DNS resolvable host name.This host name may be the host name of the public network interface (ie. interface connected to the corporate LAN)or the host name of the private network interface (ie. interface connected to private/provisioning network managed byUniCloud).Whatever the host name may be, the UniCloud installer must be able to resolve its own host name via DNS or/etc/hosts. Ensure the following ping command succeeds:
ping -c5 `hostname --fqdn`
During the installation process, UniCloud invokes Puppet to perform configuration management of the installer node.Part of the Puppet initial bootstrap process requires creating a certificate containing the fully-qualified domain name(FQDN) of the UniCloud installer node.It should be noted that, when enabled, UniCloud will also maintain its own DNS server (serving DNS requests toprivate/provisioning networks), however the initial UniCloud installation needs functional DNS to proceed. When allelse fails, use /etc/hosts to add a static entry for the UniCloud installer host.
Troubleshooting failed compute node provisioning
This section is mostly related to the provisioning of physical compute nodes, as opposed to cloud-based compute nodes.
There is usually one cause for failed compute node provisioning and that is network connectivity, or lack thereof.
1. No (private) network connectivityEnsure the private/provisioning network interface on the UniCloud installer (eth1, for many) is connected to the samenetwork as the proposed compute nodes. In demo/trial environments using virtual machines, this is usually as a resultof the UniCloud installer VM not being connected to the same (virtual) network as the compute node VM(s).As suggested in the Quickstart section above, it is recommended when using Anaconda/Kickstart-based compute nodeprovisioning, to set the root password of the compute node(s) to a known value. This will allow connecting to failedcompute node installations that may be a result of misconfiguration of the UniCloud installer.
v 110
UniCloud 6.2.0 Installation and Administration Guide Troubleshooting
2. Service (DHCP/DNS) conflicts on private networkIn some cases, when the private/provisioning network is being used for other nodes and/or services within a datacenter,this can result in DHCP/DNS services conflicting with those managed by UniCloud.A typical symptom here would be a compute node receving a DHCP address that is not the same as that assigned byUniCloud.UniCloud cannot function correctly in such an environment and must “own” exclusive access to the DHCP and DNSservices on the private network it is managing.
v 111
UniCloud 6.2.0 Installation and Administration Guide Appendix A: UniCloud End-User License Agreement (EULA)
Appendix A: UniCloud End-User License Agreement (EULA)
TERM SOFTWARE LICENSE AND SUPPORT AGREEMENT
This agreement is between the individual or entity agreeing to this agreement and Univa Corporation, a Delaware corporation(Univa) with its registered office at 2300 N Barrington Road, Suite 400, Hoffman Estates, IL 60195.
1. SCOPE: This agreement governs the licensing of the Univa Software and Support provided to Customer.
• Univa Software means the Univa software described in the order, all updates and enhancements provided under Support,its software documentation, and license keys (Univa Software), which are licensed under this agreement. This UnivaSoftware is only licensed and is not sold to Company.
• Third-Party Software/Open Source Software licensing terms are addressed on the bottom of this agreement.
2. LICENSE. Subject to the other terms of this agreement, Univa grants Customer, under an order, a non-exclusive,non-transferable, renewable term license up to the license capacity purchased to:
(a) Operate the Univa Software in Customer’s business operations; and(b) Make a reasonable number of copies of the Univa Software for archival and backup purposes.
Customer’s contractors and majority owned affiliates are allowed to use and access the Univa Software under the terms ofthis agreement. Customer is responsible for their compliance with the terms of this agreement.
The initial term of this license is for a period of one year from date hereof to be automatically renewed at each anniversaryunless a written notification of termination has been received 60 days prior to each anniversary.
3. RESTRICTIONS. Univa reserves all rights not expressly granted. Customer is prohibited from:
(a) assigning, sublicensing, or renting the Univa Software or using it as any type of software service provider or outsourcingenvironment; or
(b) causing or permitting the reverse engineering (except to the extent expressly permitted by applicable law despite thislimitation), decompiling, disassembly, modification, translation, attempting to discover the source code of the UnivaSoftware or to create derivative works from the Univa Software.
4. PROPRIETARY RIGHTS AND CONFIDENTIALITY.
(a) Proprietary Rights. The Univa Software, workflow processes, designs, know-how and other technologies provided byUniva as part of the Univa Software are the proprietary property of Univa and its licensors, and all right, title andinterest in and to such items, including all associated intellectual property rights, remain only with Univa. The UnivaSoftware is protected by applicable copyright, trade secret, and other intellectual property laws. Customer may notremove any product identification, copyright, trademark or other notice from the Univa Software. (b) Confidentiality.Recipient may not disclose Confidential Information of Discloser to any third party or use the Confidential Informationin violation of this agreement.
(b) Confidential Information means all proprietary or confidential information that is disclosed to the recipient (Recipient)by the discloser (Discloser), and includes, among other things:
• any and all information relating to Univa Software or Support provided by a Discloser, its financial information, softwarecode, flow charts, techniques, specifications, development and marketing plans, strategies, and forecasts;
• as to Univa the Univa Software and the terms of this agreement (including without limitation, pricing information).
(ii) Confidential Information excludes information that:
v 112
UniCloud 6.2.0 Installation and Administration Guide Appendix A: UniCloud End-User License Agreement (EULA)
• was rightfully in Recipient’s possession without any obligation of confidentiality before receipt from the Discloser;• is or becomes a matter of public knowledge through no fault of Recipient;• is rightfully received by Recipient from a third party without violation of a duty of confidentiality;• is independently developed by or for Recipient without use or access to the Confidential Information; or• is licensed under an open source license.
Customer acknowledges that any misuse or threatened misuse of the Univa Software may cause immediately irreparable harmto Univa for which there is no adequate remedy at law. Univa may seek immediate injunctive relief in such event.
5. PAYMENT. Customer will pay all fees due under an order within 30 days of the invoice date, plus applicable sales, useand other similar taxes.
6. WARRANTY DISCLAIMER. UNIVA DISCLAIMS ALL EXPRESS AND IMPLIED WARRANTIES, INCLUDINGWITHOUT LIMITATION THE IMPLIED WARRANTY OF TITLE, MERCHANTABILITY AND FITNESS FOR APARTICULAR PURPOSE. THE UNIVA SOFTWARE MAY NOT BE ERROR FREE, AND USE MAY BE INTER-RUPTED.
7. TERMINATION. Either party may terminate this agreement upon a material breach of the other party after a 30day notice/cure period, if the breach is not cured during such time period. Upon termination of this agreement orexpiration of an order, Customer must discontinue using the Univa Software, de-install it and destroy or return theUniva Software and all copies, within 5 days. Upon Univa’s request, Customer will provide written certification of suchcompliance.
8. SUPPORT INCLUDED. Univa’s technical support and maintenance services (Support) is included with the fees paidunder an order. Univa may change its Support terms, but Support will not materially degrade during any paid term.More details on Support are located at www.univa.com/support
9. LIMITATION OF LIABILITY AND DISCLAIMER OF DAMAGES. There may be situations in which, as a result ofmaterial breach or other liability, Customer is entitled to make a claim for damages against Univa. In each situation(regardless of the form of the legal action (e.g. contract or tort claims)), Univa is not responsible beyond:
(a) the amount of any direct damages up to the amount paid by Customer to Univa in the prior 12 months under thisagreement; and
(b) damages for bodily injury (including death), and physical damage to tangible property, to the extent caused by thegross negligence or willful misconduct of Univa employees while at Customer’s facility.
Other than for breach of the Confidentiality section by a party, the infringement indemnity, violation of Univa’s intellectualproperty rights by Customer, or for breach of Section 2 by Customer, in no circumstances is either party responsible forany (even if it knows of the possibility of such damage or loss): (a) loss of (including any loss of use), or damage to: data,information or hardware; (b) lost profits, business, or goodwill; or (c) other special, consequential, or indirect damages
10. INTELLECTUAL PROPERTY INDEMNITY. If a third-party claims that Customer’s use of the Univa Softwareunder the terms of this agreement infringes that party’s patent, copyright or other proprietary right, Univa will defendCustomer against that claim at Univa’s expense and pay all costs, damages, and attorney’s fees, that a court finallyawards or that are included in a settlement approved by Univa, provided that Customer:
(a) promptly notifies Univa in writing of the claim; and(b) allows Univa to control, and cooperates with Univa in, the defense and any related settlement.
If such a claim is made, Univa could continue to enable Customer to use the Univa Software or to modify it. If Univadetermines that these alternatives are not reasonably available, Univa may terminate the license to the Univa Software andrefund any unused fees.
v 113
UniCloud 6.2.0 Installation and Administration Guide Appendix A: UniCloud End-User License Agreement (EULA)
Univa’s obligations above do not apply if the infringement claim is based on the use of the Univa Software in combinationwith products not supplied or approved by Univa in writing or in the Univa Software, or Customer’s failure to use any updateswithin a reasonable time after such updates are made available.
This section contains Customer’s exclusive remedies and Univa’s sole liability for infringement claims.
11. GOVERNING LAW AND EXCLUSIVE FORUM. This agreement is governed by the laws of the State of Illinois,without regard to conflict of law principles. Any dispute arising out of or related to this agreement may only bebrought in the state of Illinois. Customer consents to the personal jurisdiction of such courts and waives any claim thatit is an inconvenient forum. The prevailing party in litigation is entitled to recover its attorney’s fees and costs fromthe other party.
12. MISCELLANEOUS.
(a) Inspection. Univa, or its representative, may audit Customer’s usage of the Univa Software at any Customer facility.Customer will cooperate with such audit. Customer agrees to pay within 30 days of written notification any feesapplicable to Customer’s use of the Univa Software in excess of the license.
(b) Entire Agreement. This agreement, and all orders, constitute the entire agreement between the parties, and supersedesall prior or contemporaneous negotiations, representations or agreements, whether oral or written, related to this subjectmatter.
(c) Modification Only in Writing. No modification or waiver of any term of this agreement is effective unless signed byboth parties.
(d) Non-Assignment. Neither party may assign or transfer this agreement to a third party, except that the agreement andall orders may be assigned upon notice as part of a merger, or sale of all or substantially all of the business or assets,of a party.
(e) Export Compliance. Customer must comply with all applicable export control laws of the United States, foreignjurisdictions and other applicable laws and regulations.
(f) US Government Restricted Rights. The Univa Software is provided with RESTRICTED RIGHTS. Use, duplication, ordisclosure by the U.S. government or any agency thereof is subject to restrictions as set forth in subparagraph (c)(I)(ii)of the Rights in Technical Data and Computer Software clause at DFARS 252.227-7013 or subparagraphs (c)(1) and(2) of the Commercial Computer Software Restricted Rights at 48 C.F.R. 52.227-19, as applicable.
(g) Independent Contractors. The parties are independent contractors with respect to each other.(h) Enforceability. If any term of this agreement is invalid or unenforceable, the other terms remain in effect.(i) No PO Terms. Univa rejects additional or conflicting terms of a Customer’s form-purchasing document.(j) No CISG. The United Nations Convention on Contracts for the International Sale of Goods does not apply.(k) Survival. All terms that by their nature survive termination or expiration of this agreement, will survive.
Additional software specific licensing terms:
Grid Engine incorporates certain third-party software listed at the URL below. These licenses are accepted by use of thesoftware and may represent license grants with restrictions which Univa is bound to provide. We are hereby notifying you ofthese licenses.
UniCloud Kits
• Third Party Software means certain third-party software which is provided along with the Univa Software, and suchsoftware is licensed under the license terms located at: http://www.univa.com/resources/licenses/
• Open Source Software means certain open source software which is provided along with the Univa Software, and suchsoftware is licensed under the license terms located at: http://www.univa.com/resources/licenses/
Grid Engine
• Third Party Software means certain third-party software which is provided along with the Univa Software, and suchsoftware is licensed under the license terms located at: http://www.univa.com/resources/licenses/
v 114
UniCloud 6.2.0 Installation and Administration Guide Appendix A: UniCloud End-User License Agreement (EULA)
• Open Source Software means certain open source software which is provided along with the Univa Software, and suchsoftware is licensed under the license terms located at: http://www.univa.com/resources/licenses/
Rev: March 2013
v 115
UniCloud 6.2.0 Installation and Administration GuideAppendix B: Univa-supplied Hardware and Software Profile Templates
Appendix B: Univa-supplied Hardware and Software Profile Templates
The following hardware profile templates are supplied with the base installation of UniCloud:
• defaultHardwareProfile.tmpl.xml – This template is normally the one you will use to build both physical andvirtual nodes without special requirements. You normally will create a hardware profile from this template, and then(if needed) modify it. This template without modification is suitable for physical nodes and virtual nodes which youmanually create on a hypervisor.
The following software profile templates are supplied with the base installation of UniCloud:
• defaultSoftwareProfile.tmpl.xml – This template is normally the one you will use for compute nodes. It allocatesa swap partition using the recommended operating system size and the remainder is used by the the root filesystem. Ifthe node is virtual, it will by default allocate a 16GB disk.
• defaultIdleComputeSoftwareProfile.tmpl.xml – This template can be used to create an “idle” software profile foruse by a physical node hardware profile (see the hardware profile section for details). It creates the same minimal disklayout as the “small” template above, intended to hold nothing except the operating system.
v 116
UniCloud 6.2.0 Installation and Administration Guide Appendix C: Advanced UniCloud VPN Configuration
Appendix C: Advanced UniCloud VPN Configuration
The VPN configured by UniCloud creates point-to-point connections from the UniCloud installer to the cloud-based computenodes.
For each point-to-point connection, a subnet is selected from the default network 172.16.2.0/29 (or 172.16.2.0/255.255.255.248).
The address space can be changed and/or expanded by creating the file $TORTUGA_ROOT/config/vpn.conf (if necessary) andadding a section as follows:
[default]vpnnetworkstart=w.x.y.zvpnsubnetmask=WWW.WWW.WWW.WWW
Note: this setting can be changed with previously existing VPN connections unaffected. Only newly created cloud-instances(and VPN connections) will use the updated settings.
v 117
UniCloud 6.2.0 Installation and Administration Guide Appendix D: Deprecations and obsoletions
Appendix D: Deprecations and obsoletions
The following features and/or capabilities have been removed from UniCloud:
• DHCP node discoveryDHCP node discovery is now obsolete as a result of support for asynchronous node addition.DHCP/PXE booting is still supported as in previous versions of UniCloud, however nodes must be manually added tothe cluster as follows:
add-nodes --mac-addr AA:BB:CC:DD:EE:FF \--software-profile XXXX \--hardware-profile YYYY
This will set up DHCP/PXE boot entries within UniCloud and physical node provisioning will function as normal.
• “Unmanaged” nodesThe “unmanaged” node functionality was initially provided to allow UniCloud to manage DNS entries for nodes notdirectly managed by UniCloud. Since then, UniCloud has added support for templated DNS configuration files allowingend-users to add static host entries for network infrastructure such as NAS servers, routers, switches, etc.It is recommended to delete all unmanaged hardware and software profiles, and use DNS configuration file templatesto introduce unmanaged nodes into the UniCloud-managed DNS server.Add static DNS entries to /etc/hosts (on the UniCloud installer) or the DNS configuration file templates found under$TORTUGA_ROOT/config to have the UniCloud-managed DNS server recognize these “unmanaged” nodes.
v 118
UniCloud 6.2.0 Installation and Administration Guide Appendix E: Uninstalling UniCloud
Appendix E: Uninstalling UniCloud
UniCloud is mostly contained within the /opt/unicloud and /depot directories, however there are files elsewhere within thefilesystem.
Note: make a backup of of the entire filesystem prior to performing these uninstallation steps!
If you are installing UniCloud 6.2 on top of an existing UniCloud 6.1.x installation, the following operations should beperformed on RHEL/CentOS 7:
service sgemaster.unicloud stopservice activemq stopsystemctl stop httpdsystemctl stop mariadbsystemctl stop mcollectivesystemctl stop tortugawsdrm -f \
/etc/httpd/conf.d/{tortuga.conf,passenger.conf,puppetmaster.conf}mv /opt/unicloud /opt/unicloud.origmv /depot /depot.orig
On RHEL/CentOS 6, substitute calls to systemctl stop <name> to service <name> stop.
v 119