ucla mae 94 cad design project - daniel...
TRANSCRIPT
0
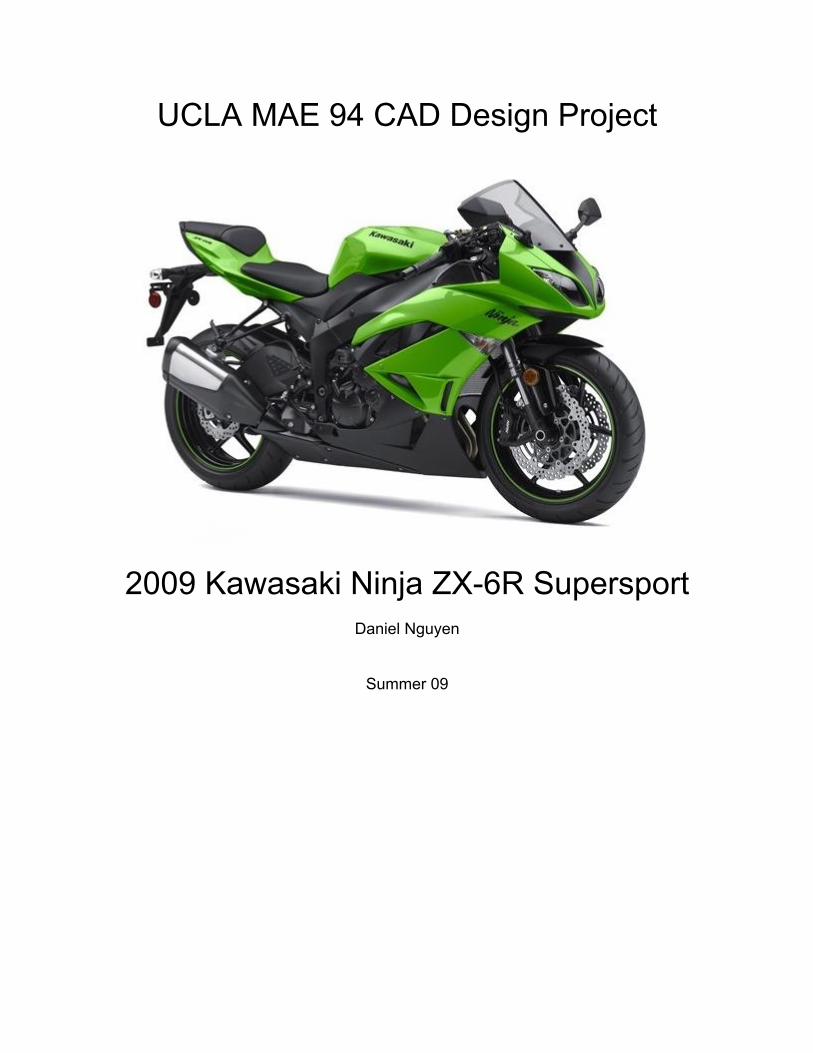
UCLA MAE 94 CAD Design Project
2009 Kawasaki Ninja ZX-6R Supersport
Daniel Nguyen
Summer 09
1
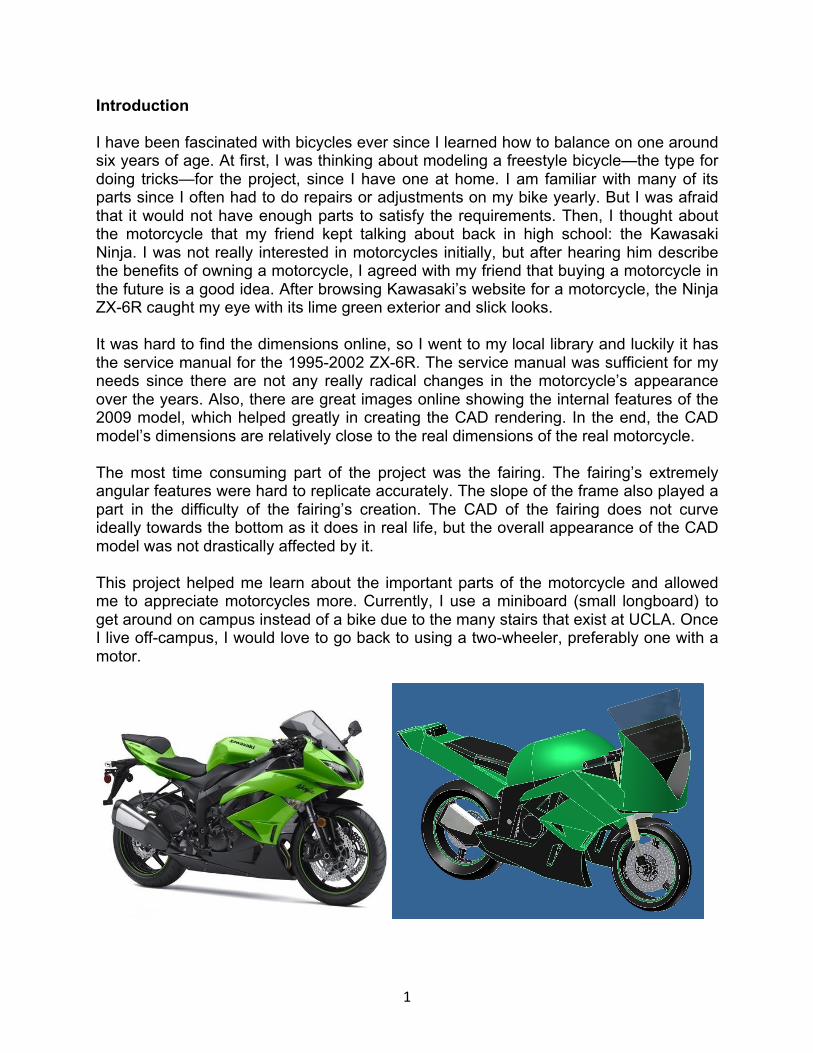
Introduction I have been fascinated with bicycles ever since I learned how to balance on one around six years of age. At first, I was thinking about modeling a freestyle bicycle—the type for doing tricks—for the project, since I have one at home. I am familiar with many of its parts since I often had to do repairs or adjustments on my bike yearly. But I was afraid that it would not have enough parts to satisfy the requirements. Then, I thought about the motorcycle that my friend kept talking about back in high school: the Kawasaki Ninja. I was not really interested in motorcycles initially, but after hearing him describe the benefits of owning a motorcycle, I agreed with my friend that buying a motorcycle in the future is a good idea. After browsing Kawasaki’s website for a motorcycle, the Ninja ZX-6R caught my eye with its lime green exterior and slick looks. It was hard to find the dimensions online, so I went to my local library and luckily it has the service manual for the 1995-2002 ZX-6R. The service manual was sufficient for my needs since there are not any really radical changes in the motorcycle’s appearance over the years. Also, there are great images online showing the internal features of the 2009 model, which helped greatly in creating the CAD rendering. In the end, the CAD model’s dimensions are relatively close to the real dimensions of the real motorcycle. The most time consuming part of the project was the fairing. The fairing’s extremely angular features were hard to replicate accurately. The slope of the frame also played a part in the difficulty of the fairing’s creation. The CAD of the fairing does not curve ideally towards the bottom as it does in real life, but the overall appearance of the CAD model was not drastically affected by it. This project helped me learn about the important parts of the motorcycle and allowed me to appreciate motorcycles more. Currently, I use a miniboard (small longboard) to get around on campus instead of a bike due to the many stairs that exist at UCLA. Once I live off-campus, I would love to go back to using a two-wheeler, preferably one with a motor.
2
Design Statistics
Part Name Function Features 1 Front Wheel
a Rim (Duplicate) 9 sketches 8 extrusions, 1 hole, 24 fillets b Brake Disc (x2) 9 sketches 9 extrusions, 48 fillets c Tire 1 sketch 1 revolution d Bolt 1 sketch 1 extrusion 2 Rear Wheel
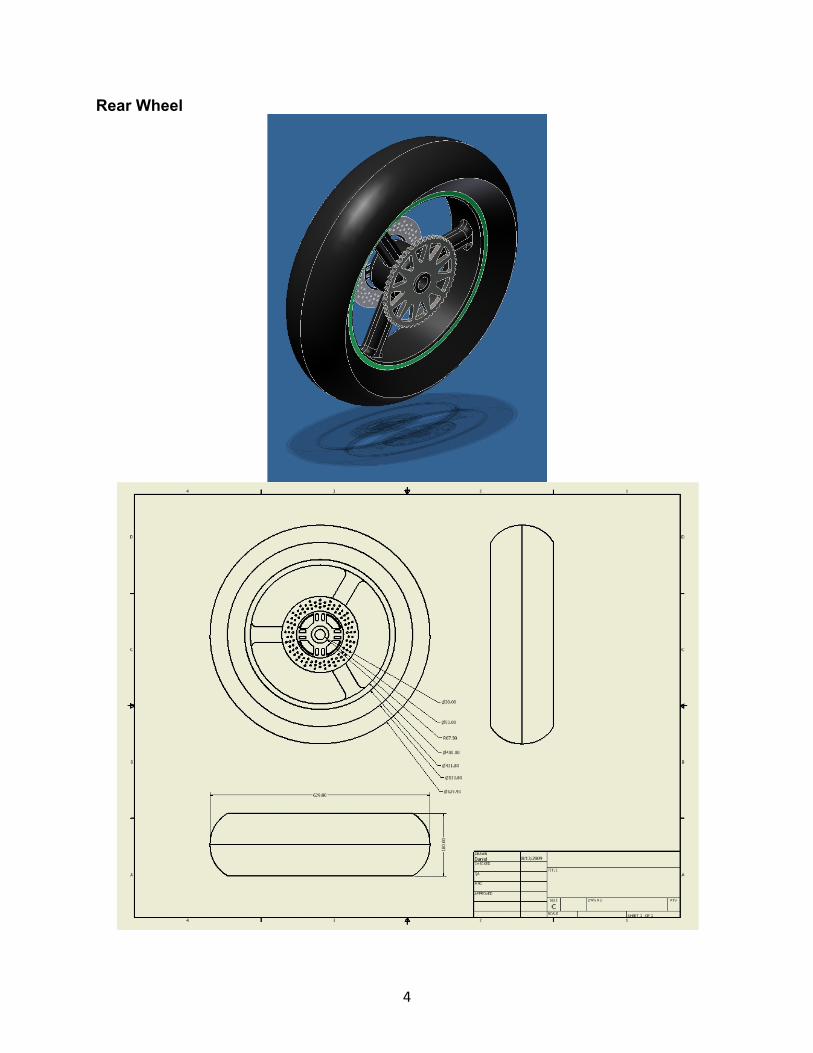
a Rim (Duplicate) 9 sketches 8 extrusions, 1 hole, 24 fillets b Brake Disc 8 sketches 8 extrusions, 48 fillets c Tire 1 sketch 1 revolution d Sprocket 4 sketches 4 extrusions, 36 fillets 3 Fork
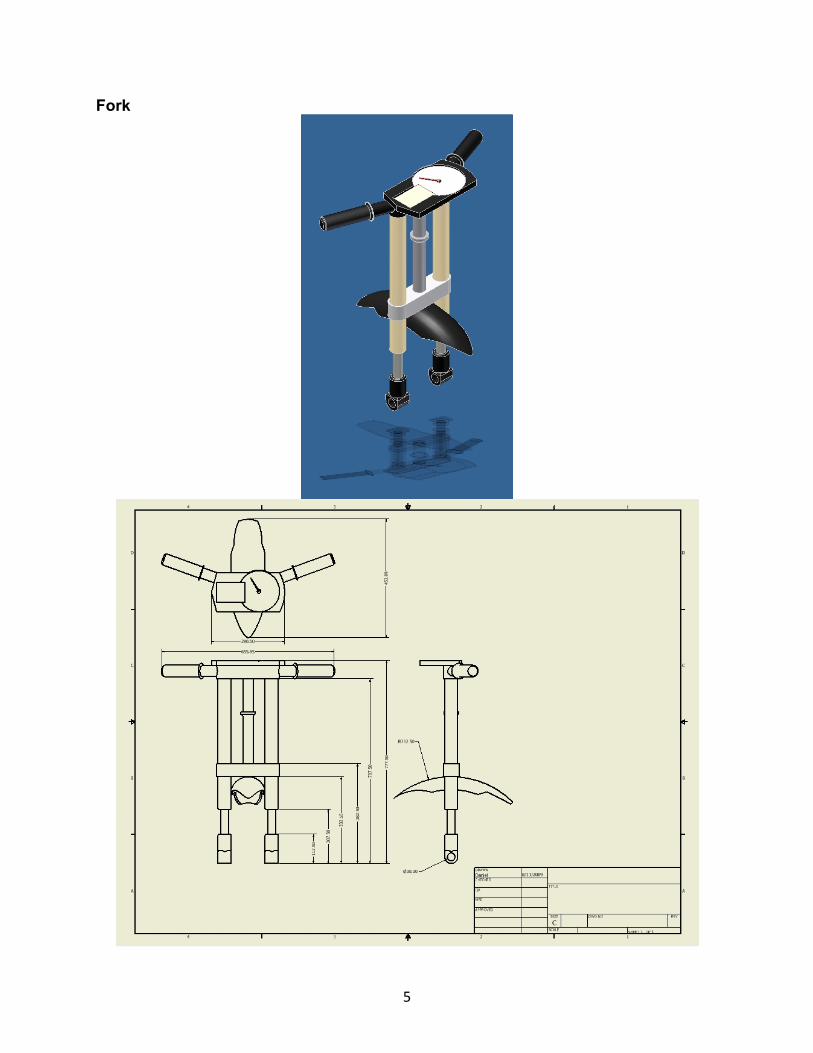
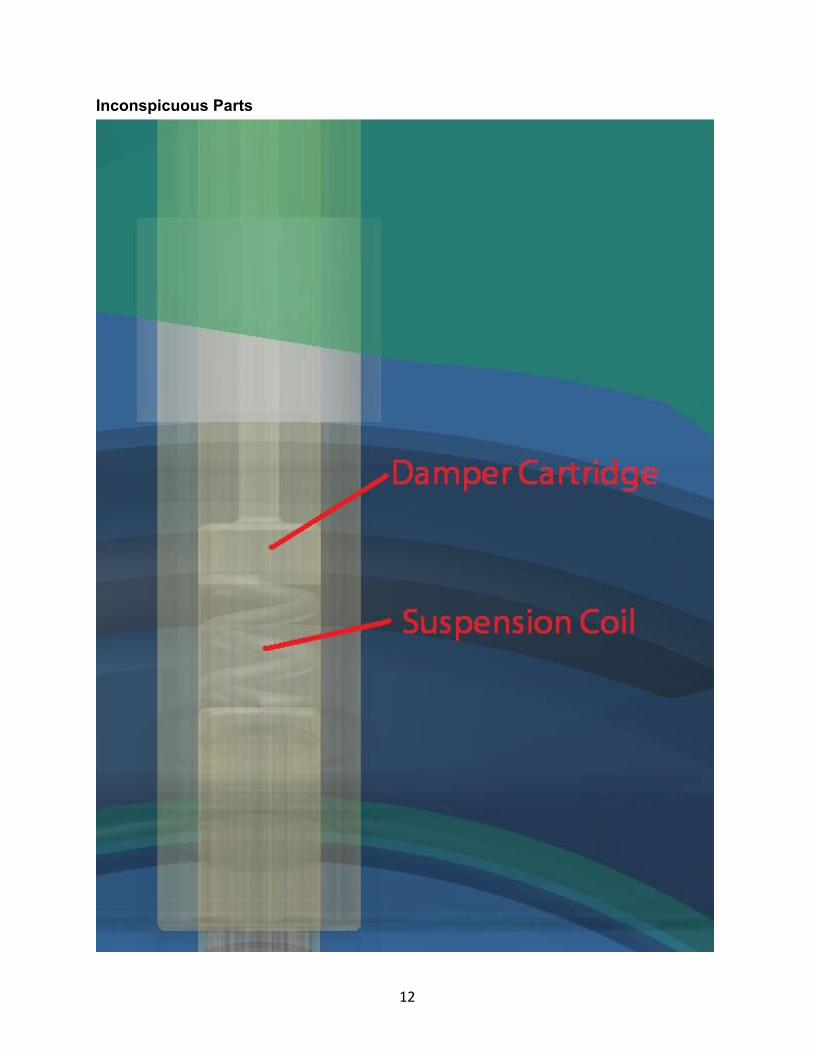
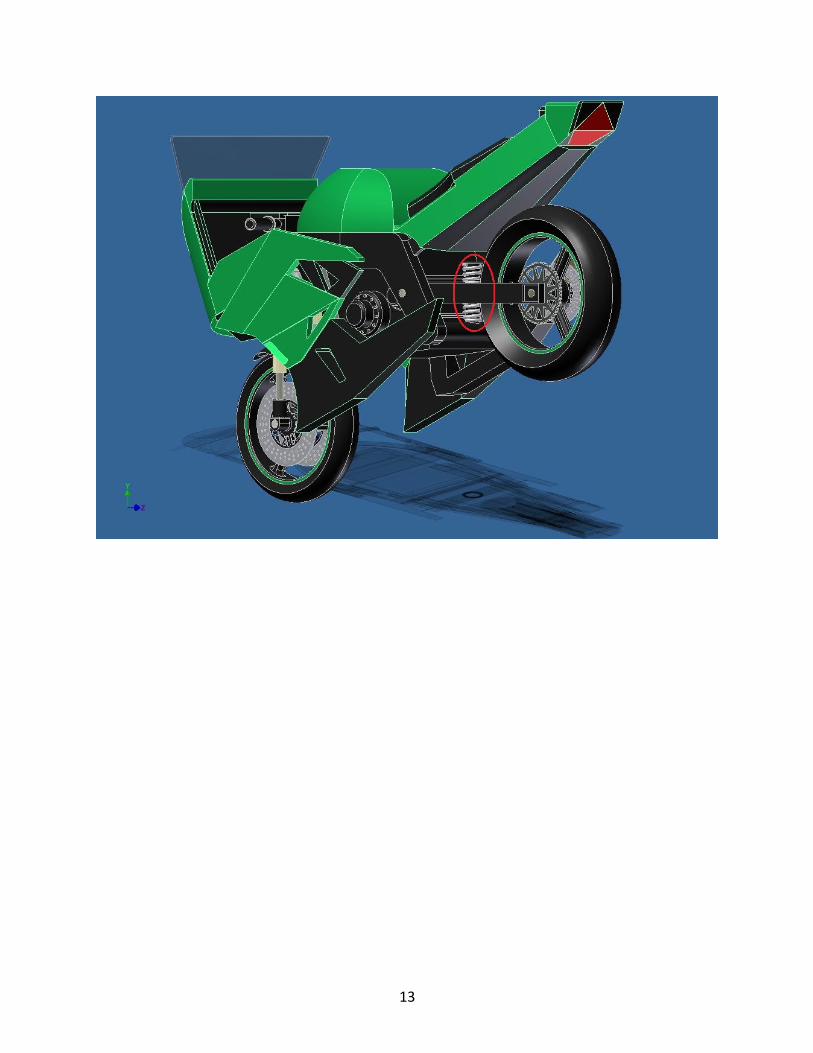
a Wheel Fastener (x2) 4 sketches 4 extrusions, 5 fillets b Damper Cartridge (x2) 2 sketches 2 extrusions, 2 fillets c Spring (x2) 1 sketch Create Feature: Coil d Slider (x2) 3 sketches 3 extrusions, 1 fillet e Handlebars 5 sketches 5 extrusions, 2 fillets f Yoke 4 sketches 4 extrusions g Aligning Pole 4 sketches 4 sketches, 1 fillet h Instrument Cluster 9 sketches 9 extrusions i Fender 3 sketches 1 revolution, 2 extrusions, 6 fillets j Grip (x2) 3 sketches 3 extrusions, 4 fillets 4 Frame
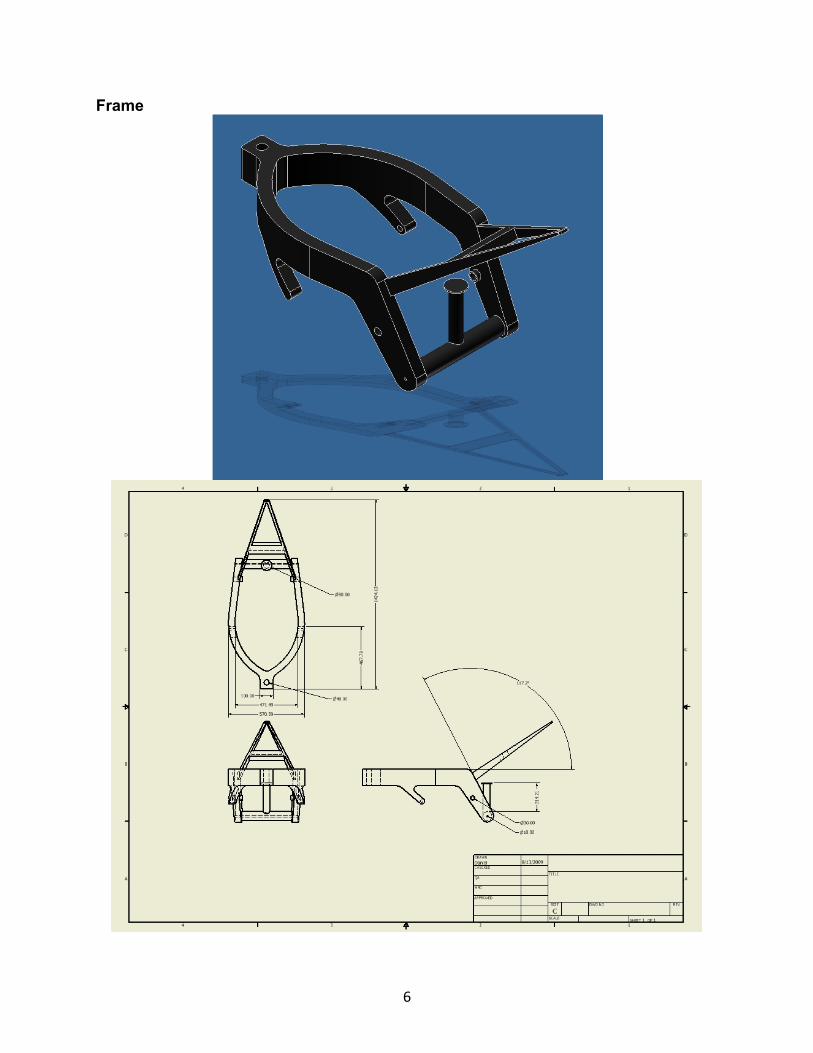
a Frame 21 sketches 18 extrusions, 1 hole, 2 lofts, 25 fillets b Spring (x2) 2 sketches Create Feature: Coil 5 Swingarm
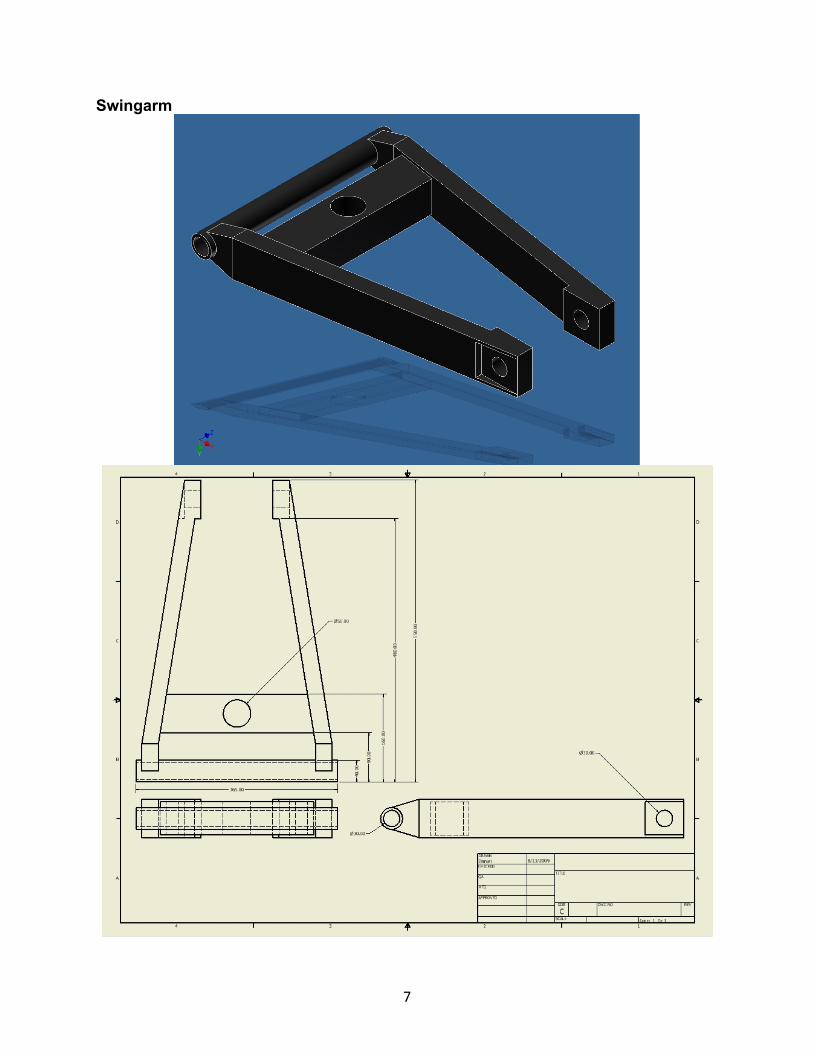
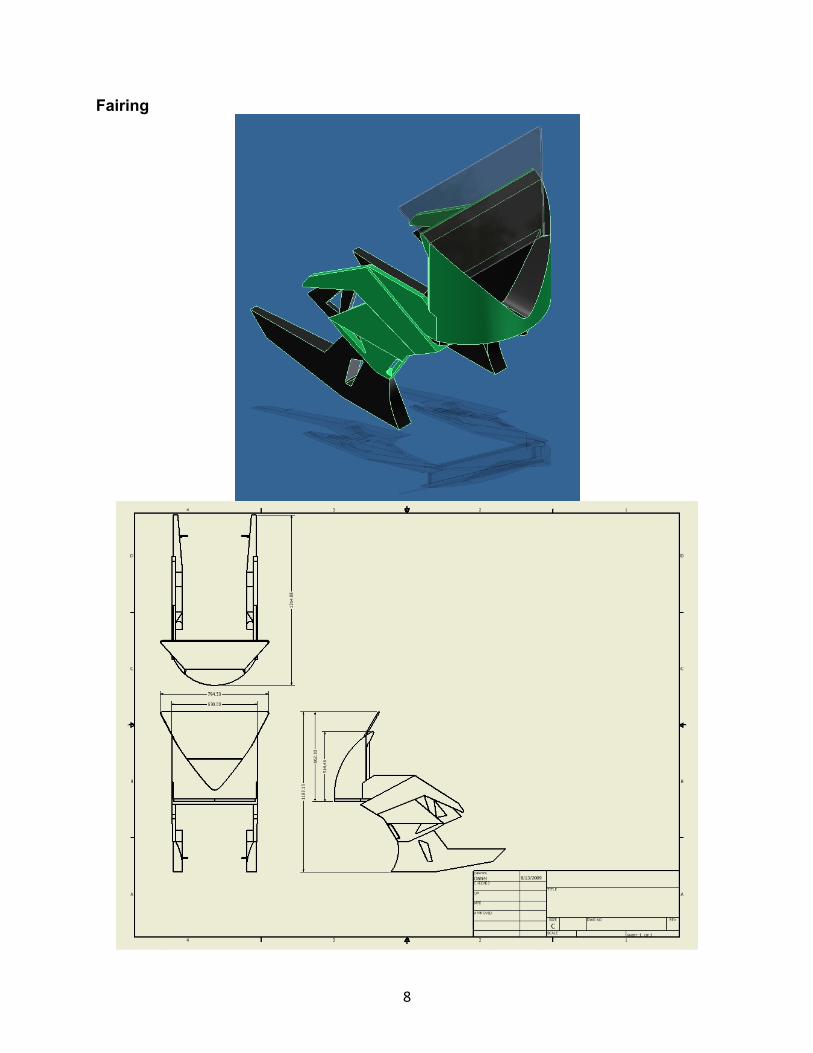
a Swingarm 13 sketches 8 extrusions, 4 lofts, 1 hole b Wheel Bolt 1 sketch 1 extrusion c Frame Bolt 1 sketch 1 extrusion 6 Fairing
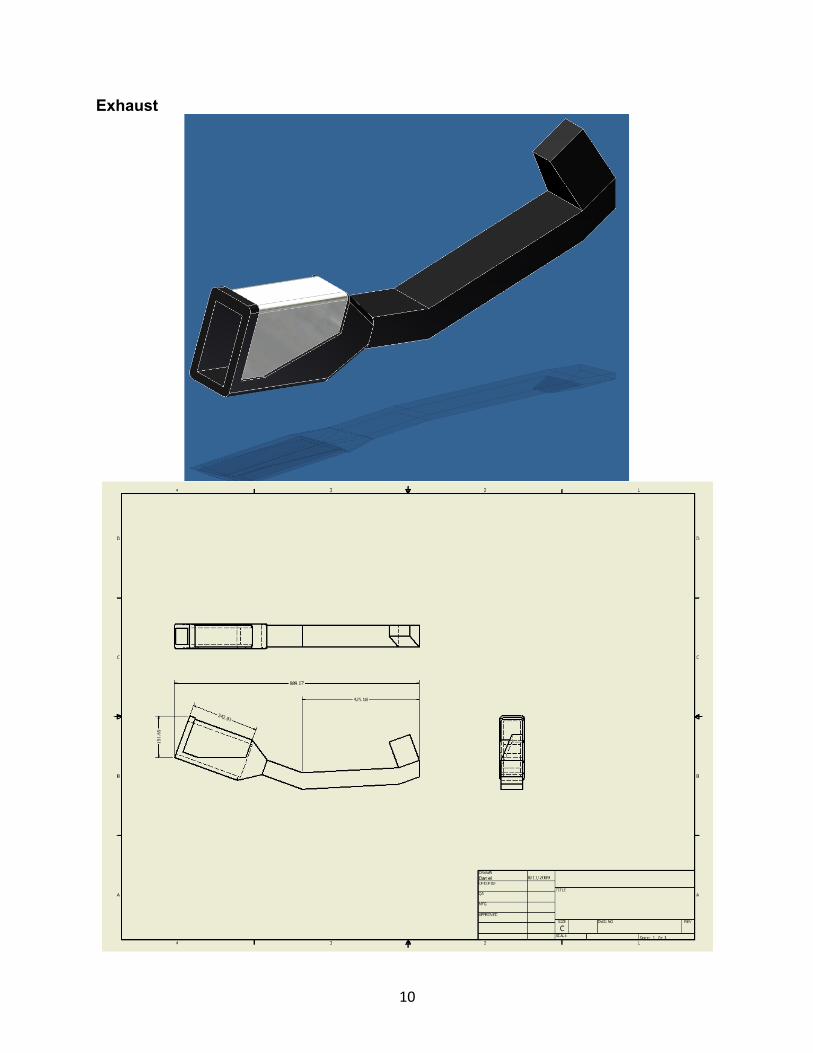
a Fairing 44 sketches 44 extrusions, 18 fillets b Windshield 1 sketch 1 extrusion, 2 fillets 7 Exhaust
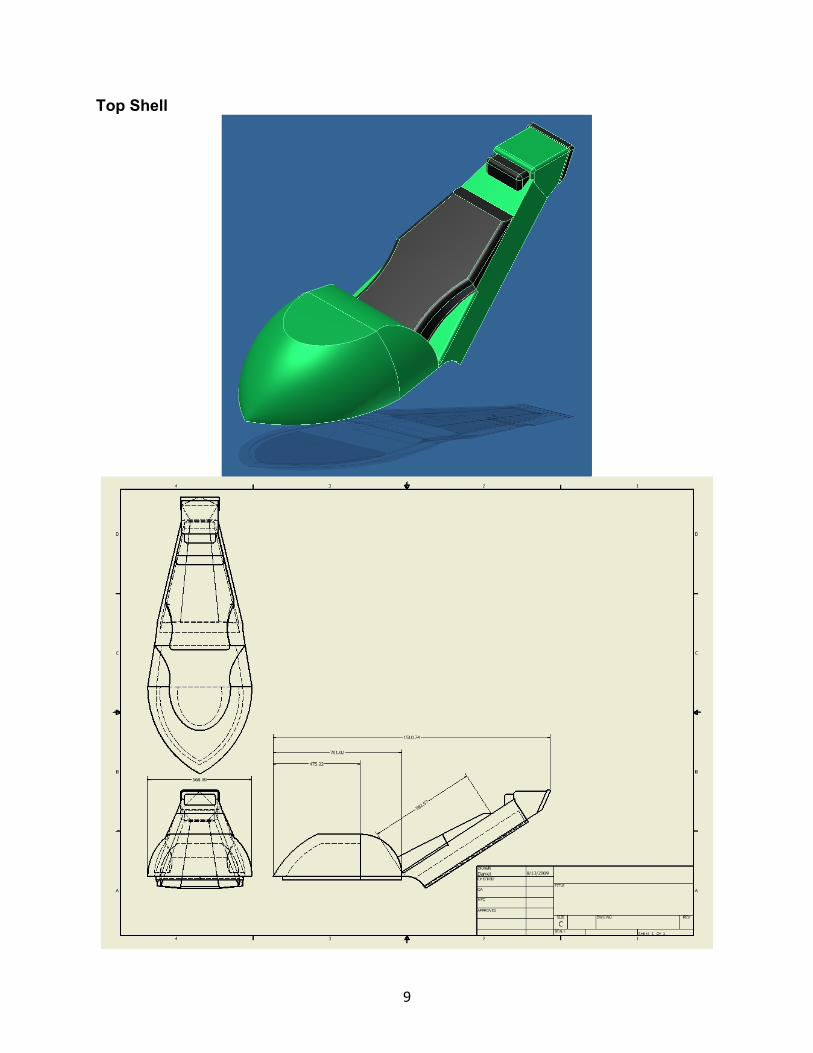
a Exhaust 15 sketches 15 extrusions, 2 fillets 8 Top Shell
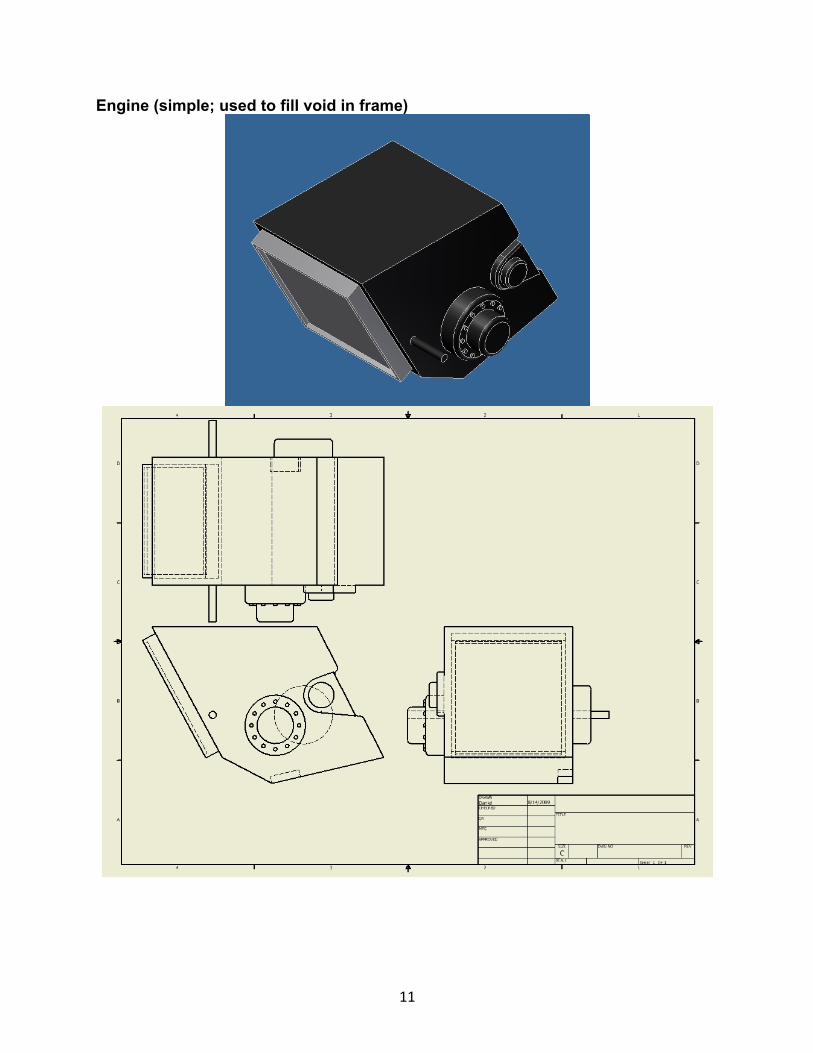
a Seat 5 sketches 5 extrusions, 2 fillets b Gas Tank 5 sketches 3 extrusion, 2 revolutions c Tail 20 sketches 18 extrusions, 2 lofts, 8 fillets 9 Engine
a Engine 13 sketches 13 extrusions, 9 fillets
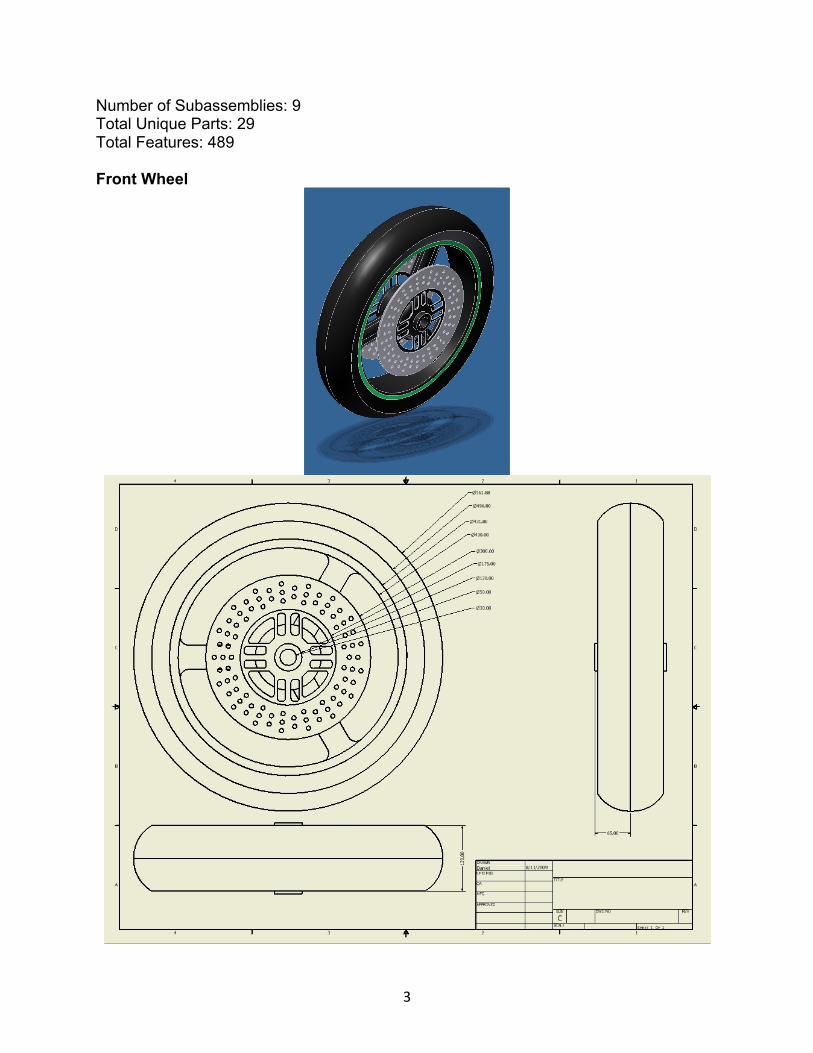
3
Number of Subassemblies: 9 Total Unique Parts: 29 Total Features: 489 Front Wheel
4
Rear Wheel
5
Fork
6
Frame
7
Swingarm
8
Fairing
9
Top Shell
10
Exhaust
11
Engine (simple; used to fill void in frame)
12
Inconspicuous Parts
13
14
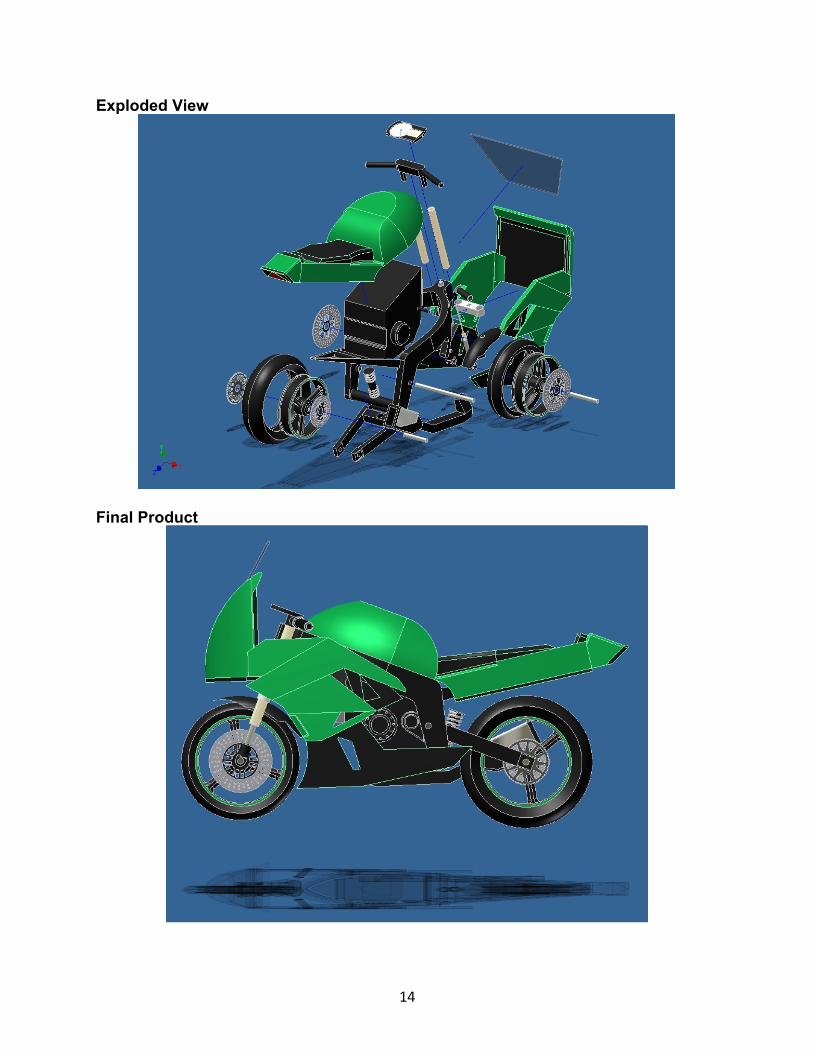
Exploded View
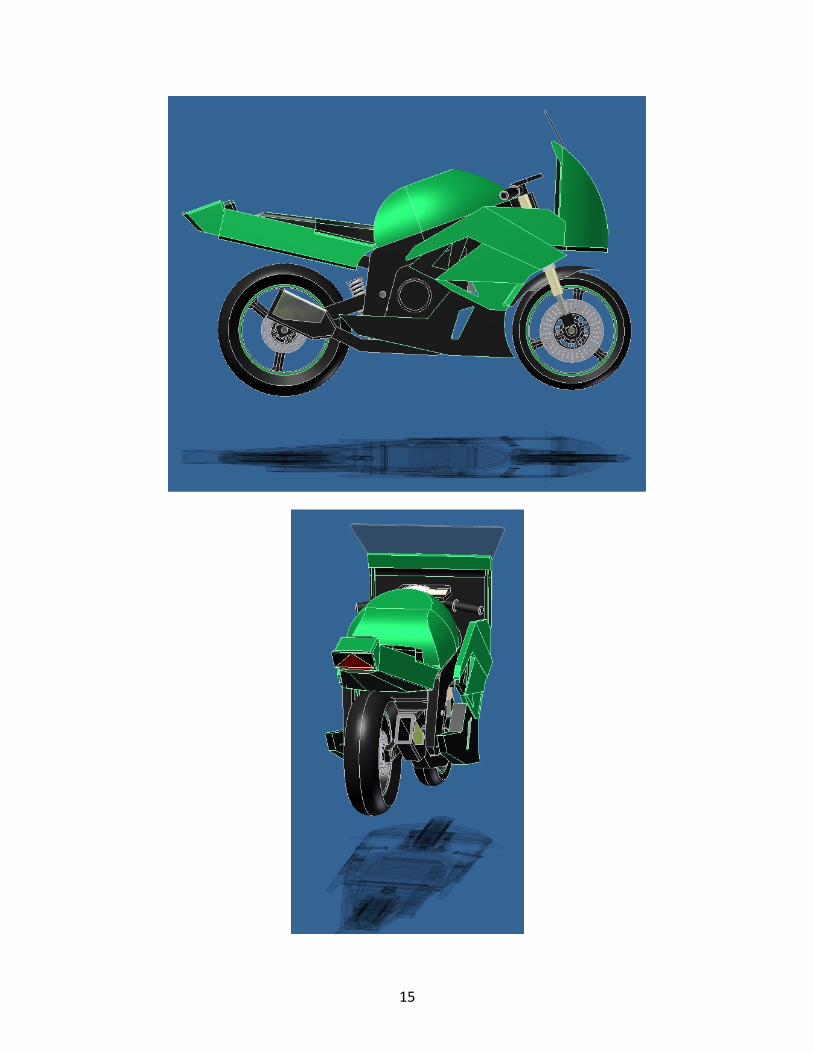
Final Product
15
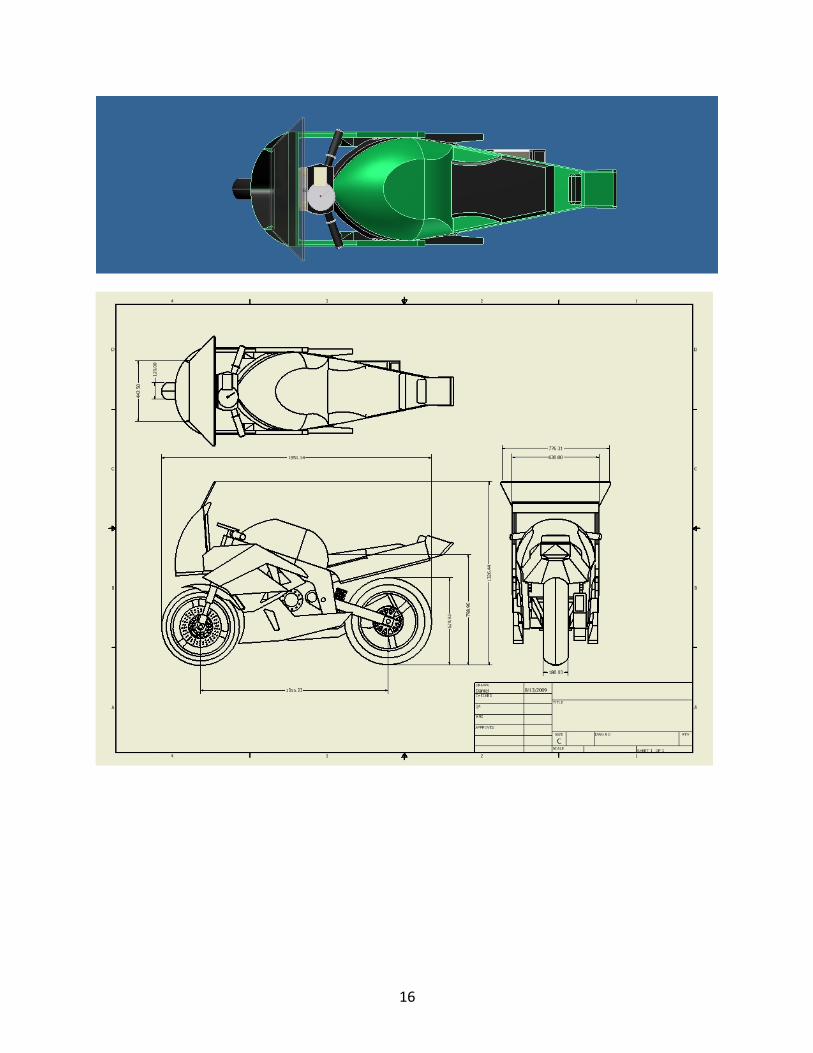
16